Herunterladen Inhalt Inhalt Diese Seite drucken

Werbung

Verfügbare Sprachen
  • DE

Verfügbare Sprachen

  • DEUTSCH, seite 48
es
Instrucciones de uso
y montaje
en
Operating and
installation instructions
fr
Notice de montage
et d'utilisation
pt
Instruções de serviçio
e de montagem
de
Gebrauchs- und
Montageanleitung
nl
Gebruiks- en
montageaanwijzing
D8240N0
es
en
fr
pt
de
nl

Werbung

Inhaltsverzeichnis
loading

Inhaltszusammenfassung für NEFF D8240N0

  • Seite 1 Instrucciones de uso y montaje Operating and installation instructions Notice de montage et d’utilisation Instruções de serviçio e de montagem Gebrauchs- und Montageanleitung Gebruiks- en montageaanwijzing D8240N0...
  • Seite 2 página 03 – 14 página 37 – 47 page 15 – 25 Seite 48 – 58 page 26– 36 Seite 48 – 58 Abb. 1 Abb. 1 ELEKTRO ELECTR. KAASU ELETT. GASS min. 650 min. 550...
  • Seite 3: Modalidades De Funcionamiento

    Instrucciones de uso Modalidades de funcionamiento Descripción del aparato Para ello, es necesario que existan aperturas no bloqueables por las que el aire de combustión pueda renovarse y Revestimien- ventilarse sin dificultad, por ejemplo por puertas, ventanas o cajas murales para la ali- to en forma mentación o evacuación del aire o de chimenea...
  • Seite 4: Antes De La Primera Utilización

    Antes de la primera utilización Antes de la puesta en marcha inicial Antes de emplear el aparato nuevo deberá leer detenidamente las del aparato: instrucciones de servicio de la cocina Las presentes instrucciones de servicio eléctrica. son válidas para diferentes modelos de En ella se facilitan informaciones y aparato;...
  • Seite 5 Manejo de la campana extractora Escalón intensivo: La manera más eficaz de absorber los vahos producidos en la cocina durante la Seleccionando el escalón de preparación de los alimentos es: funcionamiento intensivo, el ventilador desarrolla su máxima potencia. Este Conectando la campana extractora escalón se suele usar sólo durante cortos al comenzar a trabajar.
  • Seite 6 Filtros y mantenimiento Averías y perturbaciones Filtro antigrasa: En caso de consultas o averías de la campana extractora, no dude en llamar al Para retener las partículas de grasa Servicio de Asistencia Técnica. contenidas en el vaho de la cocina se (Véase al respecto la lista con las montan filtros metálicos.
  • Seite 7 Filtros y mantenimiento Desmontar y montar los filtros antigrasa Montaje y desmontaje: metálicos: ¡Atención! Las lámparas halógenas tienen ¡Atención! Las lámparas halógenas tienen que estar desconectadas y frías. que estar desconectadas y frías. 1. Desmontar los filtros antigrasa (véase a 1.
  • Seite 8: Limpieza Y Cuidados

    Limpieza y cuidados Sustituir las lámparas Desconectar la campana extractora de 1. Desconectar la campana extractora de la red eléctrica extrayendo el cable de la red eléctrica,.extrayendo el cable de conexión de la toma de corriente o a conexión de la toma de corriente o a través del fusible.
  • Seite 9 Instrucciones de montaje: – Advertencias importantes Los aparatos eléctricos usados La campana sólo se podrá montar por incorporan materiales valiosos que se encima de hogares para combustibles pueden recuperar. Por ello deberán sólidos con peligro de incendio (por entregarse a dicho efecto en un centro ejemplo proyección de chispas) si el hogar oficial de recogida o recuperación de está...
  • Seite 10: Antes Del Montaje

    Antes del montaje Funcionamiento con evacuación del aire al exterior El aire de evacuación pasa a través de un Para ello, es necesario que existan túnel de ventilación hacia arriba o aperturas no bloqueables por las que el directamente hacia el exterior, a través de aire de combustión pueda renovarse y la correspondiente pared.
  • Seite 11 Antes del montaje Conexión de los tubos de Condiciones necesarias para lograr la óptima potencia y rendimiento de la cam- evacuación pana extractora: Tubo con diámetro de 150 mm: Tubo de evacuación corto y liso. Fijar directamente el tubo de evacuación Menor número de codos posible.
  • Seite 12: Conexión Eléctrica

    Antes del montaje Conexión eléctrica La campana extractora sólo podrá Preparativos en la pared conectarse a una toma (caja) de corriente La pared tiene que ser lisa y vertical. provista de puesta a tierra. La toma de Procurar un asiento firme de los tacos corriente deberá...
  • Seite 13: Montaje

    Montaje Esta campana extractora ha sido Atención: ¡Ténganse en cuenta los diseñada exclusivamente para su montaje posibles accesorios opcionales que se en la pared. vayan a montar con la campana extractora! 1. Retirar el filtro antigrasa (véanse al 5. Encajar los 2 distanciadores adjuntos en respecto las instrucciones de uso de la la escuadra de soporte para el campana).
  • Seite 14 Montaje 08. Enroscar el tornillos inferior 13. Enganchar los dos elementos del (tornillos hexagonal). revestimiento de la chimenea desplazándolos uno respecto al otro - 09. Pegar una lámina protectora sobre los las ranuras de la parte telescópica agujeros de la rejilla protectora superior deberá...
  • Seite 15: Appliance Description

    Operating Instructions Appliance description Operating modes Chimney This can be achieved if the combustion air panelling is able to flow through non-lockable openings, e.g. in doors, windows and in conjunction with an air supply/air-intake wall Light / fan box or by other technical procedures such switches as reciprocal interlocking.
  • Seite 16: Before Using For The First Time

    Before using for the first time Important notes: The Instructions for Use apply to several Before using your appliance for the first time, please read these Instructions for versions of this appliance. Accordingly, Use carefully. They contain important you may find descriptions of individual features that do not apply to your information concerning your personal safety as well as on use and care of the...
  • Seite 17: Operating Procedure

    Operating procedure Filters and maintenance Grease filters: The most effective method of removing vapours produced during cooking is to: Metal filters are used to trap the greasy Switch the ventilator ON element of the vapours that develop as soon as you begin cooking. during cooking.
  • Seite 18 Filters and maintenance Removing and inserting the metal grease Installation and removal: filters: Warning: The halogen bulbs must be Warning: The halogen bulbs must be switched off and cool. switched off and cool. 1. Remove the metal filters 1. Press the catch on the grease filters (see "Removing and inserting the metal inwards and fold the filters down.
  • Seite 19: Cleaning And Care

    Cleaning and care Replacing the light bulbs Isolate the extractor hood by pulling out 1. Switch off the extractor hood and pull the mains plug or switching off the fuse. out the mains plug or switch off the electricity supply at the fuse box. Do not clean the extractor hood with abrasive sponges or with cleaning agents When switched on, the halogen bulbs...
  • Seite 20: Installation Instructions

    Installation Instructions: Important information Additional information concerning gas Old appliances are not worthless cookers: rubbish. Valuable raw materials can be reclaimed by recycling old appliances. When installing gas hotplates, comply Before disposing of your old appliance, with the relevant national statutory render it unusable.
  • Seite 21: Prior To Installation

    Prior to installation Exhaust-air mode The exhaust air is discharged upwards This can be achieved if combustion air can through a ventilation shaft or directly flow through non-lockable openings, e.g. in through the outside wall into the open. doors, windows and via the air- intake/exhaust-air wall box or by other Exhaust air should neither be directed technical measures, such as reciprocal...
  • Seite 22 Prior to installation Connecting a l 150 mm exhaust-air For optimum extractor hood efficiency: pipe: Short, smooth air exhaust pipe. Mount the pipe directly onto the air As few bends in the pipe as possible. outlet on the hood. Diameter of pipe to be as large as possible and no tight bends in pipe.
  • Seite 23: Electrical Connection

    Prior to installation Electrical connection The extractor hood should only be Preparing the wall connected to an earthed socket that has The wall must be flat and perpendicular. been installed according to relevant Ensure that the wall is capable of regulations.
  • Seite 24: Installation

    Installation This extractor hood is intended to be Note: Take into account any special mounted onto the kitchen wall. accessories that are going to be fitted. 1. Remove the grease filter 5. Attach the 2 enclosed spacers to the (refer to Operating Instructions). fixing bracket for the flue duct panelling.
  • Seite 25 Installation 08. Screw in lower screws (hex screws). 13. Push both sections of the flue panelling together (slots in the upper section 09. Stick protective film over the holes of must be pointing downwards) and the 2 lower mounting bolts in the insert into the opening in the extractor protective grid.
  • Seite 26: Description De L'appareil

    Mode d’emploi Description de l'appareil Modes de fonctionnement Capot de On y parvient en présence d'ouvertures non obturables ménagées par ex. dans les por- cheminée tes, fenêtres et en association avec des Commutateur ventouses télescopiques d'admission/ Lumière/ évacuation de l'air à travers la maçonnerie Ventilateur ou par d'autres mesures techniques telles qu'un verrouillage réciproque ou assimilé...
  • Seite 27: Avant La Première Utilisation

    Avant la première utilisation Remarques importantes: La présente notice d'emploi vaut pour Lisez attentivement la présente notice d'emploi avant d'utiliser votre appareil plusieurs versions de l'appareil. pour la première fois. Elle contient des Elle peut contenir des descriptions d'accessoires ne figurant pas dans votre informations importantes non seulement pour votre sécurité...
  • Seite 28: Utilisation De La Hotte Aspirante

    Utilisation de la hotte aspirante Filtre et entretien Filtres à graisse: La méthode la plus efficace pour supprimer les buées de cuisson consiste à: Vous pouvez utiliser divers filtres pour Enclencher la hotte aspirante retenir les particules grasses en en début de cuisson. suspension dans les buées de cuisson.
  • Seite 29 Filtre et entretien Retrait et mise en place des filtres à Incorporation et déposition: graisse en métal: Attention: les ampoules halogènes doivent Attention: les ampoules halogènes doivent s'être éteintes et avoir refroidi. s'être éteintes et avoir refroidi. 1. Retirez d'abord les filtres à graisse (voir 1.
  • Seite 30: Nettoyage Et Entretien

    Nettoyage et entretien Changer les ampoules halogènes Avant tout nettoyage et entretien, mettez 1. Avant tout nettoyage et entretien, mettez d'abord la hotte hors tension en d'abord la hotte hors tension en débranchant la fiche mâle de la prise de débranchant la fiche mâle de la prise de courant ou en coupant le disjoncteur/ courant ou en coupant le isjoncteur/...
  • Seite 31 Notice de montage: Remarques importantes Les anciens appareils ne sont pas des Remarques supplémentaires concernant les cuisinières à gaz: déchets sans valeur. Leur élimination respectueuse de Lors du montage de foyers gaz, veuillez l'environnement permet de récupérer de respecter les dispositions légales en précieuses matières premières.
  • Seite 32: Avant Le Montage

    Avant le montage Evacuation de l'air à l'extérieur L'air vicié est évacué vers le haut par un On y parvient en présence d'ouvertures non obturables ménagées par ex. dans les conduit d'aération ou directement à l'air portes, fenêtres et en association avec des libre par traversée du mur extérieur.
  • Seite 33 Avant le montage Branchement du conduit Pour que la hotte aspirante ait le meilleur rendement, veillez à ce que: d'évacuation l 150 mm: Le conduit d'évacuation soit court et lisse. Fixez le conduit d'évacuation directement sur l'orifice. Il ait le moins possible de coudes. Il ait le plus fort diamètre et que les coudes soient les plus arrondis possibles.
  • Seite 34: Branchement Électrique

    Avant le montage Branchement électrique La fiche mâle de la hotte aspirante ne Préparation du mur pourra être branchée que dans une prise Le mur doit être bien plat et vertical. secteur à contacts de terre réglementaire- Utilisez des chevilles pour assurer une ment posée.
  • Seite 35 Encastrement Cette hotte aspirante est prévue pour le Remarque: rappellez-vous que vous aurez montage contre le mur de la cuisine. peut-être des accessoires spéciaux à monter. 1. Retirer le filtre à graisse (voir la notice d'utilisation). 5. Faites encranter les 2 écarteurs ci-joints dans la cornière retenant le capotage de 2.
  • Seite 36 Encastrement 08. Vissez la vis inférieures 13. Insérer l'un dans l'autre les deux (boulon hexagonales). éléments du capotage-cheminée (les fentes de l'élément télescopique 09. Collez une par une les pellicules supérieur doivent être tournées vers le plastique de protection sur les trous bas) puis les introduire dans la découpe des 2 vis de fixation inférieures situés ménagée à...
  • Seite 37: Tipos De Funcionamento

    Instruções de serviço Descrição do aparelho Tipos de funcionamento Revesti- Isto pode ser conseguido se o ar necessário à combustão puder ser mento da reposto, através de aberturas não Interruptor chaminé fecháveis, p. ex. em portas, janelas e em Luz/ ligação com caixas murais de alimentação Ventilador ou de saída de ar, ou ainda através doutras...
  • Seite 38: Antes Da Primeira Utilização

    Antes da primeira utilização Indicações importantes: Antes de utilizar o novo aparelho, deverá ler com atenção estas instruções de Estas instruções de serviço aplicam-se a serviço. vários modelos de aparelhos. Delas constam informações importantes É. por isso, possível que se encontrem para a sua segurança, bem como sobre descritas várias características de a utilização e manutenção do aparelho.
  • Seite 39 Comando do exaustor Iluminação: Os vapores são eliminados de forma mais eficaz, se: A iluminação pode ser utilizada em qualquer altura, mesmo com o ventilador Ligar o ventilador desligado. no início dos cozinhados. Desligar o ventilador só alguns minutos depois de terminados os cozinhados. Filtros e Manutenção Iluminação Exaustor...
  • Seite 40 Filtros e Manutenção Desmontar e montar os filtros metálicos: Montar e desmontar: Atenção: As lâmpadas de halogéneo têm Atenção: As lâmpadas de halogéneo têm que estar desligadas e frias. que estar desligadas e frias. 1. Pressionar os encaixes dos filtros no 1.
  • Seite 41: Limpeza E Manutenção

    Limpeza e manutenção Substituíção das lâmpadas Desligar o exaustor da corrente, 1. Cortar a alimentação de corrente ao desligando a ficha da tomada, o fusível exaustor, desligando a ficha da tomada ou o disjuntor. ou os fusíveis. Não limpar o exaustor com esponjas As lâmpadas de halogéneo ficam muito ásperas, nem utilizar produtos abrasivos ou quentes, quando em funcionamento.
  • Seite 42 Instruções de Montagem: Indicações Importantes Instruções adicionais para placas a gás: Aparelhos velhos não são, de forma alguma, lixo. Na montagem de aparelhos de Através de reciclagem compatível com o cozinhar a gás (= fogões e placas), têm meio ambiente, é possível recuperar que ser respeitadas as respectivas normas matérias primas valiosas.
  • Seite 43: Antes Da Montagem

    Antes da Montagem Funcionamento com exaustão Os vapores são encaminhados para o Isto pode ser conseguido se o ar necessário à combustão puder ser exterior através de um canal de ventilação reposto, através de aberturas não ou directamente através de furo na parede, fecháveis, p.
  • Seite 44 Antes da montagem Ligação do tubo de exaustão Potência optimizada do exaustor: l 150 mm: Tubo de exaustão curto e liso. Fixar o tubo de exaustão directamente Tubo com número mínimo de curvas. no bocal. Diâmetro do tubo e curvas tão grandes quanto possível.
  • Seite 45: Ligação Eléctrica

    Antes da Montagem Ligação eléctrica O exaustor só deve ligado a uma tomada Preparação da parede com protecção de terra e instalada de A parede tem que ser plana e vertical. acordo com as normas em vigor. Deve ser assegurada uma fixação Se possível, instalar a tomada directa- perfeita das buchas.
  • Seite 46 Montagem O exaustor está preparado para ser Nota: Ter em atenção a eventual montado numa parede da cozinha. necessidade de montagem de acessórios especiais. 1. Retirar o filtro de gorduras. (Ver instruções de serviço). 5. Encaixar os 2 distanciadores, incluidos, no ângulo de apoio do revestimento da 2.
  • Seite 47 Montagem 08. Aparafusar o parafusos inferior 13. Encaixar as duas partes do (parafusos sextavado). revestimento da chaminé (ranhura na parte telescópica superior e introduzi-la 09. Colar uma película de cobertura sobre na ranhura do exaustor. os furos dos 2 parafusos inferiores de fixação na grelha de protecção.
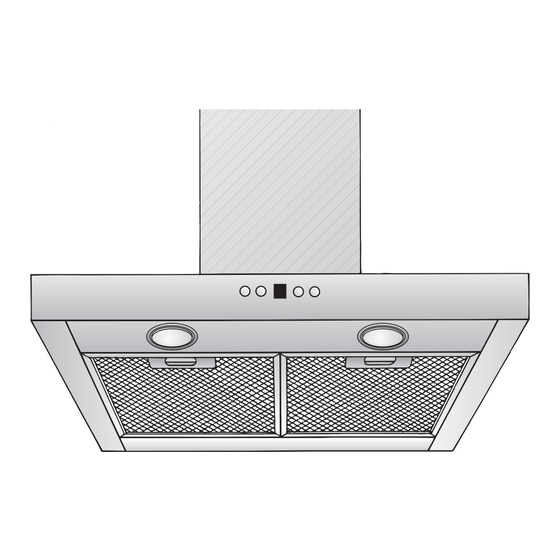
  • Seite 48: Gerätebeschreibung

    Gebrauchsanleitung Gerätebeschreibung Betriebsarten Kamin- Dies kann erreicht werden, wenn durch verblendung nicht verschließbare Öffnungen, z. B. in Türen, Fenstern und in Verbindung mit Zuluft-/Abluftmauerkasten oder durch Schalter andere techn. Maßnahmen, wie Licht/Lüfter gegenseitige Verriegelung o. ä., die Verbrennungsluft nachströmen kann. Bei nicht ausreichender Zuluft besteht Vergiftungsgefahr durch zurückgesaugte Verbrennungsgase.
  • Seite 49: Vor Dem Ersten Benutzen

    Vor dem ersten Benutzen Wichtige Hinweise: Diese Gebrauchsanleitung gilt für Bevor Sie das neue Gerät benutzen, lesen Sie bitte sorgfältig die mehrere Geräte-Ausführungen. Gebrauchsanleitung. Es ist möglich, dass einzelne Ausstattungsmerkmale beschrieben Sie enthält wichtige Informationen für Ihre Sicherheit sowie zum Gebrauch und zur sind, die nicht auf Ihr Gerät zutreffen.
  • Seite 50: Bedienen Der Dunstabzugshaube

    Bedienen der Dunstabzugshaube Filter und Wartung Fettfilter: Der Küchendunst wird am wirkungsvollsten beseitigt durch: Zur Aufnahme der fettigen Bestandteile des Küchendunstes sind Metall- Einschalten der Dunstabzugshaube Fettfilter eingesetzt. bei Kochbeginn. Die Filtermatten bestehen aus unbrenn- Ausschalten der Dunstabzugshaube barem Metall. erst einige Minuten nach Kochende.
  • Seite 51 Filter und Wartung Aus- und Einbauen der Metall-Fettfilter: Ein- und Ausbauen: Achtung: Die Halogenlampen müssen Achtung: Die Halogenlampen müssen ausgeschaltet und abgekühlt sein. ausgeschaltet und abgekühlt sein. 1. Drücken Sie die Raste an den Fettfiltern 1. Bauen Sie die Fettfilter aus (siehe Aus- und Einbauen der Metall- in Pfeilrichtung ein und klappen Sie die Fettfilter).
  • Seite 52: Reinigen Und Pflegen

    Reinigen und Pflegen Auswechseln der Lampen Dunstabzugshaube durch Ziehen des 1. Schalten Sie die Dunstabzugshaube aus Netzsteckers bzw. Ausschalten der und machen Sie durch Ziehen des Netz- Sicherung stromlos machen. steckers oder Ausschalten der Sicherung die Dunstabzugshaube stromlos. Dunstabzugshaube nicht mit kratzenden Schwämmen und nicht mit Die Halogenbirnen werden bei Betrieb sand-, soda-, säure- oder chloridhaltigen...
  • Seite 53: Wichtige Hinweise

    Montageanleitung: Wichtige Hinweise Zusätzliche Hinweise bei Gas-Koch- Altgeräte sind kein wertloser Abfall. geräten: Durch umweltgerechte Entsorgung können wertvolle Rohstoffe wiedergewonnen Bei der Montage von Gaskochstellen werden. sind die national einschlägigen gesetzlichen Bevor Sie das Altgerät entsorgen, machen Bestimmungen (z. B. in Deutschland: Sie es unbrauchbar.
  • Seite 54: Vor Der Montage

    Vor der Montage Abluftbetrieb Die Abluft wird über einen Lüftungsschacht Dies kann erreicht werden, wenn durch nach oben, oder direkt durch die Außen- nicht verschließbare Öffnungen, z. B. in wand ins Freie geleitet. Türen, Fenstern und in Verbindung mit Zuluft-/Abluftmauerkasten oder durch Die Abluft darf weder in einen in Betrieb andere techn.
  • Seite 55 Vor der Montage Anschluss Abluftrohr l 150 mm: Optimale Leistung der Dunstabzugs- haube: Abluftrohr direkt am Luftstutzen Kurzes, glattes Abluftrohr. befestigen. Möglichst wenig Rohrbögen. Möglichst große Rohrdurchmesser und große Rohrbögen. Der Einsatz von langen, rauhen Abluftrohren, vielen Rohrbögen oder kleineren Rohrdurchmessern führt zu einer Abweichung von der optimalen Luftleistung und gleichzeitig zu einer Geräuscherhöhung.
  • Seite 56: Elektrischer Anschluss

    Vor der Montage Elektrischer Anschluss Die Dunstabzugshaube darf nur an eine Vorbereiten der Wand vorschriftsmäßig installierte Schutzkontakt- Die Wand muss eben und senkrecht steckdose angeschlossen werden. sein. Die Schutzkontaktsteckdose möglichst Für festen Halt der Dübel ist zu sorgen. direkt hinter der Kaminverblendung anbringen.
  • Seite 57 Einbauen Hinweis: Achten Sie auf eventuell zu Die Dunstabzugshaube ist für die Montage an die Küchenwand vorgesehen. montierende Sonderzubehörteile. 1. Fettfilter abnehmen 5. Die 2 beiliegenden Abstandshalter in den Haltewinkel für Kaminverblendung (siehe Gebrauchsanleitung). einrasten. 2. Von der Decke bis zur Unterkante der 6.
  • Seite 58 Einbauen 08. Untere Schrauben (Sechskant- 13. Die beiden Teile der Kaminverblendung schrauben) eindrehen. ineinander schieben (Schlitze am obe- ren Teleskopteil nach unten) und in den 09. Je eine Abdeckfolie über die Löcher der Ausschnitt an der Dunstabzugshaube 2 unteren Befestigungsschrauben auf einsetzen.
  • Seite 60 Gebruiksaanwijzing Beschrijving van het apparaat Gebruiksmogelijkheden Schoor- Dit kan men bereiken wanneer er door steenaf- niet-afsluitbare openingen, bijv. in deuren, scherming ramen en d.m.v. luchtaanvoer-/ Schakelaars luchtafvoersleuven in de muur of door verlichting en andere technische maatregelen, zoals ventilator wederzijdse vergrendeling e.d., verbrandingslucht kan toestromen.
  • Seite 61: Vóór Het Eerste Gebruik

    Vóór het eerste gebruik Belangrijke aanwijzingen: Lees de gebruiksaanwijzing zorgvuldig Deze gebruiksaanwijzing geldt voor voordat u het nieuwe apparaat gebruikt. verschillende uitvoeringen van het Ze bevat belangrijke informatie voor uw apparaat. Het is mogelijk dat er een veiligheid en voor het gebruik en het aantal kenmerken worden beschreven onderhoud van het apparaat.
  • Seite 62 Bedienen van de wasemafzuigkap Filter en onderhoud Vetfilters: De keukenwasem wordt op de doeltreffendste manier verwijderd door: Voor de opname van de vettige bestanddelen van de keukenwasem Inschakelen van de afzuigkap worden metalen vetfilters gebruikt. bij het begin van het koken. De filtermatten bestaan uit onbrandbaar Uitschakelen van de afzuigkap materiaal.
  • Seite 63 Filter en onderhoud Metalen vetfilters verwijderen en Monteren en demonteren: aanbrengen: Attentie: De halogeenlampen moeten Attentie: De halogeenlampen moeten uitgeschakeld en afgekoeld zijn. uitgeschakeld en afgekoeld zijn. 1. Verwijder de vetfilters 1. Druk de blokkering van de vetfilters in de (zie Metalen vetfilters verwijderen en richting van de pijl in en klap de vetfilters aanbrengen).
  • Seite 64: Reiniging En Onderhoud

    Reiniging en onderhoud Lamp vervangen Wasemafzuigkap stroomloos maken 1. Schakel de wasemafzuigkap uit en maak door de stekker uit het stopcontact te het apparaat stroomloos door de stekker trekken of de zekering uit te schakelen. uit het stopcontact te trekken of de zekering uit te schakelen.
  • Seite 65 Montagevoorschrift: Belangrijke voorschriften Extra voorschriften bij gaskook- Oude apparaten zijn geen waardeloos apparatuur: afval. Door een milieubewuste afvoer kunnen waardevolle materialen opnieuw Bij de montage van gaskookzones worden gebruikt. moeten de geldende wettelijke nationale Maak het oude apparaat onbruikbaar voorschriften (bijv. in Duitsland: Technische voordat u het afvoert.
  • Seite 66: Voor De Montage

    Voor de montage Afzuigkap met luchtafvoer De afvoerlucht wordt via een afvoerschacht Dit kan men bereiken wanneer er door naar boven of rechtstreeks door de niet-afsluitbare openingen, bijv. in deuren, buitenmuur naar buiten geleid. ramen en d.m.v. luchtaanvoer-/ luchtafvoersleuven in de muur of door De afvoerlucht mag niet worden andere technische maatregelen, zoals afgevoerd via een in gebruik verkerende...
  • Seite 67 Voor de montage Aansluiting luchtafvoerpijp l 150 mm: Optimaal vermogen van de wasem- afzuigkap: Luchtafvoerpijp rechtstreeks aan de Korte, gladde luchtafvoerpijp. luchtaansluiting bevestigen. Zo min mogelijk bochten. Zo groot mogelijke buisdiameter en grote bochten. Gebruik van lange, ruwe luchtafvoer- buizen, veel buisbochten of kleine buisdiameters vermindert de afzuigcapaciteit en veroorzaakt bovendien hardere geluiden.
  • Seite 68: Elektrische Aansluiting

    Voor de montage Elektrische aansluiting De wasemafzuigkap mag alleen worden Voorbereiden van de muur aangesloten aan een volgens de voor- De muur moet vlak en loodrecht zijn. schriften geïnstalleerd, geaard stopcontact. Pluggen moet stevig kunnen worden Het geaarde stopcontact moet indien bevestigd.
  • Seite 69 Inbouwen De wasemafzuigkap is voorzien voor Opmerking: let op eventueel te monteren montage aan de keukenmuur. extra toebehoren. 1. Vetfilter verwijderen 5. Klik de twee meegeleverde (zie de gebruiksaanwijzing). afstandhouders vast in de bevestigingshaak voor het schoor- 2. Van het plafond tot aan de onderkant steenafschermstuk.
  • Seite 70 Inbouwen 08. De onderste schroeven 13. De beide delen van de schoorsteenaf- (zeskantschroeven) vastdraaien. scherming in elkaar schuiven (openingen op het bovenste 09. Plak beschermfolie over de gaten van telescoopdeel naar beneden) en in de de 2 onderste bevestigingsschroeven in uitsparing op de wasemafzuigkap het veiligheidsrooster.
  • Seite 71 Z5116X5 360732...
  • Seite 72 A-1100 Wien Für Österreich: Fax: +49 (0) 89 / 45 90-35 32 Fax: +43 (0) 1/ 6 05 75-5 12 60 Tel: 08 10 / 70 04 00 Internet: www.neff.de Internet: www.neff.at zum Regionaltarif 9000 293 983 Printed in Germany...

Inhaltsverzeichnis