mt vision HSR 8200 Bedienungsanleitung

Verwandte Anleitungen für mt vision HSR 8200


Inhaltszusammenfassung für mt vision HSR 8200
- Seite 1 HSR 8200 Die Kameras sind geeignet für den Außenbereich. Schutzklasse IP 66 OUTDOOR Bedienungsanleitung...
-
Seite 2: Inhaltsverzeichnis
Inhaltsverzeichnis 1. Einführung 1.1 Sicherheitshinweise ................. 03 1.2 Lieferumfang ....................03 1.3 Anschlüsse und Bezeichnungen ............. 04 2. Einbau einer Festplatte ................05 3. Installation der App / Software 2.1 iOS (App Store) .................... 06 2.2 Android (Google Play Store) ............... 06 2.3 PC / Mac ...................... -
Seite 3: Einführung
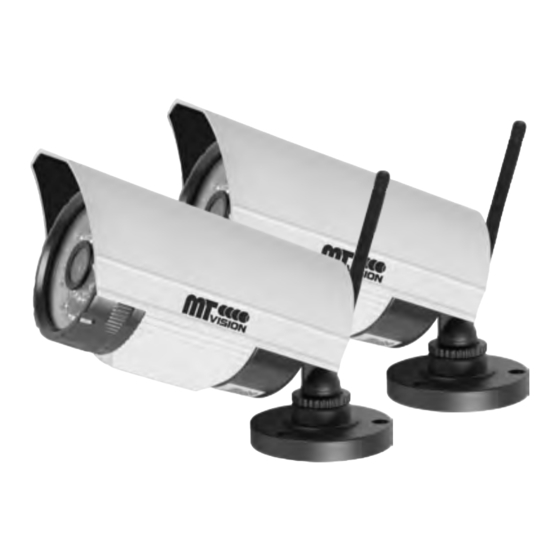
Gerät zu reparieren, oder kontaktieren Sie Ihren Händler. • Der Hersteller haftet für keinerlei Schäden, die durch Zubehör oder Software von Drittanbietern entstehen. 1.2 Lieferumfang 2x Kamera (HSR 10) 1x Netzwerk Video Rekorder (HSR 8200) • Netzteil • Netzteil • Antenne • USB Maus •... -
Seite 4: Anschlüsse Und Bezeichnungen
1. Einführung 1.3 Anschlüsse und Bezeichnungen Festplatten Betriebs Videoausgang LAN Anschluss HDMI AUDIO 2x USB Stromver- Ausgang Ausgang Ein /Ausgang Anschluss sorgung BNC Videoausgang Anschluss an einen externen Bildschirm / Monitor HDMI Ausgang Anschluss an einen externen Bildschirm / Monitor VGA Ausgang Anschluss an einen externen Bildschirm / Monitor LAN Anschluss... -
Seite 5: Einbau Einer Festplatte
2. Einbau einer Festplatte Wenn Sie die Kameras 24 Stunden täglich aufzeichnen lassen möchten, entnehmen Sie bitte der Tabelle die Aufnahmezeiten entsprechend der eingebauten Festplatte. Ist die Kapazität der Festplatte erreicht, werden die ersten Aufnahmen überschrieben. Achtung: Die Werte sind nur Richtwerte und können ggf. abweichen! Die max. Kapazität der Festplatte darf 4 TB (4.000 GB) nicht überschreiten. -
Seite 6: Installation Der App / Software
3. Installation der App / Software 2.1 iOS (App Store) Gehen Sie mit Ihrem iOS Gerät (Smartphone oder Tablet) in den App Store und suchen Sie nach der kostenlosen App VSSMobile. Laden Sie diese herunter - die Installation erfolgt vollautomatisch nach dem Download. App Store VSSMobile 2.2 Android (Google Play Store) -
Seite 7: Erste Schritte
4. Erste Schritte Verbinden Sie den Netzwerk Video Rekorder mit Ihrem Internet-Router (via LAN Kabel). Schließen Sie einen TV oder Monitor an den entsprechenden Ausgang an (HDMI, VGA oder BNC Videoausgang). Sobald die Stromversorgung über das beiliegende Netzteil hergestellt ist, startet der Netzwerk Video Rekorder automatisch (innerhalb ca. -
Seite 8: Bildschirmoberfläche
4. Erste Schritte 4.3 Bildschirmoberfläche Öffnet das Hauptmenü Wählen Sie hier aus, welche Kamera Sie auf dem Bildschirm anzeigen wollen. In dieser Ansicht ist nur eine Kameraansicht möglich. In diesem Ansichtsmodus können bis zu 4 Kameras gleichzeitig angezeigt werden. Wählen Sie Kameras 01-04 oder Kameras 05-08. In diesem Ansichtsmodus werden alle 8 Kameras gleichzeitig angezeigt. -
Seite 9: Kamera Hinzufügen
5. Kamera hinzufügen Der Netzwerk Video Rekorder unterstützt bis zu 8 Kameras. Verbinden Sie die Kamera(s) mit Ihrem Internet-Router via LAN Kabel. Ein LAN Kabel ist nur bei der Erstinstallation notwen- dig, falls Sie zu einem späteren Zeitpunkt die Kameras über WLAN betreiben möchten. Alle Kameras die den ONVIF Standard besitzen (Open Network Video Interface Forum), können mit dem Netzwerk Video Rekorder verbunden werden. -
Seite 10: Das Hauptmenü
6. Das Hauptmenü Öffnen Sie das Hauptmenü. Das Hauptmenü besteht aus 6 Untermenüs. • Suche (Search) • BackUp • Konfiguration • App Center • System • Shutdown 6.1 Suche Öffnet den Wiedergabemodus. In diesem Menü können Sie eine Kamera und ein ent- sprechendes Datum auswählen, um das Aufnahmearchiv direkt aufzurufen. -
Seite 11: Backup
6. Das Hauptmenü 6.2 BackUp Schließen Sie eine externe Festplatte an den USB Anschluss auf der Rückseite an. Sobald die Festplatte erkannt wurde, wird diese in der Liste angezeigt. Wählen Sie diese aus und drücken Sie auf Backup. Setzen Sie das Häkchen, wenn die Backup-Videos als AVI Datei gespeichert werden sollen. -
Seite 12: App Center
6. Das Hauptmenü 6.4 App Center Das App Center besteht aus weiteren Untermenüs: DDNS freigeben Haben Sie Zugriff auf einen eigenen Server, können Sie hier eine Dynamische DNS einrichten. Email Geben Sie hier Ihre Email Zugangsdaten ein, um z. B. bei Alarm- benachrichtigungen eine Email zu empfangen. -
Seite 13: Shutdown
6. Das Hauptmenü Maintain Diverse Übersichtprotokolle (System, Konfiguration, Storage, ...) Versionsinformationen des Netzwerk Video Rekorder Werkseinstellung einzeln anwendbar (Optionen, Konfiguration, ...) Automatischer Neustart des Systems (Wochentag und Uhrzeit) Account Weitere Benutzer oder Gruppen hinzufügen / bearbeiten Netzwerk Netzwerkeinstellungen bearbeiten RS232 RS232 Schnittstelle einstellen für ein evtl. -
Seite 14: Technische Daten
Hiermit erklärt die Firma Megasat Werke GmbH, dass sich folgende Geräte in Überein- stimmung mit den grundlegenden Anforderungen und den übrigen einschlägigen Bestimmungen der Richtlinie R&TTE 1999/5/EG befinden: HSR 8200 (0900135) HSR 10 (0900136) Die Konformitätserklärung zu diesen Produkten liegt der Firma vor: Megasat Werke GmbH Industriestraße 4a... - Seite 15 Notizen DEUTSCH...
- Seite 16 Version: 1.0 (Februar 2016) Technische Änderungen, Druckfehler und Irrtümer vorbehalten. Megasat Werke GmbH Industriestraße 4a D-97618 Niederlauer www.mtvision.tv info@mtvision.tv...