Omnitronic DD-4220 Bedienungsanleitung
Inhaltsverzeichnis
Verfügbare Sprachen
Verfügbare Sprachen
Quicklinks
BEDIENUNGSANLEITUNG
USER'S MANUAL
MODE D''EMPLOI
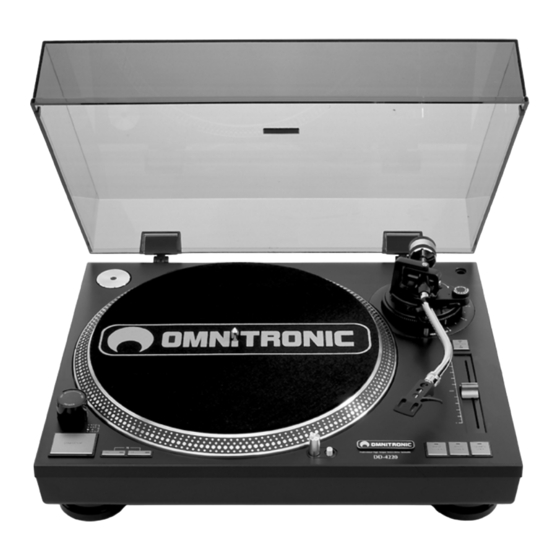
DD-4220/DD-4250
EXTREME HIGH TORQUE Turntable
©
Für weiteren Gebrauch aufbewahren!
Copyright
Keep this manual for future needs!
Nachdruck verboten!
Gardez ce mode d'emploi pour des
Reproduction prohibited!
utilisations ultérieures!
Réproduction interdit!
Guarde este manual para posteriores usos.
Prohibida toda reproducción.
Inhaltsverzeichnis

Verwandte Anleitungen für Omnitronic DD-4220


Inhaltszusammenfassung für Omnitronic DD-4220
- Seite 1 BEDIENUNGSANLEITUNG USER'S MANUAL MODE D'’EMPLOI DD-4220/DD-4250 EXTREME HIGH TORQUE Turntable © Für weiteren Gebrauch aufbewahren! Copyright Keep this manual for future needs! Nachdruck verboten! Gardez ce mode d’emploi pour des Reproduction prohibited! utilisations ultérieures! Réproduction interdit! Guarde este manual para posteriores usos.
-
Seite 2: Inhaltsverzeichnis
CARACTÉRISTIQUES TECHNIQUES ......................23 Das neueste Update dieser Bedienungsanleitung finden Sie im Internet unter: You can find the latest update of this user manual in the Internet under: Vous pouvez trouvez la dernière version de ce mode d'emploi dans l'Internet sous: www.omnitronic.com... -
Seite 3: Einführung
- sicherstellen, dass gegebenenfalls jede erhaltene Ergänzung in die Anleitung einzuführen ist EINFÜHRUNG Wir freuen uns, dass Sie sich für einen OMNITRONIC DD-4220/DD-4250 Plattenspieler entschieden haben. Wenn Sie nachfolgende Hinweise beachten, sind wir sicher, dass Sie lange Zeit Freude an Ihrem Kauf haben werden. -
Seite 4: Sicherheitshinweise
SICHERHEITSHINWEISE ACHTUNG! Seien Sie besonders vorsichtig beim Umgang mit gefährlicher Netzspannung. Bei die- ser Spannung können Sie einen lebensgefährlichen elektrischen Schlag erhalten! Dieses Gerät hat das Werk in sicherheitstechnisch einwandfreiem Zustand verlassen. Um diesen Zustand zu erhalten und einen gefahrlosen Betrieb sicherzustellen, muss der Anwender unbedingt die Sicherheits- hinweise und die Warnvermerke beachten, die in dieser Gebrauchsanweisung enthalten sind. -
Seite 5: Bestimmungsgemässe Verwendung
BESTIMMUNGSGEMÄSSE VERWENDUNG Bei diesem Gerät handelt es sich um einen professionelles Plattenspieler, mit dem sich Standard LPs und Singles abspielen lassen. Dieses Produkt ist für den Anschluss an 115/230 V, 50/60 Hz Wechselspannung zugelassen und wurde ausschließlich zur Verwendung in Innenräumen konzipiert. Vermeiden Sie Erschütterungen und jegliche Gewaltanwendung bei der Installierung oder Inbetriebnahme des Gerätes. -
Seite 6: Einstellen Des Überhangs
Grün (L-) Rechts, Minus-Pol Ziehen Sie die Befestigungsschrauben an der Headshell fest. Einstellen des Überhangs Der Überhang ist der Abstand zwischen der Nadel und dem Stift in der Mitte des Plattentellers. Der Überhang sollte für ein optimales Abtasten auf 20 mm eingestellt werden. Lösen Sie die Schrauben an der Headshell und rutschen Sie das System nach vorne bzw. -
Seite 7: Beschreibung Der Teile
BESCHREIBUNG DER TEILE 1. Staubschutzhaube 9. START/STOP-Taster 19. Tonarm 2. Scharnier 10. Geschwindigkeitsschalter 20. Justierring zur Einstellung 3. Puck 11. Nadellampe der Tonarmhöhe 4. Plattenteller 12. Lampenschalter 21. Tonarmstütze 5. Stift 13. Headshell 22. Tonarmklammer 6. Gummimatte 14. +/- 10 % Taste 23. -
Seite 8: Einstellungen
Verbinden Sie die Cinch-Kabel (weiß=linker Kanal, rot=rechter Kanal) mit den PHONO-Eingangsbuchsen Ihres Verstärkers bzw. Mischpultes. Verbinden Sie das Massekabel mit der Erdungsklemme des Verstärkers bzw. Mischpultes. An die REMOTE START/STOP-Buchse lässt sich ein Fußschalter anschließen. An die PITCH OUTPUT-Buchse lässt sich ein Beatcounter anschließen. Schließen Sie den Plattenspieler ans Netz an. -
Seite 9: Reinigung Und Wartung
• Wenn Sie den Tonarmlift nicht benötigen, lassen Sie ihn in der "AB" Position. REINIGUNG UND WARTUNG LEBENSGEFAHR! Vor Wartungsarbeiten unbedingt allpolig vom Netz trennen! Das Gerät sollte regelmäßig von Verunreinigungen wie Staub usw. gereinigt werden. Verwenden Sie zur Reinigung ein fusselfreies, angefeuchtetes Tuch. Auf keinen Fall Alkohol oder irgendwelche Lösungsmittel zur Reinigung verwenden! Im Geräteinneren befinden sich keine zu wartenden Teile.