Herunterladen Inhalt Inhalt Diese Seite drucken
Electrolux EHF6547FOK Benutzerinformation
Vorschau ausblenden Andere Handbücher für EHF6547FOK:
Inhaltsverzeichnis

Werbung

Verfügbare Sprachen

Verfügbare Sprachen

EHF6547FOK
.................................................. ...............................................
EN Hob
FR Table de cuisson
DE Kochfeld
IT Piano cottura
User manual
Notice d'utilisation
Benutzerinformation
Istruzioni per l'uso
2
18
34
50

Werbung

Inhaltsverzeichnis

Fehlerbehebung

loading

Inhaltszusammenfassung für Electrolux EHF6547FOK

  • Seite 1 ....................EHF6547FOK EN Hob User manual FR Table de cuisson Notice d'utilisation DE Kochfeld Benutzerinformation IT Piano cottura Istruzioni per l’uso...
  • Seite 2: Inhaltsverzeichnis

    Return the product to your local recycling facility or contact your municipal office. VISIT OUR WEBSITE FOR: - Products - Brochures - User manuals - Trouble shooter - Service information www.electrolux.com LEGEND Warning - Important Safety information. General information and tips Environmental information Subject to change without notice.
  • Seite 3: Accessories And Consumables

    Welcome to Electrolux. ACCESSORIES AND CONSUMABLES In the Electrolux webshop, you’ll find everything you need to keep all your Electrolux appliances looking spotless and working perfectly. Along with a wide range of accessories designed and built to the high quality standards you would expect, from specialist cookware to cutlery baskets, from bottle holders to delicate laundry bags…...
  • Seite 4: Safety Information

    SAFETY INFORMATION Before the installation and use of the appli- • If the appliance is installed above draw- ance, carefully read the supplied instruc- ers make sure that the space, between tions. The manufacturer is not responsible the bottom of the appliance and the up- if an incorrect installation and use causes per drawer, is sufficient for air circulation.
  • Seite 5 ENGLISH • Do not let the appliance stay unattended • Clean regularly the appliance to prevent during operation. the deterioration of the surface material. • Do not operate the appliance with wet • Do not use water spray and steam to hands or when it has contact with water.
  • Seite 6: Product Description

    PRODUCT DESCRIPTION GENERAL OVERVIEW 170 mm 145 mm Cooking zone 265 mm Cooking zone Cooking zone 145 mm Control panel 120/175/210 Cooking zone CONTROL PANEL LAYOUT Use the sensor fields to operate the appliance. The displays, indicators and sounds tell which functions operate. sensor field function To activates and deactivates the appli-...
  • Seite 7 ENGLISH sensor field function To increase or decrease the time. To set a cooking zone. To activate and deactivate the outer ring. HEAT SETTING DISPLAYS Display Description The cooking zone is deactivated. The cooking zone operates. function operates. The Automatic Heat Up function operates There is a malfunction.
  • Seite 8: Daily Use

    DAILY USE To activate the outer ring touch the sensor ACTIVATION AND field . The indicator comes on. DEACTIVATION For more outer rings touch the same sen- sor field again. The subsequent indicator Touch for 1 second to activate or deac- comes on.
  • Seite 9: Minute Minder

    ENGLISH • To set the cooking zone: touch Minute Minder again and again until the indicator of a You can use the timer as a Minute Minder necessary cooking zone comes on. while the cooking zones do not operate. • To activate the Count Down Timer: Touch .
  • Seite 10: Offsound Control (Deactivation And Activation Of The Sounds)

    • Deactivate the appliance with To override the child safety device for only one cooking time • Activate the appliance with . The symbol comes on. • Touch for 4 seconds. Set the heat setting in 10 seconds. You can oper- ate the appliance.
  • Seite 11: Helpful Hints And Tips

    ENGLISH HELPFUL HINTS AND TIPS • If it is possible, always put the lids on the COOKWARE cookware. Information about the cookware • Put cookware on a cooking zone before you start it. • Stop the cooking zones before the end •...
  • Seite 12 temperatures and do not brown food too much.
  • Seite 13: Care And Cleaning

    ENGLISH CARE AND CLEANING Clean the appliance after each use. Always use cookware with clean bottom. Scratches or dark stains on the glass-ceramic cause no effect on how the appliance operates. To remove the dirt: – Remove immediately: melted plastic, plastic foil, and food with sugar.
  • Seite 14: Troubleshooting

    TROUBLESHOOTING Problem Possible cause Remedy You cannot activate the Activate the appliance appliance or operate it. again and set the heat set- ting in less than 10 sec- onds. You touched 2 or more Touch only one sensor sensor fields at the same field.
  • Seite 15: Technical Information

    TECHNICAL INFORMATION Modell EHF6547FOK Prod.Nr. 949 596 005 00 Typ 58 HAD 56 AO 220-240 V 50-60 Hz Made in Germany Ser.Nr.
  • Seite 16: Installation Instructions

    INSTALLATION INSTRUCTIONS WARNING! built-in units and work surfaces that align Refer to "Safety information" chap- to the standards. ter. CONNECTION CABLE Before the installation • The appliance is supplied with the con- nection cable. • Before the installation of the appliance, •...
  • Seite 17 ENGLISH min. 28 mm If you use a protection box (an additional accessory ), the protective floor directly below the appliance is not necessary. You can not use the protection box if you install the appliance above an oven. 1) The protection box accessory may not be available in some countries. Please contact your local supplier.
  • Seite 18: En Matière De Protection De L'environnement

    RENDEZ-VOUS SUR NOTRE SITE POUR CONSULTER: - Produits - Brochures - Notices d'utilisation - Dépannage - Informations sur le service après-vente www.electrolux.com LÉGENDE Avertissement – Informations importantes sur la sécurité. Informations générales et conseils Informations écologiques Sous réserve de modifications.
  • Seite 19: Accessoires Et Consommables

    Bienvenue chez Electrolux. ACCESSOIRES ET CONSOMMABLES Dans la boutique en ligne d'Electrolux, vous trouverez tout ce qu'il vous faut pour que vos appareils Electrolux fonctionnent parfaitement. Sans oublier une vaste gamme d'accessoires conçus et fabriqués selon les critères de qualité les plus élevés qui soient, des articles de cuisine spécialisés aux range-couverts, des porte-bouteilles aux...
  • Seite 20: Consignes De Sécurité

    CONSIGNES DE SÉCURITÉ Avant d'installer et d'utiliser cet appareil, li- que la moisissure ne provoque de gon- sez soigneusement les instructions four- flements. nies. Le fabricant ne peut être tenu pour • Protégez la partie inférieure de l'appareil responsable des dommages et blessures de la vapeur et de l'humidité.
  • Seite 21: Mise Au Rebut

    FRANÇAIS AVERTISSEMENT doit présenter une distance d'ouverture des contacts d'au moins 3 mm. Risque de dommage de l'appareil. • N'utilisez que des systèmes d'isolation • Ne laissez pas de récipients chauds sur appropriés : des coupe-circuits, des fusi- le bandeau de commande. bles (les fusibles à...
  • Seite 22: Description De L'appareil

    DESCRIPTION DE L'APPAREIL VUE D'ENSEMBLE 170 mm 145 mm Zone de cuisson 265 mm Zone de cuisson Zone de cuisson 145 mm Bandeau de commande 120/175/210 Zone de cuisson DESCRIPTION DU BANDEAU DE COMMANDE Appuyez sur les touches sensitives pour faire fonctionner l'appareil. Les affichages, les voyants et les signaux sonores indiquent quelles fonctions sont activées.
  • Seite 23 FRANÇAIS touche sensitive fonction Affichage du niveau de cuisson Pour afficher le niveau de cuisson. Barre de commande Pour sélectionner un niveau de cuisson. Pour augmenter ou diminuer la durée. Pour choisir une zone de cuisson. Pour activer ou désactiver le circuit exté- rieur de la zone de cuisson.
  • Seite 24: Utilisation Quotidienne

    UTILISATION QUOTIDIENNE ACTIVATION ET ACTIVATION ET DÉSACTIVATION DÉSACTIVATION DES CIRCUITS DE CUISSON EXTÉRIEURS Appuyez sur pendant 1 seconde pour activer ou désactiver l'appareil. Vous pouvez adapter la surface de cuisson à la dimension du récipient. Pour activer le circuit de cuisson extérieur, ARRÊT AUTOMATIQUE appuyez sur la touche sensitive Cette fonction arrête l'appareil...
  • Seite 25 FRANÇAIS • Pour choisir la zone de cuisson (si MINUTEUR plusieurs zones de cuisson sont en cours de fonctionnement) : appuyez Minuteur (Décompte du plusieurs fois sur jusqu'à ce que l'in- temps) dicateur correspondant s'affiche. • Pour activer la fonction CountUp Ti- Utilisez le minuteur pour régler la durée de mer : appuyez sur la touche du minu-...
  • Seite 26: Sécurité Enfants

    VERROUILLAGE ACTIVATION DES SIGNAUX SONORES) Vous pouvez verrouiller le bandeau de commande pour éviter une modification in- Désactivation des signaux volontaire du niveau de cuisson. Réglez d'abord le niveau de cuisson. sonores Pour activer cette fonction, appuyez sur Mettez l'appareil à l'arrêt. .
  • Seite 27: Conseils Utiles

    FRANÇAIS CONSEILS UTILES • Déposez toujours le récipient sur la zone USTENSILES DE CUISSON de cuisson avant de mettre celle-ci en Informations concernant les usten- fonctionnement. siles de cuisson • Désactivez les zones de cuisson avant la fin du temps de cuisson pour utiliser la •...
  • Seite 28 Utilisation : Durée Conseils veau cuis- 12-13 Poêler à feu vif des pommes de 5-15 Retourner à mi-cuisson. terre rissolées, côtelettes de filet, steaks Faire bouillir de grandes quantités d'eau, cuire des pâtes, griller la viande (goulasch, bœuf braisé), cuisson des frites.
  • Seite 29: Entretien Et Nettoyage

    FRANÇAIS ENTRETIEN ET NETTOYAGE Nettoyez l'appareil après chaque utilisation. Utilisez toujours des récipients de cuisson dont le fond est propre. Les égratignures ou les taches sombres sur la vitrocéramique n'ont aucune influence sur le fonc- tionnement de l'appareil. Pour enlever les salissures : –...
  • Seite 30: En Cas D'anomalie De Fonctionnement

    EN CAS D'ANOMALIE DE FONCTIONNEMENT Problème Cause possible Solution Vous ne pouvez pas allu- Allumez de nouveau l'ap- mer l'appareil ou le faire pareil et réglez le niveau de fonctionner. cuisson sous 10 secondes. Vous avez appuyé sur N'appuyez que sur une plusieurs touches sensiti- seule touche sensitive à...
  • Seite 31: Caracteristiques Techniques

    CARACTERISTIQUES TECHNIQUES Modell EHF6547FOK Prod.Nr. 949 596 005 00 Typ 58 HAD 56 AO 220-240 V 50-60 Hz Made in Germany Ser.Nr.
  • Seite 32: Instructions D'installation

    INSTRUCTIONS D'INSTALLATION AVERTISSEMENT avoir été installés dans des meubles et Reportez-vous au chapitre « Consi- sur des plans de travail homologués et gnes de sécurité ». adaptés. Avant l'installation CÂBLE D'ALIMENTATION • L'appareil est fourni avec le câble d'ali- • Avant l'installation de l'appareil, notez mentation.
  • Seite 33 FRANÇAIS min. 28 mm Si vous utilisez une enceinte de protection (accessoire en option ), le fond de protec- tion installé directement sous l'appareil n'est plus nécessaire. Vous ne pouvez pas utiliser le boîtier de protection si vous installez l'appareil au- dessus d'un four.
  • Seite 34 Ihrer örtlichen Sammelstelle oder wenden Sie sich an Ihr Gemeindeamt. AUF UNSERER WEBSITE FINDEN SIE: - Produkte - Prospekte - Gebrauchsanweisungen - Problemlöser - Service-Informationen www.electrolux.com LEGENDE Warnung - Wichtige Sicherheitshinweise. Allgemeine Hinweise und Ratschläge Hinweise zum Umweltschutz Änderungen vorbehalten.
  • Seite 35: Zubehör Und Verbrauchsmaterialien

    DEUTSCH WIR DENKEN AN SIE Vielen Dank, dass Sie sich für ein Electrolux Gerät entschieden haben. Sie haben ein Produkt gewählt, hinter dem eine jahrzehntelange professionelle Erfahrung und Innovation steht. Bei der Entwicklung dieses großartigen und eleganten Geräts haben wir an Sie gedacht. So haben Sie bei jedem Gebrauch die Gewissheit, dass Sie stets großartige Ergebnisse erzielen werden.
  • Seite 36: Sicherheitshinweise

    SICHERHEITSHINWEISE Lesen Sie die mitgelieferte Anleitung sorg- • Seien Sie beim Umsetzen des Geräts fältig vor der Montage und dem ersten Ge- vorsichtig, denn es ist schwer. Tragen brauch des Geräts durch. Der Hersteller ist Sie stets Sicherheitshandschuhe. nicht dafür verantwortlich, wenn eine fehler- •...
  • Seite 37: Entsorgung

    DEUTSCH • Die elektrische Installation muss eine • Platzieren Sie keine entflammbaren Pro- Trenneinrichtung aufweisen, mit der Sie dukte oder Gegenstände, die mit ent- das Gerät allpolig von der Stromversor- flammbaren Produkten benetzt sind, im gung trennen können. Die Trenneinrich- Gerät, auf dem Gerät oder in der Nähe tung muss mit einer Kontaktöffnungs- des Geräts.
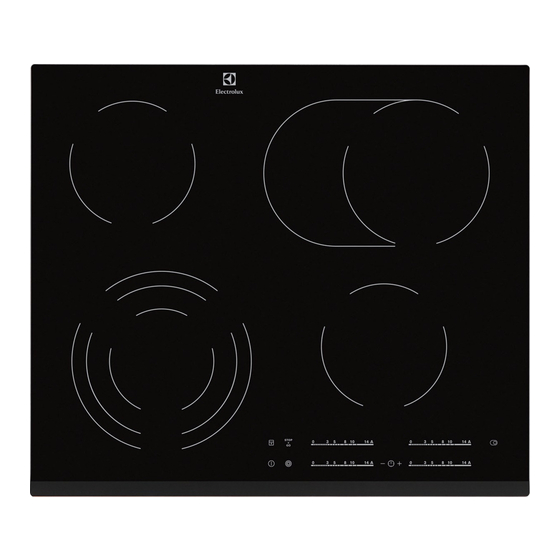
  • Seite 38: Gerätebeschreibung

    GERÄTEBESCHREIBUNG ALLGEMEINE ÜBERSICHT 170 mm 145 mm Kochzone 265 mm Kochzone Kochzone 145 mm Bedienfeld 120/175/210 Kochzone BEDIENFELDANORDNUNG Bedienen Sie das Gerät über die Sensorfelder. Die Anzeigen, Kontrolllampen und akustischen Signale informieren Sie über die aktiven Funktionen. Sensorfeld Funktion Ein- und Ausschalten des Geräts. Verriegelung/Entriegelung des Bedienfelds.
  • Seite 39: Anzeige Der Kochstufen

    DEUTSCH Sensorfeld Funktion Erhöhen oder Verringern der Zeit. Auswählen der Kochzone. Ein- und Ausschalten des äußeren Kreises. ANZEIGE DER KOCHSTUFEN Anzeige Beschreibung Die Kochzone ist ausgeschaltet. Die Kochzone ist eingeschaltet. Die Funktion ist eingeschaltet. Die Ankochautomatik ist eingeschaltet. Eine Fehlfunktion ist aufgetreten. + Zahl OptiHeat Control (3-stufige Restwärmeanzeige): Weiterga- ren/Warmhalten/Restwärme...
  • Seite 40: Täglicher Gebrauch

    TÄGLICHER GEBRAUCH EIN- UND AUSSCHALTEN EIN- UND AUSSCHALTEN DER ÄUSSEREN HEIZKREISE Berühren Sie 1 Sekunde lang , um das Gerät ein- oder auszuschalten. Die Kochflächen können an die Größe des Kochgeschirrs angepasst werden. ABSCHALTAUTOMATIK Berühren Sie das Sensorfeld , um den äußeren Heizkreis einzuschalten.
  • Seite 41: Tastensperre

    DEUTSCH TIMER leuchtet. Wenn die Anzeige der Kochzo- ne langsamer blinkt, wird die Zeit hoch- gezählt. Das Display schaltet um zwi- Kurzzeitmesser schen und der abgelaufenen Zeit (Mi- nuten). Mit dem Kurzzeitmesser stellen Sie ein, wie • So können Sie feststellen, wie lange lange eine Kochzone für einen einzelnen die Kochzone bereits in Betrieb ist: Kochvorgang eingeschaltet bleiben soll.
  • Seite 42: Kindersicherung

    Der Timer bleibt eingeschaltet. Haben Sie den Signalton deaktiviert, ertönt Berühren Sie zum Ausschalten dieser er nur in folgenden Fällen: Funktion . Die zuvor ausgewählte Koch- • Bei der Berührung von stufe wird eingestellt. • Bei Ablauf des Kurzzeitweckers Diese Funktion wird auch ausgeschaltet, •...
  • Seite 43: Praktische Tipps Und Hinweise

    DEUTSCH PRAKTISCHE TIPPS UND HINWEISE • Setzen Sie das Kochgeschirr vor dem KOCHGESCHIRR Einschalten der Kochzone auf. Informationen zum Kochgeschirr • Schalten Sie die Kochzonen bereits vor dem Ende des Garvorgangs aus und nutzen Sie die Restwärme. • Der Boden des Kochgeschirrs sollte so •...
  • Seite 44 Informationen zu Acrylamiden Wichtig! Nach neuesten wissenschaftlichen Erkenntnissen kann die Bräunung von Lebensmitteln, speziell bei stärkehaltigen Produkten, eine gesundheitliche Gefährdung durch Acrylamid verursachen. Daher empfehlen wir, bei möglichst niedrigen Temperaturen zu garen und die Speisen nicht zu stark zu bräunen.
  • Seite 45: Reinigung Und Pflege

    DEUTSCH REINIGUNG UND PFLEGE Reinigen Sie das Gerät nach jedem Ge- brauch. Achten Sie immer darauf, dass der Boden des Kochgeschirrs sauber ist. Kratzer oder dunkle Flecken in der Glaskeramik beeinträchtigen die Funktionsfähigkeit des Geräts nicht. So entfernen Sie Verschmutzungen: –...
  • Seite 46: Fehlersuche

    FEHLERSUCHE Problem Mögliche Ursache Abhilfe Das Gerät kann nicht ein- Schalten Sie das Gerät er- geschaltet oder bedient neut ein und stellen Sie in- werden. nerhalb von 10 Sekunden die Kochstufe ein. Zwei oder mehr Sensor- Berühren Sie nur ein Sen- felder wurden gleichzeitig sorfeld.
  • Seite 47: Technische Daten

    Glaskeramik (befindet sich in der dienst und die Garantiebedingungen finden Ecke der Glasfläche) und die angezeigte Sie im Garantieheft. Fehlermeldung an. TECHNISCHE DATEN Modell EHF6547FOK Prod.Nr. 949 596 005 00 Typ 58 HAD 56 AO 220-240 V 50-60 Hz Made in Germany Ser.Nr...
  • Seite 48: Montageanleitung

    MONTAGEANLEITUNG WARNUNG! sende Einbauschränke und Arbeitsplat- Siehe Kapitel „Sicherheitshinwei- ten betrieben werden. se“. ANSCHLUSSKABEL Vor der Montage • Das Gerät wird mit dem Anschlusskabel geliefert. • Notieren Sie vor der Montage des Geräts • Ein beschädigtes Netzkabel muss durch alle Daten, die Sie auf dem Typenschild ein entsprechendes Spezialkabel (Typ finden.
  • Seite 49 DEUTSCH min. 28 mm Falls Sie einen Schutzboden verwenden (zusätzliches Zubehör) , ist der Boden- schutz direkt unter dem Gerät nicht erfor- derlich. Wenn Sie das Gerät über einem Backofen einsetzen, können Sie den Schutzboden nicht verwenden. 1) Der Schutzboden ist möglicherweise in einigen Ländern nicht erhältlich. Wenden Sie sich an Ihren Händler vor Ort.
  • Seite 50 VISITA IL NOSTRO SITO WEB: - Prodotti - Brochure - Libretto istruzioni - Risoluzione dei problemi - Informazioni sui servizi www.electrolux.com LEGENDA Avvertenza - Importanti informazioni di sicurezza. Informazioni e consigli generali Informazioni in materia di sicurezza ambientale Con riserva di modifiche.
  • Seite 51 Benvenuti in Electrolux. ACCESSORI E PRODOTTI DI CONSUMO All'interno del webshop Electrolux troverete tutto ciò che vi serve per fare in modo che i vostri elettrodomestici Electrolux siano sempre perfettamente puliti e funzionanti. Non mancano inoltre una vasta gamma di accessori studiati e realizzati conformemente agli elevati standard qualitativi che vi aspettate: pentole, scolaposate, portabottiglie e sacchi biancheria delicati...
  • Seite 52: Informazioni Per La Sicurezza

    INFORMAZIONI PER LA SICUREZZA Leggere attentamente le istruzioni fornite • Proteggere la base dell'apparecchiatura prima di installare e utilizzare l'apparecchia- da vapore e umidità. tura. Il produttore non è responsabile se • Non installare l'apparecchiatura accanto un'installazione ed un uso non corretto del- ad una porta o sotto una finestra, per l'apparecchiatura provocano lesioni e dan- evitare che pentole calde cadano dal-...
  • Seite 53: Uso Dell'apparecchiatura

    ITALIANO AVVERTENZA! • Utilizzare esclusivamente dispositivi di isolamento appropriati: interruttori auto- Vi è il rischio di danneggiare l'appa- matici, fusibili (quelli a tappo devono es- recchiatura. sere rimossi dal portafusibile), sganciatori • Non poggiare pentole calde sul pannello per correnti di guasto a terra e contattori. dei comandi.
  • Seite 54: Descrizione Del Prodotto

    DESCRIZIONE DEL PRODOTTO PANORAMICA 170 mm 145 mm Zona di cottura 265 mm Zona di cottura Zona di cottura 145 mm Pannello dei comandi 120/175/210 Zona di cottura DISPOSIZIONE DEL PANNELLO DEI COMANDI Utilizzare i tasti sensore per mettere in funzione l'apparecchiatura. I display, gli indicatori ed i segnali acustici mostrano quali funzioni sono attive.
  • Seite 55 ITALIANO tasto sensore funzione Per aumentare o ridurre il tempo. Per impostare una zona di cottura. Per attivare e disattivare l'anello esterno. DISPLAY DEL LIVELLO DI POTENZA Display Descrizione La zona di cottura è disattivata. La zona di cottura è in funzione. La funzione è...
  • Seite 56: Utilizzo Quotidiano

    UTILIZZO QUOTIDIANO ATTIVAZIONE E PERMETTE DI ATTIVARE E DISATTIVAZIONE DISATTIVARE I CIRCUITI DI RISCALDAMENTO ESTERNI. Sfiorare per 1 secondo per accendere o spegnere l'apparecchiatura. È possibile adeguare la superficie di riscal- damento effettiva alle dimensioni delle pen- tole. SPEGNIMENTO AUTOMATICO Per accendere il circuito di riscaldamento La funzione spegne automaticamente esterno sfiorare il tasto sensore...
  • Seite 57 ITALIANO TIMER ripetutamente finché non si accende la spia della zona di cottura desiderata. • Per attivare CountUp Timer:sfiorare il Timer per il conto alla tasto del timer, si accende . Quan- rovescia do l'indicatore della zona di cottura lam- peggia lentamente, inizia il conteggio.
  • Seite 58: Sicurezza Bambini

    Per attivare questa funzione sfiorare . Il è attivo. Sfiorare si accende, il se- gnale acustico non è attivo. simbolo si accende per 4 secondi. Quando questa funzione è attiva, i segnali Il Timer rimane acceso. acustici saranno udibili soltanto quando: Per disattivare questa funzione sfiorare •...
  • Seite 59: Consigli E Suggerimenti Utili

    ITALIANO CONSIGLI E SUGGERIMENTI UTILI • Posizionare la pentola prima di accende- PENTOLE re la zona di cottura. Informazioni sul tipo di pentole • Spegnere le zone di cottura prima della fine del tempo di cottura, in modo da sfruttare il calore residuo. •...
  • Seite 60 Livel- Usare per: Tem- Suggerimenti lo di tenza Portare ad ebollizione grandi quantità d'acqua, cuocere la pasta, rosolare la carne (gulasch, stufati), friggere patatine. Informazioni sulle acrilamidi Importante Secondo le più recenti scoperte scientifiche, se si rosolano alimenti (in particolari quelli contenenti amido), le acrilamidi possono rappresentare un rischio per la salute.
  • Seite 61: Pulizia E Cura

    ITALIANO PULIZIA E CURA Pulire l'apparecchiatura dopo ogni utilizzo. Usare sempre pentole con il fondo pulito. I graffi o le macchie scure sul vetro- ceramica non compromettono il funzionamento dell'apparecchiatu- Per eliminare lo sporco: – Rimuovere immediatamente:pla- stica fusa, pellicola di plastica e ali- menti contenenti zucchero.
  • Seite 62: Risoluzione Dei Problemi

    RISOLUZIONE DEI PROBLEMI Problema Possibile causa Soluzione Non è possibile attivare Accendere di nuovo l'ap- l'apparecchiatura o met- parecchiatura ed impostare terla in funzione. il livello di potenza entro 10 secondi. Sono stati sfiorati 2 o più Sfiorare un solo tasto sen- tasti sensore contempora- sore.
  • Seite 63: Dati Tecnici

    Verificare di aver azionato correttamente l'apparecchiatura. In caso di azionamento DATI TECNICI Modell EHF6547FOK Prod.Nr. 949 596 005 00 Typ 58 HAD 56 AO 220-240 V 50-60 Hz Made in Germany Ser.Nr...
  • Seite 64: Istruzioni Di Installazione

    ISTRUZIONI DI INSTALLAZIONE AVVERTENZA! voro e mobili da incasso conformi alle Fare riferimento al capitolo "Infor- norme. mazioni per la sicurezza". CAVO DI COLLEGAMENTO Prima dell'installazione • L'apparecchiatura è fornita con un cavo di collegamento. • Prima di installare l'apparecchiatura, tra- •...
  • Seite 65 ITALIANO min. 28 mm Nel caso in cui si stia utilizzando un protet- tore da sovratensioni (accessorio aggiunti- ), non sarà necessaria la superficie di protezione direttamente sotto l'apparec- chiatura. Non è consentito utilizzare il protettore da sovratensioni qualora l'apparecchiatura venga installata sopra un forno.
  • Seite 67 ITALIANO...
  • Seite 68 892947882-A-412011...

Inhaltsverzeichnis