Inhaltsverzeichnis
Werbung
Verfügbare Sprachen
Verfügbare Sprachen
Werbung
Kapitel
Inhaltsverzeichnis

Verwandte Anleitungen für Octagon SF 2028 HD OPTIMA 3D


Inhaltszusammenfassung für Octagon SF 2028 HD OPTIMA 3D
-
Seite 2: Inhaltsverzeichnis
A. Lieferumfang (Zubehör) B. Gerätebeschreibung : Frontblen nde (Vorderseite) & Rückseite (Anschlüsse) C. Common Interface – CI Slot D. Fernbedienung E. Eigenschaften des Octagon SF2 2028 F. Technische Daten F. Technische Daten II. Anschlussdiagramm(e) - Geräterü ückseite 1. Anschluss des Satellitenkabels A. - Seite 3 Inhaltsverzeichnis IV. System Konfiguration 1 BENUTZEREINSTELLUNGEN 1. BENUTZEREINSTELLUNGEN A. Spracheinstellungen B. System Zeit (Zeit Einstellungen) C. Kindersicherung D. Anzeige Einstellungen E. AV Einstellungen F. Erweiterte Einstellungen G. Aufnahme Einstellungen G. Aufnahme Einstellungen 2. INSTALLATION A. Antennen Einstellungen B. Satelliten Suche C.
-
Seite 4: Wichtige Sicherheitshinweise
Wichtige Sicherheitshinweise Vorwort Sehr geehrte Kundin, sehr geehrter Kunde, Diese Bedienungsanleitung soll Ihnen helfen, die um mfangreichen Funktionen Ihres OCTAGON Digitalreceiver optimal zu nutzen. Die Bedienungshin nweise wurden so verständlich wie möglich verfasst und so knapp wie nötig gehalten. Der Funkt tionsumfang Ihres Gerätes wird durch... - Seite 5 Werfen Sie daher verbrauchte Batterien nicht in den Hausmüll, sondern geben Sie diese bei eine er Sammelstelle für Altbatterien ab! Konformitätserklärung Die Firma OCTAGON Germany erklärt hiermit für diese es Produkt die Übereinstimmung mit folgenden Richtlinien und Normen: Niederspannungsrichtlinie 2006/95/ Richtlinie zur elektromagnetischen Verträglichkeit 2004/...
-
Seite 6: Vorabinformationen
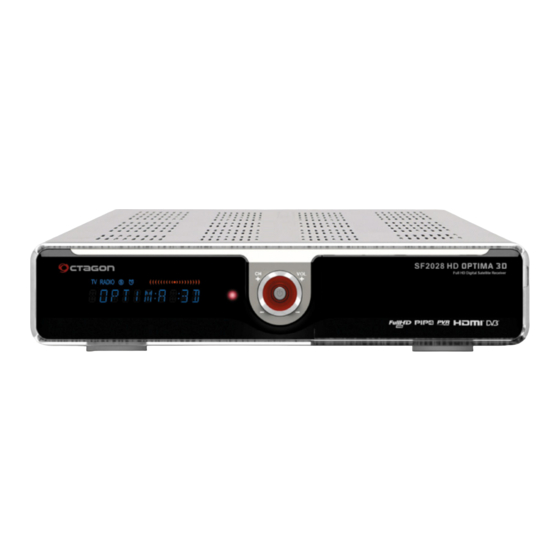
I. Vorabinformationen A. Lieferumfang (Zubehör) Überprüfen Sie die Lieferung auf Vollständig keit, bevor Sie das Gerät in Betrieb nehmen. B. Gerätebeschreibung Frontblende (Vorderseite) 1. VFD Display Programmnamen und diverse Informationen werden angezeigt. 2. CH-/+ Im Normal Modus s Programme zu wechseln, im Menü Modus zum navigieren im Men nü. -
Seite 7: Rückseite (Anschlüsse)
I. Vorabinformationen Rückseite (Anschlüsse) 1. LNB 1/2 Antenneneingang für Tuner1/2 2. SCART VCR/TV Scart Anschlu 3. YUV Komponentenausgang g (YPbBr) YUV 4. e-SATA e-SATA Anschluss für r externe Speichergeräte (HDD- Festplatte) 5. A/C Switch Netzschalter (Stromne etz) 6. HDMI HDMI Ausgang zum T TV-Gerät 7. -
Seite 8: Common Interface - Ci Slot
I. Vorabinformationen C. Common Interface – CI Slot Wenn Sie verschlüsselte Sender sehen möchten n, benötigen Sie eine passende SmartCard des jeweiligen Anbieters. SmartCard und CAM (Conditional Access Mo odule) Initialisierung Stecken Sie das CAM zusammen mit der Smart tCard in den CI Slot. -
Seite 9: Fernbedienung
I. Vorabinformationen D. Fernbedienung 1. Power SAT-Receiver Ein- /Ausschalten 2. 3D Konvertiert 3D zu 2D. 2D zu 3D 3. Mute Ton Ein- / Ausschalten 4. TXT+ Multifeed/Teletext/Untertitel 5. 576,1080 Resolution – Auflösung einstellen 6. Audio Audio Tonspur einstellen 7. INF+ Fine Einstelung Tuner, Positionierer 8. - Seite 10 I. Vorabinformationen (Lesezeich hen) Bookmark setzen/entfernen GRÜN GRÜN (Timer) BLAU Springen zum nächsten Lesezeichen GELB (Motor) Positionierer 35. PAUSE : Wiedergabe anhalten / fortsetzen 36. STOP : Wiedergabe & Aufnahme 37. Record Startet die Aufnahme 38. Play Wiedergabe Inhalt 39. Prev Sprung zum Anfang (Titel Sprung) 40.
-
Seite 11: Eigenschaften Des Octagon Sf2 2028
I. Vorabinformationen E. Eigenschaften des Octagon SF2028 - ARM Cortex-A9 Core 1500 DMIPS (OpenGL ES 2.0 - Entropic CPU 600 MHz starker Prozessor - Flash 256MB & 512MB RAM Arbeitsspeicher - Full TWIN HDTV PVR Receiver (2x DVB-S/S2) - H.264/MPEG4-HD/SD, DVB-S2 Tuner - 10-stelliges Aphanumerisches VFD Display (Blau) - 3D zu 2D &... -
Seite 12: Technische Daten
I. Vorabinformationen F. Technische Daten Front Panel Panel Smart card Slot Common Interface SD card USB 2.0 1 x USB 2.0 Standby, Vol -/+, Ch Rear Panel Sat-IF input 2 x F-type socket Connection TV 2 x Scart socket Video output (analogue) 1 x Cinch-socket Video/audio output (digital) 1 x HDMI Audio output (analogue) - Seite 13 I. Vorabinformationen Power Main voltage 100-250/50-60 V/Hz wer consumption (Max./typ. Operation/stand-by) 35/1 12/1W Modulation, FEC, de-multiplexer SK , 8PSK Video Video resolution R 601(720x576),480p, 576p, 720p, 1080i, 1080p Video decoding EG-2, MPEG-4 compatible Input data rate 2-45 5 Msymbol/s > 5 Decoding Decoding EG-4(AAC-HE), MPEG-1, Layer1,2 and 3...
-
Seite 14: Anschluss Des Satellitenkabels
II Anschlussdiagramm(e) - Ger II. Anschlussdiagramm(e) räterückseite räterückseite Dieses Kapitel führt Sie durch den Installationsproz zess des Receivers. Bitte lesen Sie diesen Bereich aufmerksam durch um die einwandfreie Fun nktion des Systems sicherzustellen. 1. Anschluss des Satellitenkabels Dieser Receiver enthält zwei Satellitentuner. Als er rsten Schritt schließen Sie das Empfangskabel an um eine optimale Signalqualität zu erhalten. -
Seite 15: Geräterückseite
II. Anschlussdiagramm(e) - G Geräterückseite Hinweis : Wenn Sie einen A/V Receiver mit e einem S/PDIF Digital Audio Eingang besitzen, verwenden Sie diesen Anschluss um die best mögliche Audio Qualität zu erzielen. B. TV-Anschluss über ein Cinch (Video) Kabe Der Receiver verfügt auch über einen Compo osite Video Anschluss. -
Seite 16: Receiver Ein/Ausschalten
II. Anschlussdiagramm(e) - Gerä äterückseite 3. Receiver ein/ausschalten Der Receiver verfügt über mehrere Wege zum ein/ /ausschalten A. Netztrennung (Netzschalter) Auf der Rückseite befindet sich ein Netzschalter. Damit wird das Gerät komplett vom Netz getrennt. Es ist nicht notwendig das Gerät immer üb ber diesen Schalter ein/aus zu schalten. -
Seite 17: Grundfunktionen
III. Grundfunktionen 1. Kanal umschalten [ I : Drücken Sie HOCH/RUNTER, CH +/-] [ I : Drücken Sie HOCH/RUNTER, CH +/ ] Dieses Produkt unterstützt mehrere Sprachen fü ür die Anzeige auf dem Bildschirm (OSD), Ton und DVB Untertitel. Nehmen Sie im Menü die gewünschten Spracheinstellungen vor. -
Seite 18: Untertitel Auswählen
III. Grundfunktionen 3. Tonspur auswählen [ I : Drücken Sie die Audio Taste] [ I : Drücken Sie die Audio Taste] Drücken Sie die Audio Taste und wählen sie eine der verfügbaren Tonspuren aus. 4. Untertitel auswählen [ I : Drücken Sie die TXT+ Taste > Untertitel ] Wenn der gewählte Kanal Untertitel sendet, können Sie diese anzeigen lassen. -
Seite 19: Programm Informationen (Info O Leiste)
III. Grundfunktionen 6. Programm Informationen (Info Leiste) [ I : Drücken Sie die INFO Taste ] Wenn Sie den Kanal wechseln, wird die Info Lei ste auf dem Bildschirm angezeigt. Der MENU Anzeigezeitraum ist konfigurierbar [ I : Drücken S Sie die Taste >... - Seite 20 III. Grundfunktionen [ I : Drücken Sie OK Taste > SAT Taste ] Drücken Sie in der Kanalliste die Drücken Sie in der Kanalliste die Taste, um einen Taste, um einen Satelliten auszuwählen. Es gibt vier verschiedene Filter für die Kanalliste, um die Auswahl zu erleichtern.
- Seite 21 III. Grundfunktionen [ I : Drücken Sie OK Taste > BLAUE Taste ] BLAUE BLAUE Taste: Sortierung der Kanäle nach Taste: Sortierung der Kanäle nach Transponder/TP. Wählen Sie in dem zusätzlichen Fenster einen Transponder aus und bestätigen Si e die Auswahl mit .
-
Seite 22: Elektronischer Programmführe Er (Epg)
III. Grundfunktionen [ I : Drücken Sie OK Taste > NEXT Taste ] (NUR für Modelle mit zwei Tunern) (NUR für Modelle mit zwei Tunern) NEXT Taste: Sortierung der Kanäle nach Tuner. Wählen Sie in dem zusätzlichen Fenster Tuner 1, Tu uner 2 oder beide Tuner aus und bestätigen Sie die Ausw wahl... -
Seite 23: Time Shift (Zeitverzögertes Fe Ernsehen)
III. Grundfunktionen 9. Time Shift (Zeitverzögertes Fernsehen) [ I : Drücken Sie die PAUSE Taste ] [ I : Drücken Sie die PAUSE Taste ] Time Shift erlaubt Ihnen, eine Sendung zeitverzö ögert anzusehen. Um Time Shift zu verwenden, muss d Sendung aufgenommen werden. -
Seite 24: Medien Browser (Media Playe R)
III. Grundfunktionen 11. Aufnahme wiedergeben [ I : Drücken Sie die MEDIEN BROWSER Taste ] MEDIEN BROWSER Drücken Sie die Taste, um den Medien Browser aufzurufen. Sie können eine Aufnah auswählen und mit der Taste die Wiedergabe starten. Im folgenden Abschnitt finden Sie weitere Informationen. -
Seite 25: Add-On Apps (Erweiterungen)
III. Grundfunktionen 14. Add-on Apps Es werden diverse Add-on Apps unterstützt. - Kalender [ I : Drücken Sie die M+ Taste > M+ Menu] LINKS/RECH Wählen Sie einen Eintrag mit Hilfe der Tasten aus und starten Sie diese mit Ein Icon zum M+ Menü hinzufügen Navigieren Sie im Hauptmenü... - Seite 26 III. Grundfunktionen - Free TV [ I : Drücken Sie die M+ Taste > Free TV ] Dieses Produkt unterstützt Free TV. Free TV Es gibt 6 Kategorien in 1) BENUTZER Dies ist die benutzerspezifische Kategorie. Sie können eine eigne Liste mit Hilfe des Browsers anleg gen.
-
Seite 27: System Konfiguration
IV. System Konfiguration 1. BENUTZEREINSTELLUNGEN A. Spracheinstellungen A. Spracheinstellungen [ I : Drücken Sie die MENU Taste > Benutzereinstellungen > Spracheinstellungen ] - Menü (OSD) Sprache : Wählen Sie die Sprache in der das Menü angezeigt werden soll. Es stehen die Sprachen Englisch, Französisch, Russisch, Arabisch, Persisch, Türkisch, Italienisch und Deutsch zur Verfügung. -
Seite 28: Anzeige Einstellungen
IV. System Konfiguration D. Anzeige Einstellungen [ I : Drücken Sie MENU Taste > Benutzereinstellungen > Anzeigeeinstellungen ] In diesem Menü können Sie Einstellungen für die Bildschirmeinblendungen (OSD) vornehmen. - Info Leiste Anzeigedauer : Dauer der Anzeige de Info Leiste. Sie können eine Dauer von 1 bis 30 Sekunden wählen. -
Seite 29: Erweiterte Einstellungen
IV. System Konfiguration F. Erweiterte Einstellungen [ I : Drücken Sie MENU Taste > [ I : Drücken Sie MENU Taste > Benutzereinstellungen > Erweiterte Einstellungen ] - LNB Stromversorgung (AN/AUS) - LNB Spannung (13/18V, 14/19V) - Ein/Ausschalter (AN/AUS): Schaltet die Funktion de Ein/Ausschalters an der Gerätefront ein oder aus. -
Seite 30: Installation
IV. System Konfiguration 2. INSTALLATION A. Antennen Einstellungen A. Antennen Einstellungen [ I : Drücken Sie MENU Taste > Benutzereinstellungen > Antennen Einstellunge en ] LINKS/RECHTS - Satellit : Wählen Sie mit den Tasten GELBE einen Satelliten aus (Verwenden Sie die aste, um den Namen des Satelliten zu editieren).. -
Seite 31: Netzwerk Einstellungen
IV. System Konfiguration Dieses Produkt unterstützt vier Suchmodi: - Auto Modus Auto Modus Alle Kanäle werden gesucht, sofern der ausgewählte Satellit im Antennenmenü korrekt eingerichtet ist. Suchtyp : * Multi Satellit : Suchen Sie auf mehreren Satelliten; wählen Sie die Satelliten im Zusatzfenster aus. -
Seite 32: System Informationen
IV. System Konfiguration D. System Informationen [ I : Drücken Sie MENU Taste > INSTALLATIO [ I : Drücken Sie MENU Taste > INSTALLATIO N > N > System Informationen ] Zeigt den Modellnamen, SW Version, HW Versio on, DB Version, Bootloader Version und System Version. -
Seite 33: Ereignis Manager
IV. System Konfiguration B. Ereignis Manager [ I : Drücken Sie die MENU Taste > SERVICE > [ I : Drücken Sie die MENU Taste > SERVICE > Ereignis Manager ] In diesem Menü können Sie zeitgesteuerte Aufnahmen konfigurieren. C. Speicher Manager [ I : Drücken Sie die MENU Taste >... - Seite 34 V. Fehlersuche PROBLEM PROBLEM LÖSUNG LÖSUNG Keine Anzeige am • Prüfen S Sie die Stromversorgung und das Stromkabel. Gerätedisplay – Gerät ist • Prüfen S Sie, ob der Receiver im Standby Modus ist. stromlos. Kein Bild • Schalten n Sie den Receiver ein. •...
- Seite 35 PROBLEM LÖSUNG DiSEqC 1.0 • Prüfen Sie Prüfen Sie ob die LNBs mit den richtigen Anschlüssen ob die LNBs mit den richtigen Anschlüssen des Schalters v verbunden sind. • Prüfen Sie die Einstellungen im Installationsmenü. DiSEqC 1.2 • Prüfen Sie die DiSEqC Einstellungen im Installationsme enü.
- Seite 38 Contents Precaution I Getting Started I. Getting Started A. Packing Contents B. Product Descriptions C. Common Interface D. Remote Control E. Main Features F. Technical Data II. Installation 1. Connecting Satellite Cable A. Connecting Satellite Cable 2. Connecting the TV A.
- Seite 39 Contents IV. System Configuration 1 USER SETUP 1. USER SETUP A. Language Setting B. System Time C. Parental Lock D. Display Setting E. AV OUT Setting F. Advance Setting G. PVR Setting G. PVR Setting 2. INSTALLATION A. Antenna Setup B.
-
Seite 40: Precaution
PRECAUTION This product has been designed and manufac ctured in compliance with EU consumer safe 1. Connecting Power - This product operates only in the range of f AC 100V – 250V and 50Hz/60Hz. Please check first your power supply to see if it fits this range. - Seite 41 PRECAUTION 6. Grounding - The LNB must be earthed to the system earth h for the satellite dish. 7. Location - Place the product indoor. - Do not expose the product to rain, sun or lig ghtening. - Do not place the product near any heat appl iances as a radiator.
-
Seite 42: Getting Started
I. Getting Started A. Packing Contents Please check all package contents before usi ng your product B. Product Descriptions Front Panel 1. Vfd display Display channel na ame and status. 2 Ch /+ 2. Ch-/+ Control channel Control channel. 3. Power button Switches the recei ver between “Standby”... - Seite 43 I. Getting Started Rear Panel 1. LNB 1/2 One Satellite cable ca n be connected. 2. SCART One SCART connector r is provided for TV using SCART cable. 3. YUV YPbPr connector is pr ovided for TV using YPbPr cable. 4.
- Seite 44 I. Getting Started C. Smart card and Common Interface Some broadcasts are scrambled so that only pa aid subscribers can enjoy them. Scrambled services can only be viewed with a Conditional Access M Module (CAM) and a subscription card belonging with the scrambling system.
-
Seite 45: Remote Control
I. Getting Started D. Remote Control 1. Power Standby or operation mode 2. 3D Convert 3D to 2D. 2D to 3D 3. Mute Mute the sound. Press again to switch in back. 4. TXT+ Multifeed/Teletext/Subtitle. 5. 576,1080 Change Resolution, the supported Resolutions 6. - Seite 46 I. Getting Started (bookmar rk jump) Green (Sleep T Timer) Blue (Motor Fi ine Tune) Yellow (bookm mark) 35. PAUSE Pasue Playing or Recording immediately 36. STOP Stop Recording or Playing media file 37. Rec Channel Recording will be started 38.
-
Seite 47: Main Features
I. Getting Started E. Main Features - MPEG-4 HD DVB-S2 Compliant - MPEG-2 MP@HL, MPEG4 AVC/H.264, - MPEG-4 AAC and MPEG4 HE AAC Audio Sup pported - MP3 player and JPEG viewer via external HD D or USB Flash Drive (memory stick) - 1x Smart Card /1 CI Slot/SD memory Card R eader - Resolution : 1080p/1080i/720p/480p/576p/48... -
Seite 48: Technical Data
I. Getting Started F. Technical Data Front Panel Panel Smart card Slot Common Interface Common Interface SD card USB 2.0 1 x USB 2.0 Standby, Vol -/+, Ch Rear Panel Sat-IF input 2 x F-type socket Connection TV 2 x Scart socket Video output (analogue) 1 x Cinch-socket Video/audio output (digital) 1 x HDMI... - Seite 49 I. Getting Started Power Main voltage 100-250/50-60 V/Hz wer consumption (Max./typ. Operation/stand-by) 35/1 12/1W Modulation, FEC, de-multiplexer SK , 8PSK Video Video resolution R 601(720x576),480p, 576p, 720p, 1080i, 1080p Video decoding EG-2, MPEG-4 compatible Input data rate 2-45 5 Msymbol/s >...
-
Seite 50: Installation
II. Installation NOTE : ( ) means Remote control operation ord This chapter will guide you through the whole insta allation process of Product, Please read each section carefully to make sure that the system runs s properly. 1. Connecting Satellite Cable This product is integrated with two satellite tuner rs, and one of the first steps is to connect satellite cable to product in order to gain optimal s... -
Seite 51: Connecting Tv Via Rca (Video O) Cable
II. Installation NOTE : When you have an A/V receiver with h S/PDIF digital audio input, this connection is recommended to enjoy the best audio quality B. Connecting TV via RCA (Video) cable This product provides Composite video conn nection as well. Composite cable has normally three connectors at the both end;... -
Seite 52: Power On/Off O /Off
II. Installation 3. Power ON/OFF There are several ways to turn ON or OFF A. Complete Power Shutdown There is a power switch in the rear panel and on nce it is ON, you do not need to turn it on or off each time. -
Seite 53: Basic Operation
III. Basic Operation 1. Switching Channel [ I : Press up/down, Channel up/down] [ I : Press up/down, Channel up/down] This product supports various languages about OSD, Audio and DVB Subtitle and here you can choose e the main language. You can switch the current channel in watch TV V mode by pressing up/down key or CHANNEL +/- key. -
Seite 54: Selecting Audio Track
III. Basic Operation 3. Selecting Audio Track [ I : Press left/right, Volume up/down] [ I : Press left/right, Volume up/down] You can select what audio tracks are available to choose by pressing Audio select key. 4. Subtitle [ I : Press TXT+ key > Subtitle ] You can view the subtitle of the current program if the program provides the subtitle. -
Seite 55: Program Information (Info Bar)
III. Basic Operation 6. Program Information (Info bar) [ I : Press INFO key ] Whenever you change the channel, information n bar is always displayed for OSD timeout [ I : Press MENU key > USER SETUP > Display Setting g >... - Seite 56 III. Basic Operation [ I : Press OK key > Press SAT key ] If press SAT key, you can select satellite on Find SAT If press SAT key, you can select satellite on Find SAT menu. Four filtering types of the channel lists are available to help you manage your channel selection.
- Seite 57 III. Basic Operation [ I : Press OK key, Press BLUE key ] BLUE : If you want to change TP(Transponder fi BLUE : If you want to change TP(Transponder fi ltering ltering mode, Press BLUE key, and then Small pop-up wi indow will be displayed, select among them by pressing UP/DOWN, and then select TP list by pressing OK...
-
Seite 58: Electronic Program Guide
III. Basic Operation [ I : Press NEXT key ] (For ONLY Two Tuner Mod del) If you want to change into TUNER filtering mode If you want to change into TUNER filtering mode, press NEXT key, and Channel List will be displayed with Find Tuner sub-window, select among them by pressing UP/DOWN, and then select “All Tuner”, “Tu... -
Seite 59: Time Shift
III. Basic Operation 9. Time Shift [ I : Press PAUSE key ] [ I : Press PAUSE key ] Time Shift is a time-delayed broadcast of the ch hannel that you are watching. To use time shift, the chan nnel must be recorded. -
Seite 60: Recording Play
III. Basic Operation 11. Recording Play [ I : Press Media Browser key ] To Play this recorded file you can press MEDIA BROWSER key to select recorded file on list menu th press OK key. About this Media Browser menu you c refer following Chapter. -
Seite 61: Add-On Apps
III. Basic Operation 14. Add-on Apps This product supports various Add-on apps. - Calendar [ I : Press M+ key > Display M+ Menu] you can control by Left, Right keys and OK key. How to register for M+ Icon go to main menu and then move cursor you want add Menu item, Press M+ key. - Seite 62 III. Basic Operation - Free TV [ I : Press M+ key > Free TV ] This product supports Free TV. There are 6 category for Free tv. 1) USER This category is used for User. So user make fre list and then download in s/w web browser by usb o hdd.
-
Seite 63: System Configuration
IV. System Configuration 1. USER SETUP A. Language Setting A. Language Setting [ I : Press Menu key > USER SETUP > Language Setting ] - OSD Language : You can set language which will b used for displaying menu. You can select English, French, Russian, Arabic, Persian, Turkish, Italian, and German. -
Seite 64: Display Setting
IV. System Configuration D. Display Setting [ I : Press MENU key > USER SETUP > Display Setting ] On this menu users can set values related with OS - OSD Timeout : You can set the displaying durat tion of Banner menu. -
Seite 65: Advance Setting
IV. System Configuration F. Advance Setting [ I : Press Menu key > USER SETUP > Advance [ I : Press Menu key > USER SETUP > Advance Setting ] - LNB Power (ON/OFF) - LNB Voltage (13/18V, 14/19V) - Front Panel Button : you can set ON/OFF about Front Panel Button working - Deep Standby (ON/OFF) : Standby mode is controlled by this mode. -
Seite 66: Installation
IV. System Configuration 2. INSTALLATION A. Antenna Setup A. Antenna Setup [ I : Press MENU key > INSTALLATION > Ante enna Setting ] - Satellite : Select any satellite by pressing <> k keys, (Press yellow key to edit the name of the satellite - Transponder : Select a transponder. -
Seite 67: Network Setup
IV. System Configuration This Product supports four search modes as below. - Auto Mode Auto Mode All channels will be searched if the selected satellite is properly assigned in the Antenna Setup menu. Search Type : * Multi Satellite : Search multiple satellites as you select in pop-up window. -
Seite 68: Information
IV. System Configuration D. Information [ I : Press MENU key > INSTALLATION > [ I : Press MENU key > INSTALLATION > Information ] Information menu shows Model Name, S/W ver rsion, H/W version, DB Version, Loader Version and Sys stem Version. -
Seite 69: Event Manager
IV. System Configuration B. Event Manager [ I : Press Menu key > SERVICE > Event manager ] [ I : Press Menu key > SERVICE > Event manager ] You can add event on this menu. C. Storage Manager [ I : Press Menu key >... -
Seite 70: Troubleshooting Guide
V. Troubleshooting Guide PROBLEM PROBLEM SOLUTIO SOLUTIO Does not display any Mess • Check th he main power cable and check that it is plugged -age or the front panel or into a su uitable power outlet. STB has no power. •... - Seite 71 PROBLEM SOLUTION DiSEqC 1.0 • Check that Check that t you have connected the LNBs to correct t you have connected the LNBs to correct connectio ns on the switch. • Check that t you have set the connected Setting in the Installation n menu.