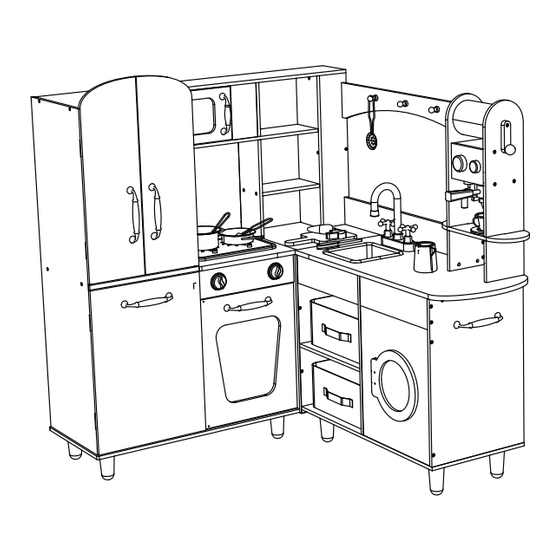
Costway TP10313 Handbuch
Kinder-eckküchen-spielset
Quicklinks
USA office: Fontana
ITA office: Milano
DEU office: FDS GmbH, Neuer Höltigbaum 30, 22143 Hamburg, Deutschland
GBR office: FDS Corporation Limited, Unit 4, Blackacre Road, Great Blakenham,
Ipswich, IP6 0FL, United Kingdom
POL office: Gdańsk
AUS office: Truganina
FRA office: Saint Vigor d'Ymonville
Kids Corner Kitchen Playset
Kinder-Eckküchen-Spielset
Jeu de Cuisine d'Angle pour Enfants
Juego de Cocina de Esquina para Niños
Cucina Giocattolo ad Angolo per Bambini
Narożny zabawkowy kącik kuchenny dla dzieci
Kinderhoekkeukenspeelset
TP10313
THIS INSTRUCTION BOOKLET CONTAINS IMPORTANT SAFETY INFORMATION.
PLEASE READ AND KEEP FOR FUTURE REFERENCE.

Verwandte Anleitungen für Costway TP10313


Inhaltszusammenfassung für Costway TP10313
- Seite 1 Jeu de Cuisine d'Angle pour Enfants Juego de Cocina de Esquina para Niños Cucina Giocattolo ad Angolo per Bambini Narożny zabawkowy kącik kuchenny dla dzieci Kinderhoekkeukenspeelset TP10313 USA office: Fontana ITA office: Milano POL office: Gdańsk AUS office: Truganina DEU office: FDS GmbH, Neuer Höltigbaum 30, 22143 Hamburg, Deutschland THIS INSTRUCTION BOOKLET CONTAINS IMPORTANT SAFETY INFORMATION.
-
Seite 2: Bevor Sie Beginnen
Before You Start Bevor Sie beginnen Please read all instructions carefully and keep it for future reference. Bitte sorgfältig lesen und zum späteren Nachschlagen aufbewahren. GENERAL SECURITY WARNING ALLGEMEINE SICHERHEITSWARNUNG Caution: Children should use this product under the parental supervision. Vorsicht: Kinder sollten diesen Artikel unter elterlicher Aufsicht benutzen. - Seite 3 Avant de Commencer Antes de Empezar Veuillez lire attentivement toutes les instructions et les conserver Lea atentamente todas las instrucciones y consérvelas pour la référence ultérieure. para futuras consultas. AVERTISSEMENT DE SÉCURITÉ GÉNÉRALE ADVERTENCIA DE SEGURIDAD GENERAL Atención: Los niños deben utilizar este producto bajo la supervisión de Attention : Les enfants doivent utiliser ce produit sous la surveillance de leurs parents.
-
Seite 4: Zanim Zaczniesz
Prima di Iniziare Zanim Zaczniesz Si prega di leggere attentamente tutte le istruzioni e Przeczytaj uważnie wszystkie instrukcje i zachowaj je na przyszłość. conservarle per riferimento futuro. AVVERTENZA DI SICUREZZA GENERALE OGÓLNE OSTRZEŻENIA DOTYCZĄCE BEZPIECZEŃSTWA Attenzione: I bambini devono usare questo prodotto sotto la supervisione Uwaga: Dzieci mogą... -
Seite 5: Voordat U Begint
x111 Voordat U Begint M4*35 M4*20 Lees alstublieft alle instructies zorgvuldig door en bewaar deze voor toekomstig gebruik. ALGEMENE VEILIGHEIDSWAARSCHUWING Let op: Kinderen dienen dit product onder ouderlijk toezicht te gebruiken. Gevaar: Houd alle kleine onderdelen en verpakkingsmaterialen van dit M3*18 product buiten bereik van baby's en kinderen, anders kunnen ze een verstikkingsgevaar opleveren. - Seite 6 M3*8 M3*20 M4*16 M4*40 M3*10 x3...
- Seite 9 Lower back panel /Untere Rückwand /Panneau inférieur du dos /Panel trasero inferior /Pannello Posteriore Inferiore /Dolny tylny panel /Onderste Rugpaneel Left wooden legs Right wooden legs /Linke Holzbeine /Rechte Holzbeine Washing machine back panel /Pieds gauches en bois /Pieds droits en bois /Rückwand der Waschmaschine /Patas de madera /Patas de madera...
- Seite 10 EN: If using a power screwdriver for assembly, you need to set it to a medium-low speed. DE: Wenn Sie für die Montage einen Elektroschrauber verwenden, müssen Sie ihn auf eine mittlere bis niedrige Drehzahl einstellen. × FR: Si vous utilisez un tournevis électrique pour l’assemblage, vous devez le régler sur une vitesse ×...
- Seite 11 EN: Fix #8 and #a with 2 screws B. EN: Fix #30 and #a with 2 × screws B. DE: Befestigen Sie #8 und #a mit 2 × Schrauben B. DE: Befestigen Sie #30 und #a mit 2 Schrauben B. FR: Fixez #8 et #a avec 2 vis B.
- Seite 12 × × EN: Secure #16 and 2 #h EN: Secure #47 and #2, and #47 with 4 screws N. and #3 with 2 screws B each. DE: Befestigen Sie #16 und DE: Befestigen Sie #47 und #2, × 2 Teile H mit 4 Schrauben N. sowie #47 und #3 mit je 2 Schrauben B.
- Seite 13 × EN: Secure #3 and 2 parts H with 4 screws EN: Secure #1 and 2 parts H with 4 screws G. DE: Befestigen Sie #3 und 2 Teile H mit 4 DE: Befestigen Sie #1 und 2 Schrauben G. Teile H mit 4 Schrauben G.
- Seite 14 ES: Fije #37 y #51 con 2 tornillos I, y fije #37 y #y con 4 tornillos A. IT: Fissare #37 e #51 con 2 viti I e fissare #37 e #y con 4 viti A. × PL: Przymocuj #37 i #51 za pomocą 2 śrub I, a #37 i #y za pomocą 4 śrub A.
- Seite 15 × × EN: Fix 3 #p and #32 EN: Secure #45 and 4 #49 × with 3 screws N. with 8 screws A. DE: Befestigen Sie 3 #p DE: Befestigen Sie #45 und und #32 mit 3 4 #49 mit 8 Schrauben A. Schrauben N.
- Seite 16 FR: Fixez #3 et #12 avec 2 vis A, et fixez #3 et #15 avec 2 vis A. ES: Fije #3 y #12 con 2 tornillos A, y fije #3 y #15 con 2 tornillos A. IT: Fissare #3 e #12 con 2 viti A e fissare #3 e #15 con 2 viti A. PL: Przymocuj #3 i #12 za pomocą...
- Seite 17 × × × Assembled part in step 9 /Zusammengebautes Teil in Schritt 9 /Pièce assemblée à l’étape 9 /Pieza montada en el paso 9 EN: Fix the components assembled in step 22 with 2 screws A, and /Parte assemblata al passo 9 secure #48 to the components assembled in step 22 with 1 screw A.
- Seite 18 × Assembled part in step 16 /Zusammengebautes Teil in Schritt 16 /Pièce assemblée à l’étape 16 × /Pieza montada en el paso 16 /Parte assemblata al passo 16 /Zmontowana część w kroku 16 /Gemonteerd onderdeel in stap 16 EN: Fix #31 and #33 with 2 screws A, fix #33 and #36 with 2 screws A, fix #33 and #37 with 2 screws A.
- Seite 19 IT: Fissare 8 #x e i componenti assemblati al passo 27 con #v. PL: Zabezpiecz 8 #x i komponenty zmontowane w kroku 27 za pomocą #v. EN: Secure #ab, #34, #ac, #w with screws A. NL: Zet 8 #x en de in stap 27 geassembleerde onderdelen vast met DE: Befestigen Sie #ab, #34, #ac, #w mit den Schrauben A.
- Seite 20 FR: Fixez les composants assemblés à l'étape 26 et #35 avec 2 chevilles F, fixez les composants assemblés à l'étape 26 et #38 avec 2 chevilles F, et fixez les composants assemblés à l'étape 28 et #35, EN: Secure #39 to the #38 avec 4 vis A.
- Seite 21 EN: Fix #m and #24 with 2 screws M, and secure #24 and the ES: Fije los componentes ensamblados en el paso 31 con 6 tornillos components assembled in step 30 with 4 screws A. A a #32 y #22. DE: Befestigen Sie #m und #24 mit 2 Schrauben M, und sichern Sie IT: Fissare i componenti assemblati al passo 31 con 6 viti A a #32 e #24 und die in Schritt 30 montierten Bauteile mit 4 Schrauben A.
- Seite 22 PL: Zamocuj elementy zmontowane w kroku 25 oraz elementy zmontowane w kroku 33 za pomocą 2 śrub A, a następnie zamocuj element nr 23 oraz elementy zmontowane w kroku 32 za pomocą 1 śruby A. EN: Secure the components NL: Zet de in stap 25 geassembleerde onderdelen en de in stap 33 assembled in step 25 and geassembleerde onderdelen vast met 2 schroeven A, en zet #23 en the components assembled...
- Seite 23 Assembled part in step 5 ES: Sujete #11 a los componentes ensamblados en el paso 35 con /Zusammengebautes Teil in Schritt 5 2 espigas F, sujete #10, #43, #42 y los componentes ensamblados /Pièce assemblée à l’étape 5 en el paso 35, y sujete #9, #11, los componentes ensamblados en el /Pieza montada en el paso 5 paso 35 con 4 espigas F.
- Seite 24 ES: Sujete los componentes ensamblados en el paso 36 con 4 × tornillos A. IT: Fissare i componenti assemblati al passo 36 con 4 viti A. EN: Fix #2 and #1 with 2 screws A, and PL: Zabezpiecz elementy zmontowane w kroku 36 za pomocą 4 fix #2 and #7 with 2 screws A.
- Seite 25 DE: Befestigen Sie #40, die in Schritt 39 montierten Bauteile und die EN: Secure 6 hinges K to the components assembled in step 40 with in Schritt 38 montierten Bauteile mit 3 Dübeln F und 1 Schraube A. 12 screws L, and place #6 on the components assembled in step 40. FR: Fixez le #40, les composants assemblés à...
- Seite 26 × × × Assembled part in step 3 /Zusammengebautes Teil in Schritt 3 /Pièce assemblée à l’étape 3 /Pieza montada en el paso 3 /Parte assemblata al passo 3 /Zmontowana część w kroku 3 /Gemonteerd onderdeel in stap 3 Assembled part in step 22 /Zusammengebautes Teil in Schritt 22 EN: Secure the components assembled in step 41 with 12 screws L.
- Seite 27 ES: Sujete #45, #17, y 2 #40, y los componentes ensamblados en el EN: Secure the components assembled in step 43 with 2 screws A, paso 42 con 6 tornillos A. 1 screw O. IT: Fissare #45, #17 e 2 #40 e i componenti assemblati al passo 42 DE: Befestigen Sie die in Schritt 43 montierten Teile mit 2 Schrauben con 6 viti A.
- Seite 28 × × EN: Secure #26 to the components assembled in step 44 with 4 EN: Secure #25 to the components assembled in step 45 with 2 screws A. dowels F. DE: Befestigen Sie #26 an den in Schritt 44 montierten Bauteilen mit DE: Befestigen Sie #25 mit 2 Dübeln F an den in Schritt 45 4 Schrauben A.
- Seite 29 × × EN: Secure #27 to the components assembled in step 46 with 2 EN: Secure the components assembled in step 47 with 2 screws A. dowels F. DE: Sichern Sie die in Schritt 47 montierten Teile mit 2 Schrauben A. DE: Befestigen Sie #27 mit 2 Dübeln F an den in Schritt 46 FR: Fixez les composants assemblés à...
- Seite 30 Assembled part in step 4 ES: Sujete #28 a los componentes ensamblados en el paso 48 con /Zusammengebautes Teil in Schritt 4 2 espigas J, sujete #29 a los componentes ensamblados en el paso /Pièce assemblée à l’étape 4 48 con 2 tornillos A, sujete #30, #28, #29 con 4 tornillos A. /Pieza montada en el paso 4 /Parte assemblata al passo 4 IT: Fissare #28 ai componenti assemblati al punto 48 con 2 tasselli...
- Seite 31 ES: Sujete los componentes ensamblados en el paso 49 con 2 IT: Fissare #47, #44, #42 e i componenti assemblati al passo 50 con tornillos A. 4 viti A. IT: Fissare i componenti assemblati al passo 49 con 2 viti A. PL: Przymocuj #47, #44, #42 oraz komponenty zmontowane w kroku 50 za pomocą...
- Seite 32 ES: Fije los componentes ensamblados en el paso 51 con 2 tornillos EN: Place #18 in the components assembled in step 52. DE: Setzen Sie #18 in die in Schritt 52 montierten Komponenten ein. IT: Fissare i componenti assemblati al passo 51 con 2 viti A. FR: Placez le #18 dans les composants assemblés à...