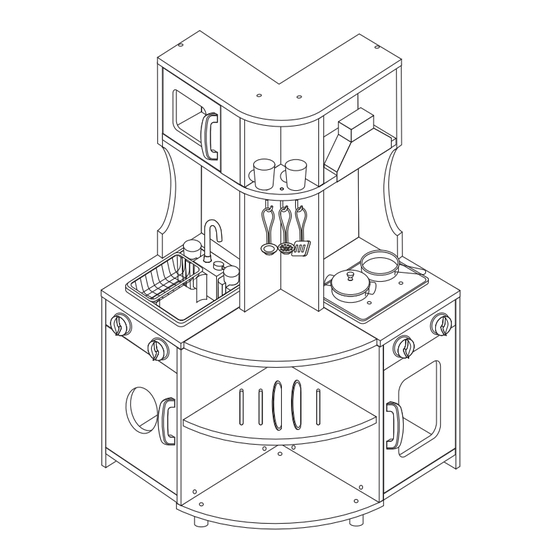
Costway TP10300 Bedienungsanleitung
Holzkinder spielen kueche
USA office: Fontana
AUS office: Truganina
DEU office: FDS GmbH, Neuer Höltigbaum 36, 22143 Hamburg, Deutschland
GBR office: FDS Corporation Limited,Unit 4, Blackacre Road, Great Blakenham,Ipswich, Ip6 0FL,United Kingdom
If you're having difficulty, our friendly
customer team is always here to help.
ITA office: Milano
POL
FRA office: Saint Vigor d'Ymonville
USA:cs.us@costway.com
POL:sklep@costway.com
AUS:cs.au@costway.com
DEU:cs.de@costway.com
GBR:cs.uk@costway.com
FRA:cs.fr@costway.com
I T A :cs.i t @costway.com
ESP:cs.es@costway.com
TP10300
THIS INSTRUCTION BOOKLET CONTAINS IMPORTANT SAFETY INFORMATION.
PLEASE READ AND KEEP FOR FUTURE REFERENCE.
Inhaltsverzeichnis

Verwandte Anleitungen für Costway TP10300


Inhaltszusammenfassung für Costway TP10300
- Seite 1 THIS INSTRUCTION BOOKLET CONTAINS IMPORTANT SAFETY INFORMATION. USA:cs.us@costway.com POL:sklep@costway.com If you're having difficulty, our friendly AUS:cs.au@costway.com DEU:cs.de@costway.com PLEASE READ AND KEEP FOR FUTURE REFERENCE. customer team is always here to help. GBR:cs.uk@costway.com FRA:cs.fr@costway.com I T A :cs.i t @costway.com ESP:cs.es@costway.com...
-
Seite 2: Before You Start
Before You Start Bevor Sie beginnen Please read all instructions carefully and keep it for future reference. Bitte sorgfältig lesen und zum späteren Nachschlagen aufbewahren. General Security Warning Allgemeine Sicherheitswarnung Caution: Children should use this product under the parental supervision. Vorsicht: Kinder sollten diesen Artikel unter elterlicher Aufsicht benutzen. -
Seite 3: Avant De Commencer
Avant de Commencer Antes de Empezar Veuillez lire attentivement toutes les instructions et les conserver pour la référence ultérieure. Lea atentamente todas las instrucciones y consérvelas para futuras consultas. Avertissement de Sécurité Générale Advertencia de Seguridad General Atención: Los niños deben utilizar este producto bajo la supervisión de sus padres. Attention : Les enfants doivent utiliser ce produit sous la surveillance de leurs parents. -
Seite 4: Prima Di Iniziare
Prima di Iniziare Zanim Zaczniesz Si prega di leggere attentamente tutte le istruzioni e conservarle per riferimento futuro. Avvertenza di sicurezza generale Attenzione: I bambini devono usare questo prodotto sotto la supervisione dei genitori. Uwaga: Pericolo: Tenere tutte le piccole parti e i materiali di imballaggio di questo prodotto lontano da neonati e bambini, altrimenti potrebbero rappresentare un rischio di soffocamento. -
Seite 5: Voordat U Begint
Voordat U Begint Lees alstublieft alle instructies zorgvuldig door en bewaar deze voor toekomstig gebruik. Algemene Veiligheidswaarschuwing Let op: Kinderen dienen dit product onder ouderlijk toezicht te gebruiken. Gevaar: Houd alle kleine onderdelen en verpakkingsmaterialen van dit product buiten bereik van baby's en kinderen, anders kunnen ze een verstikkingsgevaar opleveren. Gevaar: Gebrek aan bevestiging kan een risico op kantelen veroorzaken. - Seite 6 4x35mm 3x8mm 3x16mm 4x16mm x 41 x 36 x 14 5x30mm x 22 x 12...
- Seite 7 EN Put G(plastic buckle) in the No.6,8 and 18 panel, then use B screw to lock it on No.6,8 and 18 panel. Use D screw to lock H(button) on No.19 panel. DE Setzen Sie G (Kunststoffschnalle) in die Platte Nr. 6, 8 und 18 ein und verwenden Sie dann die Schraube B, um sie an der Platte Nr.
- Seite 8 EN Use B screw to lock J(female hinge) on the No.3,4 and 22 panel. EN Use D screw to lock F(handles) on No.23,24 and 25 panel. Use B screw to lock K(door pin) on No.23,24 and 25 panel. Use B screw to lock I(male hinge) on No.23,24 and 25 panel.
- Seite 9 EN Use C screw to lock N(ventilator) on No.12 panel. Use C screw to lock M(hooks) on No.12 panel. Insert No.13 and 14 panel to No.12 panel from the groove. panelach nr 23, 24 i 25. NL Gebruik de schroef D om F(handgrepen) te vergrendelen op paneel nr.
- Seite 10 EN Use A screw to lock No.2(foot) on No.1 panel. EN Use A screw to lock No.3 and 4 panel on No.1 panel. DE Verwenden Sie Schraube A zur Verriegelung der Platten Nr. 3 und DE Verwenden Sie die Schraube A, um die Platte Nr. 2 (Fuß) an der 4 an Platte Nr.
- Seite 11 EN Use C screw to lock L(hook) on No.7 panel. Insert E(wooden dowel) in No.7 panel rightside, connect it to No.8 panel, then use A screw to lock it on No.8 panel. Use A screw to lock No.10 panel on No.9 panel. EN Use A screw to lock No.6 panel on No.3 and 4 panel.
- Seite 12 EN Insert No.25(door) in No.10 and 19 panel via the door pin. Insert E(wooden dowels) in No.19 panel bothside, connect it to No.9 and 3 panel. Use A screw to lock No.10 panel on No.3 panel. DE Setzen Sie Nr. 25 (Tür) über den Türstift in die Platten Nr. 10 und 19 ein.
- Seite 13 EN Insert No.11 panel in the groove. Put No.8 panel on it, then use A screw to lock it on No.3 and 9 panel. DE Setzen Sie die Platte Nr. 11 in die Nut ein. Legen Sie die Platte Nr. 8 darauf und befestigen Sie sie mit der Schraube A an den Platten Nr.
- Seite 14 FR Insérez les E (chevilles en bois) dans les panneaux n° 13 et 14 sur la face inférieure, reliez-les au panneau n° 6 et fixez-les au panneau n° 6 à l'aide de la vis A. Insérez la cheville E (bois) dans le panneau n°...
- Seite 15 EN Use A screw to lock No.16 panel on No.15 panel. Insert E(wooden dowel) in No.17 panel downside, connect it to No.18 panel, use A screw to lock it on No.18 panel. DE Verriegeln Sie das Paneel Nr. 16 mit der Schraube A auf dem Paneel Nr.
- Seite 16 FR Insérez le n° 24 (porte) dans le panneau n° 16 et le panneau n° 19 via la goupille de la porte, puis insérez E (cheville en bois) dans le panneau n° 19 des deux côtés, reliez-le au panneau n° 4 et au panneau n°...
- Seite 17 FR Insérez le panneau n° 11 dans la rainure à l'arrière et placez le panneau n° 18 dessus. Insérez E (cheville en bois) dans le panneau n° 12 du côté gauche, reliez-le au panneau n° 17 et fixez-le à l'aide de la vis A. ES Inserte el panel nº...
- Seite 18 FR Insérez les chevilles en bois E dans les panneaux n° 13 et 14, insérez les chevilles en bois E dans le panneau n° 21 vers le haut et vers le bas, insérez les chevilles en bois E dans les panneaux n° 7 et 17, insérez le panneau n°...
- Seite 19 EN Put the burner, sink and accessories on the kitchen. DE Bringen Sie den Brenner, die Spüle und das Zubehör in der Küche FR Placez le brûleur, l'évier et les accessoires sur la cuisine. EN Finished the kitchen assembly. ES Coloque el quemador, el fregadero y los accesorios en la cocina. DE Die Montage der Küche ist abgeschlossen.
- Seite 20 Instructions De Retour / Réclamation De Dommages Return / Damage Claim Instructions Dans le cas où un retour est requis, l'article doit être retourné dans sa boîte In case a return is required, the item must be returned in original box. Without this d'origine.
- Seite 21 Istruzioni Per La Restituzione / Reclamo Per Danni Instructies voor Retournering/Schadeclaim Nel caso in cui sia richiesto un reso, l'articolo deve essere restituito nella scatola In het geval van een retournering moet het artikel in de originele doos originale. Senza la scatola originale il tuo reso non sarà accettato. teruggestuurd worden.