Megasat Satmaster Portable Bedienungsanleitung
Vorschau ausblenden
Andere Handbücher für Satmaster Portable:
- Bedienungsanleitung (21 Seiten) ,
- Benutzerhandbuch (19 Seiten)
Inhaltsverzeichnis
Verfügbare Sprachen
Verfügbare Sprachen
Quicklinks
Kapitel
Inhaltsverzeichnis
Fehlerbehebung

Verwandte Anleitungen für Megasat Satmaster Portable


Inhaltszusammenfassung für Megasat Satmaster Portable
- Seite 1 Satmaster Portable Bedienungsanleitung...
-
Seite 2: Inhaltsverzeichnis
Inhaltsverzeichnis 1. Einführung 1.1 Allgemeine Informationen ..............03 1.2 Auspacken ..................... 03 1.3 Lieferumfang ....................03 2. Bezeichnungen 2.1 Bezeichnungen der Außeneinheit ..........04 2.2 Bezeichnungen der Bedienfelder ............ 04 2.3 Bezeichnungen der Stromeinspeisung ........05 2.4 Bezeichnungen des Steuergerätes..........05 3. -
Seite 3: Einführung
Einführung 1.1 Allgemeine Informationen Bitte lesen Sie die Bedienungsanleitung sorgfältig vor Inbetriebnahme des Gerätes. Bei falscher oder unsachgemäßer Handhabung erlischt der Gewährleistungsanspruch. Hinweis: Falls Sie schon ähnliche Produkte installiert haben, muss die Vorge- hensweise mit diesem Produkt nicht zwingend übereinstimmen. 1.2 Auspacken Hinweis: Fassen Sie die Antenne nie am Spiegel, sonden nur am Gehäuse an! RICHTIG! -
Seite 4: Bezeichnungen
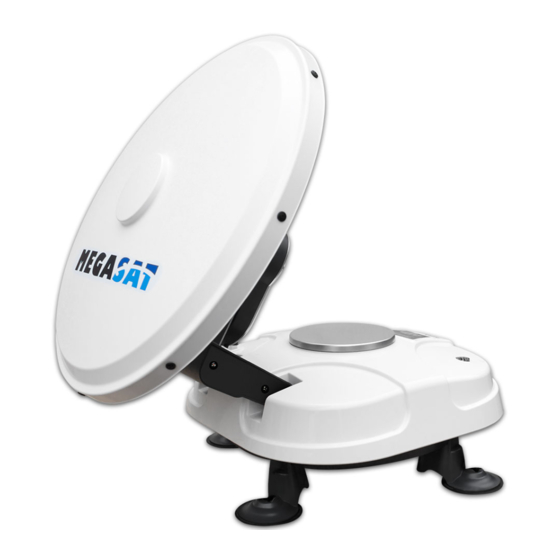
2. Bezeichnungen 2.1 Bezeichnungen der Außeneinheit Polarisationsskala (Skew) Spiegel Oberer Endschalter LNB Abdeckung Kompass Gummifuß Metallöse zur Diebstahlsicherung Bedienfeld (nur bei der Premium Version) 2.2 Bezeichnungen der Bedienfelder Classic Premium Professional keine „Hoch“ Taste „Set“ Taste keine Funktion zur Auswahl zur Bestätigung Funktion „Runter“... -
Seite 5: Bezeichnungen Der Stromeinspeisung
2. Bezeichnungen 2.3 Bezeichnungen der Stromeinspeisung (Classic und Premium Version) Antennenanschluss Receiveranschluss Betriebsanzeige LED DC Stromanschluss Ein / Aus Schalter 2.4 Bezeichnungen des Steuergerätes (Professional Version) LCD Display Netzschalter DOWN „Hoch“ Taste „Runter“ Taste Bestätigungstaste SETTOP DATA DC12-24 V Anschluss Anschluss Anschluss Stromversorgung... -
Seite 6: Wahl Des Standortes
3. Installation 3.1 Wahl des Standortes Um ein Satellitensignal zu empfangen, muss die Antenne stets im Freien installiert und grob Richtung Süden ausgerichtet werden. Nutzen Sie zur groben Einstellung den inte- grierten Kompass am Gerät (Richten Sie sich nach den Azimuthwerten in der Tabelle am Ende des Handbuches). -
Seite 7: Anschluss Der Antenneneinheit
3. Installation 3.2 Anschluss der Antenneneinheit Außenbereich Classic und Premium Version SETTOP Receiver 24 Volt 12/24 Volt Einspeisekabel Fernseher Spannungs- Einspeisekabel wandler 1. Antennenposition Platzieren Sie die Antenne mit freier Sicht Professional Version zum Satelliten. Die Antenne kann auf jedem stabilen Platz mit geradem Untergrund platziert werden. -
Seite 8: Inbetriebnahme
Sie alle Verbindungen und Einstellungen (Receiver, Satmaster Portable und TV) und folgen den obi- gen Schritten noch einmal. Wenn Sie die Nutzung des Satmaster Portable beenden oder die Antenne zum Transport in die Parkposition brin- gen möchten, schalten Sie die Antenne an der Stromeinspeisung, bzw. am Steuergerät wieder ein und warten bis die Antenne in die Parkposition gefahren ist. -
Seite 9: Anzeigen Des Lcd Displays
3. Installation 3.4 Anzeigen des LCD Displays Das LCD Display zeigt den aktuellen Status des automatischen Suchsystems. (nur bei Satmaster Portable Premium und Professional) ASTRA1 Beispiel Satellitenauswahl 19.2E EL 30DEG Beispiel Elevationsauswahl SIGNAL Satellitensignal gefunden DETECTED Bestätigt, dass das Signal des Zielsatelliten richitg ist DETECTED Kann kein Satellitensignal finden. -
Seite 10: Beispiele Für Das Auffinden Des Satelliten
3. Installation 3.5 Beispiel für das Auffinden des Satelliten Polarisationswinkel (Skew): Stellen Sie den entsprechenden Polarisationswinkel ein. Nutzen Sie hierzu die Skala auf der Rückseite der Antenne. Den entsprechenden Polarisationswinkel des jeweiligen Satelliten finden Sie in der Tabelle auf Seite 12. Elevation: Passen Sie den Elevationswinkel entsprechend der Tabelle auf Seite 12 an. -
Seite 11: Elevation (Neigung)
3. Installation Satellitenposition Azimuth (Drehung) Alle EU-relevanten 158° vom Satelliten liegen im Süden. geographischen Nordpol Satmaster Portable Elevation (Neigung) Skew Astra 19,2° Ost - Grad + Grad 31,6° von der horizontalen Ebene Die Skala für Skew ist in 5er Schritte unterteilt, was der Toleranz für die Einstellung entspricht. -
Seite 12: Einstellungswerte Für Europäische Hauptstädte
3. Installation 3.6 Einstellungswerte für europäische Hauptstädte Land Stadt Astra 2 Astra 3 Astra 1 Hotbird Astra 4 Thor Hispasat Eutelsat 5 Bulgarien Sofia +1.7 +6.8 +11.4 +11.0 +19.0 +24.0 +41.0 +27.2 Dänemark Kopenhagen -3.4 -0.4 +2.5 -0.3 +5.3 +9.1 +24.8 +11.6 Finnland... -
Seite 13: Fehlerbehebung
6. Störungen durch Funk und Radar Die Abstrahlung von Funk und Radaranlagen kann zu einer Überlast an den Eingangs- schaltkreisen der Antenne führen. Stellen Sie sicher, dass der Satmaster Portable nicht in unmittelbarer Nähe solcher Anlagen betrieben wird. 7. Frequenzdatenänderung der Satelliten Wenn die Antenne nicht in der Lage ist den Satelliten zu finden, kann es sein, dass sich die Frequenzdaten des Satelliten geändert haben. -
Seite 14: Aktualisierung Der Firmware
5. Aktualisierung der Firmware Aktualisierung bei der Classic und Premium Version Schließen Sie ein serielles Kabel an die Schnittstelle an Aktualisierung bei der Professional Version Schließen Sie ein serielles Kabel an die Schnittstelle an SETTOP DATA DC12-24 V DEUTSCH... - Seite 15 5. Aktualisierung der Firmware 1. Schalten Sie das Steuergerät, bzw. den Powersplitter aus und verbinden Sie den COM-Port des PCs mit der seriellen Schnittstelle. Das Kabel muss RS-232 und “USB zu Seriell” unterstützen. 2. Starten Sie das DOWNLOAD Programm 3. Wählen Sie den Pfad Ihrer Aktualisierungsdatei über “Open” 4.
-
Seite 16: Ausleuchtzone
6. Ausleuchtzone Hinweis: In den Randgebieten der Ausleuchtzone kann es zu Empfangsstörungen kommen. DEUTSCH... -
Seite 17: Technische Daten
7. Technische Daten Antennen Typ ........Parabolantenne LNB Typ ..........Universal Single LNB Anzahl der Teilnehmer ....1 Frequenzband ........Ku Band Eingangsfrequenzbereich ..10.7 GHz - 12.75 GHz Polarisation ..........V/H Signalverstärkung ......33 dBi Minimum EIRP ........50 dBW Ausrichtungszeit ......ca. 1-2 min. Neigungswinkel (Elevation) ..10° - 60° Suchwinkel (Azimut)......180°... -
Seite 18: Konformitätsinformation
Konformitätsinformation Hiermit erklärt die Firma Megasat Werke GmbH, dass sich folgendes Gerät in Überein- stimmung mit den grundlegenden Anforderungen und den übrigen einschlägigen Be- stimmungen der Richtlinie EC EMC Directive 2004/108/EC befindet: Megasat Satmaster Portable Classic (Artikel-Nr. 1500084) Megasat Satmaster Portable Premium (Artikel-Nr. - Seite 19 Notizen DEUTSCH...
- Seite 20 Version: 4.3 (Februar 2017) // Technische Änderungen, Druckfehler und Irrtümer vorbehalten. Megasat Werke GmbH | Industriestraße 4a | D-97618 Niederlauer | www.megasat.tv | info@megasat.tv...
- Seite 21 Satmaster Portable user manual...
- Seite 59 Notes FRANÇAIS...
- Seite 60 Version 4.3 (Février 2017) // Technische Änderungen, Druckfehler und Irrtümer vorbehalten. Megasat Werke GmbH | Industriestraße 4a | D-97618 Niederlauer | www.megasat.tv | info@megasat.tv...