BE QUIET! PURE LOOP 3 Bedienungsanleitung
Inhaltsverzeichnis

Verwandte Anleitungen für BE QUIET! PURE LOOP 3


Inhaltszusammenfassung für BE QUIET! PURE LOOP 3
- Seite 1 360mm 280mm 240mm...
- Seite 2 Introduction: Thank you for deciding to purchase a Einleitung: Vielen Dank, dass du dich für ein be quiet! be quiet! product. The following instructions will guide Produkt entschieden hast. Diese Anleitung wird dir beim you through the installation process. If you do encounter Installationsprozess helfen.
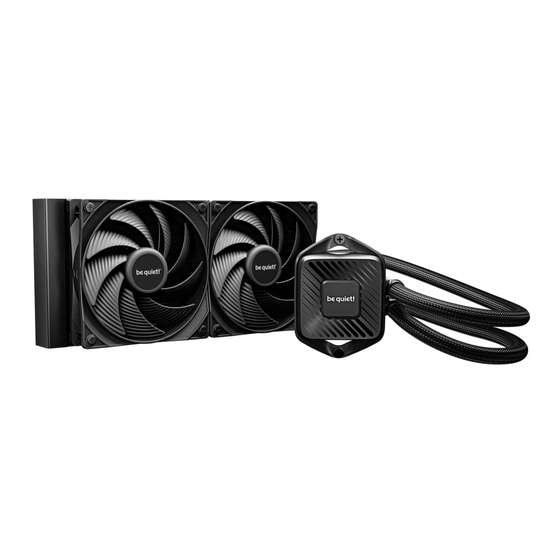
- Seite 3 360mm 280mm www.bequiet.com/BW029 www.bequiet.com/BW028 240mm www.bequiet.com/BW027 Product information for this CPU cooler Produktinformationen zu diesem CPU-Kühler Informations produit pour ce système de refroidissement Información del producto para este refrigerador de CPU Informacje produktowe dla tego coolera CPU ...
- Seite 4 Warranty: Garantie: • 3-year manufacturer guarantee for consumers (original • 3 Jahre Herstellergarantie für Endkonsumenten (nur purchase from authorized be quiet! dealers only) Ersterwerb vom autorisierten be quiet! Händler), ab Da- • Guarantee work can only be processed with a copy in- tum des Kaufbelegs cluded of the purchase receipt from an authorized be •...
- Seite 5 Гарантия: Gwarancja: • 3 года гарантии от производителя для конечного • 3 lata gwarancji producenta dla klienta końcowego (tylko покупателя (от первоначальной покупки у офици- pierwszy zakup u autoryzowanego dystrybutora be quiet!) ального дилера be quiet!) • Rozpatrzenie gwarancji jest możliwe jedynie na •...
- Seite 6 保証 : 保固: 消費者のための3年間メーカーの保証 (be quiet! 正規代理 提供顧客 3 年原廠保固 (僅限原始購買處為 be quiet! 授 • • 店 からの最初の購入の場合) 權經 銷商) be quiet!正規代理店からの購入領収書のコピーが付属さ 進行保固作業前, 需提供於 be quiet! 授權經銷商購買商 • • れている場合のみ, 保証が提供されます 品的 收據影本 あらゆる種類の改ざん, あらゆる種類の構造変更, および, 任何類型的操作或改裝, 或因施加機械外力而造成的損壞, • • 外部の機械的な力による損傷の場合,...
-
Seite 7: Inhaltsverzeichnis
INHALTSVERZEICHNIS • TABLE DES MATIÈRES • ÍNDICE • SPIS TREŚCI • ОГЛАВЛЕНИЕ • ЗМІСТ • 目次 • 目錄 • 目录 TABLE OF CONTENTS Scope of delivery Recommended Installation Installation for AMD AM5 / AM4 Installation for Intel Adjust Logo ... -
Seite 8: Scope Of Delivery
• Nazwa części • Наименование • Ilość • Количество • Кількість • Найменування • 部品名 • 配件名稱 • 配件名称 部品名数量 • 數量 • 数量 be quiet! Pure Loop 3 CPU cooler 280mm/240mm: 2 Pure Wings 3 fan 360mm: 3... - Seite 9 Part name • Bezeichnung • Nom de la pièce • Nombre Quantity • Anzahl • Quantité • Cantidad • del componente • Nazwa części • Наименование • Ilość • Количество • Кількість • Найменування • 部品名 • 配件名稱 • 配件名称 部品名数量...
-
Seite 10: Recommended Installation
EMPFOHLENE EINBAUPOSITION • INSTALLATION RECOMMANDÉE • INSTALACIÓN RECOMMENDED RECOMENDADA • ZALECANA INSTALACJA • РЕКОМЕНДАЦИЯ ПО УСТАНОВКЕ • РЕКОМЕНДАЦІЇ ЩОДО ВСТАНОВЛЕННЯ • 推奨される設置 • 建議安裝方式 • 建议安装方式 INSTALLATION... -
Seite 11: Installation For Amd Am5 / Am4
AMD: AM5 / AM4 The following parts are needed for this: • Es werden folgende Bauteile benötigt: • Les composants suivants sont nécessaires : • Se requieren los siguientes componentes : • Wymagane są następujące elementy: • Необходимы следующие крепежные элементы: • Необхідні наступні елементи кріплення: • 次のコンポーネントは必須です: • 需 要下列零件: •... - Seite 12 AMD: AM5 / AM4 クーラー取り付けフレームの組立 Збірка рамки кріплення кулера AMDのプラスチック製リテンションブラケットを2つ取り外し Попередньо демонтуйте пластикові фіксатори модуля ます。 кріплення AMD. 散熱器安裝框架的組裝方法 组装散热器安装架 分離AMD固定模組的兩塊塑膠支架。 分离AMD固定模块的两个塑料支架。 Place the four AMD spacer nuts over the threads of the Platziere die vier AMD Abstandsbolzen über die Vorderseite backplate on the front side.
- Seite 13 Установите четыре проставки AMD на выступающие Umieść cztery nakrętki dystansowe AMD na gwintach элементы задней панели. Выберите положение backplate z przodu. Wybierz pozycję „0”, aby uzyskać «0» для максимальной совместимости с вашей maksymalną kompatybilność z płytą główną. W przypadku материнской платой. Для альтернативной сборки, montażu alternatywnego, kontynuuj czytanie na następnej пожалуйста, продолжайте...
- Seite 14 AMD: AM5 / AM4 Placez les quatre entretoises AMD sur le filetage de la plaque Coloque las cuatro tuercas espaciadoras AMD sobre arrière, du côté avant. Choisissez la position “8” pour une las roscas de la placa posterior en la parte frontal. puissance de refroidissement maximale sur votre processeur Elige la posición «8»...
- Seite 15 Mounting the fans on the radiator Befestigung der Lüfter am Radiator Befestige die Lüfter am Radiator. Wir empfehlen die Affix the fans to the radiator. We recommend installation in Installation in einer Push Konfiguration. Montiere die Lüfter a push configuration. Next, mount the fans on the hose side auf der Schlauchseite und verbinde die Lüfter per Daisy- and daisy-chain the fans to each other.
- Seite 16 AMD: AM5 / AM4 ラジエーターにファンを取り付ける Встановлення вентиляторів на радіатор 次にファンをホース側に取り付けます。 次に、 ファンをホース側 Прикріпіть вентилятори до радіатора. Рекомендуємо に固定し、 ファン同士をデイジーチェーン接続します。 延長ケ встановлювати їх у конфігурації на продув. Встановіть ーブルを使用して、 ファンをマザーボードに接続します。 вентилятори зі сторони шлангів та з’єднайте їх між собою за допомогою ланцюгового підключення (daisy-chain).
- Seite 17 Fixation du radiateur au boîtier Fijación del radiador a la caja Fixez le radiateur du Pure Loop 3 au boîtier à l’aide des vis de Fije el radiador de la caja utilizando los tornillos de fijación fixation du radiateur.
- Seite 18 AMD: AM5 / AM4 Mounting the CPU cooler Montage des CPU-Kühlers First peel off the protective film from the underside of the Entferne zunachst die Schutzfolie von der Unterseite cooler. Apply thermal paste on the CPU surface. des Kühlers. Trage die Warmeleitpaste auf die CPU- Caution: The thermal paste supplied should not be Oberflache auf.
- Seite 19 Монтаж блока охлаждения CPU Montaż bloku CPU Перед установкой кулера необходимо снять защитное Najpierw zdejmij folię ochronną ze spodu coolera. Nałoż покрытие с его нижней части. Нанесите термопасту pastę termoprzewodzącą na powierzchnię procesora. на поверхность процессора. Uwaga: dostarczonej pasty termoprzewodzącej nie należy Внимание: термопаста...
- Seite 20 AMD: AM5 / AM4 Place the CPU block centrally over the short AMD Lege den CPU-Block mittig auf die kurzen AMD Mon- mounting brackets, such that these allow the CPU block tagebrücken, sodass sich der CPU-Block mit selbigen to be screwed down. For this you can use a normal verschrauben lässt.
- Seite 21 Разместите блок охлаждения процессора по центру Umieść blok CPU centralnie nad krótkimi uchwytami над монтажными кронштейнами AMD и закрепите его. montażowymi AMD, tak aby umożliwić przykręcenie Для этого вы можете использовать обычную крестовую bloku CPU. W tym celu możesz użyć zwykłego śrubokręta отвертку.
-
Seite 22: Installation For Intel
Intel LGA 1851 / 1700 / 1200 / 1150 / 1151 / 1155 The following parts are needed for this: • Es werden folgende Bauteile benötigt: • Les composants suivants sont nécessaires : • Se requieren los siguientes componentes : • Wymagane są następujące elementy: • Необходимы следующие... - Seite 23 1200, 1150, 1151, 1155 1851, 1700 Fixation de la plaque arrière Fijación de la placa trasera Placez les vis de la plaque arrière Intel dans les Coloca los tornillos de la placa trasera de Intel en las encoches situées à l’arrière de celle-ci. Repérez les trous muescas situadas en la parte posterior de la placa trasera destinés au connecteur du processeur existant.
- Seite 24 Intel LGA 1851 / 1700 / 1200 / 1150 / 1151 / 1155 バックプレートの固定 Монтаж задньої пластини Intel バックプレート用のねじ を Intel バックプレートt の背面 Зафіксуйте гвинти задньої пластини Intel у відповідних にある刻み目に配置します。 実際の CPU ソ ケッ トで、 ドリルで до типу процесорного сокету отворах задньої пластини 開けられた穴をよく見てください。...
- Seite 25 1851, 1700 Installation des ponts de montage Instalación de los puentes de montaje Vissez les entretoises sur la plaque arrière Intel placée Atornille la tuerca espaciadora Intel A en la placa posterior précédemment, puis positionnez les supports de fixation Intel previamente colocada. A continuación, coloque los Intel sur les entretoises afin de les fixer avec les vis de soportes de montaje Intel sobre la tuerca espaciadora Intel fixation du support.
- Seite 26 Intel LGA 1851 / 1700 / 1200 / 1150 / 1151 / 1155 Befestigung der Lüfter am Radiator Mounting the fans on the radiator Befestige die Lüfter am Radiator. Wir empfehlen die Affix the fans to the radiator. We recommend installation in Installation in einer Push Konfiguration.
- Seite 27 ラジエーターにファンを取り付ける Встановлення вентиляторів на радіатор 次にファンをホース側に取り付けます。 次に、 ファンをホース側 Прикріпіть вентилятори до радіатора. Рекомендуємо に固定し、 ファン同士をデイジーチェーン接続します。 延長ケ встановлювати їх у конфігурації на продув. Встановіть ーブルを使用して、 ファンをマザーボードに接続します。 вентилятори зі сторони шлангів та з’єднайте їх між собою за допомогою ланцюгового підключення (daisy-chain). Використайте подовжувач...
- Seite 28 Fixation du radiateur au boîtier Fijación del radiador a la caja Fixez le radiateur du Pure Loop 3 au boîtier à l’aide des vis Fije el radiador a la caja utilizando los tornillos de fijación de fixation du radiateur.
- Seite 29 Mounting of the CPU block Montage des CPU-Blocks First peel off the protective film from the underside of the Entferne zunächst die Schutzfolie von der Unter- cooler. Apply thermal paste on the CPU surface. seite des Kühlers. Trage die Wärmeleitpaste auf die Caution: The thermal paste supplied should not be CPU-Oberfläche auf.
- Seite 30 Intel LGA 1851 / 1700 / 1200 / 1150 / 1151 / 1155 Монтаж блока охлаждения CPU Montaż bloku CPU Перед установкой кулера необходимо снять Najpierw zdejmij folię ochronną ze spodu coolera. Nałoż защитное покрытие с его нижней части. Нанесите pastę...
- Seite 31 Place the CPU block centrally over the Intel mounting Lege den CPU-Block mittig auf die Intel Montage- brackets, such that these allow the CPU block to brücken, sodass sich der CPU-Block mit selbigen be screwed down. For this you can use a normal verschrauben lässt.
-
Seite 32: Adjust Logo
LOGO AUSRICHTEN • AJUSTEMENT DU LOGO • AJUSTA EL LOGOTIPO • DOSTOSUJ LOGO • НАСТРОЙКА ЛОГОТИПА • НАЛАШТУВАННЯ ЛОГОТИПУ • ロゴを調整する • 調整徽標 • ADJUST LOGO 调整标志 Hake unter das be quiet! Logo auf dem Kühlblock. Hebe Hook under the be quiet! logo on the cooling block. es vorsichtig raus. -
Seite 33: Refilling The System
NACHFÜLLEN DES SYSTEMS • RECHARGE DU SYSTÈME • RELLENO DEL SISTEMA • REFILLING THE NAPEŁNIANIE SYSTEMU • ДОБАВЛЕНИЕ ЖИДКОСТИ В СИСТЕМУ • ДОДАВАННЯ РІДИНИ ДО СИСТЕМИ • システムの補充 • 重重新填充水冷液 • 重新填充水冷液 SYSTEM Fülle das System nach ca. zwei Jahren Gebrauch nach. Topup the system after about two years of use. - Seite 34 LIMITED WARRANTY I. APPLICABILITY 5. be quiet!, Inc. does not warrant that this This non-transferable warranty is applicable to product will meet your requirements. It is your newly purchased, previously unopened be quiet! responsibility to determine the suitability of this products and is enforceable by only the original product for your purpose.
- Seite 35 NOTIZEN • NOTES • NOTAS • NOTATKI • ЗАМЕТКИ • НОТАТКИ • 注釈 • 備註 • 备注 NOTES...
- Seite 36 bequiet.com...