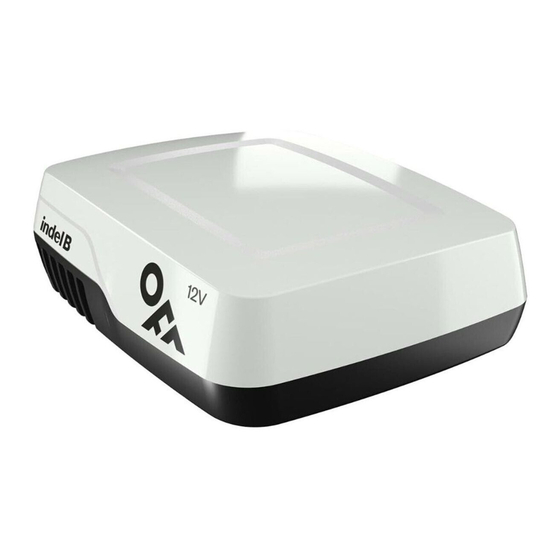
Indel B PLEIN AIRCON 12V Montageanleitung Und Wartung

Verwandte Anleitungen für Indel B PLEIN AIRCON 12V


Inhaltszusammenfassung für Indel B PLEIN AIRCON 12V
- Seite 1 PLEIN AIRCON 12V RINGLIGHT & LIGHTBOX ISTRUZIONI DI MONTAGGIO, USO E MANUTENZIONE ASSEMBLY INSTRUCTIONS, USE AND MAINTENANCE INSTRUCTIONS POUR LE MONTAGE, L'EMPLOI ET L'ENTRETIEN MONTAGEANLEITUNGEN, NUTZUNG UND WARTUNG INSTRUCCIONES DE MONTAJE, USO Y MANTENIMIENTO...
- Seite 2 80817861.4 - FEBBRAIO 2024 SW012T09...
- Seite 3 PLEIN AIRCON 12V RINGLIGHT & LIGHTBOX ITALIANO 3 - 50 ENGLISH 51 - 98 FRANÇAIS 99 - 146 DEUTSCH 147 - 194 ESPAÑOL 195 - 241...
-
Seite 4: S Mart Swi Tc Htr An S For Mer K It
Code Notes Kode Name Hinweise Còdigo Nombre Notas 2 30 V Z9 9 9/ 1 25 0 S MART SWI TC H O PTIO N AL TR AN S FOR MER K IT PLEIN AIRCON 12V - RINGLIGHT & LIGHTBOX... -
Seite 5: Istruzioni Di Montaggio, Uso E Manutenzione
ISTRUZIONI DI MONTAGGIO, USO E MANUTENZIONE OFF IS A BRAND OF INDELB... - Seite 6 PLEIN AIRCON 12V - RINGLIGHT & LIGHTBOX...
- Seite 7 PLEIN AIRCON 12V Leggere attentamente tutto il presente manuale prima di procedere con l’installazione. Per l’installazione, è importante attenersi scrupolosamente alle indicazioni riportate nel presente manuale. Il costruttore declina ogni responsabilità, in caso di danni a cose e persone provocati da installazioni o variazioni non conformi dell’impianto.
- Seite 8 - immergere immediatamente la parte congelata in acqua FREDDA. In mancanza di acqua avvolgere delicatamente la parte congelata con un panno pulito. Se del fluido refrigerante è entrato a contatto con gli occhi, sciacquarli abbondantemente con acqua pulita e per precauzione consultare un medico. PLEIN AIRCON 12V - RINGLIGHT & LIGHTBOX...
- Seite 9 Evitare il contatto con gli oli sintetici. Lavarsi accuratamente dopo l’eventuale contatto. L’olio contenuto all’interno dell’impianto è infiammabile PRIMA DI OPERARE CON FIAMME SUL CIRCUITO DEL REFRIGERANTE, ASSICURARSI CHE NON CI SIA PIÙ TRACCIA DI REFRIGERANTE ALL’INTERNO DELL’IMPIANTO. Effettuare il recupero e aprire l’impianto; attendere la fuoriuscita del refrigerante residuo. ATTENZIONE: ALCUNE PARTI DELL’IMPIANTO POSSONO CONTENERE OLIO CHE PUÒ...
- Seite 10 Bluetooth e Wi-Fi. L'App rende l'interazione con il prodotto intelligente, semplice ed intuitiva: oltre al classico funzionamento manuale, l'innovativa tecnologia Pre-Adaptive di Indel B (modalità Smart) adatta il funzionamento del condizionatore apprendendo dalle abitudini dell'utilizzatore e ottimizza le prestazioni in relazione alle condizioni meteorologiche della località...
- Seite 11 Può funzionare in 2 modalità (di cui una opzionale): - a 12 V (modalità standard), collegato alla batteria dei servizi. Il condizionatore può funzionare sia in sosta sia in marcia. - a 12 V e 230 V (modalità opzionale), collegato alla batteria dei servizi e alla rete elettrica (necessita di 230 V Smart Switch transformer kit, optional).
- Seite 12 Senso di marcia PLEIN AIRCON 12V - RINGLIGHT & LIGHTBOX...
-
Seite 13: Dati Tecnici
DATI TECNICI PL E IN A IRC ON 12 V MO D EL LO RINGLIGH T & LIGHTB OX Samsung - Singolo compressore in corrente Compressore continua 12 V cc Tensione 12 V cc - (115 V / 230 V) optional - Smart Switch power supply Refrigerante R134a... -
Seite 14: Inhaltsverzeichnis
Condizionatore a tetto Diffusore aria Telaio di fissaggio Prolunga per Guarnizione 20x10 1 m Guarnizione apertura tetto convogliatore aria Guarnizione posteriore Guarnizione posteriore Dima di foratura e sinistra destra posizionamento Cablaggio di alimentazione Manuali PLEIN AIRCON 12V - RINGLIGHT & LIGHTBOX... - Seite 15 Vite autofilettante 3.5x12.7 Dado flangiato M5 Vite T.E. M8x90 Rondella piana Ø8xØ24 Rondella ondulata Ø8 Dado M8 OFF IS A BRAND OF INDELB...
- Seite 16 è possibile utilizzare anche la seconda guarnizione aggiuntiva fornita. Guarnizione Guarnizione posteriore sinistra posteriore destra TETTO Posizionare il gruppo sul tetto del veicolo così come indicato. Senso di marcia PLEIN AIRCON 12V - RINGLIGHT & LIGHTBOX...
- Seite 17 Il condizionatore deve essere installato in piano. L’acqua di condensa prodotta dal condizionatore viene scaricata direttamente sul tetto del veicolo. Nel posizionare il condizionatore sul tetto, verificare che le aperture di ingresso ed uscita aria presenti sul gruppo non vengano ostruite o coperte in alcun modo. Senso di marcia Acqua di condensa Acqua di condensa...
- Seite 18 Verificare che nella sezione del tetto dove si intende effettuare l’apertura, non vi siano passaggi di cavi elettrici. Nell’eseguire l’apertura, mantenersi negli spazi tra le nervature del tetto senza rimuoverle. Per facilitare le operazioni di taglio, avvalersi della dima fornita. PLEIN AIRCON 12V - RINGLIGHT & LIGHTBOX...
- Seite 19 Sigillare accuratamente qualsiasi foro o apertura esistente o eseguito al fine di evitare possibili infiltrazioni di acqua. Sigillare con prodotto adeguato, flessibile e non indurente, per esempio: "SikaLastomer-710", "Selleys Butyil Mastic", "Vaber SP5" o prodotti similari. Senso di marcia Se è stata rimossa la botola, eliminare la vecchia guarnizione e, comunque, pulire accuratamente la superficie del tetto attorno all’apertura e rimuovere eventuali residui.
- Seite 20 I cavi dell’alimentazione elettrica dovranno essere fatti passare internamente al veicolo e collegati attraverso l’apertura di aspirazione dell’aria interna del condizionatore. Cablaggio di alimentazione Senso di marcia PLEIN AIRCON 12V - RINGLIGHT & LIGHTBOX...
- Seite 21 Oppure, come soluzione alternativa, potrebbero essere fatti scorrere sul tetto (entrando dalla parte posteriore del condizionatore) e protetti da una canalina (a cura dell’installatore). Senso di marcia Cablaggio di alimentazione OFF IS A BRAND OF INDELB...
- Seite 22 Senso di marcia Guarnizione apertura tetto Guarnizione Guarnizione posteriore sinistra posteriore destra TETTO PLEIN AIRCON 12V - RINGLIGHT & LIGHTBOX...
-
Seite 23: Guarnizione Posteriore Sinistra
Guarnizione posteriore destra Guarnizione apertura tetto Guarnizione posteriore sinistra Senso di marcia N.B. Nel caso si debbano compensare nervature, difformità e/o avvallamenti del tetto, è possibile utilizzare anche la seconda guarnizione aggiuntiva fornita. Guarnizione Guarnizione posteriore sinistra posteriore destra TETTO OFF IS A BRAND OF INDELB... - Seite 24 Guarnizione 20 x 10 Senso di marcia Guarnizione 20 x 10 Senso di marcia Guarnizione 20 x 10 PLEIN AIRCON 12V - RINGLIGHT & LIGHTBOX...
- Seite 25 Prima di collocare il condizionatore sul tetto, provvedere anche a sigillare il perimetro di appoggio con del sigillante adeguato, per esempio: "SikaLastomer-710", "Selleys Butyil Mastic", "Vaber SP5" o prodotti similari. Procedere con il montaggio del condizionatore, appoggiandolo delicatamente sul tetto, facendo corrispondere le aperture sul fondo del condizionatore con l’apertura (400x400) sul veicolo.
- Seite 26 Far fuoriuscire, attraverso l’apertura di aspirazione dell’aria interna e attraverso l’apertura (400x400), il cablaggio di collegamento al diffusore. Senso di marcia Cablaggio di Cablaggio di collegamento al collegamento al diffusore diffusore Senso di marcia Cablaggio di collegamento al diffusore PLEIN AIRCON 12V - RINGLIGHT & LIGHTBOX...
-
Seite 27: Cablaggio Di Alimentazione
Mentre per i cavi di alimentazione si prospettano due possibilità: PASSAGGIO DEI CAVI DI ALIMENTAZIONE ALL'INTERNO DEL VEICOLO. Scegliere il percorso idoneo e far passare il cablaggio di alimentazione fornito all'interno del veicolo, per esempio nell’intercapedine del tetto, quindi collegare il connettore alla controparte presente nel condizionatore, attraverso l’apertura di aspirazione dell’aria interna. - Seite 28 Senso di marcia Cablaggio di alimentazione Senso di marcia PLEIN AIRCON 12V - RINGLIGHT & LIGHTBOX...
- Seite 29 SOLUZIONE ALTERNATIVA: PASSAGGIO DEI CAVI DI ALIMENTAZIONE ALL'ESTERNO DEL VEICOLO. Il cablaggio di alimentazione fornito può anche essere fatto passare esternamente, sul tetto del veicolo, e fatto entrare nel condizionatore dal lato posteriore, attraverso l'apertura chiusa dalla griglia che dovrà essere opportunamente modificata. Se si opta per questa soluzione è necessario proteggere il cablaggio con una canalina (a cura dell’installatore) fino al punto di inserimento verso l’interno del veicolo.
- Seite 30 Senso di marcia Cablaggio di alimentazione Senso di marcia Cablaggio di alimentazione PLEIN AIRCON 12V - RINGLIGHT & LIGHTBOX...
-
Seite 31: Diffusore Aria
Inserire nell’apertura del tetto, operando dall’interno del veicolo, il telaio 4 di fissaggio condizionatore. Fissare il condizionatore 1 al telaio di fissaggio 4 (e quindi al tetto) mediante le viterie fornite 7-8-9-10. Nota: avvitare le viti M8x90 7 (fra telaio di fissaggio e base del condizionatore) con una coppia di chiusura di 2,5 Nm, fino a raggiungere una distanza tale da comprimere la guarnizione di appoggio ed assicurarne la tenuta, lasciando liberi i due dadi M8 10 sul filetto della vite. -
Seite 32: Guarnizione Apertura Tetto
6 Dado flangiato M5 7 Vite T.E. M8x90 8 Rondella piana Ø8xØ24 9 Rondella ondulata Ø8 10 Dado M8 11 Guarnizione 20x10 12 Guarnizione apertura tetto 13 Guarnizione posteriore sinistra 14 Guarnizione posteriore destra PLEIN AIRCON 12V - RINGLIGHT & LIGHTBOX... - Seite 33 Utilizzo della prolunga convogliatore aria 3 In base allo spessore del tetto potrà essere necessario oppure no, l’utilizzo della prolunga per convogliare l’aria trattata in modo corretto fra la bocca di mandata del condizionatore e il diffusore. Per tetti con spessore di 30 mm non è necessario l’utilizzo della prolunga. Per tetti con spessore di 70 mm è...
-
Seite 34: Collegamenti Elettrici
Sonda temperatura ambiente Diffusore aria Sonda temperatura esterna 11.1 Scheda display Compressore ermetico 11.2 Scheda led Centralina di controllo compressore 11.3 Scheda bluetooth ermetico Connettore collegamento diffusore aria Elettroventola condensatore Connettore collegamento alimentazione Elettroventola evaporatore PLEIN AIRCON 12V - RINGLIGHT & LIGHTBOX... - Seite 35 OFF IS A BRAND OF INDELB...
- Seite 36 L'App, scaricabile attraverso è dotata di un suo tutorial attraverso il quale è possibile apprendere tutte le funzionalità. Di seguito saranno elencate le indicazioni per il funzionamento dell'impianto attraverso il display posto sul diffusore dell'aria. PLEIN AIRCON 12V - RINGLIGHT & LIGHTBOX...
- Seite 37 DISPLAY • A impianto spento il display visualizza solo l’icona • Sfiorando il display o toccando l'icona , si visualizzano 3 icone che rappresentano le modalità di funzionamento: ILLUMINAZIONE / SOLO VENTILAZIONE / CONDIZIONAMENTO. Se entro 5 secondi non si effettua una scelta, si spengono. •...
-
Seite 38: Solo Ventilazione
La modalità "solo ventilazione" può rimanere attiva a tempo indeterminato; per questo motivo, anche se l’impianto è salvaguardato dal sistema di SALVA BATTERIA, è necessario porre attenzione alla carica residua della batteria a cui è collegato. PLEIN AIRCON 12V - RINGLIGHT & LIGHTBOX... - Seite 39 CONDIZIONAMENTO Toccando la relativa icona si attiva la modalità "condizionamento". Il set point (temperatura desiderata) può essere scelto nell'intervallo da 17° C (63° F) a 30° C (86° F). Si può modificare agendo sulle frecce . Ad ogni tocco corrisponde 1°. La velocità...
- Seite 40 Contemporaneamente alla modalità "MAX" è possibile abilitare la modalità "DRY" ma la velocità di ventilazione si porta al minimo e non è possibile modificarla. É possibile abilitare la modalità "ECO" ma "MAX" (ed eventualmente "DRY" se fosse attiva) viene disabilitata. PLEIN AIRCON 12V - RINGLIGHT & LIGHTBOX...
- Seite 41 É possibile scegliere questa modalità per ottenere la massima efficienza dell'impianto con il minimo assorbimento elettrico. Toccando l'icona inizieranno a lampeggiare . Toccare ancora fino a quando comparirà lampeggiante insieme ad . Con le frecce spostarsi su abilitare. Attendere qualche secondo per confermare. Per disabilitare spostarsi su In questa modalità...
- Seite 42 Contemporaneamente alla modalità "DRY" è possibile abilitare la modalità "MAX" ma la velocità di ventilazione resta al minimo e non è possibile modificarla. É possibile abilitare la modalità "ECO" ma "DRY" viene disabilitata. PLEIN AIRCON 12V - RINGLIGHT & LIGHTBOX...
- Seite 43 É possibile scegliere questa modalità per impostare il funzionamento notturno. Impostare il numero di ore di funzionamento desiderate e il set point. L'impianto funzionerà per il numero di ore selezionato e si spegnerà allo scadere del tempo. Durante il tempo di funzionamento il set point aumenterà...
- Seite 44 Quando la modalità "TIMER" è attiva, il display visualizza É possibile abilitare la modalità "SLEEP" ma "TIMER" viene disabilitata. Inoltre è possibile abilitare le modalità "MAX", "ECO" o "DRY" alle condizioni descritte precedentemente. PLEIN AIRCON 12V - RINGLIGHT & LIGHTBOX...
- Seite 45 DIFFUSORE ARIA L’aria trattata viene distribuita dal diffusore all’interno del veicolo attraverso due aperture, con la possibilità di orientare il flusso mediante i deflettori regolabili manualmente. La precisione e la flessibilità direzionale dell'aria, infatti, è ottimizzata, permettendo una distribuzione anche in verticale. Aria trattata OFF IS A BRAND OF INDELB...
- Seite 46 Infatti Plein-Aircon, oltre a raffreddare l’aria, contemporaneamente la deumidifica permettendo di avere un buon comfort termico anche a temperature elevate, grazie al suo effetto deumidificante. É quindi inutile richiedere 18° C quando esternamente ci sono 35° C. PLEIN AIRCON 12V - RINGLIGHT & LIGHTBOX...
- Seite 47 MANUTENZIONE • La manutenzione del condizionatore è alquanto ridotta. • Evitare di lasciare inattivo a lungo il condizionatore ma avviarlo almeno una volta al mese anche nei periodi invernali, in quanto il funzionamento garantisce la lubrificazione di alcuni componenti che tenderebbero ad essiccarsi se lasciati inattivi per molto tempo. •...
- Seite 48 L’impianto frigorigeno ermetico, è sottoposto ad un accurato controllo per individuare eventuali anomalie e fughe di gas. • Eventuali riparazioni oppure interventi per la carica e recupero di refrigerante, devono essere eseguiti presso officine autorizzate IndelB e da personale qualificato. PLEIN AIRCON 12V - RINGLIGHT & LIGHTBOX...
- Seite 49 DIAGNOSTICA La diagnostica del sistema monitora costantemente diversi parametri e se si presenta un'anomalia, sul display viene visualizzata l'icona accompagnata da un codice numerico; queste anomalie sono classificate come "WARNING" o "ERRORE". I "WARNING" rappresentano condizioni ambientali non idonee ma non compromettono il funzionamento dell'impianto.
- Seite 50 73 / 74 / 75 / 76 / Se l'errore persiste contattare l'assistenza 77 / 78 / 79 / 80 / Errore interno tecnica 81 / 82 / 83 / 84 / 85 / 86 / 87 PLEIN AIRCON 12V - RINGLIGHT & LIGHTBOX...
- Seite 51 TABELLA INCONVENIENTI, CAUSE, RIMEDI POSSIBILE CAUSA / SOLUZIONE La temperatura è inferiore ai 17° C / 63° F Controllare la temperatura di Set Point Carica di gas insufficiente Compressore danneggiato Batterie di scambio termico sporche Elettroventola evaporatore difettosa Filtri aria sporchi Elettroventola condensatore difettosa Fori scarico condensa ostruiti Guarnizione di tenuta danneggiata...
- Seite 52 PLEIN AIRCON 12V - RINGLIGHT & LIGHTBOX...
- Seite 53 ASSEMBLY INSTRUCTIONS, USE AND MAINTENANCE OFF IS A BRAND OF INDELB...
- Seite 54 PLEIN AIRCON 12V - RINGLIGHT & LIGHTBOX...
- Seite 55 PLEIN AIRCON 12V Read this manual carefully from start to finish before installation. For installation, it is important to strictly observe the instructions given in this manual. The manufacturer declines all responsibility in the event of damages to people and things caused by incorrect installation or alterations of the system.
- Seite 56 - plunge the frozen part immediately into COLD water. If there is no water available, gently wrap the frozen part in a clean cloth. If the cooling fluid has come into contact with the eyes, rinse them thoroughly with clean water and see a doctor. PLEIN AIRCON 12V - RINGLIGHT & LIGHTBOX...
- Seite 57 Avoid contact with synthetic oils. Wash carefully after contact. The oil contained in the system is inflammable. BEFORE OPERATING ON THE COOLING CIRCUIT WITH FLAMES, ENSURE THAT THERE ARE NO TRACES OF COOLANT LEFT INSIDE THE SYSTEM. Perform the recovery and open the system; wait for the remaining coolant to come out. ATTENTION: SOME PARTS OF THE SYSTEM MAY CONTAIN OIL THAT CAN IGNITE EVEN IN THE ABSENCE OF COOLANT.
- Seite 58 Bluetooth and Wi-Fi. The app makes interaction with the product intelligent, simple and intuitive: in addition to the classic manual operation, Indel B’s innovative Pre-Adaptive technology (Smart mode) adapts the operation of the air conditioner by learning from the user’s habits and optimizes performance in relation to the weather conditions of the current location or by predicting those of a set future destination.
- Seite 59 It can operate in two modes (one of which is optional): - 12 V (standard mode), connected to the service battery. The air conditioner can work if the vehicle is either stationary or moving. - 12 V and 230 V (optional mode), connected to the service battery and to the mains (it requires a 230 V Smart Switch transformer kit, optional).
- Seite 60 Drive way PLEIN AIRCON 12V - RINGLIGHT & LIGHTBOX...
-
Seite 61: Technical Features
TECHNICAL FEATURES PL EIN A IRC ON 12 V M ODEL RIN GLIGHT & L IGHTB OX Compressor Samsung - Singol DC compressor 12 V DC Input Voltage 12 V DC - (115 V / 230 V) optional - Smart Switch power supply Coolant R134a... -
Seite 62: Supplied Components
SUPPLIED COMPONENTS Roof-top air conditioner Air diffuser Clamping frame Air conveyor extension Gasket 20x10 Roof opening gasket Drilling and positioning Left rear gasket Right rear gasket template Power wiring Manual PLEIN AIRCON 12V - RINGLIGHT & LIGHTBOX... - Seite 63 Tapping screw 3.5x12.7 M5 flange nut H.H. screw M8x90 Flat washer Ø8xØ24 Wave washer Ø8 Nut M8 OFF IS A BRAND OF INDELB...
- Seite 64 Left rear gasket Right rear gasket ROOF Place the unit on the roof of the vehicle, as shown. Drive way PLEIN AIRCON 12V - RINGLIGHT & LIGHTBOX...
- Seite 65 The air conditioner must be installed flat. The drain water produced by the air conditioner is discharged directly on the vehicle roof. When positioning the air conditioner on the roof, verify that the inlet and the outlet air openings of the assembly are not be blocked or covered in any way.
- Seite 66 Verify that the roof section where the opening is to be made, does not have any electrical wiring. While making the opening, remain in the spaces between the roof ribs without removing them. To facilitate the cutting operations, use the supplied template. PLEIN AIRCON 12V - RINGLIGHT & LIGHTBOX...
- Seite 67 Seal carefully any existing or new hole or opening in order to avoid possible water leakage. Seal with a suitable, flexible, non-hardening product, e.g. "SikaLastomer-710", "Selleys Butyil Mastic", "Vaber SP5" or similar products. Drive way If the trapdoor has been removed, remove the old seal and, in any case, thoroughly clean the roof surface around the opening and remove any residue.
- Seite 68 The power supply cables should be passed inside the vehicle and connected through the inlet air opening of air conditioner. Power wiring Drive way PLEIN AIRCON 12V - RINGLIGHT & LIGHTBOX...
- Seite 69 Or, as an alternative solution, they could be installed externally, on the roof (inserting them from the rear part of the air conditioner) and protected by a duct (mounted by the installer). Drive way Power wiring OFF IS A BRAND OF INDELB...
- Seite 70 Drive way Roof opening gasket Left rear Right rear gasket gasket ROOF PLEIN AIRCON 12V - RINGLIGHT & LIGHTBOX...
- Seite 71 Right rear gasket Roof opening gasket Left rear gasket Drive way Please note: if ribs, unevenness and/or depressions in the roof have to be compensated for, it is also possible to use the second gasket provided. Left rear gasket Right rear gasket ROOF OFF IS A BRAND OF INDELB...
- Seite 72 Gasket 20 x 10 Drive way Gasket 20 x 10 Drive way Gasket 20 x 10 PLEIN AIRCON 12V - RINGLIGHT & LIGHTBOX...
- Seite 73 Before installing the air conditioner on the roof, also seal the perimeter of the support with an appropriate sealant, e.g. "SikaLastomer-710", "Selleys Butyil Mastic", "Vaber SP5" or similar products. Carry out the assembly of the air conditioner, placing it gently on the roof, matching the openings on the bottom of the air conditioner with the opening (400x400) on the vehicle.
- Seite 74 Bring out the air diffuser wiring, through the internal air intake opening and through the opening (400x400). Drive way Air diffuser Air diffuser wiring wiring Drive way Air diffuser wiring PLEIN AIRCON 12V - RINGLIGHT & LIGHTBOX...
- Seite 75 Instead, there are two possibilities for the power cables: ROUTING OF POWER CABLES INSIDE THE VEHICLE. Choose a suitable route and run the supplied power wiring inside the vehicle, for example in the roof cavity, then connect the connector to the counterpart in the air conditioner, through the inlet air intake opening.
- Seite 76 Drive way Power wiring Drive way PLEIN AIRCON 12V - RINGLIGHT & LIGHTBOX...
- Seite 77 ALTERNATIVE SOLUTION: ROUTING OF POWER CABLES OUTSIDE THE VEHICLE. The supplied power wiring can also be routed externally, on the roof of the vehicle, and fed into the air conditioner from the rear side, through the opening closed by the grille which must be appropriately modified.
- Seite 78 Drive way Power wiring Drive way Power wiring PLEIN AIRCON 12V - RINGLIGHT & LIGHTBOX...
- Seite 79 Insert the air conditioner fixing frame 4 into the roof opening, operating from inside the vehicle. Fasten the air conditioner 1 to the fixing frame 4 (and then to the roof) using the screws provided 7-8- 9-10. Note: screw the M8x90 screws 7 (between the fixing frame and the base of the air conditioner) with a tightening torque of 2,5 Nm, until a distance is reached that compresses the gasket and ensures its tightness, leaving the two M8 nuts 10 on the thread of the screw free.
- Seite 80 6 Flange nut M5 7 H.H. screw M8x90 8 Flat washer Ø8xØ24 9 Wave washer Ø8 10 Nut M8 11 Gasket 20x10 12 Roof opening gasket 13 Left rear gasket 14 Right rear gasket PLEIN AIRCON 12V - RINGLIGHT & LIGHTBOX...
- Seite 81 Using the air conveyor extension 3 Depending on the thickness of the roof, it may or may not be necessary to use the air conveyor extension in a correct manner between the air conditioner outlet air opening and the diffuser. For roofs with a thickness of 30 mm using the air conveyor extension is not necessary.
-
Seite 82: Electrical Connections
Air diffuser External temperature probe 11.1 Display board Hermetic compressor 11.2 Led board Hermetic compressor control unit 11.3 Bluetooth board Condenser electric fan Air diffuser connecting connector Evaporator electric fan Power supply connecting connector PLEIN AIRCON 12V - RINGLIGHT & LIGHTBOX... - Seite 83 OFF IS A BRAND OF INDELB...
-
Seite 84: Operation Mode
The App, downloadable through the , has its own tutorial through which it is possible to learn all the functions. Below are the instructions for operating the system via the display located on the air diffuser. PLEIN AIRCON 12V - RINGLIGHT & LIGHTBOX... - Seite 85 DISPLAY • With the system switched off, the display only shows the icon • By touching the display or touching the icon, 3 icons representing the operating modes are shown: LIGHTING / VENTILATION ONLY / CONDITIONING. If no choice is made within 5 seconds, they switch off.
-
Seite 86: Ventilation Only
The "ventilation only" mode can remain active indefinitely; for this reason, even if the system is protected by the BATTERY PROTECTION system, it is necessary to pay attention to the residual charge of the battery to which it is connected. PLEIN AIRCON 12V - RINGLIGHT & LIGHTBOX... - Seite 87 CONDITIONING Touching the relevant icon activates the "conditioning" mode. The set point (desired temperature) can be chosen in the range from 17° C (63° F) to 30° C (86° F). It can be changed using the arrows . Each touch corresponds to 1°. The ventilation speed varies automatically (based on the set point choice and external temperature).
- Seite 88 At the same time as the "MAX" mode, it is possible to enable the "DRY" mode, but the ventilation speed is set to the minimum and cannot be modified. "ECO" mode can be enabled but "MAX" (and possibly "DRY" if it is active) is disabled. PLEIN AIRCON 12V - RINGLIGHT & LIGHTBOX...
- Seite 89 It is possible to choose this mode to obtain maximum system efficiency with minimum power consumption. By touching the icon , will start flashing . Touch again until appears flashing together with . Use the arrows to move to to enable. Wait a few seconds to confirm.
- Seite 90 At the same time as the "DRY" mode it is possible to enable the "MAX" mode but the ventilation speed remains at minimum and cannot be modified. It is possible to enable "ECO" mode but "DRY" is disabled. PLEIN AIRCON 12V - RINGLIGHT & LIGHTBOX...
- Seite 91 It is possible to choose this mode this mode to set night operation. Set the desired number of operating hours and set point. The system will run for the selected number of hours and will switch off when the time expires. During the operating time, the set point will increase by 1°...
- Seite 92 When the "TIMER" mode is active, the display shows It is possible to enable the "SLEEP" mode but "TIMER" will be disabled. It is also possible to enable "MAX", "ECO" or "DRY" mode under the conditions described above. PLEIN AIRCON 12V - RINGLIGHT & LIGHTBOX...
- Seite 93 AIR DIFFUSER The treated air is distributed from the diffuser to the interior of the vehicle through two openings, with the possibility of directing the flow via manually adjustable deflectors. The precision and directional flexibility of the air is optimised, allowing it to be distributed vertically as well.
-
Seite 94: Recommendations For Use
As a matter of fact, Plein-Aircon, in addition to cooling the air, simultaneously dehumidifies it, allowing for good thermal comfort even at high temperatures, thanks to its dehumidifying effect. It is therefore useless to set 18° C when the outside temperature is 35° C. PLEIN AIRCON 12V - RINGLIGHT & LIGHTBOX... - Seite 95 MAINTENANCE • The maintenance of the air conditioner is quite limited. • Do not leave idle for a long time but start the air conditioner at least once a month even in winter, since the operation ensures the lubrication of some components that would dry out if left idle for a long time.
- Seite 96 The hermetically cooling system is subjected to careful control to detect any anomalies and gas leaks. • Any repairs or work on refrigerant charging and recovery must be carried out by authorized IndelB workshops and qualified personnel. PLEIN AIRCON 12V - RINGLIGHT & LIGHTBOX...
- Seite 97 DIAGNOSTIC The system diagnostics constantly monitors various parameters and if an anomaly occurs, the display shows the icon accompanied by a numerical code; these anomalies are classified as "WARNING" or "ERROR". The "WARNINGS" represent unsuitable environmental conditions but do not compromise the operation of the system.
- Seite 98 73 / 74 / 75 / 76 / If the error persists, contact technical 77 / 78 / 79 / 80 / Internal error assistance 81 / 82 / 83 / 84 / 85 / 86 / 87 PLEIN AIRCON 12V - RINGLIGHT & LIGHTBOX...
- Seite 99 TABLE OF PROBLEMS, CAUSES AND REMEDIES POSSIBLE CAUSE / SOLUTION The temperature is below 17° C / 63° F Check the Set Point temperature Insufficient gas charge Damaged compressor Dirty heat exchange coils Faulty evaporator electric fan Dirty air filters Faulty condenser electric fan Blocked condensation discharge holes Damaged seal...
- Seite 100 PLEIN AIRCON 12V - RINGLIGHT & LIGHTBOX...
- Seite 101 INSTRUCTIONS POUR LE MONTAGE, L’EMPLOI ET L’ENTRETIEN OFF IS A BRAND OF INDELB...
- Seite 102 PLEIN AIRCON 12V - RINGLIGHT & LIGHTBOX...
- Seite 103 PLEIN AIRCON 12V Lire attentivement et entièrement le présent manuel avant de procéder à l’installation. Pour l’installation, il est important de se conformer scrupuleusement aux indications reportées dans le présent manuel. Le constructeur décline toute responsabilité, en cas de dommages à des choses et des personnes provoqués par des installations ou variations non conformes de l’installation.
- Seite 104 - ne jamais réchauffer avec une flamme un circuit contenant du fluide réfrigérant parce qu’il est facilement inflammable - à l’état liquide le fluide réfrigérant évapore quand il entre en contact avec l’atmosphère et congèle PLEIN AIRCON 12V - RINGLIGHT & LIGHTBOX...
- Seite 105 tout ce qui entre en contact avec lui. En cas de congélation: - immerger immédiatement la partie congelée dans de l’eau FROIDE. En l’absence d’eau envelopper délicatement la partie congelée avec un chiffon propre. Si du fluide réfrigérant est entré en contact avec les yeux, les rincer abondamment à l’eau propre et par précaution consulter un médecin.
- Seite 106 électrique de 12 V cc (il existe aussi en catalogue, en option, un kit pour l’alimentation 12 V cc - 230 V ac 50 Hz). PLEIN AIRCON 12V - RINGLIGHT & LIGHTBOX...
- Seite 107 Il possède 2 modes de fonctionnement (dont un en option): - en 12 V (mode standard), branché à la batterie de service. Le climatiseur peut fonctionner aussi bien à l’arrêt qu’en roulant. - en 12 V et 230 V (mode optionnel), branché à la batterie de service et au secteur (requiert le 230 V Smart Switch transformer kit, en option).
- Seite 108 Sens de marche PLEIN AIRCON 12V - RINGLIGHT & LIGHTBOX...
-
Seite 109: Caractéristiques Techniques
CARACTÉRISTIQUES TECHNIQUES PLE IN AIRCON 12 V MO DÈ LE RIN GL IGHT & LIGHTB OX Samsung - Compresseur simple en courant Compresseur continu 12 V cc Tension 12 V cc - (115 V / 230 V) optionnel - Smart Switch power supply Réfrigérant R134a... -
Seite 110: Composants Fournis
Climatiseur de toit Diffuseur d’air Cadre de fixation Manchon pour convoyeur Joint 20x10 Joint ouverture toit d’air Gabarit de perçage et Joint arrière gauche Joint arrière droit positionnement Câblage d’ a limentation Manuels PLEIN AIRCON 12V - RINGLIGHT & LIGHTBOX... - Seite 111 Vis autotaraudeuse Écrou à bride M5 Vis T.H. M8x90 3.5x12.7 Rondelle plate Ø8xØ24 Rondelle ondulée Ø8 Écrou M8 OFF IS A BRAND OF INDELB...
- Seite 112 également utiliser le deuxième joint supplémentaire fourni. Joint arrière gauche Joint arrière droit TOIT Positionner le groupe sur le toit du véhicule de la façon indiquée. Sens de marche PLEIN AIRCON 12V - RINGLIGHT & LIGHTBOX...
- Seite 113 Le climatiseur doit être installé à plat. L’eau de condensation produite par le climatiseur est évacuée directement sur le toit du véhicule. Lorsque l’on positionne le climatiseur sur le toit, vérifier que les ouvertures d’entrée et de sortie d’air présentes sur le groupe ne sont pas obstruées ou couvertes, de quelque manière que ce soit. Sens de la marche Eau de condensation Eau de condensation...
- Seite 114 Vérifier qu’aucun câble électrique ne passe dans la partie du toit où l’on souhaite pratiquer l’ouverture. Lorsque l’on pratique l’ouverture, il faut se maintenir dans les espaces entre les nervures du toit, sans les retirer. Pour faciliter les opérations de découpe, utiliser le gabarit fourni. PLEIN AIRCON 12V - RINGLIGHT & LIGHTBOX...
- Seite 115 Scellez soigneusement tous les trous ou ouvertures existants ou réalisés pour éviter toute infiltration d'eau éventuelle. Sceller avec un produit approprié, flexible et non durcissant, par exemple: "SikaLastomer-710", "Selleys Butyil Mastic", "Vaber SP5" ou des produits similaires. Sens de marche Si la trappe a été...
- Seite 116 Les câbles de l’alimentation électrique doivent passer à l’intérieur du véhicule et être branchés à travers l’ouverture d’aspiration de l’air intérieur du climatiseur. Câblage d'alimentation Sens de marche PLEIN AIRCON 12V - RINGLIGHT & LIGHTBOX...
- Seite 117 Ou, en alternative, il est possible de les faire passer sur le toit (en entrant par la partie arrière du climatiseur) et en plaçant une goulotte de protection (par les soins de l’installateur). Sens de marche Câblage d'alimentation OFF IS A BRAND OF INDELB...
- Seite 118 Sens de marche Joint ouverture toit Joint arrière Joint arrière gauche droit TOIT PLEIN AIRCON 12V - RINGLIGHT & LIGHTBOX...
- Seite 119 Joint arrière droit Joint ouverture toit Joint arrière gauche Sens de marche A noter: S’il faut compenser nervure, déformations et/ou des creux dans le toit, il est possible d’utiliser aussi le second joint fourni. Joint arrière gauche Joint arrière droit TOIT OFF IS A BRAND OF INDELB...
- Seite 120 à l’huile du compresseur de revenir correctement dans le circuit. Joint 20 x 10 Sens de marche Joint 20 x 10 Sens de marche Joint 20 x 10 PLEIN AIRCON 12V - RINGLIGHT & LIGHTBOX...
- Seite 121 Avant de placer le climatiseur sur le toit, fixer aussi le périmètre d’appui avec un scellant approprié, par exemple: "SikaLastomer-710", "Selleys Butyil Mastic", "Vaber SP5" ou des produits similaires. Procéder au montage du climatiseur, en le posant délicatement sur le toit, en faisant correspondre les ouvertures sur le fond du climatiseur avec l’ouverture (400x400) sur le véhicule.
- Seite 122 Faire sortir, à travers l’ouverture d’aspiration de l’air intérieur et à travers l’ouverture (400x400), le câblage de raccordement au diffuseur. Sens de marche Câblage pour Câblage pour diffuseur d’air diffuseur d’air Sens de marche Câblage pour diffuseur d’air PLEIN AIRCON 12V - RINGLIGHT & LIGHTBOX...
- Seite 123 Pour les câbles d’alimentation, en revanche, il existe deux possibilités: PASSAGE DES CÂBLES D’ A LIMENTATION À L’INTÉRIEUR DU VÉHICULE. Choisir le parcours approprié et faire passer le câblage d’alimentation fourni à l’intérieur du véhicule, par exemple dans l’interstice du toit, puis brancher le connecteur à la contrepartie présente dans le climatiseur, à...
- Seite 124 Sens de marche Câblage d'alimentation Sens de marche PLEIN AIRCON 12V - RINGLIGHT & LIGHTBOX...
- Seite 125 AUTRE SOLUTION: PASSAGE DES CÂBLES D’ A LIMENTATION À L’EXTÉRIEUR DU VÉHICULE. Le câblage d’alimentation fourni peut aussi être fait passer à l’extérieur, sur le toit du véhicule et fait entrer dans le climatiseur par l’arrière, à travers l'ouverture fermée par la grille qui doit être modifiée en conséquence.
- Seite 126 Sens de marche Câblage d'alimentation Sens de marche Câblage d'alimentation PLEIN AIRCON 12V - RINGLIGHT & LIGHTBOX...
- Seite 127 Insérer dans l’ouverture du toit, en passant depuis l’intérieur du véhicule, le cadre de fixation 4 du climatiseur. Fixer le climatiseur 1 a le cadre de fixation 4 (et donc au toit) avec les vis fournies 7-8-9-10. Note: visser les vis M8x90 7 (entre le cadre de fixation et la base du climatiseur) avec un couple de serrage de 2,5 Nm, jusqu’à...
- Seite 128 6 Écrou à bride M5 7 Vis T.H. M8x90 8 Rondelle plate Ø8xØ24 9 Rondelle ondulée Ø8 10 Écrou M8 11 Joint 20x10 12 Joint ouverture toit 13 Joint arrière gauche 14 Joint arrière droit PLEIN AIRCON 12V - RINGLIGHT & LIGHTBOX...
- Seite 129 Utilisation du manchon convoyeur d’air 3 En fonction de l’épaisseur du toit, peut être nécessaire ou non, d’utiliser un manchon pour acheminer l’air traité de façon correcte entre la buse de refoulement du climatiseur et le diffuseur. Pour les toits de 30 mm d’épaisseur, l’utilisation du manchon n’est pas nécessaire. Pour les toits de 70 mm d’épaisseur, l’utilisation du manchon complet est nécessaire.
-
Seite 130: Branchements Électriques
Sonde de température extérieure 11.1 Fiche écran Compresseur hermétique 11.2 Fiche led Centrale contrôle compresseur 11.3 Fiche bluetooth hermétique Connecteur de connexion diffuseur d'air Électroventilateur condenseur Connecteur de connexion à l'alimentation Électroventilateur évaporateur PLEIN AIRCON 12V - RINGLIGHT & LIGHTBOX... - Seite 131 OFF IS A BRAND OF INDELB...
- Seite 132 – via l'Appli avec une double connectivité Bluetooth et Wi-Fi. L'Appli, téléchargeable depuis possède un tutoriel permettant de prendre connaissance de toutes ses fonctions. Les indications pour le fonctionnement de l’installation via l’écran situé sur le diffuseur d’air figurent ci-dessous. PLEIN AIRCON 12V - RINGLIGHT & LIGHTBOX...
- Seite 133 ÉCRAN • Lorsque l’installation est stoppée, seule l’icône apparaît sur l’écran. • En frôlant l’écran ou en touchant l’icône , s’affichent 3 icônes qui symbolisent les modes de fonctionnement: ÉCLAIRAGE / VENTILATION UNIQUEMENT / CLIMATISATION. Si aucun choix n’est effectué sous 5 secondes, les icônes s’éteignent. •...
- Seite 134 Le mode « ventilation uniquement » peut rester actif à durée indéterminée; c’est pourquoi, même si l’installation est protégée par le système de SAUVEGARDE DE LA BATTERIE, il faut prêter attention à la charge résiduelle de la batterie à laquelle elle est connecté. PLEIN AIRCON 12V - RINGLIGHT & LIGHTBOX...
- Seite 135 CLIMATISATION En touchant l’icône correspondante l’on active le mode « climatisation ». Le set point (température souhaitée) peut être sélectionné dans une plage allant de 17° C (63° F) à 30° C (86° F). Le réglage s’effectue avec les flèches .
- Seite 136 Il est possible d’activer le mode « ECO » mais « MAX » (et éventuellement « DRY » si actif) est désactivé. PLEIN AIRCON 12V - RINGLIGHT & LIGHTBOX...
- Seite 137 Il est possible de choisir ce mode pour obtenir l’efficacité maximale de l’installation avec une absorption électrique minimale. En touchant l’icône commenceront à clignoter . Toucher encore jusqu’à ce qu’ se mette à clignoter avec . Avec les flèches se déplacer sur pour activer.
- Seite 138 En même temps que le mode « DRY », il est possible d’activer le mode « MAX » mais la vitesse de ventilation reste au minimum et il est impossible de la modifier. Il est possible d’activer le mode « ECO » mais « DRY » est désactivé. PLEIN AIRCON 12V - RINGLIGHT & LIGHTBOX...
- Seite 139 Il est possible de choisir ce mode pour paramétrer le fonctionnement nocturne. Paramétrer le nombre d’heures de fonctionnement souhaitées et le set point. L'installation fonctionnera pendant le nombre d’heures sélectionnées et s’éteindra lorsque le temps sera échu. Pendant le temps de fonctionnement, le set point augmentera de 1° toutes les deux heures. En touchant l’icône commenceront à...
- Seite 140 Il est possible d’activer le mode « SLEEP » mais « TIMER » est désactivé. En outre, il est possible d’activer les modes « MAX », « ECO » ou « DRY » aux conditions décrites ci- dessus. PLEIN AIRCON 12V - RINGLIGHT & LIGHTBOX...
- Seite 141 DIFFUSEUR D’AIR L’air traité est distribué par le diffuseur à l’intérieur du véhicule à travers deux ouvertures, avec la possibilité d’orienter le flux au moyen des déflecteurs réglables manuellement. La précision et la flexibilité directionnelle de l’air sont en effet optimisées, permettant une distribution même à...
-
Seite 142: Recommandations D'utilisation
élevées, grâce à son effet déshumidifiant. Il est donc inutile de demander une température de 18° C lorsque celle extérieure est de 35° C. PLEIN AIRCON 12V - RINGLIGHT & LIGHTBOX... - Seite 143 ENTRETIEN • L’entretien du climatiseur est très réduit. • Éviter de laisser le climatiseur inactif trop longtemps mais le mettre en fonction au moins une fois par mois même pendant l’hiver, car le fonctionnement garantit la lubrification de certains composants qui ont tendance à sécher s’ils ne sont pas utilisés pendant de longues périodes. •...
- Seite 144 éventuelles anomalies et les fuites de gaz. • Les éventuelles réparations ou les interventions pour la recharge et la récupération du réfrigérant doivent être effectuées auprès des ateliers agréés IndelB et par du personnel qualifié. PLEIN AIRCON 12V - RINGLIGHT & LIGHTBOX...
- Seite 145 DIAGNOSTIC Le diagnostic du système contrôle en permanence les différents paramètres et, si une anomalie se présente, l’icône s’affiche sur l’écran, accompagnée d’un code numérique; ces anomalies sont classées comme « WARNING » ou « ERREUR ». Les « WARNING » représentent des conditions environnementales non appropriées mais ils ne compromettent pas le fonctionnement de l’installation.
- Seite 146 73 / 74 / 75 / 76 / Si l’erreur persiste contacter l'assistance 77 / 78 / 79 / 80 / Erreur interne technique 81 / 82 / 83 / 84 / 85 / 86 / 87 PLEIN AIRCON 12V - RINGLIGHT & LIGHTBOX...
- Seite 147 TABLEAU PROBLEMES, CAUSES, REMEDES POSSIBLE CAUSE / SOLUTION La température est inférieure à 17° C / 63° F Contrôler la température de Set Point Charge de gaz insuffisante Compresseur endommagé Batteries d’échange thermique sales Électroventilateur évaporateur défectueuse Filtres air sales Electroventilateur condenseur défectueuse Trous d’évacuation condensation bouchés Joint d’étanchéité...
- Seite 148 PLEIN AIRCON 12V - RINGLIGHT & LIGHTBOX...
- Seite 149 MONTAGEANLEITUNGEN, NUTZUNG UND WARTUNG OFF IS A BRAND OF INDELB...
- Seite 150 PLEIN AIRCON 12V - RINGLIGHT & LIGHTBOX...
-
Seite 151: Bemerkungen Und Allgemeine Hinweise
PLEIN AIRCON 12V Die vorliegende Anleitung ist vor Beginn der Installation sorgfältig durchzulesen. Die in der vorliegenden Anleitung enthaltenen Anweisungen sind bei der Installation sorgfältig zu befolgen. Bei Personen- oder Sachschäden durch unsachgemäße Installation oder unzulässige Veränderungen an der Anlage lehnt der Hersteller jegliche Haftung ab. -
Seite 152: Auf Allen Blechoberflächen, Auf Denen Löcher, Schnitte Und Öffnungen
Berührung gelangt Bei Vereisungen: - die vereiste Partie sofort in KALTES Wasser tauchen. Falls kein Wasser parat ist, die vereiste Partie behutsam mit einem sauberen Tuch umwickeln. PLEIN AIRCON 12V - RINGLIGHT & LIGHTBOX... - Seite 153 Falls Kühlmittel mit den Augen in Kontakt geraten ist, diese sorgfältig mit ausreichend sauberem Wasser ausspülen und sicherheitshalber einen Arzt aufsuchen. Den Kontakt mit synthetischen Ölen vermeiden. Sich nach einem eventuellen Kontakt sorgfältig reinigen. Das in der Anlage enthaltenen Öl ist entflammbar. VOR SCHWEISSARBEITEN AM KÜHLKREIS MUSS SICHERGESTELLT WERDEN, DASS SICH KEIN KÜHLMITTEL MEHR IN DER ANLAGE BEFINDET.
- Seite 154 Plein-Aircon ist das Gerät von IndelB für die Klimatisierung von Wohnmobilen und teilintegrierten Fahrzeugen, die mit einer 12 V Gleichstromversorgung ausgestattet werden können (ein 12 V Gleichstrom - 230 V Wechselstrom 50 Hz Stromversorgungsset ist ebenfalls als Option im Katalog erhältlich). PLEIN AIRCON 12V - RINGLIGHT & LIGHTBOX...
- Seite 155 Kann in 2 Betriebsarten funktionieren (von denen eine optional ist): - mit 12 V (Standard-Betriebsart), an die Betriebsbatterie angeschlossen. Das Klimagerät kann sowohl im Stand als auch bei der Fahrt funktionieren. - mit 12 V und 230 V (optionale Betriebsart), an die Betriebsbatterie und an das Stromnetz angeschlossen (bedarf 230 V Smart Switch Transformer Satz, optional).
- Seite 156 Fahrtrichtung PLEIN AIRCON 12V - RINGLIGHT & LIGHTBOX...
-
Seite 157: Technische Daten
TECHNISCHE DATEN PLE IN AIRCON 12 V M O D EL L RI N GL IGHT & LIGHTB OX Kompressor Samsung - Einzelkompressor mit Dauerstrom 12 V cc Spannung 12 V cc - (115 V / 230 V) optional - Smart Switch power supply Kühlmittel R134a... -
Seite 158: Gelieferte Komponenten
GELIEFERTE KOMPONENTEN Dachklimagerät Luftverteiler Befestigungsrahmen Verlängerung für Luftkanal Dichtung 20x10 Dichtung Dachöffnung Bohr- und Hintere linke Dichtung Hintere rechte Dichtung Positionierschablone Stromkabel Anleitungen PLEIN AIRCON 12V - RINGLIGHT & LIGHTBOX... - Seite 159 Selbstschneidende Sechskantschraube Flanschmutter M5 Schraube 3.5x12.7 M8x90 Flache Unterlegscheibe Gewellte Unterlegscheibe Mutter M8 Ø8xØ24 Ø8 OFF IS A BRAND OF INDELB...
- Seite 160 Klimagerät zu montieren beabsichtigt, flach und eben ist. Wenn Sie Rippen, Unebenheiten und / oder Einbrüche im Dach ausgleichen müssen, können Sie auch die zweite mitgelieferte zusätzliche Dichtung verwenden. Hintere linke Hintere rechte Dichtung Dichtung DACH Die Einheit laut Angaben auf dem Fahrzeugdach positionieren. Fahrtrichtung PLEIN AIRCON 12V - RINGLIGHT & LIGHTBOX...
- Seite 161 Das Klimagerät muss flach installiert werden. Das vom Klimagerät gebildete Kondenswasser wird direkt auf das Fahrzeugdach abgeleitet. Beim Positionieren des Klimagerätes auf dem Dach kontrollieren, dass die auf der Einheit befindlichen Lufteintritts- und Auslassöffnungen keinesfalls blockiert oder verdeckt werden. Fahrtrichtung Kondenswasser Kondenswasser OFF IS A BRAND OF INDELB...
- Seite 162 Prüfen, ob in dem Dachabschnitt, in dem man die Öffnung vorzunehmen gedenkt, keine Stromkabel durchgehen. Die Öffnung zwischen den Dachrippen vornehmen, ohne diese zu beschädigen oder zu entfernen. Um die Schneidearbeiten zu erleichtern, sich der im Lieferumfang enthaltenen Schablone bedienen. PLEIN AIRCON 12V - RINGLIGHT & LIGHTBOX...
- Seite 163 Dichten Sie vorhandene oder hergestellte Löcher oder Öffnungen sorgfältig ab, um ein mögliches Eindringen von Wasser zu vermeiden. Dichten Sie mit einem geeigneten, flexiblen, nicht aushärtenden Produkt ab, zum Beispiel: "SikaLastomer-710", "Selleys Butyil Mastic", "Vaber SP5" oder ähnliche Produkte. Fahrtrichtung Wenn die Luke entfernt wurde, entfernen Sie die alte Dichtung und reinigen Sie in jedem Fall die Dachfläche um die Öffnung herum gründlich und entfernen Sie alle Rückstände.
- Seite 164 Öffnung ausreichend Platz für die Montage des Luftverteilers besteht und keine Interferenzen zwischen diesem und Deckenleuchten, Klappen, Trennwänden, Vorhängen etc. vorhanden sind. Die Stromkabel müssen durch das Fahrzeuginnere geführt und über die interne Luftabsaugöffnung des Klimagerätes angeschlossen werden. Stromkabel Fahrtrichtung PLEIN AIRCON 12V - RINGLIGHT & LIGHTBOX...
- Seite 165 Oder, alternativ, könnten sie über das Dach geführt (indem sie auf der Rückseite des Klimagerätes eingeführt werden) und durch eine Abdeckung (durch den Installateur vorzunehmen) geschützt werden. Fahrtrichtung Stromkabel OFF IS A BRAND OF INDELB...
- Seite 166 Dichtung links und die hintere Dichtung rechts anbringen, und darauf achten, dass sie an den hinteren Ecken der Dichtung Dachöffnung zusammentreffen. Fahrtrichtung Dichtung Dachöffnung Hintere linke Hintere rechte Dichtung Dichtung DACH PLEIN AIRCON 12V - RINGLIGHT & LIGHTBOX...
- Seite 167 Hintere rechte Dichtung Dichtung Dachöffnung Hintere linke Dichtung Fahrtrichtung BITTE BEACHTEN SIE: Wenn Sie Rippen, Unebenheiten und/oder Vertiefungen im Dach ausgleichen müssen, können Sie auch die zweite mitgelieferte Zusatzdichtung verwenden. Hintere linke Hintere rechte Dichtung Dichtung DACH OFF IS A BRAND OF INDELB...
- Seite 168 Betrieb gesetzt wird, für eine gewisse Zeit in Horizontallage gehalten werden, damit das Öl erneut korrekt in den Kreis zurückkehren kann. Dichtung 20 x 10 Fahrtrichtung Dichtung 20 x 10 Fahrtrichtung Dichtung 20 x 10 PLEIN AIRCON 12V - RINGLIGHT & LIGHTBOX...
- Seite 169 Vor dem Anbringen des Klimagerätes auf dem Dach muss auch der Umfang der Auflagerfläche mit dem entsprechenden Abdichtmittel abgedichtet werden, zum Beispiel: "SikaLastomer-710", "Selleys Butyil Mastic", "Vaber SP5" oder ähnliche Produkte. Mit der Montage des Klimagerätes fortfahren und es behutsam auf das Dach stellen, wobei die Öffnungen auf dem Boden des Gerätes mit der Öffnung (400x400) im Dach des Fahrzeuges übereinstimmen müssen.
- Seite 170 Die Verbindungskabel zum Luftverteiler führen über die Absaugöffnung der Innenluft und über die Öffnung (400x400) führen. Fahrtrichtung Verbindungskabel Verbindungskabel Luftverteiler Luftverteiler Fahrtrichtung Verbindungskabel Luftverteiler PLEIN AIRCON 12V - RINGLIGHT & LIGHTBOX...
- Seite 171 Für die Versorgungskabel hingegen bestehen zwei Möglichkeiten: VERLEGUNG DER VERSORGUNGSKABEL IM FAHRZEUGINNERN. Wählen Sie eine geeignete Trasse für die Verlegung der Versorgungskabel im Fahrzeuginneren, Beispielsweise im Zwischendach, und Verbinden Sie dann den Stecker mit dem Gegenstück in der Klimaanlage, über die Absaugöffnung der Innenluft, an. DACH DACH Stromkabel...
- Seite 172 Fahrtrichtung Stromkabel Fahrtrichtung PLEIN AIRCON 12V - RINGLIGHT & LIGHTBOX...
- Seite 173 ALTERNATIVLÖSUNG: VERLEGUNG VERSORGUNGSKABEL AUSSERHALB FAHRZEUGES. Das Kabelbaum für die Stromversorgung kann auch außerhalb, auf dem Fahrzeugdach, verlegt und von der Rückseite aus in das Klimagerät eingeführt werden, durch die vom Gitter verschlossene Öffnung, die entsprechend angepasst werden muss. Wenn man diese Lösung wählt, muss die Verkabelung durch eine Abdeckung (durch den Installateur vorzunehmen) bis zur Eintrittsstelle in das Fahrzeuginnere geschützt werden.
- Seite 174 Fahrtrichtung Stromkabel Fahrtrichtung Stromkabel PLEIN AIRCON 12V - RINGLIGHT & LIGHTBOX...
- Seite 175 In der Dachöffnung, vom Fahrzeuginneren aus, den Rahmen 4 zur Befestigung des Klimagerätes anbringen. Das Klimagerät 1 mithilfe der mitgelieferten Schrauben 7-8-9-10 am Befestigungsrahmen 4 (und somit am Dach) befestigen. Hinweis: die Schrauben M8x90 7 (zwischen Befestigungsrahmen und Gerätsockel) so fest anschrauben, dass die Auflagedichtung zusammengedrückt wird und die Dichtheit gesichert ist, und die beiden Muttern M8 10 auf dem Schraubgewinde freibleiben.
- Seite 176 5 Selbstschneidende Schraube 3.5x12.7 6 Flanschmutter M5 7 Sechskantschraube M8x90 8 Flache Unterlegscheibe Ø8xØ24 9 Gewellte Unterlegscheibe Ø8 10 Mutter M8 11 Dichtung 20x10 12 Dichtung Dachöffnung 13 Hintere linke Dichtung 14 Hintere rechte Dichtung PLEIN AIRCON 12V - RINGLIGHT & LIGHTBOX...
- Seite 177 Verwendung der Verlängerung des Luftkanales 3 Je nach Dachdicke kann die Verlängerung des Luftkanales benötigt werden, um die aufbereitete Luft korrekt von der Einlassöffnung des Gerätes zum Luftverteiler zu leiten. Für Dächer mit einer Dicke von 30 mm ist die Verlängerung nicht notwendig. Für Dächer mit einer Dicke von 70 mm ist die Verwendung der gesamten Verlängerung notwendig.
-
Seite 178: Elektroanschlüsse
M.GE BESCHREIBUNG Steuerkreisplatine Betriebsbatterie Verdampfersonde Sicherung 80 A Raumtemperatursonde Luftverteiler Außentemperatursonde 11.1 Display-Steuerplatine Hermetischer Kompressor 11.2 Led-Steuerplatine Kontrollzentrale hermetischer 11.3 Bluetooth-Steuerplatine Kompressor Anschlussstecker für das Luftverteiler Elektrogebläse Kondensator Anschlussstecker für Elektrogebläse Verdampfer Stromversorgung PLEIN AIRCON 12V - RINGLIGHT & LIGHTBOX... - Seite 179 OFF IS A BRAND OF INDELB...
-
Seite 180: Funktionsweise
Die App kann über oder heruntergeladen werden und verfügt über ein eigenes Lernprogramm, mit dem alle Funktionen erlernt werden können. Nachfolgend finden Sie die Anweisungen für die Bedienung des Systems über das Display auf dem Luftauslass. PLEIN AIRCON 12V - RINGLIGHT & LIGHTBOX... - Seite 181 DISPLAY • Bei ausgeschaltetem System zeigt das Display nur das Symbol • Durch Berühren des Displays oder Antippen des Symbols werden 3 Symbole angezeigt, die für die folgenden Betriebsarten stehen: BELEUCHTUNG / NUR GEBLÄSE / KLIMATISIERUNG. Wenn innerhalb von 5 Sekunden keine Wahl getroffen wird, schalten sie sich aus.
-
Seite 182: Beleuchtung
Wenn der Modus „Nur Lüftung“ aktiv ist, zeigt das Display z.B. an, um die Ventilatoraktivität und die eingestellte Geschwindigkeit darzustellen. Der Modus „Nur Lüftung“ kann unbegrenzt aktiv bleiben; daher muss, auch wenn das System durch das BATTERY SAVER-System gesichert ist, auf die Restladung der angeschlossenen Batterie geachtet werden. PLEIN AIRCON 12V - RINGLIGHT & LIGHTBOX... - Seite 183 KLIMATISIERUNG Durch Antippen des entsprechenden Symbols wird der „Klimatisierungsmodus“ aktiviert. Der Sollwert (gewünschte Temperatur) kann im Bereich von 17° C (63° F) bis 30° C (86° F) gewählt werden. Er kann mit den Pfeilen geändert werden. Jede Berührung entspricht 1°. Die Lüftungsgeschwindigkeit variiert automatisch (abhängig von der Wahl des Sollwerts und der Außentemperatur).
- Seite 184 Gleichzeitig mit dem „MAX“-Modus kann der „DRY"-Modus aktiviert werden, aber die Ventilationsgeschwindigkeit wird auf das Minimum eingestellt und kann nicht geändert werden. Es ist möglich, den „ECO“-Modus zu aktivieren, aber der „MAX“-Modus (und möglicherweise der „DRY"-Modus, wenn er aktiv ist) ist deaktiviert. PLEIN AIRCON 12V - RINGLIGHT & LIGHTBOX...
- Seite 185 Sie können diesen Modus wählen, um maximale Systemeffizienz bei minimalem Stromverbrauch zu erreichen. Wenn Sie auf des Symbol tippen, beginnen zu blinken. Tippen Sie erneut auf es zusammen mit blinkt. Gehen Sie zur Aktivierung mit den Pfeilen . Warten Sie ein paar Sekunden, um zu bestätigen. Zum Deaktivieren gehen Sie auf In diesem Modus kann der Sollwert (gewünschte Temperatur) nicht manuell geändert werden.
- Seite 186 Wenn der „DRY“-Modus aktiv ist, zeigt das Display Gleichzeitig mit dem „DRY“-Modus kann der „MAX“-Modus aktiviert werden, aber die Ventilationsgeschwindigkeit bleibt auf dem Minimum und kann nicht verändert werden. Der „ECO“-Modus kann aktiviert werden, aber „DRY“ ist deaktiviert. PLEIN AIRCON 12V - RINGLIGHT & LIGHTBOX...
- Seite 187 Sie können diesen Modus wählen, um den Nachtbetrieb einzustellen. Stellen Sie die gewünschte Anzahl der Betriebsstunden und den Sollwert ein. Das System läuft für die gewählte Anzahl von Stunden und schaltet sich nach Ablauf der Zeit ab. Während der Betriebszeit wird der Sollwert alle 2 Stunden um 1°...
- Seite 188 Wenn der „TIMER“-Modus aktiv ist, zeigt das Display Der „SLEEP“-Modus kann aktiviert werden, aber der „TIMER“ ist deaktiviert. Es ist auch möglich, die Modi „MAX“, „ECO“ oder „DRY“ unter den oben beschriebenen Bedingungen zu aktivieren. PLEIN AIRCON 12V - RINGLIGHT & LIGHTBOX...
- Seite 189 LUFTVERTEILER Die aufbereitete Luft wird vom Diffusor aus durch zwei Öffnungen im Fahrzeuginneren verteilt, wobei die Möglichkeit besteht, den Luftstrom mit Hilfe von manuell verstellbaren Deflektoren zu lenken. Die Präzision und Richtungsflexibilität der Luft wird optimiert, so dass sie auch vertikal verteilt werden kann.
-
Seite 190: Empfehlungen Zur Verwendung
In der Tat entfeuchtet Plein-Aircon neben der Kühlung der Luft diese auch und gestattet somit, dank seiner entfeuchtenden Wirkung, auch bei hohen Temperaturen einen guten thermischen Komfort. Es ist daher unnötig, 18° C anzufordern, wenn es draußen 35° C hat. PLEIN AIRCON 12V - RINGLIGHT & LIGHTBOX... -
Seite 191: Wartung
WARTUNG • Die Wartung des Klimagerätes ist äußerst gering. • Einen längeren Stillstand des Klimagerätes vermeiden, und es auch im Winter mindestens einmal monatlich eingeschalten, da durch den Betrieb die Schmierung einiger Bauteile gewährleistet wird, die bei längerem Stillstand ansonsten austrocknen würden. •... - Seite 192 Die hermetische Kühlanlage wird einer sorgfältigen Kontrolle unterzogen, um eventuelle Mängel und Gasleckagen zu ermitteln. • Eventuelle Reparaturen oder Maßnahmen zum Füllen und Ablassen des Kühlmittels müssen bei autorisierten Werkstätten von IndelB und durch Fachpersonal erfolgen. PLEIN AIRCON 12V - RINGLIGHT & LIGHTBOX...
- Seite 193 DIAGNOSTIK Die Systemdiagnose überwacht ständig verschiedene Parameter, und wenn eine Anomalie auftritt, wird auf dem Display das Symbol zusammen mit einem numerischen Code angezeigt; diese Anomalien werden als „WARNING“ oder „ERROR“ eingestuft. „WARNING" steht für ungeeignete Umgebungsbedingungen, beeinträchtigt aber nicht den Betrieb des Systems.
- Seite 194 Wenn der Fehler weiterhin besteht, an den 77 / 78 / 79 / 80 / Interner Fehler technischen Kundendienst wenden 81 / 82 / 83 / 84 / 85 / 86 / 87 PLEIN AIRCON 12V - RINGLIGHT & LIGHTBOX...
-
Seite 195: Störungen, Ursachen, Behebung
STÖRUNGEN, URSACHEN, BEHEBUNG MÖGLICHE URSACHE / BEHEBUNG Die Temperatur liegt unter 17° C / 63° F Die SET Point Temperatur prüfen Gasfüllung nicht ausreichend Kompressor beschädigt Wärmeaustauscherbatterien verschmutzt Verdampferelektrogebläse defekt Luftfilter verschmutzt Kondensatorelektrogebläse defekt Kondenswasserablässe verstopft Dichtung beschädigt Stromausfall OFF IS A BRAND OF INDELB... - Seite 196 PLEIN AIRCON 12V - RINGLIGHT & LIGHTBOX...
- Seite 197 INSTRUCCIONES DE MONTAJE, USO Y MANTENIMIENTO OFF IS A BRAND OF INDELB...
- Seite 198 PLEIN AIRCON 12V - RINGLIGHT & LIGHTBOX...
- Seite 199 PLEIN AIRCON 12V Leer atentamente todo el contenido del presente manual antes de proceder con la instalación. Para realizar la instalación, es importante atenerse escrupulosamente a las indicaciones del presente manual. El constructor se exime de toda responsabilidad en caso de daños a cosas o personas provocados por instalaciones o modificaciones no conformes del equipo.
- Seite 200 - nunca se debe calentar con una llama un circuito que contenga fluido refrigerante porque es fácilmente inflamable - en estado líquido el fluido refrigerante se evapora cuando entra en contacto con la atmósfera y congela todo aquello con lo que entra en contacto. PLEIN AIRCON 12V - RINGLIGHT & LIGHTBOX...
- Seite 201 En caso de congelación: - sumergir inmediatamente la parte congelada en agua FRÍA. A falta de agua, envolver delicadamente la parte congelada en un paño limpio. Si el fluido refrigerante entrara en contacto con los ojos, lavarlos abundantemente con agua limpia y por precaución consultar al médico.
- Seite 202 Plein-Aircon es la propuesta de IndeIB para el acondicionamiento de furgonetas camper y semintegrados para los que sea posible suministrar una alimentación eléctrica de 12 V cc (en catálogo, como extra, hay un kit para alimentación 12 V cc - 230 V ac 50 Hz). PLEIN AIRCON 12V - RINGLIGHT & LIGHTBOX...
- Seite 203 Tiene 2 modalidades de funcionamiento (una de ellas opcional): - a 12 V (modalidad estándar), conectado a la batería de servicios. El acondicionador funciona con el vehículo tanto parado como en marcha. - a 12 V y 230 V (modalidad opcional), conectado a la batería de servicios y a la red eléctrica (se necesita el kit de transformador Smart Switch 230 V opcional).
- Seite 204 Dirección de marcha PLEIN AIRCON 12V - RINGLIGHT & LIGHTBOX...
-
Seite 205: Características Técnicas
CARACTERÍSTICAS TÉCNICAS PLE IN AIRC ON 12 V MO D ELO RIN GL IGHT & LIGH TB OX Samsung - Compresor individual en corriente Compresor continua 12 V cc Tensión 12 V cc - (115 V / 230 V) opcional - Smart Switch power supply Refrigerante R134a... -
Seite 206: Componentes Suministrados
Acondicionador de techo Difusor de aire Bastidor de fijación Alargador para el Junta 20x10 Junta apertura techo conductor de aire Plantilla de perforación y Junta posterior izquierda Junta posterior derecha colocación Cableado de alimentación Manuales PLEIN AIRCON 12V - RINGLIGHT & LIGHTBOX... - Seite 207 Tornillo autorroscante Tornillo cabeza hex. Tuerca con flange M5 3.5x12.7 M8x90 Arandela plana Ø8xØ24 Arandela ondulada Ø8 Tuerca M8 OFF IS A BRAND OF INDELB...
- Seite 208 / o caídas en el techo, también puede utilizar la segunda junta adicional suministrada. Junta posterior Junta posterior izquierda derecha TECHO Colocar la unidad sobre el techo del vehículo tal y como se indica. Dirección de marcha PLEIN AIRCON 12V - RINGLIGHT & LIGHTBOX...
- Seite 209 El acondicionador debe instalarse a nivel. El agua de condensación producida por el acondicionador se descarga directamente sobre el techo del vehículo. A la hora de colocar el acondicionador en el techo, comprobar que las aberturas de entrada y salida de aire presentes sobre el grupo no estén obstruidas o cubiertas en modo alguno. Dirección de marcha Agua de condensación Agua de condensación...
- Seite 210 Comprobar que, en la sección del techo donde se desee realizar la abertura, no haya ningún tendido de cables eléctricos. Cuando realice la abertura, mantenerse en los espacios entre las nervaduras del techo sin extraerlas. Para facilitar las operaciones de corte, valerse de la plantilla que se suministra. PLEIN AIRCON 12V - RINGLIGHT & LIGHTBOX...
- Seite 211 Selle con cuidado los agujeros o aberturas existentes o realizados para evitar posibles infiltraciones de agua. Sellar con un producto adecuado, flexible y que no endurezca, por ejemplo: "SikaLastomer-710", "Selleys Butyil Mastic", "Vaber SP5" o productos similares. Dirección de marcha Si se ha quitado la trampilla, quitar la junta vieja y, en cualquier caso, limpiar con cuidado la superficie del techo alrededor de la abertura y eliminar los residuos.
- Seite 212 Los cables de la alimentación eléctrica deberán pasar al interior del vehículo y conectarse a través de la abertura de admisión de aire interior del acondicionador. Cableado de alimentación Dirección de marcha PLEIN AIRCON 12V - RINGLIGHT & LIGHTBOX...
- Seite 213 O, como solución alternativa, pueden trazarse sobre el techo (entrando por la parte trasera del acondicionador) y protegerse con una canaleta (montada por el instalador). Dirección de marcha Cableado de alimentación OFF IS A BRAND OF INDELB...
- Seite 214 ángulos posteriores de la junta apertura techo. Dirección de marcha Junta apertura techo Junta posterior Junta posterior izquierda derecha TECHO PLEIN AIRCON 12V - RINGLIGHT & LIGHTBOX...
- Seite 215 Junta posterior derecha Junta apertura techo Junta posterior izquierda Dirección de marcha Nota: si necesita compensar nervaduras, desniveles y / o caídas en el techo, también puede utilizar la segunda junta adicional suministrada. Junta posterior Junta posterior izquierda derecha TECHO OFF IS A BRAND OF INDELB...
- Seite 216 Junta 20 x 10 Dirección de marcha Junta 20 x 10 Dirección de marcha Junta 20 x 10 PLEIN AIRCON 12V - RINGLIGHT & LIGHTBOX...
- Seite 217 Antes de colocar el acondicionador sobre el techo, sellar el perímetro de apoyo con el sellador adecuado, por ejemplo: "SikaLastomer-710", "Selleys Butyil Mastic", "Vaber SP5" o productos similares. Proceder con el montaje del acondicionador, apoyándolo con cuidado sobre el techo mientras se hacen coincidir las aberturas del fondo del acondicionador con la abertura (400x400) del vehículo.
- Seite 218 A través de la abertura de admisión de aire interior y la abertura (400x400), sacar al exterior el cableado de conexión al difusor. Dirección de marcha Cableado de Cableado de conexión al conexión al difusor difusor Dirección de marcha Cableado de conexión al difusor PLEIN AIRCON 12V - RINGLIGHT & LIGHTBOX...
- Seite 219 En lugar, para los cables de alimentación existen dos posibilidades: TENDIDO DE LOS CABLES DE ALIMENTACIÓN AL INTERIOR DEL VEHÍCULO. Elegir el recorrido adecuado y pasar el cableado de alimentación al interior del vehículo, por ejemplo, en la cavidad del techo. A continuación, conectar el conector a la parte opuesta situada en el acondicionador, a través de la abertura de admisión de aire interior.
- Seite 220 Dirección de marcha Cableado de alimentación Dirección de marcha PLEIN AIRCON 12V - RINGLIGHT & LIGHTBOX...
- Seite 221 SOLUCIÓN ALTERNATIVA: TENDIDO DE LOS CABLES DE ALIMENTACIÓN HACIA EL EXTERIOR DEL VEHÍCULO. El cableado de alimentación suministrado también puede pasarse externamente, sobre el techo del vehículo, y hacerse entrar en el acondicionador desde el lado posterior, a través de la abertura cerrada por la rejilla que deberá...
- Seite 222 Dirección de marcha Cableado de alimentación Dirección de marcha Cableado de alimentación PLEIN AIRCON 12V - RINGLIGHT & LIGHTBOX...
- Seite 223 Trabajando desde el interior del vehículo, introducir el bastidor 4 de fijación del acondicionador en la abertura del techo. Fijar el acondicionador 1 al bastidor de fijación 4 (y también al techo) con los tornillos que se incluyen 7-8-9-10. Nota: apretar los tornillos M8x90 7 (entre el bastidor de fijación y la base del acondicionador) con un par de apriete de 2,5 Nm, hasta alcanzar una distancia que permita comprimir la junta de apoyo y asegurar su estanqueidad, dejando libres las dos tuercas M8 10 sobre la rosca del tornillo.
- Seite 224 6 Tuerca con flange M5 7 Tornillo cabeza hex. M8x90 8 Arandela plana Ø8xØ24 9 Rondella ondulata Ø8 10 Arandela ondulada M8 11 Junta 20x10 12 Junta apertura techo 13 Junta posterior izquierda 14 Junta posterior derecha PLEIN AIRCON 12V - RINGLIGHT & LIGHTBOX...
- Seite 225 Uso del alargador para el conductor de aire 3 En función del grosor del techo, podría ser necesaria la utilización del alargador para conducir el aire tratado en modo correcto entre la boca de abastecimiento del acondicionador y el difusor. Si el techo tiene un grosor de 30 mm no es necesario el uso del alargador.
-
Seite 226: Conexiones Eléctricas
Compresor hermético 11.2 Circuito electrónico led Centralita de control del compresor 11.3 Circuito electrónico bluetooth hermético Conector de conexión del difusor de Ventilador eléctrico condensador aire Ventilador eléctrico evaporador Conector de conexión de alimentación PLEIN AIRCON 12V - RINGLIGHT & LIGHTBOX... - Seite 227 OFF IS A BRAND OF INDELB...
-
Seite 228: Información General
, está dotada de tutorial propio con el que se puede conocer todas las funciones. Seguidamente se enumeran las indicaciones para el funcionamiento del equipo mediante la pantalla situada en el difusor de aire. PLEIN AIRCON 12V - RINGLIGHT & LIGHTBOX... - Seite 229 PANTALLA • Con el equipo apagado en la pantalla se visualiza solo el icono • Rozando la pantalla o tocando el icono , aparecen 3 iconos que representan los modos de funcionamiento: ILUMINACIÓN / SOLO VENTILANCIÓN / ACONDICIONAMIENTO. Si en 5 segundos no se realiza la selección, se apagan. •...
- Seite 230 El modo “solo ventilación” puede quedar activado por tiempo indeterminado; por este motivo, aunque el equipo está protegido con el sistema SALVABATERÍA, es necesario poner atención en la carga residual de la batería a la que está conectado. PLEIN AIRCON 12V - RINGLIGHT & LIGHTBOX...
- Seite 231 ACONDICIONAMIENTO Tocando el correspondiente icono se activa el modo “acondicionamiento”. El set point (temperatura deseada) puede ser elegido en el intervalo comprendido entre 17° C (63° F) a 30° C (86° F). Se puede modificar con las flechas . A cada toque corresponde 1°. La velocidad de ventilación varía de manera automática (en base a la selección del set point y de la temperatura exterior).
- Seite 232 Es posible habilitar el modo "DRY" mientas el modo "MAX" está activado, pero la velocidad de ventilación es llevada al mínimo y no se podrá modificar. Se puede habilitar el modo "ECO", pero "MAX" ( y eventualmente "DRY» si estuviera activado) queda deshabilitado. PLEIN AIRCON 12V - RINGLIGHT & LIGHTBOX...
- Seite 233 Es posible seleccionar este modo para obtener la máxima eficiencia del equipo con el mínimo de absorción eléctrica. Tocando el i icono iniciarán a parpadear . Tocar de nuevo hasta que aparezca intermitente junto a . Con las flechas ir a para habilitar.
- Seite 234 Es posible habilitar el modo "MAX" mientas el modo "DRY" está activado, pero la velocidad de ventilación es llevada al mínimo y no se podrá modificar. Se puede habilitar el modo "ECO", pero "DRY" queda deshabilitado. PLEIN AIRCON 12V - RINGLIGHT & LIGHTBOX...
- Seite 235 Se puede seleccionar este modo para configurar el funcionamiento nocturno. Seleccionar el número de horas de funcionamiento deseadas y el set point. El equipo funcionará durante el número de horas configurado y se apagará cuando haya pasado el tiempo. Durante el tiempo de funcionamiento el set point aumentará...
- Seite 236 Cuando el modo “TIMER” está activo, en la pantalla aparece visualizado Se puede habilitar el modo "SLEEP", pero "TIMER" queda deshabilitado. Además, se pueden habilitar los modos "MAX","ECO" o "DRY” con las condiciones anteriormente descritas. PLEIN AIRCON 12V - RINGLIGHT & LIGHTBOX...
- Seite 237 DIFUSOR DE AIRE El difusor distribuye el aire tratado en el interior del vehículo a través de dos aperturas, con la posibilidad de orientar el flujo mediante los deflectores regulables de modo manual. La precisión y la flexibilidad en la dirección del aire, de hecho, está optimizada, consintiendo la distribución también en dirección vertical.
-
Seite 238: Recomendaciones De Uso
Por ello, carece de sentido solicitar una temperatura de 18 ºC cuando en el exterior hay 35 ºC. PLEIN AIRCON 12V - RINGLIGHT & LIGHTBOX... - Seite 239 MANTENIMIENTO • La manutención del acondicionador es muy baja. • No dejar el acondicionador inactivo durante largos periodos de tiempo y encenderlo al menos una vez al mes, incluso durante los meses de invierno, ya que su funcionamiento garantiza la lubricación de algunos componentes que, de lo contrario, acabarían secándose tras permanecer inactivos mucho tiempo.
- Seite 240 La instalación frigorífica hermética ha sido sometida a estrictos controles para localizar posibles anomalías y fugas de gas. • Cualquier reparación o intervención necesaria para la carga y recuperación de refrigerante será realizada en un taller oficial IndelB por personal cualificado. PLEIN AIRCON 12V - RINGLIGHT & LIGHTBOX...
- Seite 241 DIAGNÓSTICO El diagnóstico del sistema monitoriza constantemente diferentes parámetros y cuando se presenta una anomalía, en la pantalla aparece el icono acompañado por un código numérico; estas anomalías se clasifican como "ADVERTENCIA" o "ERROR". Las "ADVERTENCIAS" representan condiciones ambientales no idóneas, pero no comprometen el funcionamiento del equipo.
- Seite 242 Si el error persiste, ponerse en contacto con el 77 / 78 / 79 / 80 / Error interno servicio técnico 81 / 82 / 83 / 84 / 85 / 86 / 87 PLEIN AIRCON 12V - RINGLIGHT & LIGHTBOX...
- Seite 243 TABLA PROBLEMAS, CAUSAS, REMEDIOS POSIBLE CAUSA / SOLUCIÓN La temperatura es inferior a 17° C / 63° F Controlar la temperatura de Set Point Carga de gas insuficiente Daño en el compresor Baterias de intercambio térmico sucias Electroventilador evaporador defectuoso Filtros aire sucios Electroventilador condensador defectuoso Orificios descarga condensaciòn obstruidos...
- Seite 244 Indel B S.p.a. Via Sarsinate, 27 47866 - Sant’Agata Feltria (RN), Italia T. 0541 848 711 - F. 0541 848 741 info@indelb.com For sales and service in USA: Indel B North America 100 Triport Circle Georgetown, KY 40324 Ph 502.863.0373 infoUS@indelB.com OFF.INDELB.COM...