Samsung PS50B579T6S Bedienungsanleitung
5-serie
Inhaltsverzeichnis
Verfügbare Sprachen
Verfügbare Sprachen
Contact SAMSUNG WORLD-WIDE
If you have any questions or comments relating to Samsung products, please contact the SAMSUNG customer care centre.
Country
Customer Care Centre
AUSTRIA
0810 - SAMSUNG(7267864, € 0.07/min)
BELGIUM
02 201 2418
800 - SAMSUNG (800-726786)
CZECH REPUBLIC
Samsung Zrt., česká organizační složka, Oasis Florenc, Sokolovská394/17, 180 00, Praha 8
DENMARK
8 - SAMSUNG(7267864)
EIRE
0818 717 100
ESTONIA
800-7267
FINLAND
30 - 6227 515
3260 'dites' SAMSUNG (€ 0,15/Min)
FRANCE
0825 08 65 65 (€ 0.15/Min)
GERMANY
01805 - SAMSUNG(7267864, € 0.14/Min)
HUNGARY
06 - 80 - SAMSUNG(7267864)
ITALIA
800 - SAMSUNG(7267864)
KAZAKHSTAN
8-10-800-500-55-500
KYRGYZSTAN
00-800-500-55-500
LATVIA
8000-7267
LITHUANIA
8-800-77777
LUXEMBURG
02 261 03 710
NETHERLANDS
0900 - SAMSUNG(7267864, € 0.10/Min)
NORWAY
3 - SAMSUNG(7267864)
0 - 801 - 1SAMSUNG(172678)
POLAND
022 - 607 - 93 - 33
PORTUGAL
808 20 - SAMSUNG(7267864)
RUSSIA
8-800-555-55-55
SLOVAKIA
0800 - SAMSUNG(7267864)
SPAIN
902 - 1 - SAMSUNG (902 172 678)
SWEDEN
075 - SAMSUNG(726 78 64)
Switzerland
0848 - SAMSUNG(7267864, CHF 0.08/min)
TADJIKISTAN
8-10-800-500-55-500
Turkey
444 77 11
U.K
0845 SAMSUNG(7267864)
UKRAINE
8-800-502-0000
UZBEKISTAN
8-10-800-500-55-500
Web Site
www.samsung.com/at
www.samsung.com/be
www.samsung.com/cz
www.samsung.com/dk
www.samsung.com/ie
www.samsung.ee
www.samsung.com/fi
www.samsung.com/fr
www.samsung.de
www.samsung.com/hu
www.samsung.com/it
www.samsung.com/kz_ru
www.samsung.com/lv
www.samsung.lt
www.samsung.com/lu
www.samsung.com/nl
www.samsung.com/no
www.samsung.com/pl
www.samsung.com/pt
www.samsung.ru
www.samsung.com/sk
www.samsung.com/es
www.samsung.com/se
www.samsung.com/ch
www.samsung.com/tr
www.samsung.com/uk
www.samsung.ua
www.samsung.com/kz_ru
BN68-02147A-PR
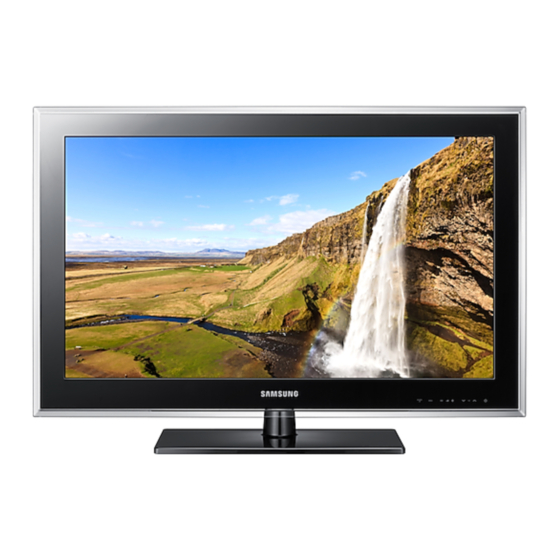
Plasma TV
user manual
imagine
the possibilities
Thank you for purchasing this Samsung product.
To receive more complete service, please register
your product at
www.samsung.com/register
Model
Serial No.
Kapitel
Inhaltsverzeichnis
Fehlerbehebung

Verwandte Anleitungen für Samsung PS50B579T6S


Inhaltszusammenfassung für Samsung PS50B579T6S
-
Seite 59: Benutzerhinweise
6. Für weitere Informationen setzen Sie sich bitte mit dem Samsung-Kundendienstzentrum in Verbindung. Wenden Sie sich an SAMSUNG WORLDWIDE Bei Fragen oder Hinweisen zu Produkten von Samsung setzen Sie sich bitte mit dem SAMSUNG-Kundendienstzentrum in Verbindung. (Siehe Abschnitt “Wenden Sie sich an Samsung”) Die Abbildungen und Illustrationen in diesem Handbuch dienen nur zur Information und können vom tatsächlichen... - Seite 60 Inhalt Anschließen und Vorbereiten des Fernsehgeräts Media Play ■ Lieferumfang ................4 ■ Anschließen eines USB-Geräts ..........31 ■ Standfuß verwenden ..............4 ■ Verwenden der Medienwiedergabefunktion ......32 ■ Montieren des Standfußes (modellabhängig) ......4 ■ Verwenden der Fotoliste ............
-
Seite 61: Anschließen Und Vorbereiten Des Fernsehgeräts Lieferumfang
Anschließen und Vorbereiten des Fernsehgeräts Lieferumfang Bedienungsanleitung Garantiekarte / Kurzanleitung Fernbedienung / Netzkabel Reinigungstuch Haltering (4 Stück) zur Konfiguration / Kurze AAA-Batterien (2 Stück) (Informationen hierzu Aufstellanleitung finden Sie auf Seite 44) (Nicht überall verfügbar) Schrauben (4 Stück) Untere Abdeckung Kabelschlauch Ferritkern für Netzkabel Ferritkern für... -
Seite 62: Bedienfeld
Bedienfeld Tasten auf der Vorderseite Berühren Sie die verschiedenen Tasten, um die gewünschten Funktionen Die Produktfarbe und -form können sich je nach Modell unterscheiden. zu nutzen. 1 SOURCE Schaltet zwischen den verfügbaren Signalquellen um Hiermit wechseln Sie den Sender. Im Bildschirmmenü (TV, Ext1, Ext2, AV, PC, Component, HDMI1, HDMI2/DVI, können Sie die -Schaltflächen wie die Tasten ▲... -
Seite 63: Anschlussfeld
Anschlussfeld Rückseite oder Kabelfernsehen Netzwerk oder Form und Farbe des Geräts können sich je nach Modell unterscheiden. Stellen Sie sicher, dass der Fernseher und alle angeschlossenen Geräte ausgeschaltet sind, bevor Sie weitere Geräte anschließen. Achten Sie beim Anschließen eines externen Geräts auf die Farbcodierung: Stecker und Buchse müssen die gleiche Farbe aufweisen. -
Seite 64: Seitenverkleidung
Regionen nicht unterstützt. Fragen Sie diesbezüglich Setzen Sie eine CI(CI+)-Karte (Common Interface) in den Steckplatz ein. (Informationen hierzu finden Sie auf Seite 26) Ihren offiziellen Samsung-Händler. Ohne eingelegte CI(CI+)-Karte zeigt das Fernsehgerät Die CI+-Funktion steht nur im Modell PS********P zur auf einigen Kanälen ein gestörtes Signal an. -
Seite 65: Fernbedienung
Fernbedienung Die Reichweite der Fernbedienung beträgt ca. 7 m. Die Leistungsfähigkeit der Fernbedienung kann durch starke Lichteinstrahlung beeinträchtigt werden. 1 POWER Taste Teletextfunktionen (Netztaste zum An- und Ausschalten 2 Teletextanzeige beenden des Fernsehgeräts) (modellabhängig) 2 TV-Modus direkt aufrufen 7 Teletext-Modus auswählen 3 Zifferntasten für direkte (LIST/FLOF) Programmplatzeingabe... -
Seite 66: Batterien In Die Fernbedienung Einsetzen
Batterien in die Fernbedienung einsetzen 1. Heben Sie die Abdeckung auf der Rückseite der Fernbedienung an, wie in der Abbildung dargestellt. 2. Legen Sie zwei AAA-Batterien ein. Achten Sie darauf, dass die Pole der Batterien wie im Batteriefach angezeigt ausgerichtet sind. 3. -
Seite 67: Menüs Anzeigen
Menüs anzeigen 1. Drücken Sie die Taste MENU bei angeschaltetem Gerät. Das Hauptmenü wird auf dem Bildschirm angezeigt. Links im Menü sind Symbole zu sehen Bild, Ton, Sender, Einstellungen, Eingang, Anwendung, Unterstützung. 2. Wählen Sie mit den Tasten ▲ oder ▼ eines der Symbole aus. Drücken Sie dann die Taste ENTER E , um in das Untermenü... -
Seite 68: Plug & Play-Funktion
Plug & Play-Funktion Wenn das Fernsehgerät zum ersten Mal eingeschaltet wird, werden automatisch die Grundeinstellungen vorgenommen. Der Bildschirmschoner wird aktiviert, wenn im Plug & Play Betrieb länger als 1 Minute keine Eingabe mit der Fernbedienung erfolgt. Der Bildschirmschoner wird aktiviert, wenn länger als 15 Minuten kein Betriebssignal anliegt. Wenn Sie versehentlich das falsche Land für Ihren Fernseher einstellen, werden die Zeichen auf dem Bildschirm möglicherweise falsch angezeigt. -
Seite 69: Sender
Sender Speichern von Sendern TV-Empfang ❑ Auswählen eines für digitale Übertragungen geeigneten TV-Empfangstyps. • Antenne : Wählen Sie Antenne für den Empfang von Digitalsendungen. TV-Empfang : Satellit ► • Kabel : Wählen Sie Kabel für den Empfang von Digitalsendungen. Land •... -
Seite 70: Suchoptionen Für Kabel
Digitaler Sender (Digital) „ Manuelles Speichern von digitalen Kanälen. Digitalsender sind nur im DTV-Modus verfügbar. Sender • : Stellen Sie die Sendernummer mit den Tasten ▲, ▼ oder einer Zifferntaste (0 – 9) ein. Frequency • : Einstellen der Frequenz mit Hilfe der Zifferntasten (0–9). •... -
Seite 71: Feinabstimmung (Nur Analoge Kanäle)
Ausführlich Übersicht DTV - Kabel 900 f tn Freshmen On Campus 2:00 DTV - Kabel 900 f tn 2:10 Di 1 Jun Street Hypnosis 2:30 5:00 Booze Britain Freshmen On Campus ▼ 2:00 - 2:30 Ansehen Information Seite „ Ausführlich „... - Seite 72 Satellitensystem einrichten ❑ Stellen Sie das LNB für den Empfang des gesendeten Signals ein. Satellitensystem einrichten Die Option Satellitensystem einrichten ist verfügbar, wenn TV-Empfang auf LNB-Versorgung : Ein ► Satellit eingestellt ist. LNB-Einstellungen Der Eingabefenster für die PIN wird geöffnet. Positionierereinstellungen Ehe Sie Automatisch Speichern ausführen, nehmen Sie die Einstellungen unter Alle Einstellungen zurücksetzen...
-
Seite 73: Verwalten Von Sendern
Verwalten von Sendern Mit diesem Menü können Sie Favoriten hinzufügen, löschen oder einstellen und den Übersicht Programmführer für Digitalsendungen verwenden. Standard : Ausführlich Wählen Sie im Fenster Alle, oder Eigene Kanäle oder Vorgemerkt einen Sender. Senderliste ► Drücken Sie hierzu die Tasten ▲ oder ▼ und dann die Taste ENTERE. Nun Feinabstimmung können Sie den gewählten Sender ansehen. - Seite 74 Timer-Wiedergabe „ Wenn Sie ein Programm zum Anschauen vorgemerkt haben, wechselt das Fernsehgerät automatisch zum vorgemerkten Sender in der Senderliste, auch wenn Sie gerade einen anderen Sender anschauen. Um ein Programm vorzumerken, müssen Sie zuerst die Uhrzeit einstellen. (siehe Seite 25) Sie können nur gespeicherte Kanäle vormerken.
-
Seite 75: Bild
Bild Ändern der Bildeinstellungen Modus ❑ Sie können den Bildstandard auswählen, der für Ihre Sehgewohnheiten am besten geeignet ist. Modus : Standard ► Dynamisch / Standard / Eco / Film „ Zellhelligkeit Kontrast : 95 Drücken Sie die Taste TOOLS, um das Menü Extras anzuzeigen. Sie können den Helligkeit : 45 Bildmodus durch Auswahl von Extras →... -
Seite 76: Weißabgleich
Weißabgleich „ Um natürlichere Bildfarben zu erhalten, können Sie die Farbtemperatur anpassen. • R-Offset / G-Offset / B-Offset / R-Gain / G-Gain / B-Gain : Wenn Sie den Wert anpassen, wird der Bildschirm aktualisiert und neu angezeigt. Reset • : Hiermit stellen Sie den Standard-Weißabgleich wieder ein. Hautton „... -
Seite 77: Filmmodus
1080 Full-HD Motion Demo → Aus / Ein „ SaDie neue Generation der Samsung Plasmabildschirme bietet höchste Klarheit der Bewegungen bei Full HD - optimal für Sportsendungen, Filme und Spiele mit schnellen Bewegungen. Diese Funktion ist im PC-, Soiele- oder Media Play-Modus nicht verfügbar. -
Seite 78: Fernsehgerät Mithilfe Des Pcs Einstellen
Fernsehgerät mithilfe des PCs einstellen Voreinstellung: Drücken Sie die Taste SOURCE, um den Modus PC einzustellen. Farbe : 55 Farbton (G/R) : G50/R50 Autom. Einstellung ❑ Autom. Einstellung ► Die automatische Einstellung ermöglicht eine automatische Anpassung des PC-Monitors PC-Bildschirm an das eingehende PC-Videosignal. Die Werte für “Fein”, “Grob” und “position” werden Erweiterte Einstellungen automatisch eingestellt. -
Seite 79: Pc-Anzeige
PC-Anzeige Konfigurieren Ihrer PC-Software (unter Windows XP) ❑ Im Folgenden sind die typischen Anzeigeeinstellungen für einen Windows-Computer aufgeführt. Die von Ihrem PC angezeigten Fenster entsprechen je nach installierter Windows-Version und verwendeter Grafikkarte möglicherweise nicht genau der Abbildung. 1. Klicken Sie im Startmenü von Windows auf die Systemsteuerung. 2. -
Seite 80: Ton
Tonstandard wählen Modus ❑ Stellen Sie den Audiomodus ein, der am besten zur jeweiligen Sendung passt. Standard / Musik / Film / Klare Stimme / Benutzerd. „ Modus : Benutzerd. ► Equalizer Drücken Sie die Taste TOOLS, um das Menü Extras anzuzeigen. Sie können SRS TruSurround HD : Aus den Tonmodus durch Auswahl von Extras →... -
Seite 81: Ton Zurücksetzen
Auto. Lautst. → Aus / Ein ❑ Aufgrund unterschiedlicher Signalbedingungen unterscheiden sich Fernsehsender in der Lautstärke, so dass es erforderlich sein kann, die Lautstärke beim Umschalten zwischen Sendern jedes Mal nachzuregeln. Mit der Funktion für automatische Lautstärkeeinstellung wird die Lautstärke automatisch bei starkem Modulationssignal verringert und bei schwachem Modulationssignal erhöht. -
Seite 82: Funktionen
Funktionen Einstellen der Uhrzeit ❑ Plug & Play Die Uhr muss eingestellt werden, damit Sie die verschiedenen Timerfunktionen des Fernsehgeräts verwenden können. Zeit ► Jedes Mal, wenn Sie die Taste INFO drücken, wird die aktuelle Zeit angezeigt. Sprache Untertitel Wenn Sie das Netzkabel ziehen, müssen Sie die Uhr erneut einstellen. Digitaltext : Aktivieren Uhr-Modus... -
Seite 83: Konfigurieren Der Menüeinstellungen
Konfigurieren der Menüeinstellungen Sprache ❑ Sie können die Menüsprache festlegen. Plug & Play Untertitel Zeit ❑ Sprache ► Sie können Untertitel aktivieren und deaktivieren. Mit diesem Menü legen Sie den Untertitelmodus fest. Die Option “Normal” im Menü ist die Basisoption für Untertitel, Untertitel und “Schwerhörig”... -
Seite 84: Allgemein
BD Wise → Aus / Ein „ BD Wise ist eine Funktion, mit der Sie automatisch für alle angeschlossenen Geräte von Samsung, die BD Wise unterstützen, den optimalen Zustand einstellen können. Diese Funktion ist nur aktiv, wenn ein externes Gerät über HDMI mit dem TV verbunden ist. -
Seite 85: Common Interface
In den Anwendungsinformationen wird die CI-Karte beschrieben. Sie können das CAM-Modul unabhängig davon anschließen, ob das Fernsehgerät angeschaltet ist oder nicht. Zugangsmodule werden in einigen Ländern und Regionen nicht unterstützt. Fragen Sie diesbezüglich Ihren offiziellen Samsung- Händler. Deutsch - 28... -
Seite 86: Unterstützung / Eingang Unterstützung
Wenn das Testbild nicht angezeigt wird oder wenn es verrauscht ist, wählen Sie Ja. Wenn das Testbild fehlerlos angezeigt wird, wählen Sie Nein. • : Möglicherweise liegt ein Problem mit dem Fernsehgerät vor. Hilfe erhalten Sie beim Callcenter von Samsung. • Nein : Möglicherweise liegt ein Problem mit einem externen Gerät vor. -
Seite 87: Hd-Anschlussplandie Kurze Einführung
Mit den Tasten ◄ oder ► können Sie zur vorigen oder zur nächsten Seite wechseln. Samsung kontaktieren ❑ Wenden Sie sich an das Callcenter von Samsung oder suchen Sie auf der Website nach Informationen für das Gerät. Quellen / Name bearbeiten Quellen ❑... -
Seite 88: Media Play
USB-Kompatibilitätsprobleme auftreten. Ehe Sie Ihr Gerät an das Fernsehgerät anschließen, sichern Sie Ihre Dateien, um eventuellem Datenverlust vorzubeugen. SAMSUNG haftet nicht für Verlust und Beschädigung von Daten. Trennen Sie das USB-Gerät nicht, solange Daten geladen werden. MSC unterstützt MP3- und JPEG-Dateien, wogegen PTP-Geräte nur JPEG-Dateien unterstützen. -
Seite 89: Verwenden Der Medienwiedergabefunktion
Verwenden der Medienwiedergabefunktion Mit dieser Funktion können Sie auf einem USB-Speichermedium (MSC) gespeicherte Foto- und Musik anzeigen bzw. wiedergeben. Möglicherweise treten bei lizenzfreien Multimediadateien weniger Probleme auf. Starten der Medienwiedergabefunktion ❑ Media Play 851.98MB/995.00MB Frei 1. Drücken Sie die MENU-Taste. Wählen Sie durch Drücken der Tasten ▲ oder ▼ USB : USB-Name die Option Anwendung, und drücken Sie dann die Taste ENTER 2. -
Seite 90: Verwenden Der Fernbedienungstasten Im Menü Media Play
Verwenden der Fernbedienungstasten im Menü Media Play ❑ Taste Vorgang ▲/▼/◄/► Cursor bewegen und Elemente auswählen. Markiertes Element auswählen. ENTER Abspielen oder Anhalten der Dateien wahrend der Wiedergabe von Diashows oder Musikdateien. Abspielen oder Anhalten der Präsentation, Musik oder Film-Datei. RETURN Kehren Sie zum vorherigen Menü... -
Seite 91: Anzeigen Eines Fotos Oder Einer Diashow
Anzeigen eines Fotos oder einer Diashow Anzeigen von Diashows ❑ 1. Wählen Sie das gewünschte Foto mit den Tasten ◄ or ► aus der Fotoliste aus. Normal IMG_0335.JPG 3648x2432 2009/3/15 2. Drücken Sie die Taste TOOLS. 3. Wählen Sie durch Drücken der Tasten ▲ oder ▼ die Option Diashow, und drücken Sie dann die Taste ENTER Alle Dateien in der Fotoliste werden für die Diashow verwendet. -
Seite 92: Verwenden Der Musiklistee
Verwenden der Musiklistee 1. Drücken Sie die MEDIA.P-Taste auf der Fernbedienung, um das Media Play-Menü anzuzeigen. 2. Wählen Sie durch Drücken der Tasten ◄ oder ► die Option Music, und drücken Sie dann die Taste ENTER button. Energetic 3. Drücken Sie die Taste ENTER , um die Musik in der vom Benutzer gewählten Carol kidd Mr A-Z... -
Seite 93: Wiedergeben Von Musik
Wiedergeben von Musik Wiedergeben einer Musikdatei ❑ 1. Wählen Sie mit den Tasten ◄ oder ► eine Musikdatei, die abgespielt werden soll. 00:00:02 / 00:04:55 2. Drücken Sie die Taste (Play)/ENTER When I Dream Geek In The Pink Heaven Dieses Menü zeigt nur Dateien mit der Dateinamenserweiterung MP3. Dateien mit anderer Dateinamenserweiterung werden nicht angezeigt, auch wenn sie auf dem gleichen USB-Gerät gespeichert wurden. -
Seite 94: Bild-/Musikeinstellungen Mit Media Play
Bild-/Musikeinstellungen mit Media Play Während Sie mit Media Play eine Diashow abspielen oder Musik hören, können Sie das Bild und den Ton einstellen. Bildeinstellungen ❑ 1. Drücken Sie während einer Diashow oder beim Abspielen von Musik die Taste Bildeinstellungen TOOLS. Bildmodus ◄... -
Seite 95: Informationen Zu Anynet
Informationen zu Anynet+ Anschließen von Anynet+ -Geräten Bei Anynet+ handelt es sich um eine Funktion, mit der Sie alle angeschlossenen Samsung-Geräte, die Anynet+ unterstützen, mit der Fernbedienung für Ihr Samsung-Fernsehgerätsteuern können. Das Anynet+-System unterstützt nur Anynet+-fähige Samsung-Geräte. Wenn Sie wissen möchten, ob Ihr Samsung-Gerät diese Funktion unterstützt, suchen Sie das Anynet+-Logo auf Ihrem Gerät. -
Seite 96: Einrichten Von Anynet
Einrichten von Anynet Einrichten von Anynet+(HDMI-CEC) ❑ Media Play (USB) Drücken Sie die Taste TOOLS, um das Menü. Extras anzuzeigen. Sie können das Anynet+ (HDMI-CEC) ► Anynet -Menü auch durch Auswahl von Extras → Anynet+(HDMI-CEC) auswählen. Anynet+ (HDMI-CEC) → Aus / Ein „... -
Seite 97: Aufnahme
Bei Anschluss von mehr als einem Aufnahmegerät werden sie als (*Aufnahmegerät) angezeigt, bei Anschluss eines einzigen Aufnahmegeräts erfolgt die Anzeige als (*Geräte_Name). Aufnahme Sie können Fernsehprogramme mit einem Samsung-Recorder aufnehmen. 1. Drücken Sie die Taste TOOLS. Drücken Sie die Taste ENTER E , um Fernsehen Anynet+ (HDMI-CEC) auszuwählen. -
Seite 98: Tonwiedergabe Mit Einem Receiver
Tonwiedergabe mit einem Receiver Sie können die Tonwiedergabe über einen Receiver anstelle des TV-Lautsprechers laufen lassen. Fernsehen 1. Drücken Sie die Taste TOOLS. Drücken Sie die Taste ENTER E , um Geräteliste Anynet+ (HDMI-CEC) auszuwählen. Aufnehmen : DVDR 2. Wählen Sie mit den Tasten ▲ oder ▼ die Option Receiver. Drücken Sie die Taste DVDR MENU DVDR INFO ◄... -
Seite 99: Empfehlungen Für Den Betrieb Videotextfunktion
Empfehlungen für den Betrieb Videotextfunktion Die meisten Fernsehsender bieten über Videotext Informationen an. Auf der Videotext-Indexseite finden Sie Verwendungshinweise zum Videotext. Darüber hinaus können Sie über die Tasten der Fernbedienung nach Bedarf verschiedene Optionen einstellen. Für die korrekte Anzeige von Videotextinformationen muss der Senderempfang einwandfrei sein. Andernfalls können Informationen unvollständig sein oder einige Seiten nicht angezeigt werden. -
Seite 100: Abschnitt Inhalt
Schrauben nicht zu fest an, weil Sie so das Produkt beschädigen könnten oder das Produkt dadurch herunterfallen könnte, was zu Verletzungen führen kann. Samsung haftet nicht bei derartigen Unfällen. Samsung haftet nicht für Geräteschäden oder Verletzungen, wenn eine Wandhalterung verwendet wird, die nicht dem VESA-Standard entspricht oder nicht spezifiziert ist, oder wenn der Verbraucher die Installationsanleitung für das Produkt nicht befolgt. -
Seite 101: Vorbereitung Für Die Befestigung Der Wandhalterung An Der Wand
1. Befestigen Sie die Wandhalterung mit einem Anzugsmoment von maximal 15kgf·cm. Denken Sie daran, dass Bauteile bei einem höheren Anzugsmoment beschädigt werden können. 2. Zum Zubehörsatz gehört ein Haltering [ 2 ] zum Befestigen der Wandhalterungen von Drittanbietern am Samsung-Fernseher. (Fall B) Drehen Sie die Schrauben bis zum Anschlag in die Bohrung [ 1 ], wenn Sie die Wandhalterung an der Wand Anbringen. -
Seite 102: Absichern Des Einbaubereichs
Brand ausbricht oder andere Probleme mit dem Gerät auftreten. Stellen Sie das Gerät so auf, dass die in der Abbildung gezeigten Mindestabstände eingehalten werden. Verwenden Sie nur Teile von Samsung Electronics, wenn Sie einen Standfuß oder eine Wandhalterung einsetzen. Wenn Sie Teile eines anderen Herstellers verwenden, kann es zu Problemen mit dem Gerät oder zu Verletzungen kommen, weil das Gerät herunterfällt. -
Seite 103: Fehlerbehebung
Fehlerbehebung Bevor Sie sich über Ihren Fachhändler an den Kundendienst von Samsung wenden, führen Sie bitte die nachstehend beschriebenen einfachen Maßnahmen durch. Wenn Sie das Problem nicht anhand der angegebenen Hinweise lösen können, notieren Sie Modell- und Seriennummer des Fernsehgeräts, und wenden Sie sich an Ihren Fachhändler. -
Seite 104: Technische Daten
Technische Daten Die Beschreibungen und Eigenschaften in diesem Handbuch werden nur zu Informationszwecken herausgegeben und können ohne vorherige Ankündigung geändert werden. Modellname PS50B579 Bildgröße (Diagonal) 50 inch PC-Auflösung (optimal) 1920 x 1080 @ 60 Hz Audio (Ausgang) 10 W x 2 Abmessungen (BxHxT) Gehäuse 1240 x 756 x 74 mm...