Herunterladen Inhalt Inhalt Diese Seite drucken
Inhaltsverzeichnis

Werbung

Verfügbare Sprachen
  • DE

Verfügbare Sprachen

  • DEUTSCH, seite 90
Dell™ OptiPlex™ 320
Quick Reference Guide
Models DCSM, DCNE
w w w . d e l l . c o m | s u p p o r t . d e l l . c o m

Werbung

Inhaltsverzeichnis
loading

Inhaltszusammenfassung für Dell OptiPlex 320 dcsm

  • Seite 1 Dell™ OptiPlex™ 320 Quick Reference Guide Models DCSM, DCNE w w w . d e l l . c o m | s u p p o r t . d e l l . c o m...
  • Seite 2 Reproduction in any manner whatsoever without the written permission of Dell Inc. is strictly forbidden. Trademarks used in this text: Dell, OptiPlex, and the DELL logo are trademarks of Dell Inc.; Microsoft and Windows are registered trademarks of Microsoft Corporation; Intel and Pentium are registered trademarks of Intel Corporation.
  • Seite 3: Inhaltsverzeichnis

    ....... . Dell Diagnostics .......
  • Seite 4 Contents...
  • Seite 5: Finding Information

    You can use the CD to reinstall drivers (see • Desktop System Software (DSS) "Reinstalling Drivers and Utilities" in your online User’s Guide), to run the Dell Diagnostics (see "Dell Diagnostics" on page 30), or to access your documentation. Readme files may be...
  • Seite 6 • Specifications Microsoft Windows XP Help and Support Center • How to configure system settings Click Start→ Help and Support→ Dell User and System • How to troubleshoot and solve problems Guides→ System Guides. Click the User’s Guide for your computer.
  • Seite 7 Select your region or business segment to view the courses appropriate support site. • Community — Online discussion with other Dell customers • Upgrades — Upgrade information for components, such as memory, the hard drive, and the operating system •...
  • Seite 8: Setting Up Your Computer

    Setting Up Your Computer CAUTION: Before performing any of the procedures in this section, follow the safety instructions in Product Information Guide. NOTICE: If your computer has an expansion card installed (such as a modem card), connect the appropriate cable to the card, not to the connector on the back panel.
  • Seite 9 3 Connect the monitor using either the white DVI cable or the blue VGA cable (do not connect both cables). Align and gently insert the monitor cable to avoid bending connector pins. Tighten the thumbscrews on the cable connectors. NOTE: Some monitors have the video connector underneath the back of the screen.
  • Seite 10 Power Connections NOTICE: To avoid damaging a computer with a manual voltage-selection switch, set the switch for the voltage that most closely matches the AC power available in your location. NOTICE: In Japan, the voltage selection switch must be set to the 115-V position even though the AC power available in Japan is 100 V.
  • Seite 11: System Views

    System Views Mini Tower Computer — Front View location of Service Tag Use the Service Tag to identify your computer when you access the Dell Support website or call technical support. CD/DVD drive Insert a CD or DVD (if supported) into this drive.
  • Seite 12 USB 2.0 connectors (2) Use the USB connectors on the front of the computer for devices that you connect occasionally, such as joysticks or cameras, or for bootable USB devices. It is recommended that you use the USB connectors on the back of the computer for devices that typically remain connected, such as printers and keyboards.
  • Seite 13: Mini Tower Computer - Back View

    Mini Tower Computer — Back View cover release latch This latch allows you to open the computer cover. padlock ring Insert a padlock to lock the computer cover. power connector Insert the power cable into this connector. Quick Reference Guide...
  • Seite 14: Mini Tower Computer - Back-Panel Connectors

    voltage selection switch Your computer is equipped with a manual voltage-selection switch. To avoid damaging a computer with a manual voltage-selection switch, set the switch for the voltage that most closely matches the AC power available in your location. NOTICE: In Japan the voltage-selection switch must be set to the 115-V position.
  • Seite 15 network adapter To attach your computer to a network or broadband device, connect one end of a connector network cable to a network jack or your network or broadband device. Connect the other end of the network cable to the network adapter connector on the back panel of your computer.
  • Seite 16: Desktop Computer - Front View

    If your operating system has ACPI enabled, when you press the power button the computer will perform an operating system shutdown. Dell badge This badge can be rotated to match the orientation of your computer. To rotate the badge, place your fingers around the outside of the badge, press firmly, and turn the badge.
  • Seite 17: Desktop Computer - Back View

    CD/DVD drive Insert a CD or DVD (if supported) into this drive. location of Service Tag Use the Service Tag to identify your computer when you access the Dell Support website or call technical support. Desktop Computer — Back View card slots Access connectors for any installed PCI and PCI Express Cards.
  • Seite 18: Desktop Computer - Back-Panel Connectors

    voltage selection switch Your computer is equipped with a manual voltage-selection switch. To avoid damaging a computer with a manual voltage-selection switch, set the switch for the voltage that most closely matches the AC power available in your location. NOTICE: In Japan, the voltage-selection switch must be set to the 115-V position.
  • Seite 19 network adapter To attach your computer to a network or broadband device, connect one end of a connector network cable to either a network jack or your network or broadband device. Connect the other end of the network cable to the network adapter connector on the back panel of your computer.
  • Seite 20: Removing The Computer Cover

    NOTICE: Only a certified service technician should perform repairs on your computer. Damage due to servicing that is not authorized by Dell is not covered by your warranty. NOTICE: When you disconnect a cable, pull on its connector or on its strain-relief loop, not on the cable itself.
  • Seite 21: Mini Tower Computer

    3 Disconnect your computer and all attached devices from their electrical outlets, and then press the power button to ground the system board. 4 If applicable, remove the computer stand (for instructions, see the documentation that came with the stand). CAUTION: To guard against electrical shock, always unplug your computer from the electrical outlet before removing the cover.
  • Seite 22 1 security cable slot 2 cover release latch 3 padlock ring Quick Reference Guide...
  • Seite 23: Desktop Computer

    Desktop Computer CAUTION: Before you begin any of the procedures in this section, follow the safety instructions in the Product Information Guide. CAUTION: To guard against electrical shock, always unplug your computer from the electrical outlet before removing the computer cover. 1 Follow the procedures in "Before You Begin"...
  • Seite 24: Inside Your Computer

    Inside Your Computer Mini Tower Computer CD/DVD drive system board floppy drive heat sink assembly power supply hard drive Quick Reference Guide...
  • Seite 25 System Board Components Quick Reference Guide...
  • Seite 26 fan connector (FAN) internal buzzer (SPKR1) processor connector (CPU) password jumper (PSWD) processor power connector (12VPOWER) real time clock reset jumper (RTCRST) front-panel connector (FNT_PANEL) battery socket (BATT) memory module connectors (DIMM_1, PCI Express x16 card connector DIMM_2) SATA drive connectors (SATA0, SATA1) PCI card connectors (2) power connector (POWER) floppy drive connector (FLOPPY)
  • Seite 27: Desktop Computer

    Jumper Setting Description PSWD Password features are enabled (default setting). Password features are disabled. RTCRST The real-time clock has been enabled (default setting). The real-time clock is being reset (jumpered temporarily). jumpered unjumpered Desktop Computer drive bay (CD/DVD, floppy, card slots and hard drive) power supply heat sink assembly...
  • Seite 28 System Board Components Quick Reference Guide...
  • Seite 29 fan connector (FAN) internal buzzer (SPKR1) processor connector (CPU) password jumper (PSWD) processor power connector (12VPOWER) RTC reset jumper (RTCRST) front-panel connector (FNT_PANEL) battery socket (BATT) memory module connectors (DIMM_1, DIMM_2) 14 PCI Express x16 card connector serial ATA drive connectors (SATA0, SATA1) PCI card connector (2) power connector (POWER) floppy drive connector (FLOPPY)
  • Seite 30: Solving Problems

    Solving Problems Dell provides a number of tools to help you if your computer does not perform as expected. For the latest troubleshooting information available for your computer, see the Dell Support website at support.dell.com. If computer problems occur that require help from Dell, write a detailed description of the error, beep codes, or diagnostics light patterns, record your Express Service Code and Service Tag below, and then contact Dell from the same location as your computer.
  • Seite 31 Start the Dell Diagnostics from either your hard drive or from the optional Drivers and Utilities CD (also known as the ResourceCD).
  • Seite 32 4 When the tests are completed, if you are running the Dell Diagnostics from the Drivers and Utilities CD (optional), remove the CD. 5 Close the test screen to return to the Main Menu screen. To exit the Dell Diagnostics and restart the computer, close the Main Menu screen.
  • Seite 33: System Lights

    (see "Diagnostic Lights" on page 34). Solid yellow The Dell Diagnostics is running a If the Dell Diagnostics is running, allow the test, or a device on the system board testing to complete. may be faulty or incorrectly installed.
  • Seite 34: Diagnostic Lights

    Diagnostic Lights CAUTION: Before you begin any of the procedures in this section, follow the safety instructions in the Product Information Guide. To help you troubleshoot a problem, your computer has four lights labeled "1," "2," "3," and "4" on the front or back panel.
  • Seite 35 • If available, install properly working memory of the same type into your computer. • If the problem persists, contact Dell. For information on contacting Dell, see your online User’s Guide. A possible graphics card failure has •...
  • Seite 36 • If available, install properly working memory of the same type into your computer. • If the problem persists, contact Dell. For information on contacting Dell, see your online User’s Guide. Memory modules are detected, but a •...
  • Seite 37: Beep Codes

    If your computer beeps during start-up: 1 Write down the beep code. 2 See "Dell Diagnostics" on page 30 to identify a more serious cause. 3 Contact Dell for technical assistance. For information on contacting Dell, see your online User’s Guide. Code...
  • Seite 38: Resolving Software And Hardware Incompatibilities

    Resolving Software and Hardware Incompatibilities If a device is either not detected during the operating system setup or is detected but incorrectly configured, you can use the Hardware Troubleshooter to resolve the incompatibility. 1 Click the Start button and click Help and Support. 2 Type hardware troubleshooter in the Search field and click the arrow to start the search.
  • Seite 39: Reinstalling Microsoft Windows Xp

    NOTE: The procedures in this document were written for the Windows default view in Windows XP Home Edition, so the steps will differ if you set your Dell computer to the Windows Classic view or are using Windows XP Professional.
  • Seite 40 The Operating System CD provides options for reinstalling Windows XP. The options can overwrite files and possibly affect programs installed on your hard drive. Therefore, do not reinstall Windows XP unless a Dell technical support representative instructs you to do so.
  • Seite 41 5 Press the arrow keys to select CD-ROM, and press <Enter>. 6 When the Press any key to boot from CD message appears, press any key. Windows XP Setup 1 When the Windows XP Setup screen appears, press <Enter> to select To set up Windows now. 2 Read the information on the Microsoft Windows Licensing Agreement screen, and press <F8>...
  • Seite 42: Using The Drivers And Utilities Cd

    3 Click OK to continue. To complete the installation, respond to the prompts offered by the installation program. 4 Click Next at the Welcome Dell System Owner screen. 5 Select the appropriate System Model, Operating System, Device Type, and Topic.
  • Seite 43: Index

    See system system lights, 33 removing, 20 board hardware Dell Diagnostics, 30 operating system beep codes, 37 Dell support site, 7 reinstalling, 6 conflicts, 38 diagnostics reinstalling Windows XP , 39 Dell Diagnostics, 30 beep codes, 37 Operating System CD, 6...
  • Seite 44 7 system board, 25, 28 System Restore, 38 troubleshooting beep codes, 37 conflicts, 38 Dell Diagnostics, 30 diagnostic lights, 34 Hardware Troubleshooter, 38 Help and Support Center, 7 restore computer to previous operating state, 38 system lights, 33 User’s Guide, 6...
  • Seite 45 Dell™ OptiPlex™ 320 Guide de référence rapide Modèles DCSM, DCNE w w w . d e l l . c o m | s u p p o r t . d e l l . c o m...
  • Seite 46 La reproduction de ce document, de quelque manière que ce soit, sans l'autorisation écrite de Dell Inc. est strictement interdite. Marques utilisées dans ce document : Dell, OptiPlex et le logo DELL sont des marques de Dell Inc. ; Microsoft et Windows sont des marques déposées de Microsoft Corporation ;...
  • Seite 47 ......Dell Diagnostics .......
  • Seite 48 Table des matières...
  • Seite 49: Recherche D'informations

    à la section « Réinstallation des pilotes et utilitaires » de votre Guide d'utilisation en ligne), pour exécuter Dell Diagnosticsics (reportez-vous à la section « Dell Diagnostics » à la page 74) ou pour accéder à votre documentation. Des fichiers « Lisez-moi » peuvent être inclus sur votre CD afin de...
  • Seite 50 Que recherchez-vous ? Cherchez ici • Comment retirer et remplacer des pièces Guide d'utilisation du Dell™ OptiPlex™ • Caractéristiques Centre d'aide et de support Microsoft Windows XP • Comment configurer les paramètres du système Cliquez sur Démarrer→ Aide et Support→ Guides d'utilisation •...
  • Seite 51 Que recherchez-vous ? Cherchez ici • Solutions — Conseils et astuces de dépannage, Site Web du service de support de Dell — support.dell.com REMARQUE : articles de techniciens, questions fréquemment Sélectionnez votre région ou votre secteur d'activité posées et cours en ligne pour afficher le site de support approprié.
  • Seite 52: Configuration De Votre Ordinateur

    Configuration de votre ordinateur PRÉCAUTION : Avant de commencer toute procédure de cette section, lisez les consignes de sécurité du Guide d'information sur le produit. AVIS : Si votre ordinateur est doté d'une carte d'extension (une carte modem par exemple), branchez le câble approprié...
  • Seite 53 3 Connectez le moniteur à l'aide du câble DVI blanc ou du câble VGA bleu (ne connectez pas les deux câbles). Alignez, puis insérez avec précaution le câble du moniteur de manière à ne pas tordre les broches du connecteur. Resserrez les vis moletées des connecteurs de câble. REMARQUE : Sur certains moniteurs, le connecteur vidéo est placé...
  • Seite 54 Connexions d'alimentation AVIS : Si vous utilisez un sélecteur de tension manuel, réglez le commutateur sur la tension la plus proche de l'alimentation en CA de votre région afin d'éviter d'endommager l'ordinateur. AVIS : Au Japon, le sélecteur de tension doit être placé en position 115 V même si la tension disponible au Japon est de 100 V.
  • Seite 55: Vues Du Système

    Utilisez le numéro de service pour identifier votre ordinateur lorsque vous accédez de service au site Web de support de Dell ou que vous contactez le support technique. lecteur de CD/DVD Permet d'insérer un CD ou un DVD (si cela est pris en charge).
  • Seite 56 connecteurs USB 2.0 (2) Utilisez les connecteurs USB frontaux pour les périphériques connectés occasionnellement, comme les manettes de jeu ou les appareils photo, ou les périphériques USB amorçables. Il est recommandé d'utiliser les connecteurs USB situés à l'arrière de l'ordinateur pour les périphériques connectés en permanence, comme l'imprimante et le clavier.
  • Seite 57: Ordinateur Mini-Tour - Vue Arrière

    Ordinateur mini-tour — Vue arrière loquet de fermeture du capot Ce loquet permet d'ouvrir le capot de l'ordinateur. anneau pour cadenas Insérez un cadenas pour verrouiller le capot de l'ordinateur. connecteur d'alimentation Permet de brancher le câble d'alimentation. Guide de référence rapide...
  • Seite 58: Ordinateur Mini-Tour - Connecteurs Du Panneau Arrière

    commutateur de sélection de Votre ordinateur est équipé d'un sélecteur de tension manuel. Si vous utilisez un tension sélecteur de tension manuel, réglez le commutateur sur la tension la plus proche de l'alimentation en CA de votre région afin d'éviter d'endommager l'ordinateur. AVIS : Au Japon le sélecteur de tension doit être configuré...
  • Seite 59 connecteur de carte Pour connecter l'ordinateur à un périphérique réseau ou large bande, branchez réseau l'une des extrémités d'un câble réseau à une prise réseau, un périphérique réseau ou un périphérique large bande. Connectez l'autre extrémité du câble au connecteur de carte réseau situé sur le panneau arrière de votre ordinateur. Un déclic indique que le câble de réseau a été...
  • Seite 60: Ordinateur De Bureau - Vue Frontale

    à un arrêt du système d'exploitation. badge Dell Vous pouvez faire pivoter ce badge pour l'aligner sur l'orientation de votre ordinateur. Pour le faire pivoter, placez vos doigts sur le pourtour du badge, appuyez fermement dessus, puis tournez-le.
  • Seite 61: Ordinateur De Bureau - Vue Arrière

    Utilisez le numéro de service pour identifier votre ordinateur lorsque vous accédez numéro de service au site Web de support de Dell ou que vous contactez le support technique. Ordinateur de bureau — Vue arrière logements de carte Permettent d'accéder aux connecteurs de toutes les cartes PCI et PCI Express...
  • Seite 62: Ordinateur De Bureau - Connecteurs Du Panneau Arrière

    connecteur Permet de brancher le câble d'alimentation. d'alimentation commutateur de Votre ordinateur est équipé d'un sélecteur de tension manuel. Si vous utilisez un sélection de tension sélecteur de tension manuel, réglez le commutateur sur la tension la plus proche de l'alimentation en CA de votre région afin d'éviter d'endommager l'ordinateur. AVIS : Au Japon, le sélecteur de tension doit être configuré...
  • Seite 63 connecteur de carte Pour connecter l'ordinateur à un périphérique réseau ou large bande, branchez réseau l'une des extrémités d'un câble réseau à une prise réseau, un périphérique réseau ou un périphérique large bande. Connectez l'autre extrémité du câble au connecteur de carte réseau situé sur le panneau arrière de votre ordinateur. Un déclic indique que le câble de réseau a été...
  • Seite 64: Retrait Du Capot De L'ordinateur

    AVIS : Seul un technicien d'entretien qualifié doit effectuer les réparations sur votre ordinateur. Les dommages causés par une personne non agréée par Dell ne sont pas couverts par votre garantie. AVIS : Lorsque vous débranchez un câble, tirez sur le connecteur ou sur la boucle prévue, mais jamais sur le câble lui-même.
  • Seite 65: Ordinateur Mini-Tour

    2 Débranchez tous les fils de téléphone ou de télécommunication de l'ordinateur. 3 Déconnectez l'ordinateur et tous ses périphériques de leurs prises secteur, puis appuyez sur le bouton d'alimentation pour mettre la carte système à la terre. 4 Retirez, le cas échéant, le socle inclinable de l'ordinateur (pour les instructions, reportez-vous à la documentation fournie avec le socle inclinable).
  • Seite 66 1 emplacement pour câble de sécurité 2 loquet de fermeture du capot 3 anneau pour cadenas Guide de référence rapide...
  • Seite 67: Ordinateur De Bureau

    Ordinateur de bureau PRÉCAUTION : Avant de commencer toute procédure de cette section, consultez et respectez les consignes de sécurité du Guide d'information sur le produit. PRÉCAUTION : Pour éviter tout choc électrique, débranchez toujours la prise secteur de votre ordinateur avant de retirer le capot de l'ordinateur.
  • Seite 68: L'intérieur De Votre Ordinateur

    L’intérieur de votre ordinateur Ordinateur mini-tour lecteur de CD/DVD carte système lecteur de disquette assemblage du dissipateur de chaleur bloc d'alimentation unité de disque dur Guide de référence rapide...
  • Seite 69 Composants de la carte système Guide de référence rapide...
  • Seite 70 connecteur de ventilateur (FAN) avertisseur interne (SPKR1) connecteur du processeur (UC) cavalier du mot de passe (PSWD) connecteur d'alimentation du processeur real time clock reset jumper (RTCRST - Cavalier (12VPOWER) de réinitialisation de l'horloge temps réel) connecteur du panneau avant (FNT_PANEL) support de pile (BATT) connecteurs de module de mémoire (DIMM_1, connecteur de carte PCI Express x16...
  • Seite 71: Ordinateur De Bureau

    Cavalier Paramètre Description PSWD Les fonctions de mot de passe sont activées (configuration par défaut). Les fonctions de mot de passe sont désactivées. RTCRST L'horloge en temps réel a été activée (configuration par défaut). L'horloge en temps réel est en cours de réinitialisation (cavalier fermé...
  • Seite 72 Composants de la carte système Guide de référence rapide...
  • Seite 73 connecteur de ventilateur (FAN) avertisseur interne (SPKR1) connecteur du processeur (UC) cavalier du mot de passe (PSWD) connecteur d'alimentation du processeur cavalier de réinitialisation RTC (RTCRST) (12VPOWER) connecteur du panneau avant (FNT_PANEL) support de pile (BATT) connecteurs de module de mémoire (DIMM_1, connecteur de carte PCI Express x16 DIMM_2) connecteurs de lecteur ATA série (SATA0, SATA1)
  • Seite 74: Résolution Des Problèmes

    Résolution des problèmes Dell fournit un certain nombre d'outils qui vous aideront si votre ordinateur ne fonctionne pas de la manière escomptée. Pour obtenir les dernières informations sur le dépannage disponibles pour votre ordinateur, consultez le site Web de support de Dell à l'adresse support.dell.com.
  • Seite 75 Dell Diagnostics à partir de votre CD Drivers and Utilities en option (reportez-vous à la section « Lancement de Dell Diagnostics à partir du CD Drivers and Utilities » à la page 75). Si vous attendez trop longtemps et que le logo du système d'exploitation apparaît, patientez jusqu'à ce ®...
  • Seite 76 Menu principal de Dell Diagnostics 1 Une fois Dell Diagnostics chargé et lorsque l'écran Menu principal s'affiche, cliquez sur le bouton de l'option que vous souhaitez. Option Fonction Express Test (Test Exécute un test rapide des périphériques. Ce test dure généralement entre 10 et 20 rapide) minutes et n'exige pas d'action de votre part.
  • Seite 77: Voyants Du Système

    4 Une fois les tests terminés, si vous exécutez Dell Diagnostics à partir du Drivers and Utilities (en option), retirez le CD. 5 Fermez l'écran de test pour revenir à l'écran Menu principal. Pour quitter Dell Diagnostics et redémarrer l'ordinateur, fermez l'écran Menu principal.
  • Seite 78: Voyants De Diagnostic

    Voyants de diagnostic PRÉCAUTION : Avant de commencer toute procédure de cette section, consultez et respectez les consignes de sécurité du Guide d'information sur le produit. Afin de vous aider à résoudre les problèmes, l'ordinateur est équipé de quatre voyants situés sur le panneau avant ou arrière : «...
  • Seite 79 • Installez correctement la mémoire de travail du même type sur votre ordinateur, si celle- ci est disponible. • Si le problème persiste, contactez Dell. Pour savoir comment contacter Dell, reportez-vous au Guide d'utilisation en ligne. Une défaillance de la carte graphique •...
  • Seite 80 • Installez correctement la mémoire de travail du même type sur votre ordinateur, si celle- ci est disponible. • Si le problème persiste, contactez Dell. Pour savoir comment contacter Dell, reportez-vous au Guide d'utilisation en ligne. Les modules de mémoire sont détectés, •...
  • Seite 81: Codes Sonores

    Si votre ordinateur émet un signal lors du démarrage : 1 Notez le code sonore. 2 Pour identifier une cause plus sérieuse, reportez-vous à la section « Dell Diagnostics » à la page 74. 3 Contactez Dell pour obtenir une assistance technique. Pour savoir comment contacter Dell, reportez- vous au Guide d'utilisation en ligne.
  • Seite 82: Résolution Des Incompatibilités Logicielles Et Matérielles

    Résolution des incompatibilités logicielles et matérielles Si un périphérique n'est pas détecté pendant la configuration du système d'exploitation ou est détecté mais n'est pas configuré correctement, utilisez le Dépanneur des conflits matériels pour résoudre cette incompatibilité. 1 Cliquez sur le bouton Démarrer, puis sur Aide et support. 2 Entrez Dépanneur des conflits matériels dans le champ Rechercher, puis cliquez sur la flèche pour lancer la recherche.
  • Seite 83: Réinstallation De Microsoft® Windows® Xp

    REMARQUE : Les procédures décrites dans ce document concernent la vue Windows par défaut dans Windows XP Home Edition ; les étapes diffèrent lorsque l'ordinateur Dell™ est défini sur la vue classique de Windows ou qu'il fonctionne sous Windows XP Professional.
  • Seite 84 Le CD Operating System offre des options de réinstallation pour Windows XP. Ces options peuvent remplacer des fichiers installés et avoir des répercussions sur les programmes installés sur votre disque dur. Par conséquent, ne réinstallez pas Windows XP à moins qu'un membre de l'équipe du support technique de Dell ne vous le demande.
  • Seite 85 4 Appuyez sur <F12> dès l'apparition du logo DELL. Si le logo du système d'exploitation apparaît, patientez jusqu'à l'affichage du bureau Windows, éteignez de nouveau l'ordinateur et faites une nouvelle tentative. 5 Utilisez les touches de direction pour sélectionner l'option CD-ROM, puis appuyez sur <Entrée>.
  • Seite 86: Utilisation Du Cd Drivers And Utilities

    3 Cliquez sur OK pour continuer. Pour terminer l'installation, suivez les invites du programme d'installation. 4 Dans l'écran Welcome Dell System Owner (Vous êtes propriétaire d'un système Dell, bienvenue), cliquez sur Suivant. 5 Effectuez les sélections appropriées pour Modèle de système, Système d'exploitation, Type de périphérique et Rubrique.
  • Seite 87: Index

    81 voyant, 61 Centre d'aide et de support de conflits, 82 Windows, 51 Dell Diagnostics, 74 Dépanneur des conflits matériels, 82 restaurer l'ordinateur à un état capot antérieur, 82 Guide d'information sur le retrait, 64...
  • Seite 88 50 matériel réinstallation de Windows codes sonores, 81 XP , 83 conflits, 82 Dell Diagnostics, 74 messages d'erreur codes sonores, 81 voyant d'alimentation voyants de diagnostic, 78 diagnostics, 77 voyants du système, 77 voyants alimentation, 61 diagnostic, 78 système, 77...
  • Seite 89 Dell™ OptiPlex™ 320 Schnellreferenzhandbuch Modelle DCSM, DCNE w w w . d e l l . c o m | s u p p o r t . d e l l . c o m...
  • Seite 90: Anmerkungen, Hinweise Und Vorsichtshinweise

    Nachdrucke jeglicher Art ohne die vorherige schriftliche Genehmigung von Dell Inc. sind strengstens untersagt. In diesem Text verwendete Marken: Dell, OptiPlex und das DELL-Logo sind Marken von Dell Inc.; Microsoft und Windows sind eingetragene Marken der Microsoft Corporation; Intel und Pentium sind eingetragene Marken der Intel Corporation.
  • Seite 91 ....... . . Dell Diagnostics ......
  • Seite 92 Inhalt...
  • Seite 93: Informationsquellen

    Verwenden Sie diese CD, um Treiber neu zu installieren • Desktop-System-Software (DSS) (siehe „Neu Installieren von Treibern und Dienstprogrammen“ im Online-Benutzerhandbuch), um Dell Diagnostics auszuführen (siehe „Dell Diagnostics“ auf Seite 119) oder um auf die Dokumen-tation zuzugreifen. Möglicherweise finden Sie auf der CD Readme-Dateien. Diese Dateien enthalten Angaben zu den neuesten technischen Än-...
  • Seite 94 Dell™ OptiPlex™ Benutzerhandbuch schen von Teilen Microsoft Windows XP Hilfe- und Supportcenter • Technische Daten Klicken Sie auf Start→ Hilfe und Support→ Dell Dell Benutzer- • Anleitungen zum Konfigurieren der System- und Systemhandbücher→ Systemhandbücher. einstellungen Klicken Sie auf das Benutzerhandbuch für Ihren Computer.
  • Seite 95 Aktualisierungen für Ihr Betriebssystem durchgeführt werden und So laden Sie die Desktop-System-Software herunter: bietet Support für Dell™ 3,5-Zoll-USB-Dis- Wählen Sie auf der Website support.dell.com Ihre Region oder ® kettenlaufwerke, Intel -Prozessoren, optische Ihren Geschäftsbereich, und geben Sie Ihre Service-Tag-Nummer Laufwerke und USB-Geräte.
  • Seite 96: Einrichten Des Computers

    Einrichten des Computers VORSICHT: Bevor Sie Arbeiten an den in diesem Abschnitt beschriebenen Komponenten ausführen, lesen Sie zuerst die Sicherheitshinweise im Produktinformationshandbuch. HINWEIS: Wenn im Computer eine Erweiterungskarte installiert ist (wie z. B. eine Modemkarte), schließen Sie das entsprechende Kabel an die Netzwerkkarte an, und nicht an den Anschluss auf der Computerrückseite. HINWEIS: Sie können den Computer dabei unterstützen, das System bei optimaler Betriebstemperatur zu betrei- ben und eine ständige Luftzirkulation um das Gehäuse sicherzustellen, indem Sie den Computer nicht direkt an eine...
  • Seite 97 3 Schließen Sie den Monitor, entweder mithilfe des weißen DVI-Kabels oder des blauen VGA-Kabels an (schließen Sie nicht beide Kabel an denselben Computer an). Richten Sie das Monitorkabel aus und schieben Sie es vorsichtig ein, damit die Anschlussstifte nicht verbogen werden. Ziehen Sie die Flügelschrauben an den Kabelanschlüssen fest. ANMERKUNG: Bei einigen Bildschirmen befindet sich der Monitoranschluss unterhalb der Bildschirmrück- seite.
  • Seite 98 Stromanschlüsse HINWEIS: Um die Beschädigung eines Computers mit einem manuellen Spannungswahlschalter zu verhindern, stellen Sie den Schalter auf die Spannung ein, die der Wechselspannung an Ihrem Standort am ehesten entspricht. HINWEIS: Obwohl die Versorgungsspannung in Japan nur 100 V beträgt, müssen in Japan am Spannungswahl- schalter 115 V eingestellt sein.
  • Seite 99: Systemansichten

    Mini-Tower-Computer – Vorderansicht Position der Service- Die Service-Tag-Nummer wird zur Identifizierung des Computers beim Zugriff auf Tag-Nummer die Support-Website von Dell oder bei Anrufen beim technischen Support verwendet. CD-/DVD-Laufwerk Legen Sie eine CD oder eine DVD (falls unterstützt) in dieses Laufwerk ein.
  • Seite 100 USB 2.0-Anschlüsse (2) Verwenden Sie die vorderen USB-Anschlüsse für Geräte, die Sie gelegentlich an- schließen, wie Joysticks oder Kameras, oder startfähige USB-Geräte. Es wird empfohlen, die USB-Anschlüsse auf der Rückseite des Computers für Geräte zu verwenden, die normalerweise angeschlossen bleiben, wie z. B. Drucker und Tastaturen.
  • Seite 101: Mini-Tower-Computer - Rückansicht

    Mini-Tower-Computer – Rückansicht Abdeckungsfreigabe- Mithilfe dieses Riegels können Sie die Computerabdeckung öffnen. vorrichtung Halbringförmiger Bügel Bringen Sie ein Vorhängeschloss an, um die Computerabdeckung zu verriegeln. für ein Vorhängeschloss Stromanschluss Fügen Sie das Netzkabel in diesen Anschluss ein. Schnellreferenzhandbuch...
  • Seite 102: Mini-Tower-Computer - Anschlüsse An Der Rückseite

    Spannungswahlschalter Der Computer ist mit einem manuellen Spannungswahlschalter ausgestattet. Um die Beschädigung eines Computers mit einem manuellen Spannungswahlschalter zu verhindern, stellen Sie den Schalter auf die Spannung ein, die der Wechsel- spannung an Ihrem Standort am ehesten entspricht. HINWEIS: In Japan sollte der Spannungswahlschalter mit dem Wert 115-V eingestellt werden.
  • Seite 103 Netzwerkadapter- Um den Computer an ein Netzwerk oder Breitbandgerät anzuschließen, stecken anschluss Sie ein Ende eines Netzwerkkabels in eine Netzwerkbuchse oder in das Netzwerk- oder Breitbandgerät. Schließen Sie das andere Ende des Netzwerkkabels an den Netzwerkadapteranschluss an der Rückseite des Computers an. Ein Klicken zeigt an, dass das Netzwerkkabel sicher angeschlossen ist.
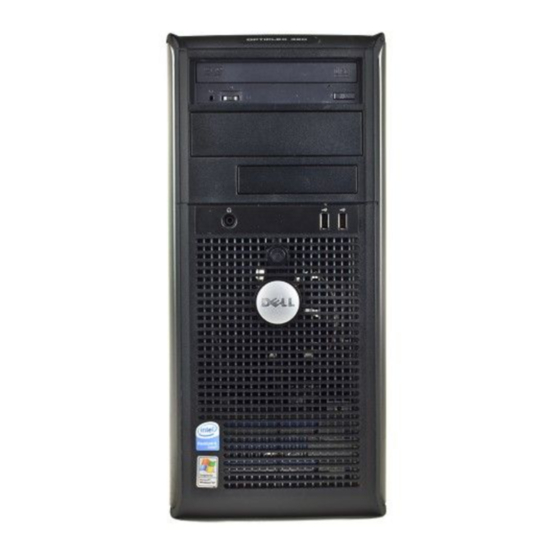
  • Seite 104: Desktop-Computer - Vorderansicht

    Betriebssystem aktiviert ist, fährt der Computer das Be- triebssystem herunter, wenn Sie den Betriebsschalter drücken. Dell-Emblem Dieses Emblem lässt sich drehen, um der Orientierung Ihres Computers zu ent- sprechen. Legen Sie zum Drehen Ihre Finger außen um das Emblem, drücken Sie fest und drehen Sie das Emblem.
  • Seite 105: Desktop-Computer - Rückansicht

    Legen Sie eine CD oder eine DVD (falls unterstützt) in dieses Laufwerk ein. Position der Service-Tag- Die Service-Tag-Nummer wird zur Identifizierung des Computers beim Zugriff auf die Support-Website von Dell oder bei Anrufen beim technischen Support Nummer verwendet. Desktop-Computer – Rückansicht Kartensteckplätze...
  • Seite 106: Desktop-Computer - Anschlüsse An Der Rückseite

    Stromanschluss Fügen Sie das Netzkabel in diesen Anschluss ein. Spannungswahlschalter Der Computer ist mit einem manuellen Spannungswahlschalter ausgestattet. Um die Beschädigung eines Computers mit einem manuellen Spannungswahlschalter zu verhindern, stellen Sie den Schalter auf die Spannung ein, die der Wechsel- spannung an Ihrem Standort am ehesten entspricht.
  • Seite 107 Netzwerkadapter- Um den Computer an ein Netzwerk oder Breitbandgerät anzuschließen, stecken anschluss Sie ein Ende eines Netzwerkkabels in eine Netzwerkbuchse oder in das Netzwerk- oder Breitbandgerät. Schließen Sie das andere Ende des Netzwerkkabels an den Netzwerkadapteranschluss an der Rückseite des Computers an. Ein Klicken zeigt an, dass das Netzwerkkabel sicher angeschlossen ist.
  • Seite 108: Abnehmen Der Computerabdeckung

    HINWEIS: Reparaturen an Ihrem Computer sollten nur von einem zertifizierten Service-Techniker ausgeführt werden. Schäden durch nicht von Dell genehmigte Wartungsversuche werden nicht durch die Garantie abgedeckt. HINWEIS: Ziehen Sie beim Trennen des Geräts nur am Stecker oder an der Zugentlastung und nicht am Kabel selbst.
  • Seite 109: Mini-Tower-Computer

    3 Trennen Sie den Computer und alle angeschlossenen Geräte von der Steckdose, und drücken Sie anschließend den Betriebsschalter, um die Systemplatine zu erden. 4 Entfernen Sie, falls vorhanden, den Computer-Standrahmen (weitere Anweisungen finden Sie in der mit dem Standrahmen mitgelieferten Dokumentation). VORSICHT: Um Stromschläge zu vermeiden, trennen Sie vor dem Entfernen der Abdeckung den Computer immer von der Steckdose.
  • Seite 110 1 Sicherheitskabeleinschub 2 Abdeckungsfreigabevorrichtung 3 Halbringförmiger Bügel für ein Vorhängeschloss Schnellreferenzhandbuch...
  • Seite 111: Desktop-Computer

    Desktop-Computer VORSICHT: Bevor Sie mit den Arbeiten in diesem Abschnitt beginnen, befolgen Sie erst die Sicherheitshinweise im Produktinformationshandbuch. VORSICHT: Um elektrische Schläge zu vermeiden, trennen Sie vor dem Entfernen der Computerabdeckung den Computer immer von der Steckdose. 1 Folgen Sie den Anweisungen unter „Vorbereitung“ auf Seite 108. 2 Wenn an der Rückseite ein Vorhängeschloss durch den Ring geschoben wurde, entfernen Sie das Vorhängeschloss.
  • Seite 112: Im Innern Des Computers

    Im Innern des Computers Mini-Tower-Computer CD-/DVD-Laufwerk Systemplatine Diskettenlaufwerk Kühlkörperbaugruppe Netzteil Festplatte Schnellreferenzhandbuch...
  • Seite 113 Komponenten der Systemplatine Schnellreferenzhandbuch...
  • Seite 114 Lüfteranschluss (FAN) interner Summer (SPKR1) Mikroprozessoranschluss (CPU) Kennwort-Jumper (PSWD) Netzanschluss des Prozessors (12V POWER) Jumper zum Zurücksetzen der Echtzeituhr (RTCRST) Frontblendenanschluss (FNT_PANEL) Batteriesockel (BATTERY) Speichermodulanschlüsse (DIMM_1, DIMM_2) 14 Anschluss für PCI-Express x16-Karte Anschlüsse für serielles SATA-Laufwerk (SATA0, PCI-Kartensteckplätze (2) SATA1) Netzanschluss (POWER) Diskettenlaufwerkanschluss (FLOPPY) Anschluss für CD-/DVD-Laufwerk (IDE)
  • Seite 115: Desktop-Computer

    Jumper Einstellung Beschreibung PSWD Die Kennwortfunktionen sind aktiviert (Standardeinstellung). Kennwortfunktionen sind deaktiviert. RTCRST Die Echtzeituhr wurde aktiviert (Standardeinstellung). Die Echtzeituhr wurde zurück- gesetzt (zeitweise überbrückt). überbrückt nicht überbrückt Desktop-Computer Laufwerkschacht (CD/DVD, Diskette und Festplatte) Kartensteckplätze Netzteil Kühlkörperbaugruppe Systemplatine Vordere E/A-Leiste Schnellreferenzhandbuch...
  • Seite 116 Komponenten der Systemplatine Schnellreferenzhandbuch...
  • Seite 117 Lüfteranschluss (FAN) interner Summer (SPKR1) Mikroprozessoranschluss (CPU) Kennwort-Jumper (PSWD) Netzanschluss des Prozessors (12V POWER) Jumper für Echtzeituhr-Reset (RTCRST) Frontblendenanschluss (FNT_PANEL) Batteriesockel (BATTERY) Speichermodulanschlüsse (DIMM_1, DIMM_2) Anschluss für PCI-Express x16-Karte Anschlüsse für serielles ATA-Festplattenlaufwerk PCI-Kartensteckplatz (2) (SATA0, SATA1) Netzanschluss (POWER) Diskettenlaufwerkanschluss (FLOPPY) Anschluss für CD-/DVD-Laufwerk (IDE) serieller/ PS/2-Anschluss (PS2/SER2) Anschlüsse für serielles ATA-Festplattenlaufwerk...
  • Seite 118: Problemlösung

    überbrückt nicht überbrückt Problemlösung Dell stellt eine Reihe von Hilfewerkzeugen zur Verfügung, die Ihnen bei Problemen mit dem Computer weiterhelfen. Neueste Informationen zur Fehlerbehebung an Ihrem Computer finden Sie auf der Support-Website von Dell unter support.dell.com. Wenn Probleme mit dem Computer auftreten, für deren Lösung Sie die Hilfe von Dell benötigen, erstellen Sie eine detaillierte Beschreibung des Fehlers, des Signaltoncodes oder der Diagnoseanzeige.
  • Seite 119: Dell Diagnostics

    ANMERKUNG: Wenn eine Meldung angezeigt wird, dass keine Partition für ein Diagnose-Dienstprogramm gefunden wurde, starten Sie Dell Diagnostics über die optionale Drivers and Utilities CD (siehe „Starten von Dell Diagnostics von der Drivers and Utilities CD“ auf Seite 119). Falls Sie zu lange gewartet haben, und das Betriebssystem-Logo angezeigt wird, warten Sie noch, bis ®...
  • Seite 120 9 Wenn das Hauptmenü des Programms „Dell Diagnostics“ erscheint, wählen Sie den gewünschten Test aus. Hauptmenü des Programms Dell Diagnostics 1 Klicken Sie nach dem Laden der Dell Diagnostics und nachdem das Hauptmenü angezeigt wird auf die Schaltfläche für die von Ihnen gewünschte Option. Option...
  • Seite 121: Systemanzeigen

    Sie können den Test durch Änderungen an den Einstellungen an Ihre Bedürfnisse anpassen. 4 Nachdem die Tests abgeschlossen sind, wenn Sie „Dell Diagnostics“ von der optionalen Drivers and Utilities CD ausführen, die CD aus dem Laufwerk entfernen. 5 Schließen Sie den Testbildschirm und kehren Sie zum Hauptmenü zurück. Schließen Sie zum Been- den von Dell Diagnostics und zum Neustart des Computers das Hauptmenü.
  • Seite 122 Problem erkannt Signaltoncode während weise fehlerhaft. wurde. Wenn Sie das Problem nicht finden kön- des POST, Computer nen, wenden Sie sich an Dell, um technische stürzt bei POST ab Unterstützung anzufordern. Informationen zur Kontaktaufnahme mit Dell finden Sie im Online- Benutzerhandbuch.
  • Seite 123: Diagnoseanzeigen

    Diagnoseanzeigen VORSICHT: Bevor Sie mit den Arbeiten in diesem Abschnitt beginnen, befolgen Sie erst die Sicherheitshinweise im Produktinformationshandbuch. Um Ihnen die Behebung einer Störung zu erleichtern, verfügt Ihr Computer an der Vorder- oder Rück- seite über vier Anzeigen, die mit „1“, „2“, „3“, und „4“ gekennzeichnet sind. Die Anzeigen können aus- geschaltet sein oder grün leuchten.
  • Seite 124 Grafikkarte, die nachweislich funktioniert, und starten Sie den Computer neu. • Besteht das Problem weiterhin oder besitzt der Computer eine integrierte Grafikkarte, wenden Sie sich an Dell. Informationen zur Kontaktauf- nahme mit Dell finden Sie im Online-Benutzer- handbuch. Ein möglicher Disketten- oder Festplat- Schließen Sie alle Strom- und Datenkabel erneut...
  • Seite 125 Speichermodule des gleichen Typs in Ihrem Computer. • Wenn das Problem fortbesteht, wenden Sie sich an Dell. Informationen zur Kontaktaufnahme mit Dell finden Sie im Online-Benutzerhandbuch. Die Speichermodule wurden erkannt, es • Vergewissern Sie sich, dass keine besonderen besteht jedoch ein Speicherkonfigura- Anforderungen für die Anordnung der Speicher-...
  • Seite 126: Signaltoncodes

    Wenn Ihr Computer während des Startvorgangs Signaltöne ausgibt: 1 Notieren Sie den Signaltoncode. 2 Lesen Sie „Dell Diagnostics“ auf Seite 119, um eine gravierendere Ursache zu ermitteln. 3 Wenden Sie sich an Dell, falls Sie technische Unterstützung brauchen. Informationen zur Kontaktaufnahme mit Dell finden Sie im Online-Benutzerhandbuch.
  • Seite 127: Beheben Von Software- Und Hardware-Inkompatibilitäten

    Beheben von Software- und Hardware-Inkompatibilitäten Wenn ein Gerät während des Betriebssystem-Setups nicht erkannt wird oder zwar erkannt, aber nicht korrekt konfiguriert wird, können Sie die Inkompatibilität mit dem „Ratgeber bei Hardware-Konflikten“ beheben. 1 Klicken Sie auf die Schaltfläche Start und auf Hilfe und Support. 2 Geben Sie im Feld Suchen den Begriff Ratgeber bei Hardware-Konflikten ein, und klicken Sie anschließend auf den Pfeil, um mit der Suche zu beginnen.
  • Seite 128: Neuinstallation Von Microsoft Windows Xp

    Neuinstallation von Microsoft Windows XP Vorbereitung ANMERKUNG: Die Anweisungen in diesem Dokument wurden für die Windows Standardansicht in Windows XP Home Edition geschrieben. Die Schritte werden daher anders sein, wenn Sie Ihren Dell-Computer zur klassischen Ansicht wechseln oder Windows XP Professional verwenden. Schnellreferenzhandbuch...
  • Seite 129 • Dell-Betriebssystem-CD • Dell Drivers and Utilities CD Führen Sie zum neu Installieren von Windows XP die Anweisungen in den folgenden Abschnitten in der angegebenen Reihenfolge aus. Der Neuinstallationsvorgang kann 1 bis 2 Stunden in Anspruch nehmen. Nach der Neuinstallation des Betriebssystems müssen Sie auch die Gerätetreiber, das Virenschutzprogramm und andere Software neu...
  • Seite 130 3 Starten Sie den Computer neu. 4 Drücken Sie <F12> sofort nachdem das Logo von DELL erscheint. Falls bereits das Logo des Betriebssystems angezeigt wird, warten Sie, bis der Windows-Desktop er- scheint, fahren Sie den Computer herunter, und versuchen Sie es noch einmal.
  • Seite 131 9 Wenn der Bildschirm Modemwählinformationen angezeigt wird, geben Sie die erforderlichen Infor- mationen ein und klicken Sie auf Weiter. 10 Geben Sie Im Fenster Datum- und Uhrzeiteinstellungen Datum, Uhrzeit und Zeitzone ein und klicken Sie anschließend auf Weiter. 11 Wenn der Bildschirm Netzwerkeinstellungen angezeigt wird, klicken Sie auf Typisch und dann auf Weiter.
  • Seite 132: Verwenden Der Drivers And Utilities Cd

    Folgen Sie den Bildschirmanweisungen des Installationsprogramms, um die Installation abzuschließen. 4 Klicken Sie im Bildschirm Herzlichen Glückwunsch zum Kauf Ihres Dell Systems! auf Weiter. 5 Treffen Sie eine geeignete Auswahl für Systemmodell, Betriebssystem, Gerätetyp und Thema. Treiber für Ihren Computer So erhalten Sie eine Liste der Gerätetreiber für Ihren Computer:...
  • Seite 133: Stichwortverzeichnis

    Stichwortverzeichnis Abdeckung Dell Fehlermeldungen abnehmen, 108 Dell Diagnostics, 119 Diagnoseanzeigen, 123 Support-Website, 95 Signaltoncodes, 126 Anzeigen Systemanzeigen, 121 Diagnose, 123 Diagnose Stromversorgung, 105 Dell, 119 System, 121 Signaltoncodes, 126 Dokumentation Garantieinformationen, 93 Benutzerhandbuch, 94 Endbenutzerlizenzvereinbarun g, 93 Beheben von Störungen Ergonomie, 93 Computer auf früheren...
  • Seite 134 Unterbrechunganforderungs (IRQ)-Konflikte, 127 Neuinstallation Windows XP , 128 Windows XP Hilfe- und Supportcenter, 95 neu installieren, 94 Probleme Neuinstallation, 128 Dell Diagnostics, 119 Ratgeber bei Hardware- Konflikten, 127 Probleme. Siehe Beheben von Störungen setup, 130 Systemwiederherstellung, 127 Produktinformationshandbuc h, 93...
  • Seite 135 Dell™ OptiPlex™ 320 Guida di consultazione rapida Modelli DCSM, DCNE w w w . d e l l . c o m | s u p p o r t . d e l l . c o m...
  • Seite 136 Altri marchi di fabbrica e nomi commerciali possono essere utilizzati in questo documento sia in riferimento alle aziende che rivendicano i marchi e i nomi che ai prodotti stessi. Dell Inc. nega qualsiasi partecipazione di proprietà relativa a marchi e nomi commerciali diversi da quelli di sua proprietà.
  • Seite 137 ....... . . Risoluzione di incompatibilità del software e dell'hardware .
  • Seite 138 Sommario...
  • Seite 139: Ricerca Di Informazioni

    È possibile utilizzare il CD per reinstallare i • Desktop System Software (DSS) driver (consultare "Reinstallazione di driver e utilità" nella Guida dell'utente in linea), per eseguire il programma Dell Diagnostics (consultare "Dell Diagnostics" a pagina 164) o per accedere alla documentazione.
  • Seite 140 Fare clic su Start→ Guida in linea e supporto tecnico→ • Come individuare e risolvere i problemi Guide dell'utente e di sistema→ Guide dell'utente. Fare clic sulla Guida dell'utente del computer. La Guida dell'utente è anche disponibile nel CD opzionale Drivers and Utilities. ® ®...
  • Seite 141 Selezionare il Paese o il settore commerciale per • Comunità — discussione in linea con altri clienti Dell visualizzare il sito del supporto corretto. • Aggiornamenti — informazioni di aggiornamento per...
  • Seite 142: Configurazione Del Computer

    AVVISO: Per consentire al computer di mantenere una temperatura di esercizio ottimale, assicurarsi di collocare il computer lontano da pareti o scaffali che potrebbero impedire la circolazione dell'aria attorno al telaio. N.B. Prima di installare qualsiasi periferica o software non forniti con il computer, leggere la documentazione fornita con tale periferica o software, o contattare il venditore per verificare che la periferica o il software sia compatibile con il computer e il sistema operativo.
  • Seite 143 3 Collegare il monitor utilizzando il cavo DVI bianco o il cavo VGA blu (non collegare entrambi i cavi). Inserire delicatamente il connettore del cavo del monitor allineandolo correttamente con il connettore sul computer per evitare di piegare i piedini. Stringere le viti a testa zigrinata dei connettori del cavo. N.B.
  • Seite 144 AVVISO: In Giappone, il selettore di tensione deve essere impostato sulla posizione 115 V anche se il valore dell'alimentazione c.a. disponibile è 100 V. 6 Verificare che il selettore di tensione sia impostato correttamente per la propria ubicazione. Il computer ha un selettore di tensione manuale. I computer con un selettore di tensione sul pannello posteriore devono essere impostati manualmente per operare alla corretta tensione di esercizio.
  • Seite 145: Viste Del Sistema

    Numero Utilizzare il Numero di servizio per identificare il computer quando si accede al sito di servizio Web del supporto tecnico della Dell o chiamare il supporto tecnico. unità CD/DVD Inserire un CD o DVD (se supportati) in questa unità.
  • Seite 146 Gestione periferiche di Windows. Per maggiori informazioni sulle modalità di sospensione e su come uscire da una modalità di risparmio energia, consultare la Guida dell'utente in linea. Per una descrizione dei codici luminosi che possono contribuire a risolvere problemi relativi al computer, consultare "Indicatori di sistema"...
  • Seite 147: Computer Minitorre - Vista Posteriore

    Computer minitorre — Vista posteriore chiusura a scatto del Questo dispositivo di chiusura consente di aprire il coperchio del computer. coperchio anello del lucchetto Inserire un lucchetto per impedire l'apertura del coperchio del computer. connettore di Inserire un cavo di alimentazione in questo connettore. alimentazione Guida di consultazione rapida...
  • Seite 148: Computer Minitorre - Connettori Del Pannello Posteriore

    Il connettore parallelo integrato è disattivato automaticamente se il computer rileva una scheda installata contenente un connettore parallelo configurato allo stesso indirizzo. Per maggiori informazioni, consultare la Guida dell'utente in linea indicatore di integrità del • Verde — È presente una connessione funzionante tra una rete a 10 Mbps e il collegamento computer.
  • Seite 149 Non rimuovere il cappuccio. connettore seriale Collegare una periferica seriale, quale ad esempio un palmare, alla porta seriale. La designazione predefinita è COM1 per il connettore seriale 1. Per maggiori informazioni, consultare la Guida dell'utente in linea. Guida di consultazione rapida...
  • Seite 150: Computer Desktop - Vista Anteriore

    USB avviabili (per maggiori informazioni sull'avvio da una periferica USB, consultare la Guida dell'utente in linea). Si consiglia di utilizzare i connettori USB sul pannello posteriore per periferiche che di solito restano collegate, quali ad esempio le stampanti e le tastiere.
  • Seite 151: Computer Desktop - Vista Posteriore

    Numero di Utilizzare il Numero di servizio per identificare il computer quando si accede al servizio sito Web del supporto tecnico della Dell o chiamare il supporto tecnico. Computer desktop — Vista posteriore slot per schede Questi slot consentono di accedere ai connettori delle schede PCI e PCI Express installate.
  • Seite 152: Computer Desktop - Connettori Del Pannello Posteriore

    Il connettore parallelo integrato è disattivato automaticamente se il computer rileva una scheda installata contenente un connettore parallelo configurato allo stesso indirizzo. Per maggiori informazioni, consultare la Guida dell'utente in linea. indicatore di integrità del • Verde — È presente una connessione funzionante tra una rete a 10 Mbps e il collegamento computer.
  • Seite 153 Non rimuovere il cappuccio. connettore seriale Collegare una periferica seriale, quale ad esempio un palmare, alla porta seriale. La designazione predefinita è COM1 per il connettore seriale 1. Per maggiori informazioni, consultare la Guida dell'utente in linea. Guida di consultazione rapida...
  • Seite 154: Rimozione Del Coperchio Del Computer

    AVVISO: Solo un tecnico di assistenza qualificato dovrebbe eseguire le riparazioni del computer. Danni dovuti a riparazioni non autorizzate da Dell non sono coperte dalla garanzia. AVVISO: Per scollegare un cavo, afferrare il connettore o il serracavi, non il cavo stesso. Alcuni cavi dispongono di un connettore con linguette di blocco;...
  • Seite 155: Computer Minitorre

    3 Scollegare il computer e tutte le periferiche collegate dalle rispettive prese elettriche, quindi premere il pulsante di alimentazione per mettere a terra la scheda di sistema. 4 Se presente, rimuovere il piedistallo del computer (per istruzioni, consultare la documentazione fornita col piedistallo).
  • Seite 156 1 slot per cavo di sicurezza 2 chiusura a scatto del coperchio 3 anello del lucchetto Guida di consultazione rapida...
  • Seite 157: Computer Desktop

    Computer desktop ATTENZIONE: Prima di eseguire le procedure descritte in questa sezione, seguire le istruzioni di sicurezza riportate nella Guida alle informazioni sul prodotto. ATTENZIONE: Per evitare il rischio di scariche elettriche, scollegare sempre il computer dalla presa elettrica prima di rimuovere il coperchio del computer. 1 Seguire le procedure descritte in "Operazioni preliminari"...
  • Seite 158: Esplorazione Dell'interno Del Computer

    Esplorazione dell'interno del computer Computer minitorre unità CD/DVD scheda di sistema unità disco floppy gruppo del dissipatore di calore alimentatore disco rigido Guida di consultazione rapida...
  • Seite 159 Componenti della scheda di sistema Guida di consultazione rapida...
  • Seite 160 (FAN) cicalino interno (SPKR1) connettore del processore (CPU) ponticello di ripristino password (PSWD) connettore di alimentazione del processore ponticello di reimpostazione dell'orologio in (12VPOWER) tempo reale (RTCRST) connettore sul pannello anteriore zoccolo della batteria (BATT) (FNT_PANEL) connettori dei moduli di memoria (DIMM_1,...
  • Seite 161: Computer Desktop

    Ponticelli Impostazione Descrizione PSWD Le funzionalità della password sono attivate (impostazione predefinita). Le funzionalità delle password sono disattivate. RTCRST L'orologio in tempo reale è stato attivato (impostazione predefinita). L'orologio in tempo reale è in corso di ripristino (collegato temporaneamente mediante ponticello). collegato mediante ponticello collegato senza ponticello Computer desktop...
  • Seite 162 Componenti della scheda di sistema Guida di consultazione rapida...
  • Seite 163 (FNT_PANEL) zoccolo della batteria (BATT) connettori dei moduli di memoria (DIMM_1, scheda PCI Express x16 DIMM_2) connettori dell'unità ATA seriale (SATA0, SATA2) connettore della scheda PCI (2) connettore di alimentazione (POWER) connettore dell'unità floppy (FLOPPY) connettore dell'unità CD/DVD (IDE) connettore PS/2/seriale (PS2/SER2) connettori dell'unità...
  • Seite 164: Soluzione Dei Problemi

    Numero di servizio, quindi contattare la Dell dalla postazione di lavoro del computer. Per informazioni su come contattare la Dell, consultare la Guida dell'utente in linea.
  • Seite 165 Avviare Dell Diagnostics dal disco rigido o dal CD opzionale Drivers and Utilities (noto anche come ResourceCD).
  • Seite 166 Annotare il codice di errore e la descrizione del problema e seguire le istruzioni visualizzate. Se non è possibile risolvere la condizione di errore, contattare la Dell. Per informazioni su come contattare la Dell, consultare la Guida dell'utente in linea.
  • Seite 167: Indicatori Di Sistema

    4 Quando le prove sono completate, se si sta eseguendo il programma Dell Diagnostics dal CD Drivers and Utilities (opzionale), rimuovere il CD. 5 Chiudere la schermata di verifica per ritornare alla schermata Main Menu (Menu principale). Per uscire dal programma Dell Diagnostics e riavviare il computer, chiudere la schermata Main Menu (Menu principale).
  • Seite 168: Indicatori Della Diagnostica

    Se non è possibile computer si blocca identificare il problema, contattare la Dell per durante il POST supporto tecnico. Per informazioni su come contattare la Dell, consultare la Guida dell'utente in linea.
  • Seite 169 • Se disponibile, installare nel computer memoria correttamente funzionante dello stesso tipo. • Se il problema persiste, contattare la Dell. Per informazioni su come contattare la Dell, consultare la Guida dell'utente in linea. Possibile guasto della scheda grafica.
  • Seite 170 • Se disponibile, installare nel computer memoria correttamente funzionante dello stesso tipo. • Se il problema persiste, contattare la Dell. Per informazioni su come contattare la Dell, consultare la Guida dell'utente in linea. I moduli di memoria sono rilevati, ma •...
  • Seite 171: Codici Bip

    Se il computer emette un bip in fase di avvio, seguire la procedura descritta. 1 Annotare il codice bip. 2 Consultare "Dell Diagnostics" a pagina 164 per identificare una causa più seria. 3 Contattare la Dell per supporto tecnico. Per informazioni su come contattare la Dell, consultare la Guida dell'utente in linea. Codice...
  • Seite 172: Risoluzione Di Incompatibilità Del Software E Dell'hardware

    Risoluzione di incompatibilità del software e dell'hardware Se durante l'installazione del sistema operativo una periferica non viene rilevata oppure viene rilevata e configurata in modo errato, è possibile usare l'utilità Risoluzione dei problemi relativi all'hardware per risolvere il problema di compatibilità.
  • Seite 173: Reinstallazione Di Microsoft Windows Xp

    Le procedure in questo documento sono state scritte per la visualizzazione predefinita di Windows XP Home Edition, quindi la procedura sarà diversa se si imposta il computer Dell™ sulla visualizzazione classica di Windows o se si sta utilizzando Windows XP Professional.
  • Seite 174 Se Ripristino driver di periferica non risolve il problema, utilizzare Ripristino configurazione di sistema per riportare il sistema operativo allo stato operativo in cui si trovava prima dell'installazione del nuovo driver della periferica (consultare "Uso del Ripristino configurazione di sistema di Microsoft Windows XP"...
  • Seite 175 5 Premere i tasti di direzione per selezionare CD-ROM, quindi premere <Invio>. 6 Quando viene visualizzato il messaggio Premere un tasto per avviare da CD-ROM, premere un tasto. Installazione di Windows XP 1 Quando viene visualizzata la schermata Installazione di Windows XP, premere <Invio> per selezionare Installa Windows ora.
  • Seite 176: Uso Del Cd Drivers And Utilities

    3 Fare clic su OK per continuare. Per completare l'installazione, rispondere alle domande visualizzate dal programma di installazione. 4 Fare clic su Next (Avanti) nella schermata Welcome Dell System Owner (Introduzione al sistema Dell). 5 Selezionare le voci appropriate per System Model (Modello del sistema), Operating System (Sistema operativo), Device Type (Tipo di periferica) e Topic (Argomento).
  • Seite 177: Indice Analitico

    Indice analitico garanzia, 139 Guida alle informazioni sul alimentazione hardware prodotto, 139 indicatore, 151 codici bip, 171 Guida dell'utente, 140 Dell Diagnostics, 164 in linea, 141 normativa, 139 sicurezza, 139 driver Sistema operativo, 140 indicatore di alimentazione elenco di, 176...
  • Seite 178 140, 173 risoluzione dei problemi Ripristino configurazione di codici bip, 171 sistema, 172 conflitti, 172 Risoluzione dei problemi Dell Diagnostics, 164 relativi all'hardware, 172 Guida in linea e supporto tecnico, 141 indicatori della diagnostica, 168 indicatori di sistema, 167...
  • Seite 179 Dell™ OptiPlex™ 320 Guía de referencia rápida Modelos DCSM, DCNE w w w . d e l l . c o m | s u p p o r t . d e l l . c o m...
  • Seite 180 La reproducción de este documento de cualquier manera sin la autorización por escrito de Dell Inc. queda estrictamente prohibida. Marcas comerciales utilizadas en este texto: Dell, OptiPlex y el logotipo de DELL son marcas comerciales de Dell Inc.; Microsoft y Windows son marcas comerciales registradas de Microsoft Corporation;...
  • Seite 181 ......Dell Diagnostics ......
  • Seite 182 Contenido...
  • Seite 183: Localización De Información

    Puede utilizar el CD para volver a instalar los controladores (consulte el apartado “Reinstalación de controladores y utilidades” en la Guía del usuario en línea). Para ejecutar los Dell Diagnostics (consulte el apartado “Dell Diagnostics” en la página 208) o para tener acceso a la documentación.
  • Seite 184 Haga clic en Inicio→ Ayuda y soporte técnico→ Guías del • Cómo detectar y solucionar problemas usuario y del sistema Dell→ Guías del sistema. Haga clic en la Guía del usuario de su ordenador. La Guía del usuario también está disponible en el CD Drivers and Utilities (Controladores y utilidades).
  • Seite 185 Para descargar Desktop System Software: también debe volver a instalar lautilidad DSS. DSS Vaya a support.dell.com, seleccione su zona o segmento proporciona actualizaciones importantes del empresarial e introduzca la etiqueta de servicio. sistema operativo y asistencia para unidades de disquete USB de 3,5 pulgadas de Dell™,...
  • Seite 186: Configuración Del Ordenador

    Configuración del ordenador PRECAUCIÓN: Antes de realizar cualquiera de los procedimientos de esta sección, siga las instrucciones de seguridad que se encuentran en la Guía de información del producto. AVISO: Si el ordenador tiene instalada una tarjeta de expansión (como una tarjeta de módem), conecte el cable adecuado a la tarjeta, no al conector situado en el panel posterior.
  • Seite 187 3 Conecte el monitor utilizando el cable DVI blanco o el cable VGA azul (no conecte ambos cables). Alinee e inserte suavemente el cable del monitor para evitar que se doblen las patas del conector. Apriete los tornillos mariposa de los conectores del cable. NOTA: En algunos monitores el conector de vídeo se encuentra debajo de la parte posterior de la pantalla.
  • Seite 188 Conexiones de alimentación AVISO: Con el fin de evitar dañar un ordenador que tenga un interruptor de selección de voltaje manual, coloque dicho interruptor en la posición que más se parezca a la de la potencia de corriente alterna disponible en su área. AVISO: En Japón, el conmutador de selección de voltaje debe estar establecido en la posición 115 V incluso si el suministro de corriente alterna disponible en Japón es de 100 V.
  • Seite 189: Vistas Del Sistema

    Utilice la etiqueta de servicio para identificar el ordenador al acceder al sitio web de servicio Dell Support o al llamar al servicio de soporte técnico. Unidad de CD/DVD Inserte un CD o DVD (si lo admite) en esta unidad.
  • Seite 190 Conectores USB 2.0 (2) Use los conectores USB situados en la parte anterior del ordenador para los dispositivos que se conectan ocasionalmente, como, por ejemplo, palancas de mando o cámaras, o para dispositivos USB de inicio. Se recomienda la utilización de los conectores USB en la parte posterior del ordenador para los dispositivos que suelen estar siempre conectados, como las impresoras y los teclados.
  • Seite 191: Ordenador De Minitorre - Vista Posterior

    Ordenador de minitorre — Vista posterior Pestillo de liberación de la cubierta Este seguro le permite abrir la cubierta de su ordenador. Anillo del candado Inserte un candado para bloquear la cubierta del ordenador. Conector de alimentación Inserte el cable de alimentación en este conector. Guía de referencia rápida...
  • Seite 192: Ordenador De Minitorre - Conectores Del Panel Posterior

    Interruptor de selección de voltaje Su ordenador está equipado con un interruptor de selección de voltaje manual. Con el fin de evitar dañar un ordenador que tenga un interruptor de selección de voltaje manual, coloque dicho interruptor en la posición que más se parezca a la de la potencia de corriente alterna disponible en su área.
  • Seite 193 Conector del adaptador Para conectar el ordenador a una red o a un dispositivo de banda ancha, conecte de red un extremo de un cable de red a un enchufe de red o a su dispositivo de banda ancha. Conecte el otro extremo del cable de red al conector del adaptador de red, situado en el panel posterior del ordenador.
  • Seite 194: Ordenador De Sobremesa - Vista Anterior

    Placa de identificación Esta placa puede girarse de modo que esté orientada igual que su ordenador. Para de Dell girar la placa, coloque los dedos alrededor de la placa, presione con fuerza y gírela. También puede girarla utilizando la ranura que hay cerca de la parte inferior de la placa.
  • Seite 195: Ordenador De Sobremesa - Vista Posterior

    Ubicación de la etiqueta Utilice la etiqueta de servicio para identificar el ordenador al acceder al sitio web de servicio Dell Support o al llamar al servicio de soporte técnico. Ordenador de sobremesa — Vista posterior Ranuras para tarjetas Acceda a los conectores de las tarjetas PCI y PCI Express instaladas.
  • Seite 196: Ordenador De Sobremesa - Conectores Del Panel Posterior

    Interruptor de selección de Su ordenador está equipado con un interruptor de selección de voltaje voltaje manual. Con el fin de evitar dañar un ordenador que tenga un interruptor de selección de voltaje manual, coloque dicho interruptor en la posición que más se parezca a la de la potencia de corriente alterna disponible en su área.
  • Seite 197 Conector del adaptador Para conectar el ordenador a una red o a un dispositivo de banda ancha, conecte de red un extremo de un cable de red a un enchufe de red o a su dispositivo de banda ancha. Conecte el otro extremo del cable de red al conector del adaptador de red, situado en el panel posterior del ordenador.
  • Seite 198: Cómo Quitar La Cubierta Del Ordenador

    AVISO: Sólo un técnico certificado debe realizar reparaciones en el ordenador. La garantía no cubre los daños por reparaciones no autorizadas por Dell. AVISO: Cuando desconecte un cable, tire de su conector o de su lazo liberador de tensión, y no del cable mismo.
  • Seite 199: Ordenador De Minitorre

    3 Desconecte el ordenador y todos los dispositivos conectados de las tomas de alimentación eléctrica correspondientes y, a continuación, pulse el botón de encendido para conectar a tierra la placa base. 4 Si fuera aplicable, retire la base del ordenador (para obtener más instrucciones, consulte la documentación que se incluye con la base).
  • Seite 200 Ranura para cable de seguridad Pestillo de liberación de la cubierta Anillo del candado Guía de referencia rápida...
  • Seite 201: Ordenador De Sobremesa

    Ordenador de sobremesa PRECAUCIÓN: Antes de comenzar cualquiera de los procedimientos de esta sección, siga las instrucciones de seguridad que se encuentran en la Guía de información del producto. PRECAUCIÓN: Para protegerse de las descargas eléctricas, desconecte el ordenador de la toma de alimentación eléctrica antes de retirar la cubierta.
  • Seite 202: Interior De Su Ordenador

    Interior de su ordenador Ordenador de minitorre Unidad de CD/DVD Tarjeta del sistema Unidad de disco flexible Ensamblaje de disipador de calor Fuente de alimentación Unidad de disco duro Guía de referencia rápida...
  • Seite 203 Componentes de la placa base Guía de referencia rápida...
  • Seite 204 Conector del ventilador (FAN) Timbre interno (SPKR1) Conector del procesador (CPU) Puente de contraseña (PSWD) Conector de alimentación del procesador Puente de restablecimiento del reloj en tiempo real (12VPOWER) (RTCRST) Conector del panel anterior (FNT_PANEL) Zócalo de la batería (BATT) Conectores del módulo de memoria Conector de tarjeta PCI Express x16 (DIMM_1, DIMM_2)
  • Seite 205: Ordenador De Sobremesa

    Puente Posición Descripción PSWD Las funciones de contraseña están activadas (valor predeterminado). Las funciones de contraseña están desactivadas. RTCRST El reloj de tiempo real se ha activado (valor predeterminado). El reloj de tiempo real se está restableciendo (puenteado temporalmente). puenteado no puenteado Ordenador de sobremesa Compartimento de las unidades (CD/DVD,...
  • Seite 206 Componentes de la placa base Guía de referencia rápida...
  • Seite 207 Conector del ventilador (FAN) Timbre interno (SPKR1) Conector del procesador (CPU) Puente de contraseña (PSWD) Conector de alimentación del procesador (12VPOWER) Puente de reinicio de RTC (RTCRST) Conector del panel anterior (FNT_PANEL) Zócalo de la batería (BATT) Conectores del módulo de memoria (DIMM_1, DIMM_2) 14 Conector de tarjeta PCI Express x16 Conectores de unidad serie ATA (SATA0, SATA1) Conector de tarjeta PCI (2)
  • Seite 208: Solución De Problemas

    Dell Support en support.dell.com. Si se produce algún problema en el ordenador para el que necesite la ayuda de Dell, escriba una descripción detallada del error, los códigos de sonido o los patrones de los indicadores de diagnóstico, introduzca el código de servicio rápido y la etiqueta de servicio que aparece a continuación y póngase en...
  • Seite 209 6 Escriba 1 para iniciar el menú del CD Drivers and Utilities (Controladores y utilidades). 7 Escriba 2 para iniciar los Dell Diagnostics. 8 Seleccione Run the 32 Bit Dell Diagnostics (Ejecutar los Dell Diagnostics de 32 bits) de la lista numerada. Si se muestran varias versiones, seleccione la apropiada para su ordenador.
  • Seite 210 La etiqueta de servicio para su ordenador está situada en la parte superior de cada pantalla de prueba. Si se pone en contacto con Dell, el servicio de asistencia técnica le pedirá su etiqueta de servicio. 3 Si ejecuta una prueba desde la opción Custom Test (Prueba personalizada) o Symptom Tree (Árbol de síntomas), haga clic en la ficha correspondiente que se describe en la tabla siguiente para obtener más...
  • Seite 211: Indicadores Luminosos Del Sistema

    5 Cierre la pantalla de prueba para volver a la pantalla Main Menu (Menú principal). Para salir de Dell Diagnostics y reiniciar el ordenador, cierre la pantalla Main Menu (Menú principal). Indicadores luminosos del sistema El indicador de alimentación puede indicar un problema en el ordenador.
  • Seite 212: Diagnóstico

    Dell para obtener asistencia técnica. la prueba POST Para obtener información acerca de cómo ponerse en contacto con Dell, consulte la Guía del usuario en línea. Diagnóstico PRECAUCIÓN: Antes de comenzar cualquiera de los procedimientos de esta sección, siga las instrucciones de seguridad que se encuentran en la Guía de información del producto.
  • Seite 213 • Si el problema persiste, póngase en contacto con Dell. Para obtener información acerca de cómo ponerse en contacto con Dell, consulte la Guía del usuario en línea. Se ha producido un posible fallo de la • Si el ordenador incluye una tarjeta gráfica, tarjeta de gráficos.
  • Seite 214 • Si el problema persiste, póngase en contacto con Dell. Para obtener información acerca de cómo ponerse en contacto con Dell, consulte la Guía del usuario en línea. Se han detectado los módulos de • Asegúrese de que no existen requisitos memoria, pero existe un error de especiales para la colocación del conector...
  • Seite 215: Códigos De Sonido

    Si el ordenador emite sonidos durante el inicio: 1 Anote el código de sonido. 2 Consulte el apartado “Dell Diagnostics” en la página 208 para identificar una causa más grave. 3 Diríjase a Dell para obtener asistencia técnica. Para obtener información acerca de cómo ponerse en contacto con Dell, consulte la Guía del usuario en línea.
  • Seite 216: Cómo Resolver Incompatibilidades De Software Y Hardware

    Cómo resolver incompatibilidades de software y hardware Si un dispositivo no se detecta durante la configuración del sistema operativo o se detecta pero no está configurado correctamente, puede utilizar el Agente de solución de errores de hardware para solucionar la incompatibilidad. 1 Haga clic en el botón Inicio y en Ayuda y soporte técnico.
  • Seite 217: Cómo Volver A Instalar Microsoft Windows Xp

    Los procedimientos de este documento fueron escritos para la vista predefinida de Windows en Windows XP Home Edition, por lo que los pasos serán diferentes si configura su ordenador Dell con la vista clásica de Windows o está utilizando Windows XP Professional.
  • Seite 218 Instalar Windows XP. 3 Reinicie el ordenador. 4 Pulse <F12> inmediatamente después de que aparezca el logotipo de DELL. Si se muestra el logotipo del sistema operativo, espere hasta que aparezca el escritorio de Windows y, a continuación, apague el ordenador e inténtelo de nuevo.
  • Seite 219 5 Pulse las teclas de flecha para seleccionar el CD-ROM y pulse <Intro>. 6 Cuando aparezca el mensaje Pulse cualquier tecla para arrancar desde el CD, pulse cualquier tecla. Configuración de Windows XP 1 Cuando aparezca la pantalla Programa de instalación de Windows XP, presione <Intro> para seleccionar Instalar Windows ahora.
  • Seite 220: Uso Del Cd Drivers And Utilities

    3 Haga clic en OK (Aceptar) para continuar. Para completar la instalación, responda a las peticiones ofrecidas por el programa de instalación. 4 Haga clic en Next (Siguiente) en la pantalla Welcome Dell System Owner (Bienvenida al propietario del sistema Dell).
  • Seite 221: Índice

    Índice alimentación Dell Diagnostics, 208 hardware indicador, 195 códigos de sonido, 215 diagnósticos Dell Diagnostics, 208 archivo de ayuda códigos de sonido, 215 Centro de ayuda y soporte Dell Diagnostics, 208 técnico de Windows, 185 documentación Contrato de licencia del usuario final, 183 indicador de alimentación...
  • Seite 222 215 códigos de sonido, 215 indicadores luminosos de conflictos de hardware y diagnóstico, 212 software, 216 indicadores luminosos del Dell Diagnostics, 208 sistema, 211 indicadores luminosos de diagnóstico, 212 indicadores luminosos del sistema, 211 restaurar al estado de...
  • Seite 223 Dell™ OptiPlex™ 320 Hızlı Başvuru Kılavuzu Modeller DCSM, DCNE w w w . d e l l . c o m | s u p p o r t . d e l l . c o m...
  • Seite 224 Corporation'ın tescilli ticari markaları ve Intel ve Pentium, Intel Corporation'ın tescilli ticari markalarıdır. Bu belgede, marka ve adların sahiplerine ya da ürünlerine atıfta bulunmak için başka ticari marka ve ticari adlar kullanılabilir. Dell Inc. kendine ait olanların dışındaki ticari markalar ve ticari isimlerle ilgili hiçbir mülkiyet hakkı olmadığını beyan eder.
  • Seite 225 ....... . . Dell Diagnostics ......
  • Seite 226 İçerik...
  • Seite 227: Bilgi Bulma

    Sürücüleri yeniden yüklemek için CD'yi kullanabilirsiniz • Masaüstü Sistem Yazılımı (DSS) (çevrimiçi Kullanım Kılavuzu 'nda "Sürücüleri ve Yardımcı Programları Yeniden Yükleme" konusuna bakın) Dell Diagnost programını çalıştırmak içinics (bkz "Dell Diagnostics" sayfa 252) veya belgenize erişmek için. Bilgisayarınızla ilgili teknik değişiklikler ya da...
  • Seite 228 • Parçaları nasıl çıkartabilirim ve değiştirebilirim? • Özellikler Microsoft Windows XP Yardım ve Destek Merkezi • Sistem ayarlarını nasıl yapılandırabilirim? Başlat→ Yardım ve Destek→ Dell User and System • Sorunları nasıl giderebilirim ve çözebilirim? Guides→ System Guides seçeneklerini tıklatın. Bilgisayarınızla ilgili User's Guide seçeneğini tıklatın.
  • Seite 229 NOT: Uygun destek sitesini görüntülemek için, bulunduğunuz bölgeyi veya iş kolunu seçin. • Topluluk — Diğer Dell müşterileriyle çevrimiçi tartışma • Yükseltmeler — Bellek, sabit sürücü ve işletim sistemi gibi bileşenler için yükseltme bilgileri • Müşteri Hizmetleri — Iletişim bilgileri, servis çağrısı ve sipariş...
  • Seite 230: Bilgisayarınızı Ayarlama

    Bilgisayarınızı Ayarlama UYARI: Bu bölümdeki yordamları uygulamadan önce, Ürün Bilgisi Kilavuzu'ndaki güvenlik yönergelerine bakın. DİKKAT: Bilgisayarınızda genişletme kartı (örneğin bir modem kartı) takılıysa, ilgili kabloyu arka paneldeki konektöre değil, karta takın. DİKKAT: Bilgisayarın uygun çalışma sıcaklığını korumasına yardımcı olmak için, bilgisayarı bir duvara veya kasa etrafında hava dolaşımını...
  • Seite 231 Monitörü ya beyaz DVI kablosunu veya mavi VGA kablosunu (her iki kabloyu birden bağlamayın) kullanarak bağlayın. Konektör pinlerinin eğilmemesine dikkat ederek, monitör kablosunu hizalayın ve hafifçe takın. Kablo konektörlerindeki kelebek başlı vidaları sıkın. NOT: Bazı monitörlerde, ekranın arkasının alt tarafında video konektörü vardır. Konektör yerleri için, monitörünüzle gelen belgelere bakın.
  • Seite 232 Güç Bağlantıları DİKKAT: Voltaj seçim anahtarını el ile ayarlamadan bilgisayarınızın zarar görmemesi için, anahtarı bulunduğunuz bölgedeki voltaja en yakın değere ayarlayın. DİKKAT: Japonya'da AC gücü 100 V olmasına karşın, voltaj seçim anahtarı 115 V olarak ayarlanmalıdır. Voltaj seçim anahtarının bölgenize uygun şekilde ayarlandığını doğrulayın. Bilgisayarınızda manüel voltaj seçim anahtarı...
  • Seite 233: Sistem Görünümleri

    Sistem Görünümleri Mini Tower Bilgisayar — Önden Görünüş Service Tag yeri Dell Support web sitesine eriştiğinizde veya teknik desteği aradığınızda bilgisayarınızı tanıtmak için Service Tag'i kullanın. CD/DVD sürücüsü Bu sürücüye CD veya DVD (destekleniyorsa) takın. disket sürücüsü Bu sürücüye disket takın.
  • Seite 234 USB 2.0 konektörleri (2) Oyun çubuğu veya kamera gibi seyrek kullandığınız aygıtlar veya önyüklenebilir USB aygıtları için bilgisayarın ön tarafındaki USB konektörlerini kullanın. Yazıcı ve klavye gibi genellikle bağlı kalan aygıtlar için bilgisayarın arkasındaki USB konektörlerini kullanmanız önerilir. tanılama ışıkları Tanılama koduna göre bilgisayarınızdaki sorunları...
  • Seite 235: Mini Tower Bilgisayar - Arkadan Görünüş

    Mini Tower Bilgisayar — Arkadan Görünüş kapak serbest bırakma Bu mandal, bilgisayar kapağını açmanızı sağlar. mandalı asma kilit halkası Bilgisayar kapağını kilitlemek için bir asma kilit takın. güç konektörü Güç kablosunu bu konektöre takın. Hızlı Başvuru Kılavuzu...
  • Seite 236: Mini Tower Bilgisayar - Arka Panel Konektörleri

    voltaj seçim anahtarı Bilgisayarınız manuel voltaj seçim anahtarı ile donatılmıştır. Voltaj seçim anahtarını el ile ayarlamadan bilgisayarınızın zarar görmemesi için, anahtarı bulunduğunuz bölgedeki voltaja en yakın değere ayarlayın. DİKKAT: Japonya'da, voltaj seçim anahtarı 115-V pozisyonuna ayarlanmalıdır. Ayrıca monitörünüzün ve bağlı aygıtlarınızın nominal elektrik değerlerinin bölgenizde kullanılan AC gücüyle çalışmaya uygun olduğundan emin olun.
  • Seite 237 ağ bağdaştırıcısı Bilgisayarınızı bir ağa veya geniş bant aygıtına bağlamak için, ağ kablosunun bir konektörü ucunu bir ağ prizine veya ağınıza ya da geniş bant aygıtına bağlayın. Ağ kablosunun diğer ucunu bilgisayarınızın arka panelindeki ağ bağdaştırıcısı konektörüne takın. Ağ kablosu tam olarak yerine oturduğunda bir tık sesi duyarsınız. NOT: Ağ...
  • Seite 238: Masaüstü Bilgisayar - Önden Görünüş

    Işletim sisteminizde ACPI etkinse, güç düğmesine bastığınızda bilgisayar işletim sisteminden kapanır. Bu rozet bilgisayarınızın yönüyle eşleşecek şekilde döndürülebilir. Rozeti Dell rozeti döndürmek için, rozetin kenarlarından tutun, sıkıca bastırın ve rozeti döndürün. Rozetin alt kısmındaki yuvayı kullanarak da rozeti döndürebilirsiniz. Hızlı Başvuru Kılavuzu...
  • Seite 239: Masaüstü Bilgisayar - Arkadan Görünüş

    Bu sürücüye disket takın. CD/DVD sürücüsü Bu sürücüye CD veya DVD (destekleniyorsa) takın. Service Tag yeri Dell Support web sitesine eriştiğinizde veya teknik desteği aradığınızda bilgisayarınızı tanıtmak için Service Tag'i kullanın. Masaüstü Bilgisayar — Arkadan Görünüş kart yuvaları Takılı PCI ve PCI Express Kartlarına erişim konektörü.
  • Seite 240: Masaüstü Bilgisayar - Arka Panel Konektörleri

    voltaj seçim anahtarı Bilgisayarınız manuel voltaj seçim anahtarı ile donatılmıştır. Voltaj seçim anahtarını el ile ayarlamadan bilgisayarınızın zarar görmemesi için, anahtarı bulunduğunuz bölgedeki voltaja en yakın değere ayarlayın. DİKKAT: Japonya'da, voltaj seçim anahtarı 115-V pozisyonuna ayarlanmış olmalıdır. Ayrıca monitörünüzün ve bağlı aygıtlarınızın nominal elektrik değerlerinin bölgenizde kullanılan AC gücüyle çalışmaya uygun olduğundan emin olun.
  • Seite 241 ağ bağdaştırıcısı Bilgisayarınızı ağa veya geniş bant aygıtına bağlamak için, ağ kablosunun bir ucunu konektörü ağ prizine veya ağ ya da geniş bant aygıtınıza bağlayın. Ağ kablosunun diğer ucunu bilgisayarınızın arka panelindeki ağ bağdaştırıcısı konektörüne takın. Ağ kablosu tam olarak yerine oturduğunda bir tık sesi duyarsınız. NOT: Ağ...
  • Seite 242: Bilgisayar Kapağını Çıkarma

    Kartları uç kısmından veya metal montaj kenarından tutun. Bileşenleri, örneğin bir işlemciyi pinlerinden değil kenarlarından tutun. DİKKAT: Yalnızca yetkili bir servis teknisyeni bilgisayarınızda onarım yapmalıdır. Dell tarafından yetkilendirilmemiş servislerden kaynaklanan zararlar garantinizin kapsamında değildir. DİKKAT: Bir kabloyu çıkarırken kablonun kendisini değil, fişi veya koruyucu halkayı tutarak çekin. Bazı kablolarda kilitleme dilleri vardır;...
  • Seite 243: Mini Tower Bilgisayar

    Bilgisayarınızı ve takılı tüm aygıtları elektrik prizlerinden çıkarın ve ardından sistem kartını topraklamak için güç düğmesine basın. Uygunsa, bilgisayarın standını çıkarın (yönergeler için, standla birlikte gelen belgelere bakın). UYARI: Elektrik çarpmalarına karşı korunmak için, kapağı çıkarmadan önce bilgisayarınızın fişini elektrik prizinden çekin.
  • Seite 244 güvenlik kablosu yuvası kapak serbest bırakma mandalı asma kilit halkası Hızlı Başvuru Kılavuzu...
  • Seite 245: Masaüstü Bilgisayar

    Masaüstü Bilgisayar UYARI: Bu bölümdeki yordamlara başlamadan önce, Ürün Bilgisi Kilavuzu'ndaki güvenlik yönergelerini izleyin. UYARI: Elektrik çarpmalarına karşı korunmak için, kapağı çıkarmadan önce bilgisayarınızın fişini elektrik prizinden çekin. "Başlamadan Önce" sayfa 242 konusundaki yönergeleri izleyin. Arka paneldeki asma kilit halkasına bir asma kilit taktıysanız asma kilidi çıkarın. Kapağı...
  • Seite 246: Bilgisayarınızın İçi

    Bilgisayarınızın İçi Mini Tower Bilgisayar CD/DVD sürücüsü sistem kartı disket sürücüsü ısı emicisi birimi güç kaynağı sabit sürücü Hızlı Başvuru Kılavuzu...
  • Seite 247 Sistem Kartı Bileşenleri Hızlı Başvuru Kılavuzu...
  • Seite 248 fan konektörü (FAN) iç hoparlör (SPKR1) işlemci konektörü (CPU) parola atlatıcı (PSWD) işlemci güç konektörü (12VPOWER) gerçek zaman saati atlatıcıyı sıfırlar (RTCRST) ön panel konektörü (FNTPANEL) pil yuvası (BATT) bellek modülü konektörleri (DIMM1, DIMM2) PCI Express x16 kart konektörü SATA sürücü konektörleri (SATA0, SATA1) PCI kart konektörleri (2) güç...
  • Seite 249: Masaüstü Bilgisayar

    Atlatıcı Ayar Açıklama PSWD Parola özellikleri etkindir (varsayılan ayar). Parola özellikleri devre dışıdır. RTCRST Gerçek zamanlı saat etkindir (varsayılan ayar). Gerçek zamanlı saat sıfırlanır (geçici atlatmalı). atlatmalı atlatmasız Masaüstü Bilgisayar sürücü yuvası (CD/DVD, kart yuvaları disket ve sabit sürücü) güç kaynağı ısı...
  • Seite 250 Sistem Kartı Bileşenleri Hızlı Başvuru Kılavuzu...
  • Seite 251 fan konektörü (FAN) iç hoparlör (SPKR1) işlemci konektörü (CPU) parola atlatıcı (PSWD) işlemci güç konektörü (12VPOWER) RTC sıfırlama atlatıcısı (RTCRST) ön panel konektörü (FNTPANEL) pil yuvası (BATT) bellek modülü konektörleri (DIMM1, DIMM2) PCI Express x16 kart konektörü seri ATA sürücü konektörleri (SATA0, SATA1) PCI kartı...
  • Seite 252: Sorun Çözme

    Sorun Çözme Dell, bilgisayarınızın beklendiği şekilde çalışmaması halinde yardımcı olacak çeşitli araçlar sağlamaktadır. Bilgisayarınız için kullanılabilecek en son sorun giderme bilgileri için, support.dell.com adresindeki Dell Destek web sitesine bakın. Bilgisayarınızda Dell'den yardım almanızı gerektiren sorunlar olursa, hatanın ayrıntılı bir açıklamasını, sesli uyarı...
  • Seite 253 Drivers and Utilities CD'si menüsünü başlatmak için 1 yazın. Dell Diagnostics programını başlatmak için 2 yazın. Numaralı listeden Run the 32 Bit Dell Diagnostics'ı (32 Bit Dell Diagnostics Programını Çalıştır) seçin. Birden çok sürüm listelenmişse, bilgisayarınıza uygun sürümü seçin. Dell Diagnostics programının Ana Menüsü göründüğünde, yürütmek istediğiniz sınamayı seçin.
  • Seite 254 Sınama sırasında bir sorunla karşılaşılırsa, sorunun hata kodunu ve açıklamasını içeren bir ileti görünür. Hata kodunu ve sorun açıklamasını not edin ve ekrandaki yönergeleri izleyin. Hata durumunu çözemiyorsanız, Dell'e başvurun. Dell'e başvurma hakkında bilgi için, çevrimiçi Kullanım Kılavuzu'nuza bakın. NOT: Bilgisayarınızın Service Tag numarası, her sınama ekranının en üstünde bulunur.
  • Seite 255: Sistem Işıkları

    Belirli bir sorunu tanımlayıp tanımlamadığını görmek için Tanılama Işıklarını denetleyin (bkz. "Tanılama Işıkları" sayfa 256). Bilgisayar önyükleme yapmıyorsa, teknik yardım için Dell'e başvurun. Dell'e başvurma hakkında bilgi için, çevrimiçi Kullanım Kılavuzu'nuza bakın. Yanıp sönen sarı Güç kaynağı veya sistem kartı arızası...
  • Seite 256: Tanılama Işıkları

    şekilde takana kadar devam edin. • Mümkünse, bilgisayarınıza aynı türde, düzgün çalışan bir bellek takın. • Sorun devam ederse, Dell'e başvurun. Dell'e başvurma hakkında bilgi için, çevrimiçi Kullanım Kılavuzu'nuza bakın. Hızlı Başvuru Kılavuzu...
  • Seite 257 şekilde takana kadar devam edin. • Mümkünse, bilgisayarınıza aynı türde, düzgün çalışan bir bellek takın. • Sorun devam ederse, Dell'e başvurun. Dell'e başvurma hakkında bilgi için, çevrimiçi Kullanım Kılavuzu'nuza bakın. Bellek modülleri saptandı, ancak bir bellek •...
  • Seite 258: Bip Kodları

    Bu sesli uyarı kodu, bilgisayarın bir bellek sorunuyla karşılaştığını anlatır. Bilgisayarınız başlatma sırasında uyarı sesi çıkartırsa: Sesli uyarı kodunu not edin. Daha ciddi bir sebebi bulmak için, bkz. "Dell Diagnostics" sayfa 252. Teknik destek için Dell'le temasa geçin. Dell'e başvurma hakkında bilgi için, çevrimiçi Kullanım Kılavuzu'nuza bakın. Sebep Sebep 1-1-2 Mikroişlemci kayıt hatası...
  • Seite 259: Yazılım Ve Donanım Uyuşmazlıklarını Çözümleme

    Sebep Sebep 3-1-3 Ana kesinti maskesi kayıt hatası 4-2-2 Kapatma hatası 4-2-3 Kapı A20 hatası 4-4-1 Seri veya paralel bağlantı noktası testi hatası 4-2-4 Korumalı kipte beklenmedik kesinti 4-4-2 Gölgeli belleğe kod açma hatası. 4-3-1 Adres 0FFFFh üzerinde bellek hatası 4-4-3 Matematik yardımcı...
  • Seite 260 Başlat düğmesini tıklatın, Tüm Programlar→ Donatılar→ Sistem Araçları'nın üzerine gelin ve ardından Sistem Geri Yükleme'yi tıklatın. Bilgisayarımı daha önceki bir tarihe geri yükle'nin seçildiğinden emin olun ve Devam'ı tıklatın. Bilgisayarınızı geri yüklemek istediğiniz bir takvim tarihini tıklatın. Geri Yükleme Noktası Seç ekranı, geri yükleme noktalarını görmenizi ve seçmenizi sağlayan bir takvim içerir.
  • Seite 261: Microsoft Windows Xp'yi Yeniden Yükleme

    Microsoft Windows XP'yi Yeniden Yükleme Başlamadan Önce NOT: Bu belgedeki yordamlar Windows XP Home Edition'daki varsayılan Windows görünümü için yazılmıştır; Dell bilgisayarınızı Windows Klasik görünümüne ayarlarsanız veya Windows XP Professional kullanıyorsanız adımlar değişebilir. Yeni yüklenen bir sürücüdeki sorunu düzeltmek için Windows XP işletim sistemini yeniden yüklemeyi düşünüyorsanız, önce Windows XP Aygıt Sürücüsünü...
  • Seite 262 DİKKAT: Operating System CD'si, Windows XP'yi yeniden yükleme seçenekleri sunar. Bu seçenekler, dosyaların üzerine yazabilir ve sabit sürücünüzde yüklü programları etkileyebilir. Bu yüzden, bir Dell teknik destek temsilcisi bunu yapmanızı söylemedikçe Windows XP'yi yeniden yüklemeyin. DİKKAT: Windows XP ile çakışmaları önlemek için, Windows XP'yi yeniden yüklemeden önce, bilgisayarınıza yüklü...
  • Seite 263: Drivers And Utilities Cd'sini Kullanma

    Kurulumu) penceresi açılır ve Drivers and Utilities CD'sinin yüklemeye başlayacağını bildirir. Devam etmek için Tamam'ı tıklatın. Yüklemeyi tamamlamak için yükleme programının istediklerini yanıtlayın. Welcome Dell System Owner (Hoş Geldiniz Dell Sistemi Sahibi) ekranında İleri 'yi tıklatın. Uygun Sistem Modeli, İşletim Sistemi, Aygıt Türü, ve Konu'yu seçin. Hızlı Başvuru Kılavuzu...
  • Seite 264 Bilgisayarınızın Sürücüleri Bilgisayarınız için bir aygıt sürücüleri listesi görüntülemek için: Topic (Konu) açılan menüsünde My Drivers'ı (Sürücülerim) tıklatın. Drivers and Utilities CD'si (isteğe bağlı) bilgisayarınızın donanımını ve işletim sistemini tarar ve sistem yapılandırmanız için aygıt sürücülerinin bir listesi görüntülenir. Uygun sürücüyü tıklatın ve sürücüyü bilgisayarınıza yükleme yönergelerini uygulayın. Bilgisayarınız için kullanılabilen tüm sürücüleri görmek için, Topic açılan menüsünde Drivers'ı...
  • Seite 265: Dizin

    259 mevzuat bilgileri, 227 hata iletileri Dell Diagnostics, 252 sesli uyarı kodları, 258 sistem ışıkları, 255 Dell support site, 229 operating system tanılama ışıkları, 256 reinstalling, 228 Help and Support Center, 229 Operating System CD, 228 Dizin...
  • Seite 266 228 bilgisayarı önceki çalışma Sistem Geri Yükleme, 259 durumuna geri yükleme, 259 yeniden yükleme, 261 çakışmalar, 259 Dell Diagnostics, 252 Donanım Sorun Giderici, 259 sesli uyarı kodları, 258 sistem ışıkları, 255 yazılım çakışmalar, 259 tanılama ışıkları, 256 yeniden yükleme sorunlar.

Diese Anleitung auch für:

Optiplex 320 dcne

Inhaltsverzeichnis