Inhaltszusammenfassung für Mackie ProFX8v2
- Seite 1 ProFX8v2 Professional Effects Mixers with USB QUICK STARTGUIDE ProFX22v2 ProFX30v2 @Sits; 0-0-0 ..„. 0-0-0=0-...
- Seite 2 ImportantSafety Instructions Read these insttucticns. 20.NOTE: This e quipment hos been t ested ond found t ocomply with the limits f or these i nstructions oCloss Bdigital device, pursuont toport 1 5ofthe FCC R ules. These limits o re oll w arning designed toprovide reasonable protection...
- Seite 3 Instruccione Importantes DeSeguridad — Leoestos instructiones. 19.El e nchufe de alimentcciån oadoptodor sirve c omo dispositivo de desconexiön, Conse:v estos i nstrucciones. 10 que c olöquelo de formo que s iempte puedo acceder oélfåcilmente. Preste o tenci6n otodoslosovisos. 20.NOTA: Se ha verificado que e sta u nidod comple con l os limites de los aporatos Sigo t odo 10 indicodo enlcsinstrucciones...
- Seite 4 équipements.En méme temps, votre coopération dans la mise au rebut de ce produitcontribuera l'utilisation efficacedesressources naturelles. P ourplusd'informations sur l'endroitoüvouspouvez déposer vos déchets d'équipementspour le rec clage, veuillezcontacter votre mairie ou votre centre local de collecte des déchets. ProFX8v2 0 ProFX12v2 0 ProFX16v2...
- Seite 5 WichtigeSicherheitsanweisunge Lese Sie diese Anleitunge 18.Dieses Geröt istmit e inem g onzpoligen Wipp-Netzscholter ausgerüstet. Der Schalter Bewohre Sie diese A nleitungen befindet sich dilf derRückseite undsollte stets erreichbor sein. Beochte Sie alle Wamungen 19. Der N ETZ-Stecker Oder eine G erötesteckvorrichtung dient als Abschclteinrichtung Befolg Sie alle Anleifunge...
- Seite 6 / Anschlussdiagramm Typical Live Sound System Sistema ti pico para sonido en directo Systöme de sonorisation pour concert Typisches Live-Sound-System Typical Recording System Sistema tipico para grabaciones Systöme d'enregistrement LL Typisehe Aufnahmesyste ProFX8v2 0 ProFX12v2 0 ProFX16v2 0 ProFX22v2 ProFX30v2...
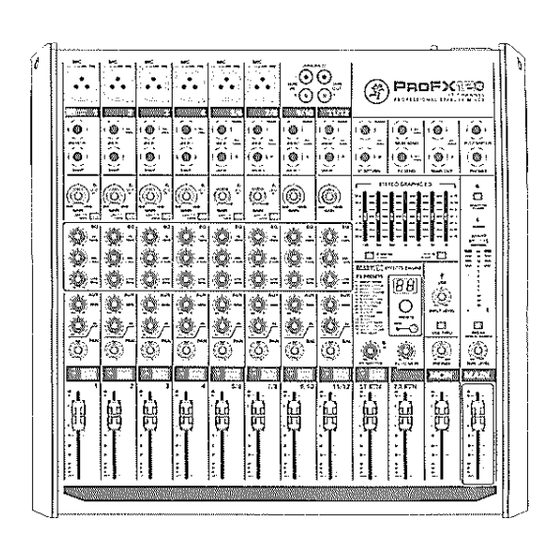
- Seite 7 ProFX8v2 a PROFESSIONAL EFFECTS 15/6 -9/10 11/12 FOOTS•,•. PHONES METERS TAPE MAIN 9/10 11/12 Quick Start Guide...
- Seite 8 37, 3532 44 29 20, 9/10 11/12 13/14 15/16 ProFX16v2/ ProFX30v2 31 0 (O) 34 31 0 (O) 31 MON SEND FOOTSWITCH BAL' 310) (O) 32 MON SEND FX SEND FX SEND ProFX8v2 0 ProFX12v2 0 ProFX16v2 0 ProFX22v2? ProFX30v2...
- Seite 9 Front& RearPanel D escnptuons I. Power C onnector & SwitchConnect thesupplied A Cpower c ord 26.Stereo Graphic E QAdjusts themainmix/ monitors o utput. to this IEC jack. The power switch turns the mixer on and off. 27.MainMix / Mon I SwitchChoose if theGEQ is usedfor 2.48VPhantom Power SwitchProvides 4 8V, affecting all XLRjacks the main mix or monitors.
- Seite 10 Descripci6 del panelfrontaly trasero— I. Interruptor y tomadecorriente Conecte e Icable dealimentaci6n 27.Interruptor M ainMix/ MonI Lepermite elegirsieIEQgråfico incluidoa estatomaIEC.El interruptorIe permiteencender y serausadosobreIa mezclaprincipal o la serial de monitores. >< apagar Ia mesa. 28.InterruptorEQIn / BypassLepermiteactivarydesactivar 2. Interruptor d ealimentaci6n f antasma d e48VActiva 48V, råpidamenteel EQgråfico.
- Seite 11 Description desfacesavantet arriöre— 1.Embas dialimentation et interrupteur marche/arrét Connectez 26.Stereo Graphic E QAgitsurlessorties MainouMonitor. Iecordon secteur f ourniåcetteembase C EI.L'interrupteur permet 27.Bouton M ainMix/ Mon1 Permet dechoisir siI'égaliseur de placer lienceinte sous/horstension. graphique a gitsurIemixprincipal o udeMonitoring. 2. Interrupteur48VPhantom PowerPournitunetensionde48V 28.Bouton EQIn/ Bypass Permet d 'activer/désactiver tous Ies connecteurs XLR simultanément.
- Seite 12 Vorder- & Rückseite— 1.Netzanschlus &-schalterVerbinden Siedasmitgelieferte 27.Main Mix/ Mon I-TasteWählt,0bdergraphische EQ Netzkabel mit diesem IEC-AnschIuss. Schalten Sie den Mischer für den Hauptmix Oderdie Monitoreverwendetwird. mit dem Netzschalter ein/aus. 28. EQIn / Bypass-Taste Z umschnellen Aktivieren/Deaktivieren 2. 48VPhantom Power-Taste Liefert 4 8VoltSpannung fiir desgraphischenEQ.
- Seite 13 Getting-Started — Mise en oeuvre — l. Readandunderstandthe Important SafetyInstructions on page2. I. Lisezlesinstructionsimportantes sur lasécuritépage 4 et assurez-vous de Iesavoir bien comprises. 2.Turndownall knobsexceptthe channel E Qandpanknobs, a nd set all the fadersfully down. 2.Metteztouslespotentiometres auminimum saufIesréglages d'égalisationet depanoramique, e t baisseztousIesFaders. 3.Set all channel EQknobs,pan knobs,and the graphic EQsliders at their center detent.
- Seite 14 Technical Specifications — ProFX8v2 ProFX16v'2 ProFX12v2 ProFX22v2 Pr0FX30v2V Mic in to insert sendout, maxgain Noise Chai•åcterisåcs -125 dBu -128 (20 Hz- 20 kHz, ResidualOutputNoise:All outputs, master levelsand channellevelsoff: — 95 dBu 150Q Source Impedance All outputs,master levelsunity, I channellevel unity...
- Seite 15 Caractéristiques t echniques — ProFX8v2 ProFXUv2 ProFX16v2 ProFX22v2 ProFX30v2 Entrée microvers départInsert, gain au max -125 (iBu -128 Iinpédancedela source Bntit desortierésiduel : Toutesles sorties,niveauprincipalet desentrées auminimum: — 95dBu d ? 15 dientré ToutesIes sorties, niveauprincipal ä I'unité, I niveaudevoie I'unité : équivalent)
- Seite 16 WARRANTY AND SUPPORT Visit WWW.720TREES.COM Identify WARRANTY coverageprovided in your local market. Please keep your sales receipt in a safe place. Retrievea full-version, printable OWNER'S MANUALfor your product. DOWNLOADsoftware, firmware and drivers for your product (if applicable). REGISTER your product. 0 CONTACT Technical Support.


