Herunterladen Inhalt Inhalt Diese Seite drucken
IMG STAGE LINE PARC-100E/WS Bedienanleitung

IMG STAGE LINE PARC-100E/WS Bedienanleitung

Dmx-led-scheinwerfer

Werbung

Verfügbare Sprachen
  • DE

Verfügbare Sprachen

  • DEUTSCH, seite 1
DMX-LED-Scheinwerfer
DMX LED Spotlight
PARC-100E / WS
Bestell-Nr. • Order No. 38.8090
BEDIENUNGSANLEITUNG
INSTRUCTION MANUAL
MODE D'EMPLOI
ISTRUZIONI PER L'USO
MANUAL DE INSTRUCCIONES
VEILIGHEIDSVOORSCHRIFTEN
ŚRODKI BEZPIECZEŃSTWA
SIKKERHEDSOPLYSNINGER
SÄKERHETSFÖRESKRIFTER
TURVALLISUUDESTA
ELECTRONICS FOR SPECIALISTS ELECTRONICS FOR SPECIALISTS ELECTRONICS FOR SPECIALISTS ELECTRONICS FOR SPECIALISTS
PARC-100E / WWS
Bestell-Nr. • Order No. 38.8100

Werbung

Inhaltsverzeichnis
loading

Inhaltszusammenfassung für IMG STAGE LINE PARC-100E/WS

  • Seite 1 DMX-LED-Scheinwerfer DMX LED Spotlight PARC-100E / WS PARC-100E / WWS Bestell-Nr. • Order No. 38.8090 Bestell-Nr. • Order No. 38.8100 BEDIENUNGSANLEITUNG INSTRUCTION MANUAL MODE D’EMPLOI ISTRUZIONI PER L’USO MANUAL DE INSTRUCCIONES VEILIGHEIDSVOORSCHRIFTEN ŚRODKI BEZPIECZEŃSTWA SIKKERHEDSOPLYSNINGER SÄKERHETSFÖRESKRIFTER TURVALLISUUDESTA ELECTRONICS FOR SPECIALISTS ELECTRONICS FOR SPECIALISTS ELECTRONICS FOR SPECIALISTS ELECTRONICS FOR SPECIALISTS...
  • Seite 3 Deutsch . . . . . . . . . . Seite English . . . . . . . . . . . Page Français .
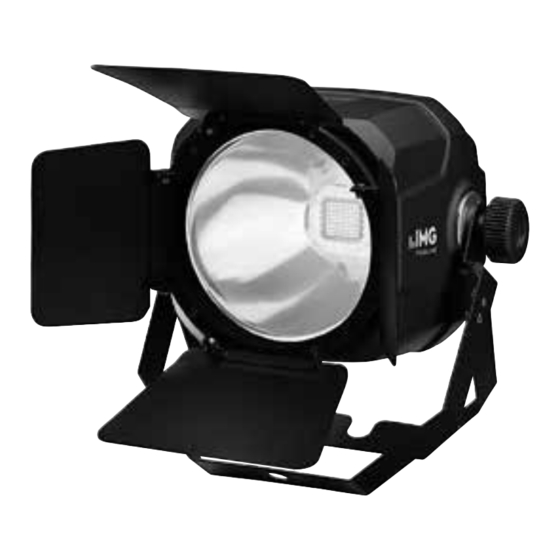
  • Seite 4: Einsatzmöglichkeiten

    • DMX-LED-Scheinwerfer Ziehen Sie den Netzstecker nie am Kabel aus der Steckdose, fassen Sie immer am Stecker an . Diese Anleitung richtet sich an den Installateur des • Geräts und an den Bediener mit Grundkenntnissen Verwenden Sie zum Säubern des Gehäuses nur ein trockenes, weiches Tuch, niemals Wasser in der DMX-Steuerung .
  • Seite 5 3.2 Anschluss an ein DMX-Steuergerät 4 Bedienung Der Scheinwerfer verfügt über zwei 3-polige XLR- WARNUNG Blicken Sie nicht für längere Zeit Steuer anschlüsse: direkt in die Lichtquelle, das kann – einen DMX-Eingang (DMX IN) zu Augenschäden führen . – einen DMX-Ausgang (DMX OUT) Beachten Sie, dass Stroboskop- Um mehrere DMX-gesteuerte Geräte an ein DMX- Effekte und sehr schnelle Licht-...
  • Seite 6: Betrieb Ohne Dmx-Steuergerät Den Menüpunkt

    4.3 Betrieb ohne DMX-Steuergerät 2) Den gewählten Menüpunkt ( oder aufrufen und die DMX-Startadresse einstellen . Den Menüpunkt anwählen: Der Scheinwerfer Um alle DMX-gesteuerten Geräte separat be- strahlt Licht in der über diesen Menüpunkt einge- dienen zu können, muss jedes Gerät eine eigene stellten Helligkeit ab .
  • Seite 7: Technische Daten

    5 Technische Daten DMX-Anschlüsse: . . . . . . . XLR, 3-polig Pinbelegung: . . . . . . . . . Pin 1 = Masse Datenprotokoll: .
  • Seite 8: Safety Notes

    • DMX LED Spotlight For cleaning the housing, only use a dry, soft cloth; never use water or chemicals . For clean- These instructions are intended for installers of the ing the clear plastic in front of the LED, a mild unit and for users with basic knowledge in DMX detergent may be used .
  • Seite 9: Operation

    4 Operation on a crossbar . To align the spotlight, release the two locking screws of the bracket, incline the spot- WARNING To prevent damage to your eyes, light as desired and fasten the screws again . never look directly into the light WARNING Install the spotlight safely and ex- source for any length of time .
  • Seite 10 4.3 Operation without DMX controller 2) Call up the menu item selected ( and set the DMX start address . For separate Select the menu item : The spotlight will control of all DMX-controlled units, each unit radiate light of a brightness that has been adjusted must have its own start address .
  • Seite 11: Specifications

    5 Specifications DMX connections: . . . . . . XLR, 3 poles Pin configuration: . . . . . . pin 1 = ground Data protocol: . . . . . . . . . . DMX 512 pin 2 = DMX−...
  • Seite 12: Possibilités D'utilisation

    • Projecteur DMX à LED Ne débranchez jamais l‘appareil en tirant sur le cordon secteur ; retirez toujours le cordon Cette notice s‘adresse à l‘installateur de l‘appareil secteur en tirant la fiche . et à l‘utilisateur avec des connaissances de base •...
  • Seite 13: Fonctionnement Avec Un Contrôleur Dmx

    4 Utilisation Positionnement : Desserrez les deux vis de fixation du double étrier pour qu‘il puisse être réglé . Dépliez AVERTISSEMENT Ne regardez jamais directement les deux parties de l‘étrier sous le projecteur pour la source de lumière pendant une les utiliser comme pied .
  • Seite 14: Fonctionnement Sans Contrôleur Dmx

    4.3 Fonctionnement sans contrôleur DMX 2) Appelez le point de menu sélectionné ( ) et réglez l‘adresse de démarrage DMX . Sélectionnez le point de menu : Le projecteur Pour pouvoir utiliser tous les appareils gérés par émet de la lumière avec la luminosité réglée via ce DMX séparément, il faut que chaque appareil point de menu .
  • Seite 15: Caractéristiques Techniques

    5 Caractéristiques techniques Protocole de données : . . . DMX 512 Connexions DMX : . . . . . . XLR, 3 pôles Configuration Pins : . . . . Pin 1 = masse Nombre de canaux DMX : .
  • Seite 16: Possibilità D'impiego

    • Proiettore DMX con LED Per la pulizia usare solo un panno morbido, asciutto; non impiegare mai acqua o prodotti Queste istruzioni sono rivolte all’installatore dell’ap- chimici . Per il disco di plastica davanti al LED si parecchio e all’utente con conoscenze base nei può...
  • Seite 17: Funzionamento

    3.2 Collegamento con Per accendere l’apparecchio, collegare il cavo rete un’unità di comando DMX con una presa di rete (230 V/ 50 Hz), per lo spegni- mento staccare l’apparecchio dalla rete . Il proiettore dispone di due contatti XLR di co- mando a 3 poli: Informazione sul ventilatore: Il ventilatore interno si avvia quando la temperatura all’interno dell’apparecchio –...
  • Seite 18: Funzionamento Senza Unità Di Comando Dmx

    4.3.1 Stroboscopio DMX è comandato tramite l’indirizzo di start . I canali DMX 2 e 3 del proiettore saranno asse- Scegliere la voce del menu : Il proiettore gnati automaticamente agli indirizzi successivi . emette lampi con la frequenza impostata con que- Esempio: Se nel modo a 3 canali è...
  • Seite 19: Dati Tecnici

    5 Dati tecnici Contatti DMX: . . . . . . . . . XLR, 3 poli Piedinatura: . . . . . . . . . . Pin 1 = massa Protocollo dati: .
  • Seite 20: Notas De Seguridad

    • Proyector LED DMX No tire nunca del cable de corriente para desco- nectarlo de la toma, tire siempre del conector . Estas instrucciones van dirigidas al instalador del • Utilice sólo un paño suave y seco para limpiar la aparato y a usuarios con conocimientos básicos en carcasa;...
  • Seite 21: Conexión A Un Controlador Dmx

    3.2 Conexión a un controlador DMX Información referente al ventilador: El ventilador in- terno empezará a funcionar cuando la temperatura en El proyector está equipado con dos conexiones de el interior supere los 58 ºC y parará cuando caiga hasta control XLR de 3 polos: los 45 ºC .
  • Seite 22: Funciones De Menú Adicionales

    4.3.1 Estroboscopio canales DMX 2 y 3 del proyector se asignarán automáticamente a las direcciones siguientes . Seleccione el objeto de menú : El proyector Ejemplo: En el modo de 3 canales con la dirección de parpadeará a la velocidad que se haya ajustado inicio 5, los canales 1 a 3 se asignan a las direcciones mediante este objeto de menú...
  • Seite 23: Especificaciones

    5 Especificaciones Protocolo de datos: . . . . . . DMX 512 Conexiones DMX: . . . . . . . XLR, 3 polos Configuración de pines: . pin 1 = masa Número de canales DMX: .
  • Seite 24: Veiligheidsvoorschriften

    Lees aandachtig de onderstaande veiligheids- voorschriften, alvorens het apparaat in gebruik te nemen . Voor meer informatie over de bediening van het ap paraat raadpleegt u de anderstalige handleidingen . Veiligheidsvoorschriften • Verwijder het stof met een droge, zachte doek Het apparaat is in overeenstemming met alle van de behuizing .
  • Seite 25: Środki Bezpieczeństwa

    Przed obsługą urządzenia należy wcześniej za- poznać się z następującymi uwagami odnośnie środków bezpieczeństwa . Więcej informacji doty- czących obsługi urządzenia znajduje się w innych wersjach językowych niniejszej instrukcji obsługi . Środki bezpieczeństwa • Do czyszczenia obudowy używać suchej, miękkiej Urządzenie spełnia wszystkie wymagania norm UE, ściereczki, nie stosować...
  • Seite 26 Læs nedenstående sikkerhedsoplysninger opmærk- somt igennem før ibrugtagning af enheden . Bort- set fra sikkerhedsoplysningerne henvises til den engelske tekst . Sikkerhedsoplysninger • Rengør kabinettet med en tør, blød klud; der må Denne enhed overholder alle relevante EU-direkti- under ingen omstændigheder benyttes kemi- ver og er som følge deraf mærket kalier eller vand .
  • Seite 27: Säkerhetsföreskrifter

    Ge akt på säkerhetsinformationen innan enheten tas i bruk . Skulle ytterliggare information behövas kan den återfinnas i Manualen för andra språk . Säkerhetsföreskrifter • Inga garantianspråk för enheten och inget Denna enhet uppfyller alla relevanta direktiv inom ansvar för eventuell personlig skada eller ma- EU och har därför fått märkning .
  • Seite 28 Ole hyvä ja huomioi joka tapauksessa seuraavat turvallisuuteen liittyvät seikat ennen laitteen käyt- töä . Laitteen toiminnasta saa lisätietoa tarvittaessa tämän laitteen muunkielisistä käyttöohjeista . Turvallisuudesta Tämä laite täyttää kaikki siihen kohdistuvat EU- kemikaaleja tai vettä . LEDien edessä olevan ruu- direktiivit ja sille on myönnetty hyväksyntä...

Inhaltsverzeichnis