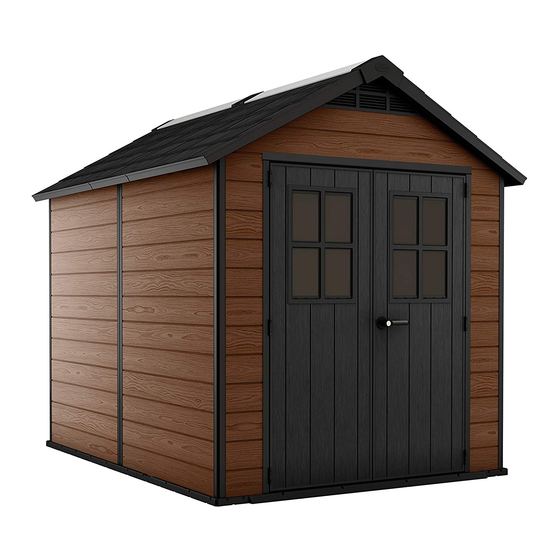
Keter NEWTON 757 Gebrauchsanleitung
Vorschau ausblenden
Andere Handbücher für NEWTON 757:
- Gebrauchsanleitung (6 Seiten) ,
- Gebrauchsanleitung (13 Seiten)
Quicklinks
NEWTON 757
USER MANUAL | І НСТРУКЦІЯ КОРИСТУВАЧА | MANUAL DEL USUARIO | GEBRAUCHSANLEITUNG |
GEBRUIKSHANDLEIDING | MANUALE PER L'UTENTE | MANUAL DO UTILIZADOR
IMPORTANT | ВАЖЛИВО
RETAIN FOR FUTURE REFERENCE: READ CAREFULLY
ЗБЕРЕГТИ ДЛЯ ПОДАЛЬШОГО ВИКОРИСТАННЯ: УВАЖНО ПРОЧИТАЙТЕ
For outdoor use only.
користування. Не для комерційного використання.
WARRANTY ACTIVATION
Not for Commercial use. |
Thank you for your purchase of the Keter shed. In order to activate your warranty,
please log onto our website and fill in the form under warranty activation.
keter.com/en/warrant-activation
ITM. / ART.1902221
Тільки для зовнішнього
WWW.KETER.COM

Verwandte Anleitungen für Keter NEWTON 757


Inhaltszusammenfassung für Keter NEWTON 757
- Seite 1 Тільки для зовнішнього користування. Не для комерційного використання. WWW.KETER.COM Thank you for your purchase of the Keter shed. In order to activate your warranty, WARRANTY ACTIVATION please log onto our website and fill in the form under warranty activation. keter.com/en/warrant-activation...
- Seite 2 SITE PREPARATION | ПІДГОТОВКА ДІЛЯНКИ | PREPARACIÓN DEL LUGAR | VORBEREITUNG DES AUFSTELLUNGSORTES | VOORBEREIDING VAN HET TERREIN | PREPARAZIONE DEL LUOGO DI MONTAGGIO | PREPARAÇÃO DO LOCAL Level the ground surface | Вирівняйте поверхню землі | Nivele la superficie del suelo | Ebnen Sie die Bodenoberfläche | Maak de bodem vlak | Livella la superficie del terreno | Nivele a superfície do solo Recommendation: Construct a wooden or concrete base as a foundation | Рекомендація: Побудувати...
- Seite 3 BEFORE STARTING ASSEMBLY | ПЕРЕД ПОЧАТКОМ МОНТАЖУ | ANTES DE EMPEZAR EL ARMADO | VOR MONTAGEBEGINN | VOORDAT U BEGINT TE MONTEREN | PRIMA DI INIZIARE IL MONTAGGIO | ANTES DE INICIAR A MONTAGEM Read the care and safety guidelines at the end of this manual | Check to ensure that there are no missing or damaged parts BEFORE starting or arranging assembly | Review all assembly instructions | Assemble all the parts according to the directions in this manual.
- Seite 4 SHED PARTS | ЧАСТИНИ САРАЮ | PARTES DEL COBERTIZO | TEILE DES SCHUPPENS | ONDERDELEN VAN HET SCHUURTJE | COMPONENTI DEL DEPOSITO ATTREZZI | PEÇAS DO ABRIGO Remove all parts from the package(s) and spread them out on a clean work surface | Code letters are imprinted on each part for Вийміть...
- Seite 5 DOOR PARTS | ДЕТАЛІ ДВЕРЕЙ | PARTES DE LA PUERTA | TÜRELEMENTE | DEURONDERDELEN | PARTI DELLA PORTA | PEÇAS DAS PORTAS (x1) (x1) (x1) (x1) (x1) (x1) (x1) (x1) (x1) (x1) METAL PARTS | МЕТАЛЕВІ ДЕТАЛІ | PIEZAS METÁLICAS | METALLTEILE | METALEN DELEN | PARTI IN METALLO | PARTES METÁLICAS (x4) (x4)
- Seite 6 SMALL PARTS | ДРІБНІ ДЕТАЛІ | PARTES PEQUEÑAS | KLEINTEILE | KLEINE ONDERDELEN | MINUTERIA | PEÇAS PEQUENAS (x2) (x1) (x4) (x6) (x2) (x1) (x2) (x2) (x8) (x2) SCREWS | ГВИНТИ | TORNILLOS | SCHRAUBEN | SCHROEVEN | VITI | PARAFUSOS inch inch inch...
- Seite 7 FLOOR ASSEMBLY | ЗБІРКА ПІДЛОГИ | ARMADO DEL PISO | MONTAGE DER BODENPLATTE | VLOERMONTAGE | MONTAGGIO DEL PAVIMENTO | MONTAGEM DO PISO (x2) Front | Передня частина | Delante | Vorderseite |Voorkant | Anteriore | Frente sc15 (x18) sc15 sc15 x18 Front | Передня...
- Seite 8 s26b (x2) (x1) s26b x2...
- Seite 9 WALL ASSEMBLY | МОНТАЖ СТІН | ARMADO DE PAREDES | MONTAGE DER WÄNDE | MONTAGE VAN DE MUREN | ASSEMBLAGGIO DELLE PARETI | MONTAGEM DA PAREDE (x3) DF (x2) Outside Назовні Exterior Außenseite Buitenkant Esterno Exterior Front | Передня частина | Delante | Vorderseite |Voorkant | Anteriore | Frente...
- Seite 10 (x4) s13b (x8) s13b...
- Seite 11 S45b (x2) s45b (x3) DF (x2)
- Seite 12 s13b (x8) s13b (x3) DF (x2)
- Seite 13 s13b (x16) s13b s13b (x2)
- Seite 14 s13b (x6) sc8 (x2) scn8 (x2) (x2) 11mm 7/16” scn8 scn8...
- Seite 15 (x2) (x1) (x1) sc8 (x6) scn8 (x6) 11mm 7/16” scn8 scn8 sc8 (x4) scn8 (x4) scn8...
- Seite 16 (x2) sc15 (x2) (x1) sc15...
- Seite 17 (x1) (x1) SPA X1 sc15 (x2) No pre-drilled holes Немає попередньо просвердлених отворів | Ohne vorgebohrte Löcher | Geen voorgeboorde gaten | Buchi preforati non presenti | Sem buracos perfurados previamente sc15 sc15...
- Seite 18 s13b (x2) s13b (x1) s13b (x3) sc15 (x1) sc15 s13b x3...
- Seite 19 (x1) (x1) SPA X1 sc15 (x3) Немає попередньо No pre-drilled holes просвердлених отворів | Ohne vorgebohrte Löcher | Geen voorgeboorde gaten | Buchi preforati non presenti | Sem buracos perfurados previamente sc15 sc15...
- Seite 20 s13b (x2) s13b x1...
- Seite 21 (x2) (x2) (x4) sc15 (x20) sc15 sc15 sc15 sc15 sc15...
- Seite 22 (x1) sc15 (x3) sc15 sc15 x3...
- Seite 23 (x1) sc15 (x8) sc15 x8...
- Seite 24 s45b (x4) (x2) sc15 (x4) s45b sc15 (x1) sc15 (x3) sc15 x3...
- Seite 25 (x1) sc15 (x8) sc15 x8 (x2) s45b (x4) sc15 (x4) s45b sc15...
- Seite 26 (x1) (x2) s26b (x6) s26b...
- Seite 27 sc15 (x20) sc15 DOOR ASSEMBLY | ЗБІРКА ДВЕРЕЙ | ARMADO DE LA PUERTA | MONTAGE DER TÜR | DEUR- MONTAGE | MONTAGGIO DELLA PORTA | MONTAGEM DA PORTA | 문 조립 (x4) (x8) sf13 (x16) sf13 x4 sf13...
- Seite 28 (x1) (x1) (x2) (x1) (x1)
- Seite 29 sc15 (x12) (x2) sc15 (x4)
- Seite 30 s13b (x26) (x6) sc15 (x12)
- Seite 31 sc15 (x8) sc15 x2...
- Seite 32 sc15 (x4) sc15 x2...
- Seite 33 WINDOW ASSEMBLY | МОНТАЖ ВІКОН | VENTANA DEL TECHO | FENSTERHMONTAGE | RAAMMONTAGE | MONTAGGIO DE LA FINESTRA | MONTAGEM DO JANELA (x2) (x4)
- Seite 34 (x2) sc15 (x18) sc15 x9 sc15 (x1) (x1) (x1) (x1)
- Seite 35 sc15 (x2) (x1) (x1) (x1) sc15 x2 (x1) (x1) (x1) (x1) sc8 x1...
- Seite 36 (x2) sc15 (x2) sc15 x2...
- Seite 37 (x2) sc15 (x4) sc15 x4 No pre-drilled holes Немає попередньо просвердлених отворів Ohne vorgebohrte Löcher | Geen voorgeboorde gaten | Buchi preforati non presenti | Sem buracos perfurados previamente...
- Seite 38 sc15 (x7) Inside Всередині Interior Innenseite Binnenkant Interno sc15 x1 Interior sc15 x1...
- Seite 39 (x2) s13b sc15 (x6) (x12) No pre-drilled holes | Немає попередньо просвердлених отворів | Ohne vorgebohrte Löcher | Geen voorgeboorde gaten | Buchi preforati non presenti | Sem buracos perfurados previamente sc15 x3 s13b x6...
- Seite 40 S45b (x4) (x1) s45b x1 s13b (x12) s13b x12...
- Seite 41 s13b (x8) s13b S45b (x26) S45b x26...
- Seite 42 OPTION | ВАРІАНТ | OPCIÓN | OPTION | OPTIE | OPZIONE | OPÇÃO If you find that the shed is not level, use shims on either side of the shed or door | Якщо ви виявили, що сарай не вирівняний, використовуйте прокладки з обох боків сараю або дверей...
- Seite 43 OPTION | | ВАРІАНТ | OPTION | OPTIE | OPZIONE | OPÇÃO SECURING THE SHED TO A FOUNDATION Affix the shed to the foundation by drilling holes in the shed floor at the pre-marked locations and screwing it into the foundation using appropriate screws (screws not included).
- Seite 44 CARE AND SAFETY GUIDELINES SAFETY GUIDELINES 1. The shed is intended for storage purposes only. It is not designed for habitation. d is intended for storage purposes only. It is not designed for habitation. 2. It is strongly recommended to secure the shed to an immovable object or anchor to the ground by drilling holes in the shed floor ngly recommended to secure the shed to an immovable object or anchor to the ground by drilling holes in the shed floor (at the pre-marked locations) and inserting proper screws into the ground (screws are not included).