Inhaltsverzeichnis
Werbung
Verfügbare Sprachen
Verfügbare Sprachen
Quicklinks
Werbung
Kapitel
Inhaltsverzeichnis

Inhaltszusammenfassung für Skandika Fitness MULTIBENCH PRO
-
Seite 2: Willkommen
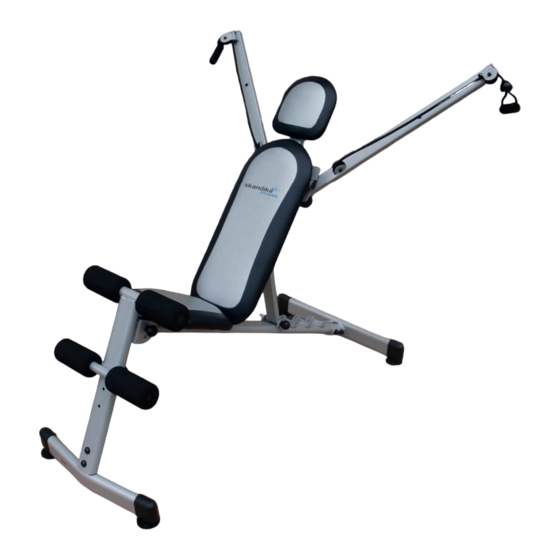
WILLKOMMEN Bevor Sie beginnen Herzlichen Glückwunsch zum Kauf Ihrer Skandika Multibench Pro! Skandika Trainingsgeräte sind leistungsfähige Qualitätsprodukte, die durch hochwertige Materialien und professionelle Verarbeitung überzeugen. Sie sind optimal geeignet für Ihr Fitnesstraining im pri- vaten Umfeld. Bitte lesen Sie vor dem Zusammenbau und Gebrauch des Produkts aufmerksam die Anleitung. -
Seite 3: Inhaltsverzeichnis
INHALTSVERZEICHNIS Inhaltsverzeichnis Montagezubehör Checkliste ......................... 3 Aufbauanleitung............................ 4 Aufwärmen ............................6 Das Workout ............................7 Explosionszeichnung ..........................8 Garantiebedingungen ........................... 9 Besuchen Sie auch unsere Webseite Scannen Sie den QR-Code für weitere Informationen mit Ihrem Smartphone www.skandika.com Montagezubehör Checkliste Bitte prüfen Sie das Montageset auf Vollständigkeit. Nr. -
Seite 4: Aufbauanleitung
AUFBAUANLEITUNG Schritt 1 1. Befestigen Sie den Frontstabilisator (Nr.7) an die Frontachse (Nr.1). Sichern Sie ihn mit zwei M10 x 42 Inbusschrauben (Nr.35), vier ϕ10 Unterlegscheiben (Nr.27) und zwei M10 Sicherungsmuttern (Nr.37). 2. Befestigen Sie die Sitzachse (Nr.2) an die Frontachse (Nr.1). Bringen Sie die Öffnungen in Über- einstimmung. - Seite 5 AUFBAUANLEITUNG Schritt 3 1. Befestigen Sie Sitzlehnenstütze (Nr.8) an die u-förmige Klammer an der Mitte der Sitzachse (Nr.2). Bringen Sie die Öffnungen in Übereinstimmung und sichern Sie die Verbindung mit einer M10 x 72 Inbusschraube (Nr.33), zwei ϕ10 Unterlegscheiben (Nr.27) und einer M10 Sicherungsmutter (Nr.37).
-
Seite 6: Aufwärmen
AUFWÄRMEN... -
Seite 7: Allgemeine Regeln Für Das Workout
DAS WORKOUT Allgemeine Regeln für das Workout 1. Aufwärmen Wärmen Sie sich vor jedem Workout auf. Gehen oder laufen am Stand sowie leichte Dehnungsübun- gen sind dafür bestens geeignet. 2. Atmung Die richtige Atmung während des Workouts spielt eine wichtige Rolle. Atmen Sie ruhig und gleichmä- ßig. -
Seite 8: Explosionszeichnung
EXPLOSIONSZEICHNUNG Bei mechanischen Schwierigkeiten jeglicher Art nutzen Sie bitte nachfolgende Explosionszeichnung. Hier sind alle Teile mit einer spezifischen Nummer gekennzeichnet. Bitte nennen Sie uns diese Nummer, um das Teil gegebenen- falls im Laufe der Garantiezeit kostenlos zu ersetzen. Auch die Versandkosten werden von Skandika getragen. Nutzen Sie zur exakten Bestimmung der Teile, falls notwen- dig, bitte das kostenlose Benutzerhandbuch im pdf-Format auf www.skandika.com. -
Seite 9: Garantiebedingungen
GARANTIEBEDINGUNGEN Für unsere Geräte leisten wir Garantie gemäß nachstehenden Bedingungen. 1. Wir beheben kostenlos nach Maßgabe der folgenden Bedingungen (Nummern 2-5) Schäden oder Män- gel am Gerät, die nachweislich auf einen Fabrikationsfehler beruhen, wenn Sie uns unverzüglich nach Feststellung und innerhalb von 24 Monaten nach Lieferung an den Endabnehmer gemeldet werden. Die Garantie erstreckt sich nicht auf leicht zerbrechliche Teile, wie z.B. -
Seite 10: Before You Begin
WELCOME Before you begin Congratulations on the purchase of your Skandika Multibench Pro! The Skandika range of training equipment is a high quality and durable product line which appeals to users with top of the line materials and professional workmanship. Skandika equipment is very well suited for fitness training in your own home. -
Seite 11: Scope Of Delivery/ Parts List For Assembly
CONTENTS Table of contents Scope of delivery/ Parts list for assembly ................... 11 Assembly instructions ......................... 12 Warm up ............................. 14 Workout .............................. 15 Exploded drawing ..........................16 Guarantee conditions ......................... 17 Visit our website Scan the QR Code with your smartphone for further information www.skandika.com Parts list for assembly... -
Seite 12: Assembly Instructions
ASSEMBLY INSTRUCTIONS Step 1 1. Fasten the front stabilizer (No.7) to the front axle (No.1). Secure with two M10 x 42 inbus screws (No.35), four diam 10 washers (No.27) and two M10 securing nuts (No.37). 2. Fasten the seat bar (axle) (No.2) to the front axle (No.1). Match the openings. Fasten both ax- les with a M10 x 90 inbus screw (No.31), two diam 10 washers (No.27) and a M10 securing nut (No.37). - Seite 13 ASSEMBLY INSTRUCTIONS Step 3 1. Fasten the back rest support (No.8) to the u-shaped bracket in the middle of the seat bar (No.2). Match the openings and secure the connection with a M10 x 72 inbus screw (N.33), two diam 10 washers (No.27) and one M10 securing nut (No.37).
-
Seite 14: Warm Up
WARM UP... -
Seite 15: Workout
THE WORKOUT General workout rules 1. Warm-up Warm up before each workout. Walking or jogging on the spot/skipping as well as easy stretching is recommended. 2. Breathing Proper breathing is crucial during the workout. Breathe calmly and regularly and never hold your breath. -
Seite 16: Exploded Drawing
EXPLODED DRAWING In case of any mechanical problems please use this explo- ded drawing. All parts are shown with a specific number. Ple- ase state this number if you will require replacement of any part during the warranty period. Shipping costs will also be on Skandika during the warranty period. -
Seite 17: Guarantee Conditions
GUARANTEE CONDITIONS We provide guarantee for our devices according to the following conditions. 1. We shall rectify the damages or defects - which are verifiably based on a manufacturing defect - in the device free of cost in accordance with the following conditions (numbers 2-5), if you have reported to us immediately after detection and within 24 months after the delivery to the end user. - Seite 18 NOTIZEN | NOTES ________________________________________________________________________________ ________________________________________________________________________________ ________________________________________________________________________________ ________________________________________________________________________________ ________________________________________________________________________________ ________________________________________________________________________________ ________________________________________________________________________________ ________________________________________________________________________________ ________________________________________________________________________________ ________________________________________________________________________________ ________________________________________________________________________________ ________________________________________________________________________________ ________________________________________________________________________________ ________________________________________________________________________________ ________________________________________________________________________________ ________________________________________________________________________________ ________________________________________________________________________________...
- Seite 19 NOTIZEN | NOTES ________________________________________________________________________________ ________________________________________________________________________________ ________________________________________________________________________________ ________________________________________________________________________________ ________________________________________________________________________________ ________________________________________________________________________________ ________________________________________________________________________________ ________________________________________________________________________________ ________________________________________________________________________________ ________________________________________________________________________________ ________________________________________________________________________________ ________________________________________________________________________________ ________________________________________________________________________________ ________________________________________________________________________________ ________________________________________________________________________________ ________________________________________________________________________________ ________________________________________________________________________________...
- Seite 20 20151117...


