Helios DV EC 200 Pro Montage- Und Betriebsvorschrift
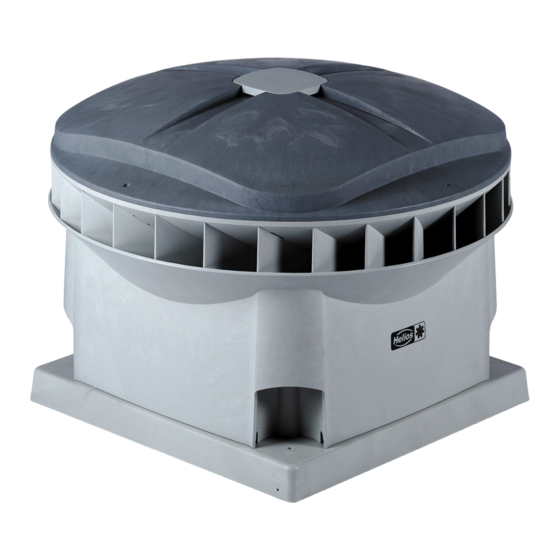
Dachventilator
Vorschau ausblenden
Andere Handbücher für DV EC 200 Pro:
- Anleitung (20 Seiten) ,
- Montage- und betriebsvorschrift (21 Seiten) ,
- Montage- und betriebsvorschrift (41 Seiten)
Inhaltsverzeichnis
Verfügbare Sprachen
Verfügbare Sprachen
Quicklinks
Kapitel
Inhaltsverzeichnis

Verwandte Anleitungen für Helios DV EC 200 Pro


Inhaltszusammenfassung für Helios DV EC 200 Pro
- Seite 1 Dachventilator DV EC 200/250/400A/400B Pro/Eco Montage- und Betriebsvorschrift...
- Seite 2 Montage- und Betriebsvorschrift Dachventilator DV EC.. Pro / Eco Alle Rechte vorbehalten Dieses Handbuch wurde mit äußerster Sorgfalt zusammengestellt. Der Hersteller kann jedoch nicht für Schäden verantwortlich gemacht werden, die durch fehlende Informationen oder falsche Anweisungen oder Angaben in diesem Dokument entstehen. Im Falle einer Übersetzung dieses Handbuchs ist die deutsche Fassung rechtsverbindlich.
-
Seite 3: Inhaltsverzeichnis
Montage- und Betriebsvorschrift Dachventilator DV EC.. Pro / Eco Inhaltsverzeichnis Vorwort ........................................4 Tabelle der Begriffe und Abkürzungen ..........................6 Sicherheit .....................................7 Explosionsansicht ..................................8 Draufsicht auf das Innere ................................9 Übersicht Aufkleber ................................. 10 Funktionsweise des DV EC.. Pro/Eco-Dachventilators ..................... 12 Technische Daten ..................................13 7.1 Tabellen und Schaubilder ............................... -
Seite 4: Vorwort
Für alle Fragen, die neuesten Handbücher und Diese Montage- und Betriebsvorschrift bezieht (Firmware-)Updates wenden Sie sich bitte an sich auf folgende Dachventilator-Ausführungen: die Helios-Niederlassung in Ihrer Nähe. Die Kontaktdaten finden Sie auf der Rückseite ■ DV EC 200/250/400A/400B Pro/Eco. dieses Handbuchs. - Seite 5 Montage- und Betriebsvorschrift Dachventilator DV EC.. Pro / Eco Garantie und Haftung Helios behält sich das Recht vor, die Konstruktion Der Hersteller gewährt auf den Dachventilator und/oder Konfiguration seiner Produkte jederzeit DV EC.. eine Garantie von 24 Monaten nach zu ändern, ohne weitere Verpflichtung, zuvor der Installation bis maximal 30 Monate ab gelieferte Produkte anzupassen.
-
Seite 6: Tabelle Der Begriffe Und Abkürzungen
Montage- und Betriebsvorschrift Dachventilator DV EC.. Pro / Eco Tabelle der Begriffe und Abkürzungen Begriff/Abkürzung Bedeutung der Abkürzung Beschreibung Control PCB PCB mit Mikrocontroller für DV EC.. Pro Drehzahlreduzierung Reduzierung der Drehzahl des Dachventilators Drehzahlerhöhung Erhöhung der Drehzahl des Dachventilators Druckseite Abluftseite DV EC.. -
Seite 7: Sicherheit
Schmutz Montage-, Installations-, Inbetriebnahme- und oder Feuchtigkeit eindringen kann. Wartungstätigkeiten dürfen, sofern nicht anders angegeben, nur von einem zugelassenen Helios Stellen Sie sicher, dass sich während Installateur durchgeführt werden. der Montage keine Kinder und Tiere im Montagebereich aufhalten. -
Seite 8: Explosionsansicht
QR-Code WLAN-AP [1] *) Wartungsschalter Max. Umgebungs- temperatur auf Typenschild (12) *) nur bei DV EC.. Pro Für Ersatzteile nehmen Sie bitte Kontakt auf zu Ihrer örtlichen Helios-Niederlassung. Die Kontaktdaten finden Sie auf der Rückseite dieses Handbuchs. 8 - DE... -
Seite 9: Draufsicht Auf Das Innere
Montage- und Betriebsvorschrift Dachventilator DV EC.. Pro / Eco Draufsicht auf das Innere Beschreibung Steuerungsbox- Gehäuse (mit darin enthaltenen PCB's) QR-Code WLAN-AP [1] *) QR-Code EW-URL [2] *) SELV-Aufkleber (IEC 60335-1) Wartungsschalter Dachventilator- Gehäuse Motor, dreht sich im Uhrzeigersinn, also rechts herum, von oben gesehen Metallrahmen... -
Seite 10: Übersicht Aufkleber
Übersicht über die Position der vier Aufkleber oben auf der Steuerungsbox- Abdeckung; siehe unten für eine Erklärung pro Aufkleber. CE-Typenschild: Produktname Dachventilator CE-Logo WEEE-Logo Helios-Katalognummer Anschlussspannung [VAC] Maximalstrom [A] Maximalleistung [W] Netzfrequenz [Hz] Anzahl der Phasen (1 oder 2) Schutzklasse Seriennummer Herstellungsdatum m. - Seite 11 SSID und ein eindeutiges Passwort zugewiesen Einen fehlenden oder beschädigten QR-Code-WiFi-AP-Aufkleber erhalten Sie bei Ihrer örtlichen Helios-Niederlassung unter Angabe der SSID und/oder Seriennummer. Die Kontaktdaten finden Sie auf der Rückseite dieses Handbuchs. Die SSID-Nummer finden Sie wie folgt: Schalten Sie den DV EC..-Dachventilator aus und wieder ein;...
-
Seite 12: Funktionsweise Des Dv Ec
Montage- und Betriebsvorschrift Dachventilator DV EC.. Pro / Eco Abbildung Beschreibung/Bedeutung DV EC CONTROL PCB Steuerungsbox-Position: am 200/250/400A/400B Stromversorgungskabel zwischen Control PCB (Anschluss CN9) und EMC-PCB [rotes Etikett] (Anschluss K7) Funktionsweise des DV EC.. Pro/Eco-Dachventilators Legende DV EC..-Dachventilator Schalldämpfer Aufsetzkranz Druckmessschlauch (außen verlegt) Druckmesspunkt... -
Seite 13: Technische Daten
Montage- und Betriebsvorschrift Dachventilator DV EC.. Pro / Eco Technische Daten Dachventilator-Ausführungen Der DV EC.. ist in einer Ausführung mit 230 VAC (einphasig). Dachventilator-Charakteristiken Die Dachventilator-Charakteristiken geben Aufschluss über die Luftleistungen bei verschiedenen Drehzahlen. Durch die Montage des DV EC..-Dachventilators auf einem Schalldämpfer (SD) ändern sich die Luftleistungen aufgrund des Luftwiderstands des Schalldämpfers geringfügig.Deshalb sind auch die Luftleistungen des DV EC..- Dachventilators mit SD (als gestrichelte Linie) angegeben. -
Seite 14: Dv Ec Eco 200/250/400 A/400 B
Montage- und Betriebsvorschrift Dachventilator DV EC.. Pro / Eco DV EC Eco 200/250/400 A/400 B Zehnder ComfoRoof MX Solo 110 (D) DV EC ECO ab Version 004 × × × × × motor (data) motor (power) N PE 85499 360 SS-1530 19.04.2024 DV EC Pro 200/250/400A/400B Zehnder ComfoRoof MX Manual 110 (D) Zehnder ComfoRoof MX Automatic 210/310/320 (D) -
Seite 15: Übersicht Anschlüsse Und Bauteile Emc Und Control Pcb
Montage- und Betriebsvorschrift Dachventilator DV EC.. Pro / Eco Übersicht Anschlüsse und Bauteile EMC und Control PCB EMC-PCB (Anschlüsse und Bauteile) Control PCB (Anschlüsse und Bauteile) K1: 230 VAC ← Wartungsschalter / Transformator K2: Motorleistung → Motor K3: Relaisausgang (NC); max. 250 VAC bei 2 A K4: PE ←... -
Seite 16: Installation
Überwurfmutter, Druckmessschlauchklemmen mit selbstschneidenden Schrauben Beschädigungen und Mängel Bitte kontaktieren Sie Helios, wenn Artikel fehlen oder Mängel/Schäden vorliegen. Auch wenn beim DV EC.. Pro die QR-Code-WiFi-AP-Aufkleber (links neben dem Wartungsschalter und an der Oberseite der Steuerungsbox- Abdeckung) nicht mehr gut lesbar sind, nehmen Sie bitte Kontakt zu Helios auf (siehe letzte Seite). -
Seite 17: Installation Allgemein
Montage- und Betriebsvorschrift Dachventilator DV EC.. Pro / Eco Installation allgemein ■ Es ist wichtig, dass die Dachkonstruktion oder das Auflager, auf dem der DV EC.. angebracht wird, über eine ausreichende Steifheit verfügt. Bei Dachkonstruktionen mit zu geringer Steifheit, können im Betrieb des Dachventilators unerwünschte Vibrationen entstehen. - Seite 18 Montage- und Betriebsvorschrift Dachventilator DV EC.. Pro / Eco Bauen Sie für den DV EC..-Dachventilator keinen ■ Das Stromversorgungskabel, eventuelle Thermoschalter oder Motorschutzschalter ein, Steuerkabel und eventuell ein Druckschlauch denn das hätte negative Auswirkungen auf den können durch eine Durchführung von unterhalb (Gleichstrom-)Motor.
-
Seite 19: Inbetriebnahme
Montage- und Betriebsvorschrift Dachventilator DV EC.. Pro / Eco Inbetriebnahme Alle Arbeiten am/im Gerät dürfen nur von Fachkräften laut „Personalqualifikation“ durchgeführt werden. 10.1 Inbetriebnahme DV EC.. Eco Gehen Sie beim DV EC.. Eco zur Inbetriebnahme des Dachventilators wie folgt vor. ■... -
Seite 20: Inbetriebnahme Dv Ec
Adressleiste ein. ■ Melden Sie sich anschließend an, indem Sie als Benutzername (user-name) Installateur auswählen und das Passwort (password) Helios eingeben. ■ Überprüfen Sie nach der Anmeldung, ob eine Verbindung zum richtigen DV EC.. Pro-Dachventilator hergestellt wurde: Vergleichen Sie die auf dem QR-Code-WiFi-AP- Aufkleber [1] angegebene SSID mit der im oberen Bereich der Webseite angegebenen SSID. -
Seite 21: Inbetriebnahmetool - Embedded Webserver
Montage- und Betriebsvorschrift Dachventilator DV EC.. Pro / Eco Inbetriebnahmetool - Embedded Webserver 11.1 Einleitung Der DV EC.. Pro-Dachventilator ist über eine SSID-Seriennummer mit einem Embedded Webserver verbunden. Durch das Scannen des QR-Codes am Dachventilator kann schnell und einfach eine Verbindung zu diesem Webserver hergestellt und die Steuerung des Dachventilators eingestellt werden. -
Seite 22: Menüstruktur
Montage- und Betriebsvorschrift Dachventilator DV EC.. Pro / Eco 11.3 Menüstruktur Die folgende Übersicht zeigt die vollständige Menüstruktur des Embedded Webservers, wie sie auf der höchsten Anmeldestufe sichtbar ist. Die Anmeldestufe bestimmt, welche Menüpunkte sichtbar sind. 22 - DE... -
Seite 23: Erläuterungen Auf Dem Interface Und Menüpunkte
2. Wählen Sie oben rechts die Sprache aus. 3. Wählen Sie den Benutzernamen aus: ■ Installateur ■ Helios Service ■ Nur anzeigen Die Anmeldestufe bestimmt, welche Funktionalität sichtbar ist. Auf der Stufe Installateur kann der DV EC.. Pro eingestellt werden. - Seite 24 Montage- und Betriebsvorschrift Dachventilator DV EC.. Pro / Eco Anmeldung Bei Wiedergabe auf einem Mobiltelefon: ■ Klicken Sie auf das Benutzerpiktogramm, um die Anmeldestufe anzuzeigen und sich abzumelden. Achtung: Drücken Sie immer Speichern, um geänderte Einstellungen zu speichern, da diese sonst beim Abmelden verloren gehen.
- Seite 25 Montage- und Betriebsvorschrift Dachventilator DV EC.. Pro / Eco Betriebsmodus > 0-10V-Eingang – variable Steuerung Diese Steuerung wird definiert durch die Min- und Max-Einstellung unter Drehzahlbegrenzung. Die Aktivierung dieses Betriebsmodus öffnet die folgenden Felder: Motorstop Hier können Sie einstellen, ob der Motorstop aktiv ist. ■...
- Seite 26 Montage- und Betriebsvorschrift Dachventilator DV EC.. Pro / Eco Basis Betriebsmodus > 0-10V-Eingang – 2-Stufen-Steuerung Diese Steuerung wird definiert durch die Werte für Niedrig und Hoch unter Sollwert (%). Die Aktivierung dieses Betriebsmodus öffnet die folgenden Felder: Motorstop Hier können Sie einstellen, ob der Motorstop aktiv ist. ■...
- Seite 27 Montage- und Betriebsvorschrift Dachventilator DV EC.. Pro / Eco Basis Betriebsmodus > Direkte Steuerung über Zeitprogramm Wählen Sie diesen Betriebsmodus, um die Steuerung über ein Zeitprogramm verlaufen zu lassen. Die folgenden Felder werden geöffnet: Sollwert (%) In diesem Feld wird die eingestellte Lüftungseinstellung in Prozent angezeigt.
- Seite 28 Montage- und Betriebsvorschrift Dachventilator DV EC.. Pro / Eco Basis Betriebsmodus > Direkte Steuerung über Modbus TCP Wählen Sie diesen Betriebsmodus, um die Steuerung des Dachventilators an ein Gebäudemanagementsystem zu koppeln. Die folgenden Felder werden geöffnet: Sollwert (%) In diesem Feld wird die eingestellte Lüftungseinstellung in Prozent angezeigt.
- Seite 29 Montage- und Betriebsvorschrift Dachventilator DV EC.. Pro / Eco Basis Betriebsmodus > Druckregelung Dieser Betriebsmodus ist einzig für die DV EC.. Pro-Ausführungen des DV EC.. verfügbar. Die folgenden Felder werden geöffnet: Zeitprogramm ■ Aus ■ Ein Wählen Sie einen Wahlzirkel, um ein Zeitprogramm zu aktivieren oder zu deaktivieren.
- Seite 30 Montage- und Betriebsvorschrift Dachventilator DV EC.. Pro / Eco Erweitert Die Registerkarte Erweitert umfasst die folgende Funktionalität: Firmware-Update ■ Hochladen Über die Schaltfläche Hochladen kann die Firmware-Datei hochgeladen werden. Konfigurationsdatei ■ Hochladen ■ Herunterladen Nach dem Speichern der Einstellungen kann die Konfiguration heruntergeladen werden.
- Seite 31 Mit der Schaltfläche „P/I-Faktor zurücksetzen“ werden die Standardwerte zurückgesetzt. Druck ■ Sensor-Offset Dieses Feld ist nur in der Anmeldestufe Helios Service verfügbar. Speichern Achtung: Drücken Sie immer Speichern, um geänderte Einstellungen zu speichern, da diese sonst beim Abmelden verloren gehen.
- Seite 32 Montage- und Betriebsvorschrift Dachventilator DV EC.. Pro / Eco Zeitprogramm Die Registerkarte Zeitprogramm umfasst die folgenden Felder: Zeitprogramm-Konfiguration ■ + Zeitprogramm hinzufügen Die Schaltfläche + Zeitprogramm hinzufügen öffnet ein Fenster, in dem ein oder mehrere Zeitprogramme eingestellt werden können. Für jeden Wochentag können 5 Zeitprogramme eingestellt werden. Zeitprogramm Sofern ein oder mehrere Zeitprogramme eingestellt sind, werden diese hier angezeigt.
- Seite 33 Montage- und Betriebsvorschrift Dachventilator DV EC.. Pro / Eco Netzwerk Die Registerkarte Netzwerk umfasst die folgenden Felder: Art der Verbindung ■ Verkabelt (Ethernet) ■ Drahtlos (WiFi) Verkabelt (Ethernet) Optionen für das Gebäudemanagementsystem (BMS) Wenn bei der Art der Verbindung der Wahlzirkel Verkabelt (Ethernet) aktiviert wird, erscheint ein Teilfenster, um die IP-Adresse einzugeben: Art der IP-Adresse...
- Seite 34 Montage- und Betriebsvorschrift Dachventilator DV EC.. Pro / Eco Netzwerk Drahtlos (WiFi) Wenn bei der Art der Verbindung der Wahlzirkel Drahtlos (WiFi) aktiviert wird, erscheint ein Teilfenster, in welchem die Hotspot- Details sichtbar werden: ■ SSID Dies ist der Name eines drahtlosen Netzwerks, das innerhalb des Gebäudemanagementsystems (BMS) verfügbar ist und an das ein DV EC..
- Seite 35 Montage- und Betriebsvorschrift Dachventilator DV EC.. Pro / Eco Live Auf der Registerkarte Live können die aktuellen Werte des Dachventilators eingesehen werden. Diese Registerkarte enthält die Felder: ■ Zuletzt aktualisiert am Zeigt Datum und Uhrzeit der letzten Änderung an. ■ DV EC.. identifizieren DV EC identifizieren Durch Drücken dieser Taste erreicht der Dachventilator die maximale Drehzahlerhöhung.
-
Seite 36: Warnungen Und Fehlermeldungen
Montage- und Betriebsvorschrift Dachventilator DV EC.. Pro / Eco 11.4.1 Warnungen und Fehlermeldungen Warnungen Möglicher Grund Aktuelle Drehzahl ist niedriger als di efür die Drehzahlüberwachung Die externe Steuerung ist ausgeschaltet eingestellte Drehzahlgrenze. Endstufentemperatur zu hoch Der Motor bekommt nicht genug Luft zum Kühlen Leistungsbegrenzung aktiviert Motor ist zu stark belastet Motorbremse aktiviert... - Seite 37 Montage- und Betriebsvorschrift Dachventilator DV EC.. Pro / Eco Schritt-für-Schritt-Plan einstellen Wenn der DV EC.. Pro für die Ventilation von Wohnraum vorgesehen ist, verwenden Sie diese Tabelle. Befolgen Sie die angekreuzten Anweisungen von oben nach unten entsprechend der entsprechenden Spalte. DV EC..
- Seite 38 Montage- und Betriebsvorschrift Dachventilator DV EC.. Pro / Eco Kontrolle Luftmenge Die Luftmenge wird durch die Drehzahl des Flügels und dem statischen Unterdruck im DV EC.. Dachrahmen bestimmt. Siehe Abschnitt Tabellen DV EC.. + SD und Schaubilder zur Luftmenge als Funktion der Drehzahl und des statischen Unterdrucks.
- Seite 39 Montage- und Betriebsvorschrift Dachventilator DV EC.. Pro / Eco Art des Ventilators: Gruppe: Adresse: Sollwert: Druck eingestellt auf..Pa: Max. Drehzahl (steuern) eingestellt auf: Schema: Raum: Küche Küche Badezimmer Toilette Art des Ventils oder der motorlosen Dunstabzugshaube: Erforderlicher Luftdurchsatz hoch: in l/s oder m3/h* Art des Ventils Luftmenge in l/s oder m3/h* Einstellung des Ventils oder der motorlosen...
-
Seite 40: Inspektion Und Wartung
Montage- und Betriebsvorschrift Dachventilator DV EC.. Pro / Eco Inspektion und Wartung 12.1 Vorschriften Inspektion und Wartung Der DV EC.. Pro/Eco-Dachventilator sollte alle 2 Jahre überprüft werden. Die Häufigkeit ist von der Luftverschmutzung abhängig. Falls eine extreme Verschmutzung auftritt, müssen häufiger Kontrollen stattfinden. Beispiele hierfür sind die Absaugung von Großküchen oder Industrieprozessen. - Seite 41 Montage- und Betriebsvorschrift Dachventilator DV EC.. Pro / Eco Lösen Sie die Zugentlastung des internen Stromversorgungskabels und entfernen Sie das Kabel (falls vorhanden). Lösen Sie die 4 Schrauben von der Abdeckung der Steuerungsbox und entfernen Sie die Abdeckung. ■ Verwenden Sie den Schraubenzieher TX 20. Notieren Sie die Stelle jedes Anschlusses oder machen Sie ein Foto.
- Seite 42 Montage- und Betriebsvorschrift Dachventilator DV EC.. Pro / Eco Lösen Sie die 3 Schrauben der Steuerungsbox und legen Sie die Steuerungsbox zur Seite. ■ Verwenden Sie den PH2-Schraubenzieher. Entfernen Sie die 4 x M6-Schrauben vom Metallrahmen. Entfernen Sie den Innenrahmen mit der Motor-Flügel-Kombination. Lösen Sie die 4 x M6-Schrauben vom Motor und heben Sie den Rahmen von der Motor-Flügel-Kombination an.
- Seite 43 Montage- und Betriebsvorschrift Dachventilator DV EC.. Pro / Eco Montieren Sie in umgekehrter Reihenfolge: Montieren Sie die (neue) Motor-Flügel-Kombination im Metallrahmen (4 x M6). ■ Stellen Sie sicher, dass die Kabel zur Aussparung im Metallrahmen hin weisen. Ersetzen Sie die Schwingungsdämpfer Ziehen Sie die alten Schwingungsdämpfer von den Metallbeinen ab.
- Seite 44 Montage- und Betriebsvorschrift Dachventilator DV EC.. Pro / Eco Montieren Sie die Steuerungsbox wieder am Metallrahmen in der dafür vorgesehenen Aussparung (3x PH2). Stecken Sie das Stromversorgungskabel des Motors (Anschluss K5) und das Motordatenkabel (Anschluss K2) wieder auf die EMC-PCB. Schieben Sie die Kabel in die Kabelkanäle.
- Seite 45 Montage- und Betriebsvorschrift Dachventilator DV EC.. Pro / Eco Setzen Sie das interne Stromversorgungskabel in der Zugentlastung fest (falls vorhanden: 0,7 Nm). Montieren Sie die Ventilatorabdeckung. Schalten Sie den Dachventilator mit dem Wartungsschalter ein. Kontrollieren Sie die ordnungsgemäße Funktionsweise: Bei DV EC.. Eco: Überprüfen Sie, ob der Ventilator wieder anläuft. Bei DV EC..
-
Seite 46: 12.3 Motorlager
Die Lebensdauer von Motorlagern hängt stark von der Nutzung, der Drehzahl und der Umgebungstemperatur ab. Die Motorlager sind nicht als separates Serviceteil erhältlich. Helios empfiehlt bei defekten Motorlagern den Austausch des kompletten Motor-Laufrads. Das Motor-Laufrad ist als separates Ersatzteil mit Austauschanleitung erhältlich. -
Seite 47: Anhang
Montage- und Betriebsvorschrift Dachventilator DV EC.. Pro / Eco Zeitschalter schaltet nicht zum ■ Überprüfen Sie das eingestellte Datum und die Uhrzeit gewünschten Zeitpunkt. (Bei DV EC.. Pro) Wenn diese nicht mit dem aktuellen Datum und/oder der Uhrzeit übereinstimmen, schaltet der Timer zu den falschen Zeiten. - Seite 48 Montage- und Betriebsvorschrift Dachventilator DV EC.. Pro / Eco Tabellen und Schaubilder DV EC 200 Eco/Pro Einst. Spannung Durchsatz Druck Drehzahl Strom Leistung Leistungs- Schallpegel faktor [m³/h] [Pa] [min Gehäuse Ansaugung [dB(A)] [dB(A)] 10,00 1300 1785 1,40 0,52 9,08 1300 1785 1,40 0,52...
- Seite 49 Montage- und Betriebsvorschrift Dachventilator DV EC.. Pro / Eco DV EC.. + SD DV EC.. DV EC 400A Eco/Pro Einst. Spannung Durchsatz Druck Drehzahl Strom Leistung Leistungs- Schallpegel faktor [m³/h] [Pa] [min Gehäuse Ansaugung [dB(A)] [dB(A)] 10,00 2900 1112 1,70 1,00 9,08 2820...
- Seite 50 Montage- und Betriebsvorschrift Dachventilator DV EC.. Pro / Eco DV EC 400B Eco/Pro Einst. Spannung Durchsatz Druck Drehzahl Strom Leistung Leistungs- Schallpegel faktor [m³/h] [Pa] [min casing suction [dB(A)] [dB(A)] 10,00 4100 1380 3,00 1,00 9,08 3800 1280 2,40 1,00 8,11 3400 1149...
-
Seite 51: Ce-Konformitätserklärung
Montage- und Betriebsvorschrift Dachventilator DV EC.. Pro / Eco CE-Konformitätserklärung DE - 51... - Seite 52 Montage- und Betriebsvorschrift Dachventilator DV EC.. Pro / Eco Deutschland (Germany) Österreich (Austria) England (Great Britain) HELIOS Ventilatoren GmbH + Co KG HELIOS Ventilatoren HELIOS Ventilation Systems Lupfenstraße 8 Siemensstraße 15 5 Crown Gate, Wyncolls Road 78056 Villingen-Schwenningen 6063 Rum/Innsbruck Severalls Industrial Park Tel.: +49 7720 606-0...