
Verwandte Anleitungen für Sartorius YDP10-0CE


Inhaltszusammenfassung für Sartorius YDP10-0CE
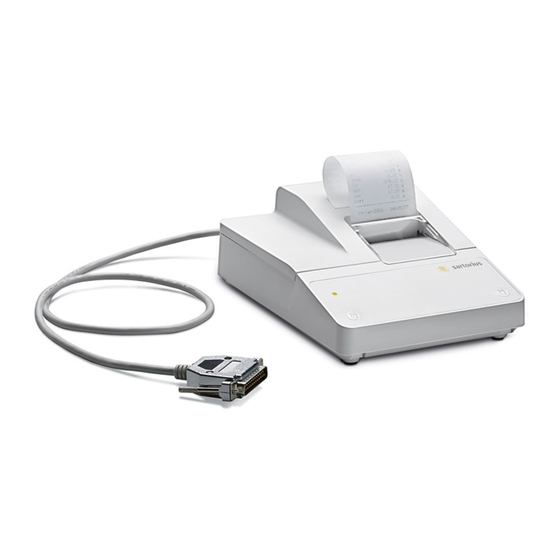
- Seite 1 Operating Instructions | Betriebsanleitung | Mode d’emploi Sartorius YDP10-0CE Data Printer | Messwertdrucker | Imprimante des valeurs de mesure 98647-004-31 98647-004-31...
- Seite 2 English – page 3 In cases involving questions of interpretation, the German-language version shall prevail. Deutsch – Seite 17 Im Auslegungsfall ist die deutsche Sprache maßgeblich. Français – page 31 En cas de questions concernant l’interprétation, la version en langue allemande fera autorité.
-
Seite 3: Inhaltsverzeichnis
Contents Intended Use Maintenance Accessories Safety Instructions Installation Specifications Operation Using the Printer in Legal Metrology 15 Printing a Measured Value from the Test Certificate Connected Weighing Instrument EU Declaration of Conformity Configuration UK Declaration of Conformity Troubleshooting Guide FCC Supplier’s Declaration of Conformity... -
Seite 4: Intended Use
“Using the Printer in Legal Metrology” a different external power source. To for more information. do this, use only an original Sartorius AC adapter (see “Accessories”). If you have any difficulties, contact our Service Center or your Sartorius dealer. -
Seite 5: Installation
Installation Equipment Supplied The following components are supplied: – Interface cable for connecting the printer to a weighing instrument – Ink ribbon – 4 rechargeable batteries – Paper roll Installing the Rechargeable Batteries § Remove the 4 batteries from the packaging (they are discharged) §... - Seite 6 Connecting the Data Printer to a Weighing Instrument § Connect the interface cable to the printer and to the weighing instrument. Secure the connection. Turning On the Weighing Instrument and the Printer § Plug in the AC adapter to power the weighing instru- ment §...
- Seite 7 § For details on inserting the paper roll, see the section entitled “Maintenance” (page 10). § Plug the original Sartorius AC adapter into an electrical outlet § Insert the right-angle plug into the jack on the right- hand side of the printer’s rear panel. The green LED lights up to indicate the presence of voltage.
-
Seite 8: Operation
Operation The data printer has 2 function keys for operation: : Line feed; advances the paper by one blank line. : Print measured value or begin automatic printing Printing a Measured Value from the Connected Weighing Instrument Advance paper to desired position, if necessary: Press the G key (repeatedly if desired), or press and hold for continuous line feed 123456789012345678901234... -
Seite 9: Troubleshooting Guide
Troubleshooting Guide Cause Solution § Press the P key Data in printer memory (EEPROM) defective (checksum invalid) > Factory settings are loaded $ It may be necessary to configure menu settings for the printer port and in the statistics application §... -
Seite 10: Maintenance
Maintenance Replacing the Paper Roll The paper rolls used with your data printer must have the following specifications (see “Accessories”): – Standard paper roll – Wood-free paper, 60 g – Width: 57.5 ± 0.5 mm – Diameter: Max. 65 mm –... - Seite 11 § To align the paper roll, hold it so that you can push both roll holders into the core § Release the roll holders on both sides § Close the paper roll compartment Replacing the Ink Ribbon Cassette Your data printer requires a black ink ribbon cassette, type ERC-22 (see “Accessories”).
- Seite 12 $ If you have any questions, please contact your local Sartorius Service Center § Place the 4 new batteries in the battery compartment. Make sure that the poles match the + and – signs §...
- Seite 13 Cleaning the Data Printer When cleaning the data printer, make sure that no liquid enters the housing Do not use any aggressive cleaning agents (solvents or similar agents). § Disconnect the power supply by unplugging the inter- face cable (connecting the weighing instrument) from the rear panel of the printer.
-
Seite 14: Accessories
Accessories Product Order No. Spare paper rolls (box of 5) 6906937 Ink ribbon cassette 6906918 AC adapter with specifications rated for: Europe 6971412 6971414 6971413 Australia 6971411 South Africa 6971410 Set of 4 rechargeable batteries (nickel-metal hydride, size AA) 69Y03136 Data cable for connecting the printer to a weighing instrument or other device of an older design series (MP technology), for use in residential areas (EN55022, Class B) -
Seite 15: Using The Printer In Legal Metrology
Physics and Metrology (PTB) has issued and included on the printout. an independent test certificate for the YDP10-0CE (see certificate for number). If the printer is subsequently connected With this certificate, the printer is per- to a verified weighing instrument already... - Seite 17 Inhalt Verwendungszweck Instandhaltung Zubehör Sicherheitshinweise Installation Technische Daten Betrieb Einsatz im eichpflichtigen Verkehr Messwert der angeschlossenen Prüfschein Waage drucken EU-Konformitätserklärung Voreinstellungen UK Declaration of Conformity Fehlermeldungen FCC Supplier’s Declaration of Conformity...
-
Seite 18: Verwendungszweck
Mit dem Drucker können einzelne Bei externer Spannungsversorgung nur Wägedaten ausgegeben werden. Original Sartorius Netzgerät für diesen Die Datenausgabe kann auf Tastendruck Drucker verwenden (siehe Kapitel Zube- oder automatisch erfolgen. hör). Das externe Netzgerät ist nur bei Der Messwertdrucker ist als Zusatz- bestimmten Waagenserien erforderlich. -
Seite 19: Installation
Installation Lieferumfang Folgende Einzelteile werden mitgeliefert: – Datenleitung Drucker – Waage – Farbband – 4 Akkus – Papierrolle Akkus einlegen § 4 Akkus aus der Verpackung entnehmen (Akkus sind entladen) § Papierfach öffnen: Papierfachabdeckung anheben § Akkufach öffnen: Akkufachabdeckung aufklappen. §... - Seite 20 Drucker an Waage anschließen § Datenverbindungskabel am Drucker und an der Waage anschließen und sichern Waage und Drucker einschalten § Waage mit Netzspannung versorgen: Netzgerätstecker einstecken § Waage einschalten > Drucker schaltet automatisch ebenfalls ein > Die grüne Kontroll-LED links auf der Frontlolie leuchtet.
- Seite 21 § Papierrolle einlegen: siehe Kapitel Instandhaltung, Seite 24 § Original Sartorius Netzgerät an Netzsteckdose anschließen § Winkelstecker des Netzgeräts an rechten Ausgang der Druckerrückseite anschließen Die grüne LED leuchtet, Netzspannung vorhanden. $ Akkus einlegen: siehe Seite 20 $ Drucker und Waage anschließen und einschalten:...
-
Seite 22: Betrieb
Betrieb Für den Betrieb des Druckers stehen 2 Tasten zur Verfügung: : Leerzeile drucken; Papiervorschub um 1 Zeile Messwert ausdrucken oder automatisch ausdrucken Messwert der angeschlossenen Waage ausdrucken Ggf. einige Leerzeilen drucken (Papiervorschub): Taste G (mehrfach) drücken oder gedrückt halten 123456789012345678901234 >... -
Seite 23: Fehlermeldungen
Fehlermeldungen Ursache Abhilfe § -Taste P drücken leuchtet rot Daten im Druckerspeicher (EEPROM) sind fehlerhaft (Prüfsumme stimmt nicht) > Werksvoreinstellungen werden geladen $ Ggf. Menü Drucker-Schnittstelle und Menü Statistik-Anwendungen neu konfigurieren § Waage ausschalten leuchtet rot Überschreitung der Eingangskapazität und neu einschalten §... -
Seite 24: Instandhaltung
Instandhaltung Papierrolle wechseln Für den Betrieb wird eine Papierrolle mit folgenden Eigenschaften benötigt (siehe auch Kapitel Zubehör): – Standard-Papierrolle – Holzfreies 60 g Papier – Breite: 57,5 ± 0,5 mm – Durchmesser: max. 65 mm – Offener Kerndurchmesser: min. 8 mm §... - Seite 25 § Papierrolle einrichten: Papierrolle so halten, dass die Rollenhalterungen in die Kernöffnung der Papierrolle zusammengeschoben werden können § Rollenhalterungen an beiden Seiten loslassen § Papierfach schließen: Papierfachabdeckung nach vorne herunterklappen Farbband wechseln Für den Betrieb wird ein schwarzes Farbband vom Typ ERC-22 benötigt (siehe auch Kapitel Zubehör).
- Seite 26 4 Akkus entnehmen Verbrauchte Akkus sind Sondermüll (kein Hausmüll): Akkus gemäß Abfallwirtschaftsgesetz als Sondermüll speziell entsorgen $ Ggf. Sartorius Kundendienstleitstelle befragen § 4 neue Akkus in Akkufach einsetzen: Polarität beachten § Akkufach schließen: Akkufachabdeckung nach vorne herunterklappen § Papierfach schließen: Papierfachabdeckung nach vorne...
- Seite 27 Drucker reinigen Es darf keine Flüssigkeit in den Drucker gelangen Keine aggressiven Reinigungsmittel (Lösungsmittel o. ä.) verwenden § Spannungsversorgung trennen: Datenkabel (zur Waage) an der Rückseite des Druckers lösen $ Bei externer Spannungsversorgung ggf. Netzgerät aus der Steckdose ziehen § Drucker mit in Seifenlauge leicht angefeuchtetem Tuch reinigen §...
-
Seite 28: Zubehör
Zubehör Bezeichnung Best.-Nr. Papierrolle (5er Pack) 6906937 Farbband 6906918 Steckernetzgerät für Norm Europa 6971412 Großbritannien 6971414 6971413 Australien 6971411 Südafrika 6971410 Akkusatz (4- Nickel-Metall-Hydrid Typ AA) 69Y03136 Datenleitung Drucker <–> Gerät älterer Bauart (MP…-Technologie) zum Einsatz im Wohnbereich (EN55022, Klasse B) VF1503 (Fast Factory) Technische Daten... -
Seite 29: Einsatz Im Eichpflichtigen Verkehr
Einsatz im eichpflichtigen Verkehr Die Datenausgabe der Waage muss so konfiguriert werden, dass die Kenn- Der Drucker YDP10-0CE verfügt über zeichnung einer gesondert gekenn- einen eigenständigen Prüfbericht der zeichneten Anzeigestelle mit ausgege- PTB Deutschland (siehe Prüfschein). ben und an den Drucker übermittelt Hierdurch kann der Drucker im eich- wird. - Seite 31 Table des matières Description générale Messages d’erreur Entretien Conseils de sécurité Installation Accessoires Fonctionnement Caractéristiques techniques Impression de la valeur mesurée Utilisation en métrologie légale par la balance connectée Certificat d’essai Réglages Déclarations de conformité UE UK Declaration of Conformity FCC Supplier’s Declaration of Conformity...
-
Seite 32: Description Générale
Description générale Conseils de sécurité Le modèle YDP10-0CE est une impri- L’imprimante répond aux directives mante qui reçoit les données de pesée et aux normes concernant les moyens d’exploitation électriques et la compati- d’une balance connectée et les imprime sur du papier normal (largeur du rou- bilité... -
Seite 33: Installation
Installation Contenu de la livraison La livraison comprend les éléments suivants : – câble de données imprimante-balance – ruban encreur – 4 accus – rouleau de papier Mise en place des accus § Retirez les 4 accus de leur emballage (les accus sont déchargés). - Seite 34 Raccordement de l’imprimante à la balance § Raccordez le câble de données à l’imprimante et à la balance et assurez la connexion. Mise sous tension de la balance et de l’imprimante § Pour alimenter la balance avec la tension du secteur, branchez la fiche du bloc d’alimentation.
- Seite 35 Insertion du rouleau de papier § Pour insérer le rouleau de papier, voir le chapitre « Entretien » page 38. § Raccordez le bloc d’alimentation d’origine Sartorius à une prise du secteur. § Raccordez la fiche coudée du bloc d’alimentation à...
-
Seite 36: Fonctionnement
Fonctionnement Pour faire fonctionner l’imprimante, vous disposez de 2 touches : Impression d’un interligne ; fait avancer le papier d’une ligne Impression de la valeur mesurée ou impression automatique Impression de la valeur mesurée par la balance connectée Le cas échéant, imprimez quelques interlignes (faites avancer le papier) en appuyant sur la 123456789012345678901234 touche G (plusieurs fois) ou en la maintenant... -
Seite 37: Messages D'erreur
Messages d’erreur Voyant Cause Remède § Appuyer sur la touche P est rouge Les données dans la mémoire de l’imprimante (EEPROM) sont incorrectes (la somme de contrôle n’est pas exacte) > Les réglages d’usine sont chargés $ Le cas échéant, configurer de nouveau le menu de l’interface de l’imprimante et le menu des applications statistiques... -
Seite 38: Entretien
Entretien Changement du rouleau de papier Pour le fonctionnement, il faut utiliser un rouleau de papier ayant les caractéristiques suivantes (voir également le chapitre « Accessoires ») : – Rouleau de papier standard – Papier de 60 g sans bois –... - Seite 39 § Pour mettre le rouleau de papier en place, tenez-le de telle sorte que les fixations puissent être enfoncées dans l’ouverture de la bobine du rouleau de papier. § Lâchez les fixations du rouleau des deux côtés. § Pour fermer le compartiment du rouleau de papier, rabattez le cache vers l’avant.
- Seite 40 Utilisez uniquement des accus standard Mignon de type nickel-métal hybride AA (voir également « Accessoires ») référence Sartorius 69Y03136. § Soulevez le cache du compartiment du rouleau de papier. § Pour ouvrir le compartiment à accus, relevez le cache vers l’arrière.
- Seite 41 Nettoyage de l’imprimante Veillez à ce qu’aucun liquide ne pénètre dans l’imprimante. N’utilisez pas de produits de nettoyage corrosifs (solvants ou produits similaires). § Pour débrancher l’appareil de l’alimentation électrique : débranchez le câble de données (vers la balance) sur la face arrière de l’imprimante. $ En cas d’alimentation en courant externe, débranchez le bloc d’alimentation de la prise de courant.
-
Seite 42: Accessoires
Accessoires Désignation Référence Rouleau de papier (paquet de 5) 6906937 Ruban encreur 6906918 Bloc d’alimentation pour normes Europe 6971412 Grande-Bretagne 6971414 6971413 Australie 6971411 Afrique du Sud 6971410 Jeu d’accus (4 nickel-métal hybride type AA) 69Y03136 Câble de données entre l’imprimante et un appareil ancien modèle (technologie MP…) pour utilisation en environnement résidentiel (EN55022, classe B) VF1503... -
Seite 43: Utilisation En Métrologie Légale
Utilisation en métrologie légale L’édition des données de la balance doit être configurée de manière à ce que L’imprimante YDP10-0CE dispose de l’identification particulière d’un incré- son propre rapport d’essai délivré par ment d’affichage soit également éditée l’Institut fédéral allemand de physique et transmise à... -
Seite 45: Eu Declaration Of Conformity
45 45... - Seite 46 D D é é c c l l a a r r a a t t i i o o n n d d e e c c o o n n f f o o r r m m i i t t é é C C E E / / U U E E Fabricant Sartorius Lab Instruments GmbH & Co. KG 37070 Goettingen, Allemagn déclare sous sa seule responsabilité...
- Seite 48 Connections between the device and peripherals must be made using shielded cables in order to maintain compliance with FCC radio frequency emission limits. Any modifications made to this device that are not approved by Sartorius may void the authority granted to the user by the FCC to operate this equipment.
- Seite 49 Sartorius Lab Instruments GmbH & Co. KG Otto-Brenner-Strasse 20 37079 Goettingen, Germany Phone: +49 551 308 0 www.sartorius.com The information and figures contained in these instructions correspond to the version date specified below. Sartorius reserves the right to make changes to the technology, features, specifications and design of the equipment without notice.