
Verwandte Anleitungen für Sartorius YDP20-0CE


Inhaltszusammenfassung für Sartorius YDP20-0CE
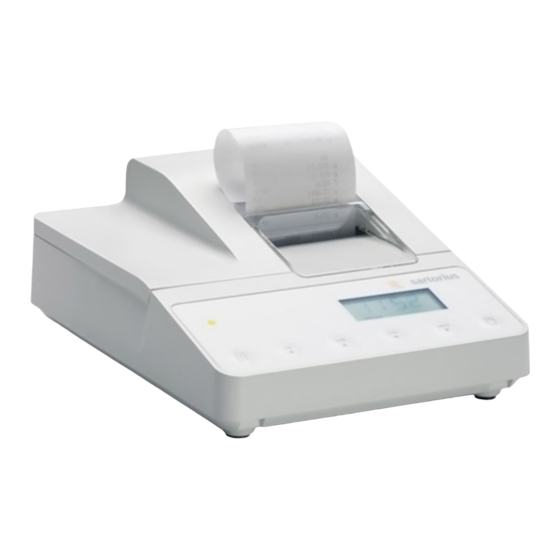
- Seite 1 Operating Instructions | Betriebsanleitung | Installation et mode d’emploi Sartorius YDP20-0CE Data Printer | Messwertdrucker | Imprimante 98647-004-35...
- Seite 2 English – page 3 In cases involving questions of interpretation, the German-language version shall prevail. Deutsch – Seite 38 Im Auslegungsfall ist die deutsche Sprache maßgeblich. Français – page 73 En cas de questions concernant l’interprétation, la version en langue allemande fera autorité.
-
Seite 3: Inhaltsverzeichnis
Contents Intended Use ....4 Configuration ....21 Setting the Date and Time . -
Seite 4: Intended Use
Intended Use The YDP20-0CE data printer is designed to receive weighing data from a connected weighing instrument and print it on plain paper (roll width: 57.5 mm), with up to 24 characters per line. The data printer is equipped with a real-time clock. -
Seite 5: Safety Instructions
If you need to use an external power supply, use only an original Sartorius AC adapter (see “Accessories”). The exter- nal power supply is required only if the printer is operated in conjunction with equipment that do not provide suffi- cient voltage for the YDP20-0CE. -
Seite 6: Installation
Installation Equipment Supplied The following components are supplied: – Interface cable for connecting the printer to a weighing instrument – Ink ribbon – 4 rechargeable batteries – Paper roll Installing the Batteries § Remove the batteries from their packaging (batteries are discharged) §... - Seite 7 Connecting the Data Printer to a Weighing Instrument § Connect the interface cable to the printer and the weighing instrument you are using. Secure the connection. Turning On the Weighing Instrument and the Printer § Plug in the AC adapter §...
- Seite 8 “Configuration” on page 20. If you connect the printer to an instrument that does not supply sufficient voltage to the YDP20- 0CE, use only an original Sartorius AC adapter (external power supply) for this printer (see “Accessories”).
-
Seite 9: Operation
Operation The data printer has 6 function keys for operation: : Line feed: Advances the paper by one blank line : “Numerator”: Switches the function for number- ing measured values on the printout on and off. This option is available only if the numerator function (-P4-) is activated in the printer port settings (see page 24). -
Seite 10: Printing The Measured Value From The Connected Weighing Instrument
Printing the Measured Value from the Connected Weighing Instrument $ If necessary, advance the paper first: Press the line feed key G repeatedly or press and hold the key $ Print date and time if desired: Press the Y key 22-Jan-08 10:25:38 >... -
Seite 11: Statistical Evaluation Of Measured Values
Statistical Evaluation of Measured Values The printer’s built-in statistics program can evaluate all values transferred from a connected weighing instru- ment. To use this function, activate the statistics program (-A3-) in the statistics application menu (see “Configuration”). When this function is active, “STAT.”... - Seite 12 Printing Individual Values To print all values included in the statistical evaluation, configure the following settings in the statistics application menu: – Printout of statistics program values = 1 (-A4-) (factory setting = 1: all values are printed) If the numerator is switched off (by pressing the I key), the individual values are not printed, but are added to the statistics memory.
- Seite 13 Data Transfer and Statistical Evaluation in Manual Mode Printer Configuration Configure the following in the statistics application menu: – Statistics program (-A3-) = 1 (factory setting = 1) The display shows “STAT.” – Print measured values (-A4-) = 1 – Store measured values manually (-P6-) = 0. Recording and Evaluating Data §...
- Seite 14 If the automatic taring function (-A2-) is switched off: § Remove the sample from the weighing pan § Place the next sample on the weighing pan § Press the P key to store the value 123456789012345678901234 > Measured values are printed (see example on the left) 001: 123.6...
- Seite 15 Data Transfer and Statistical Evaluation in the Automatic Mode Storing Measured Values The first value stored must be greater than 30 scale intervals of the weighing instrument’s display (e.g. > 3.0 g on a decigram scale). A value can be stored only when the stability symbol is displayed (i.e., when fluctuation <...
- Seite 16 Recording and Evaluating Data § Press the U key to clear the statistics memory prior to initial data transfer > Any values in memory are evaluated and the results printed § Place the first sample on the weighing pan § Press the P key to store the measured value >...
- Seite 17 § Continue as described above until all samples have been weighed 99.8 g § Press the U key to print the statistics 3.55 g > The next weight is printed out (see example on the srel 3.57 % left) 1203.4 g 96.0 g >...
- Seite 18 > The last digit of the weight must be printed inversely if the scale interval (d) of the weighing instrument used in legal metrology is not equal to its verification scale interval (e). If the weighing instrument has a scale interval (d) that matches its verification scale interval (e), none of the digits are marked (no inverse printing).
-
Seite 19: Use In Legal Metrology In The Eu
The German National Institute of Physics and Metrol- ogy (PTB) has issued an independent test certificate for the YDP20-0CE (see certificate for number). With this certificate, the printer can be operated in legal metrol- ogy in the EU and the EEA. This applies only when the... -
Seite 20: Iso/Glp-Compliant Data Records
ISO/GLP-compliant Data Records An ISO/GLP*-compliant printout must include the following data with each measurement: – Weighing instrument manufacturer – Weighing instrument model – Weighing instrument serial number – Date and time of the start and finish of each measurement – Operator/workstation ID –... -
Seite 21: Configuration
Configuration Setting the Date and Time Note: To activate the date/time setting mode, either turn on the data printer and the weighing instrument and, while all display segments are lit, § Press the Y key or, at any time during operation,: §... - Seite 22 § To store the setting, press the Y key > The two “minutes” digits flash (see example on the left) § To set the minutes, press the I key or U key, repeatedly if necessary > The “minutes” digits are adjusted (see example on the left) §...
-
Seite 23: Settings For Iso/Glp-Compliant Data Records
§ To store the setting, press the Y key § To exit the statistics application menu, press the T key § The corresponding settings must be configured in the SARTORIUS weighing instrument as well. Refer to the section on Model ED6202S... -
Seite 24: Printer Port Settings
(PIN) as a password. If you lose or forget this number, contact your local Sartorius Service Center. All settings are loaded in the printer’s memory (EEP- ROM) when the printer is switched on and applied dur- ing operation. - Seite 25 1st Level 2nd Level 3rd Level When printer is started cO de -- -- or > 5 sec. 01 -- 21 -- 99 -- 21 01 21 99 ba ud 24 00 48 00 96 00 19 20 … pa ry …...
- Seite 26 Options for Printer Port Settings Designation Display Factory Options settings Password 0100 to 9999 code Transmission rate 1,200 1,200, 2,400, 4,800, 9,600, baud (Baud rate) 19,200 Number of data bits: 7 data bits data 8 data bit Parity Pary Even 0 = Space 1 = Mark RS-232C handshake...
- Seite 27 User-defined Text Input for the First and Second Lines (Vartext1, Vartext2) § This requires a computer (PC) with a BASIC interpreter. The following BASIC program transfers text over the interface of a connected computer (PC). The BASIC interpreter that comes with the computer executes this program. PRINT “...
-
Seite 28: Statistics Application Settings
Statistics Application Settings All settings are loaded in the printer’s memory (EEP- ROM) when the printer is switched on and applied dur- ing operation. There are two ways to open the menu for configuring statistics application settings: – Hold down the U key when you switch on the print- er, or, during operation, –... - Seite 29 Configuration Options for the Statistics Application Designation Display Factory Options settings GLP/GMP printout 0 = no, 1 = yes -A1- Tare weighing instrument automatically 0 = no, 1 = yes -A2- Statistics program 0 = no, 1 = yes -A3- Print measured values 0 = no, 1 = yes -A4-...
-
Seite 30: Printing A Hard Copies Of Settings
Printing Hardcopies of Settings Printing a Hardcopy of the Printer Port Settings § Open the printer port menu: – Hold down the P key while switching on the printer, – Press and hold the P key (> 5 sec) > The display is as shown on the left §... - Seite 31 Printing a Hardcopy of the Statistics Application Settings § Open the statistics applications menu: – Hold down the U key while switching on the printer, – Press and hold the U key (> 5 sec) > The display is as shown on the left §...
-
Seite 32: Troubleshooting Guide
Troubleshooting Guide Display or printout Cause Solution § Press any key flashes Data in printer memory err1 (EEPROM) defective (checksum incorrect) > Factory settings are loaded $ If necessary, change printer port and/or statistics application settings § Switch off weighing flashes Capacity err2... -
Seite 33: Maintenance
Maintenance Changing the Paper Roll The paper rolls must have the following specifications (see “Accessories”): – Standard paper roll – Wood-free paper, 60 g – Width: 57.5 mm ± 0.5 mm – Diameter: maximum 65 mm – Open core diameter: minimum 8 mm §... - Seite 34 § To align the paper roll, hold it so that you can push both roll holders into the core § Release the roll holders on both sides § Close the paper roll compartment Replacing the Ink Ribbon Cassette Your data printer requires a black ink ribbon cassette, type ERC-22 (see “Accessories”).
- Seite 35 $ If you have any questions, please contact your local Sartorius Service Center § Install the 4 rechargeable batteries in the battery compartment. Make sure that the poles match the + and –...
- Seite 36 Cleaning the Data Printer When cleaning the data printer, make sure that no liquid enters the housing Do not use aggressive cleaning agents (solvents or similar agents) § Disconnect the power supply by – Disconnect the power supply by unplugging the interface cable (connecting the weighing instrument) from the rear panel of the printer –...
-
Seite 37: Accessories
Accessories Product Order No. Paper rolls (box of 5) 6906937 Ink ribbon cassette 6906918 AC adapter with specifications rated for: Europe 6971412 United Kingdom 6971414 6971413 Australia 6971411 South Africa 6971410 Set of rechargeable batteries (4 nickel-metal hydride, size AA) 69Y03136 Specifications Designation... - Seite 38 Inhalt Verwendungszweck ... . . 39 Voreinstellungen ....56 Uhrzeit und Datum einstellen ..56 Sicherheitshinweise .
-
Seite 39: Verwendungszweck
Verwendungszweck Der Typ YDP 20-0CE ist ein Messwertdrucker, der Wägedaten von einer angeschlossenen Waage über- nimmt und auf Normalpapier (Rollenbreite: 57,5 mm) ausdruckt. Text wird mit bis zu 24 Zeichen pro Zeile ausgegeben. Der Drucker verfügt über eine eingebaute Echtzeituhr. Nach erforderlicher Konfiguration ist der Messwertdrucker als Zusatzeinrichtung einer geeichten Waage einsetzbar. -
Seite 40: Sicherheitshinweise
Die externe Spannungsversorgung ist zu verwenden, wenn der Drucker mit Geräten eingesetzt wird, die keine oder keine ausreichende Spannungsversor- gung für den YDP20-0CE bereitstellen. Im Bedarfsfall den Sartorius Händler ansprechen. Beim Reinigen dürfen keine Flüssig- keiten in den Drucker gelangen: nur leicht angefeuchtetes Reinigungstuch verwenden. -
Seite 41: Installation
Installation Lieferumfang Folgende Einzelteile werden mitgeliefert: – Datenleitung Drucker – Waage – Schwarzes Farbband – 4 Akkus – Papierrolle Akkus einlegen § 4 Akkus aus der Verpackung entnehmen (Akkus sind entladen) § Papierfach öffnen: Papierfachabdeckung anheben § Akkufach öffnen: Akkufachabdeckung aufklappen §... - Seite 42 Drucker an Waage anschließen § Datenverbindungskabel am Drucker und an der Waage anschließen und sichern Waage und Drucker einschalten § Waage mit Netzspannung versorgen: Netzgerätstecker einstecken § Waage einschalten > Drucker schaltet automatisch ebenfalls ein > Kontrolle: alle Elemente der Druckeranzeige leuch- ten auf >...
- Seite 43 – Waage MP8-1/MP8-2 mit internem Data Input – Waage der Economy-Serie (Modell EA…, EB…) – Infrarot-Trockner 7393…/YDU01L – Externes Tastenfeld, z. B. 73392 § Original Sartorius Netzgerät an Netzsteckdose anschlie- ßen. Die grüne LED leuchtet, Netzspannung vorhanden. § Winkelstecker des Netzgeräts an rechten Ausgang der Druckerrückseite anschließen...
-
Seite 44: Betrieb
Betrieb Für den Betrieb des Druckers stehen 6 Tasten zur Verfügung: : Leerzeile drucken; Papiervorschub um 1 Zeile : Numerator (Numerierung der aus ge druck ten Messwerte) ein-/ausschalten; dies ist nur möglich, wenn der »Numerator« (-p4-) im Menü Drucker-Schnittstelle (Seite 61) eingeschaltet wurde;... -
Seite 45: Messwert Der Angeschlossenen Waage Drucken
Messwert der angeschlossenen Waage aus druc ken $ Ggf. einige Leerzeilen drucken (Papiervorschub): Taste G (mehrfach) drücken oder gedrückt halten $ Ggf. Datum und Uhrzeit drucken: Taste Y 22-Jan-08 10:25:38 drücken > Nebenstehender Ausdruck erscheint (Beispiel) 123456789012345678901234 § Messwert ausdrucken: Taste P drücken 001: 123.4 $ Ggf. -
Seite 46: Messwerte Statistisch Auswerten
Messwerte statistisch auswerten Mit dem Drucker können übernommene Messwerte statistisch ausgewertet werden. Im Menü Statistik-An- wendungen (siehe Kapitel Voreinstellungen) muss dafür das Statistikprogramm (-a3-) eingeschaltet werden. Wenn es eingeschaltet ist, leuchtet das ne ben ste hen- de Zeichen in der Anzeige für jeden übernommenen Messwert kurz (ca. - Seite 47 Einzelmesswerte ausdrucken Alle Messwerte, über die die statistische Auswertung gebildet werden soll, werden ausgedruckt, wenn im Menü Statistik-Anwendungen: – Messwertausdruck bei Statistikprogramm = 1 ein ge stellt ist (-a4-) (Werkseinstellung = 1: jeder Wert wird gedruckt) Wird jetzt der Numerator mit der Taste I ausge- schaltet, wird der Ausdruck unterdrückt.
- Seite 48 Messwerte manuell übernehmen und statistisch auswerten Notwendige Druckerkonfiguration Der Drucker muss im Menü Statistik-Anwendungen so konfiguriert sein, dass: – Statistikprogramm = 1 eingestellt ist (-a3-) (Werkseinstellung = 1) In der Anzeige erscheint nebenstehendes Zeichen – Messwertausdruck = 1eingestellt ist (-a4-) –...
- Seite 49 Wenn Automatisches Tarieren (-a2-) ausgeschaltet ist: § Wägegut von der Waage nehmen § Neues Wägegut auf die Waage legen § Messwert übernehmen: Taste P drücken 123456789012345678901234 > Messwert wird ausgedruckt (Beispiel) 001: 123.6 Wenn Automatisches Tarieren (-a2-) eingeschaltet 002: 117.8 ist: 003: 119.1...
- Seite 50 Messwerte automatisch übernehmen und statistisch auswerten Übernahme der Messwerte Der erste Messwert, der übernommen wird, muss größer als 30 Teilschritte der Waagenanzeige sein (z. B. > 3,0 g, wenn die Waage Zehntelgramm anzeigt). Die Waage muss dabei Stillstand anzeigen (Schwan- kung ≤...
- Seite 51 Messwerte erfassen und auswerten § Vor der ersten Messwertübernahme Statistikspeicher leeren: Taste U drücken > Eventuell vorhandene alte Messwerte werden ausgewertet und es erscheint ein Statistikausdruck § Erstes Wägegut auf die Waage legen § Messwertübernahme starten: Taste P drücken > In der Anzeige erscheint der Numerator (Beispiel) >...
- Seite 52 § Nacheinander wie oben beschrieben alle Wägegüter erfassen 99.8 g 3.55 g § Statistik erstellen: Taste U drücken srel 3.57 % 1203.4 g 96.0 g > Nebenstehender Ausdruck erscheint (Beispiel) 103.2 g Diff 7.2 g > Alle gespeicherten Messwerte im Druckerspeicher wer- den gelöscht 22-Jan-08 16:02:11...
- Seite 53 > Nebenstehender Ausdruck erscheint mit ISO/GLP-Kopf (Beispiel); ISO/GLP-Kopf nur bei manu- eller Messwertübernahme Die letzte Ziffer des Messwertes muss invers gedruckt werden, wenn die im eichpflichtigen Verkehr befindli- che Waage einen Eichwert (e) ungleich dem Teilungs- wert (d) besitzt. Bei einer Waage ohne Eichklasse K ist der Ausdruck normal.
-
Seite 54: Einsatz Beachten
Hinweise für eichpflichtigen Einsatz beachten Der Drucker YDP20-0CE verfügt über einen eigenstän- digen Prüfbericht der PTB Deutschland (siehe Prüf- schein). Hierdurch kann der Drucker im eichpflichtigen Verkehr in der EU und des EWR eingesetzt werden. Dies gilt nur bei Anschluss an geeichte Waagen, die durch eine EG- oder nationale Bauartzulassung zur Eichung zugelassen sind. -
Seite 55: Iso/Glp Konform Protokollieren
ISO/GLP-konform protokollieren Um ISO/GLP*-konform zu protokollieren, müssen für jede Messung folgende Angaben auf dem Ausdruck erscheinen: – Hersteller der Waage – Modell der Waage – Seriennummer der Waage – Datum und Uhrzeit für Start und Ende der Mes sun gen –... -
Seite 56: Voreinstellungen
Voreinstellungen Uhrzeit und Datum einstellen Hinweis: Einstellmodus für Uhrzeit und Datum wählen: entweder beim Starten des Druckers (resp. der Waage), d.h. wenn alle Elemente der Druckeranzeige aufleuchten: § Taste Y drücken oder während des Betriebs: § Taste Y mindestens 5 Sekunden drücken >... - Seite 57 § Einstellung speichern: Taste Y drücken > Nebenstehende Anzeige erscheint, die beiden rechten Ziffern blinken (Beispiel) § Minutenzahl einstellen: Taste I oder U ggf. mehrfach drücken > Nebenstehende Anzeige erscheint (Beispiel) § Einstellung speichern: Taste Y drücken > Nebenstehende Anzeige erscheint §...
-
Seite 58: Iso/Glp-Protokoll Konfigurieren
> Nebenstehende Anzeige erscheint § Einstellung speichern: Taste Y drücken § Menü Statistik-Anwendungen verlassen: Taste T drücken § Zusätzlich entsprechende Menüeinstellung an der Waage vornehmen: siehe Betriebsanleitung der Waage, SARTORIUS Abschnitt »ISO/GLP-Protokoll« Model ED6202S 040240772 > Bei nachfolgenden Ausdrucken erscheint der ISO/GLP-Kopf und -Fuß... -
Seite 59: Menü Drucker-Schnittstelle
Dazu muss der Benutzer eine nur ihm bekannte vierstellige Zahl (PIN Nummer) eingeben. Falls diese Zahl verloren geht, hilft der Sartorius Service weiter. Alle Voreinstellungen werden beim Start des Druk- kers aus dem Druckerspeicher (EEPROM) gelesen und an schlie ßend vom Drucker für den Betrieb übernom- men. - Seite 60 1. Ebene 2. Ebene 3. Ebene bei Druckerstart cO de -- -- oder > 5 Sek. 01 -- 21 -- 99 -- 21 01 21 99 ba ud 24 00 48 00 96 00 19 20 … pa ry … B = Beispiel = Neuer Wert wird gespeichert = Punkt zeigt bisher eingestellten Wert an...
- Seite 61 Einstellmöglichkeiten im Menü Drucker-Schnittstelle Bezeichnung Anzeige Werks- Einstellmöglichkeit einstellung Passwort 0100 … 9999 CodE Übertragungs- 1200 1200, 2400, 4800, 9600, 19200 bAUd geschwindigkeit (Baudrate) Anzahl Datenbits 7 Data Bits dATA (Data bits) 8 Data Bits Parität (Parity) odd = odd parity PArY even = even parity 0 = space parity...
- Seite 62 Eingabe des kundenspezifischen Textes für die 1. und 2. Druckzeile (Vartext1, Vartext2) § benötigt wird hierzu ein Rechner (PC) mit einem BASIC-Interpreter Das folgende BASIC-Programm dient dem Texttransfer über die Schnittstelle von einem angeschlossenen Rechner (PC). Der beim Kauf des Rechners miterworbene BASIC-Interpreter führt dieses Programm aus.
-
Seite 63: Menü Statistik-Anwendungens
Voreinstellungen im Menü: »Statistik-Anwendungen« vornehmen Alle Voreinstellungen werden beim Start des Druc kers aus dem Druckerspeicher (EEPROM) gelesen und an schlie ßend vom Drucker für den Betrieb über nom men. Das Menü Statistik-Anwendungen wird erreicht, wenn – während des Druckerstarts die Taste U gedrückt wird oder wenn –... - Seite 64 Einstellmöglichkeiten im Menü Statistik-Anwendungen Bezeichnung Anzeige Werks- Ein stell mög lich keit einstellung GLP/GMP Ausdruck 0 = nein, 1 = ja -a1- Waage automatisch tarieren 0 = nein, 1 = ja -a2- Statistikprogramm 0 = nein, 1 = ja -a3- Messwertausdruck 0 = nein, 1 = ja -a4-...
-
Seite 65: Ausdrucken
Protokoll der Vor ein stel lun gen ausdrucken: Protokoll der Voreinstellungen »Drucker-Schnitt- stelle« ausdrucken § Menü Drucker-Schnittstelle wählen: – während des Druckerstarts Taste P ge drückt halten oder – im Betrieb Taste P länger als 5 Sekunden drücken > Nebenstehende Anzeige erscheint §... -
Seite 66: Protokoll Der Voreinstellungen
Protokoll der Vor ein stel lun gen: »Statistik-Anwendungen« aus druc ken § Menü Statistik-Anwendungen wählen: – während des Druckerstarts Taste U ge drückt halten oder – im Betrieb Taste U länger als 5 Sekunden drücken > Nebenstehende Anzeige erscheint § Voreinstellungen ausdrucken: Taste P drücken >... -
Seite 67: Fehlermeldungen
Fehlermeldungen Meldung Ursache Abhilfe § Beliebige Taste drücken err1 blinkt Daten im Druckerspeicher (EEPROM) sind fehlerhaft (Prüfsumme stimmt nicht) > Werksvoreinstellungen werden geladen $ Ggf. Menü Drucker- Schnittstelle und Menü Statistik-An wen dun gen neu konfigurieren § Waage ausschalten err2 blinkt Überschreitung der Eingangskapazität und neu einschalten... -
Seite 68: Instandhaltung
Instandhaltung Papierrolle wechseln Für den Betrieb wird eine Papierrolle mit folgenden Eigenschaften benötigt (siehe auch Kapitel Zubehör): – Standard-Papierrolle – Holzfreies 60 g Papier – Breite: 57,5 ± 0,5 mm – Durchmesser: max. 65 mm – Offener Kerndurchmesser: min. 8 mm §... - Seite 69 § Papierrolle einrichten: Papierrolle so halten, dass die Rollenhalterungen in die Kernöffnung der Papierrolle zusammengeschoben werden können § Rollenhalterungen an beiden Seiten loslassen § Papierfach schließen: Papierfachabdeckung nach vorne herunterklappen Farbband wechseln Für den Betrieb wird ein schwarzes Farbband vom Typ ERC-22 benötigt (siehe auch Kapitel Zubehör).
- Seite 70 4 Akkus entnehmen W Verbrauchte Akkus sind Sondermüll (kein Haus müll): Akkus gemäß Abfallwirtschaftsgesetz als Sondermüll speziell entsorgen $ Ggf. Sartorius Kundendienstleitstelle befragen § 4 neue Akkus in Akkufach einsetzen: Polarität beachten § Akkufach schließen: Akkufachabdeckung nach vorne herunterklappen § Papierfach schließen: Papierfachabdeckung nach vorne...
- Seite 71 Drucker reinigen Es darf keine Flüssigkeit in den Drucker gelangen Keine aggressiven Reinigungsmittel (Lösungsmittel o. ä.) verwenden § Span nungs ver sor gung trennen: – Waage vom Netz trennen, oder Datenkabel (zur Waage) an der Rückseite des Druckers lösen oder –...
-
Seite 72: Zubehör
Zubehör Bezeichnung Best.-Nr. Papierrolle (5er Pack) 6906937 Farbband 6906918 Steckernetzgerät für Norm Europa 6971412 Großbritannien 6971414 6971413 Australien 6971411 Südafrika 6971410 Akkusatz (4- Nickel-Metall-Hydrid Typ AA) 69Y03136 Technische Daten Bezeichnung Größe Länge 215 mm Breite 155 mm Höhe 78 mm Gewicht (ohne Akkus, Papierrolle) ca. - Seite 73 Table des matières Description générale ... 74 Réglages ..... 91 Réglage de l’heure et de la date .
-
Seite 74: Description Générale
Description générale Le modèle YDP 03-0CE est une imprimante qui reçoit les données de pesée d’une balance connectée et les imprime sur du papier normal (largeur du rouleau : 57,5 mm). Le texte et les données sont imprimés avec au maximum 24 caractères par ligne. L’imprimante est équipée d’une horloge en temps réel. -
Seite 75: Conseils De Sécurité
En cas d’alimentation électrique externe, n’utilisez pour cette impri- mante que des blocs d’alimentation d’origine Sartorius (voir le chapitre « Accessoires »). L’alimentation électrique par l’inter- médiaire d’un bloc externe est nécessaire si vous utilisez l’imprimante avec des appareils qui n’alimentent pas ou pas assez YDP02-0CE en courant. -
Seite 76: Installation
Installation Contenu de la livraison La livraison comprend les éléments suivants : – câble de données imprimante-balance – ruban encreur – 4 accus – rouleau de papier Mise en place des accus § Retirez les 4 accus de leur emballage (les accus sont déchargés). - Seite 77 Raccordement de l’imprimante à la balance § Raccordez le câble de données à l’imprimante et à la balance et assurez la connexion. Mise sous tension de la balance et de l’imprimante § Pour alimenter la balance avec la tension du secteur, branchez la fiche du bloc d’alimentation.
- Seite 78 – balance de la série Economy (modèle EA…, EB…) – dessiccateur à infrarouge 7393.../YDU01L – clavier externe, par exemple 73392 § Raccordez le bloc d’alimentation d’origine Sartorius à une prise du secteur. § Raccordez la fiche coudée du bloc d’alimentation à la sortie droite se trouvant sur la face arrière de l’impri-...
-
Seite 79: Fonctionnement
Fonctionnement Pour faire fonctionner l’imprimante, vous dispo- sez de 6 touches : : Impression d’un interligne ; fait avancer le papier d’une ligne. : Marche/Arrêt du compteur (numérotation des valeurs mesurées imprimées) ; ceci n’est possible que si le « compteur » (-P4-) a été réglé sur «... -
Seite 80: Impression De La Valeur Mesurée Par La Balance Connectée
Impression de la valeur mesurée par la balance connectée $ Le cas échéant, imprimez quelques interlignes (faites avancer le papier) en appuyant sur la touche (plusieurs fois) ou en la maintenant enfoncée. $ Le cas échéant, pour imprimer la date et l’heure, 22-Jan-08 10:25:38 appuyez sur la touche Y... -
Seite 81: Exploitation Statistique Des Valeurs Mesurées
Exploitation statistique des valeurs mesurées A l’aide de l’imprimante, il est possible d’exploiter de manière statistique des valeurs mesurées transmises. Pour cela, il faut avoir mis le programme de statistiques (-A3-) en service dans le menu des applications statis- tiques (voir le chapitre « Réglages »). Lorsqu’il est en service, l’abréviation ci-contre s’allume brièvement (env. - Seite 82 Impression de valeurs individuelles Toutes les valeurs mesurées dont l’exploitation statistique doit être réalisée sont imprimées si dans le menu des applications statistiques : – l’impression des valeurs mesurées avec programme de statistiques = 1 est réglée (-A4-) (réglage d’usine = 0 : chaque valeur est imprimée). Si en revanche le compteur est mis hors service à...
- Seite 83 Transmission manuelle et exploitation statistique des valeurs Configuration nécessaire de l’imprimante L’imprimante doit être configurée dans le menu des applications statistiques de telle manière que : – le programme de statistiques = 1 soit réglé (-A3-) (réglage d’usine = 1). L’abréviation ci-contre apparaît sur l’écran.
- Seite 84 Si « Tarage automatique » (-A2-) est hors service : § Enlevez l’échantillon de la balance. § Posez un nouvel échantillon sur la balance. § Appuyez sur la touche P pour transmettre la valeur mesurée. 123456789012345678901234 > La valeur de mesure est imprimée (exemple). 001: 123.6 Si «...
- Seite 85 Transfert automatique et exploitation statistique des valeurs mesurées Transfert des valeurs mesurées La première valeur qui est transmise doit être supérieure à 30 digits de l’affichage de la balance (par exemple > 3,0 g si la balance affiche des décigrammes). La balance doit alors afficher l’état de stabilité...
- Seite 86 Enregistrer et exploiter des valeurs § Appuyez sur la touche U pour vider la mémoire de statistiques avant le premier transfert de valeurs mesurées. > D’anciennes valeurs éventuellement présentes sont exploitées et une impression de statistiques apparaît. § Posez le premier échantillon à peser sur la balance. §...
- Seite 87 § Enregistrer tous les échantillons les uns après les autres comme décrit ci-dessus. 99.8 g 3.55 g § Appuyez sur la touche U pour éditer des statistiques. srel 3.57 % 1203.4 g > L’impression ci-contre apparaît (exemple). 96.0 g 103.2 g >...
- Seite 88 > L’impression ci-contre apparaît avec un en-tête ISO/ BPL (exemple) ; en-tête ISO/BPL uniquement avec un transfert manuel des valeurs mesurées. Le dernier chiffre de la valeur de mesure doit être imprimé en vidéo inverse quand la balance utilisée en usage réglementé a un échelon partiel (d) différent de l’échelon de vérification (e).
-
Seite 89: Remarques Concernant L'utilisation En Usage Réglementé
: – en informer le bureau de vérification des poids et mesures compétent ou – faire effectuer une configuration et un marquage par le service après-vente Sartorius. L’utilisation immédiate en usage réglementé n’est pas concernée par cette mesure. -
Seite 90: Edition De Procès-Verbaux Conforme À Iso/Bpl
Edition de procès-verbaux conforme à ISO/BPL Afin d’éditer des procès-verbaux conformément à ISO/ BPL*, les données suivantes doivent, pour chaque mesure, apparaître sur l’impression : – Fabricant de la balance – Modèle de la balance – Numéro de série de la balance –... -
Seite 91: Réglages
Réglages Réglage de l’heure et de la date Remarque : Sélectionnez le mode de réglage de l’heure et de la date de l’une des manières suivantes : 1) soit lors du démarrage de l’imprimante (et de la balance), c’est-à-dire lorsque tous les éléments de l’affichage de l’imprimante s’allument : §... - Seite 92 § Pour mémoriser le réglage, appuyez sur la touche Y. > L’affichage ci-contre apparaît ; les deux chiffres de droite clignotent (exemple). § Pour régler le nombre des minutes, appuyez, le cas échéant plusieurs fois, sur la touche I ou sur la touche U .
-
Seite 93: Configuration D'un Procès-Verbal Iso/Bpl
§ Pour mémoriser le réglage, appuyez sur la touche Y. § Pour quitter le menu des applications statistiques, appuyez sur la touche T. § Effectuez également les réglages du menu correspon- SARTORIUS dants sur votre balance : voir à cet effet le mode d’em- Model ED6202S 040240772 ploi de la balance au chapitre «... -
Seite 94: Menu De L'interface De L'imprimante
(code PIN). Si vous perdez ou oubliez ce code, le service après- vente Sartorius peut vous aider. Tous les réglages sont lus dans la mémoire de l’impri- mante (EEPROM) lors du démarrage de cette dernière et ensuite utilisés par l’imprimante pour le fonctionne-... - Seite 95 1er niveau 2ème niveau 3ème niveau Lors du démarrage de l’imprimante cO de -- -- ou > 5 sec. 01 -- 21 -- 99 -- 21 01 21 99 ba ud 24 00 48 00 96 00 19 20 … pa ry …...
- Seite 96 Possibilités de réglages dans le menu de l’interface de l’imprimante Désignation Affichage Réglage Possibilité de réglage d’usine Mot de passe 100 … 9,999 CodE Vitesse de transmission 1200 1200 ; 2400 ; 4800 ; 9600 ; bAUd (Baudrate) 19200 Nombre de bits de données dATA 7 bits de données (Data bits) 8 bits de données...
- Seite 97 Désignation Affichage Réglage Possibilité de réglage d’usine Impression VARTEXT1 0 = OFF = pas d’impression -P8- au démarrage VARTEXT1 1 = ON = imprimer VARTEXT1 Impression VARTEXT2 0 = OFF = pas d’impression -P9- au démarrage VARTEXT2 1 = ON = imprimer VARTEXT2 Représentation de l’heure 12, 24 heures -C1-...
-
Seite 98: Menu Des Applications Statistiques
Effectuer des réglages dans le menu des « applications statistiques » Tous les réglages sont lus dans la mémoire de l’imprimante (EEPROM) lors du démarrage de cette dernière et ensuite utilisés par l’imprimante pour le fonctionnement. Pour accéder au menu de l’interface de l’imprimante, –... - Seite 99 Possibilités de réglages dans le menu des applications statistiques Désignation Affichage Réglage Possibilité de réglage d’usine Impression BPL/BPF 0 = non, 1= oui -A1- Tarage automatique de la balance 0 = non, 1= oui -A2- Programme de statistiques 0 = non, 1= oui -A3- Impression des valeurs mesurées 0 = non, 1= oui...
-
Seite 100: Impression Du Procès-Verbal Des Réglages
Impression du procès-verbal des réglages Imprimer le procès-verbal des réglages de l’interface de l’imprimante § Pour sélectionner le menu de l’interface de l’imprimante : – maintenez la touche P enfoncée pendant le démarrage de l’imprimante ou – appuyez sur la touche P pendant plus de 5 secondes pendant le fonctionnement. - Seite 101 Imprimer le procès-verbal des réglages des applications statistiques § Pour sélectionner le menu des applications statistiques : – maintenez la touche U enfoncée pendant le démarrage de l’imprimante ou – appuyez sur la touche U pendant plus de 5 secondes pendant le fonctionnement. >...
-
Seite 102: Messages D'erreur
Messages d’erreur Message Voyant Cause Remède § Appuyer sur une touche err1 clignote Les données dans la mémoire de l’imprimante au choix (EEPROM) sont incorrectes > Les réglages d’usine (la somme de contrôle sont chargés $ Le cas échéant, n’est pas exacte) configurer de nouveau le menu de l’interface de l’imprimante et le... -
Seite 103: Entretien
Entretien Changement du rouleau de papier Pour le fonctionnement, il faut utiliser un rouleau de papier ayant les caractéristiques suivantes (voir également le chapitre « Accessoires ») : – Rouleau de papier standard – Papier de 60 g sans bois –... - Seite 104 § Pour mettre le rouleau de papier en place, tenez-le de telle sorte que les fixations puissent être enfoncées dans l’ouverture de la bobine du rouleau de papier. § Lâchez les fixations du rouleau des deux côtés. § Pour fermer le compartiment du rouleau de papier, rabattez le cache vers l’avant.
- Seite 105 Utilisez uniquement des accus standard Mignon de type nickel-métal hybride AA (voir également « Accessoires ») référence Sartorius 69Y03136. § Soulevez le cache du compartiment du rouleau de papier. § Pour ouvrir le compartiment à accus, relevez le cache vers l’arrière.
- Seite 106 Nettoyage de l’imprimante Veillez à ce qu’aucun liquide ne pénètre dans l’impri- mante. N’utilisez pas de produits de nettoyage corrosifs (sol- vants ou produits similaires). § Pour débrancher l’appareil de l’alimentation électrique : - débranchez la balance du secteur ou débranchez le câble de données (vers la balance) sur la face arrière de l’imprimante - si l’imprimante est connectée à...
-
Seite 107: Accessoires
Accessoires Désignation Référence Rouleau de papier (paquet de 5) 6906937 Ruban encreur 6906918 Bloc d’alimentation pour normes Europe 6971412 Grande-Bretagne 6971414 6971413 Australie 6971411 Afrique du Sud 6971410 Jeu d’accus (4 nickel-métal hybride type AA) 69Y03136 Caractéristiques techniques Désignation Longueur 215 mm Largeur 155 mm... - Seite 112 Sartorius Weighing Technology GmbH Weender Landstrasse 94–108 37075 Goettingen, Germany Phone +49.551.308.0 Fax +49.551.308.3289 www.sartorius.com Copyright by Sartorius, Goettingen, Germany. All rights reserved. No part of this publication may be reprinted or translated in any form or by any means without the prior written permission of Sartorius.