Herunterladen Diese Seite drucken

Werbung

Verfügbare Sprachen
  • DE

Verfügbare Sprachen

  • DEUTSCH, seite 18
INSTRUCTION MANUAL
ENGLISH
EXPLORASCOPE 60AZ
Model #22100
EXPLORASCOPE 80AZ
Model #22102
EXPLORASCOPE 70AZ
Model #22101
EXPLORASCOPE 114AZ
Model #22103

Werbung

loading

Inhaltszusammenfassung für Celestron EXPLORASCOPE 60AZ

  • Seite 1 INSTRUCTION MANUAL ENGLISH EXPLORASCOPE 60AZ EXPLORASCOPE 70AZ Model #22100 Model #22101 EXPLORASCOPE 80AZ EXPLORASCOPE 114AZ Model #22102 Model #22103...
  • Seite 2 Telescope Tube Telescope Tube Erect Image Diagonal Tripod Tripod Accesory Tray Accesory Tray EXPLORASCOPE 60AZ, 70AZ, and 80AZ EXPLORASCOPE 114AZ INCLUDED BUT NOT PICTURED. (1) 4 mm Eyepiece (1) 3x Barlow Lens (1) TheSkyX – First Light Edition DVD-ROM SOLAR WARNING Never look directly at the Sun with the naked eye or with a telescope unless you have the proper solar fi...
  • Seite 3 ASSEMBLING YOUR TELESCOPE THE MOUNT The ExploraScope mount and tripod come fully assembled, so setting it up is easy. 1. Remove the tripod and mount from the box. 2. Loosen the hand knobs at the bottom of each leg and extend the inner section of the leg to the desired length.
  • Seite 4 THE EYEPIECES Your telescope comes with two eyepieces, a low power (20 mm eyepiece) and a higher power eyepiece (4 mm eyepiece). Whenever you set up your telescope, always start with the 20 mm eyepiece. Once you have your target centered in the 20 mm eyepiece, you can switch to your higher power 4 mm eyepiece to get a more detailed view.
  • Seite 5 ALIGNING THE STARPOINTER FINDERSCOPE The StarPointer fi nderscope helps you aim your telescope by looking through its round glass window and covering your target with the red dot projected in the window. The fi rst time you assemble your telescope, you’ll need to align the StarPointer with the main optics of the telescope. Although this step can be done at night, it is signifi...
  • Seite 6 YOUR FIRST ASTRONOMICAL OBSERVING SESSION THE MOON Now you are ready to take your telescope out at night and do some real observing! Let’s start with the Moon. The Moon takes about one month go through a complete phase cycle, from New Moon to Full Moon and back again.
  • Seite 7 NOTE: This warranty is valid to U.S.A. and Canadian customers who have purchased this product from an authorized Celestron dealer in the U.S.A. or Canada. Warranty outside the U.S.A. and Canada is valid only to customers who purchased from a Celestron’s International Distributor or Authorized Celestron Dealer in the specifi...
  • Seite 8 • Consult the dealer or an experienced radio/TV technician for help. Product design and specifi cations are subject to change without prior notifi cation. This product is designed and intended for use by those 14 years of age and older. © 2014 Celestron • All rights reserved celestron.com 12-13 2835 Columbia Street •...
  • Seite 9 GUIDE DE L'UTILISATEUR FRANÇAIS EXPLORASCOPE 60AZ EXPLORASCOPE 70AZ Modèle n 22100 Modèle n 22101 EXPLORASCOPE 80AZ EXPLORASCOPE 114AZ Modèle n 22102 Modèle n 22103...
  • Seite 10 CONTENU DE LA BOÎTE Nous vous recommandons de conserver votre boîte de télescope afi n de pouvoir l'utiliser pour le rangement du télescope lorsqu'il n'est pas utilisé. Déballez le contenu de la boîte avec soin, car certaines pièces sont petites. Utilisez la liste des pièces ci-dessous pour vous assurer que toutes les pièces et tous les accessoires soient compris.
  • Seite 11 ASSEMBLAGE DE VOTRE TÉLESCOPE LA MONTURE Le trépied et la monture de l’ExploraScope sont livrés entièrement assemblés, facilitant ainsi son installation : 1. Retirez le trépied et la monture de la boîte. 2. Desserrez les molettes au bas de chaque pied et étendez la partie intérieure du pied à...
  • Seite 12 L’OCULAIRE Votre télescope est vendu avec deux oculaires, un de faible puissance (oculaire 20 mm) et un de puissance plus élevée (oculaire 4 mm). Chaque fois que vous installez votre télescope, commencez toujours par l’oculaire de 20 mm. Une fois que votre objectif est centré...
  • Seite 13 ALIGNEMENT DU CHERCHEUR STARPOINTER Le chercheur StarPointer vous aide à pointer votre télescope lorsque vous regardez par sa fenêtre ronde en verre en couvrant votre cible avec le point rouge projeté sur la fenêtre. La première fois que vous assemblez votre télescope, vous devrez aligner le chercheur StarPointer avec le système optique principal du télescope.
  • Seite 14 VOTRE PREMIÈRE SESSION D’OBSERVATION ASTRONOMIQUE LA LUNE Vous êtes maintenant prêt à installer à l’extérieur votre télescope et faire quelques véritables observations pendant la nuit! Commençons par la lune. Les phases de la lune s’étendent sur un cycle complet d’environ un mois, de la nouvelle lune à la pleine lune et vice versa.
  • Seite 15 Les pièces ou le produit ayant été l’objet d’un remplacement deviendront la propriété de Celestron. Le client sera responsable de tous les frais de transport et d’assurance, à la fois vers et depuis l’usine de Celestron, et devra payer à l’avance ces coûts.
  • Seite 16 • Consultez le distributeur ou un technicien radio ou TV d’expérience pour de l’assistance. La conception et la spécifi cation du produit peuvent être modifi ées sans préavis. Ce produit a été conçu à l’intention des utilisateurs âgés de 14 ans et plus. © 2014 Celestron • Tous droits réservés. 12-13 www.celestron.com 2835 Columbia Street •...
  • Seite 17 BEDIENUNGSANLEITUNG DEUTSCH EXPLORASCOPE 60AZ EXPLORASCOPE 70AZ Modell-Nr. 22100 Modell-Nr. 22101 EXPLORASCOPE 80AZ EXPLORASCOPE 114AZ Modell-Nr.22102 Modell-Nr. 22103...
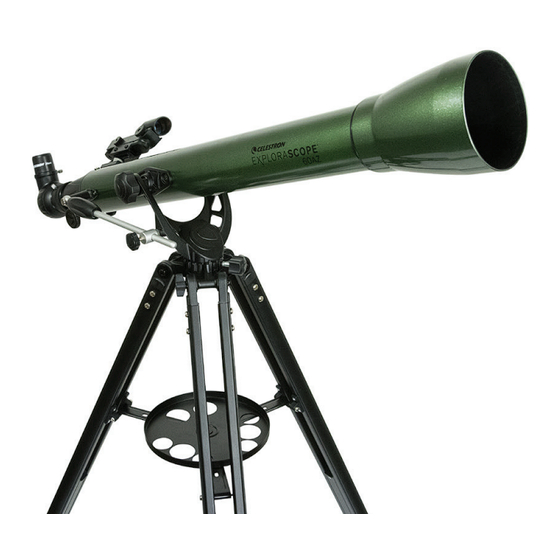
  • Seite 18 Teleskoptubus Zenitspiegel für aufrechtes Bild Stativ Stativ Zubehörablage Zubehörablage EXPLORASCOPE 60AZ, 70AZ, und 80AZ EXPLORASCOPE 114AZ EINGESCHLOSSEN, ABER NICHT DARGESTELLT (1) 4 mm-Okular (1) 3-fach Barlowlinse (1) TheSkyX – First Light Edition DVD SONNENSTRAHLEN-WARNHINWEIS Niemals mit bloßem Auge oder mit einem Teleskop (außer bei Verwendung eines vorschriftsmäßigen Sonnenfi lters) direkt in die Sonne schauen. Sie könnten permanente und irreversible Augenschäden davontragen.
  • Seite 19 DAS TELESKOP AUFBAUEN DIE MONTIERUNG Der Aufbau gestaltet sich einfach, da Stativ und Montierung des ExploraScope werden vollständig montiert geliefert werden: 1. Nehmen Sie das Stativ und die Montierung aus der Verpackung. 2. Lösen Sie die Drehknöpfe an der Unterseite jedes Beins und stellen Sie die inneren Beinabschnitte auf die gewünschte Länge ein.
  • Seite 20 DIE OKULARE Ihr Teleskop ist mit zwei Okularen ausgestattet, eines weist eine niedrige Vergrößerung (20 mm-Okular), das andere eine hohe Vergrößerung (4 mm-Okular) auf. Wählen Sie nach jedem Aufbau Ihres Teleskops immer zuerst das 20 mm- Okular. Nachdem Ihr Zielobjekt im 20 mm-Okular zentriert ist, können Sie zum 4 mm-Okular mit höherer Vergrößerung Okular.
  • Seite 21 AUSRICHTEN DES STARPOINTER-SUCHERFERNROHRS Das StarPointer-Sucherfernrohr unterstützt Sie beim Ausrichten Ihres Teleskops, indem Sie beim Blick durch das runde Glasfenster Ihr Zielobjekt mit einem roten Punkt, der auf das Fenster projiziert wird, abdecken können. Nach dem ersten Aufbau Ihres Teleskops müssen Sie den StarPointer an der Hauptoptik Ihres Teleskops ausrichten. Obwohl dies auch bei Nacht vorgenommen werden kann, ist es bei Tag bedeutend einfacher.
  • Seite 22 IHRE ERSTE ASTRONOMISCHE BEOBACHTUNG DER MOND Jetzt können Sie Ihr Teleskop bei Nacht nach draußen nehmen und ans Beobachten gehen! Fangen wir mit dem Mond an. Der Mond benötigt für einen vollständigen Phasenzyklus vom Neumond über den Vollmond zurück zum Neumond ungefähr einen Monat. Versuchen Sie, ihn zu verschiedenen Stadien dieses Zyklus zu beobachten. Obwohl sich der Mond immer als Beobachtungsobjekt eignet, wenn er sichtbar am Nachthimmel steht, ist die beste Zeit zwei Tage nach dem Neumond bis ein paar Tage vor dem Vollmond.
  • Seite 23 ANMERKUNG: Diese Garantie ist für Kunden in den USA und Kanada gültig, die dieses Produkt von einem autorisierten Celestron-Händler in den USA oder Kanada gekauft haben. Eine Garantie außerhalb der USA und Kanada gilt nur für Kunden, die bei einem internationalen Celestron-Vertrieb oder einem autorisierten Celestron-Händler im jeweiligen Land eingekauft haben.
  • Seite 24 • Den Händler oder einen erfahrenen Radio- und Fernsehtechniker um Hilfe bitten. Produktdesign und technische Daten können ohne Vorankündigung geändert werden. Dieses Produkt wurde für die Verwendung durch Personen von 14 Jahren und darüber entworfen und vorgesehen. ©2014 Celestron • Alle Rechte vorbehalten. celestron.com 12-13 2835 Columbia Street •...
  • Seite 25 MANUAL DE INSTRUCCIONES ESPAÑOL EXPLORASCOPE 60AZ EXPLORASCOPE 70AZ Modelo #22100 Modelo #22101 EXPLORASCOPE 80AZ EXPLORASCOPE 114AZ Modelo #22102 Modelo #22103...
  • Seite 26 Diagonal de imagen recta Trípode Trípode Bandeja de accesorios Bandeja de accesorios EXPLORASCOPE 60AZ, 70AZ, y 80AZ EXPLORASCOPE 114AZ INCLUYE, PERO NO EN LA FOTO. (1) Ocular de 4 mm (1) 3 Lentes Barlow (1) DVD-ROM TheSkyX – First Light Edition AVISO SOLAR Puede producir daños oculares permanentes e irreversibles.
  • Seite 27 MONTAJE DEL TELESCOPIO SOPORTE El trípode y el soporte del ExploraScope se entregan totalmente montados, por lo que la instalación es sencilla: 1. Saque el trípode y el soporte de la caja. 2. Afl oje los mandos de la parte inferior de cada pata y extienda la sección interna de la pata a la longitud deseada.
  • Seite 28 OCULARES Su telescopio incluye dos oculares, uno de baja potencia (ocular de 20 mm) y uno de una potencia superior (ocular de 4 mm). Siempre que instale el telescopio, comience por el ocular de 20 mm. Cuando haya centrado el objetivo en el ocular de 20 mm, puede cambiar al ocular de mayor potencia de 4 mm para obtener una visión más detallada.
  • Seite 29 ALINEAR EL LOCALIZADOR STARPOINTER El localizador StarPointer le ayuda a apuntar el telescopio mirando por la ventana redonda y cubriendo el objetivo con el punto rojo proyectado en la ventana. La primera vez que monte el telescopio, deberá alinear el StarPointer con la óptica principal del telescopio. Aunque puede realizar este paso de noche, es notablemente más sencillo de día.
  • Seite 30 PRIMERA SESIÓN DE OBSERVACIÓN ASTRONÓMICA LA LUNA Ahora está a punto para sacar su telescopio de noche y realizar observaciones reales. Comencemos con la Luna. La Luna tarda aproximadamente un mes en realizar un ciclo de fases completo, de Luna nueva a Luna llena y vuelta a empezar.
  • Seite 31 La presente garanzia è valida per i clienti di Stati Uniti e Canada che hanno acquistato il proprio binocolo da un rivenditore Celestron autorizzato negli Stati Uniti o in Canada. La garanzia al di fuori degli Stati Uniti e il Canada è valida solo per i clienti che hanno acquistato da un distributore Celestron internazionale o un distributore Celestron autorizzato nel specifi...
  • Seite 32 Il design e le specifi che del prodotto sono soggetti a modifi che senza previa notifi ca. Il presente prodotto è progettato e destinato all’uso da parte di persone di età pari o superiore ai 14 anni. © 2014 Celestron • Tutti i diritti riservati. celestron.com 12-13 2835 Columbia Street •...
  • Seite 33 MANUALE DI ISTRUZIONI ITALIANO EXPLORASCOPE 60AZ EXPLORASCOPE 70AZ Modello n.22100 Modello n.22101 EXPLORASCOPE 80AZ EXPLORASCOPE 114AZ Modello n.22102 Modello n.22103...
  • Seite 34 Diagonale per raddrizzare le immagini Treppiede Treppiede Vassoio porta-accessori Vassoio porta-accessori EXPLORASCOPE 60AZ, 70AZ, e 80AZ EXPLORASCOPE 114AZ INCLUDED BUT NOT PICTURED. (1) Oculare 4 mm (1) Lente di Barlow 3x (1) TheSkyX - DVD-ROM First Light Edition AVVERTENZA SOLARE Mai guardare direttamente il Sole a occhio nudo o con un telescopio, a meno che non si disponga di un fi...
  • Seite 35 MONTAGGIO DEL TELESCOPIO MONTATURA La montatura e il treppiede di ExploraScope sono forniti completamente assemblati, pertanto il montaggio è semplice.. 1. Rimuovere il treppiede e la montatura dalla confezione. 2. Allentare le manopole manuali sulla parte inferiore di ciascuna gamba ed estendere la sezione interna della gamba all’altezza desiderata.
  • Seite 36 OCULARI Il telescopio è dotato di due oculari, uno a bassa potenza (oculare da 20 mm) e uno ad alta potenza (oculare da 4 mm). Quando si prepara il telescopio, iniziare sempre con l’oculare da 20 mm. Una volta che l’oggetto target si trova al centro dell’oculare da 20 mm, è...
  • Seite 37 ALLINEAMENTO DEL CERCATORE STARPOINTER Il cercatore StarPointer consente di puntare il telescopio guardando attraverso la fi nestrella di vetro rotonda e coprendo il target con il puntino rosso proiettato nella fi nestrella. Al primo montaggio del telescopio, è necessario allineare lo StarPointer con le ottiche principali del telescopio. Nonostante ciò...
  • Seite 38 PRIMA SESSIONE DI OSSERVAZIONE ASTRONOMICA LA LUNA Ora il telescopio è pronto per essere utilizzato di notte per l’osservazione delle stelle! Iniziamo con la Luna. La Luna impiega circa un mese per eseguire un ciclo completo, dalla fase della Luna nuova alla fase della Luna piena e così...
  • Seite 39 La presente garanzia è valida per i clienti di Stati Uniti e Canada che hanno acquistato il proprio binocolo da un rivenditore Celestron autorizzato negli Stati Uniti o in Canada. La garanzia al di fuori degli Stati Uniti e il Canada è valida solo per i clienti che hanno acquistato da un distributore Celestron internazionale o un distributore Celestron autorizzato nel specifi...
  • Seite 40 Il design e le specifi che del prodotto sono soggetti a modifi che senza previa notifi ca. Il presente prodotto è progettato e destinato all’uso da parte di persone di età pari o superiore ai 14 anni. © 2014 Celestron • Tutti i diritti riservati. 12-13 celestron.com...