Herunterladen Inhalt Inhalt Diese Seite drucken
Inhaltsverzeichnis

Werbung

Verfügbare Sprachen
  • DE

Verfügbare Sprachen

  • DEUTSCH, seite 43
E NG LISH
INSTRUCTION MANUAL
Models #21073, 21074, 31036 (60AZ, 70AZ, 76AZ)

Werbung

Inhaltsverzeichnis
loading

Inhaltszusammenfassung für Celestron ASTROMASTER 21073

  • Seite 1 E NG LISH INSTRUCTION MANUAL Models #21073, 21074, 31036 (60AZ, 70AZ, 76AZ)
  • Seite 3: Inhaltsverzeichnis

    CELESTRON TWO YEAR LIMITED WARRANTY . . . . . . . . . . . . . . . . . .
  • Seite 4 ENGLISH...
  • Seite 5: Solar Warning

    SOLAR WARNING • Never look directly at the Sun with the naked eye or with a telescope unless you have the proper solar filter Permanent and irreversible eye damage may result • Never use your telescope to project an image of the Sun onto any surface Internal heat build-up can damage the telescope and any accessories attached to it •...
  • Seite 6: What's In The Box

    WHAT’S IN THE BOX We recommend saving your telescope box so it can be used to store the telescope when it is not in use Unpack the box carefully as some parts are small Use the parts list below to verify that all parts and accessories are present PARTS LIST 1.
  • Seite 7: Assembling Your Telescope

    ASSEMBLING YOUR TELESCOPE THE MOUNT The AstroMaster LT mount and tripod come fully assembled, so setting it up is easy 1 . Remove the tripod and mount from the box 2 . Loosen the hand knobs at the bottom of each leg and extend the inner section of the leg to the desired length Tighten the knobs to secure the legs, being careful not to over tighten...
  • Seite 8: The Telescope Tube

    THE TELESCOPE TUBE To attach the telescope tube to your tripod and mount: 1 . Move the mount so that the telescope mounting platform is parallel to the ground Lock the altitude clutch to prevent it from moving 2 . Locate the dovetail bar mounted on the bottom of the telescope tube olding the telescope tube above to the mount, slide the dovetail bar into the telescope clamp at the top...
  • Seite 9: The Starpointer Finderscope

    To install the eyepiece on the 60 mm and 70 mm refractor: 1 . Loosen the setscrews on the open end of the star diagonal 2 . Insert the silver barrel of the 20 mm eyepiece into the star diagonal 3 .
  • Seite 10: Changing The Finderscope Battery

    CHANGING THE FINDERSCOPE BATTERY To replace the StarPointer battery, remove the finder from the scope and turn it over The battery compartment is located directly under the large lens assembly Using a small screwdriver or your fingernail, gently lift straight up on the cover to remove it The battery is held in place by a spring contact Gently lift this contact and turn the finder on its side The battery should slip right out Replace the...
  • Seite 11: Your First Astronomical Observing Session

    YOUR FIRST ASTRONOMICAL OBSERVING SESSION THE MOON Now you are ready to take your telescope out at night and do some real observing! Let’s start with the Moon The Moon takes about one month to go through a complete phase cycle, from new Moon to full Moon and back again Try observing it at different points during this cycle While you can observe the Moon any time it is visible in the sky, the best time to view it is from two days after a new Moon up to a few days before a full Moon During this period, you will be able to see the most detail in craters and lunar mountain ranges...
  • Seite 12: The Planets

    THE PLANETS In addition to the Moon, your telescope is capable of observing the 5 brightest planets Since planets change their positions against the background stars, you will need to consult sources on the web or use a planetarium app on a smart device to help you locate where these are Here are some things to look for: •...
  • Seite 13: Selecting An Observing Site

    SELECTING AN OBSERVING SITE If you are going to be observing deep-sky objects, such as galaxies and nebulae, you should consider traveling to a dark sky site that is reasonably accessible It should be away from city lights, a relatively unobstructed view of the horizon, and upwind of any major source of air pollution Always choose as high an elevation as possible as this can lower the effects of atmospheric instability and can ensure that you are above any ground fog While it can be desirable to take your telescope to a dark sky site, it is not always necessary If you plan to view the planets, the Moon or even some of the brighter deep-...
  • Seite 14: Astroimaging

    You will need a steady hand to hold the phone to the eyepiece but you can get good results • DSLR- Celestron offers adapters that will allow you to attach a Canon or Nikon DSLR body to the telescope in place...
  • Seite 15: Star Hopping

    This will prevent contaminants from entering the tubes Internal adjustments and cleaning should be done only by the Celestron repair department If your telescope is in need of internal cleaning, please call the factory for a return authorization number and price quote...
  • Seite 16: Collimation Of A Newtonian Telescope

    COLLIMATION OF A NEWTONIAN TELESCOPE While your telescope requires little maintenance, there are a few things to remember that will ensure your telescope performs at its Collimation is the process of aligning the mirrors of your telescope so that they work in concert with each other to deliver properly focused light to your eyepiece By observing out-of-focus star images, you can test whether your telescope’s optics are aligned Place a star in the center of the field of view and move the focuser so that the image is slightly out of focus If the seeing conditions are good, you will see a central circle of light (the Airy disc) surrounded by a...
  • Seite 17: Aligning The Secondary Mirror

    ALIGNING THE SECONDARY MIRROR Point the telescope at a lit wall look into the focuser without the eyepiece installed You may have to twist the focus knob a few turns until the reflected image of the focuser is out of your view Keep your eye against the back of and centered in the focus tube Look for the three clips holding the primary mirror in place If you can’t see them, it means that you will have to adjust the three bolts on the top of the secondary mirror holder, with possibly an Allen wrench or Phillip’s screwdriver You will have to alternately loosen one and then compensate for the slack by tightening the other two Stop when you see all three mirror clips...
  • Seite 18: Notes

    NOTES ENGLISH...
  • Seite 19 NOTES ENGLISH...
  • Seite 20: Celestron Two Year Limited Warranty

    NOTE: This warranty is valid to U.S.A. and Canadian customers who have purchased this product from an authorized Celestron dealer in the U.S.A. or Canada. Warranty outside the U.S.A. and Canada is valid only to customers who purchased from a Celestron’s International Distributor or Authorized Celestron Dealer in the specific country. Please contact them for any warranty service.
  • Seite 21 FRANÇAIS MODE D’EMPLOI Modèles #21073, 21074, 31036 (60AZ, 70AZ, 76AZ)
  • Seite 23 GARANTIE LIMITÉE DE DEUX ANS DE CELESTRON . . . . . . . . . . . . . . . . .
  • Seite 24 FRANÇAIS...
  • Seite 25: Avertissement Sur Le Soleil

    AVERTISSEMENT SUR LE SOLEIL • Ne regardez jamais directement le Soleil à l'œil nu ou avec un télescope, à moins d'utiliser un filtre adapté Cela pourrait entraîner des lésions oculaires permanentes et irréversibles • N'utilisez jamais votre télescope pour projeter une image du soleil sur une surface quelconque Une concentration de chaleur dangereuse peut être générée à...
  • Seite 26: Contenu De La Boîte

    CONTENU DE LA BOÎTE Nous vous recommandons de conserver la boîte de votre télescope afin de pouvoir l'utiliser pour son rangement lorsqu'il n'est pas utilisé Déballez le contenu de la boîte avec soin, car certaines pièces sont petites Utilisez la liste des pièces ci-dessous pour vous assurer que toutes les pièces et tous les accessoires sont inclus dans la boîte LISTE DES PIÈCES 1.
  • Seite 27: Assemblage De Votre Télescope

    ASSEMBLAGE DE VOTRE TÉLESCOPE LA MONTURE La monture et le trépied de l'Astromaster LT sont livrés entièrement assemblés, facilitant ainsi son installation 1 . Sortez le trépied et la monture de la boîte 2 . Desserrez les molettes au bas de chaque pied et étendez la partie intérieure du pied à...
  • Seite 28: Le Tube Du Télescope

    LE TUBE DU TÉLESCOPE Pour fixer le tube du télescope sur votre trépied et votre monture : 1 . Orientez la monture de manière à ce que la plateforme d’accueil du télescope soit parallèle au sol Serrez le frein d’altitude pour éviter les mouvements indésirables 2 .
  • Seite 29: Le Chercheur Starpointer

    Pour installer un oculaire sur le réfracteur de 60 mm ou de 70 mm : 1 . Desserrez les vis de réglage situées à l'extrémité ouverte de la diagonale en étoile 2 . Insérez le barillet argent de l'oculaire 20 mm dans la diagonale en étoile 3 .
  • Seite 30: Changer La Pile Du Chercheur

    CHANGER LA PILE DU CHERCHEUR Pour remplacer la pile du StarPointer, retirez le chercheur du télescope et retournez-le Le compartiment de la pile est situé directement en dessous du grand ensemble de lentille À l’aide d’un petit tournevis ou de votre ongle, soulevez doucement le capot pour le retirer La pile est maintenue en place par un ressort Soulevez doucement le contact et tournez le chercheur sur le côté...
  • Seite 31: Votre Première Session D'observation Astronomique

    VOTRE PREMIÈRE SESSION D'OBSERVATION ASTRONOMIQUE LA LUNE Vous êtes maintenant prêt à installer votre télescope à l'extérieur et faire de véritables observations pendant la nuit! Commençons par la Lune Les phases de la Lune s'étendent sur un cycle complet d'environ un mois, de la nouvelle Lune à la pleine Lune et vice versa Essayez de l'observer à...
  • Seite 32: Les Planètes

    LES PLANÈTES En plus de la Lune, votre télescope est capable d’observer les 5 planètes les plus lumineuses Les planètes changent de position sur le fond d’étoiles, il vous sera donc nécessaire de consulter Internet ou une application planétarium sur un appareil compatible pour vous aider à...
  • Seite 33: Sélectionner Un Site D'observation

    SÉLECTION D’UN SITE D’OBSERVATION Si vous souhaitez observer des objets du ciel profond, comme des galaxies ou des nébuleuses, nous vous recommandons de vous déplacer sur un site où le ciel est obscure, si un tel lieu est raisonnablement facile d’accès Ce site doit idéalement se trouver à...
  • Seite 34: Astrophotographie

    à ne pas trembler, mais vous pouvez obtenir ainsi de bons résultats • Appareils photo réflex numériques- Celestron offre des adaptateurs vous permettant de fixer le boîtier d’un appareil photo réflex numérique Canon ou Nikon au télescope au lieu de l’oculaire Votre télescope devient alors une lentille téléphoto Cela nécessite l’utilisation d’un adaptateur en T pour le télescope et un anneau-T pour le boîtier de l’appareil...
  • Seite 35: Sauts Entre Les Étoiles

    Cela empêchera les corps étrangers de rentrer dans le tube optique Les réglages internes et le nettoyage ne devraient être effectués que par le service de réparation de Celestron Si votre télescope a besoin d'un nettoyage interne, veuillez appeler l'usine pour obtenir un numéro d'autorisation de retour et un devis...
  • Seite 36: Collimation D'un Télescope Newtonien

    COLLIMATION D’UN TÉLESCOPE NEWTONIEN Bien que votre télescope nécessite peu d'entretien, il y a quelques considérations à prendre en compte pour garantir que votre télescope soit au mieux de sa collimation dans le processus d’aligner les miroirs de votre télescope de manière à ce qu’ils fonctionnent de mieux en concert pour garantir qu’ils délivrent une lumière correctement mise au point dans votre oculaire En observant des images d’étoiles non mises au point, vous pouvez tester si les optiques de votre télescope sont alignés Positionnez une étoile au centre du champ de vision et effectuez la mise au point sans que l’image soit totalement...
  • Seite 37: Aligner Le Miroir Secondaire

    ALIGNER LE MIROIR SECONDAIRE Pointez le télescope vers un mur éclairé et regardez dans le foyer sans oculaire présent Il peut être nécessaire de faire pivoter la molette de mise au point sur quelques tours jusqu’à ce que l’image réfléchie dans le foyer soit hors de vue Gardez l'œil sur l’arrière et centré...
  • Seite 38: Notes

    NOTES FRANÇAIS...
  • Seite 39 NOTES FRANÇAIS...
  • Seite 40: Garantie Limitée De Deux Ans De Celestron

    NOTE : Cette garantie est valable pour les clients américains et canadiens qui ont acheté ce produit auprès d'un revendeur autorisé Celestron aux États-Unis ou au Canada. La garantie en dehors des É.-U. et du Canada n'est valable que pour les clients ayant acheté le produit d'un distributeur international de Celestron ou d'un distributeur agréé dans le pays en question. Veuillez communiquer avec eux pour toute réparation sous garantie.
  • Seite 41 DE UTSCH BEDIENUNGSANLEITUNG Modellnr. 21073, 21074, 31036 (60AZ, 70AZ, 76AZ)
  • Seite 43 ZWEIJÄHRIGE EINGESCHRÄNKTE GARANTIE VON CELESTRON . . . . . . . . . . . . . . . . . .
  • Seite 44 DEUTSCH...
  • Seite 45: Warnhinweis Bei Sonnenbeobachtung

    WARNHINWEIS BEI SONNENBEOBACHTUNG • Niemals mit bloßem Auge oder mit einem Teleskop direkt in die Sonne schauen, es sei denn, Sie verwenden einen korrekten Sonnenfilter Es können permanente und irreversible Augenschäden auftreten • Das Teleskop keinesfalls zur Projektion eines Bildes der Sonne auf eine Oberfläche verwenden Durch die interne Hitzeentwicklung können das Teleskop und etwaiges Zubehör beschädigt werden •...
  • Seite 46: Lieferumfang

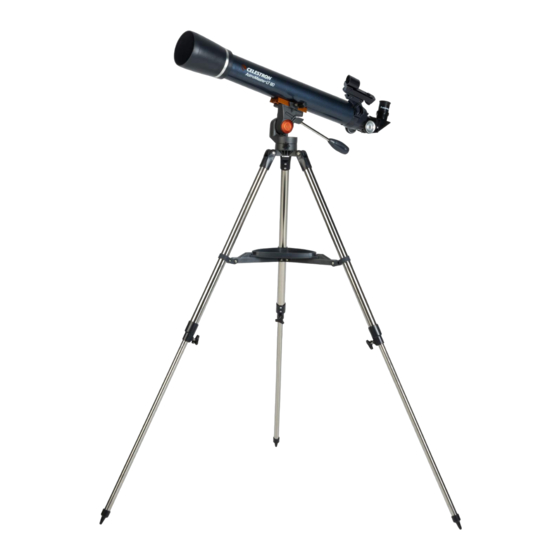
    LIEFERUMFANG Wir empfehlen Ihnen, die Verpackung Ihres Teleskops aufzubewahren, um das Teleskop bei Nichtverwendung darin zu verstauen Gehen Sie beim Auspacken vorsichtig vor, da Kleinteile enthalten sind Überprüfen Sie anhand der untenstehenden Teileliste die Vollständigkeit aller Teile und Zubehörteile TEILELISTE 1.
  • Seite 47: Das Teleskop Aufbauen

    DAS TELESKOP AUFBAUEN DIE MONTIERUNG Der Aufbau der AstroMaster LT-Montierung gestaltet sich einfach, da die Montierung und das Stativ komplett montiert geliefert werden 1 . Nehmen Sie Stativ und Montierung aus der Schachtel 2 . Lösen Sie die Fixierschrauben unten an jedem Stativbein und schieben Sie das Innenteil des Beines nach unten und stellen es auf die gewünschten Länge ein Drehen Sie die Knöpfe zum Sichern der Beine an, doch achten...
  • Seite 48: Der Teleskoptubus

    DER TELESKOPTUBUS So bringen Sie den Teleskoptubus an Ihrem Stativ mit Montierung an: 1 . Bewegen Sie die Montierung bis die Teleskopmontierung parallel Boden steht Verriegeln Höhenkupplung, damit sie sich nicht bewegt 2 . Die Schwalbenschwanzführung befindet sich auf der Unterseite des Teleskoptubus alten Sie den Teleskoptubus oberhalb der Montierung und schieben die Schwalbenschwanzführung in die...
  • Seite 49: Starpointer-Sucherfernrohr

    So installieren Sie ein Okular am 60-mm und 70-mm-Refraktor: 1 . Lösen Sie die Feststellschrauben am offenen Ende des Zenitspiegels 2 . Schieben Sie den silbernen Teil des 20-mm-Okulars in den Zenitspiegel 3 . Ziehen Sie die zwei Feststellschrauben, um das Okular zu fixieren, wieder fest 4 .
  • Seite 50: Akku Des Sucherfernrohrs Wechseln

    AKKU DES SUCHERFERNROHRS WECHSELN Um den Starpointer Akku zu wechseln, entfernen Sie den Sucher vom Fernrohr und drehen ihn um Das Batteriefach befindet sich direkt unter dem großen Objektiv Mit einem kleinen Schraubenzieher oder mit Ihrem Fingernagel heben Sie den Akkufachdeckel leicht an und entfernen ihn Der Akku wird durch einen Federkontakt festgehalten Heben Sie diesen Kontakt vorsichtig an und drehen den Sucher auf die Seite Der Stecker sollte direkt herausrutschen...
  • Seite 51: Ihre Erste Astronomische Beobachtung

    IHRE ERSTE ASTRONOMISCHE BEOBACHTUNG DER MOND Jetzt können Sie Ihr Teleskop bei Nacht nach draußen nehmen und ans Beobachten gehen! Fangen wir mit dem Mond an Der Mond benötigt für einen vollständigen Phasenzyklus vom Neumond über den Vollmond und wieder zum Neumond ungefähr einen Monat Versuchen Sie, ihn zu verschiedenen Stadien dieses Zyklus zu beobachten Obwohl sich der Mond immer, wenn er sichtbar am Himmel steht, als Beobachtungsobjekt eignet, ist die beste Zeit zwei Tage nach Neumond bis ein paar Tage vor Vollmond Innerhalb dieses Zeitfensters zeigen sich Krater und Mondgebirge am detailreichsten Schauen Sie in einem Kalender nach, wann der nächste Neumond ist...
  • Seite 52: Die Planeten

    DIE PLANETEN Zusätzlich zum Mond können Sie mit Ihrem Teleskop die 5 hellsten Planeten beobachten Da Planeten ihre Position vor dem Hintergrund der Sterne ändern, müssen Sie möglicherweise, Quellen im Internet zurate ziehen oder Sie verwenden ein Planetariumapp auf einem Smartgerät, um herauszufinden, wo die Planeten sind Hier sind einige Planeten aufgezählt, die Sie finden können: •...
  • Seite 53: Auswahl Einer Beobachtungsstelle

    AUSWAHL EINER BEOBACHTUNGSSTELLE Wenn Sie Deep-Sky-Objekte beobachten möchten wie Galaxien und planetarische Nebel, sollten Sie in Betracht ziehen, sie von einem Standort mit dunklem Himmel zu beobachten Dies sollte weit weg von den Lichtern der Stadt, mit relativ ungehindertem Blick auf den Horizont und nicht in Windrichtung von jeglichen Luftverschmutzungsquellen Gehen Sie immer große Höhen, so hoch wie möglich, da dies die Auswirkungen atmosphärischen Instabilität senken kann und Sie können sichergehen, dass Sie über jedem Bodennebel sind Es ist wohl wünschenswert das Teleobjektiv zu einer Stelle mit dunklem Himmel zu nehmen, doch das ist nicht immer notwendig Wenn Sie planen Planeten, den...
  • Seite 54: Astrobild

    Resultate erhalten • DSLR- Celestron bietet Adapter, mit denen Sie am Teleskop an Stelle des Okulars eine Canon oder Nikon DSLR befestigen können In dem Fall würden Sie Ihr Teleskop als Teleobjektiv verwenden Dazu benötigen Sie einen T-Adapter für das Teleskop und einen T-Ring für das Kameragehäuse Weitere Informationen über die Adapter für Ihr spezifisches...
  • Seite 55: Starhopping

    Öffnungen aufgesetzt werden Auf diese Weise wird verhindert, dass Verunreinigungen in den optischen Tubus eindringen Interne Einstellungen und Reinigungen dürfen nur durch die Reparaturabteilung von Celestron ausgeführt werden Wenn Ihr Teleskop eine interne Reinigung benötigt, wenden Sie sich telefonisch an das Werk, um sich eine Rücksendegeneh-...
  • Seite 56: Kollimation Eines Newton-Teleskops

    KOLLIMATION EINES NEWTON-TELESKOPS Während Ihr Teleskop wenig Wartung erfordert, gibt es einiges, was dennoch zu beachten ist, das sicherstellt, dass Ihr Teleskop die Kollimation durchführt, es ist ein Prozess zur Ausrichtung der Spiegel Ihres Teleskops, sodass sie in Überein- stimmung miteinander arbeiten, um richtig fokussiertes Licht auf Ihr Okular zu liefern Beim Beobachten von unscharfen Sternbildern können Sie testen, ob Ihre Teleskopoptik ausgerichtet ist Nehmen Sie einen Stern in die Mitte des Gesichts- feldes und bewegen den Okularauszug, sodass das Bild leicht aus dem Fokus ist Wenn die Beobachtungsbedingungen gut sind, sehen Sie einen zentralen Lichtkreis (die Airy Scheibe), die durch eine Reihe von Beugungsringen umgeben ist...
  • Seite 57: Ausrichtung Des Fangspiegels

    AUSRICHTUNG DES FANGPIEGELS Richten Sie Ihre Teleskop ohne Okular gegen eine beleuchtete Wand Möglicherweise müssen Sie den Fokusdrehknopf etwas drehen, bis das reflektierte Bild des Okularauszugs aus Ihrer Sicht heraus ist Halten Sie Ihr Auge an die Rückseite und auf die Fokusröhre zentriert Achten Sie auf die drei Klemmen die den Hauptspiegel halten Wenn Sie sie nicht sehen können, bedeutet dies, dass Sie die drei Schrauben auf der Oberseite des sekundären Spiegelhalters nachziehen müssen, eventuell mit einem Inbusschlüssel oder Kreuzschlitzschraubendreher Sie müssen abwechselnd eine lösen und dann den Durchhang durch...
  • Seite 58: Hinweise

    HINWEISE DEUTSCH...
  • Seite 59 HINWEISE DEUTSCH...
  • Seite 60: Zweijährige Eingeschränkte Garantie Von Celestron

    HINWEIS: Diese Garantie ist für Kunden in den USA und Kanada gültig, die dieses Produkt von einem autorisierten Celestron-Händler in den USA oder Kanada gekauft haben. Eine Garantie außerhalb der USA und Kanada gilt nur für Kunden, die bei einem internationalen Celestron-Vertrieb oder einem autorisierten Celestron-Händler im jeweiligen Land eingekauft haben. Bitte wenden Sie sich für jeden Garantieservice an diese Ansprechpartner.
  • Seite 61 ESPAÑOL MANUAL DE INSTRUCCIONES Modelos #21073, 21074, 31036 (60AZ, 70AZ, 76AZ)
  • Seite 63 GARANTÍA LIMITADA POR DOS AÑOS DE CELESTRON . . . . . . . . . . . . . . . . .
  • Seite 64 ESPAÑOL...
  • Seite 65: Aviso Solar

    AVISO SOLAR • No mire nunca directamente al sol con los ojos descubiertos o un telescopio a menos que tenga un filtro solar adecuado Puede producir daños oculares permanentes e irreversibles • No use nunca su telescopio para proyectar una imagen del Sol sobre ninguna superficie La acumulación interna de calor puede dañar el telescopio y cualquier accesorio que tenga instalado •...
  • Seite 66: Contenido De La Caja

    CONTENIDO DE LA CAJA Recomendamos guardar la caja de su telescopio para poder usarla para guardarlo cuando no lo use Desembale cuidadosamente la caja, algunas piezas son pequeñas Use la lista de piezas siguiente para comprobar que dispone de todas las piezas y accesorios LISTA DE PIEZAS 1.
  • Seite 67: Montaje Del Telescopio

    MONTAJE DEL TELESCOPIO SOPORTE El soporte y trípode AstroMaster LT se entrega totalmente montado, por lo que su instalación es sencilla 1 . Saque el trípode y el soporte de la caja 2 . Afloje los mandos de la parte inferior de cada pata y extienda la sección interna de la tapa a la longitud deseada Apriete los mandos para asegurar las patas, con cuidado de no apretarlos en exceso...
  • Seite 68: Tubo Del Telescopio

    TUBO DEL TELESCOPIO Para fijar el tubo del telescopio al trípode y el soporte: 1 . Mueva el soporte de forma que la plataforma de montaje del telescopio quede paralela al suelo Bloquee el cierre de altitud para evitar que se mueva 2 .
  • Seite 69: Localizador Starpointer

    Para instalar un ocular en el refractor de 60 mm y 70 mm: 1 . Afloje los tornillos del extremo abierto de la diagonal estelar 2 . Introduzca el cañón plateado del ocular de 20 mm en la diagonal estelar 3 .
  • Seite 70: Cambiar La Batería Del Localizador

    CAMBIAR LA BATERÍA DEL LOCALIZADOR Para cambiar la batería del StarPointer, retire el localizador del telescopio y gírelo El compartimiento de batería se encuentra directamente bajo la estructura de lente grande Usando un pequeño destornillador o la uña, levante la tapa directamente hacia arriba para sacarla La batería se aguanta en posición con un contacto de muelle Levante con suavidad el contacto y gire el localizador de lado La batería...
  • Seite 71: Primera Sesión De Observación Astronómica

    PRIMERA SESIÓN DE OBSERVACIÓN ASTRONÓMICA LA LUNA Ahora está a punto para sacar su telescopio de noche y realizar observaciones reales Comencemos con la Luna La Luna tarda aproximadamente un mes en pasar por un ciclo de fases completo, desde la Luna nueva hasta la Luna llena y de vuelta Pruebe a observarla en distintos momentos de este ciclo Aunque puede observar la Luna en cualquier momento en el que esté...
  • Seite 72: Los Planetas

    LOS PLANETAS Además de la Luna, su telescopio puede observar los 5 planetas más brillantes Como los planetas cambian de posición respecto a las estrellas del fondo, necesitará consultar con fuentes de información en la red o usar una app de planetario en un dispositivo para ayudarle a localizar su posición Aquí...
  • Seite 73: Selección De Un Lugar De Observación

    SELECCIÓN DE UN LUGAR DE OBSERVACIÓN Si va a observar objetos del espacio profundo, como galaxias y nebulosas, debería tener en cuenta ir a un lugar con el cielo oscuro que esté razonablemente accesible Debería estar alejado de las luces de ciudades, con un campo de visión relativamente sin obstrucciones, y a contraviento de cualquier fuente importante de contaminación del aire Elija siempre la elevación más alta posible, dado que puede así...
  • Seite 74: Astrofotografía

    Necesita un pulso firme para aguantar el teléfono contra el ocular, pero puede obtener buenos resultados • DSLR- Celestron ofrece adaptadores que le permitirán instalar un chasis DLSR Canon o Nikon al telescopio en lugar del ocular Estará usando de hecho el telescopio como lente Necesitará un adaptador en T para el telescopio y una arandela T para la cámara Para obtener más información sobre los adaptadores para su modelo concreto de...
  • Seite 75: Salto Estelar

    Evitará que entren contaminantes en el tubo óptico Los ajustes y limpieza internos solamente deben ser realizados por el departamento de reparaciones de Celestron Si su telescopio precisa de limpieza interna, llame a la fábrica para obtener un número de autorización de devolución y un presupuesto ESPAÑOL...
  • Seite 76: Colimación De Un Telescopio Newtoniano

    COLIMACIÓN DE UN TELESCOPIO NEWTONIANO Aunque su telescopio precisa de poco mantenimiento, debe recordar algunos aspectos que garantizarán que el telescopio funcione lo mejor posible El colimado es el proceso de alineación de los espejos del telescopio de forma que funcionen correctamente para ofrecer luz adecuadamente enfocada en el ocular Observando imágenes estelares desenfocadas puede comprobar si la óptica de su telescopio está...
  • Seite 77: Alineación Del Espejo Secundario

    ALINEACIÓN DEL ESPEJO SECUNDARIO Apunte el telescopio a una pared iluminada y mire en el enfoque sin instalar el ocular Puede tener que girar el mando de enfoque unas vueltas hasta que la imagen reflejada del enfoque salga de vista Tenga el ojo contra la parte posterior de y centrado en el tubo de enfoque Busque los tres clips que aguantan el espejo primario en posición Si no puede verlos indica que tiene que ajustar los tres pernos de la parte superior del soporte del espejo secundario, con una llave allen o destornillador Philips Tendrá...
  • Seite 78: Notas

    NOTAS ESPAÑOL...
  • Seite 79 NOTAS ESPAÑOL...
  • Seite 80: Garantía Limitada Por Dos Años De Celestron

    NOTA: Esta garantía tiene validez para clientes de EE.UU. y Canadá que hayan adquirido este producto en un vendedor autorizado de Celestron en EE.UU. y Canadá. La garantía fuera de EE.UU. y Canadá solamente tiene validez para clientes que hayan comprado en un distribuidor internacional de Celestron o un vendedor de Celestron autorizado en el país específico. Contacte con ellos para obtener servicio de garantía.
  • Seite 81 ITALIANO MANUALE D’USO Modelli N. #21073, 21074, 31036 (60AZ, 70AZ, 76AZ)
  • Seite 83 GARANZIA LIMITATA DI DUE ANNI CELESTRON . . . . . . . . . . . . . . . . .
  • Seite 84 ITALIANO...
  • Seite 85: Avvertimento Solare

    AVVERTIMENTO SOLARE • Non guardare mai direttamente il Sole a occhio nudo o con un telescopio a meno che non si disponga del corretto filtro solare Ciò potrebbe causare danni irreversibili agli occhi • Mai utilizzare il telescopio per proiettare un'immagine del Sole su una qualsiasi superficie L'accumulo interno di calore può...
  • Seite 86: Contenuto Della Confezione

    CONTENUTO DELLA CONFEZIONE Si consiglia di conservare la confezione del telescopio per riporre il telescopio quando non è in uso Disimballare la confezionecon attenzione poiché alcuni componenti sono di piccole dimensioni Utilizzare l'elenco dei componenti fornito di seguito per verificare che siano presenti tutti i componenti e gli accessori ELENCO COMPONENTI 1.
  • Seite 87: Montaggio Del Telescopio

    MONTAGGIO DEL TELESCOPIO MONTATURA La montatura e il treppiede AstroMaster LT sono forniti completamente assemblati, pertanto il montaggio è semplice 1 . Rimuovere il treppiede e la montatura dalla confezione 2 . Allentare le manopole manuali sulla parte inferiore di ciascuna gamba ed estendere la sezione interna della gamba all'altezza desiderata Stringere le manopole per fissare le gambe, prestando attenzione a non stringere...
  • Seite 88: Tubo Del Telescopio

    TUBO DEL TELESCOPIO Per fissare il tubo al treppiede e alla montatura procedere come segue 1 . Spostare la montatura, in modo che la piattaforma di montaggio del telescopio sia parallela al suolo Bloccare la frizione per altitudine per evitare che si sposti 2 .
  • Seite 89: Cercatore Starpointer

    Per installare l’oculare su un rifrattore da 60 mm o 70 mm: 1 . Allentare le viti sull'estremità aperta della diagonale stellare 2 . Inserire il barilotto argentato dell’oculare da 20 mm nella diagonale stellare 3 . Serrare le viti per fissare l'oculare in posizione 4 .
  • Seite 90: Sostituzione Della Batteria Del Cercatore

    SOSTITUZIONE DELLA BATTERIA DEL CERCATORE Per sostituire la batteria StarPointer, rimuovere il finder dall'alloggiamento e capovolgerlo Il vano batterie si trova proprio sotto il gruppo delle lenti grandi Utilizzando un piccolo cacciavite o unghia, sollevare delicatamente verso l'alto dal coperchio per rimuoverlo La batteria è tenuta in posizione da un contatto a molla Sollevare questo contatto delicatamente e girare lateralmente il finder La batteria Alloggiamento...
  • Seite 91: Prima Sessione Di Osservazione Astronomica

    PRIMA SESSIONE DI OSSERVAZIONE ASTRONOMICA LA LUNA Ora il telescopio è pronto per delle vere osservazioni notturne! Iniziamo con la Luna La Luna impiega circa un mese per completare un ciclo completo, dalla Luna nuova alla Luna piena e così via Provare ad osservarla nelle diverse fasi Anche se è...
  • Seite 92: I Pianeti

    I PIANETI Oltre alla Luna, il telescopio è in grado di osservare i 5 pianeti più luminosi Dal momento che i pianeti cambiano le loro posizioni rispetto alle stelle di fondo, è necessario consultare fonti sul web o utilizzare un'app planetario sullo smartphone per localizzarli Qui ci sono alcune cose da cercare: •...
  • Seite 93: Selezione Del Sito Di Osservazione

    SELEZIONE DEL SITO DI OSSERVAZIONE Se avete intenzione di osservare oggetti non stellari, quali galassie e nebulose, ci si dovrebbe dirigere verso un sito buio, che sia ragionevolmente accessibile Bisogna stare lontano dalle luci cittadine, avere una vista relativamente aperta dell'orizzonte e controvento di qualsiasi delle principali fonti di inquinamento atmosferico Scegliere sempre un punto più...
  • Seite 94: Astrofotografia

    (lunghezza focale) E' necessario avere la mano ferma per tenere il telefono vicino all'oculare, ma è possibile ottenere buoni risultati • DSLR- Celestron offre adattatori che permetteranno di collegare un corpo Canon o Nikon DSLR al telescopio al posto dell'oculare Sarà possibile effettivamente utilizzare il telescopio come teleobiettivo Ciò richiederà un adattatore a T...
  • Seite 95: Star Hopping

    Poiché i tubi del telescopio non sono a tenuta, sistemare i tappi sulle aperture quando non in uso Ciò eviterà l'ingresso di contaminanti nel tubo Le regolazioni e la pulizia interne devono essere effettuate dalla divisione di assistenza Celestron Se il telescopio necessità di pulizia interna, contattare la fabbrica per un numero di autorizzazione al reso e un preventivo...
  • Seite 96: Collimazione Del Telescopio Newtoniano

    COLLIMAZIONE DEL TELESCOPIO NEWTONIANO Sebbene il telescopio richiede poca manutenzione, ci sono alcune cose da ricordare per garantirne il suo funzionamento la collimazione rappresenta il processo di allineamento degli specchi del telescopio in modo che operino a vicenda di concerto per fornire la giusta condizione di luminosità all'oculare per la messa a fuoco Osservando le immagini stellari fuori fuoco, è...
  • Seite 97: Allineamento Dello Specchio Secondario

    ALLINEAMENTO DELLO SPECCHIO SECONDARIO Puntare il telescopio verso una parete illuminata nel focheggiatore senza l'oculare installato Potrebbe essere necessario ruotare la manopola di messa a fuoco per alcuni giri fino a quando l'immagine riflessa del focheggiatore non si vedrà più Mantenere l'occhio verso il retro ed il centro del tubo di messa a fuoco Cercare le tre linguette che tengono lo specchio primario in posizione Se non si vedono, vuol dire che bisogna regolare le tre viti sulla parte superiore del supporto dello specchio secondario, possibilmente con una chiave a brugola o cacciavite con testa a croce Si dovrà...
  • Seite 98: Note

    NOTE ITALIANO...
  • Seite 99 NOTE ITALIANO...
  • Seite 100: Garanzia Limitata Di Due Anni Celestron

    NOTA: La presente garanzia è valida per i clienti di Stati Uniti e Canada che hanno acquistato il proprio prodotto da un rivenditore Celestron autorizzato negli Stati Uniti o in Canada. La garanzia al di fuori di Stati Uniti e Canada è valida esclusivamente per i clienti che hanno effettuato l’acquisto da un distributore internazionale Celestron o da un rivenditore autorizzato Celestron nello specifico Paese. Contattare tali rivenditori per qualsiasi tipo di assistenza relativamente alla garanzia.

Inhaltsverzeichnis