eurotramp Grand Master Exclusiv Aufbauanleitung
Großtrampoline
Vorschau ausblenden
Andere Handbücher für Grand Master Exclusiv:
- Gebrauchs- und montageanleitung (13 Seiten)

Verwandte Anleitungen für eurotramp Grand Master Exclusiv


Inhaltszusammenfassung für eurotramp Grand Master Exclusiv
-
Seite 1: Inhaltsverzeichnis
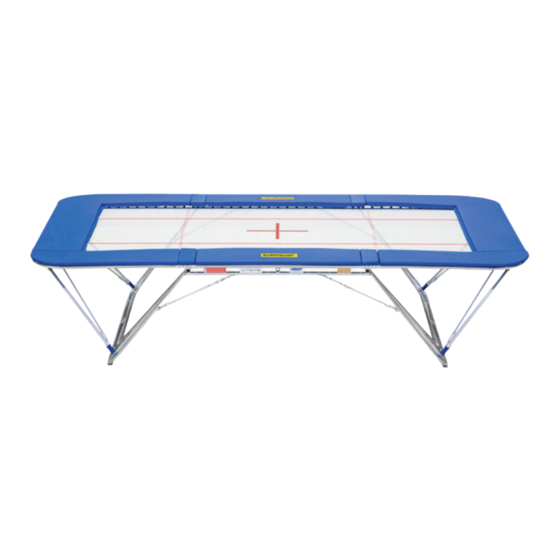
Aufbauanleitung für Eurotramp-Großtrampoline Baureihen: Ultimate, Grand Master Exclusiv, Grand Master, Master 1. Aufbauanleitung 2. Einhängen der plastikummantelten Stahlseile am Ultimate 3. Montageanleitung Ganzabdeckung 4. Verstauung 50 mm Ganzabdeckung 5. Anbringung der Zusatzrahmengestelle am Ultimate... -
Seite 2: Aufbauanleitung
1. Aufbauanleitung für Eurotramp-Großtrampoline Der Auf- und Abbau des Trampolins sollte nur durch zwei erfahrene und geübte Personen erfolgen. Lesen Sie hierfür bitte diese Aufbauanleitung sorg- fältig durch. Überprüfen Sie vor jeder Benutzung des Trampolins den einwandfreien Zustand des Ge- rätes. - Seite 3 Um das Gerät hochzustellen, geht man an beiden Heberollständern synchron wie folgt vor: Erst den beweglichen Hebel fest anfassen, dann den roten Knopf herausziehen und den Hebel bis hinter das Standrohr herunterführen. Wichtig: Unbe- dingt während des ganzen Prozesses beide Hände einsetzen.
- Seite 4 Abbildung 5 Abbildung 6 Standfüße zu beiden Seiten herausziehen (Abbildung 7-8). Abbildung 7 Abbildung 8 Ketten einhängen. Achten Sie darauf, dass die Ketten nicht verdreht sind (Ausnahme: verdrehsi- chere kunststoffummantelte Stahlseile beim Ultima- Bei den Modellen Master und (Abbildung 4-6). Grand Master ist ein Einhängen der Ketten nicht erforderlich, da alle Ketten fest montiert sind.
- Seite 5 Gerät wieder herunterhebeln. Beim herkömmli- chen Heberollständer dazu erst den Hebel anfassen, dann den roten Sicherheitsknopf herausziehen und Hebel so weit nach oben führen (etwa waagerecht), bis der Heberollständer sich leicht aus der Buchse herausziehen lässt. Beim Herausziehen wird der He- berollständer am oberen Sicherungsbügel und in der Mitte des Hebels gefasst (keinesfalls in der Nähe des Gelenks anfassen!
-
Seite 6: Abbildung
Abbildung 13 Abbildung 14 Die Streben in den Standfüßen feststecken (Ab- Ausnahme: beim Ultimate die Pfanne bildung 15). auf die Kugel setzen, mit Druck spürbar einrasten lassen. Abbildung 15 Easy-Lock-System beim Ultimate Den zweiten Trampolin ügel aufklappen, wegen der aufkommenden Spannung gut festhalten und ebenfalls die Streben in den Standfüßen feststecken (Abbildung 16-17). - Seite 7 Abbildung 17 Gelenkschoner zuklappen (nur bei der faltbaren 32 mm Abdeckung, Abbildung 18). Abbildung 18 Stellen Sie sicher, dass alle Federn richtig ein- gehängt sind und die Federhaken sowohl auf der Sprungtuch- als auch auf der Rahmenseite nach unten zeigen. Untersuchen Sie danach das Sprung- tuch auf Schäden.
- Seite 8 Abbildung 20 Abbildung 21 Abbildung 22 Lösen Sie nun die Ketten bzw. beim Ultimate die kunststoffummantelten Stahlseile. Zum Senk- rechtstellen des Trampolins heben Sie den ersten Standfuß vor den Bauch und schieben das Gerät vor sich her. Wenn möglich, sollte eine zweite Person den anderen Standfuß...
- Seite 9 Abbildung 24 Abbildung 25...
-
Seite 10: Einhängen Der Plastikummantelten Stahlseile Am Ultimate
2. Einhängen der plastikummantelten Stahlseile am Ultimate Lassen Sie das Stahlseil vor dem Einhän- gen lose herunterhängen und stellen Sie sicher, dass es nicht verdreht ist. Rasten Sie nun den Karabinerhaken am dafür vorgesehenen Kettenglied am Trampolinfuß ein ohne dabei das Seil zu verdrehen. - Seite 11 Bauen Sie das Trampolin weiter auf wie gewohnt.
-
Seite 12: Montageanleitung Ganzabdeckung
3. Montageanleitung Ganzabdeckung • Gerät aufstellen. Federn, Gurtband und Tuch einhängen. • Federbügel am Rahmen befestigen (s. Abb. 2) • Weißes Klettband auf die ache Oberseite des Rahmens kleben (siehe Abb. 1) Abbildung 1: Mit Klett zu beklebende Stellen sind rot markiert... - Seite 13 Befestigung der Federbügel am Rahmen Abbildung 2...
- Seite 14 Reihenfolge: • Stirnseiten (Abb. 2 & 3) • Eckteile (Abb. 4 & 5) • Mittelstücke (Abb. 6 & 7) Ablauf: • Unterseite der Abdeckung mit dem schwarzen Eckband verbinden (siehe Abb. 1) • Abdeckung umdrehen, am Rahmen ausrichten und Klett vom Rahmen mit Flausch am Polster verbinden •...
-
Seite 15: Verstauung 50 Mm Ganzabdeckung
4. Verstauung 50 mm Ganzabdeckung... -
Seite 16: Anbringung Der Zusatzrahmengestelle Am Ultimate
5. Anbringung der Zusatzrahmengestelle am Ultimate... -
Seite 31: Stowage 50 Mm Frame Padding
4. Stowage 50 mm frame padding...