Inhaltsverzeichnis
Werbung
Verfügbare Sprachen
Verfügbare Sprachen
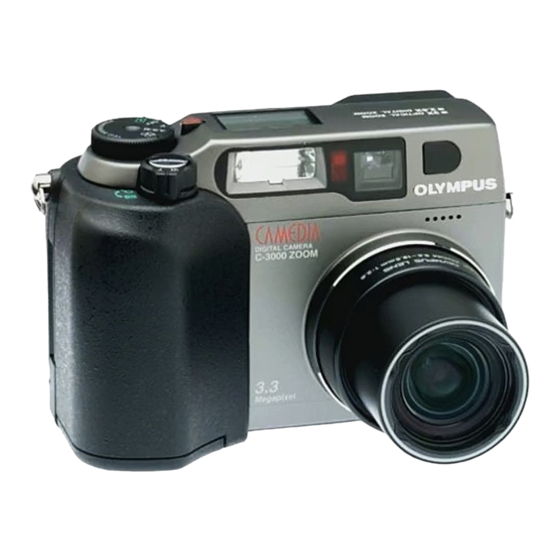
DIGITAL CAMERA
APPAREIL PHOTO NUMÉRIQUE
DIGITAL-KAMERA
C-3000ZOOM
Before using your camera, read this manual carefully to ensure correct use.
We recommend that you take test shots to get accustomed to your camera
before taking important photographs.
Avant d'utiliser votre appareil photo, veuillez lire attentivement ce mode
d'emploi, de manière à obtenir les meilleurs résultats possibles.
Avant d'effectuer des prises de vues importantes, nous vous conseillons
par ailleurs de faire quelques essais afin de vous familiariser avec le
maniement de l'appareil photo.
Bitte lesen Sie vor Gebrauch dieser Kamera sorgfältig diese
Bedienungsanleitung, um optimale Ergebnisse beim Fotografieren zu erzielen.
Wir empfehlen, vor wichtigen Aufnahmen Probeaufnahmen durchzuführen,
um sich mit der Bedienung und den Funktionen der Kamera vertraut zu
machen.
ENGLISH
FRANÇAIS
DEUTSCH
INSTRUCTIONS
MODE D'EMPLOI
BEDIENUNGSANLEITUNG
Werbung
Inhaltsverzeichnis

Verwandte Anleitungen für Olympus Camedia C-3000ZOOM


Inhaltszusammenfassung für Olympus Camedia C-3000ZOOM
- Seite 1 DIGITAL CAMERA ENGLISH APPAREIL PHOTO NUMÉRIQUE DIGITAL-KAMERA FRANÇAIS C-3000ZOOM DEUTSCH INSTRUCTIONS MODE D’EMPLOI BEDIENUNGSANLEITUNG Before using your camera, read this manual carefully to ensure correct use. We recommend that you take test shots to get accustomed to your camera before taking important photographs. Avant d’utiliser votre appareil photo, veuillez lire attentivement ce mode d’emploi, de manière à...
- Seite 2 PREPARATION & q hj k P F2.8 1/800 + 2.0 23.12. , 00 21:56...
-
Seite 3: Lcd-Monitor
Names of parts CAMERA Control panel Card compartment cover & Zoom lever Flash button, Erase button Flash Spot/Macro button, Print button Selftimer/Remote control signal Viewfinder Remote control window LCD monitor Diopter adjustment dial Jog dial Strap hook Mode dial Connector cover Shutter release button Lens OK button, MF button, Protect... - Seite 4 SmartMedia (including instructions instructions on CD-ROM) Optinal items • Special Function SmartMedia Cards • Photo Printers For Olympus Template Card (4MB) Digital Cameras Calendar Card (4MB) • AC Adapter Title Card (4MB) • Leather Camera Case • FlashPath Floppy Disk Adapter •...
- Seite 5 Attaching the strap Attach the strap to the strap hook on the camera. Loading the batteries This camera uses 2 CR-V3 lithium battery packs or 4 AA NiMH batteries, NiCd batteries, alkaline batteries or lithium batteries. Performance will be limited with alkaline batteries, especially in low temperatures.
- Seite 6 • Use 3V (3.3V) cards only. 5V cards cannot be used. Insert SmartMedia • Olympus brand cards are recommended (already formatted). Non-Olympus brand cards must be formatted by the camera. • When using a special function SmartMedia card (optional), insert it in the same way.
- Seite 7 Card format Press the Menu button, then press the top/bottom arrows on the Jog dial to select CARD SETUP. Press the right arrow to select , and press the OK button to display . Press the OK button again with YES selected to format the card.
-
Seite 8: Recording Functions
RECORDING FUNCTIONS How to use the mode dial Aperture priority Movie picture recording Shutter priority Manual Program Power off Display • P or A/S/M (Still picture recording) • (Movie picture recording) • OFF (Power off) • (Display) Adjusting the diopter •... - Seite 9 Taking pictures Press the Shutter release button halfway to lock the focus and exposure. Press the Shutter release button fully to take the picture. When the Green lamp stops blinking, the camera is ready to take the next picture. A/S/M mode Press the Menu button, then press the top/bottom arrows on the Jog dial to select A/S/M MODE.
- Seite 10 Checking the batteries When the power is turned on in the Record mode, the remaining battery power will be displayed on the control panel. lights and turns off automatically. Batteries are OK. You can shoot. blinks and other indicators on the control panel are displayed normally.
- Seite 11 Number of Still Pictures that can be Taken Memory capacity Number (without sound/with sound) Recording mode File of pixels 4MB 8MB 16MB 32MB 64MB 2048 x 1536 1600 x 1200 11/11 TIFF 1280 x 960 17/17 TIFF 1024 x 768 13/13 27/27 640 x 480...
- Seite 12 All reset With ON selected, the settings of the following items will be canceled and reset to the default when the power is turned off. Aperture priority mode Auto bracket Shutter priority mode Flash light volume correction Manual mode Slow shutter synchronization flash Zoom Flash select Exposure compensation...
- Seite 13 DISPLAYING FUNCTIONS Displaying recorded pictures Set the Mode dial to . With each press of the right arrow on the Jog dial, you can view the succeeding picture. With each press of the left arrow, you can view the preceding picture. [10-frame jump using the Jog dial] •...
- Seite 14 Close-up display mode (3X inspection) With each press of the Zoom lever toward T, the picture is enlarged 1.5X, 2X, 2.5X, and 3X. Pressing the Zoom lever toward W returns to 1X. Use the Jog dial to select the section of the picture to view. To select another picture, select 1X and move the Jog dial.
- Seite 15 Protection Press the OK button to protect the currently displayed picture. One-frame erase Display the picture you want to erase and press the Erase button. Press the OK button with YES selected to erase the picture. All-frame erase Press the Menu button, then press the top/bottom arrows on the Jog dial to select CARD SETUP.
- Seite 16 SOPHISTICATED FUNCTIONS Autofocus There are certain conditions where the autofocus may not work properly even when the Green lamp lights when the Shutter release button is pressed halfway. When this happens, try the procedure below or use Manual focus. 1 Subjects with low contrast Lock the focus on an object that is at the same distance from the camera as the subject, then aim at the subject to take the picture.
- Seite 17 Manual focus Press the OK button to turn on the LCD monitor. Press the right arrow on the Jog dial to select the Manual focus mode. While looking at the LCD monitor, press the top/bottom arrows on the Jog dial to select the distance. When the cursor is moved below 0.8 m, shorter distances will appear on the LCD monitor.
- Seite 18 Sequence mode Press the Menu button, then press the top/bottom arrows on the Jog dial to select DRIVE. Press the right arrow and press the top/bottom arrows to select or AF . Press the left arrow on the Jog dial to confirm the setting. If you take a picture without pressing the OK button, the setting will be valid until the Menu is canceled.
- Seite 19 Sound record mode Press the Menu button, then press the top/bottom arrows on the Jog dial to select . Press the right arrow and press the top/bottom arrows to select ON. When the Shutter release button is released, sound is recorded for 4 seconds per picture.
- Seite 20 SQ1/SQ2 setup Press the Menu button, then press the top/bottom arrows on the Jog dial to select MODE SETUP and press the right arrow to select SETUP. Press the OK button. Press the top/bottom arrows to select SQ1 or SQ2, then press the right arrow to select SETUP and press the OK button.
- Seite 21 Meters/Feet selection Press the Menu button, then press the top/bottom arrows on the Jog dial to select MODE SETUP and press the right arrow to select SETUP. Press the OK button. Press the top/bottom arrows to select m/ft, press the right arrow and top/bottom arrows to make the selection.
- Seite 22 Slow shutter synchronization flash mode Press the Menu button, then press the top/bottom arrows on the Jog dial to select . Press the right arrow on the Jog dial, then press the top/bottom SLOW arrows to select 1 or 2. Select 1 for capturing images at the beginning of the shutter release duration.
-
Seite 23: Printing Pictures
PRINTING PICTURES Selected images can be reserved in a SmartMedia card for printing on a printer or at a photo lab that supports the DPOF (Digital Print Order Format) system. Single-frame print reserve Press the Print button ( ), press the top/bottom arrows on the Jog dial to select and press the OK button. - Seite 24 Resetting print reserve Press the Print button ( ) to display the PRINT ORDER SETTING screen. If there are no pictures with print reserve settings in a card, this screen is not displayed. Press the right/left arrows on the Jog dial to select RESET, then press the OK button.
- Seite 25 Connecting to a personal computer Use the appropriate connector according to your computer’s specifications. For USB-equipped computers (IBM PC/AT compatible, Apple Macintosh) Connect the provided USB cable to the USB port on your computer. USB port Camera’s connector USB connection cable For serial port-equipped computers (IBM PC/AT compatible) Connect the optional RS-232C PC serial cable to the serial port (COM1, COM2, etc.) on your computer.
- Seite 26 Installing provided software By installing the provided software (CAMEDIA Master), you can download images to a computer via the provided USB cable or serial cable and access the following functions. For installation and operation, refer to the software’s online manual. •...
- Seite 27 Transferring data from SmartMedia PC card adapter The picture data in the SmartMedia can be directly transferred to a personal computer equipped with a PC card (PCMCIA) slot or an external PC card reader/writer, using the optional PC Card Adapter. FlashPath floppydisk adapter The picture data in the SmartMedia can be directly transferred to a personal computer...
- Seite 28 MISCELLANEOUS Error codes Control panel LCD monitor Error content Remedy CARD The card cover is Insert a card and close COVER open. the cover. OPEN NO CARD The card is not Insert a card. Or insert inserted, or it the card again. cannot be recognized.
- Seite 29 Control panel LCD monitor Error content Remedy (Format The card is not Format the card. confirmation formatted. screen) There are no Insert a card which pictures in the contains images. PICTURE card, so there is nothing to play back. CARD There is no Replace the card or FULL...
- Seite 30 [ You cannot use a filter or a hood. A conversion lens adapter (optional) is required to attach a conversion lens to the camera. Can I use an extension flash? [ Yes you can. You can use an extension flash with a grip. For more information, please see our Internet home page (http://www.olympus.com).
- Seite 31 Precautions Caution concerning the flash • Be careful when taking pictures at close range. • Do not take pictures of people’s faces (babies in particular) at close range. If the flash goes off too close to someone’s eyes it may cause a loss of vision. In particular, when taking pictures of babies, be sure that the distance is at least 1 m.
- Seite 32 Points to verify before using the camera • If taking particularly important pictures or if you have not used the camera for a long period, first confirm that it functions properly, or consult an Authorized Service Centre. • We decline all responsibility concerning the loss of data, down time, loss of revenue or any other direct or indirect damage or claims caused by this camera.
- Seite 33 Do not recharge alkaline or lithium batteries • If you try to recharge them, it may cause the batteries to leak and/or the camera to be damaged. Do not use or store in a hot place (e.g. inside a closed car on a hot and sunny day) •...
- Seite 34 System chart A variety of capabilities are available when connected to optional equipment. Printer (P-330N/P-330) FlashPath SmartMedia PC card adapter MO drive SmartMedia Reader/ Writer Personal computer AC adapter Camera Conversion lens adapter Remote Tele Conversion control lens Wide conversion lens Macro conversion lens...
- Seite 35 • Images taken by this camera may not be properly displayed or printed with other Olympus digital cameras. • Images taken by other Olympus digital cameras may not be properly displayed with this camera. When taken with this camera and displayed/printed with other models...
- Seite 36 Olympus. No liability is assumed with respect to the use of the information contained in these written materials or software, or for damages resulting from the use of the information contained in these written materials or of the software.
- Seite 37 : Full Auto TTL (iESP auto), Preset (Daylight, Overcast, Tungsten light, Fluorescent) Lens : Olympus lens 6.5 ~ 19.5 mm, F2.8, 6 elements in 8 groups (equivalent to 32 ~ 96 mm lens on 35 mm camera), aspherical glass Photometric system...
- Seite 38 Viewfinder : Optical real image viewfinder (Autofocus mark/Backlighting correction mark), LCD monitor LCD monitor : 1.8" TFT color LCD display No. of pixels : Approx. 114,000 pixels On-screen display : Date/Time, Frame number, Protect, Recording mode, Battery check, Picture information, Print- reserve, Menu, etc.
- Seite 40 PRÉPARATIFS & q hj k P F2.8 1/800 + 2.0 23.12. , 00 21:56...
-
Seite 41: Appareil Photo
Nomenclature des pièces APPAREIL PHOTO & Écran de commande Touche Flash/Touche d’effacement Levler de zoom Touche Spot/Gros plan/Touche Flash Impression Voyant de retardateur/télécommande Viseur Fenêtre de télécommande Écran ACL Molette de réglage dioptrique Molette de défilement Oeillet de bandoulière Molette de mode Volet de protection des connecteurs Déclencheur Objectif... - Seite 42 Accessoires optionnels • Cartes SmartMedia de fonctions spéciales • Imprimantes photo pour appareils Carte d’encadrement (4 Mo) photo numériques Olympus Carte calendrier (4 Mo) • Adaptateur secteur Carte titre (4 Mo) • Étui en cuir • Adaptateur de disquette FlashPath •...
- Seite 43 Fixation de la bandoulière Fixer la bandoulière à l’oeillet de l’appareil. Mise en place des piles Cet appareil utilise deux piles au lithium CR-V3 ou quatre piles R6 (AA) au nickel hydrogène, au nickel cadmium, alcalines ou au lithium. La performance sera limitée avec des piles alcalines, en particulier aux basses températures.
- Seite 44 Remarque: • Utiliser uniquement des cartes de 3 (3,3) volts. Cet appareil n’exploite pas les cartes de 5 volts. • Les cartes Olympus sont recommandées (formatées à l’usine). Des cartes de marque autre que “Olympus” doivent être formatées par l’appareil.
- Seite 45 Formatage des cartes Appuyer sur la touche Menu, puis appuyer sur les flèches haut/bas de la molette de défilement pour choisir CARD SETUP. Appuyer sur la flèche droite pour choisir et appuyer sur la touche OK pour afficher . Appuyer de nouveau sur la touche OK avec YES sélectionné...
-
Seite 46: Fonctions D'enregistrement
FONCTIONS D’ENREGISTREMENT Utilisation de la molette mode Priorité à l’ouverture Enregistrement Priorité à la vitesse d’images cinéma Manuel Programme Alimentation coupée Affichage • P ou A/S/M (Enregistrement d’images fixes) • (Enregistrement d’images cinéma) • OFF (Alimentation coupée) • (Affichage) Réglage dioptrique •... - Seite 47 Prise de vues Appuyer sur le déclencheur jusqu’à mi-course pour mémoriser la mise au point et l’exposition. Appuyer complètement sur le déclencheur pour prendre la photo. Lorsque le voyant vert cesse de clignoter l’appareil est prêt à prendre la photo suivante. Mode A/S/M Appuyer sur la touche Menu, puis appuyer sur les flèches haut/bas de la molette de défilement pour choisir A/S/M MODE.
- Seite 48 Vérification de l’état des piles Lorsque l’appareil est en marche en mode Enregistrement, l’état des piles est affiché sur l’écran de commande. L’indicateur s’allume et s’éteint automatiquement. Les piles sont suffisamment chargées pour pouvoir prendre des photos. L’indicateur clignote, tous les autres indicateurs de l’écran de commande apparaissent normalement.
- Seite 49 Nombre d’images fixes pouvant être prises Capacité de mémoire (sans son/avec son) Mode Nombre de pixels Fichier d’enregistrement 8Mo 16Mo 32Mo 64Mo 2048 x 1536 1600 x 1200 11/11 TIFF 1280 x 960 17/17 TIFF 1024 x 768 13/13 27/27 640 x 480 17/16 34/33...
- Seite 50 Remise à zéro complète Avec ON sélectionné, les réglages des fonctions seront annulés et remis aux valeurs par défaut quand l’alimentation est coupée. Mode à priorité à l’ouverture Retardateur/télécommande Mode à priorité à la vitesse Fourchette automatique Mode manuel Correction du flash Zoom Mode flash synchronisé...
-
Seite 51: Fonctions D'affichage
FONCTIONS D’AFFICHAGE Affichage de vues enregistrées Régler la molette Mode sur . À chaque pression sur la flèche droite de la molette de défilement, vous pouvez visionner la vue suivante. À chaque pression sur la flèche gauche, vous pouvez visionner la vue précédente. [Saut de 10 vues en utilisant la molette de défilement] •... - Seite 52 Affichage gros plan À chaque pression sur le levier de zoom vers T, la vue est agrandie de 1,5X, 2X, 2,5X, et 3X. Appuyer sur le levier de zoom vers W fait revenir sur 1X. Utiliser la molette de défilement pour choisir la partie de la vue à visionner. Pour choisir une autre vue, sélectionner 1X et déplacer la molette de défilement.
- Seite 53 Protection Appuyer sur la touche OK pour protéger l’image actuellement affichée. Effacement d’une vue Afficher l’image que vous voulez effacer et appuyer sur la touche d’effacement. Appuyer sur la touche OK avec YES sélectionné pour effacer la vue. Effacement de toutes les vues Appuyer sur la touche Menu, puis appuyer sur les flèches haut/bas de la molette de défilement pour choisir CARD SETUP.
-
Seite 54: Fonctions Élaborées
FONCTIONS ÉLABORÉES Autofocus Il existe certaines situations dans lesquelles on ne parvient pas à obtenir une mise au point correcte même si le voyant vert s’allume quand le déclencheur est enfoncé jusqu’à mi-course. Dans ces cas, essayer la procédure ci- dessous ou utiliser la mise au point manuelle. - Seite 55 Mise au point manuelle Appuyer sur la touche OK pour mettre l’écran ACL en marche. Appuyer sur la flèche droite de la molette de défilement pour sélectionner le mode de mise au point manuelle. Tout en regardant l’écran ACL, appuyer sur les flèches haut/bas de la molette de défilement pour sélectionner la distance.
- Seite 56 Prise de vues en série Appuyer sur la touche Menu, puis appuyer sur les flèches haut/bas de la molette de défilement pour choisir DRIVE. Appuyer sur la flèche droite et appuyer sur les flèches haut/bas pour choisir ou AF . Appuyer sur la flèche gauche de la molette de défilement pour valider le réglage.
- Seite 57 Mode enregistrement du son Appuyer sur la touche Menu, puis appuyer sur les flèches haut/bas de la molette de défilement pour sélectionner . Appuyer sur la flèche droite et appuyer sur les flèches haut/bas pour choisir ON. Lorsque le déclencheur est relâché, le son est enregistré...
- Seite 58 Réglage SQ1/SQ2 Appuyer sur la touche Menu, puis appuyer sur les flèches haut/bas de la molette de défilement pour choisir MODE SETUP et appuyer sur la flèche droite pour choisir SETUP. Appuyer sur la touche OK. Appuyer sur les flèches haut/bas pour choisir SQ1 ou SQ2, puis appuyer sur la flèche droite pour choisir SETUP et appuyer sur la touche OK.
- Seite 59 Sélection mètres/pieds Appuyer sur la touche Menu, puis appuyer sur les flèches haut/bas de la molette de défilement pour choisir MODE SETUP et appuyer sur la flèche droite pour choisir SETUP. Appuyer sur la touche OK. Appuyer sur les flèches haut/bas pour choisir m/ft, appuyer sur la flèche droite et sur les flèches haut/bas pour faire la sélection.
- Seite 60 Mode flash synchronisé à vitesse lente Appuyer sur la touche Menu, puis appuyer sur les flèches haut/bas de la molette de défilement pour choisir . Appuyer sur la flèche droite de la SLOW molette de défilement, puis appuyer sur les flèches haut/bas pour sélectionner 1 ou 2.
- Seite 61 IMPRESSION DES VUES Des images sélectionnées peuvent être réservées sur une carte SmartMedia pour l’impression sur une imprimante ou dans un laboratoire photo qui supporte le système DPOF (Digital Print Order Format). Réservation d’impression d’une seule image Appuyer sur la touche d’impression ( ), appuyer sur les flèches haut/bas de la molette de défilement pour sélectionner et appuyer sur la touche OK.
- Seite 62 Annulation de la réservation Appuyer sur la touche d’impression ( ) pour afficher l’écran PRINT ORDER SETTING. S’il n’y a pas d’image avec réglage de réservation d’impression sur la carte, cet écran n’est pas affiché. Appuyer sur les flèches droite/gauche de la molette de défilement pour choisir RESET, puis appuyer sur la touche OK.
- Seite 63 Raccordement à un micro-ordinateur Utiliser le connecteur ou approprié suivant les prises de l’ordinateur. Pour des ordinateurs équipés USB (PC/AT IBM et compatibles, Apple Macintosh) Raccorder le câble USB fourni au port USB de l’ordinateur. Port USB Connecteur USB de l’appareil photo Câble de raccordement USB Pour des ordinateurs équipés d’un port série (PC/AT IBM et...
- Seite 64 Installation du logiciel fourni En installant le logiciel fourni (CAMEDIA Master), vous pouvez télécharger des images vers un ordinateur via le câble USB fourni ou un câble série et avoir accès aux fonctions suivantes. Pour l’installation et le fonctionnement, veuillez vous référer à la documentation en ligne du logiciel. •...
- Seite 65 Transfert de données de la carte SmartMedia Adaptateur de carte PC Les données d’image dans la carte SmartMedia peuvent être transférées directement sur un ordinateur personnel disposant d’une case carte PC (PCMCIA) ou d’un lecteur/enregistreur de carte PC externe, en utilisant l’adaptateur de carte PC en option.
- Seite 66 DIVERS Codes d’erreur Écran de commande Écran ACL Contenu d’erreur Solution CARD Le couvercle de Insérez la carte et fermez COVER carte est ouvert. le couvercle. OPEN NO CARD La carte n'est Insérez une carte. Ou pas insérée, ou insérez la carte à elle ne peut être nouveau.
- Seite 67 Écran de commande Écran ACL Contenu d’erreur Solution (Écran de La carte n’est Formatez la carte. confirmation pas formatée. de format) Aucune image Insérez une carte qui PICTURE n’est enregistrée, contient des images. alors il n’y a rien à lire. CARD Il n’y a plus Remplacez la carte ou...
- Seite 68 [ Vous ne pouvez pas utiliser de filtre ni de pare-soleil. Un adaptateur de convertisseur (en option) est nécessaire pour fixer un convertisseur sur cet appareil. Puis-je utiliser un flash supplémentaire? [ Oui, vous pouvez utiliser un flash supplémentaire avec une poignée. Pour plus d’informations, veuillez consulter notre site Internet (http://www.olympus.com).
- Seite 69 Précautions Précautions à prendre avec le flash • Faire attention en prenant des photos de très près. • Ne pas photographier les visages de très près (les bébés en particulier). En effet, si le flash se déclenche trop près des yeux de la personne photographiée, ceci peut lui provoquer une perte de la vision.
- Seite 70 Points à vérifier avant d’utiliser l’appareil • Si vous êtes sur le point de prendre des photos importantes ou si l’appareil n’a pas été utilisé depuis longtemps, vérifier tout d’abord qu’il fonctionne normalement ou demander conseil à un centre de dépannage autorisé au préalable.
- Seite 71 Ne pas recharger des piles alcalines ou au lithium • Elles risquent de suinter et de provoquer des dommages si on essaie de les recharger. Ne pas utiliser des piles ni les ranger dans un endroit chaud (par exemple, à l’intérieur d’une voiture toutes glaces relevées par une journée d’été...
- Seite 72 Tableau synoptique du système Une variété de fonctions sont disponibles en raccordant du matériel en option. Téléviseur Imprimante (P-330NE/P-330E) FlashPath Lecteur MO Adaptateur de SmartMedia carte PC Unité de lecture/ écriture Téléviseur SmartMedia Ordinateur personnel Adaptateur d’alimentation secteur Appareil photo Adaptateur de convertisseur Télé-...
- Seite 73 • Des vues prises par cet appareil photo peuvent ne pas être affichées ni imprimées correctement avec d’autres appareils photos numériques Olympus. • Des vues prises par d’autres appareils photos numériques Olympus peuvent ne pas être affichées ni imprimées correctement avec cet appareil.
- Seite 74 écrite ou du logiciel ou pour les dommages résultant de l’utilisation des renseignements contenus dans la documentation écrite ou du logiciel. La firme Olympus se réserve le droit d’apporter toute modification nécessaire aux caractéristiques et au contenu de cette publication et du logiciel sans obligation quelconque ni préavis...
- Seite 75 Préréglage (lumière du jour, ciel couvert, tungstène, fluorescent) Objectif : Objectif Olympus de 6,5 à 19,5 mm, F2.8, 8 éléments en 6 groupes (équivalant à un objectif de 32 à 96 mm sur un appareil de 35 mm), lentille asphérique.
- Seite 76 ∞ Limites de prise de vues : 0,8 m à (mode normal) 0,2 m à 0,8 m (mode gros plan) Viseur : Viseur optique à image réelle (repère d’autofocus, repère de contre-jour), écran ACL Ecran ACL : Ecran d’affichage couleur à cristaux liquides TFT de 4,5 cm Nombre de pixels : 114.000 pixels environ...
- Seite 78 VORBEREITUNG & q hj k P F2.8 1/800 + 2.0 23.12. , 00 21:56...
- Seite 79 Beschreibung der Bedienungselemente KAMERA & LCD-Feld Blitztaste/Löschtaste Zoomhebel Spot-/Nahaufnahmetaste/Drucktaste Blitz Sucher Selbstauslöser/Fernauslöser-LED LCD-Monitor Fernauslöser-Sensor Jogregler Dioptrienausgleichsregler Programmwählscheibe Riemenöse Auslöser Anschlußbuchsenabdeckung OK-/MF-/Schreibschutztaste Objektiv LCD-Monitor ON/OFF-Taste Mikrofon Schreibanzeige-LED Blitzsynchronbuchse mit Abdeckung Menütaste Anschlußbuchse für Netzteil Batteriefachdeckel (Unterseite) AV-Ausgangsbuchse Batteriefachdeckel Entriegelung USB-Anschlußbuchse (Unterseite) Computeranschlußbuchse (RS-232C) Stativgewinde (Unterseite) Kartenfachabdeckung...
- Seite 80 (4 Stück) (Einschließlich Bedienungsanleitung) Bedienungsanleitung für SmartMedia Sonderzubehör • SmartMedia-Funktionskarten Rahmen-Funktionskarte (4 MB) • Fotodrucker für Olympus Digital- Kalender-Funktionskarte (4 MB) Kameras Titel-Funktionskarte (4 MB) • Netzteil • FlashPath-Diskettenadapter • Leder-Kameratasche • PC-Kartenadapter • S t a n d a r d - S m a r t M e d i a - K a r t e •...
- Seite 81 Anbringen des Trageriemens Den Trageriemen an den Riemenösen anbringen. Einlegen der Batterien Zwei CR-V3-Lithium-Batterieblöcke oder vier AA (Mignon) Nickel- Metallhydrid-, Nickel-Cadmium, Alkali- oder Lithium-Batterien einlegen.Alkali- Batterien weisen insbesonders unter niedrigen Temperaturen Leistungsschwankungen und -einbußen auf. Die Verwendung von Lithium- Batterieblöcken oder Nickel-Metallhydrid-Batterien wird empfohlen. Zinkkohle-Batterien dürfen nicht verwendet werden, da diese zu Überhitzung neigen und die Kamera schwer beschädigen können.
- Seite 82 Einsetzen der SmartMedia-Karte Hinweis: • Ausschließlich 3 (3,3)-Volt-Karten verwen- den. 5-Volt-Karten sind ungeeignet. • Die Verwendung einer (bereits formatierten) Olympus Speicherkarte wird empfohlen. Eine Speicherkarte eines anderen Herstellers muß in der Kamera formatiert werden. • Die Rahmen-Funktionskarten (Sonderzu- SmartMedia- behör) in gleicher Weise einsetzen.
- Seite 83 Kartenformatierung Die Menütaste drücken und dann mit dem oberen/unteren Jogregler-Pfeil CARD SETUP wählen. Mit dem rechten Jogregler-Pfeil wählen und mit der OK-Taste die Anzeige aufrufen. Zur Kartenformatierung bei gewählter Anzeige YES nochmals die OK-Taste drücken. Hinweis: • Das Formatieren der Karte löscht alle vorhandenen Daten einschließlich der Aufnahmen, die durch die Kamera schreibgeschützt wurden.
-
Seite 84: Aufnahmefunktionen
AUFNAHMEFUNKTIONEN Verwendung der Programmwählscheibe Programmautomatik mit Movie-Modus Blendenvorwahl Programmautomatik mit Verschlußzeitvorwahl Manueller Modus Programmautomatik Kamera-Ausschaltung Wiedergabemodus • P oder A/S/M (Fotoaufnahme) • (Movie-Aufnahme) • OFF (Kamera-Ausschaltung) • (Wiedergabemodus) Dioptrieneinstellung • Den Dioptrienregler drehen, bis die Dioptrienregler Autofocus-Markierung einwand- frei scharf erkennbar ist. Sucher Autofocus-Markierung Richtiges Auslösen... - Seite 85 Fotografieren Den Auslöser halb hinunterdrücken, so daß Entfernungs- und Belichtungs- einstellung gespeichert werden. Zum Aufnehmen den Auslöser vollständig hinunterdrücken. Wenn die grüne Sucher-LED nicht mehr blinkt, ist die Kamera erneut aufnahmebereit. A/S/M-Modus Die Menütaste drücken und mit dem oberen/unteren Jogregler-Pfeil A/S/M MODE wählen.
- Seite 86 Überprüfen des Batteriezustandes Bei eingeschalteter Kamera wird der Batterie-Ladezustand auf dem LCD-Feld angezeigt. Die Anzeige leuchtet und erlischt automatisch. Batterien sind für den Aufnahmebetrieb ausreichend geladen. Die Anzeige blinkt, alle weiteren LCD-Feld-Anzeigen werden normal angezeigt. Die Batterien sind schwach, Ersatzbatterien bereithalten. Sind Nickel- Metallhydrid-Batterien eingelegt, blinkt diese Warnanzeige schneller als bei Lithium-Batterieblöcken.
- Seite 87 Anzahl der verfügbaren Aufnahmen Speicherkapazität Anzahl der (Ohne Tonaufnahme/einschl. Tonaufnahme) Aufnahmemodus Datei Bildpunkte 4MB 8MB 16MB 32MB 64MB 2048 x 1536 1600 x 1200 11/11 TIFF 1280 x 960 17/17 TIFF 1024 x 768 13/13 27/27 640 x 480 34/33 68/66 17/16 2048 x 1536...
- Seite 88 Gesamtrückstellung Bei Einstellstatus ON werden die Einstellungen für die folgenden Einstell- parameter annulliert und rückgestellt, wenn die Kamera ausgeschaltet wird. Programmautomatik mit Selbstauslöser/Fernauslöser Blendenvorwahl Automatische Belichtungsreihen Programmautomatik mit Blitzhelligkeitseinstellung Verschlußzeitvorwahl Blitzaufnahmen mit langer Manueller Modus Synchronisation Zoomen Blitzwahl Belichtungskorrektur Digital-Telezoom Blitzprogramme Weißabgleich Spotmessung...
-
Seite 89: Wiedergabefunktionen
WIEDERGABEFUNKTIONEN Wiedergabe von Aufnahmen Die Programmwählscheibe auf stellen. Zur Wiedergabe der nachfolgenden Aufnahmen den rechten Jogregler-Pfeil drücken. Zur Wiedergabe der vorhergehenden Aufnahmen den linken Jogregler-Pfeil drücken. [Bildsprung (in 10-Bild-Schritten) mit dem Jogregler] • Wird der untere Jogregler-Pfeil gedrückt, wird die Wiedergabe um 10 Bilder vorversetzt. - Seite 90 Ausschnittsvergrößerung Den Zoomregler wiederholt in Richtung T drücken, um das Bild 1,5X, 2X, 2,5X und 3X zu vergrößern. Durch Drücken des Zoomreglers in Richtung W wird erneut Einstellung “1X” gewählt. Mit dem Jogregler den Bildausschnitt anwählen. Zur Wiedergabe eines anderen Bildes auf 1X schalten und dann den Jogregler verwenden.
- Seite 91 Schreibschutz Die OK-Taste drücken, um das zu diesem Zeitpunkt gezeigte Bild mit Schreibschutz zu versehen. Einzellöschung von Bildern Das zu löschende Bild aufrufen und die Löschtaste drücken. Zur Bildlöschung bei gewählter Anzeige YES die OK-Taste drücken. Gesamtlöschung Die Menütaste drücken und dann mit dem oberen/unteren Jogregler-Pfeil CARD SETUP wählen.
-
Seite 92: Weiterführende Funktionen
WEITERFÜHRENDE FUNKTIONEN Autofocus In bestimmten Aufnahmesituationen kann mit dem Autofocus ggf. keine korrekte Scharfstellung erzielt werden, selbst wenn die leuchtende grüne LED bei halb hinuntergedrücktem Auslöser Aufnahmebereitschaft anzeigt. In diesem Fall die folgenden Abhilfemaßnahmen berücksichtigen oder manuell scharfstellen. 1 Motiv mit zu geringem Kontrast Zunächst auf einen Bildbereich scharfstellen, der sich in der gleichen Entfernung befindet, und dann mittels Schärfespeicher zur Aufnahme auf das gewünschte... - Seite 93 Manuelle Scharfstellung Die OK-Taste drücken, um den LCD-Monitor einzuschalten. Mit dem rechten Jogregler-Pfeil auf manuelle Scharfstellung schalten. Unter Bezugnahme auf den LCD-Monitor mit dem oberen/unteren Jogregler-Pfeil die gewünschte Entfernung einstellen. Wird der Cursor auf den Bereich unter 0,8 m gesetzt, wechselt die Anzeige auf den Nahaufnahmebereich.
- Seite 94 Serienaufnahmen Die Menütaste drücken und mit dem oberen/unteren Jogregler-Pfeil DRIVE wählen. Dann den rechten Jogregler-Pfeil drücken und mit dem oberen/unteren Jogregler-Pfeil oder AF . wählen. Den linken Jogregler-Pfeil drücken, um die Einstellung zu bestätigen. Wird hierauf aufgenommen, ohne die OK- Taste zu drücken, gilt die vorliegende Einstellung, bis das Menü...
- Seite 95 Tonaufnahmemodus Die Menütaste drücken und dann mit dem oberen/unteren Jogregler-Pfeil wählen. Dann den rechten Jogregler-Pfeil drücken und mit dem oberen/unteren Jogregler-Pfeil ON wählen. Das Tonsignal wird jeweils unmittelbar nach Start der Bildaufnahme aufgenommen. Die Tonsignalaufnahme dauert pro Bild 4 Sekunden. Die Kamera nach Drücken des Auslösers weiterhin in Richtung des Motivs halten, solange die Tonaufnahme erfolgt.
- Seite 96 SQ1/SQ2-Einstellung Die Menütaste drücken und dann mit dem oberen/unteren Jogregler-Pfeil MODE SETUP wählen. Hierauf mit dem rechten Jogregler-Pfeil SETUP wählen und die OK-Taste drücken. Dann mit dem oberen/unteren Jogregler- Pfeil SQ1 oder SQ2 wählen. Hierauf mit dem rechten Jogregler-Pfeil SETUP wählen und die OK-Taste drücken.
- Seite 97 Maßeinheitwahl Die Menütaste drücken und dann mit dem oberen/unteren Jogregler-Pfeil MODE SETUP wählen. Hierauf mit dem rechten Jogregler-Pfeil SETUP wählen und die OK-Taste drücken. Dann mit dem oberen/unteren Jogregler- Pfeil m/ft wählen. Den rechten Jogregler-Pfeil drücken und dann die Einstellung mit dem oberen/unteren Jogregler-Pfeil vornehmen. Die Eingabe durch Drücken des linken Jogregler-Pfeils bestätigen.
- Seite 98 Blitzaufnahmen mit langer Synchronisationszeit Die Menütaste drücken und dann mit dem oberen/unteren Jogregler-Pfeil wählen. Den rechten Jogregler-Pfeil drücken und dann mit dem SLOW oberen/unteren Jogregler-Pfeil 1 oder 2 wählen. Bei Vorwahl 1 wird das Motiv am Anfang der Aufnahme aufgehellt. So gehen z.B. die Rücklichter eines fahrenden Autos dem Auto voraus.
- Seite 99 AUSDRUCKEN Die Informationen zur Druckvorauswahl gewünschter Bilder können auf der SmartMedia-Karte zum späteren Ausdruck auf einem Digital-Drucker oder in einem Fotolabor mit DPOF-Unterstützung (Digital Print Order Format) abgespeichert werden. Ausdruck ausgesuchter Bilder Die Drucktaste ( ) drücken und dann mit dem oberen/unteren Jogregler-Pfeil wählen.
-
Seite 100: Einsatz Eines Computers
Rückstellung der Druckvorauswahl Mit der Drucktaste ( ) das Druckrückfrage-Menü aufrufen. Enthält die Karte keine Druckvorauswahlinformationen, unterbleibt diese Menüanzeige. Mit dem linken/rechten Jogregler-Pfeil RESET wählen und dann die OK-Taste drücken. Der RESET-Befehl löscht alle Druckvorauswahlinformationen der Karte. EINSATZ EINES COMPUTERS Computer-Systemerfordernisse Windows Prozessor: Pentium oder höher... - Seite 101 Anschluß an einen Computer Den für das Computersystem geeigneten Anschlußstecker bzw. -adapter verwenden. Computer mit USB-Schnittstelle (IBM PC/AT und kompatible, Apple Macintosh) Das mitgelieferte USB-Kabel mit der USB-Schnittstelle des Computers verbinden. USB-Anschluß der Kamera USB- Schnittstelle USB-Kabel Computer mit serieller Schnittstelle (IBM PC/AT und kompatible) Das serielle RS-232C-Kabel (Sonderzubehör) am seriellen Port (COM1, COM2 etc.) des Computers anschließen.
- Seite 102 Installieren der mitgelieferten Software Nach Installieren der mitgelieferten Software (CAMEDIA Master) lassen sich Bilddaten über das USB-Kabel oder serielle Kabel (beide mitgeliefert) auf einen Computer herunterladen und die folgenden Funktionen verwenden. Angaben zum Installieren und Betreiben finden Sie in der Software-Online- Benutzerdokumentation.
- Seite 103 Direktübertragung von der SmartMedia-Karte PC-Kartenadapter Bei Verwendung des als Sonderzubehör erhältlichen PC-Kartenadapters können die auf der SmartMedia-Karte enthaltenen Bilddaten direkt auf einen Computer heruntergeladen werden, wenn dieser über einen PC-Karten-Einschub (PCMCIA) oder ein externes PC-Karten-Modul verfügt. FlashPath-Diskettenadapter Bei Verwendung des als Sonderzubehör erhältlichen FlashPath-Diskettenadapters können die auf der SmartMedia-Karte enthaltenen Bilddaten direkt auf einen...
- Seite 104 VERSCHIEDENES Kartenfehler LCD-Feld LCD-Monitor Fehler Abhilfe CARD Geöffnete Eine Karte einlegen und COVER Kartenfachab- die Kartenfachabdeckung OPEN deckung. schließen. NO CARD Keine oder nicht Eine Karte (nochmals) identifizerbare einlegen. Karte eingelegt. CARD Keine weitere Die Karte auswechseln FULL Aufnahme oder nicht benötigte möglich.
- Seite 105 LCD-Feld LCD-Monitor Fehler Abhilfe (Formatie- Die Karte ist Die Karte formatieren. rungs-Rück- nicht formatiert. fragean- zeige) Die Karte ist leer. Eine Karte, die Bilddaten PICTURE Es kann keine enthält, einlegen. Wiedergabe erfolgen. CARD Keine freie Spei- Die Karte auswechseln FULL cherkapazität auf oder nicht benötigte der Karte, um...
- Seite 106 [ Filter oder Gegenlichtblende können nicht angebracht werden. Zur Anbringung einer Vorsatzlinse ist ein Objektivadapter erforderlich. Kann ich ein Zusatz-Blitzgerät verwenden? [ Dies ist möglich, wen ein Zusatzblitz mittels Blitzgriff an der Kamera angebracht wird. Bitte informieren Sie sich auf unserer Internet Home Page: http://www.olympus-europa.com...
- Seite 107 Vorsichtsmaßregeln Warnhinweise für den Blitzbetrieb • Bei Nahaufnahmen mit Blitzlicht die folgenden Vorsichtsmaßregeln beachten. • Bei Porträt-Blitzaufnahmen stets auf ausreichenden Abstand achten (insbesondere bei Kleinkindern). Wird der Blitz bei einem zu geringen Abstand ausgelöst, können Schäden an den Augen verursacht werden. Insbesondere beim Fotografieren von Kleinkindern einen Mindestabstand von 1 m einhalten! Vorsichtsmaßregeln beim Fotografieren...
- Seite 108 Vor dem Kameragebrauch bitte beachten • Vor der Herstellung wichtiger Aufnahmen und/oder nach längerem Nichtgebrauch der Kamera sollten Sie eine vollständige Überprüfung auf einwandfreie Funktion vornehmen oder von Ihrem autorisierten Service Center durchführen lassen. • Wir können keinerlei Verantwortung für Datenverlust, Ausfallzeiten, Einkommenseinbußen oder sonstige direkte oder indirekte Schäden und Ansprüche übernehmen, die aus dem Gebrauch dieser Kamera herrühren.
- Seite 109 Nicht in einem Vakuumbehälter verwenden • Andernfalls können die Batterien auslaufen und evtl. die Kamera beschädigen. Alkali- oder Lithium-Batterien niemals aufladen • Batterien dieses Typs sind nicht aufladbar. Der Versuch, sie aufzuladen, kann zum Auslaufen bzw. zu Beschädigungen an der Kamera führen. Batterien nicht bei hohen Temperaturen aufbewahren (z.B.
- Seite 110 Systemübersicht Beim Anschluß an die externen Komponenten können vielseitige Möglichkeiten der Datenübertragungund -bearbeitung genutzt werden. Fernsehgerät Drucker (P-330NE/P-330E) FlashPath MO-Laufwerk SmartMedia Kartenadapter SmartMedia- Lese-/ Fernsehgerät Schreibgerät Personal-Computer Netzteil Kamera Konverter- Adapter Fernbe- dienung Tele-Konverter Weitwinkel- Konverter Nahaufnahme- Konverter Zusatzblitz mit Blitzgriff und -kabel...
- Seite 111 Kompatibilität der Bilddaten • Mit dieser Kamera hergestellte Aufnahmen können über eine andere Olympus Digitalkamera ggf. nicht einwandfrei wiedergegeben oder ausgedruckt werden. • Mit einer anderen Olympus Digitalkamera hergestellte Aufnahmen können über diese Kamera ggf. nicht einwandfrei wiedergegeben oder ausgedruckt werden.
- Seite 112 Alle Rechte vorbehalten. Die schriftlichen Angaben und Software-Inhalte dürfen, auch auszugsweise, ohne ausdrückliche schriftliche Genehmigung der Firma Olympus in keiner Form vervielfältigt oder verwendet werden. Dies gilt für alle Verfahren, mechanisch oder elektronisch, einschließlich Fotokopien und magnetischer Aufzeichnung, sowie jede Art von Informationsspeicherung und -abruf.
- Seite 113 Weißabgleich : Vollautomatisch (iESP Automatik) TTL, Manuell (Tageslicht (sonnig), Tageslicht (bewölkt)), Wolframlicht, Fluoreszenzlicht) Objektiv : F2,8/6,5 — 19,5 mm-Olympus-Objektiv, 8 Elemente in 6 Gruppen (entspricht einem 32 ~ 96-mm-Objektiv bei einer Kleinbildkamera), mit asphärischer Glaslinse. Belichtungsmessung : Digitale ESP-Messung, Spotmessung...
- Seite 114 : 0,8 m - ∞ (normal) Aufnahmebereich 0,2 m - 0,8 m (Nahaufnahme) Sucher : Realbildsucher (mit Autofocus-Markierung und Markierung für Gegenlichtkorrektur), LCD- Monitor LCD-Monitor : 4,5-cm-TFT-LCD-Farbmonitor Bildpunkte : Ca. 114.000 Pixel LCD-Anzeigen : Datum und Uhrzeit , Bildnummer, Schreibschutzzeichen, Aufnahmemodus, Batteriezustand, Information, Menü, Vorauswahl zum Drucken etc.
- Seite 116 Two Corporate Center Drive, Melville, NY 11747-3157, U.S.A. Tel. 631-844-5000 (Customer support) Tel. 1-888-553-4448 www.olympusamerica.com distec@olympus.com OLYMPUS OPTICAL CO. (EUROPA) GMBH. (Premises/Goods delivery) Wendenstraße 14-16, 20097 Hamburg, Germany. Tel. 040-237730 (Letters) Postfach 10 49 08, 20034 Hamburg, Germany. www.olympus-europa.com OLYMPUS OPTICAL CO. (U.K.) LTD.