Herunterladen Diese Seite drucken
Vorschau ausblenden Andere Handbücher für NT-2:

Werbung

Verfügbare Sprachen
  • DE

Verfügbare Sprachen

  • DEUTSCH, seite 19
NT-2 Portable Oxygen Concentrator
User Manual
* Please read the manual carefully before use.

Werbung

loading

Inhaltszusammenfassung für VARON NT-2

  • Seite 1 NT-2 Portable Oxygen Concentrator User Manual * Please read the manual carefully before use.
  • Seite 2 Preface Dear users, This manual introduces the functional features, operation steps, precautions, and maintenance of the product in detail. To ensure that you can use the product more effectively, please read this manual carefully before use and keep it well for future reference. Users shall not disassemble the product without permission, otherwise you might lose your right to enforce the warranty.
  • Seite 3 Catalogue(English) Índice(Español) 01-14 47-62 Safety Precautions Precauciones de Seguridad Product Introduction Introducción del Producto Technical Parameters Parámetros Técnicos Installation and Use Instalación y Uso 04-10 52-58 Precautions for Use Precauciones de Maintenance Mantenimiento y Cuidado Problems and Solutions Problemas y Soluciones Packing List Lista de Empaque Table de Matières(Fran ç...
  • Seite 4 Safety Precautions Product Introduction ▶ In case of a possible power failure or equipment failure, users who are in 1. Working Principle urgent need of oxygen must be equipped with other standby oxygen supply This product is powered by DC12V power supply or battery. Equipped with a pure devices (such as oxygen cylinders, oxygen bags, etc.).
  • Seite 5 Technical Parameters Installation and Use 1.Model NT-2 1. Check After Unpacking : Before installing and operating the product, please check whether the appearance 2.Power supply:DC12 16.8V AC100 240V 50 60Hz ~ ~ of the product is intact, and whether the numbers of accessories are consistent 3.Power:68W...
  • Seite 6 Installation and Use Installation and Use Recommended Method For Battery Removal 3. Panel Operation Introduction Figure 4 - Operation panel diagram 3.1 Buttons and functions ▶ Power button: To start and stop the machine. Long press the button for 3 seconds, the digital screen and battery indicators will light up;...
  • Seite 7 Installation and Use Installation and Use ▶Level: Oxygen flow rate setting. 5 gears in total and the flow is highest at 5 F0007 ---- Oxygen Concentration Below 50% (yellow light on with an alarm) gear. F0011 ---- High Temperature (red light on with an alarm) Gear F0012 ---- Oxygen Sensor Abnormality (with an alarm) Single pulse oxygen...
  • Seite 8 Installation and Use Installation and Use ▶Use with an AC adapter (optional) 4.3 Start to use Press the “Power” button to start the machine. Select a suitable gear by pressing the gear button, and wear a disposable oxygen inhaler appropriately to start inhaling oxygen.
  • Seite 9 Precautions for Use Maintenance 1.Battery Charging 1. Clean the Shell The outside of the machine should be wiped clean at least once a month. Cut 1.1 Due to transportation control and other reasons, the device's battery only has off the power supply and then wipe it with a slightly damp cotton cloth or enough power for testing or has no power at all when it leaves the factory.
  • Seite 10 Problems and Solutions Packing List Malfunctions Problems Solutions Item Number Note Connect the adapter to charge the Battery is exhausted battery Oxygen Concentrator Standard Accessory Poor connection of the Check power connection power cord The machine cannot be started. The battery was installed Battery Standard Accessory Reinstall the battery correctly...
  • Seite 11 Concentrateur d'Oxygène portable NT-2 Préface Manuel de l'Utilisateur Chers utilisateurs, Ce manuel présente en détail les caractéristiques fonctionnelles, les étapes d’opération, les précautions, l’entretien et la maintenance du produit. Pour assurer que vous pouvez utiliser plus efficacement le produit, veuillez bien lire ce manuel avant utilisation et le garder bien pour l’utilisation future.
  • Seite 12 Précautions de Sécurité Présentation du Produit ▶ Pour prévenir contre les pannes éventuelles de courant et d'équipement, les 1. Principe de fonctionnement utilisateurs qui ont un besoin urgent d'oxygène doivent être équipés d'autres Ce produit adopte l’air comme matières premières et l’alimentation ou la batterie dispositifs d'alimentation en oxygène de secours (tels que des bouteilles DC12V comme source d'alimentation.
  • Seite 13 Paramètres techniques Installation et Utilisation 1.Modèle NT-2 1. Vérifiez après le désemballage : 2.Alimentation:CC 12 à 16,8V Avant d'installer et d'utiliser le produit, veuillez vérifier si l'apparence du produit est intacte et si l’espèce et le nombre d'accessoires correspondent à la liste de CA 100~240V 50/60Hz...
  • Seite 14 Installation et Utilisation Installation et Utilisation Mode de démontage de la batterie recommandé 3. Présentation des fonctions du panneau de commande Figure 4 - Schéma du panneau de commande 3.1 Présentation des fonctions des touches ▶Touche de commutation: Touche de démarrage et d'arrêt. Appuyez longtemps sur la touche pendant 3 secondes, alors l'écran numérique et les voyants de niveau de batterie s'allumeront, et puis appuyez brièvement sur la touche, ensuite l'équipement commencera à...
  • Seite 15 Installation et Utilisation Installation et Utilisation ▶ Échelons: Il y a en tout 5 échelons de débit d'oxygène sortie (le débit de 5 F0007 ---- Concentration d'oxygène inférieure à 50% (voyant jaune allumé avec une alarme); échelon est le plus élevé). F0011 ---- Alarme lors de la haute température (voyant rouge allumé...
  • Seite 16 Installation et Utilisation Installation et Utilisation ▶Utilisation d'un adaptateur CA (accessoire en option) 4.3 Commencer à l’utiliser Appuyez sur la touche de commutation pour démarrer l’équipement, sélectionnez un échelon approprié par l’intermédiaire de la touche d’échelon, portez l’inhalateur d'oxygène jetable et commencez à inhaler de l'oxygène. Cet équipement avec un capteur respiratoire intégré...
  • Seite 17 Précautions d’Utilisation Entretien et Maintenance 1. Charge de la batterie 1. Nettoyage de la coque 1.1 En raison du contrôle du transport et d'autres raisons, la batterie de L'extérieur de la coque doit être essuyé au moins une fois par mois: coupez l'équipement n'a que certaine puissance pour les tests ou n'a aucune puissance d'abord l'alimentation électrique, et puis essuyez-la avec un chiffon en coton ou lors de la sortie de l'usine.
  • Seite 18 Pannes et Solutions Liste de Colisage Raisons possibles Pannes existantes Solutions Désignation Remarques Quantité Connectez l'adaptateur pour La batterie est épuisée. charger la batterie Unité principale Composants standards Cordon d'alimentation mal Vérifier la connexion de connecté L’équipement ne peut l'alimentation pas être démarré.
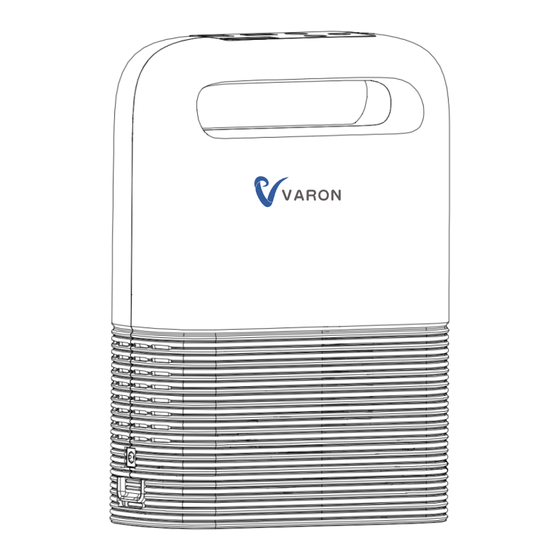
  • Seite 19 NT-2 Tragbarer Sauerstoff-Konzentrator Vorwort Benutzerhandbuch Liebe Nutzer, In diesem Handbuch werden die Funktionsmerkmale, Bedienschritte, Vorsichtsmaßnahmen und die Wartung des Produkts ausführlich beschrieben. Damit Sie das Produkt effizienter nutzen können, lesen Sie bitte diese Anleitung vor dem Gebrauch sorgfältig durch und bewahren Sie sie zum späteren Nachschlagen gut auf.
  • Seite 20 Sicherheitsvorkehrungen Produkt-Einführung ▶Für den Fall eines möglichen Stromausfalls oder eines Geräteausfalls müssen 1. Arbeitsprinzip Benutzer, die dringend Sauerstoff benötigen, mit anderen Ersatzgeräten für die Dieses Produkt wird mit einem DC12V-Netzteil oder einer Batterie betrieben. Sauerstoffversorgung ausgestattet sein (z. B. Sauerstoffflaschen, Sauerstoffbeutel Ausgestattet mit einem ölfreien Kompressor aus reinem Kupfer und einem usw.).
  • Seite 21 Technische Parameter Installation und Verwendung 1.Modell NT-2 1. Kontrolle nach dem Öffnen des Kartons : 2.Stromversorgung:DC 12 16 8V Bevor Sie das Produkt installieren und in Betrieb nehmen, überprüfen Sie bitte, ob ~ das Aussehen des Produkts intakt ist und ob die Anzahl der Zubehörteile mit der AC100~240V;...
  • Seite 22 Installation und Verwendung Installation und Verwendung Empfohlene Methode zum Entfernen des Akkus 3. Einführung in die Bedienung des Panels Abbildung 4 - Schema des Bedienfelds 3.1 Schaltflächen und Funktionen ▶Einschalttaste: Zum Starten und Stoppen des Geräts. Drücken Sie die Taste 3 Sekunden lang, der digitale Bildschirm und die Batterieanzeige leuchten auf;...
  • Seite 23 Installation und Verwendung Installation und Verwendung ▶ Niveau: Einstellung der Sauerstoffflussrate. Insgesamt 5 Gänge, wobei der F0007 ---- Sauerstoffkonzentration unter 50% (gelbes Licht leuchtet mit Alarm) Durchfluss im 5. Gang am höchsten ist. F0011 ---- Hohe Temperatur (rotes Licht leuchtet mit einem Alarm) Getriebe F0012 ---- Sauerstoffsensor Abnormalität (mit Alarm) Einzelpuls-Sauerstoff...
  • Seite 24 Installation und Verwendung Installation und Verwendung ▶Verwendung mit einem AC-Adapter (optional) 4.3 Beginn der Nutzung Drücken Sie die "Power"-Taste, um das Gerät zu starten. Wählen Sie einen geeigneten Gang, indem Sie die Taste für den Gang drücken, und tragen Sie einen Einweg-Sauerstoffinhalator, um mit der Sauerstoffinhalation zu beginnen.
  • Seite 25 Vorsichtsmaßnahmen für die Verwendung Wartung und Pflege 1.Aufladen der Batterie 1. Reinigen Sie die Schale 1.1 Aufgrund von Transportkontrollen und anderen Gründen hat der Akku des Die Außenseite des Geräts sollte mindestens einmal im Monat abgewischt werden. Geräts beim Verlassen des Werks nur genügend oder gar keine Energie für Tests. Trennen Sie das Gerät von der Stromversorgung und wischen Sie es dann mit einem Daher muss das Gerät vor der ersten Verwendung aufgeladen werden;...
  • Seite 26 Probleme und Lösungen Packliste Lösungen Fehlfunktionen Probleme Nein. Artikel Nummer Hinweis Schließen Sie den Adapter zum Batterie ist erschöpft Laden des Akkus an Sauerstoff-Konzentrator Standard-Zubehör Schlechter Anschluss des Stromanschluss prüfen Netzkabels Die Maschine kann nicht gestartet werden. Die Batterie wurde falsch Setzen Sie die Batterie wieder Batterie Standard-Zubehör...
  • Seite 27 Concentrador de Oxígeno Portátil NT-2 Prefacio Manual de Usuario Estimado usuario, Este manual describe en detalle las características funcionales, el procedimiento de operación, las precauciones e instrucciones de mantenimiento del producto. Por favor, lea detenidamente este manual antes de usar el dispositivo, para que pueda usarlo con mayor eficacia.
  • Seite 28 Precauciones de Seguridad Introducción del Producto Ⅰ. Principio del producto ▶Considerando las situaciones inesperadas tales como el corte de energía o la posible falla del dispositivo, recomendamos que aquellos que necesiten oxígeno Este producto funciona con el aire como materia prima y está alimentado por una con urgencia dispongan de otros aparatos de suministro de oxígeno de respaldo, fuente de alimentación o batería de 12 VCC.
  • Seite 29 Parámetros Técnicos Instalación y Uso Ⅰ 1.Modelo NT-2 : . Inspeccione el producto después de desempecar. 2.Fuente de alimentación:Corriente continua: 12 ~ 16,8 VCC Primero verifique que la apariencia del producto está intacta y que los tipos y cantidades de accesorios coincidan con la lista de empaque antes de instalar y Corriente alterna: 100~240 VCA, 50/60HZ...
  • Seite 30 Instalación y Uso Instalación y Uso Ⅲ. Introducción de las funciones del panel de operación Método recomendado para el retiro de la batería Figura 4 -- Diagrama del panel de operación 3.1 Introducción de las funciones de las teclas ▶Tecla de encendido: Tecla de encendido y apagado. Mantenga presionada esta tecla durante 3 segundos, para que la pantalla digital y la luz indicadora de energía estén encendidas.
  • Seite 31 Instalación y Uso Instalación y Uso ▶Nivel de flujo: Están disponibles cinco niveles (el nivel 5 es el máximo) para el F0007 Concentración de oxígeno inferior al 50%, la luz amarilla está encendida y suena una alarma; flujo del oxígeno que sale. F0011---Alarma de alta temperatura, la luz roja está...
  • Seite 32 Instalación y Uso Instalación y Uso ▶Usar el adaptador de CA (opcional) 4.3 Comenzar a usar Presione la tecla de encendido para iniciar el dispositivo. Ajuste el flujo al nivel que más le convenga presionando la tecla de nivel. Use correctamente el inhalador de oxígeno para un solo uso y comience a inhalar el oxígeno.
  • Seite 33 Precauciones de Uso Mantenimiento y Cuidado I. Carga de la batería . Limpieza de la carcasa 1.1Considerando el control de transporte, el dispositivo solo conserva la energía Limpie como mínimo mensualmente el exterior de la carcasa: Primero desconecte la alimentación, luego límpiela con un paño de algodón o una esponja un poco mojada, para la prueba o no tiene ninguna energía cuando se entrega, por lo que es teniendo especial cuidado de no evitar que se filtre líquido en el hueco de la carcasa.
  • Seite 34 Problemas y Soluciones Lista de Empaque Descripción del problema Posible causa Solución Nombre Cantidad Observación La energía de la batería Conecte el adaptador para cargar está agotada la batería Unidad principal Estándar 1 und El cable de alimentación Verifique la conexión de está...
  • Seite 35 Concentratore di Ossigeno Portatile NT-2 Premessa Manuale Utente Gentili Utenti, Questo manuale introduce in dettaglio le caratteristiche funzionali, le fasi operative, le precauzioni e la manutenzione del prodotto. Per assicurarti di utilizzare il prodotto in modo più efficace, leggi attentamente questo manuale prima dell'uso e conservalo correttamente per riferimento futuro;...
  • Seite 36 Sicherheitsvorkehrungen Introduzione al Prodotto ▶ In caso di possibile interruzione di corrente o guasto dell'apparecchiatura, gli 1. Principio di funzionamento utenti che necessitano urgentemente di ossigeno devono essere dotati di altri Questo prodotto utilizza l'aria come materia prima, è alimentato da un alimentatore dispositivi di fornitura di ossigeno di riserva (come bombole di ossigeno, sacche di DC12V o da una batteria.
  • Seite 37 Parametri Tecnici Installazione e Utilizzo 1.Modello NT-2 1. Controllo dopo il disimballaggio : 2.Alimentazione:CC 12 ~ 16,8 V Prima di installare e utilizzare il prodotto, verificare che l'aspetto del prodotto sia intatto e i tipi e le quantità di accessori siano coerenti con la lista imballaggio nel CA100~240V 50/60Hz (solo per accessori opzionali)
  • Seite 38 Installazione e Utilizzo Installazione e Utilizzo Metodo consigliato per la rimozione della batteria 3. Introduzione al funzionamento del pannello Figura 4 - Schema pannello operativo 3.1 Pulsanti e funzioni ▶Pulsante di accensione: Per avviare e arrestare la macchina. Premere a lungo il pulsante per 3 secondi, lo schermo digitale e i indicatori della batteria si illumineranno;...
  • Seite 39 Installazione e Utilizzo Installazione e Utilizzo ▶Livello: impostazione della portata del flusso di ossigeno. 5 marce in totale (il F0007 ---- Concentrazione di ossigeno inferiore al 50% (spia gialla accesa con allarme); flusso è massimo in 5a marcia) F0011 ---- Alta temperatura (spia rossa accesa con allarme); Marcia F0012 ---- Anomalia del sensore di ossigeno (con allarme);...
  • Seite 40 Installazione e Utilizzo Installazione e Utilizzo ▶Utilizzare con un adattatore CA (opzionale) 4.3 Inizia a usare Premere il pulsante "Accensione" per avviare la macchina. Seleziona una marcia adatta premendo il pulsante “Livello” e indossa un inalatore di ossigeno monouso in modo appropriato per iniziare a inalare ossigeno. La modalità...
  • Seite 41 Precauzioni per l'Uso Manutenzione 1. Ricarica della batteria 1. Pulire il guscio 1.1Per motivi di controllo del trasporto, la batteria del dispositivo ha solo energia L'esterno della macchina deve essere pulito almeno una volta al mese. Interrompere l'alimentazione e pulirla con un panno di cotone o una spugna leggermente inumiditi, sufficiente per il test o non ha alcuna alimentazione quando lascia la fabbrica.
  • Seite 42 Problemi e Soluzioni Lista Imballaggio Malfunzionamenti Problemi Soluzioni Articolo Quantità Nota Collegare l'adattatore per caricare La batteria è scarica la batteria Concentratore di ossigeno Accessori standard Cattiva connessione del Controllare il collegamento cavo di alimentazione Impossibile avviare dell'alimentazione La batteria è stata installata Reinstallare correttamente la Accessori standard Batteria...
  • Seite 43 NT-2マイクロ酸素製造機 前 書き 取り扱い説明書 尊敬するユーザー: 本仕様書は本製品の機能特徴、操作手順、注意事項及びメンテナンスなどを詳 しく紹介しています。 本製品の有効な使用を保証するために、ご使用前に本説明書をよくお読みくだ さい。 お読みになりましたら後用に大切に保管してください。 許可を得ず、ユーザーが勝手に製品を分解する場合、保証資格を失います。 弊社は製品および技術更新の権利を保持しておりますのでご注意ください。仕 様書の中には本製品でご覧になっている者と異なる例がありますので、受け 取った実物を基準にしてください。 *ご使用前には必ず説明書を詳しくお読みください。 にほんご にほんご...
  • Seite 44 安全注意事項 製品紹介 ▶ 停電または設備故障の可能性を防止するために、酸素の使用を至急必要とす 一、 製品の原理 る者は、他の予備酸素供給装置(例えば、酸素ボンベ、酸素袋など)を配置し 本製品は空気を原材料にして、DC12V電源或いは電池をパワー源にして、良質 なければなりません。本製品はライフサポートや延命用としては使用できませ なフランスの原装分子篩と小型無油空気圧縮機を採用して、常温下で前進の変 ん!新生児や乳幼児には使用できません! 圧吸着分離法(法)を通じて、空気中から高純度酸素を抽出します。この方法 は純粋な物理的な方法で、酸素の出量が安定していて、安全性と信頼性があり ▶ 高地などの低酸素環境での酸素補給にのみ使用され、代替医療機器にはなり ます。 ません。 ▶ 酸素は燃焼を促進することができるので、設備起動時、喫煙を厳禁します! 二、 製品適用範囲 ▶ 高温、火の気等の場合は設備の使用をご遠慮ください! 保健、美容用酸素補給用のみで、医療用ではありません。 ▶ 事故防止のため、子供だけで装置を操作させないようにお願いします。酸素 を吸う時、ホースを首に巻き付けてはいけません。体の不自由な高齢者が利用 三、 構造的特徴 する場合は、必ず保護者の付き添いが必要です。 ▶ 全プラスチックケースで、安全で信頼性があります。 ▶ 本製品が作動する時は、空気中から直接酸素を分離して呼吸として使用しま ▶ 取り外し可能なバッテリーパック付きで簡単なバッテリー交換が可能です。 すので、油煙、有毒有害なガスの環境で使用しないでください。 ▶ 小型軽量で持ち歩きも可能です。 ▶ 本製品は、メーカーの許可を得ていない他の機器と接続できません。 ▶...
  • Seite 45 技術的パラメータ 取り付けと使用 1、型番:NT-2 一、開梱後検査 ユーザーは製品を取り付け、操作する前に、まず製品の外観が良好かどうか、 2、電源:直流 DC 12~16.8V 付属品の品種、数量が使用マニュアルの箱詰めリストと一致しているかどうか 交流 AC 100~(選備品のみ適用) を検査してください。もし欠損がある場合は、直ちに販売者またはメーカーに 3、出力:68 W 連絡してください。 4、電池容量:92 WH 6.4 AH 二、見取り図 5、流量ギア:1~5段(段の流量がもっとも多い档流量最高) 6、酸素濃度:93%±3 7、機械騒音:≤58dB(A) (最高ギア) 8、外径サイズ:長さ18.2*幅9.1*高さ25.7 (cm) 9、正味重量:2.2 kg 10、電気分類:II類 11、酸素供給方式:パルス式酸素供給 12、通常の動作環境: 周囲温度範囲:10C~35℃; 草体湿度範囲:30%~75%; 大気圧範囲:860hPa~1060hPa 図1--右側レビュー 図2--左側レビュー 注;貯蔵温度が5℃以下の場合は、使用前に設備を通常の動作温度環境の中に 4時間以上放置します。 13、貯蔵と輸送環境:...
  • Seite 46 取り付けと使用 取り付けと使用 お勧めするバッテリーの取り外す方法 三、操作パネルの機能紹介 図4--操作パネル図 3.1 キーの機能紹介 ▶ パワーボタン:スタートストップボタン。ボタンを3秒長押しして、デジタ ルのスクリーンと電気の電灯が明るくなった時、パワーボタンを短く押したら、 パワーオンで起動します。動作中にボタンを短く押したら機械は停止して、こ の時にボタンを3秒長押ししたら、デジタルのスクリーンと電量灯は消灯しま す。 ▶ レベルボタン:酸素の流量を調整します; ▶ タイミングボタン:1回の使用時間を設定します。~分間調整可能; 3.2 表示内容紹介 ▶積算時間:デバイスがどのくらい機能しているかを示しています(単位:) ▶ タイミング:後どのくらいの時間でデバイスが自動的に停止するかを示しま す。(単位:) 注:積算時間とタイミングは同じディスプレイを共有し、デフォルトで積算時 間を表示します; 図3--電池交換と使用の概略図 「タイミングボタン」を押す時、タイミングの時間に切り替えます。新しい指 示がなければ、秒後に自動的に積算時間表示に切り替わります。 注意:ユーザーは無断で電池を取り外してはいけません。必要があれば、 ディーラーや専門的な人員に送還して処理します。 にほんご にほんご...
  • Seite 47 取り付けと使用 取り付けと使用 ▶ レベル:出力する酸素の流量ギア、全部で5段があります(段目の流量が最 F0007--- 酸素濃度が50%以下の場合は黄ランプが点灯し、同時に警報音があ ります; 大です) F0011--- 高温警報、赤ランプが点灯する同時に警報音が鳴ります; レベル設定 1回のパルス酸素 F0012— 酸素センサーの異常を知らせるアラーム音が鳴ります; 出力流量(ML) 呼吸信号ランプ:装置が作動中に使用者の呼吸信号を検出する時、このラン 許容誤差±20% プが点灯し、同時に装置は自動的にパルスで酸素を供給します。 四、使用指導 ▶電力量表示:現在の電池量を示し、電圧値を用いて計算し、実際の使用状 況を考慮しますが、この一項はあくまで参考にのみ供します。 4.1 電源接続 操作パネルには4つのバッテリーランプがあります。 使用環境に合わせて電源を選択して接続します。 ▶使用電池 4つのランプが常に点灯します-------バッテリー残量≧90%; バッテリーがデフォルトで装置の出荷時に取り付けられていますので、バッ テリー残量が十分であれば電源を入れて起動できます。 ▶車に車載電源コードを使います 3つのランプが常に点灯します-------90%>バッテリー残量≧75%; 2つのランプが常に点灯します-------75%>バッテリー残量≧50%; 1つのランプが常に点灯します-------50%>バッテリー残量≧25%; 1つのライトが光ります-------バッテリー残量<25%。 図5--車載用電源コードの概略図 ▶指示灯と警報灯: 車載電源コードの入力端を自車シガーライターに接続し、次に車載電源コー 警報灯(赤ランプ/黄ランプ): ドの出力端を自装置の充電口に接続します。この時、車上の電源線は赤ラン 設備動作中に異常があることを検出する時、警報灯が点灯し、同時にデジタ プが点灯して、電源が正常に接続されています。...
  • Seite 48 取り付けと使用 取り付けと使用 ▶交流アダプターを使用します(選備品) 4.3 使用開始 パワーボタンを押して機械を起動し、レベルボタンを通じて自分に合う段を 選択し、使い捨て酸素吸入器を装着すれば、酸素吸入は始めます。 この装置はパルス式酸素供給装置で、呼吸センターが内臓されています。 ユーザーが息を吸うと自動的に酸素が放出され「呼吸信号」が点灯します。 ユーザーが息を吸わないと機械は酸素を放出しません。ユーザーが10秒を超 えても息を吸わないとき、機械はアクティブ酸素供給モードに切り替わりま す。約3秒に1回の頻度で酸素を放出し、機械がユーザーの呼吸信号を再検出 するまで、元の酸素供給モードに戻ります。 4.4 電池の充電方法 ① 図7に示すように、交流アダプタを接続してバッテリを充電します; 図6--交流アダプターの使い方の概略図 交流アダプタと交流電源ケーブルをしっかりと接続し、交流電源ケーブルの ② 図3のように電池を取り出し、図7のように交流アダプタを接続して充電し 入力端子を室内のプラグに接続します。最後に交流アダプタの出力端子を本 ます; 装置の充電口に接続します。この時、交流アダプタの電源表示灯は赤ランプ が点灯します。電源が正常に接続されていてバッテリが充電されている状態 になります。交流アダプタの電源表示灯が青になった場合、電源は正常に接 続されバッテリーがフル充電されています。 入力端要求:交流電圧は100~,周波数50/60Hz。 4.2 使い捨て酸素吸入器に接続します(選備品) 使い捨て酸素吸入器のホーン端を装置の酸素排出口にしっかりと接続し、反 対側の端は下図を参照して装着します。 左の図のように、使い捨て酸素吸入器を装着し、通気孔を適 図7--電池単体の充電図 切な位置に調節し、装着した後、固定リングを上に押して固 定します。 4.5 使用中に酸素の供給を止める場合は、「パワーボタン」を3秒長押しします。 使用終了後、設備の酸素供給口から使い捨て酸素吸入器のホーンを抜いてか 装置からの関連警告や、正常な使用への支障を起こさないように、使い捨て ら、設備の充電口の電源コードポートを抜いて、最後に電源プラグを抜いて...
  • Seite 49 使用注意事項 メンテナンスと保養 一、電池充電 一、外殻掃除 月に1回以上はケースの外を拭きます:まず電源を切り、濡れたコットンやスポン 1 . 1 輸送規制のため、装置のバッテリーはテスト用の電力だけを残して出荷さ ジで拭きます。特にケースの隙間に液体が入り込まないように注意してください。 れるか、全く電力がないか、そのため、初めて使用する前に装置を充電する 必要があります; 掃除後、風通しの良い場所に置き、時間放置し、表面が完全に乾いてから使用しま す。 1 . 2 バッテリーが自動的に充電されるのは交流アダプター使用時のみです;車 上で車載電源コードを使用している場合は、電気を供給するだけで、バッテ リーを充電することができません; 二、使い捨て酸素吸入器の洗浄 1 . 3 この装置は今のところ外付け電池パックの使用には対応していません; 酸素吸入器は週に1回、鼻吸入器は使用後に必ず洗浄します。 1 . 4 交流アダプタと車載電源ケーブルは共通して同じ電源差込み口を使うため、 白酢に5分ほど浸した後、水で洗い流すか、医療用アルコールで拭きます。酸素吸 一度にどちらか一方しか使用できません; 入器は2ヶ月ごとに交換することが推奨されています。(注:酸素吸入器の管は常 に乾燥に保ちます) 1 . 5 バッテリーの電力が 25 %以下になると電力量表示灯が点滅します電源アダ プタまたは充電器にアクセスしてデバイスに充電してください;...
  • Seite 50 トラブルとトラブルシューティング 箱詰めリスト 故障現象 可能なる原因 解決方法 名称 数量 コメント アダプタに接続してバッテリーを バッテリーが切れた 充電 本体 標準構成 1台 電源コードの接続不良 電源接続を検査 電源オンできない 電池が正しく取り付けさ バッテリー 1個 標準構成 正しく電池を取り付ける れていない 電源オンできない 設備供給業者に連絡して処理する リュック 1個 標準構成 酸素吸入器の管が結び付 新しい酸素吸入器を交換 いたり閉塞したりする 1本 標準構成 車載電源コード 無酸素出力 酸素吸入器のホーンと装置 説明書 1冊 標準構成 酸素吸入器を正しく取り付け直す の接続が悪く空気が漏れる...