celexon Motor Expert Bedienungsanleitung
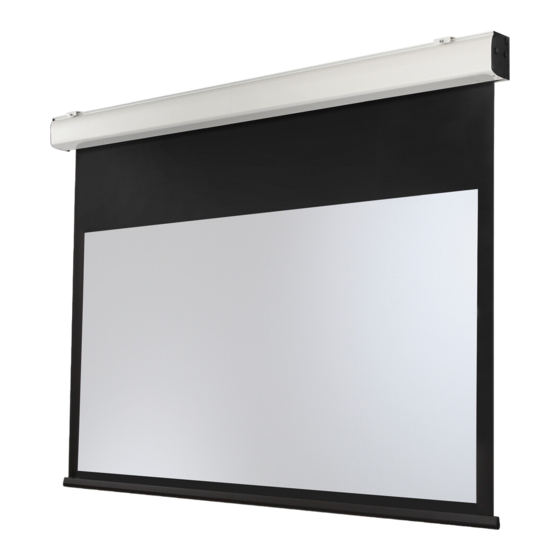
Deckeneinbauleinwand
Inhaltsverzeichnis
Verfügbare Sprachen
Verfügbare Sprachen
Bedienungsanleitung
celexon Deckeneinbauleinwand
Motor Expert | Expert XL
Vielen Dank für den Kauf dieses Produkts.
Für eine optimale Leistung und Sicherheit lesen Sie diese Anweisungen bitte sorgfältig
durch, bevor Sie dieses Produkt anschließen oder betreiben. Bitte bewahren Sie diese
Anleitung für eine spätere Verwendung auf.
Version: 32422_051
Motor Expert
Motor Expert XL
Inhaltsverzeichnis

Verwandte Anleitungen für celexon Motor Expert


Inhaltszusammenfassung für celexon Motor Expert
- Seite 1 Bedienungsanleitung celexon Deckeneinbauleinwand Motor Expert | Expert XL Motor Expert Motor Expert XL Vielen Dank für den Kauf dieses Produkts. Für eine optimale Leistung und Sicherheit lesen Sie diese Anweisungen bitte sorgfältig durch, bevor Sie dieses Produkt anschließen oder betreiben. Bitte bewahren Sie diese Anleitung für eine spätere Verwendung auf.
-
Seite 2: Warnhinweise
Beschädigungen am Produkt zu finden sind. Sollten Sie äußerliche Beschädigungen an dem Gerät oder unerwartete oder unübliche Funktionsweisen feststellen, darf das Produkt nicht weiter genutzt werden. Kontaktieren Sie umgehend den Händler, bei dem Sie das Produkt gekauft haben oder celexon direkt (Web: www.celexon.de, Mail: info@celexon.de) für weitere Informationen. •... - Seite 3 (Web: www.celexon.de, Mail: info@celexon.de). • Technische Änderungen und Irrtümer vorbehalten. Der Hersteller übernimmt keine Verantwortung für Sachschäden oder Personenschäden, wenn die Leinwand außerhalb der empfohlenen Spezifikationen verwendet wird, oder bei unsachgemäßer Installation. Verwenden Sie diese Leinwand nicht in der Nähe von Heizungen oder Klimaanlagen.
-
Seite 4: Haftungsausschluss
HAFTUNGSAUSSCHLUSS Die Angaben in diesem Dokument können ohne vorherige Ankündigung durch den Hersteller geändert werden. Änderungen werden jeweils in den folgenden Versionen dieses Handbuchs ergänzt. Irrtümer ausgeschlossen. TECHNISCHE DATEN Spannung: 220 V~240 V, 50 Hz Verbrauch: 156 W (MAX) 0,4 W (Standby) -
Seite 5: Lieferumfang Deckeneinbauleinwand Motor Expert
LIEFERUMFANG DECKENEINBAULEINWAND MOTOR EXPERT Wenn Sie die Verpackung öffnen, überprüfen Sie bitte, ob ALLE unten aufgeführten Komponenten enthalten sind. Falls ein oder mehrere Komponenten fehlen, wenden Sie sich bitte an den Händler, bei welchem Sie das Produkt gekauft haben. 2x A... -
Seite 6: Abmessungen Deckeneinbauleinwand Motor Expert
ABMESSUNGEN DECKENEINBAULEINWAND MOTOR EXPERT Vorderansicht: Seitenansicht der Decken- Aufsicht der Deckenmontageplatte: montageplatte: Alle Maße sind in mm angegeben. - Seite 7 ABMESSUNGEN DECKENEINBAULEINWAND MOTOR EXPERT Ausschnittsmaße und Befestigungspunkte in der (Zwischen-) decke Abmessungen der Befestigungspunkte der Deckenmontageplatten Modell A (mm) B (mm) Motor Expert Breite Projektionsfläche + 215 (Standard inkl. 50 mm schwarzen Rändern) Motor Expert Breite Projektionsfläche + 115 (ohne schwarze Ränder) Motor Expert Tensioned Breite Projektionsfläche + 405...
-
Seite 8: Lieferumfang Deckeneinbauleinwand Motor Expert Xl
LIEFERUMFANG DECKENEINBAULEINWAND MOTOR EXPERT XL Wenn Sie die Verpackung öffnen, überprüfen Sie bitte, ob ALLE unten aufgeführten Komponenten enthalten sind. Falls ein oder mehrere Komponenten fehlen, wenden Sie sich bitte an den Händler, bei welchem Sie das Produkt gekauft haben. -
Seite 9: Abmessungen Deckeneinbauleinwand Motor Expert Xl
ABMESSUNGEN DECKENEINBAULEINWAND MOTOR EXPERT XL Vorderansicht: Seitenansicht: Aufsicht der Deckenmontageplatte:... - Seite 10 ABMESSUNGEN DECKENEINBAULEINWAND MOTOR EXPERT XL Befestigungspunkte in der (Zwischen-) decke Abmessungen der Befestigungspunkte der Deckenmontageplatten Modell A (mm) B (mm) Motor Expert XL Breite Projektionsfläche + 230 (Standard inkl. 50 mm schwarzen Rändern) Motor Expert XL Breite Projektionsfläche + 130 (ohne schwarze Ränder)
- Seite 11 MONTAGE EXPERT & EXPERT XL Stellen Sie sicher, dass die Teile B und C rechtwinklig zu Teil A montiert werden. Achten Sie darauf, dass die Schraubverbindung zwischen N und L so ausgeführt wird, dass die Revisionsklappe D beweglich bleibt.
-
Seite 12: Montage An Der Decke Expert & Expert Xl
MONTAGE AN DER DECKE EXPERT & EXPERT XL Der Installateur muss für das Tragwerk geeignete Dübel (nicht im Lieferumfang enthalten) für die Befestigung der Deckenmontage- platten an der oberen Decke verwenden. Die Gewindestangen müssen bauseitig auf die gewünschte Länge eingekürzt werden. Beachten Sie dafür die auf Seite angegebenen Min. - Seite 13 Um die Gewindestange l an der Deckenmontageplatte G zu befestigen, drehen Sie eine Mutter H mindestens 20 mm auf den oberen Teil der Gewindestange. Schrauben Sie die Gewindestangen in die Deckenmontageplatten bis zum An- schlag ein (mindestens 10 mm!). Ziehen Sie anschließend die Mutter fest. K + J Heben Sie den vormontierten Einbaurah- men an und führen die Gewindestangen in...
-
Seite 14: Montage An Dem Einbaurahmen Expert & Expert Xl
MONTAGE AN DEM EINBAURAHMEN EXPERT & EXPERT XL Bevor Sie mit der Montage der Leinwand fortfahren, befesti- gen Sie die Montageplatten E und F, wie in der Zeichnung un- ten dargestellt. Es ist WICHTIG, die rechte Platte auf der rechten Seite zu mon- tieren. - Seite 15 Klappen Sie nun die beiden Revisionsklap- pen D in die vertikale Position auf.
- Seite 16 Heben Sie die Leinwand in den Einbaurah- Heben Sie die Leinwand in den Einbaurah- men und führen Sie die Gewindestangen men und führen Sie die Gewindestangen durch die Löcher der Montageplatten durch die Löcher der Montageplatten E E und F F . .
- Seite 17 Bestigen Sie die Monatgeplatten an den Ge- windestangen mit den Bundmuttern J. Stellen Sie vor dem Festziehen der Muttern sicher, dass das Gehäuse mittig mit in dem Deckeneinbaurahmen platziert ist. Ziehen Sie nun die Bundmut- tern fest.
- Seite 18 Nun kann der elektrische Anschluss der Leinwand durch eine Fachkraft erfolgen und die Revisionsklappen geschlossen werden. Damit ist die Installation abgeschlossen.
-
Seite 19: Information Zur Eu-Konformität
Europe GmbH Adresse: Gutenbergstraße 2, 48282 Emsdetten, DE Produktname: celexon Deckeneinbauleinwand Motor Expert | Expert XL Produkte, die mit dem CE-Zeichen gekennzeichnet sind, entsprechen allen An- forderungen der entsprechenden EU-Direktiven. Die EU-Konformitätserklärung kann unter folgender Adresse heruntergeladen werden: www.celexon.de/zertifikate Das Symbol weist auf die getrennte Rücknahme elektrischer und...