Herunterladen Inhalt Inhalt Diese Seite drucken
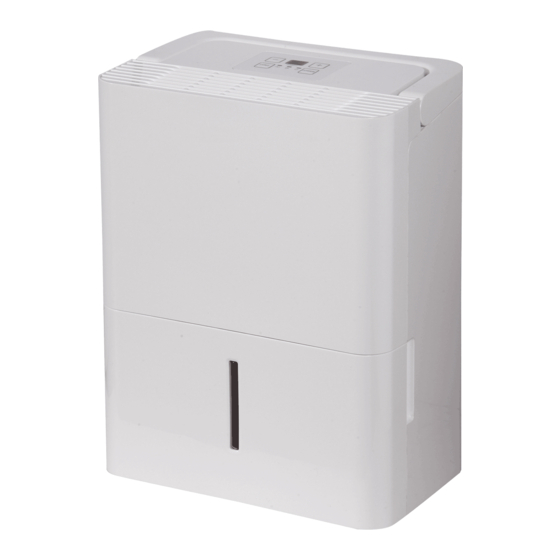
Comfee MDDN-12DEN7 Bedienungsanleitung
Vorschau ausblenden Andere Handbücher für MDDN-12DEN7:
Inhaltsverzeichnis

Werbung

Verfügbare Sprachen
  • DE

Verfügbare Sprachen

  • DEUTSCH, seite 19
Deumidificatore
Manuale utente e di installazione
MDDN-12DEN7
Nota Importante
Leggere con attenzione questo manuale
prima di utilizzare ed installare il prodotto.
Conservarlo per la eventuale successiva
consultazione.

Werbung

Inhaltsverzeichnis
loading

Inhaltszusammenfassung für Comfee MDDN-12DEN7

  • Seite 1 Deumidificatore Manuale utente e di installazione MDDN-12DEN7 Nota Importante Leggere con attenzione questo manuale prima di utilizzare ed installare il prodotto. Conservarlo per la eventuale successiva consultazione.
  • Seite 2 SOMMARIO Smaltimento del prodotto a fine vita Pag. 3 Precauzioni di sicurezza Pag. 4 Avvertenze Pag. 4 Precauzioni Pag. 5 Informazioni sulle componenti elettriche Pag. 5 Pannello di controllo Pag. 11 Pannello di controllo Pag. 11 Altre funzionalità Pag. 12 Identificazione delle parti Pag.
  • Seite 3 SMALTIMENTO DEL PRODOTTO A FINE VITA • Questo prodotto contiene un fluido refrigerante infiammabile, da cui dipende il suo funzionamento, ed altre sostanze pericolose. • Per informazioni sul tipo di refrigerante, sulla quantità contenuta e sulle emissioni equivalenti di C0 , fare riferimento all’etichetta del prodotto.
  • Seite 4: Precauzioni Di Sicurezza

    Precauzioni di sicurezza Contenuto del manuale Questo manuale contiene utili consigli su come utilizzare e mantenere il vostro deumidificatore d'aria. Alcuni piccoli accorgimenti prestati al prodotto, possono consentire un grande risparmio di tempo ed energia oltre che prolungare la vita operativa dell'apparecchio. Nel manuale troverete anche una serie di risposte alle più...
  • Seite 5 Precauzioni di sicurezza Contenuto del manuale Per evitare danni a cose e persone, seguire le istruzioni indicate in seguito. Il mancato rispetto delle istruzioni segnalate può essere causa di danni, malfunzionamenti o incidenti, anche gravi. I pericoli rappresentati sono descritti dalle seguenti indicazioni. Questo simbolo indica la possibilità...
  • Seite 6 Precauzioni di sicurezza PERICOLO Posizionare l’unità su una parte piana e robusta del Non utilizzare l’unità in spazi ridotti e con le aperture di Non posizionare dove l’unità può essere esposta a spruzzi pavimento. ventilazione ostruite. d’acqua. In caso di rovesciamento, può causare la fuoriuscita di acqua L’acqua può...
  • Seite 7 Precauzioni di sicurezza Informazioni sulle componenti elettriche • La targhetta del costruttore è situata sul pannello posteriore dell’unità e contiene dati elettrici e altri dati tecnici specifici dell’apparecchio. • Verificare che l’unità sia collegata a terra correttamente. Il cavo di alimentazione è dotato di spina con conduttore di terra per evitare scosse elettriche.
  • Seite 8 Precauzioni di sicurezza Informazioni sui refrigeranti infiammabili Attenzione: Rischio di incendio Materiali Infiammabili • Questo prodotto contiene refrigerante R290 infiammabile ed esplosivo, da cui dipende il suo funzionamento. Seguire le avvertenze elencate in seguito per consentire l’impiego del prodotto in condizioni di sicurezza.
  • Seite 9 Precauzioni di sicurezza Informazioni sui refrigeranti infiammabili • Si avvisa che il prodotto può essere immagazzinato in un’ambiente di superficie e volumetria analogo a quello per cui è previsto il funzionamento. • La riparazione e la manutenzione del prodotto può essere eseguita solamente da personale qualificato che abbia ricevuto un’apposita formazione sul prodotto.
  • Seite 10 Precauzioni di sicurezza Nota sui refrigeranti • Questo prodotto è classificato come unità ermeticamente sigillata contenente refrigeranti infiammabili ed esplosivi da cui dipende il suo funzionamento. • Per il tipo di refrigerante contenuto e la relativa quantità, fare riferimento all’etichetta del prodotto.
  • Seite 11: Pannello Di Controllo

    Pannello di controllo Il pannello di controllo effettivamente presente sul prodotto potrebbe differire da quello raffigurato in relazione a specifiche esigenze connesse con il mercato di destinazione. 1 Cont. Il LED si attiva per segnalare la modalità di funzionamento continuo è attivata 2 Segnalazione contenitore liquido pieno (FULL) Il LED si attiva per segnalare che il liquido ha raggiunto il livello massimo nel contenitore e che questo deve essere svuotato.
  • Seite 12 Pannello di controllo Altre funzionalità Indicatore sbrinamento Nel caso in cui si formi del ghiaccio sullo scambiatore di calore deputato al raffreddamento, il funzionamento del circuito viene interrotto e compare sul display il codice di protezione P1. Il funzionamento riprende automaticamente quando il ghiaccio è stato eliminato.
  • Seite 13: Identificazione Delle Parti

    Identificazione delle parti Utilizzo dell’unità Vista frontale Pannello di controllo Espulsione aria Contenitore liquido condensa Indicatore livello Ruote (Opzionali) Vista posteriore Contenitore liquido condensa Griglia aspirazione aria Filtro aria Presa per scarico continuo Fascetta avvolgicavo Cavo elettrico Spina...
  • Seite 14 Identificazione delle parti Utilizzo dell’unità Posizionamento del prodotto L’apparecchio, per poter operare correttamente deve essere posizionato in modo da consentire sufficiente circolazione di aria al suo interno. Oltre 40 cm • Non utilizzare il prodotto all’aperto • Il prodotto è progettato per utilizzo domestico e non deve essere utilizzato per applicazioni commerciali o industriali.
  • Seite 15 Identificazione delle parti Rimozione del liquido di condensa 1 Estrarre il contenitore acqua Svuotamento del contenitore Quando il contenitore è pieno, l’unità interrompe automaticamente il funzionamento e l’indicatore luminoso che segnala il contenitore dell’acqua pieno lampeggia. Estrarre lentamente il contenitore. Afferrare saldamente la maniglia destra e sinistra ed estrarre con cautela tenendo in posizione eretta, in modo che l’acqua non fuoriesca.
  • Seite 16: Cura E Manutenzione

    Cura e manutenzione Manutenzione e pulizia del prodotto Spegnere il deumidificatore ed estrarre la spina dalla presa prima di procedere con la pulizia. 1. Pulizia di griglia e corpo Utilizzare acqua e un detergente neutro. Non utilizzare candeggianti o abrasivi. Non spruzzare l’acqua direttamente sull’unità...
  • Seite 17: Guida Alla Risoluzione Dei Problemi

    Guida alla risoluzione dei problemi Prima di contattare l’assistenza, fare riferimento alla seguente tabella Verificare Problema •Verificare che la spina del deumidificatore sia correttamente inserita nella presa. •Controllare la scatola interna fusibili/interruttori. L’unità non si avvia •Il deumidificare ha raggiunto il livello impostato o il contenitore dell’acqua è pieno. •Il contenitore dell’acqua non è...
  • Seite 18 Midea Italia S.r.l. a socio unico Viale Luigi Bodio 29/37 20158 Milano -Italia- Tel. 02 96193015 www.comfee.eu...
  • Seite 19 Raumluftentfeuchter Benutzerhandbuch Bevor Sie dieses Produkt in Betrieb nehmen, lesen Sie bitte die Gebrauchsanweisung sorgfältig durch und bewahren Sie diese für den späteren Gebrauch auf.
  • Seite 20: Informationen Zur Entsorgung

    INFORMATIONEN ZUR ENTSORGUNG Beim Einsatz dieses Luftentfeuchters in den europäischen Lä ndern sind die folgenden Hinweise zu beachten: ENTSORGUNG: Entsorgen Sie dieses Produkt nicht mit dem normalen Hausmüll. Eine getrennte Sammlung dieser Abfälle zur Sonderbehandlung ist erforderlich. Es ist verboten, dieses Gerät über den Hausmüll zu entsorgen. Für die Entsorgung gibt es mehrere Möglichkeiten: A) Die Gemeinde hat Sammelsysteme eingerichtet, in denen Elektroschrott kostenlos entsorgt werden kann.
  • Seite 21: Inhaltsverzeichnis

    INHALTSVERZEICHNIS SICHERHEITSMASSNAHMEN Warnung ............................2 Vorsicht ............................2 Elektrische Informationen .......................4 WARNUNGEN (nur für die Verwendung des R290/R32 Kühlmittels) ..........5 BEDIENELEMENTE DES ENTFEUCHTERS Bedienelemente..........................11 Andere Funktionen..........................13 IDENTIFIZIERUNGEN DER TEILE Identifizierungen der Teile ..............................14 Positionierung des Gerätes ............................15 BEDIENUNG DES GERÄTES Während der Verwendung des Gerätes ...................15 Entfernung des gesammelten Wassers ....................16 REINIGUNG UND WARTUNG Reinigung und Wartung des Entfeuchters ..................17...
  • Seite 31 BEDIENELEMENTE DES ENTFEUCHTERS Kontrolleuchten  Dauerlicht im Entfeuchtungsmodus;  Behälter voll-Leuchte; STROM-Leuchte; Bedienpads  Strom-Pad Drücken Sie diese Taste, um den Luftentfeuchter ein- und auszuschalten. Sie leuchtet bei eingeschaltetem Gerät und wird bei ausgeschaltetem Gerät dunkel. Bei einer Fehlfunktion des Feuchte-/Temperatursensors blinkt die Betriebsanzeige 5 mal pro Sekunde.
  • Seite 32 AS- Fehlfunktion des Raumtemperatursensors; Schutz-Codes: P2- Behälter ist voll oder Behälter ist nicht in der richtigen Position -- entleeren Sie den Behälter und stellen Sie ihn in der richtigen Position wieder ein. Hinweis: Wenn eine der oben genannten Fehlfunktionen auftritt, schalten Sie das Gerät aus und überprüfen Sie es auf eventuelle Störungen.
  • Seite 33: Bedienelemente Des Entfeuchters Bedienelemente

    BEDIENELEMENTE DES ENTFEUCHTERS Andere Eigenschaften „Behälter voll” Anzeige Leuchtet, wenn der Behälter voll ist, oder wenn der Behälter entfernt oder nicht in der richtigen Position eingesetzt wurde. Automatische Abschaltung Der Luftentfeuchter schaltet sich automatisch ab, wenn der Behälter voll ist, oder wenn der Behälter entfernt oder nicht in der richtigen Position eingesetzt wurde.
  • Seite 34: Identifizierungen Der Teile

    IDENTIFIZIERUNGEN DER TEILE Identifizierungen der Teile Front Bedienfeld  Ausblasgitter  Wasserbehälter  Wasserstandsfenster  Nachlauf  Abb. 2 Rückseite Griff  Luftansauggitter  Luftfilter (hinter dem Grill)  Ablaufschlauch Auslauf  Netzkabel Schnalle (Wird nur zur Aufbewahrung  des Geräts verwendet.) Netzkabel und Stecker Abb.
  • Seite 35: Positionierung Des Gerätes

    BEDIENUNG DES GERÄTES Positionierung des Gerätes Ein Entfeuchter, der in einem Keller betrieben wird, hat wenig oder keinen Einfluss auf die Trocknung eines angrenzenden geschlossenen Lagerbereichs, wie z.B. eines Schranks, es sei denn, es gibt eine ausreichende Luftzirkulation innerhalb und außerhalb des Bereichs. Nicht im Freien verwenden.
  • Seite 36: Entfernung Des Gesammelten Wassers

    BEDIENUNG DES GERÄTES Entfernung des gesammelten Wassers gibt zwei Möglichkeiten, gesammelte Wasser zu entfernen. Verwendung des Behälters Wenn der Behälter voll ist, leuchtet die  Voll-Anzeige, und die Digitalanzeige zeigt P2 Ziehen Sie den Behälter langsam heraus.  Fassen Sie den linken und rechten Griff fest Abb.5 und ziehen Sie ihn vorsichtig gerade heraus, 2.
  • Seite 37: Reinigung Und Wartung

    REINIGUNG UND WARTUNG Entfernung des gesammelten Wassers Kontinuierliche Entleerung  Das Wasser kann automatisch in einen Bodenablauf entleert werden, indem ein Wasserschlauch (nicht im Lieferumfang enthalten) an dem Gerät befestigt wird. Deckel abschneiden Befestigen Sie den Schlauch am Ablaufschlauch Abb. 7 ...
  • Seite 38 REINIGUNG UND WARTUNG 3. Den Luftfilter reinigen Der Luftfilter hinter dem Frontgitter sollte mindestens alle zwei Wochen überprüft und gereinigt werden. oder öfter, wenn nötig. HINWEIS: DEN FILTER NICHT ABSPÜLEN ODER IN DER SPÜLMASCHINE WASCHEN. Entfernen: Greifen Sie die Lasche am Filter, ziehen Sie ihn nach oben, ehe Sie ihn herausziehen, wie in Abb.8 ...
  • Seite 39: Problembehebung

    PROBLEMBEHEBUNG Bevor Sie den Service in Anspruch nehmen, lesen Sie bitte zuerst die folgende Tabelle. Problem Überprüfen Stellen Sie sicher, dass der Stecker des Entfeuchters  vollständig in die Steckdose gesteckt ist. Überprüfen Sie den Sicherungskasten des Hauses.  Gerät startet nicht Der Entfeuchter hat sein voreingestelltes Niveau erreicht oder ...
  • Seite 40 Das Design und die Spezifikationen können ohne vorherige Ankündigung geändert werden, um das Produkt zu verbessern. Wenden Sie sich für weitere Informationen an das Vertriebsbüro oder den Hersteller. Alle Aktualisierungen des Handbuchs werden auf die Service-Website hochgeladen, bitte überprüfen Sie die aktuelle Version.
  • Seite 41 DESSÉCHEUSE MODE D’EMPLOI Avant d’utiliser ce produit, veuillez lire attentivement les instructions et conserver ce manuel pour une utilisation ultérieure.
  • Seite 42: Remarque Sociable

    REMARQUE SOCIABLE Lors de l'utilisation de cette dessécheuse dans les pays européens, les informations suivantes doivent être suivies: TRAITEMENT DES DÉCHETS : Ne jetez pas ce produit avec les déchets ménagers non triés. La collecte de ces déchets séparément pour un traitement spécial est nécessaire. Il est interdit de jeter cet appareil avec les ordures ménagères.
  • Seite 43 CONTENUS PRÉCAUTIONS DE SÉCURITÉ Avertissement ............................2 Attention ..............................2 Informations électriques .........................4 AVERTISSEMENTS (pour l’utilisation du réfrigérant R2/R32 uniquement)..........5 TOUCHE DE COMMANDE SUR LA DESSECHEUSE Touche de commande ........................... 11 Autres caractéristiques..........................12 IDENTIFICATION DES PIÈCES Identification des pièces ........................12 Positionnement de l'unité ........................13 OPERATION DE L'UNITE Lors de l'utilisation de l'unité........................13 Enlever l'eau collectée...........................14...
  • Seite 44: Précautions De Sécurité

    PRÉCAUTIONS DE SÉCURITÉ Pour éviter des blessures à l'utilisateur ou à d'autres personnes et des dommages matériels, les instructions suivantes doivent être suivies. Une opération incorrecte due au non-respect des instructions peut causer des dangers ou des dommages Le sérieux est classé par les indications suivantes. Ce symbole indique la possibilité...
  • Seite 45 PRÉCAUTIONS DE SÉCURITÉ ATTENTION Ne couvrez pas les ouvertures Des précautions doivent être prises lors Ne le-utiliser pas dans des d’admission ou d’échappement avec de l'emploi de l'unité dans un local avec zones où des produits des chiffons ou des serviettes. les personnes suivantes: chimiques sont manipulés.
  • Seite 46: Informations Électriques

    PRÉCAUTIONS DE SÉCURITÉ ● Contactez l'installateur agréé pour l'installation de cet appareil. ● Si le climatiseur est renversé pendant son utilisation, l’éteignez et le débranchez immédiatement de l'alimentation principale. Inspectez visuellement l'unité pour vous assurer qu'elle ne subit aucun dommage. ●...
  • Seite 47: Avertissements (Pour L'utilisation Du Réfrigérant R2/R32 Uniquement)

    PRÉCAUTIONS DE SÉCURITÉ AVERTISSEMENTS (pour l’utilisation du réfrigérant R290 / R32 uniquement) ● Ne pas utiliser de moyens pour accélérer le processus de dégivrage ou pour nettoyer, autres que ceux recommandés par le fabricant. ● L'appareil doit être rangé dans une pièce sans source d'inflammation en fonctionnement continu (par exemple: flammes nues, appareil à...
  • Seite 48 PRÉCAUTIONS DE SÉCURITÉ AVERTISSEMENTS (pour l’utilisation du réfrigérant R290 / R32 uniquement) 1. Transport d'équipements contenant des frigorigènes inflammables Voir les règlements de transport 2. Marquage de l'équipement à l'aide de signes Voir les réglementations locales 3. Implantation des équipements utilisant des réfrigérants inflammables Voir les réglementations nationales.
  • Seite 49 PRÉCAUTIONS DE SÉCURITÉ 7) Zone ventilée Assurez-vous que la zone est à l'air libre ou qu'elle est correctement ventilée avant de pénétrer dans le système ou d'effectuer des travaux à chaud. Une certaine ventilation doit être maintenue pendant la durée des travaux. La ventilation doit disperser en toute sécurité tout fluide réfrigérant libéré...
  • Seite 50 PRÉCAUTIONS DE SÉCURITÉ Les pièces de rechange doivent être conformes aux spécifications du fabricant. NOTE: L'utilisation d'un produit d'étanchéité à base de silicone peut nuire à l'efficacité de certains types d'équipement de détection des fuites. Les composants de sécurité intrinsèque ne doivent pas nécessairement être isolés avant de travailler dessus.
  • Seite 51 PRÉCAUTIONS DE SÉCURITÉ La charge de réfrigérant doit être récupérée dans les bonnes bouteilles de récupération. Le système doit être rincé avec OFN pour sécuriser l'unité. Ce processus peut avoir besoin d'être répété plusieurs fois. L'air comprimé ou l'oxygène ne doit pas être utilisé pour cette tâche. Le rinçage doit être réalisé...
  • Seite 52 PRÉCAUTIONS DE SÉCURITÉ k) Le réfrigérant récupéré ne doit pas être chargé dans un autre système de réfrigération à moins d'avoir été nettoyé et vérifié. 15. Étiquetage L'équipement doit porter une étiquette indiquant qu'il a été mis hors service et vidé du réfrigérant. L'étiquette doit être datée et signée.
  • Seite 53: Touche De Commande

    TOUCHE DE COMMANDE SUR LA DESSECHEUSE HUMIDITY CONT. ALIMENTATION Figure 1 Voyants Touche d'opération continue Voyant en mode de déshumidification continu; Sélectionnez pour que la dessécheuse fonctionne en continu pour une déshumidification maximale jusqu'à ce que le bac Bac plein de lumière; soit plein.
  • Seite 54: Autres Caractéristiques

    IDENTIFICATION DES PIÈCES Autres caractéristiques Attendez 3 minutes avant de reprendre l'opération Bac plein de lumière Une fois l’unité arrêtée, elle ne peut plus être redémarrée Il s'allume lorsque le bac est prêt à être vidé ou dans les 3 premières minutes. Ceci est pour protéger l'unité. lorsqu'il est retiré...
  • Seite 55: Positionnement De L'unité

    OPERATION DE L'UNITE Positionnement de l'unité 40cm ou plus Un dessécheuse fonctionnant dans un sous-sol aura peu ou pas Grille d'admission Grille de sortie d'air d’effet sur le séchage d’une zone de stockage fermée adjacente, d'air telle qu’un placard, à moins que la circulation d’air ne soit suffisante.
  • Seite 56: Enlever L'eau Collectée

    OPERATION DE L'UNITE Enlever l'eau collectée 1. Tirez un peu le bac. Il y a deux façons d'éliminer l'eau collectée. 1. Utilisez le bac • Lorsque le bac est plein, le voyant Full s'allume, l'affichage numérique indique P2. • Tirez lentement le bac. Saisissez les poignées gauche et droite en toute sécurité...
  • Seite 57 OPERATION DE L'UNITE Enlever l'eau collectée 2. Drainage continu • L'eau peut être automatiquement vidée dans un siphon de sol en raccordant l'unité à un tuyau d'eau (non fourni). • Retirez le bouchon en caoutchouc de la sortie du tuyau de décharge arrière.
  • Seite 58: Entretien Et Maintenance

    ENTRETIEN ET MAINTENANCE Entretien et nettoyage de la dessécheuse Éteignez la dessécheuse et débranchez-la avant de la nettoyer. 1. Nettoyez la grille et le boîtier • Utilisez de l'eau et un détergent doux. N'utilisez pas d'agent de blanchiment ou d'abrasifs. •...
  • Seite 59 ENTRETIEN ET MAINTENANCE ATTENTION: NE PAS faire fonctionner la dessécheuse sans filtre car la saleté et les peluches le bouchent et réduisent ses performances. NOTE: Le boîtier et la façade peuvent être saupoudrés avec un chiffon sans huile ou lavés avec un chiffon imbibé d'une solution d'eau tiède et de détergent à...
  • Seite 60: Indications De Dépannage

    INDICATIONS DE DÉPANNAGE Avant de faire appel au service après-vente, consultez vous-même le tableau ci-dessous. Problème À quoi vérifier ● Assurez-vous que la fiche du dessécheuse est complètement L'unité n’est pas enfoncée dans la prise. démarrée ● Vérifiez la boîte à fusibles / boîte de disjoncteur. ●...
  • Seite 61 La conception et les spécifications sont sujettes à changement sans préavis pour l'amélioration du produit. Veuillez consulter l'agence de vente ou le fabricant pour plus de détails. Toute mise à jour du manuel sera téléchargée sur le site web du service. Veuillez vérifier la version la plus récente.
  • Seite 62 Before operating this product, please read the instructions carefully and save this manual for future use.
  • Seite 63: Sociable Remark

    SOCIABLE REMARK When using this dehumidifier in the European countries, the following information must be followed: DISPOSAL: Do not dispose this product as unsorted municipal waste. Collection of such waste separately for special treatment is necessary. It is prohibited to dispose of this appliance in domestic household waste. For disposal, there are several possibilities: A) The municipality has established collection systems, where electronic waste can be disposed of at least free of charge to the user.
  • Seite 64 CONTENTS SAFETY PRECAUTIONS Warning ............................2 Caution ............................2 Electrical information ........................4 WARNINGS (for using R290/R32 refrigerant only) ................5 CONTROL PADS ON THE DEHUMIDIFIER Control pads............................11 Other features..........................12 IDENTIFICATION OF PARTS Identification of parts ........................12 Positioning the unit .........................13 OPERATING THE UNIT When using the unit ........................13 Removing the collected water ......................14 CARE AND MAINTENANCE...
  • Seite 65: Safety Precautions

    SAFETY PRECAUTIONS To prevent injury to the user or other people and property damage, the following instructions must be followed. Incorrect operation due to ignoring of instructions may cause harm or damage. The seriousness is classified by the following indications. WARNING This symbol indicates the possibility of death or serious injury.
  • Seite 66 SAFETY PRECAUTIONS CAUTION Do not cover the intake or Care should be taken when Do not use in areas exhaust openings with using the unit in a room with where chemicals are cloths or towels. the following persons: handled. This will cause the unit A lack of air flow can lead Infants, children, elderly people, deterioration due to...
  • Seite 67: Electrical Information

    SAFETY PRECAUTIONS Contact the authorised installer for installation of this unit. If the air conditioner is knocked over during use, turn off the unit and unplug it from the main power supply immediately. Visually inspect the unit to ensure there is no damage. If you suspect the unit has been damaged, contact a technician or customer service for assistance.
  • Seite 68: Warnings (For Using R290/R32 Refrigerant Only)

    SAFETY PRECAUTIONS WARNINGS (for using R290/R32 refrigerant only) Do not use means to accelerate the defrosting process or to clean, other than those recommended by the manufacturer. The appliance shall be stored in a room without continuously operating ignition sources (for example: open flames, an operating gas appliance or an operating electric heater).
  • Seite 69 SAFETY PRECAUTIONS WARNINGS (for using R290/R32 refrigerant only) 1. Transport of equipment containing flammable refrigerants See transport regulations 2. Marking of equipment using signs See local regulations 3. Disposal of equipment using flammable refrigerants See national regulations. 4. Storage of equipment/appliances The storage of equipment should be in accordance with the manufacturer's instructions.
  • Seite 70 SAFETY PRECAUTIONS 7) Ventilated area Ensure that the area is in the open or that it is adequately ventilated before breaking into the system or conducting any hot work. A degree of ventilation shall continue during the period that the work is carried out. The ventilation should safely disperse any released refrigerant and preferably expel it externally into the atmosphere.
  • Seite 71 SAFETY PRECAUTIONS preventing the ingress of flammable atmospheres. Replacement parts shall be in accordance with the manufacturer's specifications. NOTE: The use of silicon sealant may inhibit the effectiveness of some types of leak detection equipment. Intrinsically safe components do not have to be isolated prior to working on them. 8.
  • Seite 72 SAFETY PRECAUTIONS The refrigerant charge shall be recovered into the correct recovery cylinders. The system shall be flushed with OFN to render the unit safe. This process may need to be repeated several times. Compressed air or oxygen shall not be used for this task. Flushing shall be achieved by breaking the vacuum in the system with OFN and continuing to fill until the working pressure is achieved, then venting to atmosphere, and finally pulling down to a vacuum.
  • Seite 73 SAFETY PRECAUTIONS the equipment are removed from site promptly and all isolation valves on the equipment are closed off. k) Recovered refrigerant shall not be charged into another refrigeration system unless it has been cleaned and checked. 15. Labelling Equipment shall be labelled stating that it has been de-commissioned and emptied of refrigerant.
  • Seite 74: Indicator Lights

    CONTROL PADS ON THE DEHUMIDIFIER Fig.1 Indicator lights Continue pad Continuous dehumidifying mode light; Select for the dehumidifier to operate continuously for maximum dehumidification until the bucket is Bucket full light; full. The Humdity set control pads cannot be used when Continuous operation is on.
  • Seite 75: Other Features

    IDENTIFICATION OF PARTS Other features Wait 3 minutes before resuming operation Bucket Full Light After the unit has stopped, it can not be restart Glows when the bucket is ready to be opertation in the first 3 minutes. This is to protect emptied, or when the bucket is removed the unit.
  • Seite 76: Positioning The Unit

    OPERATING THE UNIT Positioning the unit 40cm or more A dehumidifier operating in a basement will have little or no effect in drying an adjacent enclosed storage area, such as a Air intake Air outlet grille closet, unless there is adequate circulation of air in and out of grille the area.
  • Seite 77: Removing The Collected Water

    OPERATING THE UNIT 1. Pull out the bucket a little. Removing the collected water There are two ways to remove collected water. 1. Use the bucket When the bucket is full, the Full indicator light will illuminate, the digital display shows P2. Slowly pull out the bucket.
  • Seite 78 OPERATING THE UNIT Removing the collected water 2. Continuous draining Water can be automatically emptied into a floor drain by attaching the unit with a water hose (not included). Remove the rubber plug from the back drain hose outlet. Attach a drain hose(ID=13.5mm) and lead it to the floor drain or a suitable drainage facility(see Fig.8 and Fig.9).
  • Seite 79: Care And Maintenance

    CARE AND MAINTENANCE Care and cleaning of the dehumidifier Turn the dehumidifier off and remove the plug from the wall outlet before cleaning. 1. Clean the Grille and Case Use water and a mild detergent. Do not use bleach or abrasives. Do not splash water directly onto the main unit.
  • Seite 80 CARE AND MAINTENANCE CAUTION: DO NOT operate the dehumidifier without a filter because dirt and lint will clog it and reduce performance. NOTE: The cabinet and front may be dusted with an oil-free cloth or washed with a cloth dampened in a solution of warm water and mildliquid dishwashing detergent.
  • Seite 81: Troubleshooting Tips

    TROUBLESHOOTING TIPS Before calling for service, review the chart below first yourself. Problem What to check Make sure the dehumidifier s plug is pushed completely into the outlet. Unit does not start Check the house fuse/circuit breaker box. Dehumidifier has reached its preset level or bucket is full. Bucket is not in the proper position.
  • Seite 82 The design and specifications are subject to change without prior notice for product improvement. Consult with the sales agency or manufacturer for details. Any updates to the manual will be uploaded to the service website, please check for the latest version.
  • Seite 83 LUCHTONTVOCHTIGER GEBRUIKERSHANDLEIDING Lees voordat u dit product gebruikt de instructies zorgvuldig en bewaar deze handleiding voor toekomstig gebruik.
  • Seite 84 SOCIALE OPMERKING Als u deze luchtontvochtiger gebruikt in Europese landen, moet de volgende informatie opgevolgd worden: VERWIJDERING: Gooi dit product niet weg als ongesorteerd stedelijk afval. Het afzonderlijk inzamelen van dit soort afval voor speciale behandeling is noodzakelijk. Het is verboden om dit toestel weg te gooien met het huishoudelijk afval. Er zijn verschillende mogelijkheden voor het verwijderen ervan: A) De stad heeft inzamelsystemen ingesteld waar elektronisch afval gratis door de gebruiker kan worden afgevoerd.
  • Seite 85 INHOUD VEILIGHEIDSMAATREGELEN Waarschuwing ............................2 Let Op ..............................2 Elektronische informatie .........................4 WAARSCHUWINGEN (enkel gebruiken met R290/R32 koelmiddel)............5 BEDIENINGSTOETSEN OP DE LUCHTONTVOCHTIGER Bedieningstoetsen..........................11 Andere functies............................12 IDENTIFICATIE VAN ONDERDELEN Identificatie van onderdelen........................12 Het apparaat positioneren ........................13 WERKEN MET HET APPARAAT Bij het gebruik van het apparaat......................13 Het opgevangen water verwijderen.......................14 ZORG EN ONDERHOUD Zorg en onderhoud van de luchtontvochtiger..................16...
  • Seite 86: Waarschuwing

    VEILIGHEIDSMAATREGELEN Om letsel bij de gebruiker of andere personen en materiële schade te voorkomen, moet men de volgende instructies naleven. Een foute bediening door het negeren van instructies kan letsel of schade veroorzaken. De ernst wordt geclassificeerd aan de hand van de volgende indicaties. WAARSCHUWING Dit symbool geeft de mogelijkheid op overlijden of ernstig letsel aan.
  • Seite 87: Let Op

    VEILIGHEIDSMAATREGELEN LET OP Dek de in- of uitlaatopeningen niet af Voorzichtigheid is geboden als je het Gebruik het niet in gebieden met doeken of handdoeken. apparaat gebruikt in een ruimte met de waar chemicaliën worden volgende personen: gehanteerd. Als er een gebrek aan luchtstroom is kan Baby's, kinderen, ouderen en mensen die niet Dit zal ervoor zorgen dat het dit leiden tot oververhitting en brand.
  • Seite 88: Elektronische Informatie

    VEILIGHEIDSMAATREGELEN ● Contacteer de geautoriseerde installateur voor installatie van dit apparaat. ● Als de luchtontvochtiger tijdens het gebruik omviel, moet je het apparaat uitschakelen en onmiddellijk de stekker uit het stopcontact trekken. Inspecteer het apparaat op zicht om er zeker van te zijn dat er geen schade is.
  • Seite 89: Waarschuwingen (Enkel Gebruiken Met R290/R32 Koelmiddel)

    VEILIGHEIDSMAATREGELEN WAARSCHUWINGEN (enkel gebruiken met R290/R32 koelmiddel) ● Gebruik geen middelen om het ontdooiproces te versnellen of om schoon te maken, anders dan degenen die aanbevolen zijn door de fabrikant. ● Je moet het apparaat opbergen in een ruimte zonder continu werkende ontstekingsbronnen (bijvoorbeeld: open vuur, een werkend gastoestel of een werkende elektrische verwarming).
  • Seite 90 VEILIGHEIDSMAATREGELEN WAARSCHUWINGEN (enkel gebruiken met R290/R32 koelmiddel) 1. Vervoer van apparatuur die ontvlambare koelmiddelen bevat Zie transportvoorschriften 2. Het markeren van apparatuur met behulp van borden Zie locale voorschriften 3. Afvoer van apparatuur die ontvlambare koelmiddelen gebruikt Zie nationale voorschriften. 4.
  • Seite 91 VEILIGHEIDSMAATREGELEN 7) Geventileerde ruimte Zorg ervoor dat het gebied buiten is of dat het voldoende geventileerd wordt voordat het systeem wordt geopend of wanneer er sprake is van warm werk. Gedurende de periode dat de werkzaamheden worden uitgevoerd, moet er ventilatie zijn. De ventilatie moet veilig elk vrijgekomen koelmiddel verspreiden en bij voorkeur het uitwendig in de atmosfeer uitstoten.
  • Seite 92 VEILIGHEIDSMAATREGELEN Vervangingsonderdelen moeten overeenstemmen met de specificaties van de fabrikant. OPMERKING: Het gebruik van siliconen kit kan de doeltreffendheid van sommige soorten lekkagedetectie apparatuur belemmeren. Intrinsiek veilige onderdelen hoeven niet te worden geïsoleerd voordat eraan gewerkt wordt. 8. Herstellingen aan intrisiek veilige onderdelen Breng geen permanente inductieve of lastcapaciteit aan op het circuit zonder ervoor te zorgen dat dit de toegestane spanning en stroom voor de gebruikte apparatuur niet overschrijdt.
  • Seite 93: Buitengebruikstelling

    VEILIGHEIDSMAATREGELEN De koelmiddelvulling moet worden gerecupereerd in de correcte recuperatie cilinders. Het systeem wordt gespoeld met OFN om het apparaat veilig te maken. Het is mogelijk dat dit proces meerdere keren moet worden herhaald. Voor deze taak mag men geen gebruik maken van perslucht of zuurstof. Het spoelen moet worden bereikt door het vacuüm in het systeem te doorbreken met OFN en te blijven vullen tot men de werkdruk bereikt, vervolgens moet er in de atmosfeer worden ontlucht en tenslotte vacuümtrekken.
  • Seite 94 VEILIGHEIDSMAATREGELEN k) Gerecupereerd koelmiddel mag niet in een ander koelsysteem worden geladen tenzij dit gereinigd en gecontroleerd is. 15. Etikettering De apparatuur moet een etiket krijgen met de vermelding dat het buitengebruik gesteld is en het koelmiddel geleegd werd. Het etiket moet worden gedateerd en ondertekend. Verzeker je ervan dat er op de apparatuur etiketten aanwezig zijn met de melding dat de apparatuur ontvlambaar koelmiddel bevat.
  • Seite 95: Bedieningstoetsen Op De Luchtontvochtiger

    BEDIENINGSTOETSEN OP DE LUCHTONTVOCHTIGER HUMIDITY CONT. POWER Fig.1 Indicatielichten Verdergaan toets Continu ontvochtigen modus licht; Selecteer om de luchtontvochtiger continu te laten werken voor een maximale ontvochtiging totdat de Emmer vol licht; emmer vol is. De bedieningstoetsen voor het instellen van de Vochtigheid kunnen niet worden STROOM licht;...
  • Seite 96: Andere Functies

    IDENTIFICATIE VAN ONDERDELEN Andere functies Wacht 3 minuten voordat je de werking hervat Emmer vol licht Nadat het apparaat stopte, kan het de eerste 3 minuten niet opnieuw gestart. Dit dient om het apparaat te Licht op wanneer de emmer geleegd dient beschermen.
  • Seite 97: Het Apparaat Positioneren

    WERKEN MET HET APPARAAT Het apparaat positioneren 40cm of meer Een luchtontvochtiger die in een kelder gebruiktwordt, heeft weinig of geen effect bij het drogen van een Luchtuilaat rooster Luchtinlaat rooster aanpalend gesloten opslaggebied, zoals een kast, tenzij er voldoende luchtcirculatie in en uit het gebied is. •...
  • Seite 98: Het Opgevangen Water Verwijderen

    WERKEN MET HET APPARAAT Het opgevangen water verwijderen 1. Trek de emmer er een stukje uit. Er zijn twee manieren om het opgevangen water te verwijderen. 1. Gebruik de emmer • Als de emmer vol is, licht het indicatielichtje Full op, en op het digitale display verschijnt er P2.
  • Seite 99 WERKEN MET HET APPARAAT Het opgevangen water verwijderen 2. Doorlopende drainage • Het water kan automatisch worden geleegd in een afvoerputje door een waterslang op het apparaat aan te sluiten (niet meegeleverd). • Verwijder de rubberen plug van de afvoerslang uitlaat aan de achterkant.
  • Seite 100: Zorg En Onderhoud

    ZORG EN ONDERHOUD Zorg en reiniging van de luchtontvochtiger Zet de luchtontvochtiger uit en trek de stekker uit het stopcontact voor je hem reinigt. 1. Reinig het Rooster en de Behuizing • Gebruik water en een mild reinigingsmiddel. Gebruik geen bleekmiddel of schuurmiddelen.
  • Seite 101 ZORG EN ONDERHOUD LET OP: Laat de luchtontvochtiger NIET werken zonder filter, omdat vuil en pluisjes de filter verstoppen wat de prestaties vermindert. OPMERKING: De kast en de voorkant kunnen worden afgestoft met een olievrije doek of gewassen worden met een doek die bevochtigd werd met een oplossing van warm water en een mild vloeibaar afwasmiddel.
  • Seite 102: Probleemoplossing Tips

    PROBLEEMOPLOSSING TIPS Raadpleeg eerst zelf het onderstaande diagram voor je om service vraagt. Probleem Wat controleren ● Verzeker je ervan dat de stekker van de luchtontvochtiger Het apparaat start niet volledig in het stopcontact zit. ● Controleer de zekering/stroomonderbreker kast. ●...
  • Seite 103 Het ontwerp en de specificaties kunnen gewijzigd worden zonder voorafgaandelijke kennisgeving omwille van productverbetering. Raadpleeg het verkoop agentschap of de fabrikant voor details. Elke update aan de handleiding zal geüpload worden op de servicewebsite, kijk alstublieft hierop voor de nieuwste versie.
  • Seite 104 DESHUMIDIFICADOR MANUAL DE USUARIO Antes de utilizar este producto, lea atentamente las instrucciones y conserve este manual para futuras consultas.
  • Seite 105 OBSERVACIÓN SOCIAL Al utilizar este deshumidificador en países europeos, debe seguirse la información mostrada a continuación: ELIMINACIÓN: No se deshaga de este producto como residuo urbano sin clasificar. Estos residuos deben ser recolectados por separado para tratamiento especial. Está prohibido deshacerse de este aparato como basura doméstica. Para su eliminación, hay varias posibilidades: A) El ayuntamiento establece sistemas de recolección, por los que los residuos electrónicos pueden ser eliminados al menos sin coste para el usuario.
  • Seite 106 CONTENIDOS MEDIDAS DE SEGURIDAD Alerta ..............................2 Precaución ..............................2 Información eléctrica ..........................4 ALERTAS (sólo para el uso del refrigerante R290/R32) .................5 BOTONES DE CONTROL EN EL DESHUMIDIFICADOR Panel de control............................. 11 Otras funciones .............................12 IDENTIFICACIÓN DE LAS PIEZAS Identificación de las piezas........................12 Colocación de la unidad ........................13 FUNCIONAMIENTO DE LA UNIDAD Al usar la unidad............................13...
  • Seite 107: Medidas De Seguridad

    MEDIDAS DE SEGURIDAD Para prevenir lesiones del usuario u otras personas, y daños materiales, deben seguirse las instrucciones mostradas a continuación. Un uso incorrecto debido a no seguir las instrucciones puede causar lesiones o daños. La gravedad se clasifica por las siguientes indicaciones. ADVERTENCIA Este símbolo indica la posibilidad de muerte o lesión grave.
  • Seite 108 MEDIDAS DE SEGURIDAD PRECAUCIÓN No tape las aberturas de entrada o No la utilice en zonas en las Debe tenerse cuidado si se utiliza la descarga con trapos o toallas. que se manejen productos unidad en habitaciones con las químicos. siguientes personas: Una falta de circulación de aire puede Bebés, niños, personas mayores, y...
  • Seite 109: Información Eléctrica

    MEDIDAS DE SEGURIDAD ● Contacte con un instalador cualificado para la instalación de esta unidad. ● Si el deshumidificador recibe un golpe durante su uso, apague la unidad y desenchúfela inmediatamente de la toma de corriente. Revise visualmente la unidad para asegurarse de que no tenga daños.
  • Seite 110: Alertas (Sólo Para El Uso Del Refrigerante R290/R32)

    MEDIDAS DE SEGURIDAD ALERTAS (sólo para usar el refrigerador R290/R32) ● No utilice otros medios para acelerar el proceso de descongelación o para limpiar que no sean los recomen dados por el fabricante. ● El aparato debe guardarse en una habitación sin fuentes de ignición en continuo funcionamiento (por ejemp lo: llamas abiertas, aparatos de gas o calentadores eléctricos en funcionamiento).
  • Seite 111 MEDIDAS DE SEGURIDAD ALERTAS (sólo para usar el refrigerador R290/R32) 1. Transporte de equipo que contiene refrigerantes inflamables Consulte las regulaciones de transporte 2. El marcado de este equipo utiliza signos Consulte las regulaciones locales 3. Eliminación de equipos que utilizan refrigerantes inflamables Consulte las regulaciones nacionales 4.
  • Seite 112 MEDIDAS DE SEGURIDAD 7) Zona ventilada Asegúrese de que la zona esté al aire libre o suficientemente ventilada antes de desmontar el sistema o realizar cualquier trabajo en caliente. Debe mantenerse un nivel de ventilación durante el periodo en el que se realiza el trabajo. La ventilación debe dispersar de forma segura cualquier refrigerante liberado y preferiblemente expulsarlo externamente a la atmósfera.
  • Seite 113 MEDIDAS DE SEGURIDAD Las piezas de repuesto deben cumplir con las especificaciones del fabricante. NOTA: El uso de sellante de silicona podría inhibir la efectividad de algunos tipos de equipos de detección de fugas. Aquellos componentes intrínsecamente seguros no tienen que ser aislados antes de trabajar con ellos.
  • Seite 114 MEDIDAS DE SEGURIDAD La carga de refrigerante debe ser recuperada en los cilindros de recuperación correctos. El sistema debe ser purgado con nitrógeno sin oxígeno para considerar la unidad segura. Puede que este proceso deba ser repetido varias veces. No debe usarse oxígeno ni aire comprimido para esta tarea. El purgado se consigue deshaciendo el vacío del sistema con nitrógeno sin oxígeno y continuando el llenado hasta alcanzar la presión de trabajo, después descargando a la atmósfera, y finalmente volviendo a hacer el vacío.
  • Seite 115 MEDIDAS DE SEGURIDAD k) El refrigerante recuperado no debe cargarse en otro sistema de refrigeración a no ser que haya sido limpiado y revisado. 15. Etiquetado El equipo debe ser etiquetado indicando que ha sido desmantelado y vaciado de refrigerante. La etiqueta debe ser fechada y firmada.
  • Seite 116: Botones De Control En El Deshumidificador

    BOTONES DE CONTROL EN EL DESHUMIDIFICADOR HUMIDITY CONT. POWER Imagen 1 Luces del indicador Botón de continuación Luz de modo de deshumidificación continua; Seleccionar para que el deshumidificador funcione continuamente en deshumidificación máxima hasta Luz de depósito lleno; que el depósito esté lleno. Los botones de control de la humedad no pueden usarse cuando el Luz de POWER;...
  • Seite 117: Identificación De Las Piezas

    IDENTIFICACIÓN DE LAS PIEZAS Otras funciones Espere 3 minutos antes de reanudar el funcionamiento Luz de Depósito Lleno Después de que la unidad se haya apagado, no puede Brilla cuando el depósito está listo para ser reanudar el funcionamiento hasta pasados 3 minutos. vaciado, o cuando el depósito ha sido Esto es para proteger la unidad.
  • Seite 118: Funcionamiento De La Unidad

    FUNCIONAMIENTO DE LA UNIDAD Colocar la unidad 40 cm o más Un deshumidificador funcionando en un sótano tendrá Rejilla de salida Rejilla de poco o ningún efecto para secar una zona de de aire almacenamiento cerrada adyacente, como un armario, a entrada de aire no ser que haya una circulación de aire adecuada dentro y fuera de la zona.
  • Seite 119 FUNCIONAMIENTO DE LA UNIDAD Retirar el agua recolectada 1. Tire ligeramente del depósito. Hay dos formas de retirar el agua recolectada. 1. Usando el depósito • Cuando el depósito esté lleno, la luz indicadora de llenado se encenderá, el indicador digital mostrará P2. •...
  • Seite 120 FUNCIONAMIENTO DE LA UNIDAD Retirar el agua recolectada 2. Drenaje continuo • El agua puede vaciarse automáticamente en un desagüe, fijando una manguera (no incluida) a la unidad. • Retire el tapón de goma de la salida de la manguera de drenaje trasera.
  • Seite 121: Cuidado Y Mantenimiento

    CUIDADO Y MANTENIMIENTO Cuidado y limpieza del deshumidificador Apague el deshumidificador y desconecte el enchufe de la toma de corriente antes de limpiarlo. 1. Limpiar la Rejilla y la Carcasa • Utilice agua y un jabón suave. No utilice lejía ni productos abrasivos.
  • Seite 122 CUIDADO Y MANTENIMIENTO PRECAUCIÓN: NO haga funcionar el deshumidificador sin un filtro ya que entrará suciedad y pelusa, que se atascarán y afectarán al rendimiento. NOTA: La carcasa y la parte delantera pueden limpiarse con un trapo sin grasa o lavarse con un paño humedecido con una solución de agua templada y jabón líquido suave de lavavajillas.
  • Seite 123: Consejos Para Resolución De Problemas

    CONSEJOS PARA RESOLUCIÓN DE PROBLEMAS Antes de llamar al servicio técnico, consulte usted mismo la siguiente tabla. Problema Qué revisar ● Asegúrese de que el enchufe del deshumidificador esté completamente insertado en la toma de corriente. La unidad no arranca ●...
  • Seite 124 El diseño y las especificaciones están sujetos a cambios sin previo aviso para la mejora del producto. Consulte a la agencia de ventas o al fabricante para más detalles. Cualquier actualización del manual se subirá a la página web del servicio, por favor revísela para tener la última versión.
  • Seite 125 Midea Italia S.r.l. a socio unico Viale Luigi Bodio 29/37 20158 Milano (MI) Italia...
Inhaltsverzeichnis