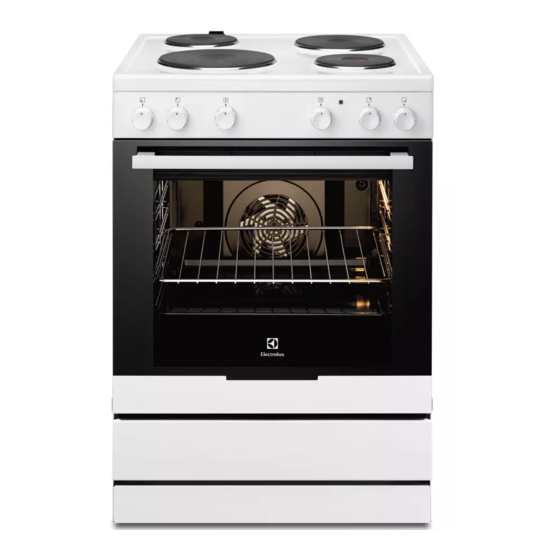
Electrolux FEH60P2102 Benutzerinformation
Vorschau ausblenden
Andere Handbücher für FEH60P2102:
- Benutzerinformation (36 Seiten) ,
- Benutzerinformation (32 Seiten)

Verwandte Anleitungen für Electrolux FEH60P2102


Inhaltszusammenfassung für Electrolux FEH60P2102
- Seite 28 12. MONTAGE ............53 WIR DENKEN AN SIE Vielen Dank, dass Sie sich für ein Electrolux Gerät entschieden haben. Sie haben ein Produkt gewählt, hinter dem eine jahrzehntelange professionelle Erfahrung und Innovation steht. Bei der Entwicklung dieses großartigen und eleganten Geräts haben wir an Sie gedacht.
-
Seite 29: Sicherheitsinformationen
All manuals and user guides at all-guides.com DEUTSCH 1. SICHERHEITSINFORMATIONEN Lesen Sie vor der Montage und Verwendung des Geräts sorgfältig die mitgelieferte Anleitung. Der Hersteller haftet nicht für Verletzungen oder Schäden, die durch eine feh- lerhafte Montage entstehen. Bewahren Sie die Anleitung zum Nachschlagen auf. -
Seite 30: Sicherheitshinweise
All manuals and user guides at all-guides.com 30 www.electrolux.com • Kochen mit Fett oder Öl auf einem unbeaufsichtigten Kochfeld ist gefährlich und kann zu einem Brand füh- ren. • Versuchen Sie nicht einen Brand mit Wasser zu lö- schen, sondern schalten Sie das Gerät aus und bede- cken Sie die Flamme mit einem Deckel oder einer Feu- erlöschdecke. -
Seite 31: Elektrischer Anschluss
All manuals and user guides at all-guides.com DEUTSCH • Stellen Sie das Gerät nicht auf einem zu trennen. Ziehen Sie dazu immer di- Sockel auf. rekt am Netzstecker. • Installieren Sie das Gerät nicht direkt • Verwenden Sie immer die richtigen neben einer Tür oder unter einem Fens- Trenneinrichtungen: Überlastschalter, ter. -
Seite 32: Reinigung Und Pflege
All manuals and user guides at all-guides.com 32 www.electrolux.com • Schalten Sie die Kochzonen nach je- oder feuchte Speisen im Backofenin- dem Gebrauch aus. nenraum stehen. • Benutzen Sie das Gerät nicht als Ar- – Gehen Sie beim Herausnehmen oder beits- oder Abstellfläche. -
Seite 33: Entsorgung
All manuals and user guides at all-guides.com DEUTSCH • Fett- oder Speisereste im Gerät können • Trennen Sie das Gerät von der Strom- einen Brand verursachen. versorgung, bevor Sie die Lampe aus- tauschen. • Reinigen Sie das Geräts mit einem wei- chen, feuchten Tuch. -
Seite 34: Kochfeldanordnung
All manuals and user guides at all-guides.com 34 www.electrolux.com 3.2 Kochfeldanordnung Kochzone 1000 W Dampfauslass Kochzone 1500 W Kochzone 1500 W Kochzone 2000 W • Fettpfanne 3.3 Zubehör Zum Backen und Braten oder zum Auf- • Rost fangen von austretendem Fett. -
Seite 35: Kochfeld - Täglicher Gebrauch
All manuals and user guides at all-guides.com DEUTSCH 5. KOCHFELD - TÄGLICHER GEBRAUCH WARNUNG! Nutzen Sie die Restwärme, um Siehe Sicherheitshinweise. den Energieverbrauch zu senken. Schalten Sie die Kochzone ca. 5-10 Minuten vor Ende des Gar- 5.1 Kochstufe vorgangs aus. Knopf Funktion 5.2 Blitzkochplatte... -
Seite 36: Backofen - Täglicher Gebrauch
All manuals and user guides at all-guides.com 36 www.electrolux.com Kratzer oder dunkle Flecken be- Zur Pflege der Kochplatten von Zeit einträchtigen die Funktionsfähig- zu Zeit ein wenig Nähmaschinenöl auf keit des Geräts nicht. den Platten verreiben und dann mit saugfähigem Papier polieren. -
Seite 37: Einsetzen Des Backofenzubehörs
All manuals and user guides at all-guides.com DEUTSCH Ofenfunktion Anwendung Zum Backen von Kuchen mit krossen Böden. Es Unterhitze ist nur das Heizelement für die Unterhitze einge- schaltet. Auftauen Zum Auftauen gefrorener Lebensmittel. Zum Grillen flacher Zutaten in kleinen Mengen in Grillen der Mitte des Rostes. -
Seite 38: Tipps Zum Backen
All manuals and user guides at all-guides.com 38 www.electrolux.com Hinweise zu den Backtabellen 9.1 Backen • Es empfiehlt sich, beim ersten Mal die Allgemeine Hinweise niedrigere Temperatur einzustellen. • Ihr neuer Backofen backt oder brät un- • Finden Sie für ein spezielles Rezept kei- ter Umständen anders als Ihr früheres... - Seite 39 All manuals and user guides at all-guides.com DEUTSCH Backergebnis Mögliche Ursache Abhilfe Verteilen Sie die Mi- Der Kuchen ist unregel- Die Mischung ist ungleich schung gleichmäßig auf mäßig gebräunt. verteilt. dem Backblech. Stellen Sie beim nächsten Der Kuchen ist nach der Die Backofentemperatur Kuchen eine etwas höhe- eingestellten Zeit nicht...
- Seite 40 All manuals and user guides at all-guides.com 40 www.electrolux.com Backware Einschubebene Temperatur in °C Zeit in Min. Apple pie (2 For- men, Ø 20 cm, di- 2- 3 60 - 90 agonal versetzt) 1) Backofen vorheizen Kuchen/Gebäck/Brot auf Backblechen Backware Einschubebene Temperatur in °C...
-
Seite 41: Backen Auf Mehreren Ebenen
All manuals and user guides at all-guides.com DEUTSCH Backen auf mehreren Ebenen Kuchen/Gebäck/Brot auf Backblechen Einschubebene Backware Temperatur in °C Zeit in Min. 2 Ebenen Windbeutel/Eclairs 25 - 45 160 - 180 Streuselkuchen, 30 - 45 150 - 160 trocken 1) Backofen vorheizen Plätzchen/kleine Kuchen/Gebäck/Brötchen Einschubebene... - Seite 42 All manuals and user guides at all-guides.com 42 www.electrolux.com Backware Einschubebene Temperatur in °C Zeit in Min. Apple pie (2 For- men, Ø 20 cm, di- 1 - 2 60 - 90 agonal versetzt) Pikante Torte (z.B. 180 - 220...
- Seite 43 All manuals and user guides at all-guides.com DEUTSCH 1) Backofen vorheizen 2) Tiefes Blech benutzen Plätzchen Backware Einschubebenen Temperatur in °C Zeit in Min. Mürbeteigplätz- 170 - 190 10 - 20 chen Short bread/ Past- 20 - 35 ry Stripes Rührteigplätzchen 170 - 190 20 - 30...
-
Seite 44: Braten Mit Ober-/Unterhitze
All manuals and user guides at all-guides.com 44 www.electrolux.com 9.7 Braten mit Ober-/Unterhitze Rindfleisch Fleischart Menge Einschub- Temperatur Zeit in Min. ebene in °C Schmorbraten 1-1,5 kg 200 - 230 105 - 150 Roastbeef oder Filet: je cm Höhe 6 - 8... -
Seite 45: Braten Mit Heißluft Grillen
All manuals and user guides at all-guides.com DEUTSCH Wild Einschub- Temperatur Fleischart Menge Zeit in Min. ebene in °C Hasenrücken, bis zu 1 kg 30 - 40 220 - 240 Hasenkeule Rehrücken, 1,5-2 kg 210 - 220 35 - 40 Hirschrücken Reh-/Hirsch- 1,5-2 kg... - Seite 46 All manuals and user guides at all-guides.com 46 www.electrolux.com 1) Backofen vorheizen Schweinefleisch Einschub- Temperatur Fleischart Menge Zeit (Min.) ebene in °C Schulter, Na- cken, Schin- 1-1,5 kg 160 - 180 90 - 120 kenstück Kotelett, 1-1,5 kg 170 - 180 60 - 90 Schälrippchen...
-
Seite 47: Einkochen
All manuals and user guides at all-guides.com DEUTSCH Heizen Sie den leeren Backofen Der Grillbereich befindet sich in der Mitte mit den Grill-Funktionen immer 5 des Rostes. Minuten vor. • Schieben Sie den Rost gemäß den Empfehlungen in der Grilltabelle in die entsprechende Einsatzebene. - Seite 48 All manuals and user guides at all-guides.com 48 www.electrolux.com Steinobst Einkochen bis Weiter kochen Einkochen Temperatur in °C Perlbeginn in bei 100 °C in Min. Min. Birnen, Quitten, 160 - 170 35 - 45 10 - 15 Zwetschgen Gemüse Einkochen bis...
-
Seite 49: Backofen - Reinigung Und Pflege
All manuals and user guides at all-guides.com DEUTSCH 10. BACKOFEN - REINIGUNG UND PFLEGE WARNUNG! • Zubehörteile mit Antihaftbeschichtung Siehe Sicherheitshinweise. dürfen nicht mit aggressiven Reini- gungsmitteln, scharfkantigen Gegen- • Feuchten Sie ein weiches Tuch mit war- ständen oder im Geschirrspüler gerei- mem Wasser und etwas Reinigungsmit- nigt werden. -
Seite 50: Reinigen Der Backofentür
All manuals and user guides at all-guides.com 50 www.electrolux.com VORSICHT! WARNUNG! Achten Sie darauf, dass der län- Wenn die Türglasscheiben be- gere Befestigungsdraht vorne ist. schädigt sind oder Kratzer aufwei- Die Enden der beiden Drähte sen, werden sie brüchig und kön- müssen nach hinten zeigen. -
Seite 51: Abnehmen Und Reinigen Der Türgläser
All manuals and user guides at all-guides.com DEUTSCH Abnehmen und Reinigen der Türgläser Fassen Sie die Türabdeckung (B) an der Oberkante der Tür an beiden Sei- ten an. Drücken Sie sie nach innen, um den Schnappverschluss zu lösen. Ziehen Sie die Türabdeckung nach vorn, um sie abzunehmen. -
Seite 52: Was Tun, Wenn
All manuals and user guides at all-guides.com 52 www.electrolux.com die Arretierungen korrekt in den Füh- rungen einrasten. Senken Sie die Schublade ab in die Waagerechte und schieben Sie sie ein. WARNUNG! In der Schublade kann bei Benut- zung des Backofens ein Wärme- stau entstehen. -
Seite 53: Montage
All manuals and user guides at all-guides.com DEUTSCH Modell (MOD.) ......... Produktnummer (PNC) ......... Seriennummer (S.N.) ......... 12. MONTAGE WARNUNG! Siehe Sicherheitshinweise. Abmessungen Höhe 847 - 867 mm Breite 596 mm Tiefe 600 mm Backofenkapazi- 74 Liter tät 12.3 Kippschutz 12.1 Standort des Geräts VORSICHT! Sie müssen den Kippschutz an-... -
Seite 54: Elektroinstallation
All manuals and user guides at all-guides.com 54 www.electrolux.com Achten Sie darauf, den Kipp- 49 mm schutz in der richtigen Höhe anzu- bringen. 77 mm Stellen Sie die korrekte Höhe des Ge- räts ein, bevor Sie den Kippschutz anbringen. Bringen Sie den Kippschutz in einem Abstand von 77 mm zur Geräteober-...