Cameo HYDRABEAM 600 RGBW Bedienungsanleitung

Verwandte Anleitungen für Cameo HYDRABEAM 600 RGBW


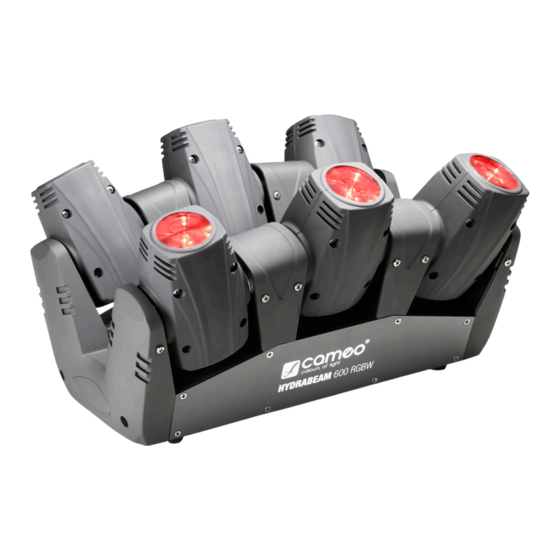
Inhaltszusammenfassung für Cameo HYDRABEAM 600 RGBW
- Seite 1 USER´S MANUAL BEDIENUNGSANLEITUNG MANUEL D´UTILISATION MANUAL DE USUARIO INSTRUKCJA OBSŁUGI MANUALE D´USO HYDRABEAM 600 RGBW LIGHTING SYSTEM WITH 6 ULTRA-FAST 10 W CREE RGBW QUAD LED MOVING HEADS CLHB600RGBW...
-
Seite 2: Preventive Measures
Questo dispositivo è stato sviluppato e prodotto in conformità con elevati standard qualitativi che ne garantiscono il regolare funzionamento per molti anni. Leggete attentamente questo manuale d‘uso per utilizzare al meglio il vostro nuovo prodotto Cameo Light. Per maggiori informazioni su Cameo Light consultare la nostra pagina Web WWW.CAMEOLIGHT.COM. -
Seite 3: Sicherheitshinweise
25. Do not step on the power cord. Make certain that the power cable does not become kinked, especially at the mains outlet and/or power adapter and the equipment connector. 26. When connecting the equipment, make certain that the power cord or power adapter is always freely accessible. Always disconnect the equip- ment from the power supply if the equipment is not in use or if you want to clean the equipment. -
Seite 4: Bei Geräten Mit Netzanschluss
12. Sorgen Sie dafür, dass kein Tropf- oder Spritzwasser in das Gerät eindringen kann. Stellen Sie keine mit Flüssigkeit gefüllten Behältnisse wie Vasen oder Trinkgefäße auf das Gerät. 13. Sorgen Sie dafür, dass keine Gegenstände in das Gerät fallen können. 14. -
Seite 5: Mesures Préventives
VORSICHT! WICHTIGE HINWEISE IN BEZUG AUF LICHT-PRODUKTE! 1. Das Produkt ist für den professionellen Einsatz im Bereich der Veranstaltungstechnik entwickelt worden und ist nicht für die Raumbeleuchtung in Haushalten geeignet. 2. Blicken Sie niemals, auch nicht kurzzeitig, direkt in den Lichtstrahl. 3. -
Seite 6: Medidas De Seguridad
35. Si vous désirez alimenter plusieurs projecteurs simultanément, les conducteurs du câble secteur doivent posséder une section minimale de 1,5 mm². Dans l’Union Européenne, les câbles électriques doivent être de type H05VV-F ou équivalent. Adam Hall propose des câbles secteur adaptés. De tels câbles permettent d’alimenter plusieurs appareils par renvoi secteur de l’un à... -
Seite 7: Środki Ostrożności
PARA LOS EQUIPOS CON TOMA ELÉCTRICA: 22. ADVERTENCIA: Si el cable eléctrico está provisto de un contacto de protección, debe conectarse a una toma eléctrica con conexión a tierra. No desactivar nunca esta conexión de protección a tierra del cable eléctrico. 23. - Seite 8 5. Używać urządzenia wyłącznie w sposób zgodny z jego przeznaczeniem. 6. Stosować wyłącznie stabilne i pasujące statywy, ew. elementy mocujące (w przypadku instalacji stałych). Należy zadbać o prawidłową instalację uchwytów ściennych i ich odpowiednie zabezpieczenie. Zapewnić bezpieczną instalację urządzenia i upewnić się, że urządzenie nie spadnie. 7.
-
Seite 9: Misure Precauzionali
Ostrzeżenie! Ten symbol ostrzega przed gorącymi powierzchniami. Podczas użytkowania niektóre elementy mogą się nagrzać. Urządzenie można dotykać lub transportować dopiero po jego ostygnięciu (po odczekaniu co najmniej 10 minut). UWAGA! WYSOKI POZIOM GŁOŚNOŚCI PRODUKTÓW AUDIO! To urządzenie przewidziane jest do zastosowań profesjonalnych. Komercyjne stosowanie tego urządzenia podlega obowiązującym w danym kraju przepisom i wytycznym dotyczącym zapobiegania wypadkom. - Seite 10 29. Per staccare completamente il dispositivo dalla rete elettrica, rimuovere il cavo di rete o l‘adattatore di rete dalla presa. 30. Per staccare un dispositivo provvisto di presa Volex, è prima necessario sbloccare la relativa spina Volex del dispositivo stesso. Tirando il cavo di rete, però, il dispositivo potrebbe spostarsi e cadere, provocando danni alle persone o di altro genere.
-
Seite 11: Eigenschaften
100 à 240 volts 50/60 Hz, consommation électrique 120 W UTILISATION La Cameo Hydrabeam RGBW est un barre de 6 projecteurs LED asservis (lyres) pilotables DMX-512. Elle s’utilise en mode autonome, en mode Master ou Slave, et peut se piloter par la musique. - Seite 12 100-240 VAC, 50/60 Hz, consumo de 100 W. El Hydrabeam RGBW de Cameo es un equipo de 6 cabezas móviles que se controla por DMX512 y se puede utilizar en los modos autónomo y maestro/ esclavo o activado por el sonido ambiente.
-
Seite 13: Led Display
CONNECTIONS, CONTROLS AND INDICATORS / ANSCHLÜSSE, BEDIEN- UND ANZEIGEELEMENTE / CONNECTEURS, CONTRÔLES ET INDICATEURS / CONEXIONES, CONTROLES E INDICADORES / PRZYŁĄCZA, ELEMENTY OBSŁUGI I WSKAŹNIKI LED DISPLAY The four-digit LED display indicates the operating mode and other system information. Das vierstellige LED-Display zeigt die Betriebsart und weitere Systeminformationen an. Cet afficheur lumineux à... - Seite 14 POWER OUT IEC mains output socket. Used to supply power to additional CAMEO spotlights. Make sure that the total current consumption in amperes (A) of all connected devices does not exceed the specified value on the device. IEC Netzausgangsbuchse. Dient der Netzversorgung weiterer CAMEO Scheinwerfer. Achten Sie darauf, dass die gesamte Stromaufnahme aller angeschlossenen Geräte den auf dem Gerät in Ampere (A) angegebenen Wert nicht überschreitet.
- Seite 15 OPERATION / BEDIENUNG / UTILISATION / OPERACIÓN / OBSŁUGA / UTILIZZO When the spotlight is properly connected to the mains, the motors are reset. Within a few seconds, the spotlight is ready for use and changes to the mode that was previously selected. SELECTING THE DMX START ADDRESS Press the MODE button repeatedly until the LED indicator shows either “Addr”...
-
Seite 16: Slave-Betrieb
SYSTEM SETTINGS AND SYSTEM INFORMATION To be able to adjust or read system settings and information, press the MODE button repeatedly until “Set” appears on the display. Confirm with ENTER. Now you can select one of the following menu items to make adjustments, using the UP and DOWN buttons: rSet ENTER Reset all motors... -
Seite 17: Systemeinstellungen Und Systeminformationen
REVERSE TILT (DMX-Betriebsart) Die TILT-Bewegungsrichtung einzelner, oder aller 6 beweglichen Köpfe kann mit dieser Funktion umgekehrt werden. Drücken Sie die MODE-Taste so oft, bis im Display „rtiL“ angezeigt wird. Durch Drücken der ENTER-Taste können Sie nun mit Hilfe der UP und DOWN Tasten alle (ALL), oder einen einzelnen Kopf (H1 - H6) auswählen. - Seite 18 PILOTAGE PAR LA MUSIQUE Appuyez plusieurs fois sur la touche MODE, jusqu’à ce que la mention «SoUn» apparaisse dans l’afficheur. Le mode Sound (pilotage par la musique) s’active immédiatement. Appuyez sur ENTER. Dans l’afficheur apparaît alors l’un des 17 programmes de pilotage par la musique disponibles (Pr00 - PR16).
-
Seite 19: Control Automático
SL 1 No invertir el sentido de giro vertical (tilt) (estándar) SL 2 Invertir el sentido de giro de las cabezas 1 a 3 SL 3 Invertir el sentido de giro de las cabezas 4 a 6 SL 4 Invertir el sentido de giro de las cabezas 1 a 3 y 4 a 6 CONTROL AUTOMÁTICO Pulse el botón MODE hasta que en pantalla se muestre «AUtO». - Seite 20 USTAWIANIE TRYBU PRACY DMX Naciskać przycisk MODE, dopóki na wyświetlaczu nie pojawi się napis „ChMO”. Nacisnąć przycisk ENTER. Gdy wszystkie cztery znaki na wyświetla- czu pulsują, można ustawić żądany tryb pracy DMX za pomocą przycisków UP i DOWN (6CH, 11CH, 20CH, 32CH, 60Ch). W celu potwierdzenia naci- snąć...
- Seite 21 Non appena il faro è collegato correttamente alla rete elettrica, i motori vengono resettati. Dopo alcuni secondi, il faro è pronto per l’uso e passa alla modalità di funzionamento precedentemente selezionata. IMPOSTAZIONE DELL’INDIRIZZO DI AVVIO DMX Premere più volte il tasto MODE finché sul display non appare “Addr” (se non è presente alcun segnale DMX) o l’indirizzo di avvio DMX (non appena è...
-
Seite 22: Controllo Dmx
rSet ENTER Reset di tutti i motori ENTER on = display sempre acceso UP/DOWN + ENTER oFF = il display si spegne dopo circa 25 secondo di inattività dISP ENTER La schermata del display viene ruotata di 180° (montaggio invertito) hour ENTER Tempo totale di funzionamento in ore ENTER... - Seite 23 11-CH Mode tilt tilt fine no function master control tilt auto movement (small angle to big angle) master dimmer 0-100% movement speed (fast to slow) no strobe strobe slow to fast automatic colour change light control colour macro (see colour macro table) automatic colour change speed (slow to fast ) all heads move in same direction left/right (heads 4-6 are inverted...
- Seite 24 20-CH Mode master dimmer dimmer 0-100% no strobe strobe slow to fast first head, tilt head speed, fast to slow first head blackout first head, colour macro (see colour macro table) second head, tilt head speed, fast to slow second head blackout second head, colour macro (see colour macro table) third head, tilt...
- Seite 25 CH15 fourth head, tilt CH16 fourth head, tilt fine CH17 fourth head head speed, fast to slow use CH29-CH32 to control colour CH18 fourth head, colour macro (see colour macro table) (overwrites Ch29-32) CH19 fifth head, tilt CH20 fifth head, tilt fine CH21 fifth head head speed, fast to slow...
- Seite 26 60-CH Mode tilt mechanic control tilt fine head speed, fast to slow dimmer dimmer, 0% - 100% no-strobe strobe slow to fast use CH07-CH10 to control colour colour macro (see colour macro table) red dimmer colour selection green dimmer blue dimmer CH10 white dimmer CH11...
- Seite 27 CH41 tilt CH42 mechanic control tilt fine CH43 head speed, fast to slow CH44 dimmer dimmer, 0% - 100% no-strobe CH45 strobe slow to fast use CH47-CH50 to control colour CH46 colour macro (see colour macro table) CH47 red dimmer colour selection CH48...
-
Seite 28: Dmx Connection
DMX TECHNOLOGY / DMX-TECHNIK / TECHNIQUE DMX / TECNOLOGÍA DMX / TECHNIKA DMX / TECNOLOGIA DMX DMX-512 DMX (Digital Multiplex) is the designation for a universal transmission protocol for communications between corresponding devices and controllers. A DMX controller sends DMX data to the connected DMX device(s). -
Seite 29: Dmx-Verbindung
DMX-512 DMX (Digital Multiplex) ist die Bezeichnung für ein universelles Übertragungsprotokoll für die Kommunikation zwischen entsprechenden Geräten und Controllern. Ein DMX-Controller sendet DMX-Daten an das/die angeschlossene(n) DMX-Gerät(e). Die DMX-Datenübertragung erfolgt stets als serieller Datenstrom, der über die an jedem DMX-fähigen Gerät vorhandenen DMX IN- und DMX OUT- Anschlüsse (XLR-Steckverbinder) von einem angeschlossenen Gerät an das nächste weitergeleitet wird, wobei die maximale Anzahl der Geräte 32 nicht überschreiten darf. -
Seite 30: Protocole Dmx
DMX-512 Le terme DMX (Digital Multiplex) désigne un protocole de transport universel permettant la communication entre des appareils et des contrôleurs à ce format. Un contrôleur DMX envoie des données DMX aux appareils DMX qui lui sont connectés. Les données DMX sont transportées sous forme d'un flux série, renvoyé... - Seite 31 DMX512 DMX (Digital Multiplex) es el nombre de un protocolo universal utilizado como medio de comunicación entre dispositivos y controladores. El controlador DMX envía datos DMX a los equipos DMX conectados. Los datos DMX se envían como datos serie que se transmiten de equipo a equipo a través de los conectores XLR «DMX IN»...
- Seite 32 DMX-512 DMX (Digital Multiplex) to nazwa uniwersalnego protokołu transmisji do komunikacji między odpowiednimi urządzeniami a kontrolerami. Kontroler DMX wysyła dane DMX do podłączonych urządzeń DMX. Transmisja danych DMX następuje zawsze w formie szeregowego strumienia danych, który jest przekazywany z jednego urządzenia do następnego przez znajdujące się w każdym urządzeniu obsługującym standard DMX złącza „DMX IN”...
-
Seite 33: Collegamento Dmx
DMX512 DMX (Digital Multiplex) è la sigla di un protocollo di trasmissione universale per la comunicazione tra dispositivi e controller. Un controller DMX invia dati DMX ai dispositivi DMX collegati. I dati DMX vengono sempre trasmessi come flusso di dati seriale, che viene inoltrato da un dispositivo collegato al successivo attraverso le connessioni (connettori XLR) DMX IN e DMX OUT presenti per ogni dispositivo DMX compatibile, per un massimo di 32 dispositivi. - Seite 34 SETTING UP AND MOUNTING / AUFSTELLUNG UND MONTAGE / MISE EN PLACE ET MONTAGE / INSTALACIÓN Y MONTAJE / USTAWIENIE I MONTAŻ / INSTALLAZIONE E MONTAGGIO Thanks to the integrated rubber feet, the spotlight can be placed in a suitable location on the stage floor etc. Mounting on a truss is performed with the help of the supplied omega mounting bracket (truss clamp not included).
- Seite 35 SPECIFICATIONS / TECHNISCHE DATEN / CARACTÉRISTIQUES TECHNIQUES / CARACTERÍSTICAS TÉCNICAS / PRZYŁĄCZA, WYMIARY I MONTAŻ / DATI TECNICI Model Name: CLHB600RGBW Product Type: LED moving light Type: Moving Head Bar Colour Spectrum: RGBW Number of LEDs: LED Type: 10 W Cree Quad LED Beam Angle: 4.5°...
- Seite 36 Stromversorgungsanschluss: IEC Netzbuchse Input und Output Sicherung: T3AL / 250 V (5 x 20 mm) Betriebstemperatur: 0°C - 40°C Relative Luftfeuchtigkeit: < 85%, nicht kondensierend Gehäusematerial: Metall, ABS Gehäusefarbe: schwarz Gehäusekühlung: leise Lüfter Abmessungen 400 x 220 x 240 mm (B x H x T, ohne Montagebügel): Gewicht: 6,8 kg...
- Seite 37 Nombre del modelo: CLHB600RGBW Tipo de producto: Cabeza móvil LED Tipo: Barra de cabezas móviles Colores: RGBW Número de LED: Tipo de LED: LED Cree de 4 colores y 10 W Ángulo de dispersión: 4,5° Entrada DMX: XLR macho de 3 pines Salida DMX: XLR hembra de 3 pines Modos DMX:...
- Seite 38 Natężenie oświetlenia (w Single Head R: 10 000, G: 22 000, B: 4200, W: 36 000 lx odległości 1 m): Złącze zasilania: gniazdo IEC, wejście i wyjście Bezpiecznik: T3AL / 250 V (5 x 20 mm) Temperatura pracy: 0°C–40°C Względna wilgotność powietrza: < 85%, bez kondensacji Materiał...
- Seite 39 MANUFACTURER´S DECLARATIONS / HERSTELLERERKLÄRUNGEN / DECLARATIONS / DECLARACIÓN DEL FABRICANTE / DEKLARACJE PRODUCENTA / DICHIARAZIONI DEL PRODUTTORE MANUFACTURER‘S WARRANTY & LIMITATIONS OF LIABILITY You can find our current warranty conditions and limitations of liability at: https://cdn-shop.adamhall.com/media/pdf/MANUFACTURERS- DECLARATIONS_CAMEO.pdf. To request warranty service for a product, please contact Adam Hall GmbH, Adam-Hall-Str. 1, 61267 Neu Anspach / Email: Info@adamhall.com / +49 (0)6081 / 9419-0.
-
Seite 40: Corretto Smaltimento Del Prodotto
GWARANCJA PRODUCENTA I OGRANICZENIE ODPOWIEDZIALNOŚCI Nasze aktualne warunki gwarancji i informacje dotyczące ograniczenia odpowiedzialności znajdą Państwo na stronie: https://cdn-shop.adamhall. com/media/pdf/MANUFACTURERS-DECLARATIONS_CAMEO.pdf. W razie konieczności skorzystania z serwisu proszę skontaktować się z firmą Adam Hall GmbH, Adam-Hall-Str. 1, 61267 Neu Anspach / e-mail Info@adamhall.com / +49 (0)6081 / 9419-0. PRAWIDŁOWA UTYLIZACJA NINIEJSZEGO PRODUKTU (Obowiązuje w Unii Europejskiej i innych krajach europejskich stosujących system sortowania odpadów) Niniejszy symbol na produkcie lub związanych z nim dokumentach wskazuje, iż... - Seite 44 CAMEOLIGHT.COM Adam Hall GmbH | Adam-Hall-Str. 1 | 61267 Neu-Anspach | Germany Phone: +49 6081 9419-0 | adamhall.com REV: 02...