Werbung
Quicklinks
For instruction video,
scan QR-code.
EN
Mounting instructions
DE
Montageanleitung
FR
Consignes d'installation
NL
Montagevoorschrift
ES
Instrucciones de montage
IT
Istruzioni di montaggio
PT
Manual de montagem
WALL_2225_2245_Mounting_Instr.indd 1
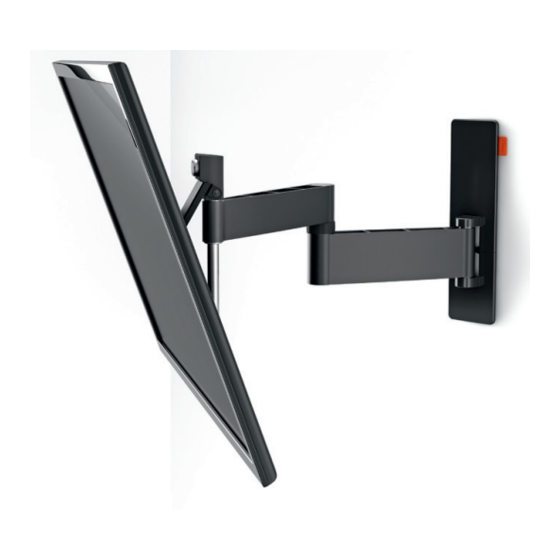
WALL 2225
Οδηγίες συναρμογής
EL
SV
Montageföreskrifter
PL
Instrukcja montażu
RU
Инструкция по сборке и установке
CS
Návod k montáži
SK
Návod na montáž
HU Szerelési előírás
WALL 2245
TR
Montaj kılavuzu
RO Instrucţiuni de montaj
UK
Вказівки по монтажі
BG Инструкции за монтаж
設置の説明書
JA
ZH
Werbung

Verwandte Anleitungen für vogel's WALL 2225


Inhaltszusammenfassung für vogel's WALL 2225
- Seite 1 For instruction video, scan QR-code. WALL 2225 WALL 2245 Οδηγίες συναρμογής Mounting instructions Montaj kılavuzu Montageanleitung Montageföreskrifter RO Instrucţiuni de montaj Consignes d’installation Instrukcja montażu Вказівки по монтажі Montagevoorschrift Инструкция по сборке и установке BG Инструкции за монтаж 設置の説明書 Instrucciones de montage Návod k montáži...
- Seite 2 Important Before mounting the wall mount, first read the warnings at the back of the supplied parts list (separate card). DE - Wichtig - Önemli Lesen Sie vor der Montage des Wandhalters zuerst die Duvar montesini monte etmeden önce, (ayrı kart olarak) Warnhinweise auf der Rückseite der mitgelieferten Teileliste verilen parça listesinin arkasında bulunan uyarıları...
- Seite 3 1 Position the strips (C) on the screen. Make sure that the strips do not cover the connectors on the screen. CS - Umístěte lišty (C) na obrazovku. DE - Positionieren Sie die Schienen (C) am Bildschirm. Achten Sie darauf, dass die Schienen die Anschlüsse am Bildschirm nicht bedecken.
- Seite 4 (Optional) (Optional) 2 Screw the strips (C) onto the screen. Refer to the user manual of your screen for the correct bolt size (G). CS - Našroubujte lišty (C) na obrazovku. DE - Schrauben Sie die Schienen (C) an den Bildschirm. Die richtige Schraubengröße (G) finden Sie im Benutzerhandbuch Ihres Bildschirms.
- Seite 5 no. 4 3.1 Loosen the bolts on the strips (C). 3.2 Remove the caps (R). DE - Lösen Sie die Schrauben an den senkrechten Schienen (C). DE - Entfernen Sie die Kappen (R). - Desserrez les boulons sur les barrettes (C). - Déposez les embouts (R).
- Seite 6 3.3 Slide the bars (B) over the strips (C). Make sure that the bars do not cover the connectors on the screen. - Schieben Sie die waagerechte Schienen (B) über die senkrechte Schienen (C). - Вставить рейки (В) в консольные планки (C). Убедитесь, что...
- Seite 7 no. 4 4.2 Place the caps (R) back onto the bars (B). 4.1 Tighten the bolts. - Ziehen Sie die Schrauben fest. - Bringen Sie die Kappen (R) wieder an den waagerechte Schienen (B) an. - Serrez les boulons. - Remettez les embouts (R) en place dans les barres (B). - Draai de bouten vast.
- Seite 8 5 Slide the covers (Q) from the wall mount (A). DE - Schieben Sie die Abdeckungen (Q) vom Wandhalter (A). - Faites glisser les capots (Q) du support mural (A). NL - Schuif de afdekkappen (Q) van de wandsteun (A). - Retire las cubiertas embellecedoras (Q) del soporte de pared (A) deslizándolas.
- Seite 9 ø 5mm 20mm/0.8” ø 5 mm ø 13/64” 20 mm/0.8" ø 13/64" 80mm/3.2” 80 mm/3.2" ø 10mm 20mm/0.8” ø 10 mm ø 25/64” 20 mm/0.8" ø 25/64" 6 Drill the holes. DE - Bohren Sie die Löcher. - Forez les trous. NL - Boor de gaten.
- Seite 10 45mm/1.8” ø 4mm 50 mm/2.0" ø 5 mm ø 5/32” ø 13/64" 6 Drill the holes. DE - Bohren Sie die Löcher. - Forez les trous. NL - Boor de gaten. - Perfore los agujeros. - Eseguire i fori con un trapano. - Abra os orifícios.
- Seite 11 ø 5mm 20mm/0.8” ø 13/64” no.13 no.13 80mm/3.2” ø 10mm 20mm/0.8” ø 25/64” 7 Screw the wall mount (A) onto the wall. DE - Schrauben Sie den Wandhalter (A) an die Wand. - Vissez le support mural (A) sur le mur. NL - Schroef de wandsteun (A) op de muur.
- Seite 12 no.13 no.13 45mm/1.8” ø 4mm ø 5/32” 7 Screw the wall mount (A) onto the wall. DE - Schrauben Sie den Wandhalter (A) an die Wand. - Vissez le support mural (A) sur le mur. NL - Schroef de wandsteun (A) op de muur. - Atornille el soporte de pared (A) a la pared.
- Seite 13 8 Slide the covers (Q) back onto the wall mount (A). 9 Loosen the upper thumbscrew; remove the lower thumbscrew. DE - Schieben Sie die Abdeckungen (Q) wieder auf den Wandhalter (A). DE - Lösen Sie die obere Flügelschraube. Entfernen Sie die untere Flügelschraube. FR - Faites à...
- Seite 14 10.1 Hook the TV onto the wall mount (A). Hook the upper thumb screw into the V-shaped recess. - Zavěste televizor na nástěnnou jednotku (A). - Haken Sie das Fernsehgerät am Wandhalter (A). Haken Sie die obere Fügelschraube in den V-förmigen Rücksprung ein. Zahákněte horní...
- Seite 15 10.2 Position the TV level. 10.3 Place the lower thumbscrew back; tighten both thumbscrews. - Richten Sie das Fernsehgerät aus. - Bringen Sie die untere Flügelschraube wieder an. Ziehen Sie beide Flügelschrauben fest. - Remettez la molette inférieure en place ; serrez les deux molettes. - Positionnez le téléviseur parfaitement de niveau.
- Seite 16 no. 4 • Guide the cables. • If the tilt option is not used and the screen still tilts downwards/upwards: tighten/loosen screw S. DE - Verlegen Sie die Kabel. DE - Wenn die Neigeoption nicht verwendet wird und der Bildschirm sich trotzdem nach unten/oben neigt: ziehen Sie Schraube S fest/lösen - Guidez les câbles.
- Seite 17 • Remove the TV from the wall mount (A). Loosen the upper thumbscrew; remove the lower thumbscrew. Remove the TV. RU - Снимите телевизор с настенного кронштейна (A). Ослабить верхний винт DE - Nehmen Sie das Fernsehgerät vom Wandhalter (A). Lösen Sie die obere Flügel- schraube.