Herunterladen Inhalt Inhalt Diese Seite drucken
Smartwares IAN 271723 Schnellstartanleitung

Smartwares IAN 271723 Schnellstartanleitung

Ip-überwachungskamera
Vorschau ausblenden Andere Handbücher für IAN 271723:
Inhaltsverzeichnis

Werbung

Verfügbare Sprachen

Verfügbare Sprachen

IP SurVeIllance camera
Quick-start guide with instructions for
assembly and use, and safety notices
IP-ÜBerwachungSkamera
Quick-Start-Guide mit Montage-, Bedienungs-
und Sicherheitshinweisen
IAN 271723
BezPečnoStní IP kamera
Quick Start Guide s návodem k montáži,
obsluze a bezpečnostními pokyny
Version 1.4

Werbung

Inhaltsverzeichnis
loading

Inhaltszusammenfassung für Smartwares IAN 271723

  • Seite 1 IP SurVeIllance camera IP SurVeIllance camera BezPečnoStní IP kamera Quick-start guide with instructions for Quick Start Guide s návodem k montáži, assembly and use, and safety notices obsluze a bezpečnostními pokyny IP-ÜBerwachungSkamera Quick-Start-Guide mit Montage-, Bedienungs- und Sicherheitshinweisen IAN 271723 Version 1.4...
  • Seite 2 Before reading, unfold both pages containing illustrations and familiarise yourself with all functions of the device. Před čtením si odklopte obě dvě strany s obrázky a potom se seznamte se všemi funkcemi přístroje. Klappen Sie vor dem Lesen die beiden Seiten mit den Abbildungen aus und machen Sie sich anschließend mit allen Funktionen des Gerätes vertraut.
  • Seite 7: Inhaltsverzeichnis

    List of pictograms used ..........Page 6 Introduction Intended use ................Page 7 Parts Description ..............Page 8 Technical Data ................ Page 8 Scope of delivery ..............Page 9 Safety instructions ............Page 10 Installing the camera ..........Page 13 Connecting the camera ............
  • Seite 8: List Of Pictograms Used

    List of pictograms used Read the instructions! Safety instructions Directions for use Dust- and hose-proof DaNger: This symbol with wording "DANGeR" indicates a hazard which may result in serious injuries or death if not observed. To avoid the danger, follow the instruction. WarNINg: This symbol with the wording "WARNING"...
  • Seite 9: Intended Use

    IP Surveillance Camera Introduction Congratulations on the purchase of your new product. In doing so you have chosen a top-quality product. Familiarise yourself with the product before using it for the first time To do so, carefully read the following quick-start guide including instructions for assembly and use, and safety notices.
  • Seite 10: Parts Description

    Parts Description Before reading, unfold the page containing the illustrations and famil- iarise yourself with all functions of the device. Camera Mounting bracket WLAN aerial Tutorial CD Wall plug Screws Power supply ethernet cable (see Fig. B) RJ-45 connection element ReSeT button (see Fig.
  • Seite 11: Scope Of Delivery

    Resolution (horizontal TV lines): 1280 x 720 pixel Picture angle: h 65 °, v 38 ° Detection range Motion detector: 90° x 5 m Infrared range (night vision mode black / white): 6 IR LeDs up to 8 m range Light sensitivity: 1–8 LUX Operating temperature:...
  • Seite 12: Safety Instructions

    1 Camera 1 Mounting bracket 1 WLAN aerial 1 Power supply 1 Mounting kit 1 Tutorial CD 1 RJ-45 connection element 2 Decals for marking the area under surveillance 1 Quick-start guide with instructions for assembly and use, and safety notices Safety instructions Damage due to failure to comply with these instructions for use will...
  • Seite 13 Do not allow children to play with the device. Cleaning and user maintenance must not be performed by children without supervision. DaNger TO LIFe! During installation keep children away from the area in which you are working. A large number of screws and other small parts are included within the scope of delivery.
  • Seite 14 aC adaptor Only plug the power supply into easy to access sockets so it can easily be unplugged in the event of an emergency. Do not touch the power supply with wet hands. Otherwise there is a risk of electric shock. Only use the power supply in dry indoor spaces.
  • Seite 15: Installing The Camera

    Keep away from open flames. For example, do not place any burning candles on or near the device. That way you can avoid the spread of fire. Installing the camera Note: Mount the camera at a height and position at which it cannot be reached without aid.
  • Seite 16: Connecting The Camera

    Note: For details and more information, please refer to the included tutorial CD Connecting the camera (see Fig. B) Connect the ethernet cable with the router. Plug the connector of the power supply into the camera Plug the power supply into the socket.
  • Seite 17: Camera Setup

    Camera setup Download the „OMGuard HD“ app from the App Store or Google Play (see Fig. C). In the app, select „Add new system“ and „Scan“ to select the camera you wish to connect to the router. This will open a new window with all the cameras available on the network.
  • Seite 18 Select „More“ and enter the default Admin password „123456“. Click „OK“ to confirm. Opening „More“ for the first time will open a window prompting you to enter a new Admin password. You will need to enter a new password or you will be unable to access the settings. To change the password again later, scroll all the way up in the „Adv.
  • Seite 19: Using The Camera

    Using the camera Please check the preview image (still frame) (see Fig. H). Select the camera image and enter your new security code. You will now see the „Live Image“ from the camera (see Fig. I). For an IOS device select in the app to view a live camera recording (see Fig.
  • Seite 20: Troubleshooting

    phone on different networks - connected via internet) Connec- tion quality = good / normal / poor. Note: For details and more information, please refer to the included tutorial CD Notice to android users: Close the app after viewing the camera image on your mobile.
  • Seite 21: Cleaning And Care

    A poor image will appear. Do not set up the camera directly behind a glass pane. Do not aim the camera directly at a light source. If necessary, clean the camera lens (carefully, using a slight damp cloth). Unable to connect to the camera. Check if the camera and smartphone / tablet are on the same WLAN network.
  • Seite 22: Warranty And Service

    In the event of a warranty claim, please first contact the service department by phone. This is the only way to return your product free of charge. Service address Smartwares Safety & Lighting Ltd. Byron House, Sherwood Road 34 Aston Fields, Bromsgrove...
  • Seite 23: Notes On Conformity

    Fees depend on your individual network. technical.sl.uk@smartwares.eu www.smartwares.eu IaN 271723 Please have your receipt and the item number (IAN 271723) ready as your proof of purchase when enquiring about your product. Notes on Conformity This „IP Surveillance Camera“ IAN 271723 meets the requirements of the applicable european directives: R&TTe Directive (1999 / 5 / eC)
  • Seite 24: Trademark Notices

    Trademark notices iOS and Apple are registered trademarks of Apple Inc in the USA and other countries. App Store is a registered trademark of Apple Inc. Android and Google Play are registered trademarks of Google Inc. Other names, trademarks and products listed in these instructions are the property of the respective owners and may be protected.
  • Seite 25 Vysvětlení použitých piktogramů ....Strana 24 Úvod Použití ke stanovenému účelu..........Strana 25 Popis dílů ................Strana 26 Technická data ..............Strana 26 Obsah dodávky ..............Strana 28 Bezpečnostní pokyny ..........Strana 28 Montáž kamery ............Strana 31 Připojení kamery..............Strana 32 Zařízení...
  • Seite 26: Vysvětlení Použitých Piktogramů

    Vysvětlení použitých piktogramů Přečtěte si pokyny! Bezpečnostní Pokyny k použití Chráněné proti prachu a stříkající vodě NeBeZPeČí: Tento symbol s upozorněním „NeBeZPečí“ označuje nebezpečí, která mohou při nerespektování pokynů vést k těžkým zraněním nebo usmrcení. Řiďte se příslušným pokynem, aby jste zabránili ohrožení. VýSTraHa: Tento symbol s upozorněním „VýSTRAHA“...
  • Seite 27: Použití Ke Stanovenému Účelu

    Bezpečnostní IP kamera Úvod Blahopřejeme Vám k zakoupení Vašeho nového přístroje. Rozhodli jste se pro vysoce kvalitní výrobek. Před prvním uvedením do provozu se seznamte s výrobkem. Přečtěte si k tomu pozorně následující Quick Start Guide s návodem k montáži, obsluze a bezpečnostními pokyny.
  • Seite 28: Popis Dílů

    Popis dílů Před čtením si otevřete stranu s obrázky a potom se seznamte se všemi funkcemi zařízení. Kamera Montážní držák WLAN anténa CD s návodem Hmoždinka Šrouby Síťový adaptér ethernet kabel (viz obr. B) RJ-45 Spojovací element Tlačítko ReSeT (viz obr. B) Slot pro SD kartu (pro Micro SD maximálně...
  • Seite 29 Rozlišení (TV řádky vodorovně): 1280 x 720 Pixel Obrazový úhel: H 65 °, V 38 ° Prostor dosahu pohybového senzoru: 90° x 5 m Infračervená oblast (režim nočního vidění, černo-bílý): 6 IR LeD, dosah až 8 m Světlocitlivost: 1 až 8 LUX Provozní...
  • Seite 30: Obsah Dodávky

    Obsah dodávky Vyjměte všechny díly z balení a odstraňte úplně obalový materiál. V případě chybějících nebo poškozených dílů se obraťte na zákaznický servis. 1 kamera 1 montážní držák 1 WLAN anténa 1 síťový adaptér 1 sada na připevnění 1 CD s návodem 1 RJ-45 spojovací...
  • Seite 31 Uchovávejte výrobek mimo dosah dětí. Tento přístroj mohou použí- vat děti starší 8 let, osoby se sníženými fyzickými, smyslovými nebo duševními schopnosti nebo s nedostatečnými zkušenostmi a zna- lostmi, jestliže budou pod dohledem nebo byly poučeny o bez- pečném používání přístroje a chápou nebezpečí, která z jeho používání...
  • Seite 32 2,4 GHz (následky rušení jsou mimo jiné špatná kvalita obrazu nebo problémy přenosu). Při instalaci nebo provozu dodržujte odstup nejméně 3 metry. Kameru neotevírejte. Kamera je bezúdržbová. Jestliže výrobek otevřete, zanikne záruka. Zajistěte, aby se při montáži nepoškodily žádné vodiče. Síťový...
  • Seite 33: Montáž Kamery

    Prostory monitorované kamerou se musí označit. Odpovídající nálepky jsou přiložené v obsahu, prosíme, respektujte povinnosti značení v dotyčné zemi. Nestavte na přístroj nebo do jeho blízkasti nádoby naplněné teku- tinou, např. vázy nebo nápoje. Chraňte síťový adaptér před kapa- jící nebo stříkající vodou. Chraňte přístroj před ohněm.
  • Seite 34: Připojení Kamery

    Jestliže je kamera šroubem již dostatečně připevněná na montážní držák , otáčejte trojúhelníkovou matkou v protisměru, abyste kameru zafixovali. Poznámka: Podrobnosti a další informace najdete v dodaném návodu na CD Připojení kamery (viz obr. B) Připojte propojovací kabel pro ethernet na router.
  • Seite 35: Zařízení Kamery

    Zařízení kamery Stáhněte si App „OMGuard HD“ z App-Store nebo od Google Play (viz obr. C). V aplikaci zvolte „přidat nový systém“ a potom „Hledat“, abyste mohli navolit kameru , která má být s routerem spojena. Otevře se další okno, ve kterém jsou uvedené všechny kamery zapojené do počítačové...
  • Seite 36 Zvolte „Další“ a zadejte přednastavené heslo administrátora „123456“. Potvrďte s „OK“. Po prvním zvolení „Další“ se otevře okno se žádostí o udání nového hesla administrátora. Zde musíte nové heslo zadat, jinak se přístup k nastavení neotevře. Jestliže chcete později Vaše heslo znovu změnit, přejděte v menu „Rozšířená...
  • Seite 37: Použití Kamery

    Použití kamery Prosíme, zkontrolujte první náhled kamery (fotografii) (viz obr. H). Zvolte obraz kamery a zadejte Vámi změněný bezpečnostní kód. Nyní vidíte „Živý obraz“ kamery (viz obr. I). Zvolte v aplikaci na Vašem IOS přístroji , pro zhlédnutí živých záběrů kamery (viz obr. J vpravo). Alternativně...
  • Seite 38: Odstranění Poruch

    Poznámka: Podrobnosti a další informace najdete v dodaném návodu na CD Poznámka pro uživatele android: Po zhlédnutí obrazu kamery aplikaci zavřete. Jestliže se aplikace nachází na hlavní stránce, stiskněte a přidržte za tímto účelem odpovídající tlačítko v levém dolním rohu displeje.
  • Seite 39: Čistění A Ošetřování

    Popřípadě vyčistěte čočku kamery (opatrně, míně navlhčeným hadříkem). Spojení s kamerou není možné. Zkontrolujte, zda se kamera a Smartphone nebo tablet nacházejí ve stejné WLAN síti. Poznámka: Podrobnosti a další informace najdete v dodaném návodu na CD Čistění a ošetřování Před čištěním odpojte výrobek od přívodu elektrického proudu.
  • Seite 40: Záruka A Servis

    starých přístrojů. Informace k bezplatnému a ekologickému odstraněni do odpadu starých elektrických přístrojů obdržíte u Vaší správy obce nebo u příslušné sběrny. Udržujte čisté životní prostředí a provádějte odstranění do odpadu odborně. Děkujeme. Záruka a servis Prohlášení k záruce Na kameru dostáváte 3 roky záruky ode dne zakoupení, platící pro prvního kupce, záruka není...
  • Seite 41: Upozornění Ke Konformitě

    Pro všechny požadavky si připravte pokladní blok a číslo výrobku (IAN 271723) jako doklad o nákupu. Upozornění ke konformitě Tato „IP bezpečnostní kamera“ IAN 271723 splňuje požadavky plat- ných evropských směrnic: Požadavky R&TTe (1999 / 5 / eC) elektromagnetická kompatibilita (2004 / 108 / eC) eG směrnice o nízkém napětí...
  • Seite 42: Upozornění K Použitým Značkám Zboží

    Upozornění k použitým značkám zboží iOS a Apple jsou registrované značky zboží Apple Inc v USA a jiných zemích. App Store je registrovaná značka Apple Inc. Android a Google Play jsou registrované značky Google Inc. Ostatní jména, značky zboží a výrobky, jmenované v tomto návodu jsou majetkem přísluštných osob nebo firem a jsou za určitých okolností...
  • Seite 43 Legende der verwendeten Piktogramme ..............Seite 42 einleitung Bestimmungsgemäße Verwendung ........Seite 43 Teilebeschreibung ..............Seite 44 Technische Daten ..............Seite 44 Lieferumfang ................Seite 46 Sicherheitshinweise ............ Seite 46 Kamera montieren ............Seite 49 Kamera anschließen ............... Seite 50 Kamera einrichten ..............
  • Seite 44: Legende Der Verwendeten Piktogramme

    Legende der verwendeten Piktogramme Anweisungen lesen! Sicherheitshinweise Handlungsanweisungen Staub- und Strahlwassergeschützt geFaHr: Dieses Symbol mit dem Hinweis „GeFAHR“ kenn- zeichnet eine Gefahr, die bei Nichtbeachtung zu schweren Verletzungen oder zum Tod führen kann. Um die Gefähr- dung zu vermeiden, befolgen Sie unbedingt den Hinweis. WarNUNg: Dieses Symbol mit dem Hinweis „WAR- NUNG“...
  • Seite 45: Einleitung

    IP-Überwachungskamera einleitung Wir beglückwünschen Sie zum Kauf Ihres neuen Gerätes. Sie haben sich damit für ein hochwertiges Produkt entschie- den. Machen Sie sich vor der ersten Inbetriebnahme mit dem Produkt vertraut. Lesen Sie hierzu aufmerksam den nachfolgenden Quick-Start-Guide mit Montage-, Bedienungs- und Sicherheitshinweisen. Mit dem Produkt wird ebenfalls eine Anleitungs-CD mitgeliefert, auf der weitere Informationen zu speziellen Funktionen der Kamera erklärt werden u.a.
  • Seite 46: Teilebeschreibung

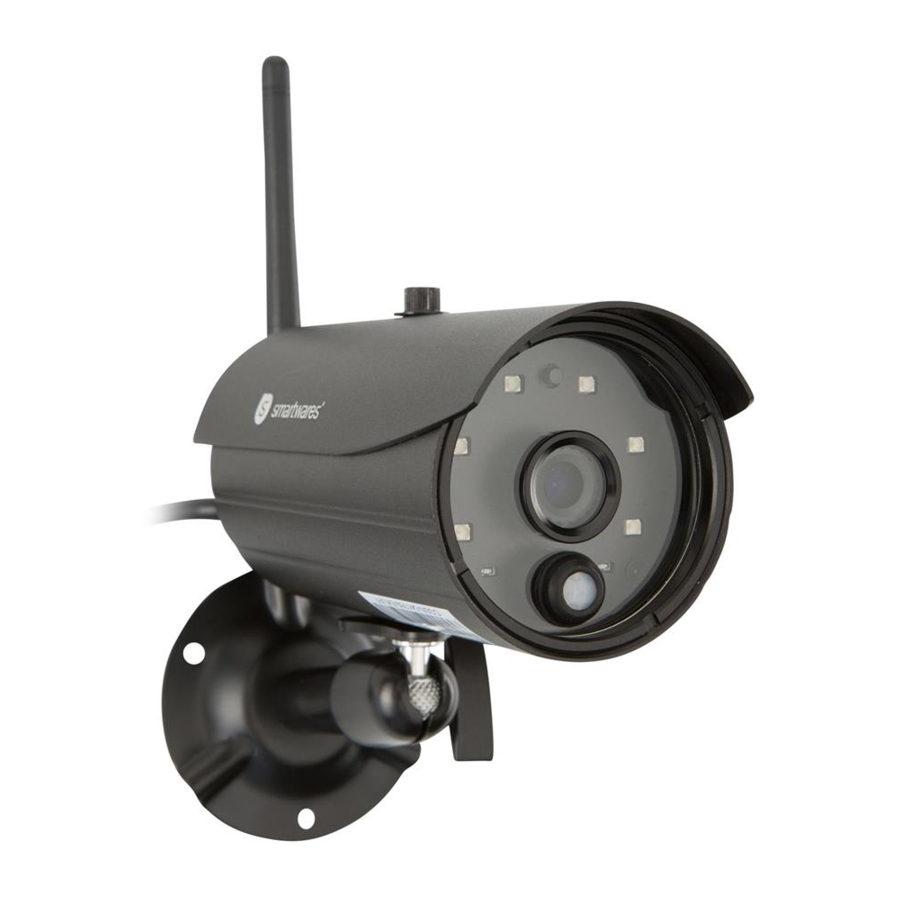
    mungswidriger Verwendung entstandene Schäden übernimmt der Hersteller keine Haftung. Das Produkt ist nicht für den gewerblichen einsatz bestimmt. Teilebeschreibung Klappen Sie vor dem Lesen die Seite mit den Abbildungen aus und machen Sie sich anschließend mit allen Funktionen des Gerätes vertraut. Kamera Montagehalterung WLAN-Antenne...
  • Seite 47: Netzteil (Nur In Trockenen Innenräumen Verwenden)

    Maße: ca. 6 x 11 cm (ø x T), ca. 6 x 15,5 cm (ø x T) (mit WLAN-Antenne und Sonnenschutz) Bildsensor: 2 Megapixel CMOS Brennweite: 3,6 mm Auflösung (TV-Linien horizontal): 1280 x 720 Pixel Bildwinkel: H 65 °, V 38 ° erfassungsbereich Bewegungsmelder: 90°...
  • Seite 48: Lieferumfang

    Lieferumfang entnehmen Sie alle Teile der Verpackung und entfernen Sie vollständig das Verpackungsmaterial. Wenden Sie sich bei fehlenden oder be- schädigten Teilen an den Kundendienst. 1 Kamera 1 Montagehalterung 1 WLAN-Antenne 1 Netzteil 1 Befestigungsset 1 Anleitungs-CD 1 RJ-45 Verbindungselement 2 Sticker zur Kennzeichnung des überwachten Bereichs 1 Quick-Start-Guide mit Bedienungs-, Montage- und Sicherheitshinweisen Sicherheitshinweise...
  • Seite 49 Halten Sie Kinder stets vom Produkt fern. Dieses Gerät kann von Kindern ab 8 Jahren und darüber sowie von Personen mit verrin- gerten physischen, sensorischen oder mentalen Fähigkeiten oder Mangel an erfahrung und Wissen benutzt werden, wenn sie be- aufsichtigt oder bezüglich des sicheren Gebrauchs des Gerätes unterwiesen wurden und die daraus resultierenden Gefahren ver- stehen.
  • Seite 50 Die Kamera ist für die Nutzung im Außenbereich geeignet, das Netzteil darf nur in Innenräumen verwendet werden. Vermeiden Sie harte Stöße. Das kann zu Beschädigung der elektro- nischen Schaltkreise führen. Kabellose Systeme sind Störeinflüssen von Telefonen, Mikrowellen sowie anderen elektronischen Geräten, die im 2,4 GHz-Bereich arbeiten, ausgesetzt (Auswirkungen von Störeinflüssen sind u.
  • Seite 51: Verwendung

    Verlegen Sie das Kabel stolpersicher. Schützen Sie alle Steckverbinder vor Feuchtigkeit. Verwendung Verwenden Sie die Kamera nicht in explosiver Umgebung, z. B. Tankanlagen, oder in staubhaltiger Umgebung. Beachten Sie die Gesetzeslage des jeweiligen Landes, wenn Personen mit dieser Kamera beobachtet werden. Kameraüberwachte Bereiche sind zu kennzeichnen.
  • Seite 52: Kamera Anschließen

    VOrSICHT! VerLeTZUNgSgeFaHr! Ziehen Sie die Bedie- nungsanleitung Ihrer Bohrmaschine hinzu. Bohren Sie nun die Befestigungslöcher (Ø 5 mm). Stellen Sie sicher, dass Sie die Zuleitung nicht beschädigen. Führen Sie nun die Dübel in die Bohrlöcher ein. Befestigen Sie die Montagehalterung mittels der Schrauben an der Wand (Abb.
  • Seite 53: Kamera Einrichten

    verbunden ist. Die grüne LeD zeigt an, dass die Kamera mit dem Router verbunden ist. Hinweis: Wenn Sie mit der Kamera aufzeichnen wollen, legen Sie eine SD-Karte in den SD-Kartenslot ein (s. Abb. B). Öffnen Sie die Gummi-Abdeckung. Schieben Sie die SD-Karte mit den Anschlüssen nach unten in den SD-Kartenslot Drücken Sie die SD-Karte vorsichtig gegen den Widerstand der Feder.
  • Seite 54: Ändern Der Passworte Und Einrichtung Der Kamera Im Wlan-Netz

    Wählen Sie in der App „neues System hinzuf.“ und dann „Su- chen“, um die Kamera auszuwählen, die mit dem Router ver- bunden werden soll. es öffnet sich ein weiteres Fenster, in dem alle im Netzwerk verfügbaren Kameras gelistet sind. Die Kamera er- scheint mit einem Buchstaben- und Zahlen-Code, der auch dem „DID-Code“...
  • Seite 55: Kamera Verwenden

    Ihr altes Passwort ein und anschließend Ihr neues. Bestätigen Sie das neue Passwort durch eine wiederholte eingabe. Scrollen Sie hinunter, bis das Feld „Sicherheitscode“ erscheint. Wählen Sie „ändern“. Geben Sie das voreingestellte alte Kennwort („123456“) ein und wählen Sie ein neues Kennwort, welches Sie durch wiederholte eingabe bestätigen.
  • Seite 56 geänderten Sicherheitscode ein. Nun sehen Sie das „Live-Bild“ der Kamera (s. Abb. I). Wählen Sie in der App bei einem IOS-Gerät , um sich eine Live-Aufnahme der Kamera anzuschauen (s. Abb. J rechts). Wählen Sie alternativ in der App bei einem ANDROID-Gerät um sich eine Aufnahme der Kamera anzuschauen (s.
  • Seite 57: Fehlerbehebung

    werk verbunden als das Telefon - Verbindung via Internet) Verbindungsqualität = gut / normal / mies. Hinweis: Details und weitere Informationen finden Sie auf der mitge- lieferten Anleitungs-CD Hinweis für android-Nutzer: Schließen Sie die App, nachdem Sie sich das Kamerabild auf Ihrem Telefon angesehen haben. Wenn sich die App im Hauptbildschirm befindet, drücken und halten Sie hierzu die entsprechende Taste in der unteren linken ecke des Displays.
  • Seite 58: Reinigung Und Pflege

    Alle einstellungen werden auf die Werkseinstellungen zurückge- setzt. Die komplette Installation muss erneut erfolgen. es wird ein schlechtes Bild angezeigt. Stellen Sie die Kamera nicht direkt hinter einer Glasscheibe auf. Richten Sie die Kamera nicht direkt gegen eine Lichtquelle aus. Reinigen Sie ggf.
  • Seite 59: Garantie Und Service

    Werfen Sie elektrogeräte nicht in den Hausmüll! Das Symbol der durchgestrichenen Mülltonne bedeutet, dass so ge- kennzeichnete Geräte der Richtlinie 2012 / 19 / eU unterliegen und keinesfalls mit dem normalen Hausmüll entsorgt werden dürfen. Sie müssen einer gesonderten Sammelstelle für Altgeräte zugeführt werden. Informationen zur kostenlosen und umweltgerechten entsorgung alter elektrogeräte erhalten Sie bei Ihrer Gemeindeverwaltung oder Ihrem entsorgungsbetrieb.
  • Seite 60: Serviceadresse

    IaN 271723 Bitte halten Sie für alle Anfragen den Kassenbon und die Artikelnum- mer (IAN 271723) als Nachweis für den Kauf bereit. Hinweise zur Konformität Diese „IP-Überwachungskamera“ IAN 271723 erfüllt die Anforderungen der geltenden europäischen Richtlinien: R&TTe-Anforderung (1999 / 5 / eC) elektromagnetische Verträglichkeit (2004 / 108 / eC)
  • Seite 61: Hinweise Zu Den Verwendeten Warenzeichen

    RoHS Richtlinie (2011 / 65 / eU) Ökodesign Richtlinie (2009 / 125 / eC) Die vollständige Konformitätserklärung ist unter folgendem Link hinterlegt: www.smartwares.eu Hinweise zu den verwendeten Warenzeichen iOS und Apple sind eingetragene Warenzeichen der Apple Inc in den USA und anderen Ländern. App Store ist eine eingetragene Marke der Apple Inc.
  • Seite 63 Smartwares BV Broekakkerweg 15 5126 BD Gilze The Netherlands Last Information Update · Stav informací Stand der Informationen: 10 / 2015 Ident.-No.: C935IP102015-CZ IAN 271723...

Inhaltsverzeichnis