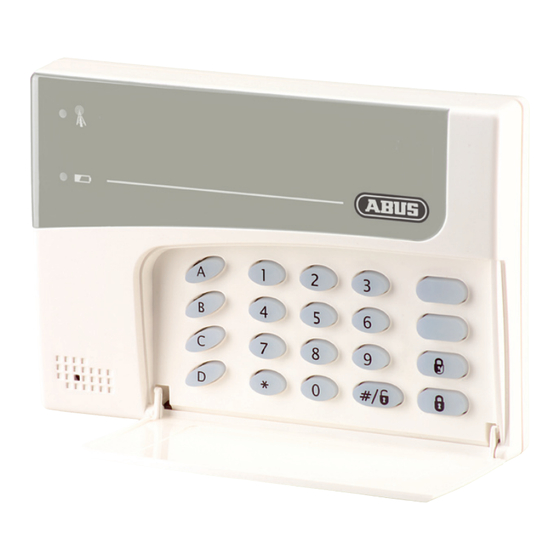
Abus FU9045 Anleitung
Funk-bedienteil
Quicklinks
Funk-Bedienteil
Radio key pad
Elément de commande sans fil
Draadlos bedieningselement
Trådløs betjeningsdel
Vorwort
Sehr geehrte Kundin, sehr geehrter
Kunde, wir bedanken uns für den Kauf des
Funkbedienteils für Ihre Funkalarmanla-
ge. Mit diesem Gerät haben Sie ein Produkt
erworben, das nach dem heutigen Stand der
Technik gebaut wurde.Dieses Produkt erfüllt die
Anforderungen der geltenden europäischen und
nationalen Richtlinien. Die Konformität wurde
nachgewiesen, die entsprechenden Erklärungen
und Unterlagen sind beim Hersteller hinterlegt.
Um diesen Zustand zu erhalten und einen
gefahrlosen Betrieb sicherzustellen, müssen Sie
als Anwender diese Installationsanleitung beach-
ten! Dieses Funkbedienteil dient zum Aktivieren
und Deaktivieren von Teilbereichen oder der
gesamten ABUS Funk-Alarmanlage. Darüber
hinaus können Sie über das Funkbedienteil Aus-
gänge steuern und einen Überfall-, Feuer und
Notfallalarm auslösen. Zwei Funk-Bedienteile
lassen sich in Ihr System einbinden.
Beachten Sie die Anweisungen und Hinweise
in dieser Anleitung! Sollten Sie sich nicht an
diese Anleitung halten, erlischt Ihr Garantiean-
spruch! Für Folgeschäden wird keine Haftung
übernommen! Das gesamte Produkt darf nicht
geändert, geöffnet bzw. umgebaut werden.
Auswahl des Montageortes
Das Funk-Bedienteil wird hauptsächlich an
Nebeneingangstüren oder Garagentüren an
einer Wand angebracht. Montieren Sie es an
einer Stelle mit möglichst guten Sende- und
Empfangseigenschaften. Montieren Sie es
so, dass Sie es bequem bedienen können.
Bringen Sie das Bedienteil NICHT an:
- in der Nähe großer Metallstrukturen
Netzleitungen oder Gasleitungen
- nahe elektr. Geräten oder Funkgeräten
- in Räumen,mit hoher Luftfeuchtigkeit
Preface
Dear Customer,
Thank you for purchasing this radio control
unit for your radio alarm equipment. You
made the right decision in choosing this
state-of-the-art technology, which complies
with the current standards of domestic and
European regulations. The CE has been pro-
ven and all related certifications are available
from the manufacturer upon request. To
maintain this status and to guarantee safe
operation, it is your obligation to observe
these installation instructions.
This radio control unit is used for activating
and deactivating partitions or the complete
ABUS radio alarm system. Furthermore, you
can use the radio control unit to control exits
and trigger panic, fire and emergency alarms.
You can connect two radio control units to
your system.
Read carefully the notes and advice in these
operating instructions! If you do not follow
these instructions, your guarantee claim
becomes invalid! We can accept no liability
for the consequences! No part of the product
may be changed or modified in any way.
Selecting the installation location
The radio control unit is mainly fixed to a wall
near side doors or garage doors. Install it in a
position with the best available transmission
and reception properties. Fix it so that you
can operate it easily.
Do NOT install the control unit:
– near large metal structures
– within 1 metre of electric cables or gas pipes
– near electronic equipment or radio devices
– in rooms with high air humidity
Dieses Gerät erfüllt die Anforderungen der
EU-Richtlinie: 1999/5/EG Richtlinie über
Funkanlagen und Telekommunikationsendein-
richtungen und die gegenseitige Anerkennung
ihrer Konformität.
This product complies with the requirements
of the EU Directive: 1999/5/EC Directive on
radio equipment and telecommunications
terminal equipment and the mutual recogniti-
on of their conformity.
Die Konformitätserklärung ist zu beziehen unter:
The declaration of conformity can be ordered from:
Security-Center GmbH & Co. KG
info@security-center.de,
www.security-center.org/ce
Montage
1. Entfernen Sie die Schraube an der Unter-
seite des Bedienteils (falls vorhanden)
2. Öffnen Sie das Gehäuse. Nehmen Sie
hierzu einen flachen Schraubendreher
und führen ihn in die Halteklappen an der
Unterseite / Rückseite des Gehäuses.
Hebeln Sie die Rückseite vorsichtig von
der Vorderseite des Bedienteils.
3. Wenn Sie den Wandabrisskontakt des
Bedienteils benutzen möchten, entfernen
Sie die Sicherung an der Bodenplatte.
4. Montieren Sie das Bedienteil an die
gewünschte Stelle. Schrauben Sie hierfür
zuerst die Bodenplatte an die Wand.
a. Markieren Sie mit Hilfe der Bodenplat-
te die Position für die Bohrlöcher und
die Schrauben. Nutzen Sie hierfür die
bereits vorhandenen Aussparungen.
b. Befestigen Sie die Bodenplatte mit
Dübel und Schrauben an der Stelle.
5. Achten Sie darauf, dass die Gehäuserück-
seite auf dem Untergrund aufliegt, damit
der Wandabrisskontakt geschlossen ist.
6. Entfernen Sie die Schutzfolie der Lithium-
Batterie und legen Sie sie in die Halterung
ein. Achten Sie auf die Polarität!
7. Schließen Sie das Gehäuse.
Einlernen
Um das Funk-Bedienteil zu nutzen, müssen
Sie es an der ABUS Funk-Alarmanlage ein-
lernen. Gehen Sie dabei wie folgt vor:
1. Gehen Sie an Ihrer Alarmanlage ins Pro-
grammiermenü. Wählen Sie die Taste [8].
2. Drücken Sie die [1]. Sie gelangen in das
Menü, zum Einlernen des Bedienteils.
3. Wählen Sie das Bedienteil, dass Sie in das
System einlernen wollen und drücken Sie die
#/ Taste. Sie haben drei Möglichkeiten:
a. Drücken Sie die [1], um die Einstellung
des nächsten Bedienteils vorzunehmen.
Installation
1. Remove the screw on the base of the
control unit (if fitted)
2. Open the case. Use a flat screwdriver and
insert it in the fixing flaps on the bottom/
back of the housing. Carefully lever the
back away from the front of the control
unit.
3. If you want to use the wall removal contact
of the control unit, remove the fuse??? on
the base-plate.
4. Install the control unit at the selected loca-
tion. First screw the base-plate to the wall.
a. Using the base-plate as a template,
mark the position for the drill-holes and
the screws. Use the holes provided for
this.
b. Fix the base-plate to the wall using wall-
plugs and screws.
5. Make sure that the housing lies flat on the
surface so that the wall removal contact is
closed.
6. Remove the protective foil and insert the
lithium battery provided in the battery clip.
Check the polarity.
7. Close the case.
Learning
To use the radio control unit, you first have
to train it on the ABUS radio alarm centre.
Proceed as follows:
1. Go to the installer menu of your alarm
centre. Press [8].
2. Press [1]. You go to the menu for training
the control unit.
3. Select the control unit you want to train for
the system and press #/. You have three
options:
a. Press [1] to change settings of the next
control unit.
b. Press [2] to train a control unit at this
position. Any existing settings are over-
b. Drücken Sie die [2], um ein Bedienteil
an dieser Position einzulernen. Bereits
vorhandene Einstellungen werden dabei
überschrieben. Um das Bedienteil einzu-
lernen, drücken Sie die Taste zwei Mal
am Bedienteil. Die LED am Bedienteil
blinkt, ein Piepton ist zu hören. Wurde
das Bedienteil erfolgreich an der Alarm-
anlage eingelernt, ertönt ein Signalton.
c. Drücken Sie die [3], um die Einstellun-
gen zu löschen. Wählen Sie J [Ja] oder
N [Nein]. Bestätigen Sie Ihre Einstellung
mit der #/ Taste.
4. Wiederholen Sie die Schritte 2 bis 4 um
das zweite Funk-Bedienteil einzulernen.
5. Testen Sie die Übertragung.
Testen der Funk-Übertragung
Sie können die Funk-Übertragung zwischen
Bedienteil und der Alarmanlage testen.
Funktionen des Bedienteils
Extern aktivieren
Intern aktivieren
Teilbereich Extern aktivieren
Teilbereich Intern aktivieren
System deaktivieren
Teilbereich deaktivieren
Alarm ausschalten
Schaltausgang aktivieren
Überfall-Alarm
Feuer-Alarm
Notfall-Alarm
Makro aktivieren
Warnsignal zurücksetzen
Zurücksetzen während der Ausgangsverzögerung
written. To train the control unit, press
twice. The LED of the control unit
flashes and you hear a beep. When the
control unit is successfully trained for the
alarm system, a signal tone is heard.
c. Press [3] to delete settings. Press for
Y [Yes] or N [No]. Confirm your selection
with #/.
4. Repeat steps 2–4 to train the second radio
control unit.
5. Test transmission.
Testing radio transmission
You can test radio transmission between the
control unit and the alarm centre.
1. Go to the installer menu of your alarm
centre. Press [8].
2. Press [2]. You go to the menu for testing
transmission between the two radio com-
ponents.
Control unit functions
External activation
Internal activation
External activation of partition
Internal activation of partition
Deactivate system
Deactivate partition
Switch off alarm
Activate switch output
Panic alarm
Fire alarm
Emergency alarm
Activate macro
Reset warning signal
Reset during exit delay
1. Gehen Sie an Ihrer Alarmanlage in das
Programmiermenü. Wählen Sie die Taste [8].
2. Drücken Sie die [2]. Sie gelangen in das
Menü zum Testen der Übertragung zwi-
schen beiden Funk-Komponenten.
3. Wählen Sie das zu testende Bedienteil.
4. Drücken Sie eine beliebige Taste.
5. Warten Sie ein paar Sekunden. Ein Signal-
ton ertönt bei erfolgreicher Übertragung.
6. Wiederholen Sie die Schritte 3-5, um das
andere Funk-Bedienteil zu testen oder drü-
cken Sie die * Taste an der Alarmanlage,
um das Programmiermenü zu verlassen.
Bedienung
Wenn der gewünschte Befehl nicht ausge-
führt wird, drücken Sie die Tasten * mehrmals
hintereinander. Versuchen daraufhin erneut
den Befehl auszuführen. Das externe und
interne Aktivieren der Anlage kann so eingestellt
Tastenkombination
Code +
Code +
#/ + [1/2/3] + Code + /
#/ + [1/2/3] + Code + #/
Code + #/
#/ + [1/2/3] + Code + #/
Code + #/
Code, welcher als UO definiert ist + #/
Tasten [1] und [2] 2 Sekunden gedrückt
Tasten [4] und [5] 2 Sekunden gedrückt
Tasten [7] und [8] 2 Sekunden gedrückt
Drücken Sie [A] [B] oder [C]
#/
*
3. Select the control unit you want to test.
4. Press any button.
5. Wait a few seconds. A signal tone sounds
if transmission is successful.
6. Repeat steps 3–5 to test the other radio
control unit or press * on the alarm centre
to exit the installer menu.
Operation
If the desired command is not executed,
press * repeatedly. Try again to execute the
command. You can set external and internal
system activation in such a way that you can
arm the system without having to enter your
user code. With macro keys, you can only
activate the system or control a switch output.
You can perform all other functions only with
the keypad of the control unit. For information
of programming macro keys, see the installa-
tion/operating instructions.
Key combination
Code +
Code +
#/ + [1/2/3] + Code + /
#/ + [1/2/3] + Code + #/
Code + #/
#/ + [1/2/3] + Code + #/
Code + #/
Code, defined as UO, + #/
Buttons [1] and [2] pressed for 2 seconds
Buttons [4] and [5] pressed for 2 seconds
Buttons [7] and [8] pressed for 2 seconds
Press [A], [B] or [C]
#/
*
werden, dass Sie das System auch ohne die
Eingabe Ihres Benutzer-Pin aktivieren können.
Mit Makro-Tasten können Sie nur das System
aktivieren oder einen Schaltausgang steuern.
Alle anderen Funktionen können Sie nur mit
Hilfe der Tastatur des Bedienteils ausführen. Wie
Sie Makro-Tasten programmieren, entnehmen
Sie der Installations-/Bedienungsanleitung.
LEDs
Die Sende-LED leuchtet, wenn eine Taste des
Bedienteils gedrückt wird. Muss die Batterie des
Bedienteils ausgetauscht werden, leuchtet die LED
für den niedrigen Batteriestatus zusätzlich auf.
Batteriewechsel
Entfernen Sie die Bodenplatte des Bedienteils
und tauschen Sie die eingelegte Batterie gegen
eine neue aus. Beachten Sie dabei die Polarität
der Batterien. Schließen Sie das Gehäuse, in-
dem Sie es wieder auf die Bodenplatte clippen.
Es wird ein Sabotagealarm ausgelöst, wenn die das
Bedienteil von der Bodenplatte entfernen. Wenn Sie
mit einer Notrufleitstelle verbunden sind, informie-
ren Sie diese vor dem Batterietausch über den
bevorstehenden Sabotagealarm. Setzen Sie den
Sabotagealarm nach dem Batterietausch zurück.
Frequenz
868,65 MHz
Reichweite
bis zu 50m
HF-Immunität
10V/m 80MHz-1GHz
Modulation
AM
Stromaufnahme
ca. 5 μA standby
Batterie
CR123 3V Lithium
Batterielebensdauer ca. 3 Jahre
Betriebstemperatur
0°C – 55°C
Gewicht
280g
Abm. (H x B x T)
122 x 162 x 30 mm
LEDs
The transmit LED lights up when a control
unit button is pressed. If the control unit bat-
tery has to be changed, the low battery LED
also lights up.
Battery change
Remove the control unit base-plate and
exchange the existing battery for a new one.
Check for correct battery polarity. Close the
housing by clipping it back on the base-plate.
A tamper alarm is triggered when you remove
the control unit from the base-plate. If you
are connected to an emergency command
centre, inform them first that you intend to
change the battery, since this triggers a
tamper alarm. Reset the tamper alarm after
changing the battery.
Frequency
868.65 MHz
Range
up to 50m
HF immunity
10V/m 80MHz – 1GHz
Modulation
AM
Power consumption
ca. 5 μA standby
Battery
CR123 3V Lithium
Battery lifetime
ca. 3 years
Ambient operating
0°C – 55°C
temperature
Weight
280g
Dimensions (HxWxD) 122 x 162 x 30 mm

Verwandte Anleitungen für Abus FU9045


Inhaltszusammenfassung für Abus FU9045
- Seite 1 Code + #/ Battery lifetime ca. 3 years The radio control unit is mainly fixed to a wall to train it on the ABUS radio alarm centre. Deactivate partition #/ + [1/2/3] + Code + #/ Ambient operating 0°C – 55°C near side doors or garage doors.
- Seite 2 Pressez sur [1] pour opérer le réglage Vous pouvez tester la transmission radio entre les clippant de nouveau sur le socle du boîtier. ABUS. En outre, vous pouvez piloter les sorties villes et vis à l’endroit désiré. de la prochaine partie de service.