Herunterladen Inhalt Inhalt Diese Seite drucken
Klarstein 10012196 Bedienungsanleitung

Klarstein 10012196 Bedienungsanleitung

Induktionskochfeld

Werbung

Verfügbare Sprachen
  • DE

Verfügbare Sprachen

  • DEUTSCH, seite 1
Induktionskochfeld
10012196

Werbung

Inhaltsverzeichnis
loading

Inhaltszusammenfassung für Klarstein 10012196

  • Seite 1 Induktionskochfeld 10012196...
  • Seite 2: Technische Daten

    Sehr geehrter Kunde, wir gratulieren Ihnen zum Erwerb Ihres Gerätes. Lesen Sie die folgenden Hinweise sorgfältig durch und befol- gen Sie diese, um möglichen Schäden vorzubeugen. Für Schäden, die durch Missachtung der Hinweise und unsachgemäßen Gebrauch entstehen, übernehmen wir keine Haftung. Technische Daten Artikelnummer 10021296...
  • Seite 3 Standort • Stellen Sie das Gerät auf eine trockene, ebene, wasserfeste und hitzebeständige Oberfläche. • Die Steckdose muss leicht zugänglich sein, um im Notfall das Gerät schnell vom Stromkreis trennen zu können. • Installieren oder positionieren Sie dieses Gerät nicht in einem Bücherregal, Einbauschrank oder einem sons- tigen engen Raum.
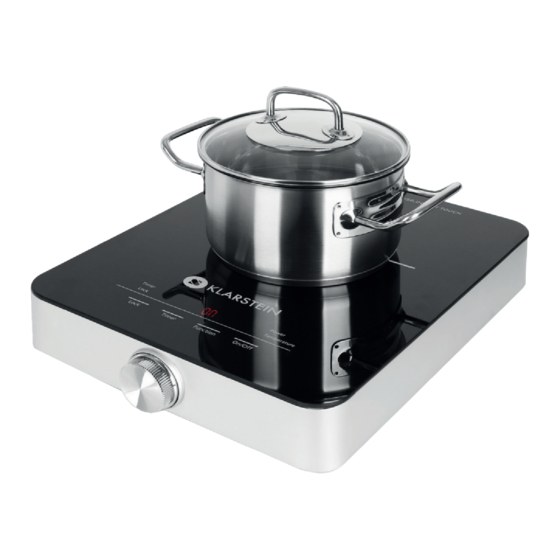
  • Seite 4 Geräteübersicht 1 Luftauslass 2 Kochfläche 3 Lufteinlass 4 Regler 5 Bedienfeld Bedienfeld 6 Timer-Anzeige 7 Power-Anzeige 8 Temperatur-Anzeige 9 Ein/Aus Taste 10 Funktionstaste 11 Timereinstellung 12 Tastensperre 13 Sperr-Anzeige...
  • Seite 5 Inbetriebnahme und Bedienung Gerät einschalten • Drücken Sie die Taste „ON/OFF“, um das Gerät einzuschalten. Das Display zeigt „ON“ und die Ventilatoren laufen an. • Das Gerät erkennt selbständig ob Sie den passenden Topf benutzen, wenn ja, betätigen Sie die „Function“- Taste, um eine gewünschte Einstellung zu wählen.
  • Seite 6: Fehlersuche Und Fehlerbehebung

    Fehlersuche und Fehlerbehebung Fehler Mögliche Ursache Problemlösung Falscher Topf. Benutzen Sie einen passenden Topf. Schaltkreis defekt. Kontaktieren Sie einen Fachbetrieb. Problem mit dem Temperatursensor. Kontaktieren Sie einen Fachbetrieb. Überspannung (mehr als 275V). Prüfen Sie den Stromkreislauf und finden Sie einen geeigneten Stromanschluss.
  • Seite 7: Technical Data

    Dear Customer, Congratulations on purchasing this equipment. Please read this manual carefully and take care of the following hints to avoid damages. Any failure caused by ignoring the mentioned items and cautions mentioned in the instruction manual are not covered by our warranty and any liability. Technical Data Item number 10021296...
  • Seite 8 Location • Set the appliance on a dry, flat, waterproof and heat-resistant surface. • The socket must be readily accessible to disconnect the unit quickly in an emergency from the electrical circuit. • Do not install or position this unit in a bookcase, built-in wardrobe or any other confined space. Ensure good ventilation of the unit.
  • Seite 9: Control Panel

    Product Desciption 1 Air vents 2 Cooktop 3 Air intake openings 4 Control button 5 Control panel Control Panel 6 Timer level display 7 Power display 8 Temperature display 9 On/Off button 10 Function button 11 Timer button 12 Lock button 13 Lock display...
  • Seite 10: Use And Operation

    Use and Operation Switching on • After plugging the induction hob in the electric outlet you will hear a beep and you will see „OFF“ • on the display. Press the On/Off button and the display will show „ON“, the fan will start and the induction hob will change from standby mode to heating mode.
  • Seite 11: Troubleshooting

    Troubleshooting Warning Possible cause Solution An unsuitable pot/pan is on the induction Place suitable cookware on the cooktop. zone or the diameter of the pot/pan is less than 12 cm. Bad connection of the induction hob/ faulty Contact an authorized service center. electrical circuit.
  • Seite 12: Dati Tecnici

    Gentile cliente, La ringraziamo per aver scelto il nostro prodotto. La preghiamo di leggere e di seguire attentamente le seguenti istruzioni in modo da evitare eventuali danni. Decliniamo ogni responsabilità in caso di danni dovuti ad una mancata osservanza delle norme di sicurezza e ad un uso improprio del prodotto. Dati tecnici Numero articolo 10021296...
  • Seite 13 Collocazione • Collocare il dispositivo su una superficie asciutta, piana, impermeabile e resistente al calore. • Collocare il dispositivo in un luogo dove i bambini non abbiano facile accesso alle superfici calde del dispo- sitivo. • La presa di corrente deve essere facilmente accessibile, in modo che il dispositivo sia facilmente scollegabile dall’...
  • Seite 14: Descrizione Del Prodotto

    Descrizione del prodotto 1 Uscita dell’ a ria 2 Piano cottura 3 Entrata dell’ a ria 4 Manopola 5 Pannello di controllo Pannello di controllo 6 Indicatore Timer 7 Indicatore Power 8 Indicatore temperatura 9 Accensione /Spegnimento 10 Tasti funzione 11 Impostazione Timer 12 Tasto di blocco 13 Indicatore blocco...
  • Seite 15: Messa In Funzione E Utilizzo

    Messa in funzione e utilizzo Accensione del dispositivo • Premere il tasto “ON/OFF” per accendere il dispositivo. Sul display appare “ON” e il sistema di ventilazione si avvia. • Il dispositivo riconosce autonomamente se la pentola utilizzata è idonea. In caso risulta adatta, azionare il tasto “Function”...
  • Seite 16: Dichiarazione Di Conformità

    Identificazione e Risoluzione dei Problemi Errore Possibili cause Soluzione Pentola non idonea. Utilizzare una pentola idonea. Circuito elettrico difettoso. Contattare personale tecnico. Problema con il sensore della Contattare personale tecnico. temperatura. Sovratensione (oltre i 275 V). Verificare la corrente elettrica e utilizzare una presa di corrente adatta.
  • Seite 17: Datos Técnicos

    Estimado cliente: Le felicitamos por la adquisición de este producto. Lea atentamente el siguiente manual y siga cuidadosamente las instrucciones de uso con el fin de evitar posibles daños. La empresa no se responsabiliza de los daños ocasionados por un uso indebido del producto o por haber desatendido las indicaciones de seguridad. Datos técnicos Número de artículo 10021296...
  • Seite 18 Colocación • Coloque el aparato en una superficie seca, plana y resistente al calor y al agua. • La toma de corriente debe ser accesible para desconectar el aparato de la red eléctrica en caso de avería. • No instale ni coloque este aparato en estanterías, armarios empotrados u otros lugares estrechos. Asegúrese de que el aparato tiene suficiente ventilación.
  • Seite 19: Descripción Del Aparato

    Descripción del aparato 1 Salida de aire 2 Superficie para cocinar 3 Entrada de aire 4 Regulador 5 Panel de control Panel de control 6 Indicador del temporizador 7 Indicador de potencia 8 Indicador de temperatura 9 Botón on/off 10 Botón de función 11 Ajustes del temporizador 12 Botón de bloqueo 13 Indicador de bloqueo...
  • Seite 20: Puesta En Marcha Y Uso

    Puesta en marcha y uso Encender el aparato • Pulse el botón “ON/OFF” para encender el aparato. El display mostrará “ON” y los ventiladores comenzarán a moverse. • El aparato reconoce si está utilizando una batería de cocina adecuada. En caso afirmativo, pulse el botón “Function”...
  • Seite 21: Detección Y Resolución De Problemas

    Detección y resolución de problemas Error Causa posible Solución Batería de cocina no adecuada. Utilice una batería de cocina adecuada. Circuito eléctrico averiado. Contacte con el servicio técnico. Problema con el sensor de Contacte con el servicio técnico. temperatura. Sobretensión (superior a 275 V). Compruebe el circuito eléctrico y localice una conexión eléctrica adecuada.
  • Seite 22: Données Techniques

    Chère cliente, cher client, Toutes nos félicitations pour l’ a cquisition de ce nouvel appareil. Veuillez lire attentivement et respecter les instructions de ce mode d’ e mploi afin d’ é viter d’ é ventuels dommages. Nous ne saurions être tenus pour res- ponsables des dommages dus au non-respect des consignes et à...
  • Seite 23 Emplacement • Placer l’ a ppareil sur une surface sèche, plane, imperméable et résistante à la chaleur. • La prise électrique doit être facile d’ a ccès pour, en cas d’urgence, pouvoir séparer l’ a ppareil du circuit élec- trique. •...
  • Seite 24: Aperçu De L' A Ppareil

    Aperçu de l’ a ppareil 1 Sortie d’ a ir 2 Surface de cuisson 3 Entrée d’ a ir 4 Régulateur 5 Panneau de commande Panneau de commande 6 Témoin du minuteur 7 Témoin de puissance 8 Témoin de température 9 Touche «...
  • Seite 25: Mise En Marche Et Utilisation

    Mise en marche et utilisation Mise en marche de l’appareil • Appuyer sur la touche « marche/arrêt » pour mettre l’ a ppareil en marche. L’ a ffichage indique « ON » et les ventilateurs se mettent en marche. • L’ a ppareil repère automatiquement si la casserole est appropriée. Si tel est le cas, appuyer sur la touche « Function »...
  • Seite 26: Résolution Des Problèmes

    Résolution des problèmes Problème Cause possible Solution Casserole inappropriée. Utiliser une casserole appropriée. Circuit défectueux. Contacter une entreprise spécialisée. Problème avec le détecteur de Contacter une entreprise spécialisée. température. Surtension (plus de 275 V). Vérifier le circuit électrique et trouver un raccordement électrique adapté.

Inhaltsverzeichnis