Werbung
Quicklinks
Aufbauanleitung / assembly instructions mod.
5612-5614 & 5616-5618 ARA mit Frontauszug
4x
4x
M10
M6 x 20
Metallstreben
Metallstreben-
-paket
paket
1.Montagematerial.
1. Fitting material.
Achtung, auf die Ausrichtung
von Säule und Bohrungen
achten!
Pay attention to the alignment
of the column and the holes!
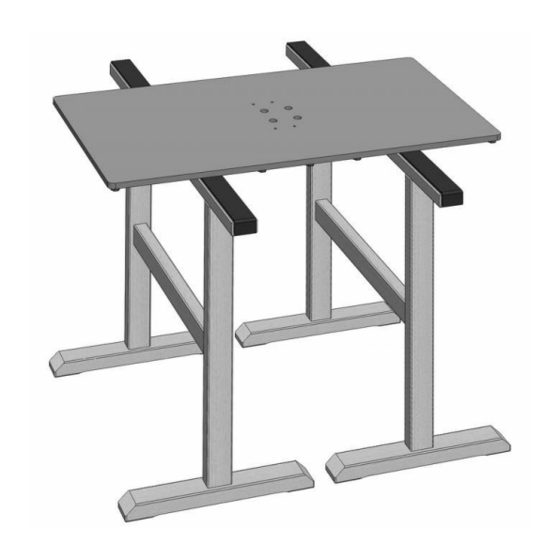
2. Die Stahl Bodenplatte auf gepolsterte Montageböcke legen.
2. Put the steel base plate onto padded assembling trestles.
5612-5614 & 5616-5618 ARA mit Frontauszug
4x
4x
M6 x 30
6 x 20
Metallstreben-
Metallstreben
paket
-paket
1 / 8
4x
4x
10,5 x 30
M10
Metallstreben-
Metallstreben
paket
-paket
Bitte diese Aufbauanleitung
sorgfältig aufbewahren!
Please keep this assembly
instructions carefully!
12x
M6 x 30
Oberbaupaket
1x
M10
Unterbau-
paket
!
Änderungsdatum: 07.04.22
Werbung

Inhaltszusammenfassung für Venjakob 5612 ARA
- Seite 1 Aufbauanleitung / assembly instructions mod. Bitte diese Aufbauanleitung sorgfältig aufbewahren! 5612-5614 & 5616-5618 ARA mit Frontauszug Please keep this assembly instructions carefully! M6 x 20 M6 x 30 6 x 20 10,5 x 30 M6 x 30 Metallstreben Metallstreben- Metallstreben- Metallstreben Metallstreben- Metallstreben...
- Seite 2 3. Die Holzsäule mit 4 Rundmuttern zunächst lose fixieren. 3. First loosely fix the wooden table column with 4 round nuts. M6 x 20 4. Die beiden Metallstreben mit je zwei Senkkopfschrauben fixieren. 4. Fix the two metal bars with each two countersunk screws. 2 / 8 5612-5614 &...
- Seite 3 Zur Überprüfung / for verification: Richtig montiert / Properly mounted. Falsch montiert / Incorrectly mounted. 5a. Die Holzsäule mittig zwischen den 5b. Die vier Rundmuttern nun fest anziehen. Metallstreben ausrichten. 5b. Now tighten the four round nuts firmly. 5a. Align the wooden column in the middle between the metal struts.
- Seite 4 M6 x 30 10,5 x 30 6 x 20 7. Die Halteplatte fixieren. Anschließend den Unterbau auf den Boden stellen. 7. Fix the holding plate. Then put the base onto the floor. 4 / 8 5612-5614 & 5616-5618 ARA mit Frontauszug Änderungsdatum: 07.04.22...
- Seite 5 M6 x 30 8. Den Oberbau auf den Unterbau legen und mit 12 Inbusschrauben verbinden. 8. Put the table top onto the table base and fix with 12 hexagon socket screws. 9. Vor dem Ausziehen auf beiden Seiten die 10. Fertig, ausgezogen. schwarzen Bremshebel lösen.
- Seite 6 Klappeinlage in der itte einstellen / adjust the extension in iddle 11. Prüfen ob die Oberkanten des Auszugs und der Hauptplatte innen auf einer Höhe sind. Nur wenn nicht … 11. Check in the middle if the upper surfaces of the board and the extension are on one level.
-
Seite 7: R Ight Side
14. Prüfen ob die Oberkanten des Auszugs und der Hauptplatte außen auf einer Höhe sind. Wenn nicht … 14. Check at the outer sides, if the upper surfaces of the board and the extension are on one level. If not ... echte Seite einstellen / adjust the ight side: schwarze Stellschrauben... -
Seite 8: L Eft Side
inke Seite einstellen / adjust the eft side: 16a. Die Klappeinlage fassen und beide Teile 16b. … und beide Halbteile umklappen. gleichzeitig vorsichtig hochklappen... Die Höhe mit einem Kreuz-Schraubendreher 16a. Grab both pieces of the table-extension an den schwarzen Laschen einstellen. and swing out both pieces of the table- 16b.


