Inhaltsverzeichnis
Werbung
Verfügbare Sprachen
Verfügbare Sprachen
Quicklinks
Werbung
Inhaltsverzeichnis

Verwandte Anleitungen für Bresser NATIONAL GEOGRAPHIC 76/700 EQ


Inhaltszusammenfassung für Bresser NATIONAL GEOGRAPHIC 76/700 EQ
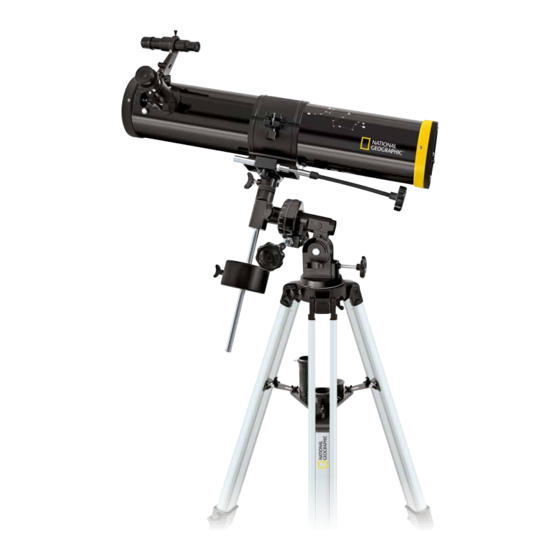
- Seite 1 REFLECTOR TELESCOPE 76/700 EQ Operating instructions Bedienungsanleitung Mode d’emploi Handleiding Istruzioni per l’uso Instrucciones de uso Manual de utilização Instrukcja obsługi Art.No.: 9454103...
-
Seite 2: General Information
General Information Scope of delivery About This Instruction Manual Telescope Tube (OTA) Protection cap Please read the safety instructions in this manual carefully. To avoid damage to the unit and the risk of injury, only use this product as described in the manual. Keep the instruction manual handy so that you can easily look up information on all ... -
Seite 3: Parts - Accessories
Moon filter Astro Software via Download Smartphone Adaptor Telescope optical tube assembly (OTA) ASTRONOMY SOFTWARE DOWNLOAD: Viewfinder scope www.bresser.de/download/EQ/Astro_Software Adjusting-screws (Viewfinder) Viewfinder slide-in OTA opening Eyepiece connection Focus wheel ... - Seite 4 1. General/Location: 4. Assembly - Accessory tray: Before you begin the assembly, you must choose a suitable location for your telescope. It helps, if you setup this instrument in a location, where a clear view of the skies, a stable footing and sufficient space around you are given.
-
Seite 5: View-Finder Adjustment
7. Assembly - Viewfinder: 10. Eyepiece setup: First place the viewfinder scope (2), as indicated, through the finder Three eyepieces are supplied as standard accessories with this holder. telescope. Then gently tighten the adjusting screws (3), so that the telescope You can decide which magnification you want to use for your does not fall out. - Seite 6 Handling of the mount Fixing- and adjusting screw latitude-axis OTA ring Focus wheel Counterweight Scale of the declination-axis Fixing screw of the rectascension-axis Fixing screw of the declination-axis Rectascension attitude Fine-adjustment of the declination-axis Fine-adjustment of the rectascension-axis Fixing screw horizontal alignment Scale of the latitude-axis...
- Seite 7 13. Handling - Getting Ready: A dark location is very important for most observations, because disturbing lights can impair your night vision. Do not observe from enclosed areas. We recommend setting up your telescope at least 30 mins before beginning your observation, in order to guarantee a temperature balance.
- Seite 8 WARNING To begin, you should look at some well known constellations and star Make sure that the smartphone can not slip out of the holder. Bresser group orders that are visible the whole year over. The position of the GmbH assumes no liability for any damages caused by a dropped celestial objects depend on date and time.
- Seite 9 If dust or moisture has gotten inside your telescope, do not try to clean it yourself, you should send it to your service center. Principle - Reflector-telescope: 24. Astronomy-Software - Download: The astronomy software Stellarium is available for download at: www.bresser.de/download/EQ/Astro_Software Stellarium_Manual Download the PDF of the manual in your language. Stellarium_Software Download Windows: Download and run the setup file with the extension .exe...
-
Seite 10: Technical Data
Technical Data Telescope ABC: Telescope: What do the following terms mean? Focal length: ....694.2 mm Barlow Lens: Clear aperture: ... . . 75.2 mm The Barlow lens was named after its inventor, Peter Barlow, a British Viewfinder: mathematician and physicist who lived from 1776–1862. - Seite 11 To benefit from an extended voluntary guarantee period as stated on the gift box, registration on our website is required. You can consult the full warranty terms as well as information on extending the warranty period and details of our services at www.bresser.de/warranty_terms.
-
Seite 12: Lieferumfang
Lieferumfang Allgemeine Informationen Zu dieser Anleitung Teleskop-Tubus (OTA) Schutzkappe Lesen Sie bitte aufmerksam die Sicherheitshinweise in dieser Anleitung.Verwenden Sie dieses Produkt nur wie in der Anleitung beschrieben, um Schäden am Gerät oder Verletzungen zu ver- meiden. Bewahren Sie die Bedienungsanleitung auf, damit Sie ... -
Seite 13: Teile - Zubehör
3-fache Barlow-Linse 1,5-fache Umkehrlinse Mondfilter Astronomie-Software zum Herunterladen Smartphone-Halterung Teleskop-Tubus (OTA) ASTRONOMIE SOFTWARE DOWNLOAD: Sucherfernrohr www.bresser.de/download/EQ/Astro_Software Justierschrauben (Sucherfernrohr) Sucherfernrohr-Einschub Tubus-Öffnung (OTA) Okulareinschub Fokussierrad OTA-ring (Tubusring / Rohrschelle) ... -
Seite 14: Aufbau - Montierung
1. Allgemeines/Standort: 4. Aufbau - Zubehörablage: Bevor Sie mit dem Aufbau beginnen, wählen Sie einen geeigneten Standort für Ihr Teleskop. Es wird Ihnen helfen, wenn Sie dieses Gerät an einem Ort aufbauen, an dem Sie gute Sicht auf den Himmel, einen stabilen Untergrund und genügend Platz haben. -
Seite 15: Okulareinstellung
7. Aufbau - Sucherfernrohr: 10. Okulareinstellung: Schieben Sie zunächst das Sucherfernrohr (2), wie angegeben, in den Drei Okulare werden bei diesem Teleskop als Standardzubehör Sucherhalter. mitgeliefert. Ziehen Sie dann die Einstellschrauben (3) vorsichtig an, damit der Sie können entscheiden, welche Vergrößerung Sie für Ihr Teleskop Sucher nicht herausfällt. -
Seite 16: Handhabung Der Halterung
Handhabung der Halterung Befestigungs- und Justierschraube für die OTA-ring (Tubusring / Rohrschelle) Breitengradachse Fokussierrad Gegengewicht Skala der Deklinationsachse Befestigungsschraube der Rektaszensionsachse Befestigungsschraube der Deklinationsachse Einstellung zur Rektaszension Feineinstellung der Deklinationsachse Feineinstellung der Rektaszensionsachse Skala der Breitengrad-Achse Befestigungsschraube horizontale Ausrichtung... - Seite 17 13. Handhabung - Vorbereitung: Ein dunkler Ort ist für die meisten Beobachtungen sehr wichtig, da störende Lichter Ihre Nachtsicht beeinträchtigen können. Nicht aus geschlossenen Räumen beobachten. Wir empfehlen, Ihr Teleskop mindestens 30 Minuten vor Beginn der Beobachtung aufzustellen, um einen Temperaturausgleich zu ermöglichen. Sie sollten auch darauf achten, dass das Teleskop auf einem stabilen und ebenen Boden steht.
- Seite 18 Sie feststellen, dass er nach wenigen Minuten aus Ihrem herausrutschen kann. Für Beschädigungen durch ein herabgefallenes Gesichtsfeld verschwindet. Um diesen Effekt auszugleichen, müssen Smartphone übernimmt die Bresser GmbH keine Haftung! Sie den Griff zur Feineinstellung (K) drehen. Die Rektaszensionsachse und Ihr Teleskop folgt der Flugbahn dieses Sterns.
-
Seite 19: Funktionsweise - Reflektor-Teleskop
Wenn Staub oder Feuchtigkeit in Ihr Teleskop gelangt ist, versuchen Sie nicht, es selbst zu reinigen, Sie sollten es an Ihr Service-Center schicken. Funktionsweise - Reflektor-Teleskop: 24. Astronomie-Software - Download: Die Astronomie-Software Stellarium steht zum Download bereit unter: www.bresser.de/download/EQ/Astro_Software Stellarium_Manual Laden Sie das PDF der Anleitung in Ihrer Sprache herunter. Stellarium_Software Download Windows: Setup Datei mit der Endung .exe herunterladen und ausführen. -
Seite 20: Technische Daten
Technische Daten: Teleskop ABC: Telescope: Was bedeuten die folgenden Begriffe? Brennweite: ....694.2 mm Spiegeldurchmesser: ..75.2 mm Barlow-Linse: Die Barlow-Linse wurde nach ihrem Erfinder Peter Barlow benannt, Sucherfernrohr:... -
Seite 21: Entsorgung
Die reguläre Garantiezeit beträgt 2 Jahre und beginnt am Tag des Kaufs. Um von einer verlängerten, freiwilligen Garantiezeit wie auf dem Geschenkkarton angegeben zu profitieren, ist eine Registrierung auf unserer Website erforderlich. Die vollständigen Garantiebedingungen sowie Informationen zu Garantiezeitverlängerung und Serviceleistungen können Sie unter www.bresser.de/garantiebedingungen einsehen. -
Seite 22: Informations Générales
Informations générales Contenu de la livraison A propos de ce mode d’emploi Tube du télescope (OTA) Cache de protection Veuillez lire les consignes de sécurité de ce manuel soign- eusement. Pour éviter d'endommager l'appareil et le risque de blessure, utilisez uniquement ce produit comme décrit dans le manuel. -
Seite 23: Pièces - Accessoires
Logiciels par téléchargement Adaptateur SMARTPHONE Assemblage du tube optique du télescope (OTA) TÉLÉCHARGEMENT DU LOGICIEL ASTRONOMIE : Chercheur www.bresser.de/download/EQ/Astro_Software Vis de réglage (Viseur) Support Chercheur à glissière Ouverture de l'OTA Porte oculaire ... - Seite 24 1. Général/Localisation 4. Montage - Plateau d'accessoires : Avant de commencer le montage, vous devez choisir un emplacement approprié pour votre lunette. Il est utile d'installer cet instrument dans un endroit offrant une vue dégagée du ciel, un sol stable et un espace suffisant autour de vous.
- Seite 25 7. Montage - Viseur : 10. Oculaire configuration : Placez d'abord la lunette de visée (2), comme indiqué, dans le support Trois oculaires sont fournis comme accessoires standard avec ce du viseur. télescope. Ensuite, serrez doucement les vis de réglage (3), afin que le télescope Vous pouvez décider du grossissement que vous souhaitez utiliser ne tombe pas.
- Seite 26 Manipulation de la monture Vis de fixation et de réglage de l'axe de latitude Collier du OTA Molette de mise au point Contrepoids Échelle de l'axe de déclinaison Vis de fixation de l'axe d'ascension droite Vis de fixation de l'axe de déclinaison L'attitude de l’axe polaire Ajustement fin de l'axe de déclinaison Ajustement fin de l'axe de l'ascension droite...
- Seite 27 13. Manipulation - Se préparer : Un endroit sombre est très important pour la plupart des observations, car les lumières gênantes peuvent altérer votre vision nocturne. Ne pas observer depuis des lieux fermés. Nous vous recommandons d'installer votre télescope au moins 30 minutes avant de commencer votre observation, afin de garantir un équilibre des températures.
- Seite 28 Assurez-vous que le smartphone ne peut pas glisser hors du support. Si vous avez aligné votre télescope avec précision sur l'une de ces Bresser GmbH n'assume aucune responsabilité pour tout dommage étoiles, vous constaterez qu'elle disparaît de votre champ visuel au causé...
- Seite 29 Si de la poussière ou de l'humidité s'est infiltrée dans votre télescope, n'essayez pas de le nettoyer vous-même, vous devez l'envoyer à votre centre de service. Principe - Télescope à miroir : 24. Astronomy-Software - Télécharger : Le logiciel d'astronomie Stellarium peut être téléchargé à l'adresse suivante : www.bresser.de/download/EQ/Astro_Software Stellarium_Manual Téléchargez le PDF du manuel dans votre langue. Stellarium_Software TÉLÉCHARGER : Les fenêtres : Téléchargez et exécutez le fichier d'installation avec l'extension .exe...
-
Seite 30: Données Techniques
Données techniques Télescope ABC : Télescope : Que signifient les termes suivants ? Distance focale : ... . 694.2 mm Lentille de Barlow : Ouverture apparente : ..75.2 mm La lentille de Barlow doit son nom à... - Seite 31 Vous pouvez avoir accès à l’intégralité des conditions de garantie ainsi qu’à des informations sur la prolongation de la période de garantie et sur nos services à la page www.bresser.de/warranty_terms.
- Seite 32 Leveringsomvang Algemene informatie Over deze handleiding Telescoopbuis (OTA) Beschermkap Lees a.u.b. de veiligheidsinstructies in deze handleiding zorg- vuldig door. Om schade aan het apparaat of letsel te voorko- men: gebruik dit product alleen zoals beschreven in de handlei- ding.
- Seite 33 1.5x Omkeerlens Maanfilter Astronomie software om te downloaden Smartphone-houder Telescoopbuis (OTA) ASTRONOMIE SOFTWARE DOWNLOAD: Zoekerkijker www.bresser.de/download/EQ/Astro_Software Stelschroeven (zoekerkijker) Zoekerschoen Buis-opening (OTA) Focuser Scherpstelwiel OTA-ring (buisring / buisklem) ...
- Seite 34 1. Algemeen/Plaats: 4. Opbouw - Bakje voor de accessoires: Voordat u begint met opzetten, kies a.u.b. een geschikte plaats voor uw telescoop. U kunt dit apparaat het beste opzetten op een plaats waar u een stabiele ondergrond, voldoende ruimte en een goed zicht op de hemel heeft.
- Seite 35 7. Opbouw - Zoekerkijker: 10. Oculair-instelling. Schuif eerst de zoekerkijker (2) in de zoeker-houder zoals afgebeeld. Bij deze telescoop worden drie oculairs als standaardaccessoires meegeleverd. Draai vervolgens de stelschroeven (3) voorzichtig vast, zodat de zoeker er niet uit valt. Door de oculairs te wisselen, kunt u beslissen welke vergroting u voor uw telescoop wilt gebruiken.
- Seite 36 Instructie voor de montering Montage- en stelschroef voor de breedtegraad-as OTA-ring (buisring / buisklem) Scherpstelwiel Contragewicht Scala van de declinatie-as Montageschroef van de rechte klimming-as Montageschroef van de declinatie-as Instelling rechte klimming Fijnregeling van de declinatie-as Fijnregeling van de rechte klimming-as Scala van de breedtegraad-as Montageschroef voor een horizontale uitlijning...
- Seite 37 13. Instructie - Voorbereiding: Een donkere plaats is zeer belangrijk voor de meeste observaties; storende lichten kunnen uw nachtzicht negatief beïnvloeden . Niet observeren vanuit gesloten ruimtes. Stel uw telescoop ten minste 30 minuten voor gebruik op; zo is een temperatuurcompensatie mogelijk Let op! De telescoop moet op een stabiele en vlakke ondergrond staan.
- Seite 38 WAARSCHUWING af van de datum en de tijd. Zorg ervoor dat de smartphone niet uit de houder kan glijden. Bresser GmbH aanvaardt geen aansprakelijkheid voor schade veroorzaakt Als u de telescoop precies op zo'n ster richt, zul je zien dat hij na een door een gevallen smartphone! paar minuten uit uw gezichtsveld verdwijnt.
- Seite 39 Als er stof of vocht in uw telescoop is gekomen, moet u het niet zelf proberen schoon te maken. Neem eerst contact op met uw servicecentrum en stuur het indien nodig daar naartoe. Werkwijze - reflector-telescoop: 24. Astronomie-software - Download: De astronomie-software Stellarium kan worden gedownload op: www.bresser.de/download/EQ/Astro_Software Stellarium_Handleiding Download de PDF van de handleiding in uw taal. Stellarium_Software Download Windows: Download het setup-bestand met de extensie .exe en installeer het.
-
Seite 40: Technische Gegevens
Technische gegevens: Telescoop ABC: Telescoop: Wat betekenen de volgende termen? Brandpuntsafstand: ..694.2 mm Spiegeldiameter: ... . 75.2 mm Barlow-lens: De Barlow-lens is genoemd naar zijn uitvinder Peter Barlow, een Brits Zoekerkijker: wis- en natuurkundige die leefde van 1776-1862. - Seite 41 Om te profiteren van een verlengde, vrijwillige garantieperiode zoals aangegeven op de geschenkverpakking, is een registratie op onze website vereist. De volledige garantievoorwaarden en informatie over de services en de verlenging van de garantie zijn te vinden op www.bresser.de/ garantiebedingungen.
-
Seite 42: Informazioni Generali
Informazioni generali Contenuto della confezione Informazioni su questo manuale Tubo ottico (OTA) Cappuccio di protezione Leggere attentamente le avvertenze di sicurezza riportate in questo manuale. Per evitare il rischio di danni al prodotto e lesioni personali, usare il prodotto esclusivamente come descritto nel manuale. - Seite 43 Software di astronomia (da scaricare) Supporto per smartphone Tubo ottico (OTA) DOWNLOAD DEL SOFTWARE DI ASTRONOMIA: Cercatore www.bresser.de/download/EQ/Astro_Software Viti di regolazione (cercatore) Supporto del cercatore Apertura dell'OTA Connettore per oculare ...
- Seite 44 1. Posizionamento 4. Assemblaggio - Vassoio porta-accessori Prima di iniziare l'assemblaggio del telescopio è necessario individuare un luogo di installazione adatto. Si raccomanda di installare il telescopio in un luogo con una chiara visuale del cielo, un pavimento stabile e sufficiente spazio libero. Per prima cosa, estrarre tutti i componenti dalla confezione.
- Seite 45 7. Assemblaggio - Cercatore 10. Installazione dell'oculare Inserire il cercatore (2), come illustrato, nel suo supporto. Insieme al telescopio sono forniti tre oculari. Quindi serrare delicatamente le viti di regolazione (3) in modo tale che Ciascun oculare corrisponde a un diverso ingrandimento. Prima di non possa cadere.
- Seite 46 Utilizzo del telescopio Vite di fissaggio e regolazione dell'asse di latitudine Anello dell'OTA Rotella di messa a fuoco Contrappeso Scala dell'asse di declinazione Vite di fissaggio dell'asse di ascensione retta Vite di fissaggio dell'asse di declinazione Altitudine dell'ascensione retta Manopola di regolazione fine dell'asse di Manopola di regolazione fine dell'asse di ascensione declinazione retta...
- Seite 47 13. Utilizzo - Preparazione Per la maggior parte delle osservazioni è essenziale un luogo molto buio, perché l'inquinamento luminoso può ridurre la visione notturna. Non osservare il cielo da locali chiusi. Si raccomanda di installare il telescopio almeno 30 minuti prima dell'osservazione affinché si acclimati.
- Seite 48 Assicurarsi che il proprio smartphone non possa cadere dal supporto. Per iniziare, si raccomanda di individuare le costellazioni e i gruppi Bresser GmbH declina ogni responsabilità per eventuali danni causati stellari più conosciuti che sono visibili tutto l'anno. La posizione degli dalla caduta dello smartphone.
- Seite 49 Se polvere o umidità sono penetrate all'interno del telescopio, non tentare di pulirlo ma portarlo presso un centro di assistenza. Principio di funzionamento del telescopio riflettore 24. Download del software di astronomia Il software di astronomia Stellarium è scaricabile all'indirizzo www.bresser.de/download/EQ/Astro_Software Stellarium_Manuale Scaricare il manuale nella propria lingua in formato PDF. Stellarium_Software Download Windows: scaricare ed eseguire il file di installazione con estensione .exe...
-
Seite 50: Specifiche Tecniche
Specifiche tecniche Glossario del telescopio Telescopio Di seguito sono riportati i significati di alcuni termini frequenti. Lunghezza focale: ... 694,2 mm Lente di Barlow Apertura libera: ... . . 75,2 mm La lente di Barlow prende il nome dal suo inventore, Peter Barlow, un Cercatore matematico e fisico britannico vissuto dal 1776 al 1862. -
Seite 51: Smaltimento
Il periodo di garanzia regolare è di 2 anni a decorrere dalla data di acquisto. Per prolungare volontariamenteil periodo di garanzia come indicato sulla confezione regalo è necessario registrarsi al nostro sitoWeb. Le condizioni di garanzia complete e maggiori informazioni sul pro- lungamento della garanzia e suiservizi sono disponibili all’indirizzo www.bresser.de/warranty_terms. -
Seite 52: Información General
Información general Incluye Sobre este manual de instrucciones Tubo del telescopio (OTA) Tapa de protección Lea atentamente las indicaciones de seguridad de este manu- al. Con el fin de evitar daños en el aparato o riesgo de lesiones, utilice este producto solamente de la forma descrita en el man- ual. - Seite 53 Adaptador para Smartphone Conjunto del tubo óptico del telescopio (OTA) Visor SOFTWARE ASTRONÓMICO (PARA DESCARGAR) Tornillos de ajuste (Visor) www.bresser.de/download/EQ/Astro_Software Visor deslizable Apertura de la OTA Conexión del ocular Rueda de enfoque ...
- Seite 54 1. Instalación: 4. Ensamblaje - Bandeja de accesorios: Antes de comenzar el montaje, debe elegir un lugar adecuado para su telescopio. Es útil instalar este instrumento en un lugar donde se tenga una visión clara del cielo, una base estable y suficiente espacio a su alrededor.
- Seite 55 7. Ensamblaje - Visor: 10. Configuración del ocular: Coloque primero el visor (2), como se indica, a través del soporte del Con este telescopio se suministran tres oculares como accesorios visor. estándar. A continuación, apriete suavemente los tornillos de ajuste (3), para Puede decidir qué...
- Seite 56 Manejo de la montura Tornillo de fijación y ajuste del eje de latitud Anillo OTA Rueda de enfoque Contrapeso Escala del eje de declinación Tornillo de fijación del eje de ascensión derecha Tornillo de fijación del eje de declinación Posición de rectascensión Ajuste fino del eje de declinación Ajuste fino del eje de rectascensión Tornillo de fijación para la alineación horizontal...
- Seite 57 13. Manipulación - Preparación: Un lugar oscuro es muy importante para la mayoría de las observaciones, porque las luces molestas pueden perjudicar la visión nocturna. No observar desde lugares cerrados. Le recomendamos que monte su telescopio al menos 30 minutos antes de comenzar la observación, para garantizar el equilibrio de la temperatura.
- Seite 58 La posición de los objetos celestes depende de la fecha y la hora. Asegúrese de que el smartphone no pueda salirse del soporte. Bresser GmbH no asume ninguna responsabilidad por los daños Si ha alineado su telescopio con precisión sobre una de estas estrel- causados por la caída del smartphone.
- Seite 59 Si el polvo o la humedad han entrado en su telescopio, no intente limpiarlo usted mismo, debe enviarlo a su centro de servicio. Principio - Reflector-telescopio: 24. Software astronómico (para descargar): El software de astronomía Stellarium está disponible para su descarga en: www.bresser.de/download/EQ/Astro_Software Stellarium_Manual Descargue el PDF del manual en su idioma. Stellarium_Software Descargar Windows Descargue y ejecute el archivo de instalación con la extensión .exe...
-
Seite 60: Datos Técnicos
Datos técnicos Telescope ABC: Telescopio: ¿Qué significan los siguientes términos? Distancia focal: ... . . 694.2 mm Lentes Barlow: Abertura: ....75.2 mm La lente de Barlow debe su nombre a su inventor, Peter Barlow, Buscador: matemático y físico británico que vivió... - Seite 61 Para beneficiarse de un período de garantía más largo, tal y como se indica en la caja, es necesario registrarse en nuestra página web. Puede consultar las condiciones completas de la garantía, así como información sobre la ampliación del periodo de garantía y detalles de nuestros servicios en www.bresser.de/warranty_terms.
-
Seite 62: Informação Geral
Informação geral Âmbito de entrega Acerca deste manual de instruções Tubo telescópico (OTA) Tampa de proteção Leia as instruções de segurança neste manual com atenção. Para evitar danos na unidade e o risco de ferimentos, use este produto apenas conforme descrito no manual. Guarde o manual de instruções por perto, de modo a que possa procurar ... - Seite 63 Software de astronomia por Download Adaptador para Smartphone Conjunto do tubo ótico telescópico (TOT) DOWNLOAD DO SOFTWARE DE ASTRONOMIA: Apontador www.bresser.de/download/EQ/Astro_Software Parafusos de ajuste (apontador) Apontador deslizante Abertura TOT Ligação da ocular ...
- Seite 64 1. Geral/Localização: 4. Montagem - Bandeja dos acessórios: Antes de começar a montagem, tem de selecionar um local adequado para o seu telescópio. Ajuda, se montar este instrumento num local onde tenha uma vista nítida do céu, uma base estável e espaço suficiente.
- Seite 65 7. Montagem - Apontador: 10. Montagem da ocular: Primeiro, coloque o apontador (2) conforme indicado, através do São fornecidas três oculares como acessórios padrão para este suporte do apontador. telescópio. Depois, aperte gentilmente os parafusos de ajuste (3), de modo a que Pode decidir a ampliação a usar com o seu telescópio, substituindo o telescópio não saia.
- Seite 66 Manusear o encaixe Parafuso de fixação e ajuste do eixo da latitude Anel TOT Disco de focagem Contrapeso Escala do eixo da declinação Parafuso de fixação do eixo da ascensão reta Parafuso de fixação do eixo da declinação Altitude da ascensão reta Ajuste preciso do eixo da declinação Ajuste preciso do eixo da ascensão reta Parafuso de fixação do alinhamento horizontal...
- Seite 67 13. Manuseamento - Preparação: É muito importante ter um local escuro para grande parte das observações, pois as luzes em redor podem perturbar a sua visão noturna. Não observe a partir de áreas fechadas. Recomendamos que prepare o seu telescópio, pelo menos, 30 minutos antes de começar a observação, para garantir um equilíbrio da temperatura.
- Seite 68 AVISO Para começar, deverá observar algumas constelações conhecidas e Certifique-se de que o Smartphone não sai do suporte. A Bresser grupos de estrelas que estejam visíveis todo o ano. O posicionamento GmbH não se responsabiliza por quaisquer danos devido à queda de dos objetos celestiais depende da data e da hora.
- Seite 69 Se o pó ou humidade entrarem no telescópio, não tente fazer a limpeza sozinho. Deverá contactar o centro de reparação. Princípio - Telescópio refletor: 24. Download do Software de Astronomia: O software de astronomia Stellarium pode ser descarregado em: www.bresser.de/download/EQ/Astro_Software Manual do Stellarium Descarregue o PDF do manual na sua língua. Software Stellarium Download Windows: Descarregue e execute o ficheiro de configuração com a extensão .exe.
-
Seite 70: Dados Técnicos
Dados técnicos ABC do telescópio: Telescópio: O que significam os seguintes termos? Distância focal: ... . . 694,2 mm Lente Barlow: Abertura nítida: ... . . 75,2 mm A lente Barlow recebeu o seu nome a partir do seu inventor, Peter Apontador: Barlow, um matemático e físico britânico que viveu entre 1776 e 1862. - Seite 71 Para beneficiar de uma extensão da garantia, conforme indicado na caixa, tem de se registar no nosso website. Pode consultar os termos completos da garantia, bem como a infor- mação acerca da extensão da garantia e mais detalhes dos nossos serviços em: www.bresser.de/warranty_terms.
-
Seite 72: Informacje Ogólne
Informacje ogólne Zakres dostawy Informacje o tej instrukcji obsługi Rura teleskopowa (OTA) Nasadka ochronna Prosimy o uważne zapoznanie się z instrukcją bezpieczeństwa zawartą w tej instrukcji. Aby uniknąć uszkodzenia urządzenia i ryzyka obrażeń, używaj tego produktu wyłącznie w sposób opisany w instrukcji. - Seite 73 Filtr księżycowy Oprogramowanie astronomiczne do pobrania Adapter do smartfona Montaż tuby optycznej teleskopu (OTA) POBIERANIE OPROGRAMOWANIA ASTRONOMICZNEGO: Szukacz www.bresser.de/download/EQ/Astro_Software Śruby regulacyjne (szukacz) Mocowanie szukacza Otwór OTA Złącze okularu Pokrętło ostrości ...
- Seite 74 1. Ogólne/lokalizacja: 4. Składanie – taca na akcesoria: Przed złożeniem teleskopu należy wybrać dla niego odpowiednie miejsce. Dobrym pomysłem jest ustawienie tego instrumentu w miejscu, w którym zapewniony jest wyraźny widok nieba, stabilna podstawa i wystarczająca przestrzeń wokół Ciebie. Najpierw usuń...
- Seite 75 7. Składanie – szukacz 10. Konfiguracja okularu: Najpierw przełóż szukacza (2), jak pokazano na rysunku, przez uchwyt Trzy okulary są dostarczane jako standardowe akcesoria do tego szukacza. teleskopu. Następnie delikatnie dokręć śruby regulacyjne (3), aby teleskop nie Możesz zdecydować, którego powiększenia chcesz użyć...
- Seite 76 Obsługa montażu Śruba mocująca i regulacyjna osi szerokości Pierścień OTA geograficznej Pokrętło do regulacji ostrości Przeciwwaga Skala osi deklinacji Śruba mocująca oś rektascensji Śruba mocująca oś deklinacji Rektascensja Precyzyjna regulacja osi deklinacji Precyzyjna regulacja osi rektascencji Śruba mocująca justowania w poziomie Skala osi szerokości geograficznej...
- Seite 77 13. Obsługa – przygotowanie: Ciemne położenie jest bardzo ważne dla większości obserwacji, ponieważ przeszkadzające światła mogą utrudniać widzenie w nocy. Nie obserwuj z zamkniętych obszarów. Zalecamy ustawienie teleskopu co najmniej 30 minut przed rozpoczęciem obserwacji, aby zagwarantować wyrównanie temperatury. Należy również upewnić się, że teleskop jest umieszczony na stabilnym i równym podłożu.
- Seite 78 Jest to gwiazda stała i punkt wyjścia dla wszystkich map OSTRZEŻENIE nieba na półkuli północnej. Upewnij się, że smartfon nie może wysunąć się z uchwytu. Bresser GmbH nie ponosi odpowiedzialności za jakiekolwiek szkody Na początek musisz spojrzeć na niektóre dobrze znane konstelacje spowodowane przez upuszczony smartfon.
- Seite 79 Jeśli kurz lub wilgoć dostały się do wnętrza teleskopu, nie próbuj go samodzielnie czyścić; wyślij go do centrum serwisowego. Zasada – teleskop zwierciadlany: 24. Oprogramowanie astronomiczne – pobierz: Oprogramowanie astronomiczne Stellarium jest dostępne do pobrania pod adresem: www.bresser.de/download/EQ/Astro_Software Stellarium_Manual Pobierz plik PDF z podręcznikiem w swoim języku. Stellarium_Software Pobierz Windows: Pobierz i uruchom plik instalacyjny z rozszerzeniem .exe...
-
Seite 80: Dane Techniczne
Dane techniczne Podstawy teleskopu: Teleskop: Co oznaczają poniższe terminy? Ogniskowa: ....694,2 mm Soczewka Barlowa: Apertura użyteczna: ..75,2 mm Soczewka Barlowa została nazwana na cześć... - Seite 81 Aby skorzystać z przedłużonego okresu dobrowolnej gwarancji, jak podano na pudełku podarunkowym, wymagana jest rejestracja na naszej stronie internetowej. Pełne warunki gwarancji oraz informacje na temat przedłużenia okresu gwarancji i szczegóły naszych usług można znaleźć na stron- ie www.bresser.de/warranty_terms.
- Seite 84 © National Geographic Partners LLC. All rights reserved. NATIONAL GEOGRAPHIC and Yellow Border Design are trademarks of National Geographic Society, used under license. Visit our website: www.nationalgeographic.com Bresser GmbH Gutenbergstr. 2 46414 Rhede Germany www.bresser.de info@bresser.de Errors and technical changes reserved.