Herunterladen Inhalt Inhalt Diese Seite drucken
MBM MC201E Bedienungsanleitung

MBM MC201E Bedienungsanleitung

Digitaler elektronischer kombidämpfer
Inhaltsverzeichnis

Werbung

Verfügbare Sprachen
  • DE

Verfügbare Sprachen

  • DEUTSCH, seite 35
FOUR ELECTRONIQUE NUMERIQUE A ECRAN TACTILE
MANUEL D'UTILISATION ET DE MAINTENANCE ORDINAIRE
DIGITALER ELEKTRONISCHER KOMBIDÄMPFER TOUCH
BEDIENUNGSANLEITUNG UND HANDBUCH ZUR
MANUAL DE USO Y MANTENIMIENTO ORDINARIO
MANUALE DI USO E MANUTENZIONE ORDINARIA
FORNO ELETTRICO
FOUR ELECTRIQUE
ELEKTROBACKOFEN
FORNO ELÉTRICO
TOUCH DIGITAL ELECTRONIC OVEN
USE AND ROUTINE MAINTENANCE MANUAL
HORNO ELECTRÓNICO DIGITAL TOUCH
FORNO ELETTRONICO DIGITALE TOUCH
ELECTRIC OVEN
PLANMÄSSIGEN WARTUNG
FORNO A GAS
OVEN GAS
FOUR A GAZ
GASBACKOFEN
FORNO A GÁS
MC201E/MC201G
MC202E/MC202G
FR
EN
DE
ES
IT

Werbung

Inhaltsverzeichnis
loading

Inhaltszusammenfassung für MBM MC201E

  • Seite 1 DIGITALER ELEKTRONISCHER KOMBIDÄMPFER TOUCH BEDIENUNGSANLEITUNG UND HANDBUCH ZUR PLANMÄSSIGEN WARTUNG HORNO ELECTRÓNICO DIGITAL TOUCH MANUAL DE USO Y MANTENIMIENTO ORDINARIO FORNO ELETTRONICO DIGITALE TOUCH MANUALE DI USO E MANUTENZIONE ORDINARIA MC201E/MC201G MC202E/MC202G FORNO ELETTRICO FORNO A GAS ELECTRIC OVEN OVEN GAS FOUR ELECTRIQUE...
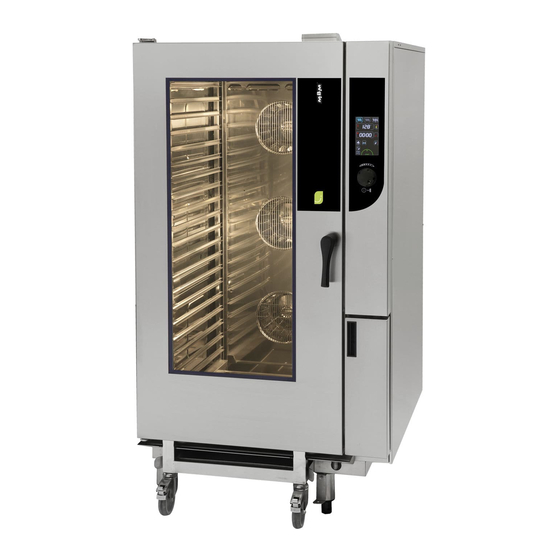
  • Seite 2 3B-390977NU – 01/17 COMPOSIZIONE DELL’APPARECCHIO / COMPOSIÇÃO DOS APARELHOS / 3B-390977NU – 01/17 COMPOSITION DES APPAREILS / COMPOSITION OF THE APPLIANCES / LS / COMPOSITION OF THE APPLIANCES / FUNKTIONSTEILE DER GERÄTE / COMPOSICIÓN DE LOS APARATOS ÄTE / COMPOSICIÓN DE LOS APARATOS 1 : Porte double vitrage (déverrouillage du double vitrage par l’intérieur) / Double glazed door (un- FOURS 20 NIVEAUX / 20 LEVEL OVENS / FOURS 6 ET 10 NIVEAUX / 6 AND 10 LEVEL OVENS /...
  • Seite 3: Inhaltsverzeichnis

    Page 1 3B-390977NI – 01/17 SOMMAIRE 3B-390977NU – 10/18 Page 1 EQUAJET EQUAJET GAZ & ELECTRIQUES GAZ & ELECTRIQUES COMPOSITION DES APPAREILS CONSEILS PRATIQUES D’UTILISATION A) CARACTERISTIQUES TECHNIQUES GENERALITES ..................................2 PLAQUE SIGNALETIQUE MODE MANUEL ..................................2 ADAPTATION DE L'APPAREIL D'UN GAZ A UN AUTRE PRECHAUFFAGE .........................................
  • Seite 4: Generalites

    3B-390977NU – 10/18 Page 2 GENERALITES Le tableau de commande en verre trempé de votre four est composé : - d’un bouton codeur : Permet la mise sous tension du four et de l’écran. Mise sous tension : un appui de 1s Arrêt : un appui de 3s Permet également la modification rapide des paramètres (Température, temps …) et leur validation par appui.
  • Seite 5: Prechauffage

    3B-390977NU – 10/18 Page 3 Zone durée Affiche le « temps écoulé » ou le « temps restant » La Zone de Temps est réglable par appui sur la zone correspondante è La consigne entrée est validée après 5 secondes ou par appui sur une autre zone/bouton Le réglage peut se faire par le codeur ou avec les touches 6/5 au pas de 1 minute La position des points blancs à...
  • Seite 6: Menu Programmes

    3B-390977NU – 10/18 Page 4 2.3 MENU PROGRAMMES Un premier appui sur la touche PROG/VALID permet d’accéder aux programmes è sauvegardés (recettes) Affichage de « Pr00 » dans la zone minuterie. Une action sur le codeur ou sur les touches 6/5permet de faire défiler les programmes (100 Programmes n°00 à...
  • Seite 7: Mode Abc

    3B-390977NU – 10/18 Page 5 logo Pause « ∥ ». Pour arrêter un programme en cours, appuyer sur la touche « STOP » : Affichage du Tant que la confirmation n’est pas validée, le programme n’est pas stoppé (Reprise automatique du programme après quelques secondes sans action utilisateur sur l’écran).
  • Seite 8: Menu Nettoyage

    3B-390977NU – 10/18 Page 6 MENU NETTOYAGE Il existe 4 possibilités : - Nettoyage Manuel - Nettoyage Automatique à départ Manuel (option lavage automatique) - Nettoyage Automatique à départ Programmé (option lavage automatique) - Nettoyage Forcé (option lavage automatique) Il est interdit de nettoyer l’enceinte du four avec les grilles et/ou les bacs en place.
  • Seite 9 3B-390977NU – 10/18 Page 7 - Déverrouiller la gaine de ventilation et la faire pivoter en la tirant vers soi pour les fours 10 GN 2/1 et 20 niveaux. Pour les autres modèles, laisser en place la gaine de ventilation en fils inox. - Bien pulvériser le produit sur l'ensemble des parois arrières alors exposées.
  • Seite 10: Nettoyage Automatique A Depart Manuel

    3B-390977NU – 10/18 Page 8 4.3 NETTOYAGE AUTOMATIQUE A DEPART PROGRAMME Cette fonction donne la possibilité de programmer le démarrage automatique et quotidien du nettoyage à l'heure et l'intensité souhaitée. NOTA : Il est toujours possible de réaliser un nettoyage automatique à départ manuel (voir paragraphe « Nettoyage automatique à départ manuel »), un rinçage (voir paragraphe «...
  • Seite 11: Arret D'un Cycle De Nettoyage

    3B-390977NU – 10/18 Page 9 4.5 ARRET D’UN CYCLE DE NETTOYAGE Pour arrêter le cycle de nettoyage en cours : - Appuyer sur la touche : "STOP" Arrêt du cycle de nettoyage. è Tant que la confirmation n’est pas validé, le cycle de nettoyage est en « pose » mais non stoppé (Reprise automatique du cycle après quelques secondes sans action utilisateur sur l’écran).
  • Seite 12: Entretien Du Four

    3B-390977NU – 10/18 Page 10 ENTRETIEN DU FOUR ATTENTION: Un nettoyage régulier et complet de l’appareil garantit une utilisation prolongée ¨ L'APPLICATION DU PRODUIT DE NETTOYAGE A CHAUD, AU-DESSUS DE 60°C, EST FORMELLEMENT INTERDITE. Les parois chaudes seraient irrémédiablement attaquées (couleur foncée, quasiment noire). ¨...
  • Seite 13: Entretien De La Chaudiere Vapeur (Equajet Chaudière)

    3B-390977NU – 10/18 Page 11 Pour une efficacité maximale du produit sans endommager les matériaux et composants de votre four, il convient d'utiliser le produit de détartrage approprié. L'utilisation de certains acides a un rôle destructeur irréversible pouvant endommager de manière importante votre appareil.
  • Seite 14: Pieces Recommandees Et De Premiere Urgence

    DEFAUTS DE FONCTIONNEMENT Messages sur l'écran Conséquences Que faire ? i31 : Surchauffe de l'Electronique : La La cuisson se poursuit et la Nettoyer les prises d'air en partie inférieur et à l'arrière. température est réduite à 180°C température est automatiquement Prévenir le dépanneur si le problème persiste réduite à...
  • Seite 15: Recommandations

    Moteur réducteur ressort rappel au centre 85 degré 305108 Porte Fusible 3P 125A 307468 Porte Fusible 3P 50A 307469 Fusible GG 14x51 32A 307471 Fusible GG 22x58 63A 307472 Alimentation à découpage 15V 15W RS15-15 308350 Fusible 3.15 Ampères calibre 309407 Cordon Inter cartes 309581...
  • Seite 16 doivent : - avoir une composition basée sur l’hydroxyde de potassium avec une concentration < 25%, SANS hydroxyde de sodium - être compatible avec une température d’utilisation de 60°C. - comporter des agents anticorrosion Pour une efficacité maximale du produit sans endommager les matériaux et composants de votre four, il convient d'utiliser le produit de ¨...
  • Seite 17: Garantie

    traitement, une récupération et un recyclage, conformément à la législation nationale. 10 GARANTIE ATTENTION! AUCUNE GARANTIE N'EST INCONDITIONNELLE Notre garantie ne s'applique que pour une utilisation normale. C'est-à-dire dans le stricte respect des recommandations figurant dans nos notices d'utilisation et d'entretien. Elle ne sera valable également que dans la mesure où...
  • Seite 18 NOTES CE MANUEL EST L A PROPRIETE DU FABRICANT ET TOUTE REPRODUCTION MEME PARTIELLE EST INTERDITE. - 16 -...
  • Seite 19 Page 1 3B-390977NU – 01/17 3B-390977NU – 10/18 Page 1 CONTENT EQUAJET EQUAJET GAS & ELECTRIC GAS & ELECTRIC COMPOSITION OF THE APPLIANCES PRACTICAL OPERATING ADVICE GENERAL ....................................2 COMPOSITION OF THE APPLIANCES MANUAL MODE ..................................2 PRACTICAL OPERATING ADVISE 12.1 PREHEATING ........................................3 12.2 ADJUSTING THE HUMIDITY LEVEL IN COMBINATION MODE ........................
  • Seite 20: General

    3B-390977NU – 10/18 Page 2 11 GENERAL The toughened glass control panel on your oven consists of: - a coder knob: Switches on the oven and its display screen. Power on: press for 1 second Switch off: press for 3 seconds Allows parameters to be changed rapidly (Temperature, time …) and validated by simply pressing the knob.
  • Seite 21: Preheating

    3B-390977NU – 10/18 Page 3 Timer zone Displays the “running time” or “remaining time”. The time is adjustable by pressing the corresponding zone è The setting entered is validated after 5 seconds or by pressing on another zone/button Adjustment can be made using the coder or with the 6/5 buttons in 1 minute intervals The location of the white dots at the side of the timer logo indicates what is displayed: Dots on the left: remaining time è...
  • Seite 22: Programmes Menu

    3B-390977NU – 10/18 Page 4 12.3 PROGRAMMES MENU The first press on the PROG/VALID button gives access to saved programmes è (recipes) Display shows “Pr01” in the timer zone. Moving the coder or the 6/5buttons scrolls through the programmes (Programmes No 01 to 18).
  • Seite 23: Abc Mode

    3B-390977NU – 10/18 Page 5 “Pause” logo “ ∥ ”. To stop a programme that is running press the “STOP” zone: The display shows the If the action is not validated the programme does not stop (It automatically restarts after a few seconds delay if the screen is not touched). Pressing the zone again restarts the current programme è...
  • Seite 24: Cleaning Menu

    3B-390977NU – 10/18 Page 6 14 CLEANING MENU There are 4 options: - Manual cleaning (semi-automatic) - Automatic cleaning started manually (Automatic wash option) - Automatic cleaning with a programmed start (Automatic wash option) - Forced clean (Automatic wash option) The cavity should never be cleaned with grills or containers in situ.
  • Seite 25 3B-390977NU – 10/18 Page 7 - Unlock the ventilation duct and swing it open by pulling it towards you for 10 GN 2/1 and 20 level ovens. For other models leave the duct in place - Spray detergent on all the exposed surfaces. Only use products specifically designed for cleaning professional stainless steel cooking cavities.
  • Seite 26: Automatic Cleaning Started Manually

    3B-390977NU – 10/18 Page 8 14.3 AUTOMATIC CLEANING WITH A PROGRAMMED START This function offers the possibility to program a daily automatic start time and the desired wash intensity. NOTE: It is always possible to start an automatic cleaning cycle manually (see the paragraph ‘Automatic cleaning started manually’), a rinse (see paragraph ‘Rapid rinse’) and/or priming (see paragraph on ‘Replacing the detergent container’) This function is accessible via the client parameters in the “CHEF”...
  • Seite 27: Stopping The Cleaning Cycle

    3B-390977NU – 10/18 Page 9 14.5 STOPPING THE CLEANING CYCLE To stop a cleaning cycle that is running: - Press the stop button: "STOP" stops the cycle. è If this action is not validated the cycle is paused but not stopped (It will restart after a few seconds if no further action is taken). Pressing the button for a second time will restart the cleaning cycle - Confirm by validating using “End?”.
  • Seite 28: Maintenance Of The Oven

    3B-390977NU – 10/18 Page 10 15 MAINTENANCE OF THE OVEN WARNING: Regular and thorough cleaning will ensure prolonged service life UNDER NO CIRCUMSTANCES SHOULD CLEANING CHEMICALS BE USED ON SURFACES THAT ARE OVER 60°C. ¨ The result will be serious discolouration and damage to the surfaces. Jet washers and hoses, high or low pressure should never be used for cleaning.
  • Seite 29: Maintenance Of The Steam Boiler (Equajet Boiler)

    3B-390977NU – 10/18 Page 11 For maximum efficiency of the descaling product without damaging the material and components of the oven, you should use an appropriate descaler. The use of certain acids has an irreversible destructive effect that may cause significant damage. The descaling product must contain corrosion inhibitors to prevent metal attack.
  • Seite 30: Recommended And Front Line Spare Parts

    17 ERROR MESSAGES Message on the screen Consequences What to do? i31 : Electronics overheating: Temperature Cooking continues automatically Clean the lower and rear air intakes. If the problem reduced to 180°C at a temperature below 180°C persists, call a service technician. i33 : Core probe non function or not plugged in Cooking stops To continue cooking connect a probe or switch to timer mode.
  • Seite 31 Reducing gear with centre return spring, 85 degrees 305108 3 phase 125A fuse holder 307468 3 phase 50A fuse holder 307469 14 x 51 32A GG fuse 307471 22 x 58 63A GG fuse 307472 Switching regulator 15V 15W RS 15-15 308350 Fuse 3.15 Amp 309407...
  • Seite 32 In order to ensure optimum cleaning results without the risk of chemical attack we recommend using our cleaning chemical BK101. Other ¨ products can be used. Generally cleaning products that are compatible with our ovens should: - have a composition based on potassium hydroxide with a concentration < 25%, WITHOUT sodium hydroxide - be suitable for use at a temperature of 60°C.
  • Seite 33 - Dispose of the product and its container as hazardous waste. 20 GUARANTEE PLEASE NOTE THAT NO GUARANTEE IS UNCONDITIONAL Our guarantee applies only for normal use. That is, with the strict observance of the recommendations given in our instructions for use and maintenance.
  • Seite 34 NOTES CE MANUEL EST L A PROPRIETE DU FABRICANT ET TOUTE REPRODUCTION MEME PARTIELLE EST INTERDITE. - 16 -...
  • Seite 35 Page 1 3B-390977NU – 01/17 3B-390977NU – 10/18 Seite 1 INHALT EQUAJET EQUAJET GAS & ELEKTRISCH GAS & ELEKTRISCH FUNKTIONSTEILE DER GERÄTE PRAKTISCHE ANWENDUNGSTIPPS ALLGEMEINES ..................................2 FUNKTIONSTEILE DER GERÄTE BETRIEBSART MANUELLE BEDIENUNG ..........................2 PRAKTISCHE ANWENDUNGSTIPPS 22.1 VORHEIZEN .......................................... 3 22.2 EINSTELLUNG GARRAUMFEUCHTE IN DER BETRIEBSART KOMBINATION .....................
  • Seite 36: Allgemeines

    3B-390977NU – 10/18 Seite 2 21 ALLGEMEINES Das Bedienfeld aus Sicherheitsglas Ihres Kombidämpfers besteht aus: - einem Drehknopf: Zum Einschalten des Kombidämpfers und des Displays. Einschalten: 1 Sek. lang drücken Ausschalten: 3 Sek. lang drücken Auch zur schnellen Änderung von Parametern (Temperatur, Zeit...) und deren Bestätigung durch Drücken.
  • Seite 37: Vorheizen

    3B-390977NU – 10/18 Seite 3 Zeitanzeige Zeigt die „abgelaufene Zeit“ oder „Restlaufzeit“ an Die Einstellung der Zeit erfolgt durch Drücken auf das entsprechende Feld Die Sollwerteingabe wird nach 5 Sekunden oder durch Drücken eines anderen è Feldes/Taste übernommen Die Einstellung erfolgt mit dem Drehknopf oder den Tasten 6/5 in Schritten von 1 Minute Die Anordnung der weißen Punkte neben dem Symbol der Zeitschaltuhr weist auf folgendes hin: Punkte links: Restlaufzeit...
  • Seite 38: Menü Programme

    3B-390977NU – 10/18 Seite 4 22.3 MENÜ PROGRAMME Ein erstes Drücken auf die Taste PROG/VALID ermöglicht es, die gespeicherten è Programme (Rezepte) aufzurufen Anzeige von „Pr00“ im Zeitschaltuhr-Feld. Durch Betätigung des Drehknopfes oder Drücken der Tasten 6/5kann man durch die Programme scrollen (100 Programme Nr.
  • Seite 39: Betriebsart Abc

    3B-390977NU – 10/18 Seite 5 des Symbols Pause „ ∥ “. Zum Beenden des laufenden Programms drücken Sie auf die Taste „STOP“: Anzeige Solange keine Bestätigung vorliegt, ist das Programm noch nicht gestoppt (automatische Wiederaufnahme des Programms nach einigen Sekunden, wenn der è...
  • Seite 40: Menü Reinigung

    3B-390977NU – 10/18 Seite 6 24 MENÜ REINIGUNG Es gibt 4 Möglichkeiten: - Manuelle Reinigung (Halbautomatische Reinigung) - Automatische Reinigung mit manuellem Start (Option Automatische Reinigung) - Automatische Reinigung mit programmiertem Start (Option Automatische Reinigung) - Erzwungene Reinigung (Option Automatische Reinigung) Es ist untersagt, den Garraum mit eingeschobenen Rosten oder Behältern zu reinigen.
  • Seite 41: Automatische Reinigung Mit Manuellem Start

    3B-390977NU – 10/18 Seite 7 - Bei den Kombidämpfern 10 GN 2/1 und 20 Einschübe die Rückwandabdeckung entriegeln und durch Heranziehen schwenken. Bei den anderen Modellen die Rückwandabdeckung aus Edelstahldraht an Ort und Stelle belassen. - Das Mittel gründlich auf alle nun zugänglichen Rückwände sprühen. Verwenden Sie ein Mittel, das speziell für die Pflege der Edelstahl-Garräume von professionellen Gargeräten entwickelt wurde.
  • Seite 42: Automatische Reinigung Mit Programmiertem Start

    3B-390977NU – 10/18 Seite 8 24.3 AUTOMATISCHE REINIGUNG MIT PROGRAMMIERTEM START Diese Funktion bietet Ihnen die Möglichkeit, den automatischen und täglichen Start der Reinigung zur gewünschten Uhrzeit und mit der gewünschten Intensität zu programmieren. HINWEIS: Eine automatische Reinigung mit manuellem Start (siehe Abschnitt „Automatische Reinigung mit manuellem Start“), ein Spülgang (siehe Abschnitt „Schnellspülgang“) oder/und eine Vorbereitung der Reinigungsleitung (siehe Abschnitt „Austausch des Reinigungsmittelbehälters“) können jederzeit durchgeführt werden Zugang zu dieser Funktion im Menü...
  • Seite 43: Abbruch Eines Reinigungszyklus

    3B-390977NU – 10/18 Seite 9 24.5 ABBRUCH EINES REINIGUNGSZYKLUS Um die laufenden Reinigung zu unterbrechen: - Folgende Taste drücken: "STOP" Beendet den Reinigungszyklus. è Solange keine Bestätigung vorliegt, geht der Reinigungszyklus in „Pause“, wird jedoch noch nicht gestoppt (automatische Wiederaufnahme des Programms nach einigen Sekunden, wenn der Anwender keine weiteren Eingaben macht).
  • Seite 44: Pflege Des Kombidämpfers

    3B-390977NU – 10/18 Seite 10 25 PFLEGE DES KOMBIDÄMPFERS ACHTUNG: Eine regelmäßige und umfassende Reinigung des Geräts garantiert eine verlängerte Nutzungsdauer DIE ANWENDUNG DES REINIGUNGSMITTELS IN HEISSEM ZUSTAND, ÜBER 60°C, IST AUSDRÜCKLICH UNTERSAGT. ¨ Die aufgeheizten Innenwände des Kombidämpfers würden irreparabel angegriffen werden (dunkle Verfärbungen, fast schwarz). ¨...
  • Seite 45: Instandhaltung Des Dampfgenerators (Equajet Boiler)

    3B-390977NU – 10/18 Seite 11 ENTKALKUNG: täglich, falls erforderlich Falls sich Mineralien an den Innenwänden des Garraums aufgrund von nicht enthärtetem Wasser ablagern (weißlicher Belag), müssen diese Ablagerungen täglich entfernt werden. Zur Sicherstellung der maximalen Effizienz des Produktes, ohne Verursachung von Schäden am Material und an den Komponenten Ihres Kombidämpfers, empfiehlt es sich, ein geeignetes Entkalkungsmittel zu verwenden.
  • Seite 46: Empfohlene Ersatzteile Und Ersatzteil-Notfallaussstattung

    Sichtprüfung - Einsteckfühler (Spitze; Kabel; Bei Beschädigung den Kundendienst verständigen Wanddurchführung) Regelmäßige Wartung durch den Kundendienst 27 FUNKTIONSSTÖRUNGEN Meldungen auf dem Display Auswirkungen Was ist zu tun? Der Garvorgang wird fortgesetzt Den unteren und hinteren Lufteinlass des Kombidämpfers reinigen. i31: Überhitzung der Elektronik: Die und die Temperatur wird Sollte das Problem weiterhin bestehen, ist ein Kundendiensttechniker Temperatur wird auf 180°C gesenkt...
  • Seite 47: Empfehlungen

    2-Punkt-Temperaturfühler PT 100 301471 Fühler Gasgenerator 301479 1-Punkt-Temperaturfühler PT 100 301485 Axialer Lüfter 304194 Zentrifugaler Lüfter LN2, 7000 Umdrehungen 304276 Motor 304292 Kondensator 12.5µf 304293 Getriebemotor Rückholfeder im Zentrum 85 Grad 305108 Sicherungshalter 3P 125A 307468 Sicherungshalter 3P 50A 307469 Sicherung GG 14x51 32A 307471 Sicherung GG 22x58 63A...
  • Seite 48 DIE ANWENDUNG DES REINIGUNGSMITTELS IN HEISSEM ZUSTAND, ÜBER 60°C, IST AUSDRÜCKLICH UNTERSAGT. Die Innenwände ¨ des Kombidämpfers würden irreparabel angegriffen werden (dunkle Verfärbungen, fast schwarz). ¨ Es ist streng untersagt, die Tür des Kombidämpfers während der Ausführung des Reinigungszyklus im Gerät zu öffnen. Der Kombidämpfer muss mit speziellen Reinigungsmitteln gepflegt werden, die bis zu 70°C temperaturbeständig sein müssen.
  • Seite 49 Hinweis: Kontaktieren Sie hierzu eine geeignete Sammelstelle für das Recycling von elektrischen und elektronischen Geräten, um gemäß den nationalen Rechtsvorschriften eine Aufbereitung, Verwertung oder Recycling vornehmen zu lassen. 30 GARANTIE ACHTUNG! JEDE GARANTIE IST AN BEDINGUNGEN GEBUNDEN Unsere Garantie gilt nur für einen normalen Gebrauch. Damit meinen wir die strikte Befolgung der Empfehlungen, die in unseren Bedienungs- und Wartungsanleitungen nachzulesen sind.
  • Seite 50 NOTES CE MANUEL EST L A PROPRIETE DU FABRICANT ET TOUTE REPRODUCTION MEME PARTIELLE EST INTERDITE. - 16 -...
  • Seite 51 Page 1 3B-390977NU – 01/17 3B-390977NU – 10/18 Página 1 SUMARIO EQUAJET EQUAJET GAS & ELÉCTRICAS GAS & ELÉCTRICAS COMPOSICIÓN DE LOS APARATOS CONSEJO PRÁCTICO DE UTILIZACIÓN GENERALIDADES .................................2 COMPOSICIÓN DE LOS APARATOS MODO MANUAL ..................................2 CONSEJO PRÁCTICO DE UTILIZACIÓN 32.1 PRECALENTAMIENTO ......................................
  • Seite 52: Modo Manual

    3B-390977NU – 10/18 Página 2 31 GENERALIDADES El panel de mandos de cristal templado de su horno se compone de: - un botón codificador: permite la conexión del horno y de la pantalla. Conexión: pulse 1 segundo. Parada: pulse 3 segundos. Permite también modificar rápidamente los parámetros (temperatura, tiempo...) y su validación mediante la pulsión.
  • Seite 53: Precalentamiento

    3B-390977NU – 10/18 Página 3 Zona duración Fija el « tiempo pasado » o el « tiempo restante » La zona de tiempo se puede ajustar pulsando la zona correspondiente. è La consigna introducida se valida al cabo de 5 segundos o pulsando otra zona/botón. El ajuste se puede hacer mediante el codificador o con las teclas 6/5 al paso de 1 minuto La posición de los puntos blancos al lado del logotipo temporizador indica que se trata de: Puntos a la izquierda: tiempo restante...
  • Seite 54 3B-390977NU – 10/18 Página 4 32.3 MENU PROGRAMMES Pulsando la primera vez la tecla PROG/VALID se accede a los programas salvados è (recetas) Visualización de « Pr00 » en la zona temporizador. Accionando el codificador o las teclas 6/5se pasan los programas (100 programas n°00 à...
  • Seite 55: Modo Abc

    3B-390977NU – 10/18 Página 5 Pausa « ∥ ». Para parar un programa en curso pulse la tecla «STOP»: Visualización del logotipo El programa no se detiene hasta que no se valida la confirmación (reinicio automático del programa después de varios segundos sin que el usuario accione la è...
  • Seite 56: Menú Limpieza

    3B-390977NU – 10/18 Página 6 34 MENÚ LIMPIEZA Existen 4 posibilidades: - Limpieza manual (Semiautomático) - Limpieza automática con inicio manual (Opción lavado automático) - Limpieza automática con inicio programado (Opción lavado automático) - Limpieza obligatoria (Opción lavado automático) Está prohibido limpiar el recinto del horno con las parrillas y/o las bandejas en su sitio.
  • Seite 57: Limpieza Automática Con Inicio Manual

    3B-390977NU – 10/18 Página 7 - Desbloquee el conducto de ventilación y gírelo tirando hacia usted para los hornos 10 GN 2/1 y 20 niveles. En los otros modelos deje en su sitio el conducto de ventilación de hilo de acero inoxidable. - Pulverizar bien el producto por las paredes traseras expuestas.
  • Seite 58: Limpieza Automática Con Inicio Programado

    3B-390977NU – 10/18 Página 8 34.3 LIMPIEZA AUTOMÁTICA CON INICIO PROGRAMADO Esta función ofrece la posibilidad de programar el inicio automático y cotidiano de la limpieza a la hora y con la intensidad deseadas. NOTA : En cualquier momento es posible efectuar una limpieza automática con inicio manual (consulte el apartado « Limpieza automática con inicio manual »), un enjuague (consulte el apartado «...
  • Seite 59: Parada Del Ciclo De Limpieza

    3B-390977NU – 10/18 Página 9 34.5 PARADA DEL CICLO DE LIMPIEZA Para detener el ciclo de limpieza en curso: - Pulse la tecla: "STOP" El ciclo de limpieza se detiene è Hasta que no se valida la confirmación el ciclo del limpieza permanece en « pausa », pero no está parado (reinicio automático del ciclo al cabo de unos segundos sin que el usuario realice ninguna acción en la pantalla).
  • Seite 60: Mantenimiento Del Horno

    3B-390977NU – 10/18 Página 10 35 MANTENIMIENTO DEL HORNO ATENCIÓN: La limpieza regular y completa del aparato garantiza un uso prolongado. ¨ LA APLICACIÓN DEL PRODUCTO DE LIMPIEZA EN CALIENTE, POR ENCIMA DE LOS 66º C ESTÁ FORMALMENTE PROHIBIDA. Las paredes calientes se dañarían de forma irremediable (color oscuro, casi negro). ¨...
  • Seite 61: Mantenimiento De La Caldera De Vapor (Equajet Caldera)

    3B-390977NU – 10/18 Página 11 Para que el producto tenga una eficacia máxima sin dañar los materiales y componentes de su horno es conveniente utilizar el descalcificador adecuado. El uso de ciertos ácidos tiene un efecto destructor irreversible que puede dañar de forma grave su horno.
  • Seite 62: Piezas Recomendadas Y De Urgencia

    37 FALLOS DE FUNCIONAMIENTO Mensajes en la pantalla Consecuencias ¿Qué hacer? i31 : Sobrecalentamiento de la electrónica: La cocción sigue y la temperatura se Limpie las tomas de aire en la parte inferior y posterior. La temperatura se reduce a 180ºC reduce automáticamente a 180ºC Llamar a un técnico si el problema persiste.
  • Seite 63 Condensador 12.5µf 304293 Motor reductor muelle de retorno en el centro 85 grados 305108 Portafusible 3P 125A 307468 Portafusible 3P 50A 307469 Fusible GG 14x51 32A 307471 Fusible GG 22x58 63A 307472 Fuente conmutada 15V 15W RS15-15 308350 Fusible 3.15 Amperios calibre 309407 Cable entre tarjetas 309581...
  • Seite 64 La categoría de riesgo del limpiador químico debe ser, como máximo 3, de acuerdo con la norma EN 1717 (información toxicológica sobre FDS: ¨ LD50 > 200mg/kg). Le recomendamos vivamente utilizar los productos de limpieza aconsejados por el fabricante y suministrados con el horno para ¨...
  • Seite 65 40 GARANTÍA ¡ATENCIÓN! NINGUNA GARANTÍA ES INCONDICIONAL Nuestra garantía solo se usa en caso de uso normal. Es decir, cumpliendo estrictamente las recomendaciones que figuran en nuestras instrucciones de uso y mantenimiento. Será también válida si las visitas periódicas de mantenimiento y/o los controles requeridos son debidamente efectuadas por nuestros técnicos.
  • Seite 66 NOTES CE MANUEL EST L A PROPRIETE DU FABRICANT ET TOUTE REPRODUCTION MEME PARTIELLE EST INTERDITE. - 16 -...
  • Seite 67 Pagina 1 3B-390977NI – 02/17 3B-390977NU – 06/18 INDICE Page 1 EQUAJET EQUAJET GAS & ELETTRICO MODELLI A GAS ED ELETTRICI COMPOSIZIONE DELL’APPARECCHIO CONSIGLI PRATICI DI UTILIZZO GENERALITA' ..................................... 2 MODALITÀ MANUALE MANUALE ..................................2 PRERISCALDAMENTO ....................................4 REGOLAZIONE DEL LIVELLO DI UMIDITÀ IN MODALITÀ DI COMBINAZIONE ..................5 REGOLAZIONE DEL LIVELLO DI UMIDITÀ...
  • Seite 68 3B-390977NU – 06/18 Page 2 41 GENERALITA ‘ Il pannello di controllo in vetro temperato del tuo forno è composto da: - una manopola codificatore Accendi il forno e il suo schermo. Accensione: premere per 1 secondo Spegni: premere per 3 secondi Permette di modificare rapidamente i parametri (Temperatura, tempo ...) e di confermare semplicemente premendo la manopola.
  • Seite 69 visualizzato: ➔ Punti a sinistra: tempo rimanente 3B-390977NU – 06/18 Page 4 Punti a destra: tempo di esecuzione Sezione timer Pulsante temperatura interna Premendo questo pulsante si passa automaticam Visualizza il tempo di esecuzione >> e il << tempo rimanente <<...
  • Seite 70 Per tornare alla modalità timer (zona timer), toccare nuovamente il pulsante di fr display 3B-390977NU – 06/18 Page 6 Pulsante ventola MENU PROGRAMMI Premendo questo pulsante è possibile modificare la velocità della ventola (l'impostazione predefinita è 100%) passando alla modalità di regolazione della ➔...
  • Seite 71 3B-390977NU – 06/18 Page 8 Per interrompere un programma in esecuzione, premere la zona "STOP": il display mostra il logo "Pausa" "∥". ➔ Se l'azione non viene convalidata, il programma non si ferma (si riavvia automaticamente dopo alcuni secondi di ritardo se lo schermo non viene toccato). Premendo di nuovo la zona si riavvia il programma corrente Premere la zona “Fine”...
  • Seite 72 3B-390977NU – 06/18 Page 10 MENU NETTOYAGE 3B-390977NU – 06/18 Page 10 44 MENU DI LAVAGGIO Il existe 4 possibilités : 3B-390977NU – 06/18 Page 10 - Nettoyage Manuel 44 MENU DI LAVAGGIO - Nettoyage Automatique à départ Manuel (option lavage automatique) - Nettoyage Automatique à...
  • Seite 73 acciaio inossidabile. - Chiudere il condotto e bloccarlo (10 forni GN 2/1 e 20 di livello) - Spruzzare la cavità di cottura e rimontare i pattini o il modulo - Spruzzare i pattini o il modulo e l'interno o la porta, quindi chiudere la porta. Il ciclo di pulizia inizierà...
  • Seite 74 PULIZIA AUTOMATICA CON AVVIO PROGRAMMATO Questa funzione offre la possibilità di programmare un orario di avvio automatico giornaliero e l'intensità di lavaggio desiderata. NOTA: è sempre possibile avviare manualmente un ciclo di pulizia automatico (vedere il paragrafo 'Pulizia automatica avviata manualmente'), un risciacquo (vedere il paragrafo 'Risciacquo rapido') e/o caricamento (vedere il paragrafo 'Sostituzione del contenitore del detersivo') Questa funzione è...
  • Seite 75 3B-390977NU – 06/18 Page 14 .4 ARRESTO DEL CICLO DI PULIZIA Per interrompere un ciclo di pulizia in esecuzione: - Premere il tasto stop: "STOP" ferma il ciclo. ➔ Se questa azione non viene convalidata, il ciclo viene messo in pausa ma non fermato (verrà riavviato dopo alcuni secondi se non viene eseguita alcuna azione ulteriore).
  • Seite 76 3B-390977NU – 06/18 Page 16 MANUTENZIONE DEL FORNO 45 CONSERVAZIONE DEL FORNO AVVERTENZA: una pulizia regolare e accurata garantirà una durata prolungata • IN NESSUN CASO UTILIZZARE PRODOTTI CHIMICI AD UNA TEMPERATURA SUPERIORI I 60 °C. Ciò causerebbe danni all’apparecchio. •...
  • Seite 77 3B-390977NU – 10/18 Page 11 Per un’efficacia ottimale del prodotto, senza danni ai materiali e ai componenti del vostro forno, si consiglia di utilizzare il prodotto Pour une efficacité maximale du produit sans endommager les matériaux et composants de votre four, il convient d'utiliser le anti calcare appropriato.
  • Seite 78 post-vendita in caso di comparsa di ruggine. attraverso la paratia) vendita Controllo quantità del detergente nel contenitore Sostituire il contenitore tutte le volte che è necessario Manutenzione periodica a cura dal post-vendita Controllo dello stato del tubo e della valvola di pescaggio nel Controllo da eseguire durante la sostituzione del contenitore del detersivo contenitore/ Pulire la valvola di pescaggio...
  • Seite 79 LN2 ventilatore centrifugo 7000 giri 304276 Motore 304292 Condensatore12.5µf 304293 Moto-riduttore con molla di richiamo, 85 gradi 305108 Portafusibili trifase 125A 307468 Portafusibili trifase 50A 307469 14 x 51 32A GG fusibile 307471 22 x 58 63A GG fusibilie 307472 Taglia picchi di tensione 15V 15W RS 15-15 308350 Fusibile 3.15 Amp...
  • Seite 80 Ad eccezione del mercato del Regno Unito: nessun prodotto detergente è raccomandato o fornito. Qualsiasi detergente utilizzato con questo decalcificante. Ciò danneggerebbe irreversibilmente l'impianto idraulico del forno. apparecchio deve essere stato verificato per non rappresentare un rischio maggiore rispetto alla categoria rischio chimico 3. Se il detergente utilizzato •...
  • Seite 81 - In caso di contatto con gli occhi, sciacquare immediatamente con abbondante acqua e consultare un medico. - Indossare indumenti protettivi adeguati, guanti e indumenti per il viso e gli occhi. - In caso di incidente o malattia, consultare immediatamente un medico - Smaltire il prodotto e il suo contenitore come rifiuto pericoloso.

Diese Anleitung auch für:

Mc201gMc202eMc202g

Inhaltsverzeichnis