
Verwandte Anleitungen für CARAVITA BELVEDERE


Inhaltszusammenfassung für CARAVITA BELVEDERE
- Seite 1 BELVEDERE Montage- und Bedienungsanleitung | Installation and operating instruction | Instructions de montage et d‘utilisation | Instrucciones de montaje y funcionamiento...
- Seite 2 ab Seite from page à partir de la page a partir de la página 2 | 88 4000258 [v0]/2022-01-01...
-
Seite 3: Vorwort
Vorwort Vorwort Vorwort Wir freuen uns, dass Sie sich für unser Produkt entschieden haben. Mit dem Erwerb eines CARAVITA-Produktes haben Sie sich für Qualität entschieden, welche aus besten Materialien besteht und in der Konstruktion nach höchsten Ansprüchen konzi- piert wurde. -
Seite 4: Inhaltsverzeichnis
Inhaltsverzeichnis Inhaltsverzeichnis Vorwort..........................3 Einleitung.......................... 5 Hinweise zur Sicherheit..........................5 Erklärung der Signalworte..........................5 Grundlegende Sicherheitshinweise......................5 Informationen zum Produkt....................7 Montage..........................8 Produkt auspacken............................8 Lieferumfang..............................9 Produkt transportieren..........................10 Produkt aufstellen............................10 Bedienung........................12 Schirmdach öffnen............................12 Korrigieren der Schirmtuchspannung......................13 Schirmdach nivellieren (optional)....................... -
Seite 5: Einleitung
Für die Sicherheit von Personen ist es wichtig, die Anleitung zu befolgen. Durch Nichtbeachtung der Anleitung können funk- tionsbedingt bei der Verwendung des Produktes Personen- und/oder Sachschäden entstehen. Die Nichtbeachtung entbindet Caravita von der Haftungspflicht. Warnhinweise sind mit diesem oder ähnlichem Symbol in der Anleitung gekennzeichnet. - Seite 6 Einleitung GEFAHR Erstickungsgefahr durch Verpackungsmaterial Kunststofffolien, Polystyrolteile und Kleinteile aus der Verpackung können für Kinder zu einem gefährlichen Spielzeug werden. Kinder von Kleinteilen fernhalten. Verpackungsmaterial nicht achtlos liegen lassen. VORSICHT Verletzungsgefahr durch Kippen Durch Unachtsamkeit kann der Schirm mit seinem schweren Gewicht kippen. Zur Montage sind stets 2 Personen erforderlich.
-
Seite 7: Informationen Zum Produkt
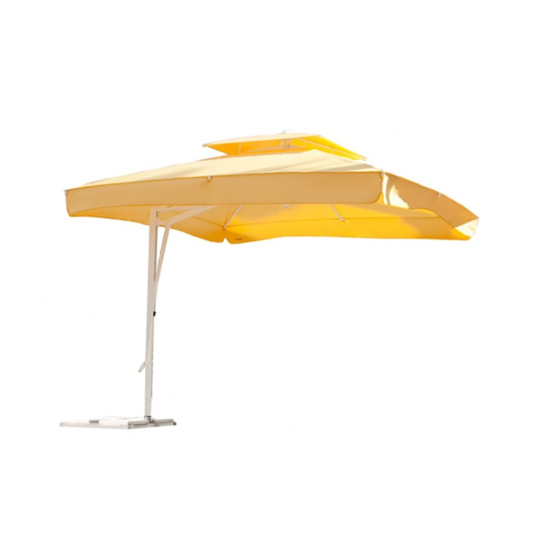
Informationen zum Produkt Produktbeschreibung Der Sonnenschirm Belvedere dient zum Schutz vor direkter Sonneneinstrahlung und bedingt zum Wetterschutz. Das Produkt ist in einem festen Edelstahlsockel installiert und wird je nach Ausführung über eine Kurbel-Seilwinde oder über einen Hebel- mechanismus bedient. Die Neigung des Schirmdaches ist optional nivellierbar. Der Stoff des Schirmdaches besteht aus pfle- geleichtem und waschbarem Material. -
Seite 8: Montage
Montage Montage VORSICHT Verletzungsgefahr durch Kippen bei der Montage Durch Kippen oder Herunterfallen des Produkts kann es zu schweren Verletzungen kommen. Für das Montieren und Aufstellen des Produkts sind 2 Personen erforderlich. Das Produkt auf einen ebenen Untergrund montieren. HINWEIS Bei der Installation von mehreren Sonnenschirmen muss ein Abstand von mindestens 20 cm zwischen den einzelnen Schirmen eingehalten werden. -
Seite 9: Lieferumfang
Montage Lieferumfang 1x Mast mit Hebel 1x Abdeckkappe 1x Schirmdach 1x Gurt 1x Schutzhülle 4x Befestigungsschrauben Abdeckkappe 1x Teleskopschubstange 1x Montage- und Bedienungsanleitung Abb. 1: Lieferumfang 4000258 [v0]/2022-01-01 9 | 88... -
Seite 10: Produkt Transportieren
Montage Produkt transportieren Das Produkt ist ohne zusätzliche Hilfsmittel problemlos und leicht zu transportieren. Für den Transport sind, aufgrund des Gewichts und der Größe des Produkts, 2 Personen erforderlich. HINWEIS Sachschaden durch Risse und verbogene Streben Durch unachtsamen Transport kann das Schirmdach beschädigt werden. Den Schirm nicht am Schirmbezug oder an der Schutzhülle über den Boden ziehen. - Seite 11 Montage 3 Mit einem Akkuschrauber die Befestigungsschrauben festdrehen. Mast am Standfuß montieren 1 Die Schraube M10x30 in den Standfuß eindrehen (12-15 mm). 2 Den Mast aufrecht aufstellen. 3 Die Öse am Edelstahlfuß in die Schraube schieben. Der Schirm gewinnt geringfügig Halt. 4 1 Person befestigt die 2.
-
Seite 12: Bedienung
Bedienung Bedienung Schirmdach öffnen Die an den Streben befestigten Kunststoffnetze dienen zum Schutz gegen Transportschäden. Ist das Schirmdach geöffnet, können diese vorsichtig mit einem Messer oder einer Schere entfernt werden. WARNUNG Verletzungsgefahr unbeteiligter Personen Befinden sich Personen im Öffnungsradius des Schirmdaches, können diese durch Unachtsamkeit beim Öffnen des Schirmdaches verletzt werden. -
Seite 13: Korrigieren Der Schirmtuchspannung
Bedienung 3 Den Hebel nach unten ziehen. Das Schirmdach öffnet sich. 4 Den Hebel ganz nach unten drücken. 5 Den Hebel mit dem Sicherungsdrehknopf verriegeln. INFO Der Sicherungsdrehknopf verhindert ein versehentliches Zusam- menklappen des Produkts. Korrigieren der Schirmtuchspannung Beim Nivellieren kann die Spannung des Schirmtuches nachlassen oder sich erhöhen. Die Tuchspannung kann über das Spannschloss am Zugseil des Seitenmastes verändert werden. -
Seite 14: Schirmdach Nivellieren (Optional)
Bedienung Die Kontermuttern am Spannschloss sind offen. 1 Das Seil am Gewindeterminal mit einer Zange festhalten. 2 Den Spanner mit einer Zange oder einem Splint drehen. Drehung rechts = Spannung erhöht sich. Drehung links = Spannung lässt nach. 3 Den Spanner über die Kontermuttern fixieren. Schirmdach nivellieren (optional) Das Schirmdach kann nivelliert werden. -
Seite 15: Schirmdach Schließen
HINWEIS Sachschaden durch Scheuern des Schirmtuches Permanentes flattern im Wind kann das Schirmtuch durch Scheuern an den Streben beschädigen. Hierfür können kei- ne Schadensansprüche bei CARAVITA geltend gemacht werden. Das geschlossene Schirmdach stets mit dem Gurt sichern. Den Gurt bereitlegen. - Seite 16 Bedienung 1 Den Sicherungsdrehknopf entriegeln. 2 Den Hebel langsam nach oben drücken. Das Schirmdach schließt sich. 4 Das Zugseil vom Seilwickler lösen. 5 Das Zugseil mit einer Hand straff gespannt halten. 6 Den Sperrbolzen mit der anderen Hand aus der Vorrichtung ziehen. 16 | 88 4000258 [v0]/2022-01-01...
-
Seite 17: Verwendung Der Teleskopschubstange (Optional)
Bedienung 7 Das Schirmtuch zwischen den Streben herausziehe, um zu vermeiden, dass dieses nicht eingeklemmt oder beschädigt wird. 8 Das geschlossene Schirmdach mit dem Gurt sichern. 9 Das Schirmdach mit der Schutzhülle überziehen. INFO Die Teleskopschubstange dient zur leichteren Bedienung bei Tätigkei- ten wie z.B. - Seite 18 Bedienung 2 Die Rändelschraube an der Teleskopschubstange öffnen. 3 Die Teleskopschubstange auf erforderliche Länge aufziehen. 4 Die Rändelschraube an der Teleskopschubstange festdrehen. 5 Teleskopschubstange in die Tasche der Schutzhülle stecken. 18 | 88 4000258 [v0]/2022-01-01...
- Seite 19 Bedienung 6 Die Schutzhülle mit der Teleskopschubstange über den Schirm heben. 7 Die Ringschraube der Teleskopschubstange in den Schlüsselring am Reißverschluss der Schutzhülle anbringen. 8 Den Reißverschluss nach unten ziehen. HINWEIS Sachschaden durch festes Ziehen am Reißverschluss Der Verschluss der Schutzhülle kann beschädigt werden. Bei Klemmen des Reißverschlusses: Mit leichten Vor- und Rückwärtsbewegungen lösen.
-
Seite 20: Pflegehinweise
Pflegehinweise Pflegehinweise Schirmtuch HINWEIS Sachschaden am Schirmstoff durch falsche Reinigung und Reinigungsmittel Der Acryl-Stoff des Schirmdaches ist imprägniert und bedarf spezieller Reinigung und Reinigungsmittel. Das Schirmtuch stets kalt waschen. Zum Reinigen des Schirmtuchs keinen Hochdruckreiniger anwenden. Während der Reinigung starke Reibung, z. B. mit harten Bürsten oder Schwämmen, vermeiden. Schirmtuch reinigen Abgefallene Blätter (Laub) nach Möglichkeit sofort entfernen (Ausgangspunkt für mikrobiellen Befall). -
Seite 21: Lagerung
HINWEIS Sachschaden durch Scheuern des Schirmtuches Permanentes flattern im Wind kann das Schirmtuch durch Scheuern an den Streben beschädigen. Hierfür können kei- ne Schadensansprüche bei CARAVITA geltend gemacht werden. Das geschlossene Schirmdach stets mit dem Gurt sichern. HINWEIS Sachschaden durch Schimmel Wird die Schutzhülle über das feuchte Tuch gezogen, bildet sich Schimmel. -
Seite 22: Problembehebung
Bei Fehlfunktionen des Schirmes, die mit Hilfe nachfolgender Hinweise nicht behoben werden können, kontaktieren Sie uns über unsere CARAVITA-Service-Hotline. Die Kontaktdaten finden Sie jeweils auf der ersten und letzten Seite dieser Anleitung. Folgende Fehlfunktionen können bei Verwendung des Schirmes auftreten:... -
Seite 23: Garantiebestimmungen
Garantiebestimmungen Garantiebestimmungen Es gelten nachfolgende Garantiebestimmungen: Garantiegeber CARAVITA GmbH Hans-Wilhelm-Renkhoff-Straße 2 D-97828 Marktheidenfeld Tel.: +49-8458-60389-0 E-Mail: info@caravita.eu www.caravita.de Garantieumfang Zeitlich: 5 Jahre ab Übergabe des Produktes Räumlich: Alle Mitgliedsstaaten der Europäischen Union Sachlich: Ein Garantiefall ist gegeben, wenn sich am Produkt Funktions-, Material- oder Verarbeitungsfehler zeigen, die nicht auf äuße- re Einflüsse, wie Wind, Hagel, Schnee etc. -
Seite 24: Foreword
Foreword Foreword Thank you for choosing our product. By selecting a CARAVITA product, you purchased a quality product that was designed to highest standards with the best materials. Read the instructions in this document carefully in order to set up the product safely. Be sure to comply with the safety instructions described here and do not make changes to the product without permission. - Seite 25 Table of contents Table of contents Foreword......................... 24 Introduction........................26 Information on safety..........................26 Explanation of the signal words......................... 26 Basic safety instructions..........................26 Product information......................28 Installation........................29 Unpacking the product..........................29 Scope of delivery............................30 Transporting the product..........................31 Setting up the product..........................31 Operation........................
-
Seite 26: Introduction
It is important to follow these instructions in the interest of personal safety. Failure to comply with these instructions when operating the product may result in personal injury and/or property damage. Failure to comply with these instructions relieves CARAVITA of liability. Warnings are marked in the instructions with this symbol or a similar symbol. - Seite 27 Introduction DANGER Danger of suffocation from packaging materials Plastic film, polystyrene parts and small parts from the packaging, etc., can be dangerous for children to play with. Keep children away from small parts. Do not leave the packaging material lying about. CAUTION Danger of injury from tipping over Lack of care can cause the parasol to tip over on account of its high weight.
-
Seite 28: Product Information
Product information Product description The Belvedere parasol provides protection against direct sunlight and some protection against inclement weather. The product is installed in a fixed stainless steel base and, depending on the model, is operated using a crank-operated cable winch or a lever mechanism. -
Seite 29: Installation
Installation Installation CAUTION Danger of injury from tipping during installation Tipping over or falling off of the product can result in serious injury. Two people are required to install and set up the product. Install the product on level ground. NOTICE If multiple parasols are being installed, at last 20 cm must be located between the individual parasols. -
Seite 30: Scope Of Delivery
Installation Scope of delivery 1x pole with lever 1x finial 1x canopy 1x strap 1x protective cover 4x fixing screws for the finial 1x telescope rod 1x installation and operating instructions Fig. 2: Scope of delivery 30 | 88 4000258 [v0]/2022-01-01... -
Seite 31: Transporting The Product
Installation Transporting the product The product is easy to transport without additional aids. Due to its weight and size, two people are required to transport the product. NOTICE Property damage due to cracks and bent ribs Lack of care during transport may damage the canopy. Do not drag the parasol over the ground by holding the canopy fabric or the protective cover. - Seite 32 Installation 3 Tighten the fixing screws using the power drill. Installing the pole in the base 1 Screw the screw M10x30 into the base (12-15 mm). 2 Set up the pole in a vertical position. 3 Push the eyelet on the stainless steel base into the screw. The parasol become slightly more stable.
-
Seite 33: Operation
Operation Operation Opening the canopy The plastic nets attached to the ribs are intended to protect against transport damage. After the canopy is opened, they can be removed carefully with a knife or scissors. WARNING Danger of injury to bystanders People located within the opening radius of the canopy may be injured when the canopy is opened. -
Seite 34: Correcting The Parasol Fabric Tension
Operation 3 Pull the lever down. The canopy opens. 4 Push the lever all the way down. 5 Lock the lever using the locking rotary knob. INFO The locking rotary knob prevents the product from folding together accidentally. Correcting the parasol fabric tension When levelling, the tension in the parasol fabric may decrease or increase. -
Seite 35: Levelling The Canopy (Optional)
Operation The counter nuts on the turnbuckle are open. 1 Hold the cable on the threaded terminal using pliers. 2 Turn the adjuster with pliers or a splint. Right-hand rotation = tension increases. Left-hand rotation = tension decreases 3 Secure the adjuster using the counter nuts. Levelling the canopy (optional) The canopy can be levelled. -
Seite 36: Closing The Canopy
Property damage from abrasion of the parasol fabric Permanent fluttering in the wind can damage the parasol fabric due to abrasion against the ribs. Claims for compensation cannot be asserted against CARAVITA for this type of damage. Always secure the closed canopy using the strap. - Seite 37 Operation 1 Unlock the locking rotary knob. 2 Push the lever up slowly. The canopy closes. 4 Release the traction cable from the cleat. 5 Keep the traction cable taut with one hand. 6 Pull the locking pin out of the mechanism with the other hand. 4000258 [v0]/2022-01-01 37 | 88...
-
Seite 38: Use Of The Telescope Rod (Optional)
Operation 7 Pull the parasol fabric out from between the ribs to prevent the fabric from being pinched or damaged. 8 Always secure the closed canopy using the strap. 9 Pull the protective cover over the canopy. INFO The telescope rod helps perform operating tasks such as pulling on the protective cover. - Seite 39 Operation 2 Open the knurled screw on the telescope rod. 3 Extend the telescope rod to the necessary length. 4 Tighten the knurled screw on the telescope rod. 5 Insert the telescope rod into the pocket of the protective cover. 4000258 [v0]/2022-01-01 39 | 88...
- Seite 40 Operation 6 Lift the protective cover over the parasol using the telescope rod. 7 Attach the ring screw of the telescope rod to the key ring of the zipper of the protective cover. 8 Pull the zipper down. NOTICE Property damage due to pulling too forcefully on the zipper The closure of the protective cover could be damaged.
-
Seite 41: Care Instructions
Care instructions Care instructions Parasol fabric NOTICE Property damage to the parasol fabric due to incorrect cleaning procedure and cleaning agent The acrylic fabric of the canopy is impregnated and requires a special cleaning procedure and cleaning agent. Only wash the parasol fabric using cold water. Never use a high pressure washer to clean the parasol fabric. -
Seite 42: Bearing
Property damage from abrasion of the parasol fabric Permanent fluttering in the wind can damage the parasol fabric due to abrasion against the ribs. Claims for compensation cannot be asserted against CARAVITA for this type of damage. Always secure the closed canopy using the strap. -
Seite 43: Troubleshooting
Troubleshooting Troubleshooting If the parasol exhibits malfunctions that cannot be eliminated by following the steps below, contact us at the CARAVITA service hotline. The contact data can be found on the first and last pages of these instructions The following malfunctions can occur when using the parasol:... -
Seite 44: Warranty Conditions
Warranty conditions Warranty conditions The following warranty conditions apply: Warrantor CARAVITA GmbH Hans-Wilhelm-Renkhoff-Straße 2 D-97828 Marktheidenfeld, Germany Tel.: +49-8458-60389-0 E-mail: info@caravita.eu www.caravita.de Scope of warranty Period: 5 years from transfer of product Region: All member states of the European Union... -
Seite 45: Avant-Propos
Avant-propos Avant-propos Nous vous remercions d'avoir choisi notre produit. En faisant l'acquisition d'un produit CARAVITA, vous vous êtes décidé pour un produit de qualité, fabriqué avec les meilleurs matériaux et d'une construction répondant aux plus grandes exigences. Lisez les instructions de ce document avec attention afin de pouvoir installer le produit en toute sécurité. Respectez impérativement les consignes de sécurité... - Seite 46 Sommaire Sommaire Avant-propos........................45 Introduction........................47 Consignes de sécurité..........................47 Explication des mentions d'avertissement....................47 Consignes de sécurité de base......................... 47 Informations sur le produit..................... 49 Pose..........................50 Déballage du produit..........................50 Volume de livraison............................ 51 Transport du produit........................... 52 Mise en place du produit..........................52 Manœuvre........................54 Ouverture du toit du parasol........................
-
Seite 47: Introduction
/ ou matériels. Le non-respect des instructions décharge la CARAVITA de toute responsabilité civile. Les mises en garde sont signalées dans ce manuel par ce symbole ou un symbole similaire. - Seite 48 Introduction DANGER Risque d'étouffement lié aux emballages ! Les films en plastique, les pièces en polystyrène et les petites pièces des emballages peuvent être dangereux pour les enfants s'ils jouent avec. Tenez les petites pièces hors de la portée des enfants. Ne laissez pas les emballages sans surveillance.
-
Seite 49: Informations Sur Le Produit
Différentes formes de toit de parasol sont disponibles. Caractéristiques techniques Les produits de la société CARAVITA sont tous des pièces uniques fabriquées sur mesure. Les dimensions et le poids varient selon la façon dont le modèle est réalisé. -
Seite 50: Pose
Pose Pose ATTENTION Risque de blessure si le produit bascule lors de la pose ! Si le produit bascule ou tombe, il risque de causer des blessures graves. Il est indispensable que la pose et l'installation du produit soit effectuée par deux personnes. Montez le produit sur une surface plane. -
Seite 51: Volume De Livraison
Pose Volume de livraison 1 mât avec levier 1 embout de protection 1 toit de parasol 1 sangle 1 housse de protection 4 vis de fixation pour embout de protection 1 barre télescopique 1 exemplaire des instructions de pose et manuel d'utilisation Fig. -
Seite 52: Transport Du Produit
Pose Transport du produit Le produit peut être transporté sans problème et facilement sans accessoires supplémentaire. En raison du poids et de la taille, il est indispensable que le produit soit transporté par deux personnes. AVIS Risque de dommages matériels dû à des fissures ou des baleines déformées ! Le toit du parasol risque d'être endommagé... - Seite 53 Pose 3 Serrez les vis de fixation avec une visseuse sans fil. Montage du mât sur le pied 1 Vissez une vis M10 x 30 dans le pied (12 à 15 mm). 2 Placez le mât à la verticale. 3 Poussez l'œillet situé sur le pied en acier inoxydable sur la vis. Le parasol tient légèrement.
-
Seite 54: Manœuvre
Manœuvre Manœuvre Ouverture du toit du parasol Des filets en plastique sont fixés sur les baleines afin de les protéger de tout dommage pendant le transport. Il est possible de les retirer prudemment avec un couteau ou des ciseaux lorsque le toit du parasol est ouvert. AVERTISSEMENT Risque de blessure de personnes non impliquées ! Si des personnes se trouvent dans le rayon d'ouverture du toit du parasol, elles risquent d'être blessées par inattention... -
Seite 55: Correction De La Tension De La Toile Du Parasol
Manœuvre 3 Tirez le levier vers le bas. Le toit du parasol s'ouvre. 4 Poussez le levier entièrement vers le bas. 5 Bloquez le levier avec le bouton rotatif de sécurité. INFO Le bouton rotatif de sécurité empêche que le produit se replie par erreur. -
Seite 56: Mise À Niveau Du Toit Du Parasol (En Option)
Manœuvre Les contre-écrous situés sur le tendeur à vis sont desserrés. 1 Maintenez le câble avec une pince au niveau de l'embout fileté. 2 Tournez le tendeur avec une pince ou une goupille. Rotation vers la droite = la tension augmente. Rotation vers la gauche = la tension diminue. -
Seite 57: Fermeture Du Toit Du Parasol
Si la toile du parasol flotte constamment au vent, elle risque d'être endommagée en frottant sur les baleines. Dans ce cas, le client ne peut pas faire valoir de droit à dommages et intérêts auprès de la société CARAVITA. Fixez toujours le toit du parasol avec la sangle après l'avoir fermé. - Seite 58 Manœuvre 1 Débloquez le bouton rotatif de sécurité. 2 Poussez le levier lentement vers le haut. Le toit du parasol se ferme. 4 Détachez le câble de traction de l'enrouleur de câble. 5 Maintenez le câble de traction tendu avec une main. 6 Sortez la goupille de blocage du dispositif avec l'autre main.
-
Seite 59: Utilisation De La Barre Télescopique (En Option)
Manœuvre 7 Sortez la toile du parasol entre les baleines afin d'empêcher qu'elle se coince ou qu'elle soit endommagée. 8 Fixez le toit du parasol avec la sangle après l'avoir fermé. 9 Enveloppez le toit du parasol dans la housse de protection. INFO La barre télescopique facilite certaines opérations telles qu'enfiler la housse de protection. - Seite 60 Manœuvre 2 Desserrez la vis à tête moletée située sur la barre télescopique. 3 Déployez la barre télescopique sur la longueur requise. 4 Serrez la vis à tête moletée située sur la barre télescopique. 5 Insérez la barre télescopique dans la poche située sur la housse de protection.
- Seite 61 Manœuvre 6 Soulevez la housse de protection au-dessus du parasol avec la barre télescopique. 7 Placez la vis à anneau de la barre télescopique dans l'anneau de la fermeture à glissière de la housse de protection. 8 Tirez la fermeture à glissière vers le bas. AVIS Risque de dommages matériels si la fermeture à...
-
Seite 62: Instructions D'entretien
Instructions d'entretien Instructions d'entretien Toile du parasol AVIS Risque de dommages matériels de la toile du parasol suite à un nettoyage et des nettoyants incorrects ! La toile acrylique du toit du parasol est imprégnée et doit faire l'objet d'un nettoyage particulier avec des nettoyants spéciaux. -
Seite 63: Stockage
Si la toile du parasol flotte constamment au vent, elle risque d'être endommagée en frottant sur les baleines. Dans ce cas, le client ne peut pas faire valoir de droit à dommages et intérêts auprès de la société CARAVITA. Fixez toujours le toit du parasol avec la sangle après l'avoir fermé. -
Seite 64: Que Faire En Cas De Problème
En cas de dysfonctionnements du parasol auxquels il n'est pas possible de remédier à l'aide des instructions indiquées ci- dessous, contactez le service d'assistance téléphonique de la société CARAVITA. Vous trouverez les coordonnées à la première et à la dernière page de ce manuel. -
Seite 65: Conditions De Garantie
CARAVITA GmbH Hans-Wilhelm-Renkhoff-Straße 2 D-97828 Marktheidenfeld Tél. : +49-8458-60389-0 E-mail : info@caravita.eu www.caravita.de Étendue de la garantie Dans le temps : 5 ans à partir de la remise du produit Dans l'espace : tous les États membres de l'Union européenne Concrètement :... -
Seite 66: Prefacio
Prefacio Prefacio Nos alegra que haya elegido nuestro producto. Con la compra de un producto de CARAVITA, usted ha elegido un artículo de calidad fabricado con los mejores materiales y diseñado siguiendo las exigencias más rigurosas. Lea con detenimiento las instrucciones del presente documento para montar el producto de forma segura. Preste especial atención a las indicaciones de seguridad facilitadas y no lleve a cabo cambios constructivos por cuenta propia en el producto. - Seite 67 Índice Índice Prefacio........................... 66 Introducción........................68 Indicaciones de seguridad..........................68 Explicación de las palabras clave......................68 Indicaciones de seguridad básicas......................68 Información acerca del producto..................70 Montaje........................... 71 Desembalaje del producto..........................71 Volumen de suministro..........................72 Transportar el producto..........................73 Colocar el producto............................ 73 Manejo..........................
-
Seite 68: Introducción
Es importante respetar las instrucciones con el fin de garantizar la seguridad para las personas. El incumplimiento de las instrucciones puede ocasionar daños personales y/o materiales durante la utilización del producto. Dicho incumplimiento desliga a Caravita de sus responsabilidades. En las presentes instrucciones, este símbolo y otros similares identifican las advertencias. - Seite 69 Introducción PELIGRO Riesgo de asfixia con el material de embalaje Los plásticos, las piezas de poliestireno expandido y las piezas pequeñas del embalaje pueden convertirse en un juguete peligroso para los niños. Mantenga las piezas pequeñas fuera del alcance de los niños. No deje tirado el material de embalaje de forma descuidada.
-
Seite 70: Información Acerca Del Producto
Descripción del producto El parasol Belvedere sirve para proteger de la radiación solar directa y, en parte, para la protección contra la intemperie. El producto está instalado en una base firme de acero inoxidable y, según la versión, se maneja con un torno de cable de manivela o con un mecanismo de palanca. -
Seite 71: Montaje
Montaje Montaje ATENCIÓN Riesgo de lesiones debido al vuelco durante el montaje El vuelco o la caída del producto puede provocar lesiones de gravedad. El producto debe montarse y colocarse entre 2 personas. Monte el producto sobre una superficie llana. AVISO En caso de instalar varios parasoles, respete una distancia mínima de 20 cm entre los diferentes parasoles. -
Seite 72: Volumen De Suministro
Montaje Volumen de suministro 1 mástil con palanca 1 tapa 1 techo 1 correa 1 funda de protección 4 tornillos de fijación para tapa 1 barra de empuje telescópica 1 instrucciones de montaje y uso Fig. 4: Volumen de suministro 72 | 88 4000258 [v0]/2022-01-01... -
Seite 73: Transportar El Producto
Montaje Transportar el producto El producto puede transportarse fácilmente y sin problema sin necesidad de más medios auxiliares. Debido al peso y al tamaño del producto, este debe transportarse entre 2 personas. AVISO Daños materiales debido a desgarros y a varillas dobladas Un transporte descuidado puede provocar daños en el techo del parasol. - Seite 74 Montaje 3 Apriete los tornillos de fijación con un destornillador eléctrico. Montar el mástil en la base 1 Enrosque el tornillo M10x30 en la base (12-15 mm). 2 Coloque el mástil en vertical. 3 Encaje el ojal de la base de acero inoxidable en el tornillo. El parasol adquiere cierta estabilidad.
-
Seite 75: Manejo
Manejo Manejo Abrir el techo del parasol Las redes de plástico fijadas a las varillas protegen contra daños de transporte. Con el techo del parasol abierto, pueden retirarse cuidadosamente con un cuchillo o unas tijeras. ADCERTENCIA Riesgo de lesiones de personas ajenas Si hubiera personas en el radio de apertura del techo del parasol, pueden sufrir lesiones al abrirse este sin tener cuidado. -
Seite 76: Corregir El Tensado Del Tejido Del Parasol
Manejo 3 Tire hacia abajo de la palanca. El techo del parasol se abre. 4 Presione la palanca por completo hacia abajo. 5 Bloquee la palanca con el botón giratorio de bloqueo. INFORMACIÓN El botón giratorio de bloqueo impide plegar el producto de forma involuntaria. -
Seite 77: Nivelar El Techo Del Parasol (Opcional)
Manejo Las contratuercas del tensor se han aflojado. 1 Sujete el cable por la zona roscada con unas tenazas. 2 Gire el tensor con unas tenadas o un pasador. Giro a derechas = el tensado aumenta. Giro a izquierdas = el tensado disminuye. 3 Fije el tensor con las contratuercas. -
Seite 78: Cerrar El Techo Del Parasol
Daños materiales al rozar el tejido del parasol Si el tejido del parasol ondea constantemente debido al viento, puede resultar dañado al rozar con las varillas. CARAVITA no asumirá los daños resultantes. Asegure el techo del parasol cerrado siempre con la correa. - Seite 79 Manejo 1 Desbloquee el botón giratorio de bloqueo. 2 Presione lentamente la palanca hacia arriba. El techo del parasol se cierra. 4 Suelte el cable de tracción del torno. 5 Mantenga el cable de tracción tensado con una mano. 6 Tire del perno del bloqueo con la otra mano para extraerlo del dispositivo. 4000258 [v0]/2022-01-01 79 | 88...
-
Seite 80: Uso De La Barra De Empuje Telescópica (Opcional)
Manejo 7 Extraiga el tejido del parasol de entre las varillas para evitar que quede pillado o que resulte dañado. 8 Asegure el techo del parasol cerrado con la correa. 9 Cubra el techo del parasol con la funda de protección. INFORMACIÓN La barra de empuje telescópica se utiliza para facilitar, p. - Seite 81 Manejo 2 Afloje el tornillo moleteado de la barra de empuje telescópica. 3 Extienda la barra de empuje telescópica a la longitud necesaria. 4 Apriete el tornillo moleteado de la barra de empuje telescópica. 5 Inserte la barra de empuje telescópica en el bolsillo de la funda de protección.
- Seite 82 Manejo 6 Levante la funda de protección con la barra de empuje telescópica por encima del parasol. 7 Enganche el cáncamo de la barra de empuje telescópica en la anilla del cierre de cremallera de la funda de protección. 8 Tire del cierre de cremallera hacia abajo. AVISO Daños materiales al tirar con fuerza del cierre de cremallera El cierre de la funda de protección puede resultar dañado.
-
Seite 83: Indicaciones Para El Cuidado
Indicaciones para el cuidado Indicaciones para el cuidado Tejido del parasol AVISO Daños materiales en el tejido del parasol debido a una limpieza y un producto de limpieza incorrectos El tejido acrílico del techo del parasol está impregnado y precisa de una limpieza y de un producto de limpieza especiales. -
Seite 84: Almacenamiento
Daños materiales al rozar el tejido del parasol Si el tejido del parasol ondea constantemente debido al viento, puede resultar dañado al rozar con las varillas. CARAVITA no asumirá los daños resultantes. Asegure el techo del parasol cerrado siempre con la correa. -
Seite 85: Solución De Problemas
Si el parasol no funcionara correctamente y el problema no pudiera solucionarse con las indicaciones siguientes, póngase en contacto con nosotros a través de la línea de atención telefónica del servicio técnico de CARAVITA. Encontrará los datos de contacto en la primera y en la última página de estas instrucciones. -
Seite 86: Términos De La Garantía
Garante CARAVITA GmbH Hans-Wilhelm-Renkhoff-Straße 2 D-97828 Marktheidenfeld Tel.: +49-8458-60389-0 Correo electrónico: info@caravita.eu www.caravita.de Cobertura de la garantía Período de vigencia: 5 años a partir de la entrega del producto Ámbito territorial: todos los Estados miembros de la Unión Europea Objeto: La garantía cubre aquellos casos en los que el producto presenta un fallo de funcionamiento o un error de material o de... - Seite 87 4000258 [v0]/2022-01-01 87 | 88...
- Seite 88 Druckfehler, Änderungen und Abweichungen vorbehalten. | Misprints, changes and deviations reserved. | Sous réserve de fautes d‘impression, de modifications et de divergences. | Se reservan las erratas, los cambios y las desviaciones.