Herunterladen Inhalt Inhalt Diese Seite drucken
Panasonic CS-V18CKP Bedienungsanleitung

Panasonic CS-V18CKP Bedienungsanleitung

Room air conditioner
Vorschau ausblenden Andere Handbücher für CS-V18CKP:
Inhaltsverzeichnis

Werbung

Verfügbare Sprachen
  • DE

Verfügbare Sprachen

  • DEUTSCH, seite 22
Before using your air-conditioner, please read
this operating instructions carefully and keep it
for future reference.
OPERATING INSTRUCTIONS
Before using your air-conditioner, please read this operating instructions
C
M
:-
OOLING
ODEL
(Refrigerant : R401A)
Indoor
CS-V18CKP
CU-V18CKP5
CS-V24CKP
CU-V24CKP5
H
-P
M
:-
EAT
UMP
ODEL
(Refrigerant : R401A)
Indoor
CS-W18CKP
CU-W18CKP5
CS-W24CKP
CU-W24CKP5
Room Air Conditioner
carefully and keep it for future reference.
Outdoor
Outdoor
ENGLISH ...................... P.
PORTUGUÊS ............... P. 11 – P. 20
DEUTSCH ..................... P. 21 – P. 30
FRANÇAIS .................... P. 31 – P. 40
NEDERLAND ................ P. 41 – P. 50
ITALIANO ..................... P. 51 – P. 60
GREEK ......................... P. 61 – P. 70
ESPAÑOL ..................... P. 71 – P. 80
RUSSIAN ...................... P. 81 – P. 92
MATSUSHITA INDUSTRIAL CORP.
LOT 2, PERSIARAN TENGKU AMPUAN, SECTION 21,
SHAH ALAM INDUSTRIAL SITE, SELANGOR, MALAYSIA
1 – P. 10
F563837

Werbung

Inhaltsverzeichnis
loading

Inhaltszusammenfassung für Panasonic CS-V18CKP

  • Seite 1 OPERATING INSTRUCTIONS for future reference. Before using your air-conditioner, please read this operating instructions carefully and keep it for future reference. OOLING ODEL (Refrigerant : R401A) Indoor Outdoor CS-V18CKP CU-V18CKP5 CS-V24CKP CU-V24CKP5 ODEL (Refrigerant : R401A) Indoor Outdoor CS-W18CKP CU-W18CKP5...
  • Seite 2: Inhaltsverzeichnis

    Thank you for purchasing our Panasonic Room Air FEATURES Warning Conditioner. G Self-illuminating Button 1) If the supply cord is damaged or needed to be replaced, CONTENTS it must be replaced by the manufacturer or its service For your convenience to operate in the dark.
  • Seite 3: Safety Precautions

    SAFETY PRECAUTIONS I Operation Precautions I Installation Precautions Before operating, please read the following “Safety Precautions” carefully. Warning Warning G To prevent personal injury, injury to others and This sign warns of death or serious injury. property damage, the following instructions must be G Do not install, remove and reinstall the unit by followed.
  • Seite 4: Name Of Each Part

    NAME OF EACH PART I Accessories I Indoor Unit G Indoor Unit G Remote Control (when the front panel is opened) G Remote Control Indication Sticker 1 Front Panel 1 Front Panel 2 Air Intake Vent 2 Air Filters 3 Power Supply Cord 3 Air Purifying Filter 4 Air Outlet Vent 5 Vertical Airflow Direction Louver...
  • Seite 5: I Remote Control

    G How to Insert the Batteries NAME OF EACH PART I Remote Control 1 Signal Transmitter 2 Operation Display 3 Powerful Mode Operation Button 4 Room Temperature Setting Button (self-illuminating button) AUTOHEA HEAT COOL COOL DRY FAN AUTO 5 Operation Mode Selection Button AUTO 6 Economy Mode Operation Button AUTO...
  • Seite 6: Preparation Before Operation

    I Setting Temperature PREPARATION BEFORE OPERATION HOW TO OPERATE • Press 3 to increase or decrease the temperature. • The temperature can be set between 16°C ~ 30°C. I Indoor Unit • Recommended temperature: Cooling Model Heat Pump Model COOL – 26°C ~ 28°C COOL –...
  • Seite 7 I Setting the Fan Speed G Use this air conditioner under the following G Operation Details • Press 4 to select:- conditions: – Low Fan Speed COOL – Cooling Operation – Medium Fan Speed • To set the room temperature at your preference –...
  • Seite 8: Setting The Timer

    AUTO CONVENIENCE OPERATION OFF/ON POWERFUL I Economy Mode Operation I Sleep Mode Operation To obtain a comfortable room temperature while To save electrical power consumption. MODE ECONOMY SLEEP sleeping:- Please use this mode when the room has reached • Press 6. your desired temperature.
  • Seite 9: Care And Maintenance

    CARE AND MAINTENANCE I Pre-season Inspection I Cleaning the Indoor Unit and Remote I Air Purifying Filters Control G Is the discharged air cold/warm? • Wipe gently with a soft, dry cloth. Operation is normal if 15 minutes after the start of •...
  • Seite 10: Helpful Information

    HELPFUL INFORMATION ENERGY SAVING AND OPERATION HINTS I Auto Operation Button I Auto Restart Control • If power is resumed after a power failure, the I Setting the Temperature operation will restart automatically after 3 - 4 • Approximately 10% of electricity can be saved. ECONOMY ECONOMY ECONOMY...
  • Seite 11: Troubleshooting

    TROUBLESHOOTING I Call the Dealer Immediately I Normal Operation If the following conditions occur, turn off and unplug the Is it okay? This is the answer main power supply, and then call the dealer immediately. • Air conditioner has been restarted, but does not •...
  • Seite 12: Características

    Obrigado por ter adquirido o nosso Aparelho de Ar CARACTERÍSTICAS Perigo Condicionado Panasonic. G Botão Auto-lluminãvel 1) Se o cabo de alimentação está danificado ou é necessário ÍNDICE trocá-lo, a troca deve ser feita pelo fabricante ou pelo seu Para facilitar a sua manipulação na escuridão.
  • Seite 13: Recomendações De Segurança

    RECOMENDAÇÕES DE SEGURANÇA I Recomendações de Instalação I Recomendações de Funcionamento Antes de pôr em funcionamento este aparelho, leia atentamente as seguintes Recomendações de PERIGO PERIGO Segurança. Este sinal significa perigo de morte ou de ferimentos graves. G Para evitar danos pessoais, de terceiros ou danos G Não instale, retire a instalação, nem reinstale G Não ligue outros aparelhos à...
  • Seite 14 DESCRÍÇÃO DAS PEÇAS I Unidade Interior I Acessórios G Unidade Interior (Quando o painel frontal está aberto) G Controlo Remoto G Etiqueta Bilingue do Controlo Remoto 1 Painel Frontal 1 Painel Frontal 2 Entrada de Ar 2 Filtros de Ar 3 Cabo de Alimentação 3 Filtro Purificador do Ar 4 Saída de Ar...
  • Seite 15 G Como inserir as pilhas DESCRÍÇÃO DAS PEÇAS I Controlo Remoto 1 Emissor de Infravermelhos 2 Visor de Operação 3 Botão de Operação do Modo Potente 4 Botão de Regulação da Temperatura Ambiente AUTOHEA HEAT COOL COOL DRY FAN (botão auto-iluminãvel) AUTO AUTO 5 Botão de Selecção do Modo de Operação...
  • Seite 16: Como Utilizar O Aparelho

    I Ajuste da Temperatura PREPARAÇÃO ANTES DE UTÍLIZAR COMO UTILIZAR O APARELHO • Prima 3 para aumentar ou diminuir a temperatura. • A temperatura pode ser regulada entre os 16°C ~ 30°C I Unidade Interior • Temperatura recomendada: Modelo de Modelo Bomba refrigeração de Calor...
  • Seite 17 G Utilize este aparelho de ar condicionado nas I Ajuste da velocidade do ventilador G Detalhes de Funcionamento seguintes condições: • Prima 4 para seleccionar:- – Velocidade baixa do ventilador COOL – Função de Arrefecimento Modelo de refrigeração – Velocidade média do ventilador •...
  • Seite 18: Programar O Temporizador

    AUTO OFF/ON POWERFUL UTILIZAÇÃO PRÁTICA I Funcionamento em modo económico I Funcionamento em modo de sono MODE ECONOMY SLEEP Para poupar energia. Para conseguir uma temperatura ambiental AIR SWING Convém usar este modo quando a sala atingiu a confortável enquanto dorme FAN SPEED •...
  • Seite 19: Cuidados E Manutenção

    CUIDADOS E MANUTENÇÃO I Limpeza da Unidade Interior e do Controlo I Inspecção Pré-Temporada I Filtros Purificadores do Ar Remoto G O sopro de ar é frio ou morno? • Limpe cuidadosamente, com um pano macio e seco. Será considerado funcionamento normal se, passados 15 •...
  • Seite 20: Informações Úteis

    INFORMAÇÕES ÚTEIS ESUGESTÕES PARA POUPAR ENERGIA E OBTER UM I Botão de funcionamento automático I Controlo de Rearme Automático FUNCIONAMENTO MAIS EFICAZ • Caso ocorra uma falha eléctrica, o aparelho retomará automaticamente o funcionamento ECONOMY ECONOMY ECONOMY ECONOMY POWERFUL POWERFUL POWERFUL POWERFUL POWER...
  • Seite 21: Detecção De Avarias

    DETECÇÃO DE AVARIAS I Contactar o serviço de Assistência I Funcionamento Normal imediatamente Será normal quando ... ? Esta é a resposta Se surgem as seguintes circunstâncias, apague e • O aparelho de ar condicionado foi reactivado, • É para proteger o aparelho de ar condicionado. desligue a alimentação principal e contacte mas não funciona durante três minutos? Espere até...
  • Seite 22: Besondere Merkmale

    Wir danken Ihnen für den Kauf unseres Panasonic- BESONDERE MERKMALE Vorsicht Raumklimageräts. G Leuchttaste 1) Bei Beschädigung des Netzkabels muss das Kabel durch INHALT den Hersteller, seinen Kundendienst oder eine Einfachere Bedienung im Dunkeln. entsprechend autorisierte Person ausgewechselt werden, (Siehe Seite 24) :Besondere Merkmale ......
  • Seite 23: Sicherheitshinweise

    SICHERHEITSHINWEISE I Montagehinweise I Wichtige Betriebshinweise Bitte lesen Sie die folgenden Sicherheitshinweise vor der Inbetriebnahme sorgfältig durch! Vorsicht Vorsicht Dieses Symbol warnt vor schweren Verletzungen mit G Eine unsachgemäße Bedienung infolge Mißachtung eventueller Todesfolge. G Nehmen Sie den Ein- und Ausbau bzw. die der Bedienungsanleitung kann zu Verletzungen und Beschädigungen führen.
  • Seite 24: Bezeichnung Der Geräteteile

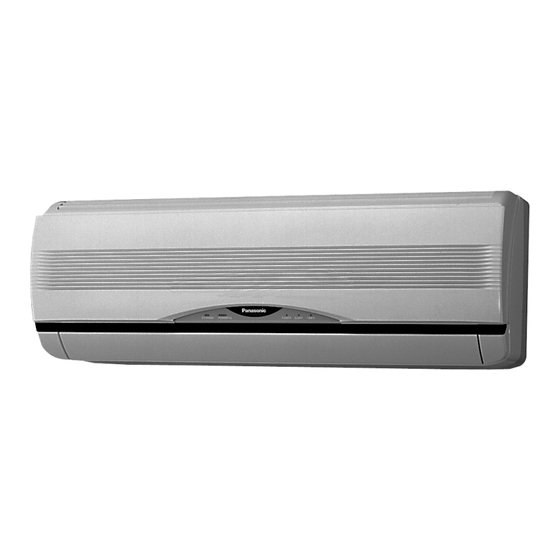
    BEZEICHNUNG DER GERÄTETEILE I Innengerät I Zubehör G Innengerät (Innengerät bei geöffnetem Frontgitter) G Fernbedienung G Mehrsprachiger Aufkleber für Fernbedienung 1 Frontgitter 1 Frontgitter 2 Lufteinlaß 2 Grobstaubfilter 3 Netzkabel 3 Feinfilter 4 Luftauslaß 5 Luftlenklamelle für vertikale Zuluftrichtung I Außengerät 6 Luftlenklamelle für horizontale Zuluftrichtung G Fernbedienungshalter 7 Anzeigetafel...
  • Seite 25: I Fernbedienung

    G Einlegen der Batterien BEZEICHNUNG DER GERÄTETEILE I Fernbedienung 1 Sender 2 Anzeigefeld 3 Taste für Turbobetrieb 4 Tasten zum Einstellen der Raumtemperatur AUTOHEA HEAT COOL COOL DRY FAN (leuchttaste) AUTO AUTO 5 Betriebsarten-Wahltaste AUTO 6 Taste für Sparbetrieb TEMP 7 Taste für vertikale Luftstromrichtung OFF/ON POWERFUL...
  • Seite 26: Betriebsvorbereitungen

    I Einstellen der Temperatur BETRIEBSVORBEREITUNGEN BEDIENUNG • Taste 3 drücken, um die Temperatur zu erhöhen bzw. zu senken. I Innengerät • Die Solltemperatur kann zwischen 16°C ~ 30°C eingestellt werden. • Empfohlene Temperaturbereiche: Kühlmodell Wärmepumpenmodell COOL – 26°C ~ 28°C COOL –...
  • Seite 27: I Einstellung Der Ventilatordrehzahl

    I Einstellung der Ventilatordrehzahl G Verwenden Sie dieses Klimagerät unter folgenden G Hinweise zu den Betriebsarten • Taste 4 drücken, um die Auswahl vorzunehmen: Bedingungen: – Niedrige Drehzahl COOL – Kühlbetrieb – Mittlere Drehzahl Kühlmodell • Zur Regelung der Raumtemperatur auf Ihr –...
  • Seite 28: Einstellen Des Timers

    AUTO KOMFORTBETRIEB OFF/ON POWERFUL I SLEEP-Betrieb I Sparbetrieb Zur komfortablen Raumtemperatur-Regelung während des Im Sparbetrieb wird der Stromverbrauch herabgesetzt. MODE ECONOMY SLEEP Verwenden Sie bitte diese Betriebsart, sobald die Schlafs. AIR SWING • Taste 6 drücken. Raumtemperatur den gewünschten Wert erreicht hat. FAN SPEED •...
  • Seite 29: Pflege Und Wartung

    PFLEGE UND WARTUNG I Kontrollen vor Beginn der Kühlsaison I Reinigen des Innengeräts und der Fernbedienung I Feinfilter • Wischen Sie das Klimagerät mit einem weichen, trockenen G Ist der Abluftsrom kalt bzw. warm? Tuch ab. Eine normale Funktion liegt vor, wenn 15 Minuten nach •...
  • Seite 30: Nützliche Hinweise

    NÜTZLICHE HINWEISE TIPS ZU BETRIEB UND ENERGIEEINSPARUNG I Funktionstaste für den Betrieb ohne I Automatischer Wiederanlauf Fernbedienung • Kehrt nach einem Stromausfall die Versorgung I Temperatureinstellung zurück, setzt der Betrieb automatisch nach • Durch richtige Einstellung lassen sich ca. 10% des 3 –...
  • Seite 31: Störungssuche

    STÖRUNGSSUCHE I Wenden Sie Sich direkt an Ihren Händler I Normaler Betrieb Fragen? Antworten In folgenden Fällen bitte Gerät ausschalten, Netzstecker ziehen und schnellstmöglich den Händler verständigen: • Beim Wiedereinschalten läuft das Gerät etwa • Dies dient zum Schutz des Geräts. Warten Sie, bis 3 Minuten lang nicht.
  • Seite 32: Caracteristiques

    CARACTERISTIQUES Nous vous remercions d’avoir choisi un climatiseur Avertissement Panasonic. G Touche Illumineen 1) Si le cordon d’alimentation est endommagé ou doit être remplacé, cette opération doit être confiée au fabricant, à Pour faciliter l’utilisation dans la pènombre. SOMMAIRE un de ses techniciens de service ou à toute autre (Voir page 34) : Caracteristiques ........
  • Seite 33: Mode D'emploi

    MODE D’EMPLOI I Précautions D’installation I Précautions de Fonctionnement Avant la mise en marche, veuillez lire attentivement le Mode d’emploi qui suit. Avertissement Avertissement Ce signe indique le danger de mort ou de G Pour éviter toute blessure et endommagement de votre blessures sérieuses.
  • Seite 34: Nom De Chaque Piéce

    NOM DE CHAQUE PIÈCE I Appareil D’intérieur I Accessoires G Appareil D’intérieur (lorsque le panneau avant est ouvert) G Télécommande G Télécommande reflecteur d’indication 1 Panneau avant 1 Panneau avant 2 Volet de prise d’air 2 Filtres à air 3 Câble électrique d’arrivée du courant 3 Filtres purificateurs d’air 4 Volet de sortie d’air I Appareil D’extérieur...
  • Seite 35: I Télécommande

    G Comment insérer les piles NOM DE CHAQUE PIÈCE I Télécommande 1 Transmetteur de signaux 2 Affichage du mode de fonctionnement 3 Touche de commande du mode Powerful 4 Touche de réglage de la température de la pièce AUTOHEA HEAT COOL COOL DRY FAN...
  • Seite 36: Préparation Avant Fonctionnement

    I Réglage de la Température PRÉPARATION AVANT FONCTIONNEMENT COMMENT UTILISER I'APPAREIL • Appuyez sur 3 pour augmenter ou diminuer la température. • La températura peut être réglée entre 16°C ~ 30°C. I Appareil D’intérieur • Température recommandée: Modèle à Modèle à pompe à refroidissement chaleur COOL –...
  • Seite 37 I Réglage de la vitesse du ventilateur G Utilisez ce climatiseur dans les conditions G Détails de fonctionnement • Appuyez sur 4 pour sélectionner:- suivantes: – Vitesse basse du ventilateur COOL – Rafraîchissement – Vitesse moyenne du ventilateur Modèle à refroidissement •...
  • Seite 38: Réglage De La Minuterie

    AUTO FONCTIONS PRATIQUES OFF/ON POWERFUL I Fonctionnement en mode Sommeil I Fonctionnement en mode Economique Pour obtenir une température ambiante confortable Pour économiser de l’électricité. MODE ECONOMY SLEEP pendant le sommeil Utilisez ce mode lorsque la température ambiante a atteint AIR SWING •...
  • Seite 39: Soin Et Entretien

    SOIN ET ENTRETIEN I Inspection Avant Terme I Nettoyer L’appareil d’interieur et la I Filtres purificateurs d’air Télécommande G L’air d’évacuation est-il froid/chaud ? • Essuyer doucement avec un chiffon doux et sec. Le fonctionnement est normal si, 15 minutes après le •...
  • Seite 40: Information Utile

    INFORMATION UTILE ECONOMIES D’ENERGIE ET CONSEILS D’UTILISATION I Touche Fonctionnement automatique I Remise en Marche Automatique I Réglage de la température • Lorsque le courant est rétabli à la suite d’une • Il est possible d’économiser environ 10% panne, le fonctionnement reprend automatiquement ECONOMY ECONOMY ECONOMY...
  • Seite 41: Résolution De Problèmes

    RÉSOLUTION DE PROBLÈMES I Fonctionnement Ordinaire I Appelez Immédiatement un Dépanneur Probleme Voici la reponse Dans les conditions suivantes, coupez et débranchez • Le climatiseur a été remis en marche, mais il ne • Cela protège le climatiseur. Attendez qu’il commence à l’alimentation secteur principale et appelez démarre pas pendant 3 minutes.
  • Seite 42: Kenmerken

    Dank u voor uw aankoop van deze Panasonic Room KENMERKEN Waarschuwing Air Conditioner. 1) Als het stroomsnoer beschadigd is of moet vervangen G Verlichte Knop INHOUD worden, moet het vervangen worden door de fabrikant of Makkelijker terug te vinden in het donker.
  • Seite 43: Veiligheidsmaatregelen

    VEILIGHEIDSMAATREGELEN I Installatie-aanwijzingen I Gebruiksaanwijzingen Alvorens het gebruik dient u de onderstaande “Veiligheidsmaatregelen” zorgvuldig te lezen. Waarschuwing Waarschuwing Deze aanduiding betekent dat er kans is op levensgevaar, G Ter voorkoming van letsel of schade aan uw G Installeer, verwijder en herinstalleer het ernstige verwonding of andere ernstige gevolgen.
  • Seite 44: Benaming Van De Onderdelen

    BENAMING VAN DE ONDERDELEN I Binnen-unit I Accessoires G Binnen-unit (Met geopend voorpaneel) G Afstandsbediening G Afstand Controle indicatie Sticker 1 Voorpaneel 1 Voorpaneel 2 Aanzuigopening 2 Luchtfilters 3 Netsnoer 3 Luchtreinigingsfilter 4 Uitblaasopening 5 Uitblaasrooster voor vertikale richting I Buiten-unit 6 Uitblaasrooster voor horizontale richting G Afstandsbedieningshouder 7 Verklikkerpaneel...
  • Seite 45: I Afstandsbediening

    G Aanbrengen van de batterijen BENAMING VAN DE ONDERDELEN I Afstandsbediening 1 Signaalzender 2 Bedieningsdisplay 3 Powerful-toets 4 Insteltoetsen voor kamertemperatuur AUTOHEA HEAT COOL COOL DRY FAN (verlichte knop) AUTO AUTO 5 Functietoets AUTO 6 Economy-toets TEMP 7 Knop verticale luchtstroom OFF/ON POWERFUL 8 Slaapfunctie toets...
  • Seite 46: Voorbereiding Voor Gebruik

    I De temperatuur instellen VOORBEREIDING VOOR GEBRUIK GEBRUIKSAANWIJZING • Druk op 3 om de temperatuur te verhogen of te verlagen temperature. I Binnen-unit • De temperatuur kan ingesteld worden tussen 16°C ~ 30°C. • Aanbevolen temperatuur: Koelend model Warmtepompmodel COOL – 26°C ~ 28°C COOL –...
  • Seite 47 I Instelling van de ventilatorsnelheid G Gebruik dit klimaatregelingstoestel in de volgende G Informatie over het gebruik • Druk op 4 om te selecteren: omstandigheden: – Lage ventilatorsnelheid COOL – Koelen – Middelhoge ventilatorsnelheid Koelend model • Om de kamertemperatuur in te stellen op een –...
  • Seite 48: Instellen Van De Timer

    AUTO GEMAKKELIJK GEBRUIK OFF/ON POWERFUL I Werking in slaapstand I Werking in spaarstand Om elektriciteit te sparen. Om een comfortabele kamertemperatuur te krijgen terwijl MODE ECONOMY SLEEP Gebruik a.u.b. deze stand wanneer de kamer de men slaapt AIR SWING gewenste temperatuur bereikt heeft. •...
  • Seite 49: Verzorging En Onderhoud

    VERZORGING EN ONDERHOUD I Vóórseizoen controle I Het reinigen van binnen-unit en I Luchtzuiveringsfilters afstandsbediening G Is de uitlaatlucht koud/warm? • Voorzichtig schoonvegen met een zachte droge doek. De werking is normaal indien het verschil tussen de • Gebruik geen water van meer dan 40°C of luchtinlaat- en de uitlaattemperatuur 15 minuten na het polijstvloeistof om het toestel schoon te maken.
  • Seite 50: Hulpzame Informat

    HULPZAME INFORMATIE TIPS VOOR ENERGIEBESPARING EN BEDIENING I Toets Auto Operation I Auto Herstart functie I Instelling van de temperatuur • Als de stroom na een stroomuitval weer wordt • Er kan ongeveer 10% stroom bespaard worden. hersteld, begint het apparaat automatisch na 3 tot 4 ECONOMY ECONOMY POWERFUL...
  • Seite 51: Het Oplossen Van Problemen

    HET OPLOSSEN VAN PROBLEMEN I Bel onmiddellijk een STEK erkende dealer I Bij Normale werkinsg Indien het volgende zich voordoet moet u het toestel Is dit in orde? Dit is be het antwoord uitschakelen, de stroomtoevoer afsnijden en onmiddellijk uw verdeler contacteren. •...
  • Seite 52: Caratteristiche

    Grazie per aver acquistato un climatizzatore CARATTERISTICHE Avvertenze Panasonic G Pulsante Autoilluminate 1) Se il cavo di alimentazione è danneggiato o necessita di SOMMARIO sostituzione, questo deve essere sostituito dal produttore Consente un facile utilizzo al buio. o da un centro di assistenza o altro tecnico qualificato (Vedere a pagina 54) : Caratteristiche ........
  • Seite 53: Precauzioni Per La Sicurezza

    PRECAUZIONI PER LA SICUREZZA I Precauzioni nell’installazione I Precauzioni per il funzionamento Si prega di leggere attentamente le seguenti Avvertenze “Precauzioni di Sicurezza” prima di utilizzare il Avvertenze climatizzatore. Questo simbolo avverte del pericolo G Eseguire le seguenti istruzioni per evitare di causare di morte o di lesioni gravi.
  • Seite 54: Identificazione Parti

    IDENTIFICAZIONE PARTI I Unita’ interna I Accessori G Unita’ interna (Apertura del pannello frontale) G Telecomando G Sticker d’indicazione del Telecomando 1 Pannello Anteriore 1 Pannello Anteriore 2 Bocca di entrata dell’aria 2 Filtri dell’aria 3 Punto per apertura del pannello 3 Filtri purfichori del’aria 4 Bocca di uscita dell’aria I Unita’...
  • Seite 55: I Telecomando

    G Inserimento delle batterie IDENTIFICAZIONE PARTI I Telecomando 1 Trasmettitore di Segnali 2 Display (Indicatore di Funzione) 3 Tasto di azionamento del modo Powerful 4 Tasto di impostazione della temperatura ambiente (pulsante autoilluminante) AUTOHEA HEAT COOL COOL DRY FAN AUTO 5 Tasto di selezione del modo di funzionamento AUTO 6 Tasto di azionamento del modo Economy...
  • Seite 56: Preparazione Prima Dell'uso

    I Impostazione della temperatura PREPARAZIONE PRIMA DELL’USO MODALITA’ D’USO • Premere 3 per aumentare o diminuire la temperatura. • La temperatura si imposta da 16 gradi C a 30 gradi C. I Unita’ interna • Temperatura consigliata: Modello con pompa Modello solo freddo di calore COOL –...
  • Seite 57 I Impostazione della velocità della ventola G Usare questo climatizzatore nelle seguenti G Dettagli sul funzionamento • Premere 4 per selezionare:- condizioni: – Velocità della ventola bassa COOL – Raffreddamento – Velocità della ventola media • Per impostare la temperatura dell’ambiente sul livello –...
  • Seite 58: Impostazione Del Timer (Temporizzatore)

    AUTO FUNZIONI DI CONVENIENZA OFF/ON POWERFUL I Funzionamento in modo Standby I Funzionamento in modo Economy Per ottenere una temperatura ambientale confortevole di Per risparmiare energia elettrica. MODE ECONOMY SLEEP Usare questa modalità quando l’ambiente raggiunge la notte in camera da letto:- •...
  • Seite 59: Cura E Manutenzione

    CURA E MANUTENZIONE I Controllo stagionale I Pulitura dell’unità interna e del I Filtri purificatori dell’aria telecomando G L’aria emessa è fredda/calda? • Pulire delicatamente con un panno asciutto e morbido. Il funzionamento è normale se 15 minuti dopo l’avvio la •...
  • Seite 60: Informazioni Utili

    INFORMAZIONI UTILI RISPARMIO ENERGETICO E CONSIGLI I Tasto “Auto Operation” I Controllo Automatico Di Rimessa In Moto I Impostazione della temperatura • In caso di interruzione della corrente, l’apparecchio • È possibile risparmiare circa il 10% di energia elettrica. riprenderà a funzionare dopo 3 - 4 minuti dal ripristino •...
  • Seite 61: Localizzazione Dei Guasti

    LOCALIZZAZIONE DEI GUASTI I Chiamate immediatamente il rivenditore I Funzionamento normale autorizzato Van bene se ...? Risposta Se si verifica una delle seguenti condizioni, spegnere • Ciò serve a proteggere il climatizzatore. Attendere • Il climatizzatore d’aria e’stato riacceso, ma per 3 immediatamente l’interruttore generale e scollegare minuti non funziona.
  • Seite 62 63~64 65~66...
  • Seite 64 ECONOMY ECONOMY ECONOMY ECONOMY POWERFUL POWERFUL POWERFUL POWERFUL POWER POWER POWER POWER SLEEP SLEEP SLEEP SLEEP TIMER TIMER TIMER TIMER...
  • Seite 65 AUTOHEA HEAT COOL COOL DRY FAN AUTO AUTO AUTO TEMP OFF/ON POWERFUL MODE ECONOMY SLEEP AIR SWING FAN SPEED – – • CANCEL & TIMER CHECK RESET CLOCK • • • • • • • & • • •...
  • Seite 66 • • ° ° • COOL – 26°C ~ 28°C COOL – 26°C ~ 28°C – 1°C ~ 2°C – 1°C ~ 2°C HEAT – 20°C ~ 24°C • • ° • • • • • ° AUTO COOL DRY FAN AUTO •...
  • Seite 67 • – COOL – – • – AUTO – ° AUTO – • DBT: • WBT: DRY – • • AUTO • • AUTO ° HEAT – DBT: • AUTO WBT: • (30) (24) (18) • (16) (-5) (-6) • •...
  • Seite 68 AUTO OFF/ON POWERFUL MODE ECONOMY SLEEP AIR SWING FAN SPEED • • • • CANCEL • TIMER CHECK RESET CLOCK • • • • • • • • • • • • • • • • • • – ← 1 →...
  • Seite 69 • • ° COOL – 8°C COOL – 8°C HEAT – 14°C • • • • • • • • • ° • • – • – –...
  • Seite 70 • • • ECONOMY ECONOMY POWERFUL POWERFUL POWER POWER SLEEP SLEEP TIMER TIMER ECONOMY ECONOMY POWERFUL POWERFUL POWER POWER SLEEP SLEEP TIMER TIMER • • • • : 1°C • • : 1°C : 2°C • • • • • •...
  • Seite 71 • • • • • • • • • • • • • • • • • • • • • • • • • • • • • • • • • • • • •...
  • Seite 72: Caracteristicas

    Muchas gracias por elegir la unidad de aire CARACTERÍSTICAS Advertencia acondicionado de Panasonic. G Botón Autoiluminable 1) Si el cable de alimentación está dañado o es necesario Para facilitar su manipulaciÛn en la oscuridad. CONTENIDO cambiarlo, el cambio debe hacerlo el fabricante o su servicio (Página 74)
  • Seite 73: Medidas De Seguridad

    MEDIDAS DE SEGURIDAD I Precauciones al Instalar I Precauciones al Operar Antes de operar el equipo, por favor lea cuidadosamente las siguientes “Medidas de Advertencia Advertencia Seguridad” Esta indicación muestra la posibilidad G Para prevenir heridas personales, heridas a otras G No instale ni desinstale ni reinstale la unidad de causar muerte o daños serios.
  • Seite 74: Nombre De Cada Pieza

    NOMBRE DE CADA PIEZA I Unidad Interior I Accesorios G Unidad Interior (al abrir el panel frontal) G Control Remoto G Etiquete del indicador de telemando 1 Panel Frontal 1 Panel frontal 2 Entrada De Aire 2 Filtros de aire 3 Cable De Alimentación 3 Filtros purificadores de aire 4 Salida De Aire...
  • Seite 75: I Control Remoto

    G Cómo insertar las pilas NOMBRE DE CADA PIEZA I Control Remoto 1 Transmisor de señales 2 Visualización de funciones 3 Botón de funcionamiento en modo potente AUTOHEA HEAT COOL COOL DRY FAN 4 Botón de ajuste de la temperatura de la habitación AUTO (botón autoiluminable) AUTO...
  • Seite 76: Preparación Antes Del Funcionamiento

    I Ajuste de la temperatura PREPARACIÓN ANTES DEL CÓMO HACERLO FUNCIONAR • Presione 3 para aumentar o reducir la temperatura. FUNCIONAMIENTO • La temperatura se puede ajustar entre 16°C ~ 30°C. • Temperatura recomendada: I Unidad Interior Modelo de refrigeración Modelo Bomba de Calor COOL –...
  • Seite 77 I Ajuste de la velocidad del ventilador G Utilice este acondicionador de aire en las G Detalles de funcionamiento • Presione 4 para seleccionar:- siguientes condiciones: – Velocidad baja del ventilador COOL – Función de enfriamiento – Velocidad media del ventilador •...
  • Seite 78: Ajuste Del Temporizador

    AUTO FUNCIONAMIENTO CONVENIENTE OFF/ON POWERFUL I Funcionamiento en modo de sueño I Funcionamiento en modo económico Se encenderá el indicador de modo de sueño de la MODE ECONOMY SLEEP Para ahorrar en el consumo de energína. unidad interior. Conviene usar este modo cuando la habitación ha AIR SWING •...
  • Seite 79: Cuidado Y Mantenimiento

    I Filtros Purificadores De Aire I Inspección de Pretemporada CUIDADO Y MANTENIMIENTO G ¿El soplo de aire es frío o tibio ? I Limpieza de la Unidad Interior y el El funcionamiento es normal si 15 minutos después de Control Remoto ponerlo en marcha, la diferencia entre las temperaturas •...
  • Seite 80: Información Útil

    INFORMACIÓN ÚTIL SUGERENCIAS PARA AHORRAR ENERGÍA Y PARA UN MEJOR FUNCIONAMIENTO I Botón de funcionamiento automático I Control de Autorecomienzo • Si hay un corte eléctrico, la unidad comenzará a I Ajuste de la Temperatura funcionar automáticamente de 3 - 4 minutos •...
  • Seite 81: Localización De Averias

    Ocurre esto? Compruebe ....................................RUIDO DE FUNCIONAMIENTO DEL MODELO: • El acondicionador de aire no funciona. • Ha saltado el interruptor automático ? CS-V18CKP/CU-V18CKP5 CS-W18CKP/CU-W18CKP5 • El enchufe está bien enchufado en el tomacorriente? CS-V24CKP/CU-V24CKP5 CS-W24CKP/CU-W24CKP5 • Usa correctamente el temporizador? ....................................
  • Seite 82 ë‚ÓÈÒÚ‚‡ Å·„Ó‰‡ËÏ Á‡ ÔÓÍÛÔÍÛ ·˚ÚÓ‚Ó„Ó ÍÓ̉ˈËÓÌÂ‡ èêÖÑìèêÖÜÑÖçàÖ ‚ÓÁ‰Ûı‡ Panasonic. G KÌÓÔ͇ Ò ÔÓ‰Ò‚ÂÚÍÓÈ ëéÑÖêÜÄçàÖ : ë‚ÓÈÒÚ‚‡ ..........81 : åÂ˚ Ô‰ÓÒÚÓoÊÌÓÒÚË ....82 G Ä‚ÚÓχÚ˘ÂÒÍËÈ ÂÊËÏ : ç‡ËÏÂÌÓ‚‡ÌË ÍÓÏÔÓÌÂÌÚÓ‚ ÍÓ̉ˈËÓÌÂ‡ ........ 83~84 G êÂÊËÏ Ò̇ G ùÍÓÌÓÏ˘Ì˚È ÂÊËÏ : èÓ‰„ÓÚÓ‚ËÚÂθÌ˚ ÓÔÂ‡ˆËË ÔÂ‰...
  • Seite 83: Åâ˚ Ô‰ÓòúóOêìóòúë

    I åÂ˚ Ô‰ÓÒÚÓÓÊÌÓÒÚË ÔË I åÂ˚ Ô‰ÓÒÚÓÓÊÌÓÒÚË ÔË åÖêõ èêÖÑéëíéêéÜçéëíà ˝ÍÒÔÎÛ‡Ú‡ˆËË ˝ÍÒÔÎÛ‡Ú‡ˆËË èÂ‰ ̇˜‡ÎÓÏ ˝ÍÒÔÎÛ‡Ú‡ˆËË ÍÓ̉ˈËÓÌÂ‡ Ú˘‡ÚÂθÌÓ ËÁÛ˜ËÚ ‡Á‰ÂÎ “åÂ˚ èêÖÑìèêÖÜÑÖçàÖ Ô‰ÓÒÚÓÊÌÓÒÚË”. èêÖÑìèêÖÜÑÖçàÖ G ç ÛÒڇ̇‚ÎË‚‡ÈÚÂ, Ì ‰ÂÏÓÌÚËÛÈÚÂ Ë Ì ÔÂÂÌÓÒËÚ ÛÒÚÓÈÒÚ‚Ó Ò‡ÏÓÒÚÓflÚÂθÌÓ. èêÖÑìèêÖÜÑÖçàÖ èêÖÑéëíÖêÖÜÖçàÖ G чÌÌ˚È ÍÓÏ̇ÚÌ˚È ÍÓ̉ˈËÓÌÂ ‰ÓÎÊÂÌ ·˚Ú¸ Á‡ÁÂÏÎÂÌ. èêÖÑéëíÖêÖÜÖçàÖ...
  • Seite 84 çÄàåÖçéÇÄçàÖ äéåèéçÖçíéÇ äéçÑàñàéçÖêÄ I èË̇‰ÎÂÊÌÓÒÚË G ÇÌÛÚÂÌÌËÈ ·ÎÓÍ I ÇÌÛÚÂÌÌËÈ ·ÎÓÍ G èÛÎ¸Ú ‰ËÒڇ̈ËÓÌÌÓ„Ó ÛÔ‡‚ÎÂÌËfl G ᇢËÚ̇fl ̇ÍÎÂÈ͇ ̇ Ë̉Ë͇ˆËÓÌÌÓÈ Ô‡ÌÂÎË ÔÛθڇ ‰ËÒڇ̈ËÓÌÌÓ„Ó ÛÔ‡‚ÎÂÌËfl I ç‡ÛÊÌ˚È ·ÎÓÍ G ‰ÂʇÚÂθ ÔÛθڇ ‰ËÒڇ̈ËÓÌÌÓ„Ó ÛÔ‡‚ÎÂÌËfl G Ñ‚‡ ÒÛıËı ˝ÎÂÏÂÌÚ‡ ÔËÚ‡ÌËfl ÚËÔ‡ RO3 ËÎË ÔÓ‰Ó·Ì˚ ECONOMY ECONOMY ECONOMY...
  • Seite 85 G K‡Í ‚ÒÚ‡‚ËÚ¸ ·‡Ú‡ÂÈÍË çÄàåÖçéÇÄçàÖ äéåèéçÖçíéÇ äéçÑàñàéçÖêÄ I ÑËÒڇ̈ËÓÌÌÓ ÛÔ‡‚ÎÂÌË AUTOHEA HEAT COOL COOL DRY FAN AUTO AUTO AUTO TEMP èÓÎÌÓÒÚ¸˛ ÓÔÛÒÚËÚ ‚ÌËÁ Í˚¯ÍÛ èÑì OFF/ON POWERFUL Ǭ Ò Ú‡‚¸Ú ·‡Ú‡ÂÈÍË MODE ECONOMY SLEEP AIR SWING FAN SPEED CANCEL G àÒÔÓθÁÓ‚‡ÌË ·‡Ú‡ÂÂÍ &...
  • Seite 86: I I I I : Èó‰„Óúó'ëúâî¸ì˚â Óôâ‡ˆËë Ôâ‰ ̇˜‡Îóï ˝Íòôîû‡Ú‡ˆËë

    I ìÒÚ‡Ìӂ͇ ÚÂÏÔÂ‡ÚÛ‡ èéÑÉéíéÇàíÖãúçõÖ äÄä èéãúáéÇÄíúëü éèÖêÄñàà èÖêÖÑ çÄóÄãéå äéçÑàñàéçÖêéå ùäëèãìÄíÄñàà I ÇÌÛÚÂÌÌËÈ ·ÎÓÍ ABTO ° I óÚÓ·˚ ‚Íβ˜ËÚ¸ ÛÒÚÓÈÒÚ‚Ó ° AUTO COOL DRY FAN AUTO G ëڇ̉‡Ú̇fl ÚÂÏÔÂ‡ÚÛ‡ I êÂÊËÏ Ì‡ÒÚÓÈÍË AUTO I èÛÎ¸Ú ‰ËÒڇ̈ËÓÌÌÓ„Ó ÛÔ‡‚ÎÂÌËfl AUTO – COOL –...
  • Seite 87 I ìÒÚ‡Ìӂ͇ ÒÍÓÓÒÚË ‚‡˘ÂÌËfl ‚ÂÌÚËÎflÚÓ‡ G àÒÔÓθÁÛÈÚ ÍÓ̉ˈËÓÌÂ ‚ ÒÎÂ‰Û˛˘Ëı ÒÎÛ˜‡flı: G ÑÂڇθÌÓ ÓÔËÒ‡ÌË ÓÔÂ‡ˆËÈ COOL – êÂÊËÏ Óx·‰ÂÌËfl DBT: AUTO – Ä‚ÚÓχÚ˘ÂÒÍËÈ ÂÊËÏ WBT: I ìÒÚ‡Ìӂ͇ ‚ÂÚË͇θÌÓ„Ó Ì‡Ô‡‚ÎÂÌËfl ÔÓÚÓ͇ ‚ÓÁ‰Ûı‡ DRY – êÂÊËÏ Ïfl„ÍÓ„Ó ÓÒÛ¯ÂÌËfl AUTO AUTO HEAT – êÂÊËÏ Ó·Ó„‚‡ DBT: AUTO WBT:...
  • Seite 88: Ìòú‡Ìó'í‡ Ú‡Èïâ

    AUTO ÊÂÊËÏ˚, Ó·ÂÒÔ˜˂‡˛˘Ë OFF/ON POWERFUL ÔÓ‚˚¯ÂÌÌÓ ۉӷÒÚ‚Ó ËÒÔÓθÁÓ‚‡ÌËfl I ùÍÓÌÓÏ˘Ì˚È ÂÊËÏ ‡·ÓÚ˚ MODE ECONOMY SLEEP I HÓ˜ÌÓÈ ÂÊËÏ ‡·ÓÚ˚ AIR SWING FAN SPEED CANCEL TIMER CHECK RESET CLOCK ÅÓΠÔÓ‰Ó·ÌÓ Ó çÓ˜ÌÓÏ ÂÊËÏ I åÓ˘Ì˚È ÂÊËÏ ‡·ÓÚ˚ ìÒÚ‡Ìӂ͇ Ú‡ÈÏÂ‡ I Ǭ Í Î˛˜ÂÌË ÔÓ Ú‡ÈÏÂÛ G ÅÓÎÂÂ...
  • Seite 89: Ëó‰ÂʇÌëâ Ë Ûıó

    I èÓ‚Â͇ ÔÂ‰ ̇˜‡ÎÓÏ ÒÂÁÓ̇ I îËθÚ˚ ‰Îfl Ó˜ËÒÚÍË ‚ÓÁ‰Ûı‡ ëÓ‰ÂʇÌËÂ Ë ÛıÓ‰ G Ç˚‰Û‚‡ÂÏ˚È ‚ÓÁ‰Ûı ıÓÎÓ‰Ì˚È ËÎË „Ófl˜ËÈ? I é˜ËÒÚ͇ ‚ÌÛÚÂÌÌÂ„Ó ÏÓ‰ÛÎfl Ë ÔÛθڇ ‰ËÒڇ̈ËÓÌÌÓ„Ó ÛÔ‡‚ÎÂÌËfl ° I é˜ËÒÚ͇ ‚ÓÁ‰Û¯ÌÓ„Ó ÙËθÚ‡ G èÓ‚Â¸ÚÂ, Ì Á‡„ÓÓÊÂÌ˚ ÎË ‚ÓÁ‰ÛıÓÁ‡·ÓÌ˚Â Ë ‚˚ÔÛÒÍÌ˚ ÓÚ‚ÂÒÚËfl ‚ÌÛÚÂÌÌÂ„Ó Ë ‚̯ÌÂ„Ó ÏÓ‰ÛÎÂÈ? G èÓ‚Â¸ÚÂ, ÌÂ...
  • Seite 90: Èóîâáì‡Fl ËìùóχˆËfl

    èÓÎÂÁ̇fl ËÌÙÓχˆËfl ëÓ‚ÂÚ˚ ÔÓ ˝ÍÒÔÎÛ‡Ú‡ˆËË Ë ˝ÍÓÌÓÏËË ˝ÎÂÍÚÓ˝ÌÂ„ËË I Ryjgrf Fdnjvfnbxtcrbq ht;bv I Ç˚Íβ˜‡ÚÂθ ‡‚ÚÓÁ‡ÔÛÒ͇ I ìÒÚ‡Ìӂ͇ ÚÂÏÔÂ‡ÚÛ˚ ECONOMY ECONOMY ECONOMY ECONOMY POWERFUL POWERFUL POWERFUL POWERFUL POWER POWER POWER POWER SLEEP SLEEP SLEEP SLEEP TIMER TIMER TIMER TIMER G Fdnjvfnbxtcrbq ht;bv hf,jns I ìÒÚ‡ÌÓ‚ÍË...
  • Seite 91: Èóëòí Ë Ûòú‡Ìâìëâ Ìâëòô‡'Ìóòúâè

    èéàëä à ìëíêÄçÖHàE HEàCèPABHOCTEâ I çÓpχθ̇fl p‡·ÓÚ‡ I ëËÚÛ‡ˆËfl, ÍÓ„‰‡ ÌÂÓ·ıÓ‰ËÏ ÒÓ˜Ì˚È ‚˚ÁÓ‚ ÒÔˆˇÎËÒÚ‡ ÙËÏ˚ • ÇÓ ‚ÂÏfl ‡·ÓÚ˚ ÍÓ̉ˈËÓÌÂ‡ ÒÎ˚¯ÂÌ ÌÂÌÓχθÌ˚È ¯ÛÏ. • ÇÓ‰‡ ËÎË Í‡ÍËÂ-ÎË·Ó ÔÓÒÚÓÓÌÌË χÚÂˇÎ˚ ÔÓ Ó¯Ë·Í ÔÓÔ‡ÎË ‚ ÔÛÎ¸Ú ‰ËÒڇ̈ËÓÌÌÓ„Ó ÛÔ‡‚ÎÂÌËfl. • àÁ ‚ÌÛÚÂÌÌÂ„Ó ·ÎÓ͇ ̇·Î˛‰‡ÂÚÒfl ÛÚ˜͇ ‚Ó‰˚.
  • Seite 92 éı·ʉ‡˛˘‡fl ÏÓ‰Âθ CÓÍÒÎÛÊ·˚ (˝ÍÒÔÎÛ‡Ú‡ˆËfl ‚ Ú˜ÂÌË ÌÂÒÍÓθÍËı ÎÂÚ) ìÒÎÓ‚Ëfl ˝ÍÒÔÎÛ‡Ú‡ˆËË: × × × × × × × × × × åÓ‰Âθ “íÂÔÎÓ‚ÓÈ ‚ÂÌÚËÎflÚÓ” × × × × × × × × × ×...
  • Seite 93 Co., Ltd. Web Site : http://www.panasonic.co.jp/global/...
  • Seite 94 ç Á‡·Û‰¸ÚÂ, ÔÓʇÎÛÈÒÚ‡, Á‡ÔËÒ‡Ú¸ ÒÎÂ‰Û˛˘Û˛ ËÌÙÓχˆË˛: Modell-Nr Codice modello çÓÏÂ ÏÓ‰ÂÎË Serien-Nr Numero di serie çÓÏÂ ÒÂËË Händler-Nr Codice rivenditore àÏfl ‰ËÎÂ‡ Kaufdatum Data di acquisto чڇ ÔËÓ·ÂÚÂÌËfl F563837 Printed in Malaysia Matsushita Electric Industrial Co., Ltd. P0212-0 Web Site : http://www.panasonic.co.jp/global/...

Inhaltsverzeichnis