Herunterladen Inhalt Inhalt Diese Seite drucken
Beko GN162420 Bedienungsanleitung
Vorschau ausblenden Andere Handbücher für GN162420:
Inhaltsverzeichnis

Werbung

Verfügbare Sprachen
  • DE

Verfügbare Sprachen

  • DEUTSCH, seite 66
Refrigerator
Réfrigérateur
Kühlschrank
Chłodziarka
Chladnička
Chladnička
Koelkast
Frižider
Frižider
Холодильник
Frigorífico
Frigorifero
Hűtőszekrény
All manuals and user guides at all-guides.com
GN162420
GN162320
GN162320X
GN162320W
GN162330X
GN162420X
GN162430X
GN163230X
GN162430P
GN163040X
GN162530X
GN162420

Werbung

Inhaltsverzeichnis
loading

Inhaltszusammenfassung für Beko GN162420

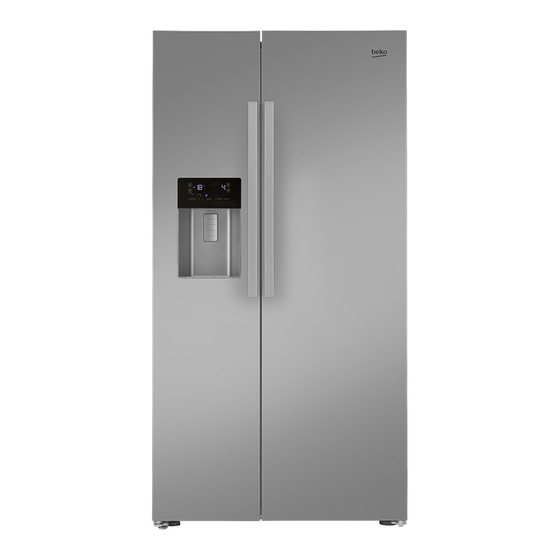
  • Seite 1 All manuals and user guides at all-guides.com GN162420 GN162320 GN162320X GN162320W GN162330X GN162420X Refrigerator GN162430X GN163230X Réfrigérateur GN162430P Kühlschrank GN163040X Chłodziarka GN162530X Chladnička GN162420 Chladnička Koelkast Frižider Frižider Холодильник Frigorífico Frigorifero Hűtőszekrény...
  • Seite 2 All manuals and user guides at all-guides.com Dear Customer, We'd like you to achieve the optimal efficiency from our product, which has been manufactured in modern facilities with meticulous quality controls. For this purpose, please fully read the user guide before using the product and keep the guide as a reference source.
  • Seite 3: Inhaltsverzeichnis

    All manuals and user guides at all-guides.com Table of Contents 1 Safety and environment instructions 3 5 Using the product 1.1. General safety..... . . 3 5.1.
  • Seite 4: Safety And Environment Instructions

    All manuals and user guides at all-guides.com Safety and environment instructions This section provides the safety instructions • Do not place liquids in bottles and cans into the freezer compartment. They may burst out! necessary to prevent the risk of injury and material • Place liquids in upright position after tightly damage.
  • Seite 5: Hc Warning

    All manuals and user guides at all-guides.com Safety and environment instructions 1.1.1 HC warning • The product’s bench life is 10 years. The spare If the product comprises a cooling system using parts necessary for the product to function will R600a gas, take care to avoid damaging the be available for this period.
  • Seite 6: Refrigerator

    All manuals and user guides at all-guides.com Refrigerator 1- Freezer compartment 10- Zero degree compartment 2- Cooler compartment 11- Vegetable bins 3- Fan 12- Adjustable stands 4- Butter-cheese compartment 13- Frozen food storing compartments 5- Glass shelves 14- Freezer compartment door shelves 6- Cooler compartment door shelves 15- Icematics 7- Minibar accessory...
  • Seite 7: Installation

    All manuals and user guides at all-guides.com Installation 3.1. Right place for installation 3.2. Attaching the plastic wedges Use the plastic wedges in the provided with Contact the Authorized Service for the product's the product to provide sufficient space for air installation.
  • Seite 8: Adjusting The Stands

    All manuals and user guides at all-guides.com Installation 3.3. Adjusting the stands 3.5. Water connection If the product is not in balanced position, adjust the (Optional) front adjustable stands by rotating right or left. WARNING: Unplug the product and the water pump (if available) during connection.
  • Seite 9: Connecting Water Hose To The Product

    All manuals and user guides at all-guides.com Installation 3.6. Connecting water 3.7. Connecting to water mains hose to the product (Optional) To connect the water hose to the product, To use the product by connecting to the cold water follow the instructions below. mains, a standard 1/2”...
  • Seite 10: For Products Using Water Carboy

    All manuals and user guides at all-guides.com Installation 4. Attach the connector into the faucet adaptor 2. Connect the other end of the water hose to and tighten by hand / tool. the water pump by pushing the hose into the pump’s hose inlet.
  • Seite 11: Fixing External Filter On The Wall (Optional)

    All manuals and user guides at all-guides.com Installation 3.9.1.Fixing external filter on the wall (Optional) WARNING: Do not fix the filter on the product. Check to see the following parts are supplied with your product’s model: 4. Attach the water hose extending from the top of the filter to the product’s water connection adaptor, (see 3.6.) 1.
  • Seite 12: Internal Filter

    All manuals and user guides at all-guides.com Installation 3.9.2.Internal filter 1. “Ice Off” indicator must be active while installing the filter. Switch the ON-OFF The internal filter provided with the product is not indicator using the “Ice” button on the screen. installed upon delivery;...
  • Seite 13 All manuals and user guides at all-guides.com Installation 3. Remove the water filter by-pass cover by pulling. A few drops of water may flow out after removing the cover; this is normal. 4. Place the water filter cover into the mechanism and push to lock in place.
  • Seite 14: Preparation

    All manuals and user guides at all-guides.com Preparation 4.1. What to do for energy saving 4.2. First Use mehmet Before using your refrigerator, make sure the Connecting the product to electronic necessary preparations are made in line with energy-saving systems is harmful, as it the instructions in “Safety and environment may damage the product.
  • Seite 15: Using The Product

    All manuals and user guides at all-guides.com Using the product 5.1. Indicator panel Indicator panels may vary depending on the model of your product. Audial and visual functions of the indicator panel will assist in using the refrigerator. 1. Cooler compartment indicator 2.
  • Seite 16 All manuals and user guides at all-guides.com Using the product 1. Cooler compartment indicator Push the Vacation button ( ) again to cancel The cooler compartment light will turn on when this function. adjusting the cooler compartment temperature. 5. Temperature adjustment button 2.
  • Seite 17 All manuals and user guides at all-guides.com Using the product 1- Economic use 2- High temperature / fault alert 3- Rapid cooling 4- Vacation function 5- Cooler compartment temperature setting 6- Energy saving (display off) 7- Keypad lock 8- Eco-fuzzy 9- Freezer compartment temperature setting 10- Rapid freezing *Optional: The figures in this user guide are intended as drafts and may not perfectly match...
  • Seite 18: Vacation Function

    All manuals and user guides at all-guides.com Using the product 1. Economic use 6. Energy saving (display off) This sign will light up when the freezer Pressing this button ( ) will light up the energy- compartment is set to -18°C', the most saving sign ( ) and the Energy-saving function economical setting.
  • Seite 19 All manuals and user guides at all-guides.com Using the product 10. Rapid freezing For rapid freezing, press the button number (10); this will activate the rapid freezing indicator ( When the rapid freezing function is turned on, the rapid freeze indicator will light up and the freezer compartment temperature indicator will display the value -27.
  • Seite 20 All manuals and user guides at all-guides.com Using the product 1. Freezer compartment temperature setting 2. Economy mode 3. Error status 4. Cooler compartment temperature setting 5. Rapid cooling 6. Vacation function 7. Keypad lock / filter replacing alert cancellation 8.
  • Seite 21 All manuals and user guides at all-guides.com Using the product 6. Vacation function 1. Freezer compartment temperature setting Pressing the button ( ) number (1) will enable When the Vacation function ( ) is active, the the freezer compartment temperature to be set at cooler compartment temperature indicator displays -18,-19,-20,-21 ,-22,-23,-24,-18...
  • Seite 22: Activating The Water Filter Replacing Alert

    All manuals and user guides at all-guides.com Using the product 5.2. Activating the water 11. Autoeco filter replacing alert Press the auto eco button ( ), number (11), for 3 seconds to activate this function. If the (For products connected to water mains and door remains closed for a long time when this comprising filter) function is activated, the cooler section will switch...
  • Seite 23: Using The Water Fountain

    All manuals and user guides at all-guides.com Using the product 5.4. Filling the fountain water tank 5.3. Using the water fountain Open the water tank’s lid, as shown in the figure. (for certain models) Fill in pure and clean drinking water. Close the lid. The first few glasses of water taken from the fountain will normally be warm.
  • Seite 24: Cleaning The Water Tank

    All manuals and user guides at all-guides.com Using the product 5.5. Cleaning the water tank Remove the water filling reservoir inside the door shelf. Detach by holding both sides of the door shelf. Hold both sides of the water tank and remove at 45°...
  • Seite 25: Taking Ice / Water

    All manuals and user guides at all-guides.com Using the product 5.6. Taking ice / water • The water may be cloudy during first use of the filter; do not consume the first 10 glasses (Optional) of water. To take water ( ) / ice cube ( ) / fragmented • You must wait approximately 12 hours to get...
  • Seite 26: Zero Degree Compartment

    All manuals and user guides at all-guides.com Using the product 5.8. Zero degree compartment 5.11. Ionizer (Optional) (Optional) Use this compartment to keep delicatessen The ionizer system in the cooler compartment's at lower temperatures or meat products for air duct serves to ionize the air. The negative immediate consumption.
  • Seite 27: Icematic And Ice Storage Box

    All manuals and user guides at all-guides.com Using the product 5.15. Ice-maker 5.14. Icematic and ice storage box (Optional) (Optional) Ice maker is located on the upper section of the Fill the icematic with water and put in place. freezer cover. The ice will be ready after approximately two Hold the handles on the sides of the ice stock hours.
  • Seite 28: Freezing Fresh Food

    All manuals and user guides at all-guides.com Using the product 5.16. Freezing fresh food 5.17. Recommendations for storing frozen foods • To preserve food quality, the food items placed in the freezer compartment must be frozen as The compartment must be set to at least -18°C. quickly as possible, use the rapid freezing for 1.
  • Seite 29: Placing The Food

    All manuals and user guides at all-guides.com Using the product 5.19. Placing the food Freezer Various frozen goods including compartment meat, fish, ice cream, shelves vegetables etc. Cooler Food items inside pots, capped compartment plate and capped cases, eggs shelves (in capped case) Cooler Small and packed food or...
  • Seite 30: Maintenance And Cleaning

    All manuals and user guides at all-guides.com Maintenance and cleaning 6.2. Protecting plastic surfaces Cleaning the product regularly will prolong its service life. Oil spilled on plastic surfaces may damage the surface and must be cleaned immediately with WARNING: Disconnect the power before warm water.
  • Seite 31: Troubleshooting

    All manuals and user guides at all-guides.com Troubleshooting Check this list before contacting the service. Doing so will save you time and money. This list includes frequent complaints that are not related to faulty workmanship or materials. Certain features mentioned herein may not apply to your product.
  • Seite 32 All manuals and user guides at all-guides.com Troubleshooting The freezer temperature is very low, but the cooler temperature is adequate. • The freezer compartment temperature is set to a very low degree. >>> Set the freezer compartment temperature to a higher degree and check again. The cooler temperature is very low, but the freezer temperature is adequate.
  • Seite 33 All manuals and user guides at all-guides.com Troubleshooting The interior smells bad. • The product is not cleaned regularly. >>> Clean the interior regularly using sponge, warm water and carbonated water. • Certain holders and packaging materials may cause odour. >>> Use holders and packaging materials without free of odour.
  • Seite 34 All manuals and user guides at all-guides.com Chère cliente, cher client, Nous aimerions que vous soyez entièrement satisfait de notre appareil, fabriqué dans des infrastructures modernes et ayant fait l'objet d'un contrôle de qualité minutieux. À cet effet, veuillez lire en intégralité le manuel d'utilisation avant d'utiliser cet appareil, et conservez-le pour références ultérieures.
  • Seite 35 All manuals and user guides at all-guides.com Table des matières 1 Instructions en matière de sécurité et 4 Préparation d’environnement 4.1. Moyens d'économiser l'énergie ..13 1.1. Sécurité générale ....3 4.2.
  • Seite 36: Instructions En Matière De Sécurité Et D'environnement

    All manuals and user guides at all-guides.com Instructions en matière de sécurité et d’environnement Cette section fournit les instructions de sécurité • Si l’appareil possède un éclairage de type DEL, contactez le service agréé pour tout nécessaires à la prévention des risques de remplacement ou en cas de problème.
  • Seite 37: Avertissement Hc

    All manuals and user guides at all-guides.com Instructions en matière de sécurité et d’environnement 1.1.1 Avertissement HC 1.3. Sécurité enfants Si votre réfrigérateur possède un système de • Conservez les matériaux d’emballage hors de refroidissement utilisant le gaz R600a, évitez la portée des enfants.
  • Seite 38: Réfrigérateur

    All manuals and user guides at all-guides.com Réfrigérateur 1- Compartiment congélateur 10- Compartiment zéro degré 2- Compartiment réfrigérateur 11- Bac à légumes 3- Ventilateur 12- Pieds réglables 4- Compartiment amuse-gueule 13- Compartiments de conservation des aliments 5- Clayettes en verre congelés 6- Balconnets de la porte du compartiment 14- Balconnets de la porte du compartiment...
  • Seite 39: Installation

    All manuals and user guides at all-guides.com Installation 3.1. Lieu idéal d'installation 3.2. Fixation des cales en plastique Utilisez les cales en plastiques fournies avec Contactez le service agréé pour l'installation de le réfrigérateur pour créer une circulation d’air votre réfrigérateur. Pour préparer l'installation du suffisante entre le réfrigérateur et le mur.
  • Seite 40: Réglage Des Pieds

    All manuals and user guides at all-guides.com Installation 3.3. Réglage des pieds 3.5. Raccordement à l'approvisionnement d'eau Si le réfrigérateur n’est pas équilibré, réglez les pieds avant en les tournant vers la gauche ou la (En option) droite. AVERTISSEMENT: Débranchez le réfrigérateur et la pompe à...
  • Seite 41: Raccordement Du Tuyau D'eau À L'appareil

    All manuals and user guides at all-guides.com Installation 3.6. Raccordement du 3.7. Raccordement au réseau tuyau d'eau à l'appareil d'approvisionnement d'eau Pour raccorder le tuyau d’eau au (En option) réfrigérateur, suivez les instructions Pour utiliser le réfrigérateur en le raccordant à suivantes : un réseau d’approvisionnement d’eau froide, il 1.
  • Seite 42: Pour Les Réfrigérateurs Utilisant Une Bonbonne D'eau

    All manuals and user guides at all-guides.com Installation 4. Fixez le joint à l’adaptateur du robinet et 2. Raccordez l’autre extrémité du tuyau d’eau serrez à la main ou à l’aide d’un outil. à la pompe à eau en poussant le tuyau à l’intérieur de l’orifice d’entrée de la pompe.
  • Seite 43: Fixation Du Filtre Externe Au Mur (En Option)

    All manuals and user guides at all-guides.com Installation 3.9.1.Fixation du filtre 3. Fixez le filtre en position verticale sur les externe au mur accessoires de raccordement, tel qu’illustré (en option) sur l’étiquette. (6) AVERTISSEMENT: Ne fixez pas le filtre sur le réfrigérateur. Vérifiez que les pièces suivantes sont fournies avec votre modèle de réfrigérateur : 4.
  • Seite 44: Filtre Interne

    All manuals and user guides at all-guides.com Installation 3.9.2.Filtre interne 1. Le voyant « Ice Off » (Désactivation de la Le filtre interne livré avec l'appareil n'est pas installé préparation de glace) doit être actif au moment de l’installation du filtre. Passez du à...
  • Seite 45 All manuals and user guides at all-guides.com Installation 3. Retirez le couvercle de dérivation du filtre en le tirant. Quelques gouttes d’eau pourraient s’écoulées après le retrait du couvercle, c’est tout à fait normal. 4. Placez le couvercle du filtre dans le mécanisme et poussez-le pour verrouiller.
  • Seite 46: Préparation

    All manuals and user guides at all-guides.com Préparation 4.1. Moyens d'économiser l'énergie 4.2. Première utilisation mehmet Avant d’utiliser votre réfrigérateur, assurez-vous Il est dangereux de connecter l’appareil que les installations nécessaires sont conformes aux systèmes électroniques d’économie aux instructions des sections « Instructions en d’énergie, ils pourraient l’endommager.
  • Seite 47: Utilisation De L'appareil

    All manuals and user guides at all-guides.com Utilisation de l’appareil 5.1. Panneau indicateur Les panneaux indicateurs varient en fonction du modèle de votre appareil. Les fonctions sonores et visuelles dudit panneau vous aident à utiliser votre réfrigérateur. 1. Indicateur du compartiment réfrigérateur 2.
  • Seite 48 All manuals and user guides at all-guides.com Utilisation de l’appareil 1. Indicateur du compartiment réfrigérateur Appuyez à nouveau sur le bouton Vacances ( La lampe du compartiment réfrigérateur s'allume pour annuler cette fonction. au moment du réglage de la température dans ce 5.
  • Seite 49 All manuals and user guides at all-guides.com Utilisation de l’appareil 1- Utilisation économique 2- Température élevée/alerte de défaillance 3- Congélation rapide 4- Fonction Vacances 5- Réglage de la température du compartiment réfrigérateur 6- Économie d'énergie (voyant éteint) 7- Verrouillage du clavier 8- Eco-fuzzy 9- Réglage de la température du compartiment réfrigérateur...
  • Seite 50: Réfrigération Rapide

    All manuals and user guides at all-guides.com Utilisation de l’appareil 1. Utilisation économique 5. Réglage de la température du comparti- ment réfrigérateur Ce voyant s'allume lorsque le compartiment Après avoir appuyé sur la touche (5), la congélateur est réglé à -18 °C, paramètre le plus température du compartiment réfrigérateur peut économique.
  • Seite 51 All manuals and user guides at all-guides.com Utilisation de l’appareil 9. Réglage de la température du comparti- ment réfrigérateur La température du compartiment congélateur est réglable. La pression de la touche (9) permet de régler la température du compartiment congélateur à...
  • Seite 52 All manuals and user guides at all-guides.com Utilisation de l’appareil 1. Réglage de la température du compartiment congélateur 2. Mode économie 3. Dysfonctionnements 4. Réglage de la température du compartiment réfrigérateur 5. Congélation rapide 6. Fonction Vacances 7. Verrouillage du clavier/alerte d’annulation du remplacement du filtre 8.
  • Seite 53 All manuals and user guides at all-guides.com Utilisation de l’appareil 6. Fonction Vacances 1. Réglages de la température du compartiment congélateur Lorsque la fonction Vacances ( ) est activée, Une pression sur le bouton ( ) numéro (1), l'indicateur de la température du compartiment permet de définir la température du compartiment réfrigérateur affiche l'inscription «...
  • Seite 54: Activation De L'alerte De Remplacement Du Filtre À Eau

    All manuals and user guides at all-guides.com Utilisation de l’appareil 11. Autoeco 5.2. Activation de l'alerte de Appuyez sur le bouton auto eco ( ), numéro (11) remplacement du filtre à eau pendant 3 secondes pour activer cette fonction. Si (pour les appareils connectés aux conduites la porte reste fermée pendant longtemps lorsque d’eau et dotés de filtre)
  • Seite 55: Utilisation Du Distributeur D'eau

    All manuals and user guides at all-guides.com Utilisation de l’appareil 5.4. Remplissage du réservoir 5.3. Utilisation du distributeur d’eau du distributeur d'eau (pour certains modèles) Soulevez le couvercle du réservoir d’eau comme l’indique la figure. Remplissez-le d’eau pure et Les premiers verres d'eau obtenue du potable.
  • Seite 56: Nettoyage Du Réservoir D'eau

    All manuals and user guides at all-guides.com Utilisation de l’appareil 5.5. Nettoyage du réservoir d'eau Retirez le réservoir d'eau à l'intérieur du balconnet. Dégagez-le en tenant les deux côtés du balconnet. Tenez les deux côtés du réservoir et tirez-le dans un angle de 45 °.
  • Seite 57: Récupération De Glace Ou De L'eau

    All manuals and user guides at all-guides.com Utilisation de l’appareil 5.6. Récupération de • L’appareil pourrait ne pas libérer de l’eau glace ou de l'eau durant la première utilisation. Ceci est dû à l’air qui se trouve dans le système. Il doit (en option) être évacué.
  • Seite 58: Compartiment Zéro Degré

    All manuals and user guides at all-guides.com Utilisation de l’appareil 5.8. Compartiment zéro degré 5.11. Ioniseur (En option) (En option) Utilisez ce compartiment pour conserver de Le système d'ioniseur dans le conduit d'air du l'épicerie fine à des températures faibles, ou des compartiment réfrigérateur sert à...
  • Seite 59: Machine À Glaçons Icematic Et Bac À Glaçons

    All manuals and user guides at all-guides.com Utilisation de l’appareil 5.15. Machine à glaçons 5.14. Machine à glaçons Icematic et bac à glaçons (En option) La machine à glaçons est située dans la partie (En option) supérieure du couvercle du congélateur. Remplissez la machine à...
  • Seite 60: Congélation Des Aliments Frais

    All manuals and user guides at all-guides.com Utilisation de l’appareil 5.16. Congélation des aliments frais 5.17. Recommandations relatives à la conservation des aliments congelés • Pour conserver la qualité des aliments, les denrées placées dans le compartiment Le compartiment doit être réglé à -18 °C congélateur doivent être congelées le plus minimum.
  • Seite 61: Position Des Aliments

    All manuals and user guides at all-guides.com Utilisation de l’appareil 5.20. Alerte ouverture de porte Faites bouillir les légumes et filtrer l'eau pour prolonger la durée de conservation à l'état (en option) congelé. Placez les aliments dans des emballages Un signal sonore est émis si la porte de l'appareil sous vide après les avoir filtrés et placez-les reste ouverte pendant 1 minute.
  • Seite 62: Entretien Et Nettoyage

    All manuals and user guides at all-guides.com Entretien et nettoyage Le nettoyage régulier du produit prolonge sa durée • Conservez les aliments dans des récipients fermés. Des micro-organismes peuvent de vie. proliférer des récipients non fermés et émettre AVERTISSEMENT: Débranchez de mauvaises odeurs.
  • Seite 63: Dépannage

    All manuals and user guides at all-guides.com Dépannage Parcourez la liste ci-après avant de contacter le service de maintenance. Cela devrait vous éviter de perdre du temps et de l'argent. Cette liste répertorie les plaintes fréquentes ne provenant pas de vices de fabrication ou des défauts de pièces.
  • Seite 64 All manuals and user guides at all-guides.com Dépannage • Il se peut que le nouvel appareil soit plus grand que l’ancien. Les appareils plus grands fonctionnent plus longtemps. • La température de la pièce est probablement élevée. >>> Il est normal que l’appareil fonctionne plus longtemps quand la température de la pièce est élevée.
  • Seite 65 All manuals and user guides at all-guides.com Dépannage En cas de vibrations ou de bruits. • Le sol n’est pas plat ou solide. >>> Si l’appareil balance lorsqu’il est déplacé doucement, ajustez les supports afin de le remettre en équilibre. Vérifiez également que le sol est assez solide pour supporter l’appareil.
  • Seite 66: Symbole Und Erläuterungen In Dieser Bedienungsanleitung Befinden Sich Folgende Symbole

    All manuals and user guides at all-guides.com Sehr geehrter Kunde, Wir möchten Ihnen eine optimale Effizienz Ihres Produkts bieten, welches in modernen Betrieben mit akribischen Qualitätskontrollen hergestellt wurde. Hierzu bitten wir Sie die Bedienungsanleitung vollständig und gründlich durchzulesen und das Handbuch als Referenzquelle aufzubewahren.
  • Seite 67 All manuals and user guides at all-guides.com Inhaltsverzeichnis 1 Sicherheits- und 4 Vorbereitung Umweltschutzanweisungen 4.1. Energiesparmaßnahmen ....13 1.1. Allgemeine Sicherheit ....3 4.2.
  • Seite 68: Sicherheits- Und Umweltschutzanweisungen

    All manuals and user guides at all-guides.com Sicherheits- und Umweltschutzanweisungen Dieses Kapitel beinhaltet die Sicherheitshinweise, • Schließen Sie das Produkt an eine geerdete Steckdose an. Die Erdung muss durch einen um Verletzungsgefahr und materielle Schäden zu Fachmann durchgeführt werden. vermeiden. Bei Nichtbeachtung dieser Hinweise • Falls in Ihrem Produkt eine LED Beleuchtung erlischt sämtliche Garantieleistung des Geräts.
  • Seite 69: Hc Hinweis

    All manuals and user guides at all-guides.com Sicherheits- und Umweltschutzanweisungen 1.1.1 HC Hinweis 1.3. Kindersicherheit Sofern Ihr Gerät mit dem Kühlmittel R600a • Da das Verpackungsmaterial für Kinder eine arbeitet, achten Sie also darauf, Kühlkreislauf und Gefahr darstellen kann, sollte es an einer für Leitungen während Betrieb und Transport nicht diese unzugängliche Stelle aufbewahrt werden.
  • Seite 70: Ihr Kühlschrank

    All manuals and user guides at all-guides.com Ihr Kühlschrank 1- Tiefkühlbereich 10- Nullgrad-Fach 2- Kühlbereich 11- Gemüsefach 3- Ventilator 12- Einstellbare Füße 4- Butter- und Käsefach 13- Fach für eingefrorene Lebensmittel 5- Glasregal 14- Kühlfach Türkästen 6- Kühlfach Türkästen 15- Eismatic 7- Minibar-Zubehör 16- Eiseimer 8- Wassertank...
  • Seite 71: Montage

    All manuals and user guides at all-guides.com Montage 3.1. Richtiger Standort 3.2. Anbringen der Kunststoffkeile für Installation Für die Einhaltung des Abstands für den Luftkreislauf müssen zwischen dem Gerät und der Kontaktieren Sie für die Installation des Gerätes Wand die Kunststoffkeile angebracht werden. den Kundendienst.
  • Seite 72: Einstellung Der Füße

    All manuals and user guides at all-guides.com Montage 3.3. Einstellung der Füße 3.5. Wasseranschluss (Diese Falls Ihr Gerät an seinem Platz nicht ausbalanciert Eigenschaft ist optional) steht, können Sie die Vorderfüße durch das Drehen HINWEIS: Während dem Anschluss sollte nach rechts und links einstellen. der Stecker des Geräts und falls vorhanden der von der Wasserpumpe ausgesteckt sein.
  • Seite 73: Anschluss Des Wasserschlauchs An Das Gerät

    All manuals and user guides at all-guides.com Montage 3.6. Anschluss des 3.7. Anschluss ans Leitungswasser Wasserschlauchs an das Gerät (Diese Eigenschaft ist optional) Zum Verbinden des Geräts an den Falls Sie das Gerät, angeschlossen an die Wasserschlauch führen Sie bitte folgende Kaltwasserleitung benutzen möchten, müssen Anweisungen durch.
  • Seite 74: Für Geräte Mit Dem Einsatz Von Wassergallonen

    All manuals and user guides at all-guides.com Montage 4. Befestigen Sie die Anschlussmuffe manuell/ 2. Schließen Sie das andere Ende des oder mit einem Werkzeug. Wasserschlauchs an der Wasserpumpe an, indem Sie den Schlauch in den Schlauchanschluss der Pumpe schieben. 5.
  • Seite 75: Die Montage Des Externen Filters An Die Wand (Diese Eigenschaft Ist Optionell)

    All manuals and user guides at all-guides.com Montage 3.9.1.Die Montage des externen 3. Bringen Sie den Verbindungsapparat, wie Filters an die Wand auf dem Etikett auf dem Filter angezeigt, (diese senkrecht an. (6) Eigenschaft ist optionell) HINWEIS: Montieren Sie den Filter auf das Gerät.
  • Seite 76: Interne Filter

    All manuals and user guides at all-guides.com Montage 3.9.2.Interne Filter 1. Für die Installation des Filters “Ice Off” (Eis Aus) Anzeige aktiv sein. Der Wechsel der Da der interne Filter, bei der Lieferung nicht im Gerät Anzeige zwischen EIN - AUS kann durch montiert sein wird, müssen für die Vorbereitung Drücken der Taste “lce”(Eis) getätigt werden.
  • Seite 77 All manuals and user guides at all-guides.com Montage 3. Ziehen Sie den Bypass-Deckel des Wasserfilters an sich selbst. Es ist normal, dass nachdem Entfernen des Deckels einige Wassertropfen vorhanden sind. 4. Verriegeln sie den Deckel des Wasserfilters indem Sie es in die Vorrichtung setzen und nach vorne schieben.
  • Seite 78: Vorbereitung

    All manuals and user guides at all-guides.com Vorbereitung 4.1. Energiesparmaßnahmen 4.2. Erstanwendung mehmet Vor der Benutzung Ihres Kühlschranks, lesen Da es dem Gerät schaden könnte, ist es Sie die “Anweisungen zur Sicherheit und zum nicht geeignet, dass das Gerät an die Umweltschutz”...
  • Seite 79: Nutzung Des Geräts

    All manuals and user guides at all-guides.com Nutzung des Geräts 5.1. Anzeigetafel Die Anzeigetafel kann je nach Modell Ihres Geräts Unterschiede vorweisen. Die visuellen und akustischen Funktionen Ihrer Anzeigetafel helfen Ihnen bei der Nutzung Ihres Kühlschranks. 1. Anzeige Kühlbereich 2. Anzeige Fehlerzustand 3.
  • Seite 80 All manuals and user guides at all-guides.com Nutzung des Geräts 1. Anzeige Kühlbereich Um diese Funktion auszuschalten, drücken Sie Beim Einstellen des Kühlungsbereichs brennt das nochmals auf die Ferien-Taste ( Licht des Kühlbereichs. 5. Temperatureinstellungsknopf 2. Anzeige Fehlerzustand Ändert die Temperatur zwischen -24°C ..- Falls Ihr Kühlschrank nicht ausreichend kühlt oder 18°C und 8°...1°C.
  • Seite 81 All manuals and user guides at all-guides.com Nutzung des Geräts 1- Wirtschaftliche Nutzung 2- Hohe Temperatur / Fehlermeldung 3- Schnelle Kühlung 4- Ferienfunktion 5- Temperaturregelung Kühlfach 6- Energiesparen (Bildschirm ausgeschaltet) 7- Tastensperre 8- Eko fuzzy 9- Temperaturregelung Gefrierfach 10- Schock-Frieren *Optional: Die in dieser Bedienungsanleitung aufgeführten Symbole sind als Beispiele aufgeführt, es ist möglich, dass diese nicht voll und ganz mit Ihrem Gerät übereinstimmen.
  • Seite 82: Wirtschaftliche Nutzung

    All manuals and user guides at all-guides.com Nutzung des Geräts 1. Wirtschaftliche Nutzung 6. Energiesparen (Bildschirm ausgeschaltet) Dieses Symbol leuchtet, wenn der Gefrierbereich Wenn Sie auf diese Taste ( ) drücken leuchtet auf die wirtschaftlichsten Einstellwerte -18°C das Energiesparsymbol ( ) und die Funktion eingestellt ist.
  • Seite 83: Schock-Frieren

    All manuals and user guides at all-guides.com Nutzung des Geräts 9. Temperaturregelung Gefrierfach Die Temperatureinstellung für das Gefrierfach wird durchgeführt. Wenn Sie die Taste Nummer (9) drücken, können Sie die Temperatur des Gefrierfachs auf die Werte -18,-19, -20, -21, -22, -23 und -24 einstellen.
  • Seite 84 All manuals and user guides at all-guides.com Nutzung des Geräts 1. Temperaturregelung Gefrierfach 2. Eco-Modus 3. Fehlerzustand 4. Temperaturregelung Kühlfach 5. Schnelle Kühlung 6. Ferienfunktion 7. Tastensperre / Filterwechsel Warnung Abbrechen 8. Auswahl Wasser, zerkleinertes Eis, Eiswürfel 9. Eisproduktion Ein/Aus 10.
  • Seite 85 All manuals and user guides at all-guides.com Nutzung des Geräts 6. Ferienfunktion 1. Temperaturregelung Gefrierfach Wenn auf die Taste Nummer (1) gedrückt wird ( Wenn die Ferienfunktion ( ) aktiviert ist, zeigt die Temperaturanzeige des Kühlfachs "- -" an und es ), kann die Temperatur des Gefrierfachs auf finden im Kühlfach keine aktiven Kühlungsprozesse die Werte -18,-19,-20,-21 ,-22,-23,-24,-18...
  • Seite 86: Aktivieren Des Hinweises Auf Wasserfilterwechsel

    All manuals and user guides at all-guides.com Nutzung des Geräts 11. Autoeco 5.2. Aktivieren des Hinweises Wenn auf die Taste Auteco, Taste Nummer (11) ( auf Wasserfilterwechsel ) für 3 Sekunden lange gedrückt wird, aktiviert (Für Geräte mit Leitungswasseranschluss es sich. Falls die Tür eine längere Zeit geschlossen und mit Filter) bleibt, während diese Funktion aktiv ist, beginnt Die Warnung für Filterwechsel wird wie folgt...
  • Seite 87: Anwendung Des Wasserspenders

    All manuals and user guides at all-guides.com Nutzung des Geräts 5.4. Auffüllen des Wassertanks 5.3. Anwendung des Wasserspenders für den Wasserspender (verfügbar bei einigen Modellen) Öffnen Sie den Deckel des Wassertanks wie in der Abbildung dargestellt wird. Füllen Sie es mit reines und sauberes Trinkwasser.
  • Seite 88: Reinigung Des Wassertanks

    All manuals and user guides at all-guides.com Nutzung des Geräts 5.5. Reinigung des Wassertanks Entnehmen Sie den Wasserspeicher aus dem Regal der Tür. Entnehmen Sie das Regal aus der Tür mit beiden Händen. Halten Sie den Wasserspeicher an beiden Seiten und entnehmen Sie es mit einem 45-gradigen Winkel.
  • Seite 89: Eis / Wasserentnahme

    All manuals and user guides at all-guides.com Nutzung des Geräts 5.6. Eis / Wasserentnahme • Es kann sein, dass das Gerät beim Erstbetrieb kein Wasser annimmt. Der Grund hierfür ist (diese Einschaft ist optional) die Luft, die sich im System befindet. Die Luft Zur Entnahme von Wasser ( ) / Eiswürfel ( aus dem System muss abgeführt werden.
  • Seite 90: Nullgrad-Fach

    All manuals and user guides at all-guides.com Nutzung des Geräts 5.8. Nullgrad-Fach 5.11. Ionisator (Diese Eigenschaft ist optional) (Diese Eigenschaft ist optional) In diesem Fach werden Molkerei-Lebensmittel, die Die Luft im Kühlraum wird mithilfe des eine Aufbewahrung bei niedrigeren Temperaturen Ionisierungssystem im Luftkanalsystem von benötigen oder für Fleischprodukte die sofort negativen Ionen, die die Luft mit schlechten...
  • Seite 91: Icematic Eiskübel

    All manuals and user guides at all-guides.com Nutzung des Geräts 5.15. Eismaschine 5.14. Icematic Eiskübel (Diese Eigenschaft ist optional) (Diese Eigenschaft ist optional) Die Eismaschine befindet sich im Oberteil der Tür Füllen Sie das Icematic mit Wasser. In ca. zwei des Gefrierfachs.
  • Seite 92: Einfrieren Von Frischen Lebensmitteln

    All manuals and user guides at all-guides.com Nutzung des Geräts 5.16. Einfrieren von frischen 5.17. Empfehlungen zur Lagerung Lebensmitteln von eingefrorenen Lebensmitteln • Um die Qualität der Lebensmittel im Gefrierfach Das Fach muss mindestens auf -18°C eingestellt zu erhalten, sollten diese so schnell wie sein.
  • Seite 93: Einräumen Der Lebensmittel

    All manuals and user guides at all-guides.com Nutzung des Geräts 5.20. Tür-Offen-Warnung Um die Dauer der Lagerung von eingefrorenem Gemüse zu verlängern, brühen Sie diese vorher (diese Eigenschaft ist optional) und sieben Sie das Wasser. Nach dem Absieben Wenn die Tür Ihres Geräts für eine Dauer von legen Sie es in luftdichte Verpackungen und 1 Minute offen bleibt ertönt dieses Warnsignal.
  • Seite 94: Pflege Und Reinigung

    All manuals and user guides at all-guides.com Pflege und Reinigung • Bewahren Sie die Speisen in geschlossenen Behältern auf. Lebensmittel, die in offenen Eine regelmäßige Reinigung erhöht die Behältern aufbewahrt werden, können durch Lebensdauer des Geräts. die Verbreitung von Mikroorganismen Gerüche verursachen.
  • Seite 95: Problemlösungen

    All manuals and user guides at all-guides.com Problemlösungen Bevor Sie den Kundendienst rufen, gehen Sie bitte diese Liste durch. Dies wird Ihnen helfen Zeit und Geld zu sparen. Diese Liste beinhaltet häufig auftretende Probleme, die nicht auf fehlerhafte Bearbeitung oder Materialien, Benutzung zurückzuführen sind. Manche aufgeführten Eigenschaften können bei Ihrem Gerät nicht vorhanden sein.
  • Seite 96 All manuals and user guides at all-guides.com Problemlösungen • Ihr neuer Kühlschrank ist vielleicht etwas breiter als sein Vorgänger. Große Kühlgeräte arbeiten oft längere Zeit. • Die Zimmertemperatur kann hoch sein. Es ist normal, dass bei höheren Umgebungstemperaturen das Gerät längere Zeit in Betrieb ist. • Das Kühlgerät wurde möglicherweise erst vor kurzem in Betrieb genommen oder mitLebensmitteln gefüllt.
  • Seite 97 All manuals and user guides at all-guides.com Problemlösungen • Der Boden ist nicht eben oder nicht fest. Wenn der Kühlschrank wackelt, wenn er etwas bewegt wird, balancieren Sie es aus, indem Sie die Füße einstellen. Achten Sie darauf, dass der Boden eben, stabil und in der Lage ist, den Kühlschrank problemlos zu tragen.
  • Seite 98 All manuals and user guides at all-guides.com Drogi kliencie, Chcemy, abyś mógł uzyskać optymalną efektywność naszego produktu, który został wyprodukowany w nowoczesnym zakładzie i przy drobiazgowej kontroli jakości. W tym celu prosimy przeczytać całą instrukcję obsługi przed użyciem produktu i przechowywać ją do ewentualnego użycia w przyszłości.
  • Seite 99 All manuals and user guides at all-guides.com Spis treści 1 Instrukcje dotyczące bezpieczeństwa 4 Przygotowanie i środowiska 4.1. Co robić, aby zaoszczędzić energię ..13 1.1. Bezpieczeństwo ogólne ....3 4.2.
  • Seite 100: Instrukcje Dotyczące Bezpieczeństwa I Środowiska

    All manuals and user guides at all-guides.com Instrukcje dotyczące bezpieczeństwa i środowiska Ten rozdział zawiera instrukcje dotyczące • Produkt należy podłączyć do uziemionego gniazdka. Uziemienie musi być wykonane przez bezpieczeństwa służące unikaniu obrażeń i szkód wykwalifikowanego elektryka. materialnych. Nieprzestrzeganie tych instrukcji • Jeśli produkt ma oświetlenie typu LED, w celu spowoduje unieważnienie wszelkich typów wymiany lub usunięcia problemu należy się...
  • Seite 101: Ostrzeżenie Hc

    All manuals and user guides at all-guides.com Instrukcje dotyczące bezpieczeństwa i środowiska 1.1.1 Ostrzeżenie HC 1.3. Bezpieczeństwo dzieci Jeśli produkt zawiera układ chłodzenia używający • Materiały opakowaniowe należy przechowywać gazu R600a, należy uważać, aby nie uszkodzić poza zasięgiem dzieci. układu chłodzenia i jego rurki podczas używania • Nie wolno pozwalać...
  • Seite 102: Lodówka

    All manuals and user guides at all-guides.com Lodówka 1- Komora zamrażarki 10- Komora zero stopni 2- Komora chłodziarki 11- Pojemniki na warzywa 3- Wentylator 12- Regulowane nóżki 4- Komora na masło/ser 13- Komory przechowywania zamrożonej żywności 5- Półki szklane 14- Półki w drzwiach komory zamrażarki 6- Półki w drzwiach komory chłodziarki 15- Automat do lodu 7- Minibarek...
  • Seite 103: Instalacja

    All manuals and user guides at all-guides.com Instalacja 3.1. Odpowiednie miejsce instalacji 3.2. Podkładanie plastikowych klinów Skontaktuj się z autoryzowanym serwisem w Za pomocą plastikowych klinów należy ustawić sprawie instalacji produktu. Aby przygotować odpowiedni odstęp między produktem i ścianą na produkt do instalacji, zapoznaj się...
  • Seite 104: Regulacja Nóżek

    All manuals and user guides at all-guides.com Instalacja 3.3. Regulacja nóżek 3.5. Podłączenie wody (Opcjonalne) Jeśli produkt nie znajduje się w równowadze, OSTRZEŻENIE: Podczas podłączania dostosuj przednie regulowane nóżki, obracając je należy odłączyć produkt i pompę wodną (o w prawo lub w lewo. ile jest dostępna).
  • Seite 105: Podłączanie Węża Wody Do Produktu

    All manuals and user guides at all-guides.com Instalacja 3.6. Podłączanie węża 3.7. Podłączanie do zasilania wodą wody do produktu (Opcjonalne) Aby podłączyć wąż wody do produktu, Aby używać produktu, korzystając z zasilania zimną postępuj zgodnie z poniższymi instrukcjami. wodą, należy na zasilaniu zimną wodą w domu 1.
  • Seite 106: Dla Produktów Używających Gąsiora Na Wodę (Opcjonalne)

    All manuals and user guides at all-guides.com Instalacja 4. Podłącz złącze do przejściówki i dokręć ręką/ 2. Podłącz drugi koniec węża wody do pompy narzędziem. wodnej, wciskając go do wlotu węża pompy. 5. Aby uniknąć uszkodzenia, przesunięcia 3. Umieść i zamocuj wąż pompy wewnątrz lub przypadkowego odłączenia węża, użyj gąsiora.
  • Seite 107: Mocowanie Filtra Zewnętrznego Na Ścianie (Opcjonalne)

    All manuals and user guides at all-guides.com Instalacja 3.9.1.Mocowanie filtra zewnętrznego 3. Zamocuj filtr pionowo w urządzeniu do na ścianie podłączania filtra w sposób pokazany na (opcjonalne) etykiecie. (6) OSTRZEŻENIE: Filtra nie należy mocować do produktu. Sprawdź, czy wraz z modelem produktu zostały dostarczone następujące części: 4.
  • Seite 108: Filtr Wewnętrzny

    All manuals and user guides at all-guides.com Instalacja 3.9.2.Filtr wewnętrzny 1. Wskaźnik Lód wył. musi być aktywny podczas Dostarczany z produktem filtr wewnętrzny nie jest montażu filtra. Przełącz wskaźnik WŁ.-WYŁ. za pomocą przycisku Lód na ekranie. zainstalowany w chwili dostawy – wykonaj poniższe instrukcje, aby go zainstalować.
  • Seite 109 All manuals and user guides at all-guides.com Instalacja 3. Zdejmij pokrywę obejścia filtra wody, pociągając ją. Po zdjęciu pokrywy może wyciec kilka kropli wody, to normalne. 4. Umieść pokrywę filtra wody na mechanizmie i wciśnij na miejsce do zatrzaśnięcia. 5. Naciśnij przycisk Lód na ekranie, aby wyłączyć tryb Lód wył.
  • Seite 110: Przygotowanie

    All manuals and user guides at all-guides.com Przygotowanie 4.1. Co robić, aby 4.2. Pierwsze użycie zaoszczędzić energię Przed użyciem lodówki należy się upewnić, że mehmet zostały wykonane niezbędne przygotowania Podłączenie produktu do elektronicznych podane w rozdziałach „Instrukcje dotyczące układów oszczędzania energii jest bezpieczeństwa i środowiska”...
  • Seite 111: Korzystanie Z Produktu

    All manuals and user guides at all-guides.com Korzystanie z produktu 5.1. Panel wskaźników Panele wskaźników mogą się różnić w zależności od modelu produktu. Funkcje dźwiękowe i optyczne panelu wskaźników pomagają korzystać z lodówki. 1. Wskaźnik komory chłodziarki 2. Wskaźnik stanu błędu 3.
  • Seite 112: Wskaźnik Temperatury

    All manuals and user guides at all-guides.com Korzystanie z produktu 1. Wskaźnik komory chłodziarki Aby anulować tę funkcję, naciśnij ponownie Lampka komory chłodziarki włącza się podczas przycisk Wakacje ( regulacji temperatury komory chłodziarki. 5. Przycisk regulacji temperatury 2. Wskaźnik stanu błędu Temperatura odpowiedniej komory wacha się...
  • Seite 113 All manuals and user guides at all-guides.com Korzystanie z produktu 1- Oszczędne używanie 2- Alert wysokiej temperatury/błędu 3- Szybkie chłodzenie 4- Funkcja wakacyjna 5- Ustawianie temperatury komory chłodzenia 6- Oszczędzanie energii (wyłączenie wyświetlacza) 7- Blokada klawiatury 8- Wstępne eko 9- Ustawianie temperatury komory chłodzenia 10- Szybkie zamrażanie *Opcjonalne: Rysunki w tej instrukcji obsługi są...
  • Seite 114 All manuals and user guides at all-guides.com Korzystanie z produktu 1. Oszczędne używanie 6. Oszczędzanie energii (wyłączenie wyświetlacza) Ten symbol zaświeci się, gdy komora Naciśnięcie przycisku ( ) spowoduje zapalenie zamrażarki będzie ustawiona na -18°C, co jest symbolu oszczędzania energii ( ) i uaktywnienie najoszczędniejszym ustawieniem.
  • Seite 115 All manuals and user guides at all-guides.com Korzystanie z produktu 10. Szybkie zamrażanie W celu szybkiego zamrożenia naciśnij przycisk numer (10), co włączy wskaźnik szybkiego zamrażania ( Gdy jest włączona funkcja szybkiego zamrażania, zapali się wskaźnik szybkiego zamrażania i wskaźnik temperatury komory zamrażania będzie wskazywał...
  • Seite 116 All manuals and user guides at all-guides.com Korzystanie z produktu 1. Ustawianie temperatury komory zamrażania 2. Tryb oszczędzania 3. Stan błędu 4. Ustawianie temperatury komory chłodzenia 5. Szybkie chłodzenie 6. Funkcja wakacyjna 7. Anulowanie blokady klawiatury/alertu wymiany filtra 8. Wybór wody, kawałków lodu i kostek lodu 9.
  • Seite 117 All manuals and user guides at all-guides.com Korzystanie z produktu 6. Funkcja wakacyjna 1. Ustawianie temperatury komory zamrażania Gdy funkcja wakacyjna ( ) jest aktywna, Naciśnięcie przycisku ( ) numer (1) umożliwia wskaźnik temperatury komory chłodzenia będzie ustawienie temperatury komory zamrażania na pokazywać...
  • Seite 118: Uaktywnianie Alertu Wymiany Filtra Wody

    All manuals and user guides at all-guides.com Korzystanie z produktu 11. Autoeko 5.2. Uaktywnianie alertu Naciśnij przycisk Autoeko ( ), numer (11), na wymiany filtra wody 3 sekundy, aby uaktywnić tę funkcję. Jeśli drzwi (Dla produktów podłączonych do zasilania pozostaną zamknięte przez dłuższy czas, gdy ta wodą...
  • Seite 119: Korzystanie Z Wodotrysku (Dla Pewnych Modeli)

    All manuals and user guides at all-guides.com Korzystanie z produktu 5.4. Napełnianie zbiornika 5.3. Korzystanie z wodotrysku wodotrysku (dla pewnych modeli) Otwórz pokrywę zbiornika wody w sposób pokazany na rysunku. Nalej czystej wody pitnej. Pierwszych kilka szklanek wody z wodotrysku będzie ciepłe. Zamknij pokrywę.
  • Seite 120: Czyszczenie Zbiornika Wodotrysku

    All manuals and user guides at all-guides.com Korzystanie z produktu 5.5. Czyszczenie zbiornika wodotrysku Wyjmij zbiornik napełniania wody wewnątrz półki drzwi. Odłącz go, trzymając obie strony półki drzwi. Trzymając obie strony zbiornika wody, wyjmij go pod kątem 45°. Zdejmij i oczyść pokrywę zbiornika wody. Nie należy napełniać...
  • Seite 121: Pobieranie Lodu/Wody (Opcjonalne)

    All manuals and user guides at all-guides.com Korzystanie z produktu 5.6. Pobieranie lodu/wody (opcjonalne) • Podczas pierwszego korzystania z filtra woda Aby pobrać wodę ( ) / kostki lodu ( )/kawałki może być mętna – nie należy spożywać lodu ( ), należy wybrać...
  • Seite 122: Komora Zero Stopni (Opcjonalne)

    All manuals and user guides at all-guides.com Korzystanie z produktu 5.8. Komora zero stopni 5.11. Jonizator (Opcjonalne) Ta komora służy do przechowywania delikatesów (Opcjonalne) w niższych temperaturach lub mięsa do Układ jonizatora w kanale powietrza komory natychmiastowej konsumpcji. W tej komorze nie chłodzenia służy do jonizacji powietrza.
  • Seite 123: Automat Do Lodu I Pojemnik Do Przechowywania Lodu

    All manuals and user guides at all-guides.com Korzystanie z produktu 5.15. Wytwornica lodu 5.14. Automat do lodu i pojemnik (opcjonalna) do przechowywania lodu Wytwornica lodu znajduje się w górnej części pokrywy zamrażarki. (Opcjonalne) Chwyć za uchwyty z boku zbiornika na lód i unieś Napełnij automat do lodu wodą...
  • Seite 124: Zamrażanie Świeżej Żywności

    All manuals and user guides at all-guides.com Korzystanie z produktu 5.16. Zamrażanie świeżej żywności 5.17. Zalecenia dotyczące przechowywania mrożonej żywności • Aby zachować jakość żywności, żywność umieszczona w komorze zamrażarki musi Temperatura komory musi być ustawiona zostać jak najszybciej zamrożona , w tym celu przynajmniej na -18°C.
  • Seite 125: Rozmieszczanie Żywności

    All manuals and user guides at all-guides.com Korzystanie z produktu 5.20. Alert otwarcia drzwi Warzywa należy zagotować i odcedzić wodę, aby (opcjonalny) wydłużyć czas zamrażania. Umieść żywność w Alarm dźwiękowy rozlegnie się, jeśli drzwi produktu hermetycznych opakowaniach po odfiltrowaniu pozostaną otwarte przez minutę. Alarm dźwiękowy i włóż...
  • Seite 126: Konserwacja I Czyszczenie

    All manuals and user guides at all-guides.com Konserwacja i czyszczenie Regularne czyszczenie produktu przedłuży jego • Żywność należy przechowywać w zamkniętych opakowaniach. Drobnoustroje mogą się okres eksploatacji. rozprzestrzeniać z niezamkniętych opakowań i OSTRZEŻENIE: powodować nieprzyjemne zapachy. Przed czyszczeniem • W lodówce nie należy przechowywać lodówki należy wyłączyć...
  • Seite 127: Rozwiązywanie Problemów

    All manuals and user guides at all-guides.com Rozwiązywanie problemów Przed skontaktowaniem się z serwisem należy sprawdzić tę listę. Umożliwi to zaoszczędzenie czasu i pieniędzy. Ta lista zawiera często spotykane problemy niezwiązane z wadami jakości wykonania lub materiałów. Pewne wymienione tutaj funkcje mogą nie dotyczyć posiadanego produktu. Lodówka nie działa.
  • Seite 128 All manuals and user guides at all-guides.com Rozwiązywanie problemów • Nowy produkt może być większy niż poprzedni. Większe produkty pracują dłużej. • Temperatura w pomieszczeniu może być wysoka. >>> Produkt będzie normalnie działał przed dłuższy czas przy wyższej temperaturze w pomieszczeniu. • Produkt mógł...
  • Seite 129 All manuals and user guides at all-guides.com Rozwiązywanie problemów Wstrząsy lub hałas. • Podłoże nie jest poziome lub wytrzymałe. >>> Jeśli produkt się kołysze podczas powolnego przemieszczania, wyreguluj nóżki w celu zrównoważenia produktu. Upewnij się też, że podłoże jest wystarczająco wytrzymałe i uniesie produkt. • Wszelkie przedmioty umieszczone na produkcie mogą...
  • Seite 130 All manuals and user guides at all-guides.com Vážení zákazníci, Rádi bychom Vám poskytli možnost k dosažení optimální účinnosti našeho výrobku, který byl vyroben v moderních zařízeních s důkladnou kontrolou kvality. Za tímto účelem si před použitím výrobku prosím pozorně přečtěte celou příručku a uschovejte si ji jako referenční...
  • Seite 131 All manuals and user guides at all-guides.com Obsah 1 Bezpečnostní pokyny a životní 4 Příprava prostředí 4.1. Co udělat pro úsporu energie... 13 1.1. Všeobecná bezpečnost ....3 4.2.
  • Seite 132: Bezpečnostní Pokyny A Životní Prostředí

    All manuals and user guides at all-guides.com Bezpečnostní pokyny a životní prostředí Tato část obsahuje bezpečnostní pokyny nezbytné • Nepokládejte do mrazničky tekutiny v lahvích a plechovkách. Mohou vybuchnout! pro zabránění nebezpečí zranění a materiálních • Tekutiny umístěte ve vzpřímené poloze a pevně škod.
  • Seite 133: Varování Hc

    All manuals and user guides at all-guides.com Bezpečnostní pokyny a životní prostředí 1.1.1 Varování HC 1.3. Bezpečnost dětí Jestliže výrobek obsahuje chladicí systém ve • Obalové materiály uchovávejte mimo dosah kterém se používá plyn R600a, zajistěte, aby dětí. při používání a pohybování spotřebiče nedošlo k • Nedovolte dětem, aby se s výrobkem hrály.
  • Seite 134: Chladnička

    All manuals and user guides at all-guides.com Chladnička 1- Mrazicí prostor 10- Oddělení Nulového stupně 2- Chladicí prostor 11- Zásobníky na zeleninu 3- Ventilátor 12- Nastavitelné stojany 4- Prostor pro máslo a sýr 13- Skladovací prostory pro mražené potraviny 5- Skleněné police 14- Police ve dveřích mrazící...
  • Seite 135: Instalace

    All manuals and user guides at all-guides.com Instalace 3.1. Správné místo pro instalaci 3.2. Připojení plastových klínů Použijte plastové klíny dodané s produktem pro Pro instalaci výrobku se obraťte na autorizovaný zajištění dostatečného prostoru pro cirkulaci servis. Pro přípravu produktu pro instalaci vzduchu mezi výrobkem a stěnou.
  • Seite 136: Nastavení Stojanů

    All manuals and user guides at all-guides.com Instalace 3.3. Nastavení stojanů 3.5. Připojení vody Jestliže výrobek není v rovnovážné poloze, nastavte (Volitelné) přední nastavitelné stojany jejich otáčením směrem UPOZORNĚNÍ: Během připojování doprava nebo doleva. odpojte produkt a vodní čerpadlo (pokud je k dispozici).
  • Seite 137: Připojení Vodovodní Hadice K Výrobku

    All manuals and user guides at all-guides.com Instalace 3.6. Připojení vodovodní 3.7. Připojení k vodovodní síti hadice k výrobku (Volitelné) Pro připojení hadice k výrobku postupujte Pokud chcete používat produkt jeho připojením na podle následujících pokynů. síť studené vody, ve vaší domácnosti musí být na 1.
  • Seite 138: Pro Produkty Používající Zásobník Vody

    All manuals and user guides at all-guides.com Instalace 4. Připojte přípojku na adaptér na kohoutek a 2. Připojte druhý konec vodovodní hadice k dotáhněte jej ručně / nástrojem. vodnímu čerpadlu stisknutím hadice do přívodu hadice na čerpadle. 5. Aby nedošlo k poškození, posunutí nebo 3.
  • Seite 139: Upevnění Externího Filtru Na Stěnu (Volitelné)

    All manuals and user guides at all-guides.com Instalace 3.9.1.Upevnění externího 3. Připojte filtr ve vzpřímené poloze na spojovací filtru na stěnu zařízení filtru, jak je uvedeno na etiketě. (6) (volitelné) UPOZORNĚNÍ: Nepřipojujte filtr na výrobek. Zkontrolujte, zda jsou následující díly dodávány pro model vašeho výrobku: 4.
  • Seite 140: Vnitřní Filtr

    All manuals and user guides at all-guides.com Instalace 3.9.2.Vnitřní filtr 1. Při instalaci filtru musí být aktivní indikátor “Ice Vnitřní filtr dodávaný s výrobkem není nainstalován Off”. ZAPNĚTE / VYPNĚTE indikátor pomocí tlačítka “Ice” na obrazovce. při dodání, prosím, při instalaci filtru postupujte podle níže uvedených pokynů.
  • Seite 141 All manuals and user guides at all-guides.com Instalace 3. Tahem vytáhněte kryt vodního filtru. Po odstranění krytu několik kapek vody může vytékat, to je normální. 4. Umístěte kryt vodního filtru do mechanismu a zatlačte ho, dokud se nedosedne na své místo.
  • Seite 142: Příprava

    All manuals and user guides at all-guides.com Příprava 4.1. Co udělat pro úsporu energie 4.2. První uvedení do provozu mehmet Před použitím chladničky se ujistěte, že byly Připojení výrobku k elektronickým provedeny všechny nezbytné přípravy v souladu systémem pro úsporu energie je škodlivé, s pokyny uvedenými v kapitolách “Bezpečnostní...
  • Seite 143: Používání Výrobku

    All manuals and user guides at all-guides.com Používání výrobku 5.1. Indikační panel Indikační panely se mohou lišit v závislosti na modelu vašeho výrobku. Při používání chladničky vám budou pomáhat zvukové a vizuální funkce indikačního panelu. 1. Indikátor Chladicího prostoru 2. Indikátor poruchového stavu 3.
  • Seite 144: Indikátor Teploty

    All manuals and user guides at all-guides.com Používání výrobku 1. Indikátor Chladicího prostoru Zatlačte tlačítko Dovolená ( ) znovu pro Světlo Chladicího prostoru se zapne při zrušení této funkce. nastavování chladnější teploty v prostoru. 5. Tlačítko pro Nastavení teploty 2. Indikátor poruchového stavu Teplota příslušné...
  • Seite 145 All manuals and user guides at all-guides.com Používání výrobku 1- Ekonomické použití 2- Upozornění na Vysokou teplotu / Poruchu 3- Rychlé chlazení 4- Funkce Dovolená 5- Nastavení teploty Chladícího prostoru 6- Úspora energie (vypnutý displej) 7- Zámek klávesnice 8- Eco-fuzzy 9- Nastavení...
  • Seite 146 All manuals and user guides at all-guides.com Používání výrobku 1. Ekonomické použití 6. Úspora energie (vypnutý displej) Tato značka se rozsvítí, když je mrazicí část Po stisknutí tohoto tlačítka ( ) se rozsvítí znak nastavena na -18 ° C, na nejúspornější nastavení. úspory energie ( ) a aktivuje se funkce Úspory ) Indikátor ekonomického použití...
  • Seite 147 All manuals and user guides at all-guides.com Používání výrobku 10. Rychlé zmrazování Pro rychlé zmrazení stiskněte tlačítko číslo (10), čímž aktivujete indikátor rychlého zmrazování ( Když je funkce rychlého zmrazování zapnutá, rozsvítí se Indikátor Rychlého zmrazování ( ) a Indikátor teploty mrazícího prostoru zobrazí hodnotu -27.
  • Seite 148 All manuals and user guides at all-guides.com Používání výrobku 1. Nastavení teploty mrazicího prostoru 2. Ekonomický provoz 3. Chybový stav 4. Nastavení teploty Chladicího prostoru 5. Rychlé chlazení 6. Funkce Dovolená 7. Zrušení Zámku klávesnice / Upozornění na výměnu filtru 8.
  • Seite 149 All manuals and user guides at all-guides.com Používání výrobku 6. Funkce Dovolená 1. Nastavení teploty mrazicího prostoru Pokud je funkce Dovolená ( ) aktivní, na Stisknutí tlačítka ( ) číslo (1) umožní nastavení indikátoru teploty Chladícího prostoru se zobrazí teploty mrazničky na -18, -19, -20, - 21, -22, -23, nápis "-"...
  • Seite 150: Aktivace Upozornění Pro Nahrazení Vodního Filtru

    All manuals and user guides at all-guides.com Používání výrobku 11. Autoeco 5.2. Aktivace upozornění pro Stiskněte tlačítko Auto eco ( ), číslo (11), po nahrazení vodního filtru dobu 3 sekund pro aktivaci této funkce. Pokud (Pro chladničky připojené k vodovodu a dveře zůstanou zavřené...
  • Seite 151: Používání Dávkovače Vody

    All manuals and user guides at all-guides.com Používání výrobku 5.4. Plnění nádrže dávkovače vody 5.3. Používání dávkovače vody Otevřete víko nádrže na vodu, tak jak je (u některých modelů) znázorněno na obrázku. Naplňte ji čistou pitnou vodou. Zavřete víko. Prvních několik sklenic vody odebrané z dávkovače vody bude obvykle teplých.
  • Seite 152: Čištění Nádrže Na Vodu

    All manuals and user guides at all-guides.com Používání výrobku 5.5. Čištění nádrže na vodu Vyberte nádrž na vodu uvnitř police dveří. Odpojte ji držením za obě strany dveřní police. Držte obě strany vodní nádrže a odstraňte ji v 45° úhlu. Vyjměte a vyčistěte víko nádrže na vodu.
  • Seite 153: Čerpání Ledu / Vody

    All manuals and user guides at all-guides.com Používání výrobku 5.6. Čerpání ledu / vody vody může být nepravidelný. Po vypuštění vzduchu ze systému voda poteče obvyklým (Volitelné) způsobem. Pro čerpání vody ( ) / ledových kostek ( • Při prvním použití filtru může být voda kalná, ) / roztříštěného ledu ( ) použijte displej a prvních deset sklenic vody vylijte.
  • Seite 154: Oddělení Nulového Stupně

    All manuals and user guides at all-guides.com Používání výrobku 5.8. Oddělení Nulového stupně 5.11. Ionizátor (Volitelné) (Volitelné) Použijte tento prostor pro udržení lahůdek nebo Ionizační systém ve vzduchovém potrubí chladicí masných výrobků pro okamžitou spotřebu při části slouží k ionizaci vzduchu. Emise negativních nižších teplotách.
  • Seite 155: Icematic A Box Pro Skladování Ledu

    All manuals and user guides at all-guides.com Používání výrobku 5.15. Výrobník ledu 5.14. Icematic a box pro skladování ledu (volitelné) Výrobník ledu se nachází v horní části krytu (Volitelné) mrazničky. Naplňte icematic vodou a uložte jej na Uchopte držadla na stranách ledové nádrže a své...
  • Seite 156: Zmrazování Čerstvých Potravin

    All manuals and user guides at all-guides.com Používání výrobku 5.16. Zmrazování čerstvých potravin 5.17. Doporučení pro skladování zmrazených potravin • Chcete-li zachovat kvalitu potravin, potraviny umístěny v mrazničce musí být zmražené tak Chladicí prostor musí být nastaven na méně než rychle, jak je to možné, z toho důvodu použijte -18°...
  • Seite 157: Umístění Jídla

    All manuals and user guides at all-guides.com Používání výrobku 5.20. Upozornění na otevřené dveře Zeleninu uvařte a vodu odfiltrujte pro prodloužení doby zmrazeného skladování. Po filtraci dejte (volitelné) jídlo do vzduchotěsných balení a umístěte jej v Pokud dveře výrobku zůstanou otevřené po dobu mrazničce.
  • Seite 158: Údržba A Čištění

    All manuals and user guides at all-guides.com Údržba a čištění 6.2. Ochrana plastových povrchů Olej vyteklý na plastové povrchy může poškodit Čistěte produkt pravidelně, čímž prodloužíte jeho povrch a musí být ihned umytý teplou vodou. životnost. UPOZORNĚNÍ: Před čištěním chladničku odpojte od napájení.
  • Seite 159: Řešení Problémů

    All manuals and user guides at all-guides.com Řešení problémů Než se obrátíte na servis, viz následující seznam. Může Vám to ušetřit čas i peníze. Tento seznam obsahuje časté stížnosti, které nejsou spojeny s chybným zpracováním nebo poškozením materiálu. Některé funkce uvedené v tomto dokumentu se nemusí vztahovat na váš produkt. Chladnička nefunguje.
  • Seite 160 All manuals and user guides at all-guides.com Řešení problémů • Nový výrobek může být větší než ten předchozí. Větší výrobky budou pracovat po delší dobu. • Teplota v místnosti může být vysoká. >>> Výrobek bude v místnosti s vyšší teplotou spuštěn po delší...
  • Seite 161 All manuals and user guides at all-guides.com Řešení problémů • Podlaha není ve vodováze nebo není odolná. >>> Pokud se výrobek třese, když se pomalu pohybuje, nastavte stojany na vyrovnání výrobku. >>> Ujistěte se také, že podlaha je dostatečně odolná k tomu, aby unesla produkt. • Všechny položky umístěné...
  • Seite 162 All manuals and user guides at all-guides.com Vážení zákazníci, Radi by sme vám poskytli možnosť na dosiahnutie optimálnej účinnosti nášho výrobku, ktorý bol vyrobený v moderných zariadeniach s dôkladnou kontrolou kvality. Za týmto účelom si pred použitím výrobku prosím prečítajte celú príručku a uschovajte si ju ako referenčný...
  • Seite 163 All manuals and user guides at all-guides.com Obsah 1 Bezpečnostné pokyny a životné 4 Príprava prostredie 4.1. Čo urobiť pre úsporu energie ... 13 1.1. Všeobecná bezpečnosť ....3 4.2.
  • Seite 164: Bezpečnostné Pokyny A Životné Prostredie

    All manuals and user guides at all-guides.com Bezpečnostné pokyny a životné prostredie Táto časť obsahuje bezpečnostné pokyny • Neklaďte do mrazničky tekutiny vo fľašiach a plechovkách. Môžu vybuchnúť! nevyhnutné pre zabránenie nebezpečenstvu • Tekutiny umiestnite vo vzpriamenej polohe a zranení a materiálnych škôd. Nedodržaním týchto pevne uzatvorte ich veko.
  • Seite 165: Varovanie Hc

    All manuals and user guides at all-guides.com Bezpečnostné pokyny a životné prostredie 1.1.1 Varovanie HC 1.3. Bezpečnosť detí Ak výrobok obsahuje chladiaci systém v ktorom sa • Obalové materiály uchovávajte mimo dosahu používa plyn R600a, zabezpečte, aby pri používaní detí. a pohybovaní...
  • Seite 166: Chladnička

    All manuals and user guides at all-guides.com Chladnička 1- Mraziaci priestor 10- Oddelenia Nulového stupňa 2- Chladiaci priestor 11- Zásobníky na zeleninu 3- Ventilátor 12- Nastaviteľné stojany 4- Priestor pre maslo a syr 13- Skladovacie priehradky pre mrazené potraviny 5- Sklenené police 14- Police v dverách mraziacej časti 6- Police v dverách chladiacej časti 15- Icematic (Výrobník ľadu)
  • Seite 167: Inštalácia

    All manuals and user guides at all-guides.com Inštalácia 3.1. Správne miesto pre inštaláciu 3.2. Pripojenie plastových klinov Použite plastové kliny dodané s produktom pre Pre inštaláciu výrobku sa obráťte na autorizovaný zabezpečenie dostatočného priestoru pre cirkuláciu servis. Pre prípravu výrobku pre inštaláciu vzduchu medzi výrobkom a stenou.
  • Seite 168: Nastavenie Stojanov

    All manuals and user guides at all-guides.com Inštalácia 3.3. Nastavenie stojanov 3.5. Pripojenie vody Ak výrobok nie je v rovnovážnej polohe, nastavte (Voliteľné) predné nastaviteľné stojany ich otáčaním smerom UPOZORNENIE: Počas pripájania doprava alebo doľava. odpojte produkt a vodné čerpadlo (ak je k dispozícii).
  • Seite 169: Pripojenie Vodovodnej Hadice K Výrobku

    All manuals and user guides at all-guides.com Inštalácia 3.6. Pripojenie vodovodnej 3.7. Pripojenie k vodovodnej sieti hadice k výrobku (Voliteľné) Pre pripojenie hadice k výrobku postupujte Ak chcete používať produkt jeho pripojením na podľa nasledujúcich pokynov. sieť studenej vody, vo vašej domácnosti musí byť 1.
  • Seite 170: Pre Produkty Používajúce Zásobník Vody

    All manuals and user guides at all-guides.com Inštalácia 4. Pripojte prípojku na adaptér na kohútik a 2. Pripojte druhý koniec vodovodnej hadice dotiahnite ho ručne/nástrojom. k vodnému čerpadlu stlačením hadice do prívodu hadice na čerpadle. 5. Aby nedošlo k poškodeniu, posunutiu alebo 3.
  • Seite 171: Upevnenie Externého Filtra Na Stenu (Voliteľné)

    All manuals and user guides at all-guides.com Inštalácia 3.9.1.Upevnenie externého 3. Pripojte filter vo vzpriamenej polohe na filtra na stenu spojovacie zariadenie filtra, ako je uvedené na (voliteľné) etikete. (6) UPOZORNENIE: Nepripájajte filter na výrobok. Skontrolujte či sú nasledujúce diely dodávané pre model vášho výrobku: 4.
  • Seite 172: Vnútorný Filter

    All manuals and user guides at all-guides.com Inštalácia 3.9.2.Vnútorný filter 1. Pri inštalácii filtra musí byť aktívny indikátor “Ice Off” . ZAPNITE/VYPNITE indikátor Vnútorný filter dodávaný s výrobkom nie je pomocou tlačidla “Ice” na obrazovke. nainštalovaný pri dodaní, prosím, pri inštalácii filtra postupujte podľa nižšie uvedených pokynov.
  • Seite 173 All manuals and user guides at all-guides.com Inštalácia 3. Ťahom vytiahnite kryt vodného filtra. Po odstránení krytu niekoľko kvapiek vody môže vyteka, to je normálne. 4. Umiestnite kryt vodného filtra do mechanizmu a zatlačte ho, kým sa nedosadne na svoje miesto.
  • Seite 174: Príprava

    All manuals and user guides at all-guides.com Príprava 4.1. Čo urobiť pre úsporu energie 4.2. Prvé uvedenie do prevádzky mehmet Pred použitím chladničky sa uistite, že boli Pripojenie výrobku k elektronickým vykonané všetky nevyhnutné prípravy v súlade s systémom pre úsporu energie je škodlivé, pokynmi uvedenými v kapitolách “Bezpečnostné...
  • Seite 175: Používanie Výrobku

    All manuals and user guides at all-guides.com Používanie výrobku 5.1. Indikačný panel Indikačné panely sa môžu líšiť v závislosti od modelu vášho výrobku. Pri používaní chladničky vám budú pomáhať zvukové a vizuálne funkcie indikačného panela. 1. Indikátor Chladiaceho priestoru 2. Indikátor Poruchového stavu 3.
  • Seite 176 All manuals and user guides at all-guides.com Používanie výrobku 1. Indikátor Chladiaceho priestoru Zatlačte tlačidlo Dovolenka ( ) znova pre Svetlo Chladiaceho priestoru sa zapne pri zrušenie tejto funkcie. nastavovaní chladnejšej teploty v priestore. 5. Tlačidlo pre Nastavenie teploty 2. Indikátor Poruchového stavu Teplota príslušnej priehradky sa pohybuje v Tento snímač...
  • Seite 177 All manuals and user guides at all-guides.com Používanie výrobku 1- Ekonomické použitie 2- Upozornenie na Vysokú teplotu/Poruchu 3- Rýchle chladenie 4- Funkcia Dovolenka 5- Nastavenie teploty Chladiaceho priestoru 6- Úspora energie (vypnutý displej) 7- Zámok klávesnice 8- Eco-fuzzy 9- Nastavenie teploty Chladiaceho priestoru 10- Rýchle zmrazovanie *Voliteľné: Údaje uvedené...
  • Seite 178 All manuals and user guides at all-guides.com Používanie výrobku 1. Ekonomické použitie resp. 1.( Táto značka sa rozsvieti, keď je mraziaca časť 6. Úspora energie (vypnutý displej) nastavená na -18°C, na najúspornejší nastavenie. Po stlačení tohto tlačidla ( ) sa rozsvieti znak ) Indikátor ekonomického použitia sa vypne, úspory energie ( ) a aktivuje sa funkcia Úspory...
  • Seite 179 All manuals and user guides at all-guides.com Používanie výrobku 10. Rýchle zmrazovanie Pre rýchle zmrazenie stlačte tlačidlo číslo (10), čím aktivujete indikátor rýchleho zmrazovania ( Keď je funkcia rýchleho zmrazovania zapnutá, rozsvieti sa Indikátor Rýchleho zmrazovania ( ) a Indikátor teploty Mraziaceho priestoru zobrazí...
  • Seite 180 All manuals and user guides at all-guides.com Používanie výrobku 1. Nastavenie teploty Mraziaceho priestoru 2. Ekonomická prevádzka 3. Chybový stav 4. Nastavenie teploty Chladiaceho priestoru 5. Rýchle chladenie 6. Funkcia Dovolenka 7. Zrušenie Zámku klávesnice/Upozornenia na výmenu filtra 8. Voľba Vody, Roztriešteného ľadu, a Ľadových kociek 9.
  • Seite 181 All manuals and user guides at all-guides.com Používanie výrobku 6. Funkcia Dovolenka 1. Nastavenie teploty Mraziaceho priestoru Ak je funkcia Dovolenka ( ) aktívna, na Indikátore Stlačenie tlačidla ( ) číslo (1) umožní nastavenie teploty Chladiaceho priestoru sa zobrazí nápis "-" teploty mrazničky na -18, -19, -20, - 21, -22, -23, a v chladiacom priestore nebude aktívny žiadny -24 a -18...
  • Seite 182: Aktivácia Upozornenia Pre Nahradenie Vodného Filtra

    All manuals and user guides at all-guides.com Používanie výrobku 11. Autoeco 5.2. Aktivácia upozornenia pre Stlačte tlačidlo Auto eco ( ), číslo (11), po nahradenie vodného filtra dobu 3 sekúnd pre aktiváciu tejto funkcie. Ak (Pre chladničky pripojené k vodovodu a dvere zostanú...
  • Seite 183: Používanie Dávkovača Vody

    All manuals and user guides at all-guides.com Používanie výrobku 5.4. Plnenie nádrže dávkovača vody 5.3. Používanie dávkovača vody Otvorte veko nádrže na vodu, tak ako je (pri niektorých modeloch) znázornené na obrázku. naplňte ju čistou pitnou vodou. Zatvorte veko. Prvých niekoľko pohárov vody odobranej z dávkovača vody bude obvykle teplých.
  • Seite 184: Čistenie Nádrže Na Vodu

    All manuals and user guides at all-guides.com Používanie výrobku 5.5. Čistenie nádrže na vodu Vyberte nádrž na vodu vo vnútri police dverí. Odpojte ju držaním za obe strany dvernej police. Držte obe strany vodnej nádrže a odstráňte ju v 45° uhle. Vyberte a vyčistite veko nádrže na vodu.
  • Seite 185: Čerpanie Ľadu/Vody

    All manuals and user guides at all-guides.com Používanie výrobku 5.6. Čerpanie ľadu/vody páčku dávkovača vody po dobu 1-2 minút, kým dávkovača vody vypustí vodu. Počiatočný (Voliteľné) prietok vody môže byť nepravidelný. Po Pre čerpanie vody ( ) / ľadových kociek ( vypustení...
  • Seite 186: Oddelenia Nulového Stupňa

    All manuals and user guides at all-guides.com Používanie výrobku 5.8. Oddelenia Nulového stupňa 5.11. Ionizátor (Voliteľné) (Voliteľné) Použite tento priestor pre udržanie lahôdok alebo Ionizačný systém vo vzduchovom potrubí chladiacej mäsových výrobkov na okamžitú spotrebu pri časti slúži k ionizácii vzduchu. Emisia negatívnych nižších teplotách.
  • Seite 187: Icematic A Box Pre Skladovanie Ľadu

    All manuals and user guides at all-guides.com Používanie výrobku 5.15. Výrobník ľadu 5.14. Icematic a box pre skladovanie ľadu (voliteľne) Výrobník ľadu sa nachádza v hornej časti krytu (Voliteľné) mrazničky. Naplňte icematic vodou a uložte ho na svo- Uchopte držadlá na stranách ľadovej nádrže je miesto.
  • Seite 188: Zmrazovanie Čerstvých Potravín

    All manuals and user guides at all-guides.com Používanie výrobku 5.16. Zmrazovanie čerstvých potravín 5.17. Odporúčania pre skladovanie zmrazených potravín • Ak chcete zachovať kvalitu potravín, potraviny umiestnené v mrazničke musia byť zmrazené Chladiaci priestor musí byť nastavený na menej tak rýchlo, ako je to možné, z toho dôvodu ako -18°C.
  • Seite 189: Umiestnenie Jedla

    All manuals and user guides at all-guides.com Používanie výrobku 5.20. Upozornenie na otvorené dvere Zeleninu uvarte a vodu odfiltrujte pre predĺženie doby zmrazeného skladovania. Po filtrácii dajte (voliteľné) jedlo do vzduchotesných balení a umiestnite Ak dvere výrobku zostanú otvorené po dobu 1 ho v mrazničke.
  • Seite 190: Údržba A Čistenie

    All manuals and user guides at all-guides.com Údržba a čistenie Čistite produkt pravidelne, čím predĺžite jeho životnosť. 6.2. Ochrana plastových povrchov Olej vytečený na plastové povrchy môže poškodiť UPOZORNENIE: Pred čistením povrch a musí byť ihneď umytý teplou vodou. chladničku odpojte od napájania. • Nikdy nepoužívajte ostré...
  • Seite 191: Riešenie Problémov

    All manuals and user guides at all-guides.com Riešenie problémov Než sa obrátite na servis, pozrite si nasledujúci zoznam. Môže Vám to ušetriť čas aj peniaze. Tento zoznam obsahuje časté sťažnosti, ktoré nie sú spojené s chybným spracovaním alebo poškodením materiálu. Niektoré funkcie uvedené v tomto dokumente sa nemusia vzťahovať na váš produkt. Chladnička nefunguje.
  • Seite 192 All manuals and user guides at all-guides.com Riešenie problémov • Nový výrobok môže byť väčší ako ten predchádzajúci. Väčšia výrobky budú pracovať po dlhšiu dobu. • Teplota v miestnosti môže byť vysoká. >>> Výrobok bude v miestnosti s vyššou teplotou spustený po dlhšiu dobu.
  • Seite 193 All manuals and user guides at all-guides.com Riešenie problémov Výrobok vytvára hluk tečúcej, striekajúcej kvapaliny a pod. • Princíp fungovania tohto výrobku je založený na toku kvapalín a plynu. >>> To je normálne a nejedná sa o závadu. Z výrobku znie zvuk ako vanúci vietor. • Výrobok pre proces chladenia používa ventilátor.
  • Seite 194 All manuals and user guides at all-guides.com Beste klant, We willen optimale prestaties bereiken met onze producten die in moderne faciliteiten worden gefabriceerd met nauwgezette kwaliteitscontroles. Om die reden moet u de gebruikersgids volledig lezen voor u het product in gebruik neemt en bewaar de handleiding als referentiebron.
  • Seite 195 All manuals and user guides at all-guides.com Inhoud 1 Veiligheids- en omgevingsinstructies 3 4 Voorbereiding 1.1. Algemene veiligheid ....3 4.1. Wat u kunt doen om energie te besparen. . 13 1.1.1 HC-waarschuwing .
  • Seite 196: Veiligheids- En Omgevingsinstructies

    All manuals and user guides at all-guides.com Veiligheids- en omgevingsinstructies Deze sectie bevat de noodzakelijke • Als er een defect optreedt, mag u het product niet gebruiken want dit kan elektrische veiligheidsinstructies om risico op letsels schokken veroorzaken. Neem contact op met of materiële schade te vermijden.
  • Seite 197: Hc-Waarschuwing

    All manuals and user guides at all-guides.com Veiligheids- en omgevingsinstructies 1.1.1 HC-waarschuwing 1.3. Kinderveiligheid Als het product voorzien is van een koelsysteem • Houd de verpakking uit de buurt van kinderen. met R600 gas moet u er op letten het koelsysteem • Laat kinderen nooit spelen met het product.
  • Seite 198: Koelkast

    All manuals and user guides at all-guides.com Koelkast 1- Vriesvak 10- Nul-graden compartiment 2- Koelvak 11- Groentevakken 3- Ventilator 12- Instelbare voetjes 4- Boter-kaasvak 13- Compartimenten voor ingevroren etenswaren 5- Glazen platen 14- Diepvriezer deurvakken 6- Koelvak deurvakken 15- Icematics 7- Minibar accessoire 16- IJsvak 8- Waterreservoir...
  • Seite 199: Installatie

    All manuals and user guides at all-guides.com Installatie 3.1. Correcte plaats 3.2. De plastic spieën bevestigen voor de installatie Gebruik de plastic spieën die worden geleverd met het product om voldoende ruimte te laten voor de Neem contact op met de Geautoriseerde Dienst luchtcirculatie tussen het product en de muur.
  • Seite 200: De Voetjes Aanpassen

    All manuals and user guides at all-guides.com Installatie 3.3. De voetjes aanpassen 3.5. Wateraansluiting (Optioneel) Als het product niet in evenwicht staat, moet u de WAARSCHUWING: Verwijder de stekker voorste instelbare voetjes aanpassen door ze naar van het product en de waterpomp (indien rechts of links te draaien.
  • Seite 201: De Waterleiding Aansluiten Op Het Product

    All manuals and user guides at all-guides.com Installatie 3.6. De waterleiding 3.7. Aansluiting op het aansluiten op het product waternetwerk (Optioneel) Om het product te gebruiken door het aan te Om de waterslang aansluiten op het product sluiten op het koud waternetwerk moet een moet u de onderstaande instructies volgen.
  • Seite 202: Voor Producten Die Water Mandflessen Gebruiken (Optioneel)

    All manuals and user guides at all-guides.com Installatie 4. Bevestig de connector in de kraanadapter en 2. Sluit het andere uiteinde van de waterslang draai aan met de hand / een werktuig. aan op de waterpomp door de slang in de ingang van de pomp te duwen.
  • Seite 203: De Externe Filter Op De Wand Bevestigen (Optioneel)

    All manuals and user guides at all-guides.com Installatie 3.9.1.De externe filter op de 3. Bevestig de filter rechtop op de het wand bevestigen verbindingsstuk van de filter zoals aangeduid (Optioneel) op het label. (6) WAARSCHUWING: Bevestig de filter niet op het product. Controleer of de volgende onderdelen werden geleverd met het model van uw product: 4.
  • Seite 204: Interne Filter

    All manuals and user guides at all-guides.com Installatie 3.9.2.Interne filter 1. “Ice Off” (“IJs uit”) indicator moet actief zijn tijdens de installatie van de filter. Gebruik De interne filter die wordt geleverd met het product de ON-OFF (AAN-UIT) indicator met de “Ice” is niet geïnstalleerd op het moment van de levering;...
  • Seite 205 All manuals and user guides at all-guides.com Installatie 3. Trek aan het bypass deksel van de waterfilter om het te verwijderen. Er kunnen een aantal druppels uitstromen wanneer u het deksel verwijdert; dit is normaal. 4. Plaats het deksel van de waterfilter in het mechanisme en duw om het te vergrendelen.
  • Seite 206: Voorbereiding

    All manuals and user guides at all-guides.com Voorbereiding 4.1. Wat u kunt doen om 4.2. Eerste gebruik energie te besparen Voor u de koelkast in gebruik neemt, moet u ervoor mehmet zorgen dat u de nodige voorbereidingen treft in Het product verbinden met elektronische overeenstemming met de instructies vermeld energiebesparende systemen is schadelijk in de “Veiligheids- en omgevingsinstructies”...
  • Seite 207: Het Gebruik Van Het Product

    All manuals and user guides at all-guides.com Het gebruik van het product 5.1. Indicatorpaneel Indicatorpanelen kunnen variëren naargelang het model van uw product. De geluids- en visuele functies van het indicatorpaneel helpen bij het gebruik van de koelkast. 1. Koelvak indicator 2.
  • Seite 208 All manuals and user guides at all-guides.com Het gebruik van het product 1. Koelvak indicator Druk opnieuw op de Vakantieknop ( ) om deze Het licht in het koelvak schakelt in wanneer de functie te annuleren. temperatuur van het koelvak wordt aangepast. 5.
  • Seite 209 All manuals and user guides at all-guides.com Het gebruik van het product 1- Economisch gebruik 2- Hoge temperatuur / fout alarm 3- Snel koelen 4- Vakantiefunctie 5- Koelvak temperatuurinstelling 6- Energie besparen (scherm uit) 7- Toetsenbord vergrendeling 8- Eco-fuzzy 9- Diepvriezer temperatuurinstelling 10- Snel invriezen *Optioneel: De afbeeldingen in deze handleiding zijn bedoeld als schetsen en het is mogelijk dat...
  • Seite 210 All manuals and user guides at all-guides.com Het gebruik van het product 1. Economisch gebruik 6. Energie besparen (scherm uit) Dit symbool licht op wanneer het vriesvak ingesteld Als u op deze knop ( ) drukt, begint het is op -18°C, de meest energiebesparende energiebesparing symbool ( ) te branden en instelling.
  • Seite 211 All manuals and user guides at all-guides.com Het gebruik van het product 10. Snel invriezen Om snel in te vriezen, drukt u op knop nummer (10); hiermee schakelt de snel invriezen indicator ( ) in. Wanneer de snel invriezen functie ingeschakeld is, begint de snel invriezen indicator te branden en de temperatuurindicator van het vriesvak geeft de waarde -27 weer.
  • Seite 212 All manuals and user guides at all-guides.com Het gebruik van het product 1. Diepvriezer temperatuurinstellingen 2. Energiebesparende modus 3. Foutstatus 4. Koelvak temperatuurinstelling 5. Snel koelen 6. Vakantiefunctie 7. Toetsenbord vergrendeling / filter vervangen alarm annulering 8. Water, gemalen ijs, ijsblokjes selectie 9.
  • Seite 213 All manuals and user guides at all-guides.com Het gebruik van het product 6. Vakantiefunctie 1. Diepvriezer temperatuurinstellingen Als de Vakantiefunctie ( ) actief is, geeft de Als de knop ( ) nummer (1) wordt ingedrukt, kan temperatuurindicator van het koelvak "- -" weer de temperatuur in het vriesvak worden ingesteld en er is geen koelproces actief in het koelvak.
  • Seite 214: Het Waterfilter Vervangen Alarm Inschakelen

    All manuals and user guides at all-guides.com Het gebruik van het product 11. Autoeco 5.2. Het waterfilter vervangen Druk op de auto eco knop ( ), nummer (11) alarm inschakelen gedurende 3 seconden om deze functie in te (Voor producten aangesloten op het schakelen.
  • Seite 215: Het Gebruik Van De Drinkfontein (Voor Bepaalde Modellen)

    All manuals and user guides at all-guides.com Het gebruik van het product 5.4. Het reservoir van de 5.3. Het gebruik van de drinkfontein drinkfontein opvullen (voor bepaalde modellen) Open het deksel van het waterreservoir zoals aangetoond in de afbeelding. Vul het op met zuiver drinkwater.
  • Seite 216: Het Waterreservoir Schoonmaken

    All manuals and user guides at all-guides.com Het gebruik van het product 5.5. Het waterreservoir schoonmaken Verwijder het waterreservoir uit de deurplank. Verwijder het door beide zijden van de deurplank vast te nemen. Houd beide zijden van het waterreservoir en verwijder het in een hoek van 45°.
  • Seite 217: Bijs / Water Nemen (Optioneel)

    All manuals and user guides at all-guides.com Het gebruik van het product 5.6. BIJs / water nemen (Optioneel) Duw hiervoor op de schakelaar van de Om water ( ) / ijsblokje ( ) / gemalen ijs ( drinkfontein gedurende 1-2 minuten tot er ) te nemen, kunt u het scherm gebruiken om de water uit de fontein komt.
  • Seite 218: Nul-Graden Compartiment (Optioneel)

    All manuals and user guides at all-guides.com Het gebruik van het product 5.8. Nul-graden 5.11. Ionisator (Optioneel) compartiment Het ionisatorsysteem in het koelvak (Optioneel) ventilatiekanaal dient om de lucht te ioniseren. Gebruik dit compartiment om delicatessen te De negatieve ion-emissies verwijderen bacteriën bewaren bij lagere temperaturen of vleeswaren en andere moleculen die onaangename geurtjes voor onmiddellijk gebruik.
  • Seite 219: Icematic Ijs En Opslagvak

    All manuals and user guides at all-guides.com Het gebruik van het product 5.15. Ijsmaker 5.14. Icematic ijs en opslagvak (Optioneel) De ijsmaker bevindt zich in de bovenste sectie van (Optioneel) het vriesvak. Vul de icematic met water en breng hem aan. Houd de handvaten aan de zijkant van het Het ijs is klaar na ongeveer twee uur.
  • Seite 220: Verse Etenswaren Invriezen

    All manuals and user guides at all-guides.com Het gebruik van het product 5.16. Verse etenswaren invriezen 5.17. Aanbevelingen voor het opslaan van ingevroren etenswaren • Om de kwaliteit van de etenswaren te bewaren, moeten de etenswaren die in het Het compartiment moet op minimum -18°C vriesvak worden geplaatst zo snel mogelijk worden ingesteld.
  • Seite 221: De Etenswaren Plaatsen

    All manuals and user guides at all-guides.com Het gebruik van het product 5.20. Deur open alarm Kook de groenten en filter het water om de (Optioneel) ingevroren bewaartijd te verlengen. Plaats de Een hoorbaar alarm weerklinkt als de deur van etenswaren in luchtdichte verpakkingen na het het product langer dan 1 minuut open blijft.
  • Seite 222: Onderhoud En Reiniging

    All manuals and user guides at all-guides.com Onderhoud en reiniging • Bewaar de etenswaren in afgedekte Het product regelmatig reinigen zal de levensduur containers. Micro-organismen kunnen zich verlengen. verspreiden uit niet afgedekte etenswaren en onaangename geurtjes veroorzaken. WAARSCHUWING: Schakel de stroom • Bewaar geen verstreken en bedorven uit voor u de koelkast reinigt.
  • Seite 223: Probleemoplossing

    All manuals and user guides at all-guides.com Probleemoplossing Controleer deze lijst voor u contact opneemt met de dienst. Dit kan u tijd en geld besparen. Deze lijst omvat regelmatig voorkomende klachten die niet het resultaat zijn van gebrekkig vakmanschap of materiaal.
  • Seite 224 All manuals and user guides at all-guides.com Probleemoplossing • Het nieuwe product kan groter zijn dan het vorige. Grotere producten werken gedurende langere perioden. • De temperatuur in de ruimte kan hoog zijn. >>> Het product zal normaal werken gedurende lange perioden bij hogere kamertemperaturen.
  • Seite 225 All manuals and user guides at all-guides.com Probleemoplossing • De grond is niet horizontaal of duurzaam. >>> Als het product schudt wanneer het langzaam wordt verplaatst, moet u de voetjes instellen om het product in evenwicht te brengen. Zorg er ook voor dat de vloer voldoende duurzaam is om het product te kunnen dragen.
  • Seite 226 All manuals and user guides at all-guides.com Dragi kupce, Mi želimo da se postigne optimalna efikasnost od našeg proizvoda, koji je proizveden u modernim objektima s pedantnom kontrole kvalitete. Za tu svrhu, molimo vas da u potpunosti pročitate korisnički vodič prije korištenja proizvoda i zadržati ga kao izvor referenca.
  • Seite 227 All manuals and user guides at all-guides.com Pregled sadržaja 1 Uputstva o sigurnosti i okoliš 4 Priprema 1.1. Generalna sigurnost ....3 4.1. Što učiniti za uštedu energije ... 13 1.1.1 HC upozorenja.
  • Seite 228: Uputstva O Sigurnosti I Okoliš

    All manuals and user guides at all-guides.com Uputstva o sigurnosti i okoliš Ovo poglavlje sadrži sigurnosne upute potrebne • Postavite tečnosti u uspravnom položaju nakon što čvrsto zatvorite poklopac. da bi spriječili rizik od ozljede i materijalne štete. • Ne prskati zapaljive tvari blizu proizvoda, jer se Nepoštovanje ovih uputa će poništiti sve vrste mogu zapaliti ili eksplodirati.
  • Seite 229: Hc Upozorenja

    All manuals and user guides at all-guides.com Uputstva o sigurnosti i okoliš 1.1.1 HC upozorenja 1.3. Sigurnost djece Ako proizvod sadrži sistem za hlađenje koji • Držite ambalažu van dohvata djece. koristi R600a plina, voditi računa da se izbjegne • Nemojte dopustiti djeci da se igraju s oštećenje sistem za hlađenje i njegove cijevi dok proizvoda.
  • Seite 230: Frižider

    All manuals and user guides at all-guides.com Frižider 1- Zamrzivač 10- Odjeljak nultog stupanja 2- Odjeljak hladnjaka 11- Kutija za povrće 3- Ventilator 12- Podesiva postolja 4- Butter-sir odjeljak 13- Odjeljke za skladištenje zamrznule hrane 5- Staklene police 14- Police na vratima zamrzivača 6- Police na vratima odjeljka za hlađenje 15- Icematics 7- Minibar pribor...
  • Seite 231: Instalacija

    All manuals and user guides at all-guides.com Instalacija 3.1. Pravo mjesto za ugradnju 3.2. Postavljanje plastične klinove Koristite priložene plastične klinove uz ovaj Kontaktirajte Ovlašteni servis oko ugradnju proizvod da pružite dovoljno prostora za cirkulaciju proizvoda. Da biste spremili proizvod za instalaciju, zraka između uređaja i zida.
  • Seite 232: Podešavanje Postolja

    All manuals and user guides at all-guides.com Instalacija 3.3. Podešavanje postolja 3.5. Priključak za vodu Ako proizvod nije u uravnotežen položaj, podesite (Opcionalno) prednja podesiva postolja okretanjem na desno ili UPOZORENJE: Isključite proizvod i lijevo. pumpe za vodu (ako je dostupna) za vrijeme povjezivanja.
  • Seite 233: Povezivanje Crijevo Za Vodu Na Proizvod

    All manuals and user guides at all-guides.com Instalacija 3.6. Povezivanje crijevo 3.7. Povezivanje na vodovod za vodu na proizvod (Opcionalno) Da biste povjezali crijevo za vodu na Da biste koristili proizvod povezivanjem na mrežu proizvod, slijedite upute u nastavku. hladne vode, na vodovodnu mrežu hladne vode 1.
  • Seite 234: Za Proizvode Koje Imaju Flašu Za Vodu

    All manuals and user guides at all-guides.com Instalacija 4. Pričvrstite priključak na adapter slavine i 2. Spojite drugi kraj crijeva na pumpu za vodu zategnite rukom / alatom. guranjem crijeva u pumpin dovod za crijevo. 5. Da biste izbjegli oštećenja, prebacivanje ili 3.
  • Seite 235: Učvršćivanje Vanjskog Filtera Na Zidu (Opcionalno)

    All manuals and user guides at all-guides.com Instalacija 3.9.1.Učvršćivanje vanjskog 3. Postavite filter u upravnome položaju na filtera na zidu aparatu za povezivanje filtera, kao što je (opcionalno) navedeno na etiketi. (6) UPOZORENJE: Ne fiksirati filter na proizvodu. Provjerite da sljedeći dijelovi su bili dostavljeni uz vašeg proizvoda: 4.
  • Seite 236: Interni Filter

    All manuals and user guides at all-guides.com Instalacija 3.9.2.Interni filter 1. “Ice Off” pokazatelj mora biti aktivan dok instalirate filtera. Uključite indikator ON-OFF Unutrašnji filter dobili uz proizvod nije instaliran pomoću dugmeta “Ice” na ekranu. kodisporuke; molimo slijedite upute u nastavku za instalaciju filtera.
  • Seite 237 All manuals and user guides at all-guides.com Instalacija 3. Izvadite prolazni poklopac filtera za vodu povlačenjem. Nekoliko kapi vode može teći nakon skidanja poklopca, to je normalno. 4. Postavite poklopac filtera za vodu u mehanizam i gurnite da se zaključa u mjestu. 5.
  • Seite 238: Priprema

    All manuals and user guides at all-guides.com Priprema 4.1. Što učiniti za uštedu energije 4.2. Prvo korištenje mehmet Prije upotrebe hladnjaka, pobrinite se da su Povezivanje proizvoda na elektronske potrebne pripreme napravljene u skladu sa sisteme za uštedu energije je štetno, jer to uputstvima u sekcije “Uputstva o sigurnosti i može oštetiti proizvod.
  • Seite 239: Korištenje Proizvoda

    All manuals and user guides at all-guides.com Korištenje proizvoda 5.1. Panel indikatora Panel indikatora može se razlikovati ovisno o modelu vašeg proizvoda. Zvučne i vizualne funkcije panela indikatora će pomoći u korištenju frižideru. 1. Pokazatelj odjeljka hladnjaka 2. Indikator statusa greške 3.
  • Seite 240 All manuals and user guides at all-guides.com Korištenje proizvoda 1. Pokazatelj odjeljka hladnjaka Pritisnite tipku za odmor ( ) da biste otkazali Svjetlo hladnjaka će se uključiti pri podešavanju ovu funkciju. temperature hladnjaka. 5. Tipka za podešavanje temperature 2. Indikator statusa greške Temperature odgovarajućeg odjeljka varira u Ovaj senzor će se aktivirati ako se hladnjak ne -24°C.
  • Seite 241 All manuals and user guides at all-guides.com Korištenje proizvoda 1- Štedljivo korištenje 2- Visoka temperatura / upozorenja kvara 3- Brzo hlađenje 4- Funkcija Odmor 5- Podešavanje temperature hladnjaka 6- Ušteda energije (prikaz isključan) 7- Zaključavanje tastature 8- Eko-fuzzy 9- Podešavanje temperature hladnjaka 10- Brzo zamrzavanje *Opcionalno: Figure u ovom uputstvu su namijenjeni kao nacrte i mogu da ne odgovaraju savršeno...
  • Seite 242 All manuals and user guides at all-guides.com Korištenje proizvoda 1. Štedljivo korištenje 6. Ušteda energije (prikaz isključen) Ovaj znak će se upaliti kada temperatura Pritiskom na ovaj gumb ( ) će se upaliti znak za zamrzivača je postavljena na -18 ° C ', uštedu energije ( ) i funkciju uštede energije će najekonomične postavke.
  • Seite 243 All manuals and user guides at all-guides.com Korištenje proizvoda 10. Brzo zamrzavanje Za brzo zamrzavanje, pritisnite tipku broj (10), a to će aktivirati pokazatelj brzo zamrzavanje ( Kada je uključen funkcija brzo zamrzavanje, pokazatelj brzog zamrzavanja će se upaliti i indikator za zamrzavanje temperature će prikazati vrijednost -27.
  • Seite 244 All manuals and user guides at all-guides.com Korištenje proizvoda 1. Podešavanje temperature zamrzivača 2. Rezim uštede 3. Status Greška 4. Podešavanje temperature hladnjaka 5. Brzo hlađenje 6. Funkcija Odmor 7. Zaključavanje tastature / otkaz upozorenja Promjena filtera 8. Voda, polomljeni led, izbor kockice leda 9.
  • Seite 245 All manuals and user guides at all-guides.com Korištenje proizvoda 6. Funkcija Odmor 1. Podešavanje temperature zamrzivača Kada je aktivna funkcija odmor ( ), indikator Pritiskom na tipku ( ) broj (1) omogućit će da se temperature hladnjaka prikazuje natpis "- -" i u temperatura zamrzivača postavi na -18, -19, -20, prostoru za hlađenje neće biti procesa hlađenja .
  • Seite 246: Aktiviranje Upozorenja Zamjena Filtera Za Vodu

    All manuals and user guides at all-guides.com Korištenje proizvoda 11. Autoeco 5.2. Aktiviranje upozorenja Pritisnite auto eko tipku ( ) broj (11), za 3 Zamjena filtera za vodu sekunde da biste aktivirali ovu funkciju. Ako vrata (Za proizvode spojene na vodovod i koji ostaju zatvorena za dugo vreme kada je aktivirana imaju filter) ova funkcija, odjeljak hladnjaka će se prebaciti...
  • Seite 247: Koristeći Česmu

    All manuals and user guides at all-guides.com Korištenje proizvoda 5.4. Punjenje spremnika česme 5.3. Koristeći česmu Otvorite poklopac spremnika vode , kao što je (za određene modele) prikazano na slici. Napunite čiste vode za piće. Zatvorite poklopac. Prvih nekoliko čaša vode uzeti iz česme obično će biti tople.
  • Seite 248: Čišćenje Rezervoara Za Vodu

    All manuals and user guides at all-guides.com Korištenje proizvoda 5.5. Čišćenje rezervoara za vodu Uklonite rezervoar za punjenje vode unutar police vrata. Odvojite držeći obje strane police vrata. Držite obje strane spremnika za vodu i ukloniti ispod 45° kut . Izvadite i očistite poklopac rezervoara za vodu.
  • Seite 249: Uzimanje Leda / Vode

    All manuals and user guides at all-guides.com Korištenje proizvoda 5.6. Uzimanje leda / vode • Voda može biti zamućena tokom prve upotrebe filtera; ne konzumirati prve 10 čaše vode. (opcionalno) • Morate čekati oko 12 sati da bi dobili hladne Da bi uzeli vodu ( ) / kocke leda ( vode nakon prve instalacije.
  • Seite 250: Odjeljak Nultog Stupanja

    All manuals and user guides at all-guides.com Korištenje proizvoda 5.8. Odjeljak nultog stupanja 5.11. Jonizator (Opcionalno) (Opcionalno) Koristite ovaj odjeljak za držati delikatese na Sistem jonizatora u kanal za zrak hladnjaka služi nižim temperaturama ili mesnih proizvoda za za jonizaciju zraka. Emisija negativnih jona će neposrednu potrošnju.
  • Seite 251: Icematic I Kutija Za Skladištenje Leda

    All manuals and user guides at all-guides.com Korištenje proizvoda 5.15. Ledomat 5.14. Icematic i kutija za skladištenje leda (opcionalno) Ledomat se nalazi na gornjem dijelu poklopca (Opcionalno) zamrzivača. Napunite icematic vodom i stavi ga na mestu. Držite ručke na bočnim stranama rezervoara leda i Led će biti spreman nakon otprilike dva sata.
  • Seite 252: Zamrzavanje Svježe Hrane

    All manuals and user guides at all-guides.com Korištenje proizvoda 5.16. Zamrzavanje svježe hrane 5.17. Preporuke za skladištenje smrznute hrane • Za očuvanje kvalitete hrane, hrane postavljene u zamrzivaču moraju se zamrznuti što je Odjeljak mora biti postavljen na najmanje -18 ° C. brže moguće, za ovo možete koristiti brzi 1.
  • Seite 253: Stavljanje Hrane

    All manuals and user guides at all-guides.com Korištenje proizvoda 5.20. Upozorenje Otvorena vrata alert Skuhati povrće i filtrirati vodu da produžite vremena zamrznulog skladištenja. Stavite hranu (opcionalno) u hermetičke pakete nakon filtriranja i stavite u Ako vrata proizvoda ostaje otvorena za 1 minutu zamrzivač.
  • Seite 254: Održavanje I Čišćenje

    All manuals and user guides at all-guides.com Održavanje i čišćenje 6.2. Zaštita plastične površine Redovno čišćenje proizvoda će produžiti njegovi Ulje proliveno na plastične površine može oštetiti životni vijek. površinu i mora se odmah očistiti s toplom vodom. UPOZORENJE: Isključite napajanje pre čišćenja frižidera.
  • Seite 255: Rješavanje Problema

    All manuals and user guides at all-guides.com Rješavanje problema Provjerite ovu listu prije kontaktiranja servisa. Na taj način ćete uštedjeti vrijeme i novac. Ova lista uključuje česte pritužbe koje se ne odnose na neispravne izradu ili materijale. Određene navedene odlike mogu se ne odnositi na vaš...
  • Seite 256 All manuals and user guides at all-guides.com Rješavanje problema • Novi proizvod može biti veći od prethodnog. Veći proizvodi će duže raditi. • Sobna temperatura može biti visoka. >>> Proizvod će normalno raditi za duže periode kod višu temperaturu sobe. • Proizvod je možda nedavno uključen ili nove hrane su unutra.
  • Seite 257 All manuals and user guides at all-guides.com Rješavanje problema • Tlo nije ravno ili izdržljivo. >>> Ako se proizvod trese kada se polako pomiče, prilagoditi nogare za uravnoteženje proizvoda. Također pazite da je tlo dovoljno izdržljivo da nosi proizvoda. • Svi predmeti na proizvodu mogu izazvati buku. >>> Uklonite sve predmete koje se nalaze na proizvodu.
  • Seite 258 All manuals and user guides at all-guides.com Poštovani potrošaču, Mi želimo postići optimalnu efikasnost naših proizvoda, proizvodi koji su proizvedeni u modernim objektima s pedantnom kontrole kvaliteta. Za to, molimo vas da potpuno pročitate korisnička uputstva pre upotrebe proizvoda i zadržati ih kao izvor referenca.
  • Seite 259 All manuals and user guides at all-guides.com Sadržaj 1 Uputstva o sigurnosti i okoline 4 Priprema 1.1. Opšta sigurnost..... . 3 4.1.
  • Seite 260: Uputstva O Sigurnosti I Okoline

    All manuals and user guides at all-guides.com Uputstva o sigurnosti i okoline Ovo deo sadrži sigurnosne upute potrebne da • Postavite tečnosti u vertikalnom položaju nakon što snažno zatvorite poklopac. bi uklonili rizik od ozlede i materijalne štete. • Ne prskati zapaljive materije u blizini proizvoda, Nepoštovanje ovih uputa će poništiti sve vrste jer oni se mogu zapaliti ili eksplodirati.
  • Seite 261: Hc Upozorenja

    All manuals and user guides at all-guides.com Uputstva o sigurnosti i okoline 1.1.1 HC upozorenja 1.3. Sigurnost dece Ako proizvod ima sistem za hlađenje koji sadrži • Držite ambalažu van dohvata dece. gasa R600a, obratite pažnju da se izbegne • Nemojte dopustiti deci da se s proizvodom oštećenje sistema za hlađenje i njegove cevi dok igraju.
  • Seite 262: Frižider

    All manuals and user guides at all-guides.com Frižider 1- Zamrzivač 10- Odeljak nultog stupnja 2- Hladnjak 11- Kutija za povrće 3- Ventilator 12- Podesiva postolja 4- Odeljak za puter i sir 13- Odeljke za čuvanje zamrznule hrane 5- Staklene police 14- Police na vratima zamrzivača 6- Police na vratima odeljka za hlađenje 15- Icematics...
  • Seite 263: Instalacija

    All manuals and user guides at all-guides.com Instalacija 3.1. Pravo mesto za instalaciju 3.2. Postavljanje plastične klinove Koristite priložene plastične klinove uz ovaj Kontaktirajte Ovlašteni servis oko ugradnju proizvod da pružite dovoljno prostora za cirkulaciju proizvoda. Da biste spremili proizvod za instalaciju, zraka između uređaja i zida.
  • Seite 264: Podešavanje Stalaka

    All manuals and user guides at all-guides.com Instalacija 3.3. Podešavanje stalaka 3.5. Priključak za vodu Ako uređaj nije izbalansiran, postavite prednje (Opcionalno) podesive stope okretanjem u desno ili levo. UPOZORENJE: Isključite proizvod i vodnu pumpu (ako je dostupna) tokom uspostavljanja povezivanja. Povezivanje na vodovodnu mrežu proizvoda, povezivanje filtera i flašu za vode mora biti urađeno sa strane ovlašćenog servisera.
  • Seite 265: Povezivanje Creva Za Vodu Na Proizvod

    All manuals and user guides at all-guides.com Instalacija 3.6. Povezivanje creva 3.7. Povezivanje na vodovodnu mrežu za vodu na proizvod (Opcionalno) Da biste povezali crevo za vodu na proizvod, Da biste koristili proizvod povezivanjem na mrežu sledite upute u nastavku. hladne vode, na vodovodnu mrežu hladne vode 1.
  • Seite 266: Za Proizvode Koje Imaju Flašu Za Vodu

    All manuals and user guides at all-guides.com Instalacija 4. Pričvrstite priključak na adapter slavine i 2. Spojite drugi kraj creva na pumpu za vodu zategnite rukom / alatom. guranjem creva u pumpin dovod. 5. Da biste izbegli štete, prebacivanje ili slučajno 3.
  • Seite 267: Postavljanje Spoljašnog Filtera Na Zidu (Opcionalno)

    All manuals and user guides at all-guides.com Instalacija 3.9.1.Postavljanje spoljašnog 3. Postavite filter u uspravnome položaju na filtera na zidu aparatu za povezivanje filtera, kao što je (opcionalno) prikazano na etiketi. (6) UPOZORENJE: Nemojte pričvrstavati filter na proizvodu. Uveriti se da su sledeći delovi bili dostavljeni uz vaš proizvod: 4.
  • Seite 268: Unutrašnji Filter

    All manuals and user guides at all-guides.com Instalacija 3.9.2.Unutrašnji filter 1. “Ice Off” pokazatelj mora biti aktivan dok instalirate filtera. Uključite indikator ON-OFF Unutrašnji filter dobili uz proizvod nije instaliran kod pomoću dugmeta “Ice” na ekranu. isporuke; molimo sledite upute u nastavku da bi instalirali filter.
  • Seite 269 All manuals and user guides at all-guides.com Instalacija 3. Izvadite prolazni poklopac filtera za vodu povlačenjem na njega. Normalno je da nekoliko kapi vode poteče nakon skidanja poklopca. 4. Postavite poklopac filtera za vodu u mehanizam i gurnite da se zaključa u mjestu. 5.
  • Seite 270: Priprema

    All manuals and user guides at all-guides.com Priprema 4.1. Što raditi da bi uštedeli energije 4.2. Prvo upotreba mehmet Pre upotrebe frižidera, pobrinite se da su potrebne Povezivanje proizvoda na elektronske pripreme napravljene u skladu sa uputstvima sisteme za uštedu energije je štetno, jer to u sekcije “Uputstva o sigurnosti i okoliša”...
  • Seite 271: Upotreba Proizvoda

    All manuals and user guides at all-guides.com Upotreba proizvoda 5.1. Panel indikatora Panel indikatora može biti različan kod različitih modela vašeg proizvoda. Zvučne i vizualne funkcije panela indikatora će vam pomoći kod upotrebe frižidera. 1. Pokazatelj odeljka frižidera 2. Indikator statusa greške 3.
  • Seite 272 All manuals and user guides at all-guides.com Upotreba proizvoda 1. Pokazatelj odeljka frižidera Pritisnite dugme za odmor ( ) da biste otkazali Svetlo frižidera će se uključiti pri podešavanju ovu funkciju. temperature frižidera. 5. Dugme za prilagođavanje temperature 2. Indikator statusa greške Temperature odgovarajućeg odeljka varira u Ako se frižider ne hladi ispravno ili u slučaju kvara -24°C.
  • Seite 273 All manuals and user guides at all-guides.com Upotreba proizvoda 1- Štedljivo korišćenje 2- Visoka temperatura / upozorenja kvara 3- Brzo hlađenje 4- Funkcija Odmor 5- Podešavanje temperature frižidera 6- Ušteda energije (prikaz isključen) 7- Zaključavanje tastature 8- Eko-fuzzy 9- Podešavanje temperature frižidera 10- Brzo zamrzavanje *Opcionalno: Figure u ovom uputstvu su namijenjeni kao nacrte i mogu da ne odgovaraju savršeno...
  • Seite 274 All manuals and user guides at all-guides.com Upotreba proizvoda 1. Štedljivo korišćenje 6. Ušteda energije (prikaz isključen) Ovaj znak će se upaliti kada temperatura Pritiskom na ovaj gumb ( ) će se upaliti znak za zamrzivača je postavljena na -18 ° C ', uštedu energije ( ) i funkciju uštede energije će najekonomične postavke.
  • Seite 275 All manuals and user guides at all-guides.com Upotreba proizvoda 10. Brzo zamrzavanje Za brzo zamrzavanje, pritisnite dugme broj (10), a to će aktivirati pokazatelj brzo zamrzavanje ( Kada je uključen funkcija brzo zamrzavanje, pokazatelj brzog zamrzavanja će se upaliti i indikator za zamrzavanje temperature će prikazati vrijednost -27.
  • Seite 276 All manuals and user guides at all-guides.com Upotreba proizvoda 1. Podešavanje temperature zamrzivača 2. Rezim uštede 3. Status Greška 4. Podešavanje temperature frižidera 5. Brzo hlađenje 6. Funkcija Odmor 7. Zaključavanje tastature / otkaz upozorenja Promjena filtera 8. Voda, polomljeni led, izbor kockice leda 9.
  • Seite 277 All manuals and user guides at all-guides.com Upotreba proizvoda 6.Funkcija Odmor 1. Podešavanje temperature zamrzivača Kada je aktivna funkcija odmor ( ), indikator Pritiskom na dugme ( ) broj (1) omogućit će da temperature frižidera prikazuje natpis "- -" i u se temperatura zamrzivača postavi na -18, -19, prostoru za hlađenje neće biti procesa hlađenja -20, -21, -22, -23, -24, -18 ...
  • Seite 278: Aktiviranje Upozorenja Zamjena Filtera Za Vodu

    All manuals and user guides at all-guides.com Upotreba proizvoda 11. Autoeco 5.2. Aktiviranje upozorenja Pritisnite auto eko dugme ( ) broj (11), za 3 Zamjena filtera za vodu sekunde da biste aktivirali ovu funkciju. Ako vrata (Za proizvode spojene na vodovod i koji ostaju zatvorena za dugo vreme kada je aktivirana imaju filter) ova funkcija, odjeljak hladnjaka će se prebaciti...
  • Seite 279: Koristeći Česmu

    All manuals and user guides at all-guides.com Upotreba proizvoda 5.4. Punjenje spremnika česme 5.3. Koristeći česmu Otvorite poklopac spremnika vode , kao što je (za određene modele) prikazano na slici. Napunite čiste vode za piće. Zatvorite poklopac. Prvih nekoliko čaša vode uzeti iz česme obično će biti tople.
  • Seite 280: Čišćenje Rezervoara Za Vodu

    All manuals and user guides at all-guides.com Upotreba proizvoda 5.5. Čišćenje rezervoara za vodu Uklonite rezervoar za punjenje vode unutar police vrata. Detach by holding both sides of the door shelf. Držite obje strane spremnika za vodu i ukloniti ispod 45° kut . Izvadite i očistite poklopac rezervoara za vodu.
  • Seite 281: Uzimanje Leda / Vode

    All manuals and user guides at all-guides.com Upotreba proizvoda 5.6. Uzimanje leda / vode • Voda može biti zamućena tokom prve upotrebe filtera; ne konzumirati prve 10 čaše vode. (opcionalno) • Morate čekati oko 12 sati da bi dobili hladne Da bi uzeli vodu ( ) / kocke leda ( vode nakon prve instalacije.
  • Seite 282: Odjeljak Nultog Stupanja

    All manuals and user guides at all-guides.com Upotreba proizvoda 5.8. Odjeljak nultog stupanja 5.11. Jonizator (Opcionalno) (Opcionalno) Koristite ovaj odjeljak za držati delikatese na Sistem jonizatora u kanal za zrak hladnjaka služi nižim temperaturama ili mesnih proizvoda za za jonizaciju zraka. Emisija negativnih jona će neposrednu potrošnju.
  • Seite 283: Icematic I Korpa Za Čuvanje Leda

    All manuals and user guides at all-guides.com Upotreba proizvoda 5.15. Ledomat 5.14. Icematic i korpa za čuvanje leda (opcionalno) Ledomat se nalazi na gornjem delu poklopca (Opcionalno) zamrzivača. Napunite icematic vodom i stavi ga na mestu. Držite ručke na bočnim stranama rezervoara leda i Led će biti spreman nakon otprilike dva sata.
  • Seite 284: Zamrzavanje Svježe Hrane

    All manuals and user guides at all-guides.com Upotreba proizvoda 5.16. Zamrzavanje svježe hrane 5.17. Preporuke za čuvanje smrznute hrane • Za očuvanje kvalitete hrane, hrane postavljene u zamrzivaču moraju se zamrznuti što je Odjeljak mora biti postavljen na najmanje -18 ° C. brže moguće, za ovo možete koristiti brzi 1.
  • Seite 285: Stavljanje Hrane

    All manuals and user guides at all-guides.com Upotreba proizvoda 5.20. Upozorenje Otvorena vrata Skuhati povrće i filtrirati vodu da produžite vremena zamrznulog skladištenja. Stavite hranu (opcionalno) u hermetičke pakete nakon filtriranja i stavite u Ako vrata proizvoda ostaje otvorena za 1 minutu zamrzivač.
  • Seite 286: Održavanje I Čišćenje

    All manuals and user guides at all-guides.com Održavanje i čišćenje 6.2. Zaštita plastične površine Redovno čišćenje proizvoda će produžiti njegovi životni vijek. Ulje proliveno na plastične površine može oštetiti površinu i mora se odmah očistiti s toplom vodom. UPOZORENJE: Isključite napajanje pre čišćenja frižidera.
  • Seite 287: Rješavanje Problema

    All manuals and user guides at all-guides.com Rješavanje problema Provjerite ovu listu prije kontaktiranja servisa. Na taj način ćete uštedjeti vreme i novac. Ova lista uključuje česte pritužbe koje se ne odnose na neispravne izradu ili materijale. Određene navedene odlike mogu se ne odnositi na vaš...
  • Seite 288 All manuals and user guides at all-guides.com Rješavanje problema • Novi proizvod može biti veći od prethodnog. Veći proizvodi će duže raditi. • Sobna temperatura može biti visoka. >>> Proizvod će normalno raditi za duže periode kod višu temperaturu sobe. • Proizvod je možda nedavno uključen ili nove hrane su unutra.
  • Seite 289 All manuals and user guides at all-guides.com Rješavanje problema • Tlo nije ravno ili izdržljivo. >>> Ako se proizvod trese kada se polako pomiče, prilagoditi nogare za uravnoteženje proizvoda. Također pazite da je tlo dovoljno izdržljivo da nosi proizvoda. • Svi predmeti na proizvodu mogu izazvati buku. >>> Uklonite sve predmete koje se nalaze na proizvodu.
  • Seite 290 All manuals and user guides at all-guides.com Уважаемый покупатель, Мы хотим, чтобы Вы извлекли максимальную пользу из нашей продукции, изготовленной с помощью современного оборудования в условиях тщательного контроля качества. Для этого перед использованием полностью прочитайте руководство по эксплуатации устройства и сохраните руководство в качестве источника для справок. Если вы передадите устройство...
  • Seite 291 All manuals and user guides at all-guides.com Содержание 1 Указания по безопасности и охране 5.3. И спользование водного окружающей среды фонтана 5.4. Н аполнение резервуара водного 1.1. О бщая безопасность фонтана 1 1 1 Предупреждение НС....4 5.5. О...
  • Seite 292: Указания По Безопасности И Охране Окружающей Среды

    All manuals and user guides at all-guides.com Указания по безопасности и охране окружающей среды В данном разделе содержатся указания действий обратитесь в авторизованную сервисную службу. по безопасности, необходимые для • Продукт разрешается подключать только к предупреждения травматизма и заземленному гнезду. Заземление должен материального...
  • Seite 293: Для Моделей С Водным Фонтаном

    All manuals and user guides at all-guides.com Указания по безопасности и охране окружающей среды 1.1.1 Предупреждение НС 1.3. Безопасность детей Если система охлаждения вашего устройства • Храните упаковочные материалы вне содержит газ R600a, постарайтесь не доступа детей. повредить систему охлаждения и ее трубку • Не...
  • Seite 294: Холодильник

    All manuals and user guides at all-guides.com Холодильник 1- Морозильное отделение 10- Отсек с нулевой температурой 2- Холодильное отделение 11- Емкости для овощей 3- Вентилятор 12- Регулируемые стойки 4- Отсек для масла и сыра 13- Отсеки для хранения замороженных 5- Стеклянные полки продуктов...
  • Seite 295: Установка

    All manuals and user guides at all-guides.com Установка 3.1. Выбор правильного 3.2. Установка места для установки пластиковых клиньев Чтобы обеспечить достаточно пространства Для установки устройства обратитесь для циркуляции воздуха между устройством в авторизованную сервисную службу. и стеной, следует использовать пластиковые Для...
  • Seite 296: Подключение К Электросети

    All manuals and user guides at all-guides.com Установка 3.5. Подключение воды (в зависимости от модели) ПРЕДУПРЕЖДЕНИЕ: Во время подключения отсоедините изделие и водяной насос (если он имеется). Работы с водопроводом, фильтрами и гибкими соединениями изделия должны выполнять авторизованные специалисты. В зависимости от модели, изделие может подключаться...
  • Seite 297: П Одсоединение Водного Шланга К Изделию

    All manuals and user guides at all-guides.com Установка 3.6. Подсоединение водного 3.7. Подключение к водопроводу шланга к изделию (в зависимости от модели) Чтобы подсоединить водный шланг к Чтобы изделие можно было подключить к изделию, следуйте инструкциям ниже. водопроводу холодной воды, в вашем доме 1.
  • Seite 298: Для Изделий, В Которых Применяются Резервуары

    All manuals and user guides at all-guides.com Установка 4. Посоедините соединитель к переходнику 2. Подсоедините другой конец водного для крана и затяните вручную или при шланга к водному насосу, вставив шланг помощи инструмента. во входное отверстие насоса.. 5. Во избежание поломки, сдвига или случайного...
  • Seite 299: Крепление Внешнего Фильтра На Стене (В Зависимости От Модели)

    All manuals and user guides at all-guides.com Установка 3.9.1.Крепление внешнего фильтра 3. Установите фильтр вертикально на на стене соединительное устройство - как показано (в зависимости от модели) на рисунке. (6) ПРЕДУПРЕЖДЕНИЕ: Не крепите фильтр на устройстве. Проверьте, входят ли в комплектацию вашей модели...
  • Seite 300: Внутренний Фильтр

    All manuals and user guides at all-guides.com Установка 3.9.2.Внутренний фильтр 1. «Ice Off» (Лед выкл) должен светиться при установке фильтра. Включите индикатор Внутренний фильтр, входящий в комплектацию ON-OFF (Вкл/выкл) при помощи кнопки изделия, при доставке не устанавливается. «Ice» (Лед) на экране. Чтобы...
  • Seite 301 All manuals and user guides at all-guides.com Установка 3. Потяните на себя и снимите крышку фильтра для воды. После снятия крышки может вытечь несколько капель воды - это нормально. 4. Поместите крышку фильтра для воды в механизм и прижмите, чтобы установить ее...
  • Seite 302: Подготовка

    All manuals and user guides at all-guides.com Подготовка 4.2. Первое включение 4.1. Как экономить электроэнергию Перед тем, как использовать холодильник, mehmet Не рекомендуется подключать убедитесь, что все подготовительные работы устройство к энергосберегающим выполнены в соответствии с рекомендациями системам, поскольку это может в...
  • Seite 303: Эксплуатация Устройства

    All manuals and user guides at all-guides.com Эксплуатация устройства 5.1. Индикаторная панель Индикаторные панели могут быть разными - это зависит от модели устройства. При эксплуатации холодильника помогут звуковые и визуальные функции. 1. Индикатор холодильной камеры 2. Индикатор ошибки 3. Индикатор температуры 4.
  • Seite 304 All manuals and user guides at all-guides.com Эксплуатация устройства 1. Индикатор холодильной камеры Снова нажмите кнопку Vacation (Отпуск), После того, как будет установлена чтобы выключить этот ( ) режим. температура в холодильной камере, загорится 5. Кнопка настройки температуры соответствующая лампочка. Уровень...
  • Seite 305 All manuals and user guides at all-guides.com Эксплуатация устройства 1- Экономное использование 2- Сообщение о перегреве/поломке. 3- Быстрое охлаждение 4- Функция «Отпуск» 5- Установка температуры холодильной камеры 6- Экономия энергии (дисплей выключен) 7- Блокировка клавиатуры 8- Функция «Eco-fuzzy» (автоматический перевод холодильника...
  • Seite 306 All manuals and user guides at all-guides.com Эксплуатация устройства 1. Экономное использование температурой, заданной для каждого отсека. Этот индикатор загорается, если температура Чтобы выключить эту функцию, снова в морозильной камере установлена на -18°C, нажмите кнопку «Отпуск». самый экономный режим. ( ) Индикатор...
  • Seite 307 All manuals and user guides at all-guides.com Эксплуатация устройства переключить морозильную камеру в энергосберегающий режим через как минимум 6 часов; загорится индикатор экономии энергии. Чтобы выключить функцию «Eco- fuzzy» ( ), нажмите и удерживайте кнопку «Eco-fuzzy» в течение 3 сек. В...
  • Seite 308 All manuals and user guides at all-guides.com Эксплуатация устройства 1. Установка температуры морозильной камеры 2. Экономичный режим 3. Состояние ошибки 4. Установка температуры холодильной камеры 5. Быстрое охлаждение 6. Функция «Отпуск» 7. Блокировка клавиатуры / отключение сигнала о необходимости замены фильтра 8.
  • Seite 309: Экономичный Режим

    All manuals and user guides at all-guides.com Эксплуатация устройства 6. Функция «Отпуск» 1. Установка температуры морозильной камеры При активации функции «Отпуск» ( Нажимайте на кнопку ( ) номер (1), чтобы ), индикатор температуры холодильной установить температуру морозильной камеры камеры отображает надпись «- -», а на...
  • Seite 310: Активация Сигнала О

    All manuals and user guides at all-guides.com Эксплуатация устройства 10. Дисплей вкл/выкл 2. Затем в указанном порядке нажмите Нажмите кнопку номер (10), чтобы отменить ( следующие кнопки ) или активировать ( включение/выключение дисплея. 11. Функция «Auto eco» Чтобы активировать эту функцию, удерживайте...
  • Seite 311: И Спользование Водного Фонтана

    All manuals and user guides at all-guides.com Эксплуатация устройства 5.4. Наполнение резервуара 5.3. Использование водного фонтана водного фонтана Откройте крышку емкости для воды, как (в зависимости от модели) показано на рисунке. Заполните чистой питьевой водой. Закройте крышку. Первые несколько стаканов воды, взятой...
  • Seite 312: Фонтана

    All manuals and user guides at all-guides.com Эксплуатация устройства 5.5. Очистка емкости для воды Снимите водный резервуар с дверной полки. Извлеките, удерживая обе стороны дверной полки. Возьмите емкость с водой за обе стороны и снимите под углом 45 °. Снимите и почистите крышку емкости для воды.
  • Seite 313: Получение Льда/Воды

    All manuals and user guides at all-guides.com Эксплуатация устройства 5.6. Получение льда/воды • При начале эксплуатации устройство (в зависимости от модели) может не выдавать воду. Это вызвано наличием воздуха в системе. Этот воздух Чтобы получить воду ( ) / кубики льда ( необходимо...
  • Seite 314: Отсек С Нулевой Температурой

    All manuals and user guides at all-guides.com Эксплуатация устройства 5.8. Отсек с нулевой температурой 5.11. Ионизатор (в зависимости от модели) (в зависимости от модели) Используйте данный отсек, чтобы хранить Система ионизации в воздуховоде холодные закуски при более низких холодильной камеры служит для ионизации температурах...
  • Seite 315: Льдогенератор Icematic И Ящик Для Хранения Льда

    All manuals and user guides at all-guides.com Эксплуатация устройства 5.15. Ледогенератор с дозатором 5.14. Льдогенератор Icematic и ящик для хранения льда (в зависимости от модели) Ледогенератор с дозатором расположен на (в зависимости от модели) верхней части крышки морозильной камеры. Наполните льдогенератор Icematic водой Возьмитесь...
  • Seite 316: Замораживание Свежих Продуктов

    All manuals and user guides at all-guides.com Эксплуатация устройства 5.16. Замораживание 5.17. Рекомендации для хранения свежих продуктов замороженных продуктов • Для сохранения качества продуктов Температура отсека должна быть установлена питания, размещенных в морозильной как минимум на -18°С. камере, их необходимо замораживать как 1.
  • Seite 317: Размещение Продуктов

    All manuals and user guides at all-guides.com Эксплуатация устройства Установка Установка температуры температуры Описания морозильной холодильной камеры камеры -18°C 4°C Это рекомендуемые настройки, установленные по умолчанию. -20, -22 или Эти настройки рекомендуются при температуре окружающей 4°C -24°C среды выше 30°C. Используйте...
  • Seite 318: Обслуживание И Очистка

    All manuals and user guides at all-guides.com Обслуживание и очистка Периодическая очистка устройства • Храните пищу в закрытых упаковках. Из незакрытых пищевых продуктов могут продлевает срок его службы. выделяться микроорганизмы, вызывающие ПРЕДУПРЕЖДЕНИЕ: Перед началом неприятные запахи. очистки отключите холодильник от • Не...
  • Seite 319: Поиск И Устранение Неисправностей

    All manuals and user guides at all-guides.com Поиск и устранение неисправностей Прежде чем обращаться в сервисный центр, ознакомьтесь с данным разделом. Это поможет вам сэкономить ваше время и деньги. В этом списке описаны наиболее частые жалобы, не относящиеся к браку производства или материалов. Некоторые упомянутые ниже функции могут...
  • Seite 320 All manuals and user guides at all-guides.com Поиск и устранение неисправностей • Новый холодильник может быть больше предыдущего. Большие холодильники текут дольше. • Комнатная температура может быть высокой. >>> При боле высокой температуре холодильник обычно течет более длительные периоды времени. • Холодильник...
  • Seite 321 All manuals and user guides at all-guides.com Поиск и устранение неисправностей • Поверхность пола неровная или неустойчивая. >>> Если устройство трясется при медленном перемещении, отрегулируйте стойки для выравнивания устройства. Также проверьте, достаточно ли устойчива поверхность для размещения на ней устройства. • Размещение...
  • Seite 322 All manuals and user guides at all-guides.com Caro Cliente, Gostaríamos que aproveitasse a óptima eficiência do nosso produto, fabricado em modernas instalações segundo controlos de qualidade meticulosos. Para este propósito, ler integralmente o guia do utilizador antes de utilizar o produto e manter o guia como fonte de referência.
  • Seite 323 All manuals and user guides at all-guides.com Conteúdo 1 Instruções de segurança e 5 Utilizar o produto ambientais 5.1. Painel indicador ....14 1.1.
  • Seite 324: Instruções De Segurança E Ambientais

    All manuals and user guides at all-guides.com Instruções de segurança e ambientais Esta secção fornece as instruções de segurança • Não tocar em alimentos congelados com as mãos molhadas! Podem aderir às suas mãos! necessárias para prevenir risco de lesões e danos • Não colocar líquidos em garrafas e latas materiais.
  • Seite 325: Advertência Hc

    All manuals and user guides at all-guides.com Instruções de segurança e ambientais 1.1.1 Advertência HC • O tempo de vida do produto é de 10 anos. Se o produto inclui um sistema de refrigeração As peças sobresselentes necessárias ao com gás R600a, ter cuidado para não danificar funcionamento do produto estarão disponíveis o sistema de arrefecimento e a sua tubagem durante o referido período de tempo.
  • Seite 326: Frigorífico

    All manuals and user guides at all-guides.com Frigorífico 1- Compartimento congelador 10- Compartimento zero graus 2- Compartimento refrigerador 11- Gaveta para vegetais 3- Ventilador 12- Pés ajustáveis 4- Compartimento de manteiga-queijo 13- Compartimento de armazenagem de alimentos 5- Prateleiras de vidro congelados 6- Prateleiras da porta do compartimento 14- Prateleiras da porta do compartimento...
  • Seite 327: Instalação

    All manuals and user guides at all-guides.com Instalação 3.1. Lugar correcto para a instalação 3.2. Fixar os calços de plástico Usar os calços de plástico fornecidos com o Contactar a Assistência Autorizada para a produto para permitir espaço suficiente para a instalação do produto.
  • Seite 328: Ajustar Os Pés

    All manuals and user guides at all-guides.com Instalação 3.3. Ajustar os pés 3.5. Ligação à água (Opcional) Se o produto não estiver em posição equilibrada, RECOMENDAÇÕES: Desligar o produto ajustar os pés ajustáveis da frente rodando-os e a bomba de água (se disponível) durante para a direita ou esquerda.
  • Seite 329: Ligar A Mangueira De Água Ao Produto

    All manuals and user guides at all-guides.com Instalação 3.6. Ligar a mangueira 3.7. Ligar à canalização de água ao produto de água (Opcional) Para usar o produto com ligação à canalização Para ligar a mangueira de água ao produto, de água fria, deve instalar uma ligação de válvula seguir as instruções abaixo.
  • Seite 330: Para Produtos Que Usam Bocal De Água (Opcional)

    All manuals and user guides at all-guides.com Instalação 4. Fixar o conector ao adaptador da torneira e 2. Ligar a outra extremidade da mangueira apertar manualmente / ou com ferramenta. de água à bomba de água empurrando a mangueira na entrada de mangueira da bomba.
  • Seite 331: Fixar Filtro Externo Na Parede (Opcional)

    All manuals and user guides at all-guides.com Instalação 3.9.1.Fixar filtro externo 3. Fixar o filtro na posição vertical no aparelho de na parede ligação do filtro, como indicado na etiqueta. (Opcional) RECOMENDAÇÕES: Não fixar o filtro no produto. Verificar se as seguintes peças são fornecidas com o modelo do seu produto: 4.
  • Seite 332: Filtro Interno

    All manuals and user guides at all-guides.com Instalação 3.9.2.Filtro interno 1. O indicador “Gelo Desligado” deve estar activo enquanto instalar o filtro. Mudar o indicador O filtro interno fornecido com o produto não está LIGAR-DESLIGAR usando o botão “Gelo” no instalado no acto de entrega;...
  • Seite 333 All manuals and user guides at all-guides.com Instalação 3. Retirar a tampa de derivação do filtro de água puxando. Podem escorrer algumas gotas de água depois de retirar a tampa, isto é normal. 4. Colocar a tampa do filtro de água no mecanismo e empurrar para fixar no local.
  • Seite 334: Preparação

    All manuals and user guides at all-guides.com Preparação 4.1. O que fazer para poupar energia 4.2. Primeira utilização mehmet Antes de utilizar o seu frigorífico, assegurar Ligar o produto a sistemas electrónicos de que os preparativos necessários são feitos em poupança de energia é...
  • Seite 335: Utilizar O Produto

    All manuals and user guides at all-guides.com Utilizar o produto 5.1. Painel indicador Os painéis indicadores podem diferir dependendo do modelo do seu produto. As funções áudio e vídeo do painel indicador irão ajudar na utilização do frigorífico. 1. Indicador do compartimento refrigerador 2.
  • Seite 336 All manuals and user guides at all-guides.com Utilizar o produto 1. Indicador do compartimento refrigerador Empurrar de novo o botão Férias ( ) para A luz do compartimento refrigerador acenderá cancelar esta função. quando ajustar a temperatura do compartimento 5. Botão de ajuste de temperatura refrigerador.
  • Seite 337 All manuals and user guides at all-guides.com Utilizar o produto 1- Utilização económica 2- Temperatura elevada / alerta de avaria 3- Refrigeração rápida 4- Função férias 5- Definição de temperatura do compartimento de refrigeração 6- Poupança de energia (exibe desligado) 7- Bloqueio do teclado 8- Eco-fuzzy 9- Definição de temperatura do compartimento de...
  • Seite 338 All manuals and user guides at all-guides.com Utilizar o produto 1. Utilização económica pode ser definida para 8,7,6,5,4,3,2 e 1 Este sinal acende quando o compartimento de respectivamente.( congelação está definido para -18ºC. a definição 6. Poupança de energia (exibe desligado) mais económica.
  • Seite 339 All manuals and user guides at all-guides.com Utilizar o produto 10. Congelação rápida Para congelação rápida, premir o botão número (10): isto activará o indicador ( ) de congelação rápida. Quando a função de congelação rápida está ligada, o indicador de congelação rápida acende e o indicador de temperatura do compartimento de refrigeração exibirá...
  • Seite 340 All manuals and user guides at all-guides.com Utilizar o produto 1. Definição de temperatura do compartimento de congelação 2. Modo económico 3. Estado do erro 4. Definição de temperatura do compartimento de refrigeração 5. Refrigeração rápida 6. Função férias 7. Cancelamento de bloqueio do teclado / alerta de substituição do filtro 8.
  • Seite 341 All manuals and user guides at all-guides.com Utilizar o produto 6. Função férias 1. Definição de temperatura do compartimento de congelação Quando a função ( ) Férias estiver activa, o Premindo o botão ( ) número (1) permitirá definir indicador de temperatura do compartimento de a temperatura do compartimento de congelação refrigeração exibe a inscrição "- -"...
  • Seite 342: Activar O Alerta De Substituição Do Filtro De Água

    All manuals and user guides at all-guides.com Utilizar o produto 11. Económico automático 5.2. Activar o alerta de Premir o botão económico automático ( substituição do filtro de água número (11), durante 3 segundos para activar (Para produtos ligados à canalização de água esta função.
  • Seite 343: Utilizar O Dispensador De Água (Para Alguns Modelos)

    All manuals and user guides at all-guides.com Utilizar o produto 5.4. Encher o reservatório 5.3. Utilizar o dispensador de de água do dispensador água (para alguns modelos) Abrir a tampa do reservatório de água, como mostrado na figura. Encher com água potável e limpa.
  • Seite 344: Limpar O Reservatório De Água

    All manuals and user guides at all-guides.com Utilizar o produto 5.5. Limpar o reservatório de água Retirar o reservatório de enchimento de água no interior da prateleira da porta. Soltar mantendo ambos os lados da prateleira da porta. Manter ambos os lados do reservatório de água e retirar num ângulo de 45º.
  • Seite 345: Tirar Gelo / Água (Opcional)

    All manuals and user guides at all-guides.com Utilizar o produto 5.6. Tirar gelo / água (Opcional) do dispensador de água durante 1-2 minutos Para tirar água ( ) /cubos de gelo ( ) / gelo até que o dispensador comece a deitar água. O partido ( , usar o visor para seleccionar a fluxo inicial de água deve ser irregular.
  • Seite 346: Compartimento Zero Graus

    All manuals and user guides at all-guides.com Utilizar o produto 5.8. Compartimento zero graus 5.11. Ionizador (Opcional) (Opcional) Usar este compartimento para manter charcutaria O sistema ionizador na conduta de ar do a temperaturas mais baixas ou produtos à base de compartimento de refrigeração serve para ionizar carne para consumo imediato.
  • Seite 347: Icematic E Caixa De Armazenamento De Gelo (Opcional)

    All manuals and user guides at all-guides.com Utilizar o produto 5.15. Dispensador de gelo 5.14. Icematic e caixa de (Opcional) armazenamento de gelo O dispensador de gelo está localizado na parte (Opcional) superior da tampa do congelador. Encher o icematic com água e colocar no lu- gar.
  • Seite 348: Congelar Alimentos Frescos

    All manuals and user guides at all-guides.com Utilizar o produto 5.16. Congelar alimentos frescos 5.17. Recomendações para armazenar alimentos congelados • Para preservar a qualidade dos alimentos, os alimentos colocados no compartimento de O compartimento deve ser definido pelo menos a congelação devem ser congelados tão rápido -18ºC.
  • Seite 349: Colocar Alimentos

    All manuals and user guides at all-guides.com Utilizar o produto 5.20. Alerta de porta aberta Ferver os vegetais e escorrer a água para (Opcional) prolongar o tempo de armazenagem congelados. Será ouvido um alerta sonoro se a porta do Colocar os alimentos em embalagens herméticas produto permanecer aberta durante 1 minuto.
  • Seite 350: Manutenção E Limpeza

    All manuals and user guides at all-guides.com Manutenção e limpeza 6.2. Proteger superfícies de plástico Limpar o produto regularmente prolongará a sua vida útil. Óleo derramado em superfícies de plástico pode danificar a superfície e deve ser limpo RECOMENDAÇÕES: Desligar a imediatamente com água morna.
  • Seite 351: Resolução De Problemas

    All manuals and user guides at all-guides.com Resolução de problemas Verificar a lista antes de contactar a assistência. Fazer isto poupa-lhe tempo e dinheiro. Esta lista inclui queixas frequentes que não estão relacionadas com o fabrico ou materiais defeituosos. Certas características mencionadas neste documento podem não ser aplicáveis ao seu produto.
  • Seite 352 All manuals and user guides at all-guides.com Resolução de problemas • O novo produto pode ser maior do que o anterior. Produtos maiores funcionam por períodos mais longos. • A temperatura da sala pode ser elevada. >>> O produto funcionará normalmente por períodos mais longos com temperaturas de sala mais elevadas.
  • Seite 353 All manuals and user guides at all-guides.com Resolução de problemas Vibração ou ruído. • O chão não está nivelado ou não é resistente. >>> Se o produto vibra quando movido lentamente, ajustar os pés para equilibrar o produto. Assegurar também que o chão é suficientemente resistente para suportar o produto.
  • Seite 354 All manuals and user guides at all-guides.com Gentile cliente, ci piacerebbe che lei potesse raggiungere un livello di efficacia ottimale dal nostro prodotto, che è stato realizzato in una struttura moderna, adottando controlli meticolosi a livello qualitativo. A tal fine la invitiamo a leggere con attenzione il manuale dell'utente prima di iniziare a servirsi del dispositivo.
  • Seite 355 All manuals and user guides at all-guides.com Indice 1 Istruzioni relativamente a sicurezza e 4 Procedimento ambiente 4.1. Cosa fare per risparmiare energia ..13 1.1. Norme di sicurezza generali... . . 3 4.2.
  • Seite 356: Istruzioni Relativamente A Sicurezza E Ambiente

    All manuals and user guides at all-guides.com Istruzioni relativamente a sicurezza e ambiente Questa sezione fornisce le istruzioni di sicurezza • Collegare il prodotto ha una presa che disponga di messa a terra. L’operazione di necessarie per evitare il rischio di lesioni e danni messa a terra deve essere eseguita da un materiali.
  • Seite 357: Impiego Conforme Allo Scopo Previsto

    All manuals and user guides at all-guides.com Istruzioni relativamente a sicurezza e ambiente 1.1.1 Avvertenza HC 1.3. Sicurezza bambini Qualora il prodotto sia dotato di sistema di • Tenere gli imballaggi fuori dalla portata dei raffreddamento che utilizza il gas R600a, fare bambini.
  • Seite 358 All manuals and user guides at all-guides.com Frigorifero 1- Scomparto congelatore 10- Scomparto zero gradi 2- Scomparto frigorifero 11- Cassetti per verdura 3- Ventola 12- Supporti regolabili 4- Scomparto burro-formaggio 13- Scomparti per la conservazione di alimenti 5- Ripiani in vetro congelati 6- Ripiani della porta dello scomparto frigorifero 14- Ripiani della porta dello scomparto congelatore...
  • Seite 359: Luogo Idoneo Per L'installazione

    All manuals and user guides at all-guides.com Installazione 3.1. Luogo idoneo per l'installazione 3.2. Fissaggio dei cunei in plastica Servirsi dei cunei in plastica forniti in dotazione Rivolgersi al Servizio Autorizzato per l'installazione con il prodotto per garantire una circolazione d’aria del prodotto.
  • Seite 360: Regolazione Dei Supporti

    All manuals and user guides at all-guides.com Installazione 3.3. Regolazione dei supporti 3.5. Collegamento acqua (Opzionale) Qualora il prodotto non sia in equilibrio, regolare AVVERTENZA: Scollegare il prodotto e la i supporti anteriori regolabili, ruotandosi verso pompa d’acqua, ove disponibile, in fase di destra o verso sinistra.
  • Seite 361: Collegamento Del Tubo Dell'acqua Al Prodotto

    All manuals and user guides at all-guides.com Installazione 3.6. Collegamento del tubo 3.7. Collegamento alla dell'acqua al prodotto rete idrica (Opzionale) Per usare il prodotto collegandolo alla presa Per collegare il tubo dell’acqua al prodotto, dell’acqua fredda, sarà necessario installare un attenersi alle seguenti istruzioni.
  • Seite 362: Per I Prodotti Che Si Servono Di Un Serbatoio D'acqua (Opzionale)

    All manuals and user guides at all-guides.com Installazione 4. Fissare il connettore all’adattatore del 2. Collegare l’altra estremità del tubo della qua rubinetto, e serrare a mano o servendosi di un alla pompa della qua premendo il tubo nella attrezzo. presa di ingresso della pompa.
  • Seite 363 All manuals and user guides at all-guides.com Installazione 3.9.1.Fissaggio del filtro 3. Fissare il filtro in posizione verticale sulla esterno a parete dispositivo di collegamento del filtro, come (opzionale) indicato sull’etichetta. (6) AVVERTENZA: Non fissare il filtro sul prodotto. Verificare qui se le seguenti componenti vengono fornite in dotazione con il modello di prodotto selezionato: 4.
  • Seite 364: Collegamento Idrico

    All manuals and user guides at all-guides.com Installazione 3.9.2.Filtro interno 1. L’indicatore “Ice Off” deve essere attivo in Il filtro interno fornito in dotazione con il prodotto fase di installazione del filtro. ACCENDERE- SPEGNERE l’indicatore servendosi del non viene installato al momento della consegna; pulsante “Ice”...
  • Seite 365 All manuals and user guides at all-guides.com Installazione 3. Rimuovere il coperchio by-pass filtro tirando. Alcune gocce di acqua potrebbero fuoriuscire dopo aver tolto il coperchio, non si tratta di un’anomalia di funzionamento. 4. Posizionare il coperchio del filtro dell’acqua all’interno del meccanismo e premere per fissare in posizione.
  • Seite 366: Cosa Fare Per Risparmiare Energia

    All manuals and user guides at all-guides.com Procedimento 4.1. Cosa fare per 4.2. Primo utilizzo risparmiare energia Prima di iniziare a usare il frigorifero, accertarsi mehmet che tutti i preparativi necessari vengano eseguiti in Collegare il prodotto a sistemi di risparmio conformità...
  • Seite 367: Using The Product

    All manuals and user guides at all-guides.com Using the product 5.1. Indicator panel Indicator panels may vary depending on the model of your product. Audial and visual functions of the indicator panel will assist in using the refrigerator. 1. Cooler compartment indicator 2.
  • Seite 368 All manuals and user guides at all-guides.com Using the product 1. Indicatore dello scomparto frigorifero Premere nuovamente il pulsante Vacation ( La spia dello scomparto frigorifero si accende in per annullare questa funzione. una fase di regolazione della temperatura dello 5.
  • Seite 369 All manuals and user guides at all-guides.com Using the product 1- Uso economico 2- Temperatura elevata / allarme guasto 3- Raffreddamento rapido 4- Funzione vacanza 5- Impostazione di temperatura scomparto frigorifero 6- Risparmio energetico (display off) 7- Blocco tastiera 8- Eco-fuzzy 9- Impostazione di temperatura scomparto frigorifero 10- Congelamento rapido *Opzionale: I dati in questo manuale devono essere intesi come bozze, e potrebbero non...
  • Seite 370: Raffreddamento Rapido

    All manuals and user guides at all-guides.com Using the product 1. Uso economico 5. Impostazione di temperatura scomparto frigorifero Questo simbolo si illumina lo scomparto Dopo aver premuto il tasto (5), la temperatura congelatore si imposta su -18°C', l'impostazione dello scomparto frigorifero potrà essere impostata più...
  • Seite 371 All manuals and user guides at all-guides.com Using the product 9. Impostazione di temperatura scomparto frigorifero La temperatura nel vano congelatore è regolabile. Premendo il pulsante numerico (9) sarà possibile impostare la temperatura dello scomparto congelatore a -18,-19, -20, -21, -22, -23 e -24. 10.
  • Seite 372 All manuals and user guides at all-guides.com Using the product 1. Impostazioni di temperatura del congelatore 2. Modalità economy 3. Stato errore 4. Impostazione di temperatura scomparto frigorifero 5. Raffreddamento rapido 6. Funzione vacanza 7. Blocco tastiera / Annullamento allarme sostituzione filtro 8.
  • Seite 373 All manuals and user guides at all-guides.com Using the product Premere nuovamente questo pulsante per 1. Impostazioni di temperatura del disattivare questa funzione. congelatore Servirsi di questa funzione quando vengono Premendo il pulsante numerico ( ) (1) sarà posizionati alimenti freschi all'interno dello possibile impostare la temperatura dello scomparto scomparto frigorifero oppure per raffreddare congelatore a -18,-19,-20,-21 ,-22,-23,-24,-18...
  • Seite 374 All manuals and user guides at all-guides.com Using the product 9. Attivazione / disattivazione produzione 5.2. Attivazione dell'allarme cubetti di ghiaccio sostituzione filtro dell'acqua Premere il pulsante numerico ( ) (9) per (Per i prodotti collegati alla presa idrica e annullare ( ) o attivare ( ) la...
  • Seite 375 All manuals and user guides at all-guides.com Using the product 5.4. Riempimento del serbatoio 5.3. Uso della fontana della fontana dell'acqua d'acqua (per alcuni modelli) Aprire il coperchio del serbatoio dell’acqua, come indicato nella figura. Riempire con acqua potabile pura e limpida. Chiudere il coperchio. I primi bicchieri di acqua presi dalla fontana saranno di norma tiepidi.
  • Seite 376: Pulizia Del Serbatoio Dell'acqua

    All manuals and user guides at all-guides.com Using the product 5.5. Pulizia del serbatoio dell'acqua Scegliere il serbatoio di riempimento dell'acqua all'interno del ripiano della porta. Staccare tenendo entrambi i lati del ripiano della porta. Tenere entrambi i lati del serbatoio dell'acqua e rimuovere a un angolo di 45°.
  • Seite 377: Prelevamento Di Ghiaccio / Acqua

    All manuals and user guides at all-guides.com Using the product 5.6. Prelevamento di • Il prodotto potrebbe non scaricare acqua ghiaccio / acqua durante la prima messa in funzione. Ciò avviene a causa dell’aria contenuta nel (Opzionale) sistema. Sarà necessario scaricare l’aria Per prendere acqua ( ) / cubetti di ghiaccio ( contenuta nel sistema.
  • Seite 378: Scomparto Zero Gradi (Opzionale)

    All manuals and user guides at all-guides.com Using the product 5.8. Scomparto zero gradi 5.11. Ionizzatore (Opzionale) (Opzionale) Usare questo scomparto per conservare cibi Il sistema ionizzatore all'interno del tubo dell'aria a temperature inferiori, oppure le carni da dello scomparto del frigorifero serve per ionizzare consumare immediatamente.
  • Seite 379 All manuals and user guides at all-guides.com Using the product 5.15. Dispositivo per la produzione 5.14. Icematic e scatola di di ghiaccio stoccaggio del ghiaccio (opzionale) (Opzionale) Il dispositivo per la produzione di ghiaccio si Riempire l’icematic con acqua, e posizionare. trova sulla sezione superiore della copertura del Il ghiaccio sarà...
  • Seite 380: Congelazione Dei Cibi Freschi

    All manuals and user guides at all-guides.com Using the product 5.16. Congelazione dei cibi freschi 5.17. Consigli per conservare alimenti surgelati • Per conservare la qualità degli alimenti, i cibi posizionati nello scomparto congelatore devono Lo scomparto deve essere impostato a una essere congelati quanto più...
  • Seite 381: Posizionamento Degli Alimenti

    All manuals and user guides at all-guides.com Using the product 5.20. Allarme porta aperta Bollire le verdure filtrare l'acqua per estendere il (opzionale) tempo di conservazione congelato. Collocare gli Se la porta del dispositivo rimane aperta per un alimenti in sacchetti ermetici, dopo aver eseguito minuto verrà...
  • Seite 382: Pulizia E Manutenzione

    All manuals and user guides at all-guides.com Pulizia e manutenzione • Tenere gli alimenti in contenitori sigillati. I microrganismi potrebbero fuoriuscire dagli Pulendo il prodotto a intervalli regolari sarà alimenti non sigillati causando così cattivi possibile prolungare la durata di vita. odori.
  • Seite 383: Risoluzione Dei Problemi

    All manuals and user guides at all-guides.com Risoluzione dei problemi Controllare questo elenco prima di contattare l'assistenza clienti. Questa operazione vi consentirà di risparmiare soldi. Questo elenco contiene le lamentele più frequenti che non riguardano problemi a livello di manodopera o materiali. Alcune funzioni qui indicate potrebbero non essere valide per il vostro prodotto.
  • Seite 384 All manuals and user guides at all-guides.com Risoluzione dei problemi • Il nuovo prodotto potrebbe essere più grande di quello precedente. I prodotti più grandi funzioneranno più a lungo. • La temperatura ambiente potrebbe essere alta. >>> Il prodotto funzionerà normalmente per lunghi periodi di tempo con temperature superiori.
  • Seite 385 All manuals and user guides at all-guides.com Risoluzione dei problemi • Il pavimento non è in piano o resistente. >>> Se il prodotto vibra, quando viene spostato lentamente, regolare i supporti per equilibrare il prodotto. Verificare inoltre che la superficie di appoggio sia sufficientemente resistente per supportarne il peso.
  • Seite 386 All manuals and user guides at all-guides.com Tisztelt vásárlónk! Bízunk benne, hogy termékünk, mely egy modern gyárban készült, és a legaprólékosabb minőségirányítási eljárások alapján lett tesztelve, hatékony szolgáltatást fog biztosítani az Ön számára. Ehhez azt javasoljuk, hogy használat előtt alaposan olvassa el a teljes használati útmutatót, és azt ne dobja ki, mert a jövőben még szüksége lehet rá..
  • Seite 387 All manuals and user guides at all-guides.com Tartalomjegyzék 1 Biztonsági és környezetvédelmi 4 Előkészítés figyelmeztetések 4.1. Teendők az energiatakarékosság érdekében 13 1.1. Általános biztonság ....3 4.2.
  • Seite 388: Biztonsági És Környezetvédelmi Figyelmeztetések

    All manuals and user guides at all-guides.com Biztonsági és környezetvédelmi figyelmeztetések Ez a rész a sérülések vagy anyagi károk • A hűtőszekrényt egy olyan földelt aljzathoz csatlakoztassa. A földelést szakképzett elkerüléséhez szükséges biztonsági utasításokat villanyszerelő végezze el. tartalmazza. A következő információk figyelmen • Ha a termék LED típusú...
  • Seite 389: Hc Figyelmeztetés

    All manuals and user guides at all-guides.com Biztonsági és környezetvédelmi figyelmeztetések 1.1.1 HC figyelmeztetés • A gyártó nem vállal felelősséget a rendellenes Ha terméke rendelkezik olyan hűtőrendszerrel, használatból származó károkért. mely R600a gázt tartalmaz, figyeljen oda, hogy • A készülék élettartama 10 év. Ennyi ideig szállítás és használat közben ne tegyen kárt a biztosítunk pótalkatrészeket a készülékhez.
  • Seite 390: Hűtőszekrény

    All manuals and user guides at all-guides.com Hűtőszekrény 1- Fagyasztórekesz 10- Nullfokos tárolórekesz 2- Hűtőrekesz 11- Zöldségtartók 3- Ventilátor 12- Állítható lábak 4- Vaj- és sajttároló polc 13- Fagyasztott-étel tároló rekeszek 5- Üvegpolcok 14- Fagyasztórekesz ajtópolcai 6- Hűtőrekesz ajtópolcai 15- Icematic 7- Minibár 16- Jégkocka-tartó...
  • Seite 391: Üzembe Helyezés

    All manuals and user guides at all-guides.com Üzembe helyezés 3.1. A megfelelő elhelyezés 3.2. A műanyag ékek rögzítése A mellékelt műanyag ékek segítenek megtartani a A termék üzembe helyezéséhez lépjen szükséges távolságot a hűtő és a fal között, és így kapcsolatba a hivatalos szervizzel.
  • Seite 392: A Lábak Beállítása

    All manuals and user guides at all-guides.com Üzembe helyezés 3.3. A lábak beállítása 3.5. A vízvezeték csatlakoztatása Ha a hűtőszekrény nincs egy kiegyensúlyozott (Opcionális) helyzetben, állítsa be az elülső állítható lábakat VIGYÁZAT: A bekötés során húzza ki a jobbra vagy balra forgatva. hűtőszekrényt és a vízszivattyút (ha van) is a fali konnektorból.
  • Seite 393: A Vízvezeték Csatlakoztatása A Termékhez

    All manuals and user guides at all-guides.com Üzembe helyezés 3.6. A vízvezeték 3.7. Csatlakoztatás a csatlakoztatása a termékhez vezetékes vízhez Vízcsatlakozás a hűtőhöz. Kérjük, járjon el az (Opcionális) alábbi utasítások szerint. Ha a hűtőt a vezetékes vízzel szeretné használni, 1. Távolítsa el a csatlakozót a hűtőszekrény akkor fel kell helyezni egy standard 1/2”-os csapot hátulján lévő...
  • Seite 394: Víztartályt Használó Termékekhez

    All manuals and user guides at all-guides.com Üzembe helyezés 4. Helyezze fel a csőcsatlakozót a csap adapterre 2. Csatlakoztassa a vízvezeték másik végét és húzza meg kézzel / szerszámmal. a vízszivattyúhoz. Ehhez tolja a vízvezeték szivattyú csőbemenetébe. 5. A sérülések, kicsúszások vagy a cső véletlen 3.
  • Seite 395: A Külső Szűrő Rögzítése A Falra (Opcionális)

    All manuals and user guides at all-guides.com Üzembe helyezés 3.9.1. A külső szűrő rögzítése 3. A vízszűrőt felfelé kell tartani a szűrőt rögzítő a falra alkatrészeken a címkén látható módon. (6) (opcionális) VIGYÁZAT: Ne rögzítse a szűrőt a termékhez. Ellenőrizze, hogy az alábbi alkatrészek, melyeket a berendezéshez mellékelünk, megvannak-e.
  • Seite 396: Belső Szűrő

    All manuals and user guides at all-guides.com Üzembe helyezés 3.9.2.Belső szűrő 1. A szűrő beszerelése előtt győződjön meg róla, hogy a “Jég leállítva” kijelző be legyen A hűtőszekrényhez tartozó belső szűrő nincs kapcsolva. A kijelzőn lévő “Jég” gomb beszerelve, ezért a szűrő beszereléséhez kövesse az használatával állítsa be az ON-OFF kijelzőt.
  • Seite 397 All manuals and user guides at all-guides.com Üzembe helyezés 3. Távolítsa el a vízszűrő megkerülő fedelét. A fedél eltávolítása után néhány csepp víz kicsöpöghet, ez azonban normális jelenség. 4. Helyezze be a vízszűrő fedelét a szerkezetbe és nyomja le, amíg az a helyére nem kattan. 5.
  • Seite 398: Előkészítés

    All manuals and user guides at all-guides.com Előkészítés 4.1. Teendők az 4.2. Az első használat energiatakarékosság érdekében A hűtőszekrény használata előtt győződjön mehmet meg róla, hogy elvégezte a “Biztonsági és A termék csatlakoztatása elektromos környezetvédelmi utasítások” és az “Üzembe energiatakarékos rendszerekhez káros és helyezés”...
  • Seite 399: Termék Használata

    All manuals and user guides at all-guides.com A termék használata 5.1. Kijelző panel A termék modelljétől függően a kijelző panelek változhatnak. A kijelző panel hangjelzései és vizuális funkciói segítik Önt a hűtőszekrény használatában. 1. Hűtőrekesz jelző 2. Hibaállapot jelző 3. Hőmérséklet jelző 4.
  • Seite 400 All manuals and user guides at all-guides.com A termék használata 1. Hűtőrekesz jelző 5. Hőmérsékletbeállító gomb A hűtőrekesz hőmérsékletének a beállításakor A gomb megnyomásával a következő fagyasztó- kigyullad a hűtőrekesz világítása. hőmérsékletfokozatok között válthat: -24°C..-18°C és 8°C...1°C. 2. Hibaállapot jelző 6. Rekesz kiválasztó gomb Ha a hűtő...
  • Seite 401 All manuals and user guides at all-guides.com A termék használata 1- Gazdaságos üzemmód 2- Magas hőmérséklet / hiba jelzés 3- Gyorshűtés 4- Nyaralás funkció 5- Hűtőrekesz hőmérsékletbeállítása 6- Energiatakarékos üzemmód (kijelző kikapcsolva) 7- Billentyűzár 8- Eco-fuzzy 9- Fagyasztórekesz hőmérsékletbeállítása 10- Gyorsfagyasztás *Opcionális: A használati útmutatóban található...
  • Seite 402 All manuals and user guides at all-guides.com A termék használata 1. Gazdaságos üzemmód 6. Energiatakarékos üzemmód (kijelző ki- kapcsolva) Ez a jelző akkor látható, ha a fagyasztórekesz A gomb ( ) megnyomására kigyullad -18 fokra van állítva, mely a leggazdaságosabb az energiatakarékos jelzés ( ) és az beállításnak felel meg.
  • Seite 403 All manuals and user guides at all-guides.com A termék használata 10. Gyorsfagyasztás A gyorsfagyasztás funkció aktiválásához nyomja meg a (10) számú gombot. Ez aktiválja a Gyorsfagyasztás jelzőt ( Amikor a Gyorsfagyasztás funkció be van kapcsolva, a Gyorsfagyasztás jelzés kigyullad és a fagyasztórekesz hőmérsékletjelzője a -27-es értéket jeleníti meg.
  • Seite 404 All manuals and user guides at all-guides.com A termék használata 1. Fagyasztórekesz hőmérsékletbeállítása 2. Gazdaságos üzemmód 3. Hibaállapot 4. Hűtőrekesz hőmérsékletbeállítása 5. Gyorshűtés 6. Nyaralás funkció 7. Billentyűzár / Szűrőcsere figyelmeztető jelző 8. Víz, darabolt jég, jégkockák kiválasztás 9. Jégkészítés be/ki 10.
  • Seite 405 All manuals and user guides at all-guides.com A termék használata 6. Nyaralás funkció 1. Fagyasztórekesz hőmérsékletbeállítása Ha a Nyaralás funkció ( ) aktív, akkor "- -" jelzés Az (1) számú gomb ( ) megnyomásával a jelenik meg a hűtőrekesz jelzőjén, és a hűtő nem következő...
  • Seite 406: A Vízszűrő Cseréjére Figyelmeztető Jelzés Aktiválása

    All manuals and user guides at all-guides.com A termék használata 11. Autoeco 5.2. A vízszűrő cseréjére A funkció aktiválásához nyomja meg 3 figyelmeztető jelzés aktiválása másodpercig a (11) számú auto eco ( ) gombot. (A vezetékes vízhez csatlakoztatott, vízszűrőt Ha az ajtó hosszú ideig zárva marad, amikor ez tartalmazó...
  • Seite 407: A Vízcsap Használata

    All manuals and user guides at all-guides.com A termék használata 5.4. A víztartály feltöltése 5.3. A vízcsap használata Nyissa ki a víztartály fedelét az ábrán látható (bizonyos modellek esetén) módon. Töltse fel tiszta ivóvízzel. Zárja vissza a fedelet. Előfordulhat, hogy a vízcsap által adott első pár pohár víz meleg lesz.
  • Seite 408: A Víztartály Tisztítása

    All manuals and user guides at all-guides.com A termék használata 5.5. A víztartály tisztítása Vegye ki a víztartályt az ajtópolcból. Eközben tartsa meg az ajtópolc mindkét oldalát. Fogja meg a víztartály mindkét oldalát és vegye ki 45°-os szögben. Vegye ki és tisztítsa meg a víztartály fedelét. Ne töltse meg a víztartályt gyümölcslével, üdítővel vagy szeszes itallal vagy egyéb nem kompatibilis folyadékkal.
  • Seite 409: Víz / Jég Választó

    All manuals and user guides at all-guides.com A termék használata 5.6. Víz / jég választó a víz kifolyása rendszertelen lehet. A levegő eltávozása után a víz folymatosan áramlik. (opcionális) • A szűrő csatlakoztatása után a víz zavaros A kijelző segítségével választhat a víz ( lehet, ezért az első...
  • Seite 410: Nullfokos Tárolórekesz

    All manuals and user guides at all-guides.com A termék használata 5.8. Nullfokos tárolórekesz 5.11. Ionizáló (Opcionális) (Opcionális) Használja ezt a rekeszt az élelmiszerek vagy Az ionizáló rendszer segít tisztán tartani a húsok alacsony hőmérsékleten való tárolására, hűtőszekrény levegőjét. A negatív ionok melyek azonnali fogyasztásra kerülnek.
  • Seite 411: Icematic És Jégdoboz

    All manuals and user guides at all-guides.com A termék használata 5.15. Jégkészítés 5.14. Icematic és jégdoboz (opcionális) (Opcionális) A Jégkészítő a fagyasztórekesz felső részében Töltse fel az Icematic-ot vízzel és tegye a található. helyére. A jég kb. 2 óra múlva lesz kész. A jég Az eltávolításához fogja meg a jégdoboz oldalain kivételéhez ne távolítsa el az Icematic-ot.
  • Seite 412: Friss Étel Lefagyasztása

    All manuals and user guides at all-guides.com A termék használata 5.16. Friss étel lefagyasztása 5.17. Tippek a fagyasztott ételek tárolásához • A élelmiszert a lehető leggyorsabban kell lefagyasztani miután a hűtőbe helyezte, hogy A rekeszt legalább -18°C-ra kell állítani. megtartsa jó minőségét. Ezért használja a 1.
  • Seite 413: Az Élelmiszer Elhelyezése

    All manuals and user guides at all-guides.com A termék használata 5.20. Nyitott ajtó riasztás A zöldségeket forralja fel és szűrje le a vizet a fagyasztási idő meghosszabbítása érdekében. (opcionális) Az élelmiszert a szűrés után légmentesen záró Ha a hűtőszekrény ajtaja legalább 1 percig csomagolásba kell helyezni és a fagyasztóba tenni.
  • Seite 414: Tisztítás És Karbantartás

    All manuals and user guides at all-guides.com Tisztítás és karbantartás A termék rendszeres tisztítása növeli az • Az ételeket jól lezárt edényekben tárolja. A nem jól lezárt ételekből származó élettartamát. mikroorganizmusok kellemetlen szagokat VIGYÁZAT: okozhatnak. Tisztítás előtt húzza ki a • A hűtőszekrényben ne tároljon lejárt vagy hűtőszekrényt.
  • Seite 415: Problémák Javasolt Megoldása

    All manuals and user guides at all-guides.com A problémák javasolt megoldása Kérjük, mielőtt kihívná a szervizt, oldassa át a következő listát. Ezzel időt és pénzt takaríthat meg. Ez a lista azon gyakran előforduló panaszokat tartalmazza, melyek nem a hibás gyártásból vagy anyagokból erednek.
  • Seite 416 All manuals and user guides at all-guides.com A problémák javasolt megoldása • Az új hűtőszekrénye lehet, hogy nagyobb, mint az előző. A nagyobb hűtőszekrények hosszabb ideig működnek. • Lehet, hogy túl magas a szobahőmérséklet. >>> Magasabb szobahőmérséklet esetén a hűtőszekrény tovább működik. • Előfordulhat, hogy a hűtőszekrény nem régen lett bedugva, vagy tele lett pakolva élelmiszerrel.
  • Seite 417 All manuals and user guides at all-guides.com A problémák javasolt megoldása • A padló nem egyenes vagy gyenge. >>> A hűtő a lassú mozgás miatt ad ki hangot. Győződjön meg róla, hogy a padló egyenes-e, illetve elég erős-e ahhoz, hogy elbírja a hűtőszekrényt. • A zajt a hűtőszekrény tetejére helyezett tárgyak is okozhatják.
  • Seite 418 All manuals and user guides at all-guides.com 57 3778 0000/AN en-fr-de-pl-cz-sk-nl- www.beko.com bo-sb-ru-pt-it-hu...

Inhaltsverzeichnis