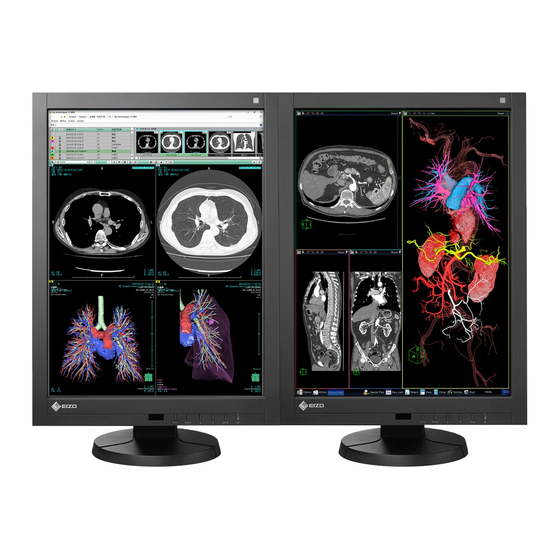
Herunterladen Inhalt Inhalt Diese Seite drucken

Werbung

Verfügbare Sprachen

Verfügbare Sprachen

Instructions for Use: ■Setup Manual
Important:
Please read PRECAUTIONS, this Setup Manual and the User's Manual
(on the CD-ROM) carefully to familiarize yourself with safe and effective
usage. Please retain this manual for future reference.
Gebrauchsanweisung: ■Installationshandbuch
Wichtig:
Lesen Sie die VORSICHTSMASSNAHMEN, dieses Handbuch zur
Einrichtung und das Benutzerhandbuch (auf der CD-ROM) aufmerksam
durch, um sich mit der sicheren und effizienten Bedienung vertraut zu
machen. Bewahren Sie dieses Handbuch zum späteren Nachschlagen auf.
Notice d'instruction: ■Manuel d'installation
Important :
Veuillez lire attentivement les PRECAUTIONS, ce Manuel d'installation
ainsi que le Manuel d'utilisation (inclus sur le CD-ROM) afin de vous
familiariser avec ce produit et de l'utiliser efficacement et en toute sécurité.
Veuillez conserver ce manuel pour référence ultérieure.
使用说明书:•■设定手册
重要事项:•
请仔细阅读预防措施、本设定手册和用户手册(储存在光盘上),以便掌握
如何安全、有效地使用本产品。请保留本手册,以备日后参考。
• El Manual de instalación en español se puede descargar del sitio: http://www.eizo.com
• Il Manuale di installazione in Italiano è disponibile per il download nel sito Web all'indirizzo:
http://www.eizo.com
• Installationshandboken på svenska går att ladda ned från vår webbplats: http://www.eizo.com
• Μπορείτε να κάνετε λήψη του Εγχειριδίου εγκατάστασης στα Ελληνικά από τον ιστότοπό μας:
http://www.eizo.com
• Руководство по установке на русском языке доступно для загрузки с нашего сайта по адресу:
http://www.eizo.com
• • 中文的設定操作手冊可以從我們的網站下載:http://www.eizo.com
• Instalační příručka v češtině je dostupná ke stažení z našich stránek: http://www.eizo.com
• En installationsvejledning på dansk kan hentes fra vores websted: http://www.eizo.com
• Asennusopas suomeksi on ladattavissa osoitteesta: http://www.eizo.com
• 한국어로 된 설치 설명서를 당사 웹 사이트에서 다운로드할 수 있습니다: http://www.eizo.com
• De installatiehandleiding in het Nederlands kan worden gedownload van onze site:
http://www.eizo.com
• Installasjonsveiledning på norsk kan lastes ned fra vårt område: http://www.eizo.com
• Podręcznik instalacji w języku polskim można pobrać z naszej witryny internetowej:
http://www.eizo.com
• O Manual de instalação (em português) está disponível para download no nosso website:
http://www.eizo.com
• Türkçe Kurulum Kılavuzu sitemizden indirilebilir: http://www.eizo.com
• http://www.eizo.com:

Werbung

Inhaltsverzeichnis
loading

Inhaltszusammenfassung für Radiforce RX240

  • Seite 1 Instructions for Use: ■Setup Manual Important: Please read PRECAUTIONS, this Setup Manual and the User’s Manual (on the CD-ROM) carefully to familiarize yourself with safe and effective usage. Please retain this manual for future reference. Gebrauchsanweisung: ■Installationshandbuch Wichtig: Lesen Sie die VORSICHTSMASSNAHMEN, dieses Handbuch zur Einrichtung und das Benutzerhandbuch (auf der CD-ROM) aufmerksam durch, um sich mit der sicheren und effizienten Bedienung vertraut zu machen. Bewahren Sie dieses Handbuch zum späteren Nachschlagen auf. Notice d’instruction: ■Manuel d’installation Important : Veuillez lire attentivement les PRECAUTIONS, ce Manuel d’installation ainsi que le Manuel d’utilisation (inclus sur le CD-ROM) afin de vous familiariser avec ce produit et de l’utiliser efficacement et en toute sécurité. Veuillez conserver ce manuel pour référence ultérieure. 使用说明书:•■设定手册 重要事项:• 请仔细阅读预防措施、本设定手册和用户手册(储存在光盘上),以便掌握 如何安全、有效地使用本产品。请保留本手册,以备日后参考。 • El Manual de instalación en español se puede descargar del sitio: http://www.eizo.com • Il Manuale di installazione in Italiano è disponibile per il download nel sito Web all’indirizzo: http://www.eizo.com • Installationshandboken på svenska går att ladda ned från vår webbplats: http://www.eizo.com • Μπορείτε να κάνετε λήψη του Εγχειριδίου εγκατάστασης στα Ελληνικά από τον ιστότοπό μας: http://www.eizo.com • Руководство по установке на русском языке доступно для загрузки с нашего сайта по адресу: http://www.eizo.com •...
  • Seite 2 1600×1200 VESA Standard 60 Hz √ √ 2048×1536 VESA CVT RB 47 Hz √ 2048×1536 VESA CVT RB 60 Hz √ √ It is also appropriate for the 10 bit. Es ist auch für 10 Bit geeignet. Il est aussi approprié pour l e 10 bits. 同样适合 10 位。 RX240/GX240-CL DisplayPort Applicable vertical scan Resolution Dot Clock signal frequency Portrait Landscape Portrait Landscape 720×400 VGA TEXT 70 Hz √ √ √ √...
  • Seite 3 Location of the Caution Statements Symbols on the unit Symbol This symbol indicates Main Power Switch: Press to turn the monitor’s main power off. Main Power Switch: Press to turn the monitor’s main power on. Power button: Press to turn the monitor’s power on or off. Alternating current Alerting electrical hazard CAUTION: Refer to SAFETY SYMBOLS section in PRECAUTIONS. No part of this manual may be reproduced, stored in a retrieval system, or transmitted, in any form or by any means, electronic, mechanical, or otherwise, without the prior written permission of EIZO Corporation.
  • Seite 4: Package Contents

    Package Contents Check that all the following items are included in the packaging box. If any items are missing or damaged, contact your local dealer. Note • Please keep the packaging box and materials for future movement or transport of the monitor. • Monitor • Digital signal cable(Single Link): DD300 • Power cord (for RX240/GX240-CL only) • USB cable: UU300 • EIZO LCD Utility Disk (CD-ROM) • Setup Manual (this manual) • Digital signal cable (DisplayPort): PP300 • PRECAUTIONS • Digital signal cable (Dual Link): DD300DL (for RX340/RX340-AR/GX340-CL only)
  • Seite 5: Connecting Cables

    Digital connection (DisplayPort) PP300 Digital connection DD300DL: (DVI) RX340/RX340-AR GX340-CL DD300:RX240/GX240-CL Plug the power cord into a power outlet and the power connector on the monitor. Connect the USB cable when using RadiCS LE or ScreenManager Pro for Medical. Connecting to the Monitor Connecting to a Computer Press to turn on the monitor.
  • Seite 6 Adjusting the Screen Height and Angle Hold left and right edge of the monitor with both hands, and adjust the screen height, tilt and swivel of the screen to the best condition for working. Attention • Be sure that the cables are correctly connected. Showing Button Guide Press the front buttons (except button), the Button Guide appears above the button.
  • Seite 7 Selecting Display Mode This function allows easy selection of a desired mode according to monitor application. RX240/RX340/RX340-AR Mode Purpose 1-DICOM Available to display in DICOM mode. 2-Custom Available for the setting according to your preference. 3-CAL1/4-CAL2/5-CAL3 Displays the screen adjusted by calibration software. 6-Hybrid-γ Automatically identifies the display area for the monochrome and color images on the same screen, and displays each set status. 7-sRGB Suitable for color matching with sRGB compatible peripherals. 8-Text Suitable for displaying texts for word processing or spreadsheets. GX240-CL/GX340-CL Mode Purpose 1-DICOM Available to display in DICOM mode. 2-CAL1/3-CAL2 Displays the screen adjusted by calibration software. 4-Hybrid-γ...
  • Seite 8 Possible cause and remedy 1. No picture • Check whether the power cord is connected properly. • Power indicator does not light. • Turn the main power switch on. • Press . • Turn off the main power, and then turn it on again a few minutes later. • Power indicator is lighting green. • Increase “Brightness”, “Contrast”, or “Gain” in the (RX240/RX340/RX340-AR) Adjustment menu. • Power indicator is lighting orange. • Switch the input signal. For details, refer to the User’s Manual (on the CD-ROM). • Operate the mouse or keyboard. • Check whether the PC is turned on. • When the Presence Sensor is set at a value from “Level-1” to “Level-4”, the monitor may have shifted to the power saving mode. Come near to the monitor. • Power indicator flashes orange and green.
  • Seite 9: Stelle Der Warnungshinweise

    Stelle der Warnungshinweise Symbole am Gerät Symbol Bedeutung Hauptnetz-Schalter: Drücken, um das Netzteil des Monitors auszuschalten. Hauptnetz-Schalter: Drücken, um das Netzteil des Monitors einzuschalten. Netzschalter: Drücken, um den Monitor ein- und auszuschalten. Wechselstrom Warnung vor elektrischem Schlag Informationen zu den SICHERHEITSSYMBOLEN finden ACHTUNG: Sie in den VORSICHTSMASSNAHMEN. Kein Teil dieses Handbuchs darf ohne die vorherige schriftliche Zustimmung von EIZO Corporation in irgendeiner Form oder mit irgendwelchen Mitteln – elektronisch, mechanisch oder auf andere Weise – reproduziert, in einem Suchsystem gespeichert oder übertragen werden.
  • Seite 10: Verpackungsinhalt

    Verpackungsinhalt Prüfen Sie, ob sich alle der folgenden Gegenstände in der Verpackung befinden. Sollte einer der Gegenstände fehlen oder beschädigt sein, wenden Sie sich an Ihren Fachhändler. Hinweis • Heben Sie die Verpackung sowie die Verpackungsmaterialien für evtl. Transporte des Monitors gut auf. • Monitor • Digitales Signalkabel (Single Link) : DD300 • Netzkabel (nur für RX240/GX240-CL) • USB-Kabel: UU300 • EIZO LCD Utility Disk (CD-ROM) • Installationshandbuch (das vorliegende Handbuch) • Digitales Signalkabel (DisplayPort) : PP300 • VORSICHTSMASSNAHMEN • Digitales Signalkabel (Dual Link) : DD300DL (nur für RX340/RX340-AR/GX340-CL) Steuerelemente und Funktionen Beispiel: RX340 Justierungsmenü*...
  • Seite 11: Kabel Anschließen

    PP300 oder Digitalanschluss DD300DL: (DVI) RX340/RX340-AR GX340-CL DD300:RX240/GX240-CL Verbinden sie mithilfe des Netzkabels den Netzanschluss des Monitors mit einer Steckdose. Bei Verwendung der Software RadiCS LE oder ScreenManager Pro for Medical schließen Sie das USB-Kabel an. Anschließen an den Monitor Anschließen an einen Computer Drücken Sie , um den Monitor einzuschalten.
  • Seite 12: Höhe Und Neigung Des Bildschirms Einstellen

    Höhe und Neigung des Bildschirms einstellen Halten Sie den Monitor mit beiden Händen am linken und rechten Rand fest und stellen Sie die für Ihren Arbeitsplatz optimal Höhe, Neigung und Drehung ein. Beachte • Vergewissern Sie sich, dass die Kabel richtig angeschlossen sind. Anzeigen der Tastenführung Drücken Sie die Tasten an der Vorderseite (außer Taste ).
  • Seite 13: Anzeigemodus Auswählen

    Anzeigemodus auswählen Diese Funktion ermöglicht die einfache Auswahl eines gewünschten Modus entsprechend der Monitoranwendung. RX240/RX340/RX340-AR Modus Zweck 1-DICOM Anzeige im DICOM-Modus möglich. 2-Custom Verfügbar für die Einstellung nach Wunsch. 3-CAL1/4-CAL2/5-CAL3 Zeigt den mit der Kalibrierungssoftware justierten Bildparameter an. 6-Hybrid-γ Identifiziert automatisch den Anzeigebereich für Monochrom- und Farbbilder auf demselben Bildschirm und zeigt den jeweils eingestellten Status an. 7-sRGB Geeignet für den Farbabgleich mit Peripheriegeräten, die sRGB unterstützen. 8-Text Einstellung zur Anzeige von Text für Textverarbeitungen oder Tabellenkalkulationen. GX240-CL/GX340-CL Modus Zweck 1-DICOM Anzeige im DICOM-Modus möglich. 2-CAL1/3-CAL2 Zeigt den mit der Kalibrierungssoftware justierten Bildparameter an. 4-Hybrid-γ Erkennt automatisch den Anzeigebereich für die medizinischen und andere BIlder auf demselben Bildschirm und zeigt den eingestellten Status an.
  • Seite 14: Kein Bild

    Mögliche Ursache und Lösung 1. Kein Bild • Prüfen Sie, ob das Netzkabel ordnungsgemäß • Die Netzkontroll-LED leuchtet nicht. angeschlossen ist. • Schalten Sie den Hauptnetz-Schalter ein. • Drücken Sie . • Schalten Sie das Hauptnetz aus und einige Minuten später wieder ein. • Die Netzkontroll-LED leuchtet grün. • Erhöhen Sie im Justierungsmenü die Werte für (RX240/RX340/RX340-AR) „Helligkeit“, „Kontrast“ und/oder „Gain-Einstellung“. • Die Netzkontroll-LED leuchtet orange. • Wechseln Sie das Eingangssignal. Einzelheiten entnehmen Sie dem Benutzerhandbuch (auf der CD- ROM). • Bedienen Sie die Maus oder die Tastatur. • Prüfen Sie, ob der Computer eingeschaltet ist. • Wenn der Anwesenheitssensor auf einen Wert zwischen „Stufe-1“ und „Stufe-4“ eingestellt ist, hat der Monitor möglicherweise in den Energiesparmodus gewechselt.
  • Seite 15: Emplacements Des Étiquettes De Sécurité

    Emplacements des étiquettes de sécurité Symboles sur l’appareil Symbole Signification du symbole Commutateur Appuyez pour éteindre le moniteur. d’alimentation principal : Commutateur Appuyez pour allumer le moniteur. d’alimentation principal : Touche d’alimentation : Appuyez pour allumer ou éteindre le moniteur. Courant alternatif Avertissement sur les dangers electriques Reportez-vous à la section SYMBOLES DE SECURITE ATTENTION : du chapitre PRECAUTIONS. Aucune partie de ce manuel ne peut être reproduite, enregistrée dans un système documentaire ou transmise sous quelque forme et par quelque moyen que ce soit électronique, mécanique ou autre, sans l’autorisation écrite préalable de EIZO Corporation.
  • Seite 16: Commandes Et Fonctions

    Vérifiez que tous les éléments indiqués ci-dessous sont inclus dans le carton d’emballage. Contactez votre revendeur local si l’un des éléments est manquant ou endommagé. Remarque • Veuillez conserver le carton et les matériaux d’emballage pour les réutiliser lors d’un déplacement ultérieur du moniteur. • Moniteur • Câble de signal numérique (Single Link) : DD300 • Cordon d’alimentation (pour RX240/GX240-CL seulement) • Câble USB : UU300 • EIZO LCD Utility Disk (CD-ROM) • Manuel d’installation (ce manuel) • Câble de signal numérique (DisplayPort) : PP300 • PRECAUTIONS • Câble de signal numérique (Dual Link) : DD300DL...
  • Seite 17: Branchement Des Câbles

    (DisplayPort) PP300 Branchement numérique DD300DL: (DVI) RX340/RX340-AR GX340-CL DD300:RX240/GX240-CL Branchez le cordon d’alimentation dans une prise secteur et dans le connecteur d’alimentation du moniteur. Connectez le câble USB lorsque RadiCS LE ou ScreenManager Pro for Medical est utilisé. Connexion au moniteur Branchement à un ordinateur Appuyez sur pour mettre le moniteur sous tension.
  • Seite 18 Ajustage de la hauteur et de l’angle de l’écran Placez vos mains des deux côtés du moniteur et réglez la hauteur, l’inclinaison et le pivotement de l’écran dans une position agréable et confortable pour travailler. Attention • Vérifiez que les câbles sont correctement branchés. Affichage du Guide Touches Appuyez sur les touches situées à...
  • Seite 19 Sélection du mode d’écran Cette fonction facilite la sélection d’un mode personnalisé en fonction de l’application du moniteur. RX240/RX340/RX340-AR Mode Fonction 1-DICOM Disponible pour l’affichage en mode DICOM. 2-Custom Permet de régler le paramètre en fonction de vos préférences personnelles. 3-CAL1/4-CAL2/5-CAL3 Affiche l’écran ajusté par le logiciel de calibrage. 6-Hybrid-γ Identifie automatiquement la zone d’affichage pour les images monochromes et en couleurs sur le même écran, et affiche chaque état paramétré. 7-sRGB Adapté à la comparaison des couleurs des périphériques compatibles sRGB. 8-Text Adapté à l’affichage de textes sur traitement de texte ou feuille de calcul. GX240-CL/GX340-CL Mode Fonction 1-DICOM Disponible pour l’affichage en mode DICOM. 2-CAL1/3-CAL2 Affiche l’écran ajusté par le logiciel de calibrage.
  • Seite 20: Aucune Image

    Cause possible et solution 1. Aucune image • Vérifiez que le cordon d’alimentation est correctement • Le témoin de fonctionnement ne s’allume pas. branché. • Activez le commutateur d’alimentation principal. • Appuyez sur . • Coupez l’alimentation du moniteur, puis rétablissez-là quelques minutes plus tard. • Le témoin de fonctionnement s’allume en vert. • Augmentez les valeurs de « Luminosité », « Contraste », (RX240/RX340/RX340-AR) et/ou « Gain » dans le menu Ajustage. • Le témoin de fonctionnement s’allume en • Changez le signal d’entrée Reportez-vous au Manuel orange. d’utilisation (sur le CD-ROM) pour obtenir plus de détails. • Appuyez sur une touche du clavier ou faites bouger la souris. • Vérifiez si l’ordinateur est sous tension. • Lorsque la fonction Capteur présence est réglée sur une valeur de « Niveau-1 » à « Niveau-4 », il se peut que le moniteur entre en mode d’économie d’énergie.
  • Seite 21 警告声明的位置 设备上的标识 标识 标识指示 主电源开关: 按此键关闭显示器的主电源。 主电源开关: 按此键打开显示器的主电源。 电源按钮: 按此键打开 / 关闭显示器的主电源。 交流电 电子报警器 警告: 请参照预防措施中的安全符号章节。 未经EIZO Corporation事先书面许可, 不得以任何形式或以任何方式 (电子、 机械或其它方式) 复制本手册的任何 部分、 或者将其存放到检索系统中或进行发送。 EIZO Corporation没有义务为任何已提交的材料或信息保密, 除非 已经依照EIZO Corporation书面接收的或口头告知的信息进行了事先商议。 尽管本公司已经尽最大努力使本手册提 供最新信息, 但是请注意, EIZO显示器规格仍会进行变更, 恕不另行通知。...
  • Seite 22 打包内容 请检查包装盒中是否包含下列物品。 如果缺少物品, 或物品存在损坏现象, 请与您当地的经销商联系。 注 • 请保留好包装盒和包装材料, 以便将来显示器移动或搬运时使用。 • 显示器 • 数字信号线 (Single Link) : DD300 • 电源线 (仅限于 RX240/GX240-CL) • USB电缆: UU300 • EIZO LCD Utility Disk (CD-ROM) • 设定手册 (本手册) • 数字信号线 (DisplayPort) : PP300 • 预防措施 • 数字信号线 (Dual Link) : DD300DL (仅限于 RX340/RX340-AR/GX340-CL)...
  • Seite 23 将信号线连接至输入信号连接器和PC。 检查连接器的形状, 然后连接电缆。 连接到信号线后, 请拧紧连接器的螺钉, 固定连接。 数字连接 PP300 (DisplayPort) 或 DD300DL: 数字连接 RX340/RX340-AR (DVI) GX340-CL DD300:RX240/GX240-CL 将电源线插头插入电源插座和显示器上的电源连接器。 当使用RadiCS LE或ScreenManager Pro for Medical时, 请连接USB电缆。 接续到显示器 接续到计算机 按 打开显示器。 显示器电源指示灯亮起绿色。 将个人计算机开机。 出现画面图像。 如果未出现图像, 请参照 “不显示图像” (第6页) 获得帮助。 注意 • 使用后关闭显示器和个人计算机。 • 为了最大限度地省电, 建议您关闭电源按钮。 断开主电源开关, 或者拔掉电源线, 彻底断开显示器电源供应。...
  • Seite 24 调整屏幕高度和角度 用双手抓住显示器的左右两边, 调节屏幕高度, 将屏幕倾斜并回转到最佳工作状态。 注意 • 请确认各接线是否正确。 显示按钮指南 按前按钮 ( 按钮除外) , 按钮上方出现按钮指南。 注 • 显示调整菜单和彩色模式菜单时, 持续显示按钮指南。 • 按钮指南的显示因所选菜单或状态而异。...
  • Seite 25 选择显示模式 可以根据显示器的用途, 用此功能轻松选择一种希望的模式。 RX240/RX340/RX340-AR 模式 用途 1-DICOM 可在 DICOM 模式中显示。 2-Custom 在根据自己的偏爱设定时选择。 3-CAL1/4-CAL2/5-CAL3 显示用校准软件调整的屏幕。 6-Hybrid-γ 自动识别同一屏幕上显示的黑白和色彩图像的显示区域, 并显示相应的设定状态。 7-sRGB 适合与兼容sRGB的外部设备进行色彩匹配。 8-Text 适合显示文字处理或电子表格中的文本。 GX240-CL/GX340-CL 模式 用途 1-DICOM 可在 DICOM 模式中显示。 2-CAL1/3-CAL2 显示用校准软件调整的屏幕。 4-Hybrid-γ 自动识别同一屏幕上显示的医学及其它图像的显示区域, 并显示相应的设定状态。 RX240 GX240-CL RX340/RX340-AR GX340-CL 出现模式菜单。 步骤 1. 按 。 屏幕左下角出现模式菜单。 2. 每按一次...
  • Seite 26 • 电源指示灯不亮。 • 接通主电源开关。 • 按 。 • 关闭主电源, 几分钟后再将其打开。 • 电源指示灯是绿色。 • 通过调节菜单增大 “亮度” 、 “对比度” 和/或 “增益” (RX240/RX340/RX340-AR) • 电源指示灯呈橙色。 • 切换输入信号。 详细说明, 请参照 (在CD-ROM上) 用户手 册。 • 操作鼠标或键盘。 • 检查个人计算机的电源是否已打开。 • 当状态传感器值被设定在 “级别-1” 与 “级别-4” 之间时, 显...
  • Seite 28 4th Edition-January, 2014 Printed in Japan. 00N0L721D1 Copyright © 2011-2014 EIZO Corporation All rights reserved. (U.M-SUMRX340-4)

Diese Anleitung auch für:

Rx340Gx340-clRx340-arGx240-cl

Inhaltsverzeichnis