DuraMax 4 Ft SideMate-V2 Benutzerhandbuch
Quicklinks
A L L
P U R P O S E
V I N Y L
G A R D E N
EN
OWNER'S MANUAL /
Instructions for Assembly '4 Ft SideMate-V2'
Size 4Ft x 8Ft / 1.2 m x 2.4 m
Ver: 1.0
FR
MANUEL D'INSTRUCTION/
Instructions pour l'Assemblage '4 Pieds SideMate-V2'
Dimension 4Pieds x 8Pieds / 1.2 Mètre x 2.4 Mètre
Ver: 1.0
DE
Benutzerhandbuch /
Montageanleitung'4 Ft SideMate-V2'
Größe: 4Ft x 8Ft / 1.2 m x 2.4 m
Ver: 1.0
ES
MANUAL DE USO /
Instrucciones de montaje '4 Pies SideMate-V2'
Tamaño 4Pies x 8Pies / 1.2 Metros x 2.4 Metros
Ver: 1.0
PT
MANUAL DO PROPRIETARIO/
Intruções de montagem.'4 pés SideMate-V2'
Tamanho 4pés x 8pés / 1.2 Metro x 2.4 Metro
Ver: 1.0
NL
Gebruiksaanwijzing voor eigenaar/
Instructies voor bouw '4Voet SideMate-V2'
Maat 4 voet x 8 voet / 1.2 Meter x 2.4 Meter
Versie: 1.0
Příručka uživatele /
CS
Návod k montáži '4 Stopy SideMate-V2'
Velikost 4 Stopy x 8 Stopy / 1.2 Metr x 2.4 Metr
Verze : 1.0
NÁVOD PRE UŽÍVATELA /
SK
Návod na zloženie '4 Stopa SideMate-V2'
Velkosť 4Stopa x 8Stopa / 1.2 m x 2.4 m
Pozri: 1.0
PRIROČNIK ZA LASTNIKA /
SL
Navodila za montažo '4 Čevljev SideMate-V2'
Velikost 4Čevljev x 8Čevljev / 1.2 Metrov x 2.4 Metrov
Razl: 1.0
Model # 06625-2
TM
A Product of
S H E D S
(Approx.)
(Approx.)
(Ca.)
(Aprox.)
(Aprox.)
(Ongeveer)
(Přibližně)
(približne)
(Približno)
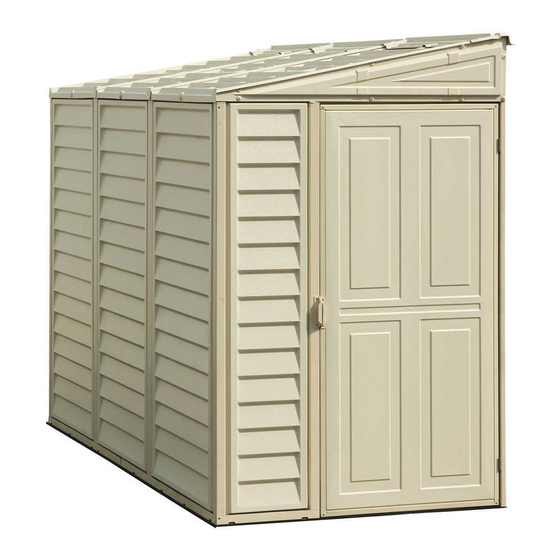
VINYL GARDEN SHED
Gazdinski Priručnik /
HR
Instrukcije za skupštine '4 Stopalo SideMate-V2'
Veličina 4Stopalo x 8 Stopalo/ 1.2 Metar x 2.4 Metar
Ver: 1.0
FELHASZNÁLÓI KÉZIKÖNYV /
HU
Útmutató az összeszereléshez '4 Láb SideMate-V2'
4Láb x 8Láb / 1.2 Méter x 2.4 Méter
Verzió: 1.0
SV
ÄGARENS MANUAL/
Monteringsinstruktioner för '4 Fot SideMate-V2'
Storlek 4 fot x 8 fot / 1.2 m x 2.4 m
Version: 1.0
IT
MANUALE DEL PROPRIETARIO /
Istruzioni per l'assemblaggio '4 Piedi SideMate-V2'
Dimensione 4 Piedi x 8 Piedi / 1.2Metri x 2.4Metri
Versione 1.0
PODRĘCZNIK UŻYTKOWNIKA /
PL
Instrukcja montażu '4 Stopy SideMate-V2'
Wymiary 4Stopy x 8Stopy / 1.2 Metr x 2.4 Metr
Wersja: 1.0
MANUAL DE UTILIZARE /
RO
Instrucţiuni de asamblare '4 Picioare SideMate-V2'
Mărime 4Picioare x 8Picioare / 1.2 Metri x 2.4 Metri
Ver: 1.0
РЪКОВОДСТВО ЗА ПРИТЕЖАТЕЛЯ /
BG
Инструкции за сглобяване '4 Фута SideMate-V2'
Размер 4 Фута x 8 Фута / 1.2 Метра x 2.4 Метра
Версия: 1.0
KULLANIM KILAVUZU /
TR
Montaj Talimatları '4 Fit SideMate-V2'
(Yaklaşık olarak)
4Fit x 8Fit / 1.2m x 2.4m
Sürüm: 1.0
Patent #416.091
(Približno)
(Hozzávetőlegesen)
(Ungefär)
(Circa)
(W przybliżeniu)
(Aprox.)
(приблизително)

Verwandte Anleitungen für DuraMax 4 Ft SideMate-V2


Inhaltszusammenfassung für DuraMax 4 Ft SideMate-V2
- Seite 1 G A R D E N S H E D S Gazdinski Priručnik / OWNER’S MANUAL / Instructions for Assembly ‘4 Ft SideMate-V2’ Instrukcije za skupštine ‘4 Stopalo SideMate-V2’ Veličina 4Stopalo x 8 Stopalo/ 1.2 Metar x 2.4 Metar (Približno) Size 4Ft x 8Ft / 1.2 m x 2.4 m...
- Seite 2 Building Dimensions : Storage Exterior Dimension Interior Dimension Approximate Door Opening Size Base Dimension Roof Edge to Edge Area Volume Wall to Wall inch inch inch inch 29 1/4 Sq. Ft 154 1/4 Cu.Ft 4 Ft x 8 Ft Width 121.2 122.2 75.6...
- Seite 3 Gebouw afmeting: Opslag Binnenkant afmeting Buitenkant afmeting Benadering Deur opening Maat Gebied Muur tot muur Volume Basis afmeting Dakrand tot rand inch inch inch inch 29 1/4 154 1/4 4 Voet x 8 Voet Vierkante voet Kubieke voet Wijdte 47 5/8 121.2 122.2 45 1/2...
- Seite 4 Zgrada dimenzija Približno određena Skladištenje Vanjski dimenzija Interijer dimenzija Vrata Open Područje Zidni to zidni Krov rub to rub mjera Svezak Temeljiti dimenzija inch inch inch inch 29 1/4 Četvornih 154 1/4 Kubni 4 Stopalo x Stopalo Stopalo 8 Stopalo širina 121.2 47 5/8...
- Seite 5 Wymiary budowlane: Wymiary wewnętrzne Magazynowa Wymiary zewnętrzne Przybliżone Otwieranie drzwi Kubatura Wymiary fundamentów Dachu od krawędzi do krawędzi od ściany do ściany Powierzchnia wymiary inch inch inch 4 Stopy x 8 154 1/4 Stopy 29 1/4 Stopy sześcienny Szerokość Stopy kwadratowy 121.2 47 5/8...
- Seite 6 Tools You Will Need Alati, Trebat će Vam 1. Bežični Svrdlo – Philips Voditelj 1. Cordless Drill - Philips Head 6. Tape Measure 6. Traka Divizor 2. Vijak Vozač - Philips Voditelj 7. Ručni Rukavice 2. Screwdriver - Philips Head 7.
-
Seite 7: Lista Części
Seznam součásti Parts List Lista delle varie parti Zoznam častí Lista części Liste des pièces Teileliste Seznam delov Lista elementelor componente Списък на частите La Lista de Partes Dijelovi Lists Lista de Peças Alkatrészlista Parça Listesi Onderdelenlijst Komponentlista 1.Check all parts prior to installation. 2.Before starting installation, please refer to Safety &... - Seite 8 B1LS RS2FS FDCLS B1RS RS2BS FDCRS B21Q RS4S B22Q RS5S RS6S FRLC B4LS CMB1 B4RS CMS1 CCS1 CB1S CCRS1 CB2S CCES1 CB3S CDLC1 CB4S CDRS1 CB6S FSPC1 1.57 eter CB2Q SPB1 CB3Q SPS1 RS14S RS1S FPLC RS3LQ FPRC RS3SQ RS3LS RS3SS RS9B DSHC...
- Seite 9 FPLC FRLC RS2FS RS3LS FPRC RS14S RS4S RS5S RS14S RS3SS RS9B RS4S RS6S RS14S RS1S RS2BS RS3SQ FRLC RS3LQ RS9B DSHC RS1S CCES1 CMB1 FSPC1 SPS1 SPS1 SPB1 CCS1 SPS1 CCRS1 CB2Q VFA15 CMS1 B22Q CDRS1 CB2S CB3S CMB1 CMS1 F10C B4LS F10B...
- Seite 10 # 10-15 # 16 # 17-41 # 42-44 # 45-46...
- Seite 11 4.All parts are clearly marked and care should be taken to use the correct one. 5.If you are building the shed against a wall,build it 2.5 ft. away then slide it in.(Only for Duramax foundation & Wooden foundation) 1.Réglez la limite de couple de votre perceuse Vis à n # 3 o u n # 4 pour s'assurer que les vis ne supprime pas les renforts métalliques 2.Il est important que ces instructions soient suivies pas à...
- Seite 12 4.Alla delar är tydligt märkta och försiktighet bör vidtas för att använda rätt. 5.Om du bygger ett skjul mot en vägg, bygg det 2,5 ft. bort och skjut in den. (Endast för Duramax Foundation & Wooden stiftelse) 1. Impostare il limite di coppia della fresa a vite a #3 o #4 per assicurare che le viti non striscia i rinforzi metallici 2.E’...
- Seite 13 51 1/2” x 98 1/4”(1312mm x 2497mm). (IT) Duramax deve essere installato su una base Duramax, una piattaforma di legno a livello o una base di calcestruzzo a livello, che ha una dimensione esterna di 51 1/2” x 98 1/4”(1312mm x 2497mm).
- Seite 14 Potřebné součástí Parts needed Parti occorrenti Potrebné časti Niezbędne elementy Pièces nécessaires Benötigte Teile Dele, ki jih boste potrebovali Elementele componente necesare еобходими части Las partes necesitaron Dijelovi potreban Peças Necessárias Szükséges részek Gerekli parçalar Onderdelen nodig Delar som behövs F10B VFA15 F11B...
- Seite 15 F10C (x2) (x6) VFA15 (x2) 1&2 F10B F10C F11B VFA15 VFA15 F10C F10C F10B F10B F10C VFA15 (x2) (x6) F10C F10B 1&2 F11B VFA15 F11B F10C F10C VFA15 F10B VFA15 F10C VFA15 F11B F11B...
- Seite 16 F11C (x3) (x6) F11C F11C F11C...
- Seite 17 Base Frame Základní kostra Cornice di Base Základ ov rám Canaux de base Rama fundamentowa Bodenrahmen Osnovni okvir Rama bazei Основна Рама Armazón de la base Baza okvir Base de armação Alapváz Temel Çerçevesi Basis frame Basram Potřebné součástí Parts needed Parti occorrenti Potrebné...
- Seite 18 Zidovi i krovni kon rukcije Walls Roof Structures Falak és tetőszerkezetek Murs et ructures de toit V ggar och takkon ruktioner W nde Dachkon ruktionen Pareti e rutture di tetto Paredes y e ructuras de techo Paredes e e ruturas de telhado ciany i kon rukcje dachowe Muren en dakcon ructies Pere i i ructuri de acoperi...
- Seite 19 Column & Panel Assembly method etoda montaže stupaca i panela Colonne et méthode de montage panneau Az oszlop és a panel összeszerelési módszere Montageverfahren für Säulen und Paneele Kolonn- och panelmonteringsmetod Columna y el método de montaje de Panel Metodo di assemblaggio di colonne e pannelli Método de montagem de colunas e painéis Metoda montażu kolumn i paneli Kolom en paneelmontage methode...
- Seite 20 CCS1 (x1) S1 (x2) CCS1 CCS1 CCS1 CCS1 CCS1 B1RS B1RS B1LS B1LS 2&3 B1LS FSPC1 (x1) 1&2 FSPC1 FSPC1 FSPC1 CCS1 CCS1 CLICK! FSPC1 CCS1 B1RS B1RS FSPC1 FSPC1 CCS1 CCS1 B1LS B1LS 3&4...
- Seite 21 CDLC1 (x1) S1 (x2) FSPC1 CDLC1 CDLC1 CLICK! CDLC1 FSPC1 B1RS B1RS S2 (x1) CCF (x1) CCS1 CCS1...
- Seite 22 S1 (x2) CB1S (x1) CB1S CB1S 1&2 CB1S CB1S CDLC1 S1 (x2) CB4S (x1) CB4S B1RS CDLC1 CB4S CB4S...
- Seite 23 S1 (x2) SPB1 (x1) CMB1 (x1) CLICK! SPB1 1&2 CCS1 CCS1 CLICK! 3&4 SPB1 CMB1 SPB1 SPB1 CMB1 CMB1 CMB1 B4RS S1 (x2) CB2Q (x1) CMB1 1&2 CB2Q CB2Q CMB1 CB2Q CB2Q...
- Seite 24 S1 (x3) S2 (x1) CMF (x1) CMB1 (x1) SPB1 (x1) CMB1 SPB1 B21Q CMB1 SPB1 CMB1 3&4 CB2Q CB2Q CB2Q CMB1 CMB1 S1 (x2) SPB1 (x1) CCS1 (x1) CCS1 B21Q CMB1 SPB1 SPB1 CCS1 CCS1 SPB1 CCS1 2&4...
- Seite 25 CB3Q (x1) S1 (x1) CB3Q 1&2 CB3Q CB3Q S2 (x1) S1 (x1) CCF (x1) CCS1 CB3Q CCS1 1,2&3 CB3Q CB3Q CCS1...
- Seite 26 S1 (x2) FSPC1 (x1) CMB1 (x1) FSPC1 FSPC1 SPB1 CMB1 CCS1 CMB1 S1 (x2) CB2S (x1) 1&2 CB2S CB2S CB2S CMB1 CB2S...
- Seite 27 SPB1 (x1) SPB1 FSPC1 SPB1 CMB1 CCES1 (x1) CCRS1 (x1) CCES1 COAS COAS CCRS1 CCRS1...
- Seite 28 CCES1 CCRS1 COAS CCES1 COAS CCRS1 CCRS1 CCRS1 COAS S1 (x2) CCES1 CCRS1 CCRS1 B22Q...
- Seite 29 S2 (x1) CCF (x1) S1 (x1) CCRS1 CB2S CCRS1 CB2S 1,2&3 CB2S CCRS1 FMC (x3) S1 (x4) FDCRS (x1) FDCRS FDCRS CDLC1 1&2 3&4 3&4 CMB1 CDLC1 CMB1 3&4 CDLC1 CMB1 CMB1 CMB1...
- Seite 30 FCC (x2) S1 (x2) 3&4 CCS1 CCS1 CCS1 1&2 CCS1 CCS1 CCS1 Prednja sklopa krovne kon rukcije Front Roof Strcture Assembly Első tetőszerkezet szerelvény Assemblage De La Structure Avant Du Toit Vordere Dachkon ruktion Montage Frammonterad takkon ruktion E ructura de Asamblea de techo Frontal Assemblea anteriore tetto della ruttura Armaç...
- Seite 31 RS9B (x1) RS1S (x1) FRLC (x1) S1 (x3) FRLC RS9B RS1S Sa avni dio krovne rukture Back Roof Strcture Assembly Vissza Tetőszerkezet szerelvény Assemblage De La Structure Arriere Du Toit Hintere Dachkon ruktion Montage Bakre takkon ruktion E ructura de montaje de techo trasera Assemblea Struttura po eriore del tetto Armaç...
- Seite 32 RS9B (x1) RS1S (x1) FRLC (x1) S1 (x4) FRLC RS9B RS1S S1 (x5) RS3SQ (x1) RS3LS (x1) RS3LQ (x1) MJ (x2) RS3SQ RS3SQ RS3LQ RS3LQ RS3LS RS3LS...
- Seite 33 RJ (x2) S1 (x2) RS3LQ RS3SQ RS3LQ RS3LQ 1&2 RS3SQ RS5S (x1) S1 (x6) RS6S (x1) RS5S RS6S...
- Seite 34 S1 (x2) RS3LQ RS3SQ RS3LQ 1&2 RS3SQ RS3LQ RS3LQ S1 (x4) S2 (x1) RS1S RS1S RS3SQ RS1S FRLC 1&4 RS1S FRLC CCES1 RS3SQ...
- Seite 35 S1 (x2) SPS1 (x1) CMS1 (x1) SPS1 CMS1 CMS1 B22Q S1 (x2) CB2Q (x1) CCRS1 CMS1 CB2Q 1&2 CB2Q CB2Q CMS1 CCRS1 CB2Q...
- Seite 36 S1 (x3) SPS1 (x1) CMS1 (x1) CMF (x1) S2 (x1) CMS1 SPS1 CMS1 B4LS CMS1 CB2Q SPS1 3&4 CB2Q CB2Q CMS1 CMS1 S1 (x2) FDCRS (x1) FMC (x1) FDCRS CCES1 CCES1 CMS1 CMS1...
- Seite 37 S1 (x2) 1&2 RS3LS RS3LS CCES1 FDCRS CCES1 RS3LS CMS1 FDCRS CMS1 CCES1 RS3LS CMS1 RS2FS (x1) S1 (x4) RS2FS RS2FS RS9B RS2FS RS3SQ RS3LS RS2FS...
- Seite 38 S1 (x2) RS4S (x1) RS4S RS3SQ RS3LQ RS4S RS3LS RS4S S1 (x4) CB3S (x1) CDRS1 (x1) SPS1 (x1) CDRS1 CB3S CMS1 SPS1 2&3 CDRS1 CB3S CB3S CDRS1 CMS1...
- Seite 39 S1 (x3) S2 (x1) FDCRS RS3LQ RS1S CDLC1 RS1S FRLC RS1S FRLC 1&4 RS3LQ RS1S CDRS1 DSHC (x1) S1 (x4) RS1S DSHC DSHC RS9B DSHC...
- Seite 40 CB6S (x1) S1 (x2) CB6S CDLC1 CB6S RS1S CB6S S1 (x2) FDCLS (x1) FMC (x1) 1&2 RS3LS FDCLS CMS1 CMS1 FDCLS CMS1 CDRS1 CDRS1...
- Seite 41 S1 (x3) RS3SS (x1) RS3LS RS3SS 1&3 RS3SS RS3SS FDCLS RS3LS RS3SS CMS1 RS4S (x1) S1 (x6) RS2BS (x1) RS2BS RS3LQ RS2BS RS9B RS3SS RS4S RS4S RS2BS RS3LQ RS2BS...
- Seite 42 S1 (x4) S7 (x2) RS6S RS5S RS2BS RS9B RS6S RS2FS RS5S RS9B RS4S RS5S RS6S S7 (x9) RS14S (x3) RS3SS RS14S RS14S RS14S RS14S RS3LQ RS14S RS14S RS6S...
- Seite 43 Střešní panely Roof Panels Pannelli del tetto Planches de Toiture Strešné panely Panele dachowe Strešni Paneli Panouri de acoperi Dachplatten Krovne ploče Покривни панели Paneles de techo Tetőpanelek atı Panelleri Painéis do Telhado Dakpanelen Takpaneler Potřebné součástí Parts needed Parti occorrenti Potrebné...
- Seite 44 Insert roof plugs into Facia Panel only as indicated. Insérez les bouchons de toit dans le panneau Fascia uniquement comme indiqué. Dachstopfen nur wie angegeben in das Fascia Panel einstecken. Inserte los enchufes del techo en el panel frontal solo como se indica. Insira os plugues do teto no Painel de Fáscia somente conforme indicado.
- Seite 45 PPG (x8) PIN (x8) RPS (x1) PPG (x11) PPG (x8) PIN (x8) PIN (x11) RPS (x1) RPS (x1)
- Seite 46 Dveře Door Porta Dvere Porte Drzwi Uşa Die Tür Vrata La puerta Врата Vrata Ajtó Kapı Porta De deur Dörr Potřebné součástí Parts needed Parti occorrenti Potrebné časti Niezbędne elementy Pièces nécessaires Dele, ki jih boste potrebovali Benötigte Teile Elementele componente necesare Dijelovi potreban еобходими...
- Seite 47 ST (x1)
- Seite 48 Assembly on Concrete Platform Montáž na betonové plošině Montaggio su piattaforma in calcestruzzo Assemblage sur plate-forme en béton Montáž na betónovú plošinu Montaż na betonowej platformie Montage auf Betonplattform Montaža na betonsko ploščad Adunarea pe platforma de beton Montaje en plataforma de hormigón Montaža na betonskoj platformi Монта...
- Seite 49 Aby ste zabezpečili, že vaša haly odolá vysokému vetru, odporúčame použiť túto podlahovú možnosť. Na vhodnú podlahovú základňu sa odporúča betónová podložka alebo veľké betónové terasové kamenné štvorce. Uistite sa, že je pevný a rovný a umožní odvodnenie z miesta. Vytvorte základový betónový základ, ktorý má vonkajší rozmer 51 1/2” x 98 1/4”(1312mm x 2497mm).pre základňu. Pre betónové...
- Seite 50 (x14) (x14) Možnosti podlahy Opzioni del pavimento Floor Options Možnosti podlahové Opcje podłogowe Option plancher Možnosti tal Op iuni de podea Bedenoptionen Opción de piso Kat Mogućnosti Подови оп ии Padlóbeállítások Opções de piso Yer Seçenekleri Golvalternativ Betonnen plaat Plywood (Not included) Překližka (není...
- Seite 51 miestnite vonkajšie použitie ( D ) mm), odolná voči poveternostn m vplyvom morskej stupeň preglejky na vrchole základu. Postavite Zunanjost razred (CDX) - 3/4 "(19mm) Vreme dokaz Marine stopnje vezan na vrhu temelja. ostavite vanjsku površinu ( D ) mm) morsku ploču s obloženom vremenskom zaštitom na vrhu temelja. Helyezzük el a külső...
- Seite 52 Concrete Floor (Not included) Betonová podlaha (není součástí balení) Pavimento in cemento (non incluso) Plancher de béton (non inclus) Betónová podlaha (nie je súčasťou balenia) Podłoga betonowa (nie wliczone) Betonboden (Nicht enthalten) Betonska tla (niso vključene) Podea din beton (nu este inclusă) Piso de concreto (No incluido) Betonski kat (nije uključen) Бетонни...
- Seite 53 pply silicone around the perimeter of the base channel. Seal the corners, joints and base of door column. This is optional and should be done for heavy rain areas if needed. ppli uez de la silicone sur le pourtour du canal de de la base.
- Seite 54 or heavy rain areas, you can fix a eather strip at the bottom of the door. This is optional and the part in not included. our les zones de fortes pluies, vous pouvez fixer un coupe-froid au bas de la porte. Cette étape est facultative et la partie n'est pas incluse.
- Seite 55 Ventilační souprava Kit di ventilazione Ventilation kit Kit de ventilation Vetracia súprava Zestaw wentylacyjny Lüftungskit Prezračevalni komplet Kit de ventila ie Kit de ventilación Комплект за вентила ия Ventilacijski kit Kit de ventilaç o Szellőztető készlet Havalandırma kiti Ventilatiekit Ventilationskit Potřebné...
- Seite 56 SPB1 SPB1 SPB1...
- Seite 57 High wind area installation instructions Visoke instalacije za instalaciju vjetra Instructions pour une installation dans des zones de vent violent Magas szélterületi szerelési útmutató Starke Windbereiche Installationsanweisungen Installationsanvisningar f r h g vindomr de Istruzioni per l installazione dell area vento forte Instrucciones de instalación de la zona con fuertes vientos Instruç...
- Seite 58 To ensure that your shed ill ithstand high inds,you need to anchor on the concrete foundation. lign the shed, mark the concrete at the holes in the Foundation Profiles and drill concrete with suitable concrete bit to accept Dia 6mm wall plug. (Follow the assembly step in page 47-49).
- Seite 59 ttach each side panel (S ,S S , S ) on the bottom to the ase channel. sing a dia. mm ( ) drill ith a po er drill, make t o e ual distance holes on the ase channel through the Side anel. Drive a self tapping scre (S ) through the Base U-channel to the Side Panel.
- Seite 60 FSPC1 FSPC1 SPS1 SPS1 SPB1 SPB1 FSPC1 SPS1 SPB1...
- Seite 61 Attach each Side Panel (SPB1 ,SPS1 ,FSPC1 ) on top to the Roof Structure (RS1S, RS3SS, RS3LS, RS3LQ, RS3SQ). Using a dia. 3mm(1/8”) drill with a power drill, make two equal distance holes on the Side Panel through the Roof Structure. Drive a self tapping screw (S4) through the Side Panel to the Roof Structure.
- Seite 62 RS1S RS3SQ RS3LQ RS3LS RS3SS RS1S RS1S RS3SS RS3LS RS3LQ RS3SQ FSPC1 SPS1 SPB1 RS1S RS3SS RS3LS RS3LQ RS3SQ FSPC1 SPS1 SPB1...
- Seite 63 As such we cannot guarantee the performance of the shed in these extreme situations Le hangar ' DURAMAX ' a été testé et passé des charges de vent élevées dans un environnement de laboratoire contrôlé lorsqu'il est installé avec les directives d'installation de haute vent . Naturelles, les zones de vents forts créent vent à des vitesses imprévisibles qui sont très difficiles à...
- Seite 64 Dulapul "DURAMAX" a fost testat și a fost încărcat cu încărcături puternice de vânt într-un mediu de laborator controlat atunci când este instalat cu instruc iunile de instalare a vântului. Zonele naturale cu vânt puternic creează vânt la viteze imprevizibile, care sunt foarte greu de capturat cu precizie în func ie de loca ie.
- Seite 65 DODATNI PROGRAMI RASPOLOŽIV ADDITIONAL ACCESSORIES AVAILABLE (nije uključeno) (Not included) TOVÁBBI MEGVÁSÁROLHATÓ TARTOZÉKOK ACCESSOIRES ADDITIONNELS DISPONIBLES (nem tartozék) (non inclus) YTTERLIGARE TILLG NGLIGA ACCESSOARERV WEITERES ZUBEHöR (Nicht enthalten) (ingår ej) ACCESORIOS ADICIONALES DISPONIBLES ACCESSORI SUPPLEMENTARI DISPONIBILI (no incluida) (non incluso) DOSTĘPNE DODATKOWE AKCESORIA ACESSóRIOS ADICIONAIS DISPONíVEIS (não incluído)
- Seite 66 ANCHOR KIT (Soil) SIDRO KOMPLET (tla) RÖGZÍT FELSZERELÉS (Talaj) KIT D'ANCRE (Sol) FÖRANKRINGS-KIT ( ord) ANKER-KIT (Boden) KIT DE ANCLA E (Suelo) KIT DI ANCORAGGIO (Suolo) KIT DE APOIO (Solo) ZESTAW DO MOCOWANIA (Grunt) ANKER GEREEDSCHAP (bodem) SET DE ANCORARE (ÎN SOL) KOTEVNÍ...
- Seite 67 ANCHOR KIT (Concrete) SIDRO KOMPLET (beton) KIT D ANCRE (Béton) RÖGZÍT FELSZERELÉS (Beton) Verankerungsset (Beton) FÖRANKRINGS-KIT (Betong) KIT DE ANCLA E (hormigón) KIT DI ANCORAGGIO (cemento) KIT DE APOIO (Concreto) ZESTAW DO MOCOWANIA (Beton) ANKER GEREEDSCHAP ( Beton) SET DE ACORARE (Beton) KOTEVNÍ...
- Seite 68 KUPAN E KIT SHELF KIT UN KIT D’ÉTAG RE MINİSÉGÉT KIT HYLLA KIT REGAL AUSSTATTUNG KIT ESTANTE KIT MENSOLA PÓ KA KIT KIT DE PRATELEIRAS PLANK MONTAGE KIT SHELF KIT MONTÁŽNÍ SOUPRAVA POLIC КОМПЛЕКТ КОЛЕК ИЯ RAF KİTİ DOPLNKOVÝ KIT KOMPLET POLIC Easy mounting system on the middle column.
- Seite 69 .S. oly er 1057 S. Vail Ave Montebello, CA 90640, w w w . d u r a m a x b p . c o m United States of America SKU# 06625-2 17 RD-0.0 21-05-2020...