Bellelli B-FIX Bedienungsanleitung
Kindersitz
Inhaltsverzeichnis
Verfügbare Sprachen
Verfügbare Sprachen
Quicklinks
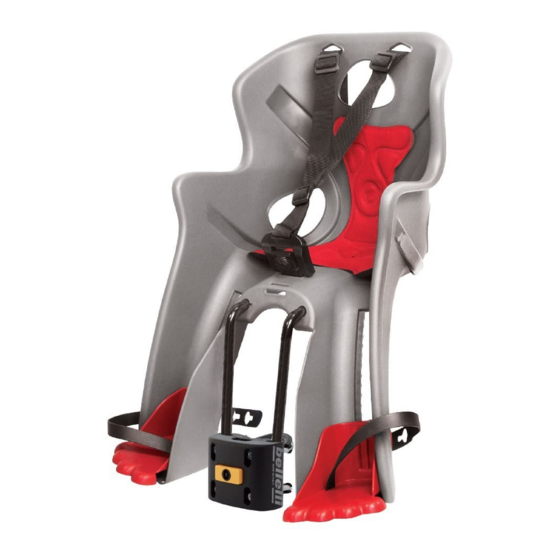
B-FIX
IT. Seggiolino per Bicicletta - Fissaggio Anteriore
EN. Baby Seat for Bicycle - Front Mounting
FR. Porte Bébé pour Bicyclette - Fixation Frontale
DE. Kindersitz - Befestigung Vorn
ES. Portabebé para Bicicletas - Fijación Frontal
PL. Dzieciecy Fotelik Rowerowy - Mocowanie z Przodu
33-37 mm
1.30"-1.45"
max 15 kg
50-60 mm
1.96"-2.36"
max 33 lbs
45-50 mm
1.77"-1.96"
28-32 mm
38-40 mm
1.10"-1.26"
1.50"-1.57"
45-50 mm
1.77"-1.96"
40-45 mm
1.57"-1.77"
1
Inhaltsverzeichnis

Verwandte Anleitungen für Bellelli B-FIX


Inhaltszusammenfassung für Bellelli B-FIX
- Seite 1 B-FIX IT. Seggiolino per Bicicletta - Fissaggio Anteriore EN. Baby Seat for Bicycle - Front Mounting FR. Porte Bébé pour Bicyclette - Fixation Frontale DE. Kindersitz - Befestigung Vorn ES. Portabebé para Bicicletas - Fijación Frontal PL. Dzieciecy Fotelik Rowerowy - Mocowanie z Przodu...
- Seite 3 28-32 mm 1.10”-1.26” 33-37 mm 38-40 mm 1.30”-1.45” 1.50”-1.57” 45-50 mm 50-60 mm 1.77”-1.96” 1.96”-2.36” 40-45 mm 45-50 mm 1.57”-1.77” 1.77”-1.96”...
- Seite 6 washing instructions 30°...
- Seite 7 03IS...
- Seite 13 RICICLO 1. PP 2. Ferro 3. Ferro 4. PP 5. PP 6. PE 7. PA 8. Ferro 9. PA 10. Ferro 11. PP 12. PP 13. PA 14. Ferro 15. Ferro 16. PA 17. Ferro 18. PP 19. PA 20. PC + ABS 21.
- Seite 19 17. Iron 18. PP 19. PA 20. PC + ABS 21. PP 22. Polyester 23. PP 24. PE 25. PP 26. PVC...
- Seite 25 5. PP 6. PE 7. PA 8. Fer 9. PA 10. Fer 11. PP 12. PP 13. PA 14. Fer 15. Fer 16. PA 17. Fer 18. PP 19. PA 20. PC + ABS 21. PP 22. Polyester 23. PP 24.
-
Seite 26: Allgemeine Informationen Zur Montage
B-FIX FRONTSITZ - DE Herzlichen Glückwunsch und vielen Dank für den Kauf Ihres neuen Fahrradsitzes. Wenn Sie Informationen zu anderen Produkten Bellelli wünschen, besuchen Sie unsere Web-Seite www. bellelli.com. Diese Anleitung gilt ausschließlich für Frontsitze Bellelli. Lesen Sie aufmerksam die Montage- und Gebrauchsanleitung, bevor Sie den Sitz montieren und verwenden. -
Seite 27: Montage Des Sitzes
Fahrrad notwendig. Trotzdem ist es empfehlenswert, den Bügel für einen eventuell späteren Gebrauch der Halterung zur Montage des Sitzes Bellelli hinten am Fahrrad aufzubewahren. Für diese Modalität der Montage die Anleitung, die mit dem Rücksitz geliefert wird, befolgen. -
Seite 28: Montage Der Halterung
Montage der Halterung Lokalisieren Sie am Fahrrad den Punkt, an dem die Halterung befestigt wird. Konsultieren Sie die Abbildungen C1, C2, C3, C4, C5 und identifizieren Sie die Komponenten, die zur Montage der Halterung notwendig sind (Abb. A). Setzen Sie die Dichtungen (4) in die beiden Eisenschrauben ein (2 oder 3). Die Wahl des korrekten Paars der Schrauben, wie auch der geeigneten Komponenten, hängt vom Fahrradrahmen ab, wie in den Abbildungen C1, C2, C3, C4, C5 gezeigt. -
Seite 29: Montage Der Stützgabel Am Sitz
Montage der Stützgabel am Sitz Stellen Sie den Sitz auf den Kopf. Positionieren Sie die Stützgabel (17) unter dem Sitz (Abb. G). Setzen Sie die Schrauben (15) in den Sitz ein (Abb. H). Positionieren Sie die Befestigungsplatte (16) unter dem Sitz (Abb. I). Ziehen Sie die Muttern (14) an, um die Stützgabel zu befestigen (Abb. -
Seite 30: Installation Der Fußstützen
Installation der Fußstützen Nehmen Sie die Stütze (25) des linken Fußes (Symbol L, auf der Rückseite aufgedruckt). Setzen Sie sie in den vertikalen Schlitz des linken Beinschoners ein. Schieben Sie sie ganz nach oben (Abb. O). Nehmen Sie den Sperrhebel (23) der linken Fußstütze (Symbol L, auf der Rückseite aufgedruckt). Setzen Sie den Sperrhebel in die Öffnung auf der Rückseite der Fußstütze ein. -
Seite 31: Wartung
Drücken Sie den Knopf der mittleren Schnalle (20) bis ein Klick das Aushaken des Zahns anzeigt. Ziehen Sie sie nach oben, um sie herauszuziehen. Die Gurte über den Kopf des Kindes ziehen. WARTUNG Reinigen Sie den Sitz regelmäßig mit Wasser und Seife. Verwenden Sie keine aggressiven Reinigungsmittel. - Seite 37 3. Hierro 4. PP 5. PP 6. PE 7. PA 8. Hierro 9. PA 10. Hierro 11. PP 12. PP 13. PA 14. Hierro 15. Hierro 16. PA 17. Hierro 18. PP 19. PA 20. PC + ABS 21. PP 22.
- Seite 43 6. PE 7. PA 8. Żelazo 9. PA 10. Żelazo 11. PP 12. PP 13. PA 14. Żelazo 15. Żelazo 16. PA 17. Żelazo 18. PP 19. PA 20. PC + ABS 21. PP 22. Poliester 23. PP 24. PE 25.
- Seite 44 Bellelli srl Via Meucci, 232 45021 Badia Polesine RO - ITALY www.bellelli.com...