Inhaltsverzeichnis
Werbung
Verfügbare Sprachen
Verfügbare Sprachen
Quicklinks
User & installation manual
CEILING & FLOOR TYPE AIR CONDITIONER
FDMX R32
Multilingual Manual
(English- French-German-Dutch-Italiano - Português - Español -
FDMX-050N-09M25 / YDAX-050H-09M25
FDMX-070N-09M25 / YDAX-070H-09M25
FDMX-100N-09M25 / YDAX-100H-09M25
FDMX-100N-09M25 / YDAX-100H-09T35
FDMX-140N-09M25 / YDAX-140H-09T35
FDMX-175N-09M25 / YDAX-175H-09T35
IMPORTANT NOTE:
Read this manual carefully before installing or operating your new air conditioning unit. Make sure to
save this manual for future reference.
21.AW.FDMX.18-60K.R32.UM+IM.EN.FR.DE.IT.SP.POR.DU.08.30.Rev01
)
Dutch
Werbung
Kapitel
Inhaltsverzeichnis
Fehlerbehebung

Verwandte Anleitungen für Airwell FDMX-050N-09M25


Inhaltszusammenfassung für Airwell FDMX-050N-09M25
- Seite 1 User & installation manual CEILING & FLOOR TYPE AIR CONDITIONER FDMX R32 Multilingual Manual (English- French-German-Dutch-Italiano - Português - Español - Dutch FDMX-050N-09M25 / YDAX-050H-09M25 FDMX-070N-09M25 / YDAX-070H-09M25 FDMX-100N-09M25 / YDAX-100H-09M25 FDMX-100N-09M25 / YDAX-100H-09T35 FDMX-140N-09M25 / YDAX-140H-09T35 FDMX-175N-09M25 / YDAX-175H-09T35 IMPORTANT NOTE: Read this manual carefully before installing or operating your new air conditioning unit.
- Seite 2 User & Installation Manual CEILING & FLOOR TYPE AIR CONDITIONER FDMX R32 English Manual FDMX-050N-09M25 / YDAX-050H-09M25 FDMX-070N-09M25 / YDAX-070H-09M25 FDMX-100N-09M25 / YDAX-100H-09M25 FDMX-100N-09M25 / YDAX-100H-09T35 FDMX-140N-09M25 / YDAX-140H-09T35 FDMX-175N-09M25 / YDAX-175H-09T35 IMPORTANT NOTE: Read this manual carefully before installing or operating your new air conditioning unit. Make sure to save this manual for future reference.
-
Seite 3: Inhaltsverzeichnis
Table of Contents Safety Precautions ................04 Owner’s Manual Unit Specifications and Features ............09 1. Indoor unit display ................................09 2. Operating temperature ..............................11 3. Other features ..................................12 Care and Maintenance ..............13 Troubleshooting ................15... - Seite 4 Installation Manual Accessories ..................18 Installation Summary ..............19 Unit Parts ..................20 Indoor Unit Installation ..............21 1. Select installation location ............................21 2. Hang indoor unit ................................23 3. Drill wall hole for connective piping ..........................25 4. Connect drain hose ................................25 Outdoor Unit Installation ..............
-
Seite 5: Safety Precautions
Safety Precautions Read Safety Precautions Before Operation and Installation Incorrect installation due to ignoring instructions can cause serious damage or injury. The seriousness of potential damage or injuries is classified as either a WARNING or CAUTION. WARNING CAUTION This symbol indicates the possibility of This symbol indicates the possibility property damage or serious consequences. -
Seite 6: Electrical Warnings
CLEANING AND MAINTENANCE WARNINGS Turn o the device and disconnect the power before cleaning. Failure to do so can cause • electrical shock. Do not clean the air conditioner with excessive amounts of water. • Do not clean the air conditioner with combustible cleaning agents. Combustible cleaning agents •... -
Seite 7: Owner's Manual
WARNINGS FOR PRODUCT INSTALLATION 1. Installation must be performed by an authorized dealer or specialist. Defective installation can cause water leakage, electrical shock, or re. 2. Installation must be performed according to the installation instructions. Improper installation can cause water leakage, electrical shock, or re. (In North America,installation must be performed in accordance with the requirement of NEC and CEC by authorized personnel only.) 3. - Seite 8 WARNING for Using R32/R290 Refrigerant When ammable refrigerant are employed, appliance shall be stored in a well -ventilated area where the room size corresponds to the room area as speci ec for operation. For R32 frigerant models: Appliance shall be installed, operated and stored in a room with a oor area larger than X m²...
-
Seite 9: European Disposal Guidelines
European Disposal Guidelines This marking shown on the product or its literature, indicates that waste electrical and eletrical equipment should not be mixed with general household waste. Correct Disposal of This Product (Waste Electrical & Electronic Equipment) This appliance contains refrigerant and other potentially hazardous materials. When disposing of this appliance, the law requires special collection and treatment. -
Seite 10: Unit Specifications And Features
Unit Specifications and Features Indoor unit display NOTE: Di erent models have di erent display panel. Not all the indicators describing below are available for the air conditioner you purchased. Please check the indoor display panel of the unit you purchased. Illustrations in this manual are for explanatory purposes. -
Seite 11: Operation Indicator
MANUAL Infrared receiver LED display Infrared receiver LED display MANUAL button : This button selects the mode in the following order: AUTO, FORCED COOL, OFF. • FORCED COOL mode : In FORCED COOL mode, the Operation light flashes. The system will then turn to AUTO after it has cooled with a high wind speed for 30 minutes. -
Seite 12: Operating Temperature
Operating temperature When your air conditioner is used outside of the following temperature ranges, certain safety protection features may activate and cause the unit to disable. Inverter Split Type FOR OUTDOOR UNITS COOL mode HEAT mode DRY mode WITH AUXILIARY 17°C - 32°C 0°C - 30°C 10°C - 32°C... -
Seite 13: Other Features
Other features Default Setting Louver Angle Memory Function (some models) When the air conditioner restarts after a power Some models are designed with a louver angle failure, it will default to the factory settings memory function. When the unit restarts after a (AUTO mode, AUTO fan, 24°C (76°F)). -
Seite 14: Care And Maintenance
Care and Maintenance Directly pull out the air lter from the air inlet Cleaning Your Indoor Unit as indicated (applicable to 14~16KW air conditioners only). BEFORE CLEANING OR 4. Remove the air lter. MAINTENANCE 5. Clean the air lter by vacuuming the surface ALWAYS TURN OFF YOUR AIR CONDITIONER or washing it in warm water with mild SYSTEM AND DISCONNECT ITS POWER SUPPLY... - Seite 15 Maintenance – CAUTION Long Periods of Non-Use Before changing the lter or cleaning, • If you plan not to use your air conditioner for an turn o the unit and disconnect its power extended period of time, do the following: supply.
-
Seite 16: Troubleshooting
Troubleshooting SAFETY PRECAUTIONS If any of the following conditions occurs, turn o your unit immediately! The power cord is damaged or abnormally warm • You smell a burning odor • The unit emits loud or abnormal sounds • A power fuse blows or the circuit breaker frequently trips •... - Seite 17 Issue Possible Causes The outdoor unit The unit will make di erent sounds based on its current operating mode. makes noises Dust is emitted from The unit may accumulate dust during extended periods of non-use, which will be either the indoor or emitted when the unit is turned on.
- Seite 18 Problem Possible Causes Solution Wait for the power to be restored Power failure The power is turned o Turn on the power The unit is not The fuse is burned out Replace the fuse working Replace batteries Remote control batteries are dead The Unit’...
-
Seite 19: Accessories
Accessories The air conditioning system comes with the following accessories. Use all of the installation parts and accessories to install the air conditioner. Improper installation may result in water leakage, electrical shock and re, or cause the equipment to fail. The items are not included with the air conditioner must be purchased separately. -
Seite 20: Installation Summary
Installation Summary Install the indoor unit Install the drainpipe Install the outdoor unit L(L1) N(L2) Evacuate the refrigeration Connect the wires Connect the refrigerant system pipes Perform a test run Page 19 ... -
Seite 21: Unit Parts
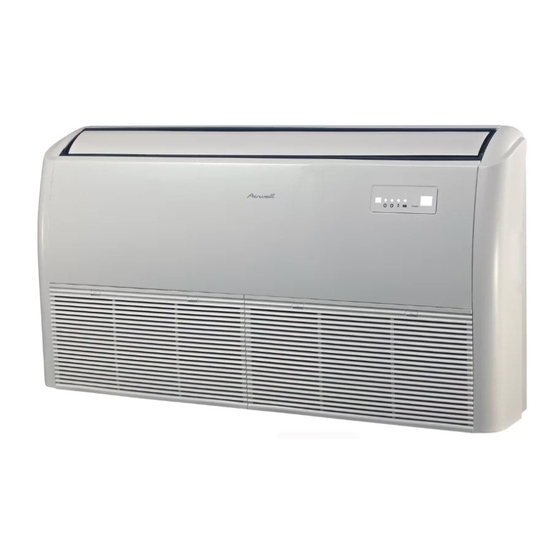
Unit Parts NOTE: The installation must be performed in accordance with the requirement of local and national standards. The installation may be slightly di erent in di erent areas. Air ow louver (at air outlet) Air inlet (with air lter in it) Installation part Display panel Remote controller... -
Seite 22: Indoor Unit Installation
Indoor Unit Installation DO NOT install unit in the following Installation Instructions – Indoor unit locations: NOTE: Panel installation should be performed Areas with oil drilling or fracking after piping and wiring have been completed. Coastal areas with high salt content in the Step 1: Select installation location Areas with caustic gases in the air, such as Before installing the indoor unit, you must... -
Seite 23: Refrigerant Pipe Connection
Refrigerant pipe connection (D. gas side) Drain point Refrigerant pipe connection (E. Liquid side) Hook Indoor parts installation size MODEL(Btu/h) Length of A (mm/inch) Length of B (mm/inch) Length of C (mm/inch) Length of D (mm/inch) Length of E (mm/inch) 18K~24K 1068/42 675/26.6... -
Seite 24: Hang Indoor Unit
Step 2: Hang indoor unit CAUTION Wood The unit body must be completely aligned with the hole. Ensure that the unit and the hole are Place the wood mounting across the roof beam, the same size before moving on. then install the hanging screw bolts. 1. -
Seite 25: Wall-Mounted Installation
How to install the conduit installation plate 8. Remove the side board and the grille. (if supplied) Hanging Hanging arm 1. Fix the sheath connector (not supply) on the screw bolt wire hole of the conduit installation plate. 2. Fix the the conduit installation plate on the chassis of the unit. -
Seite 26: Drill Wall Hole For Connective Piping
Indoor Drainpipe Installation Step 3: Drill wall hole for connective piping 1. Determine the location of the wall hole Install the drainpipe as illustrated in the following based on the location of the outdoor unit. Figure. 2. Using a 65mm (2.5in) or 90mm(3.54in) 1-1.5m (depending on models )core drill, drill a (39-59”) -
Seite 27: Outdoor Unit Installation
Outdoor Unit Installation Install the unit by following local codes and install unit in the following locations: DO NOT regulations , there may be di er slightly Near an obstacle that will block air inlets between di erent regions. and outlets Near a public street, crowded areas, or where noise from the unit will disturb others Near animals or plants that will be harmed... -
Seite 28: Anchor Outdoor Unit
Step 2: Install drain joint(Heat pump unit only) Step 3: Anchor outdoor unit Before bolting the outdoor unit in place, you must The outdoor unit can be anchored to the install the drain joint at the bottom of the unit. ground or to a wall-mounted bracket with Note that there are two di erent types of drain bolt(M10). - Seite 29 (unit: mm/inch) Rows of series installation The relations between H, A and L are as follows. 25 cm / 9.8” or more L ° 1/2H L ° H 30 cm / 11.8” or more 1/2H < L ° H L > H Can not be installed Outdoor Unit Dimensions Mounting Dimensions...
-
Seite 30: Refrigerant Piping Connection
Refrigerant Piping Connection When connecting refrigerant piping, do not let substances or gases other than the speci ed refrigerant enter the unit. The presence of other gases or substances will lower the unit’ s capacity, and can cause abnormally high pressure in the refrigeration cycle. This can cause explosion and injury. -
Seite 31: Connection Instructions -Refrigerant Piping
2. Using a reamer or deburring tool, remove Connection Instructions – all burrs from the cut section of the pipe. Refrigerant Piping Pipe Reamer CAUTION The branching pipe must be installed • Point down horizontally. An angle of more than 10° may cause malfunction. -
Seite 32: Connect Pipes
PIPING EXTENSION BEYOND FLARE FORM CAUTION Pipe Tightening Flare dimension (A) Flare shape torque (Unit: mm/Inch) gauge Ensure to wrap insulation around the piping. • Min. Max. Direct contact with the bare piping may 18-20 N.m 90 ° ± 4 8.4/0.33 8.7/0.34 Ø... -
Seite 33: Wiring
Wiring BEFORE PERFORMING ANY Make sure that you do not cross your electrical wiring with your signal wiring. ELECTRICAL WORK, READ THESE This may cause distortion and REGULATIONS interference. 1. All wiring must comply with local and national The unit must be connected to the electrical codes, regulations and must be main outlet. -
Seite 34: Outdoor Uint Wiring
Outdoor Unit Wiring Air switch (purchased seperately) Indoor unit power wires WARNING Before performing any electrical or wiring work, turn o the main power to the system. Indoor unit Outdoor unit 1. Prepare the cable for connection a. You must rst choose the right cable size. -
Seite 35: Indoor Uint Wiring
4. Connect the u-lugs to the terminals. Using a wire crimper, crimp u-lugs on the ends. Match the wire colors/labels with the labels on the terminal block. Firmly screw the u-lug NOTE: When connecting the wires, strictly of each wire to its corresponding terminal. follow the wiring diagram found inside the Refer to the Serial Number and Wiring electrical box cover. - Seite 36 Power Specifications(Not applicable for North America) NOTE: Electric auxiliary heating type circuit breaker/fuse need to add more than 10 A. Outdoor Power Supply Specifications ≤18K MODEL(Btu/h) 19K~24K 25K~36K 37K~48K 49K~60K PHASE 1 Phase 1 Phase 1 Phase 1 Phase 1 Phase POWER 208-240V 208-240V 208-240V 208-240V 208-240V VOLT...
-
Seite 37: Air Evacuation
Air Evacuation If there is a change in system pressure, refer Preparations and Precautions to Gas Leak Check section for information Air and foreign matter in the refrigerant circuit can on how to check for leaks. If there is no cause abnormal rises in pressure, which can damage change in system pressure, unscrew the cap from the packed valve (high pressure valve). -
Seite 38: Note On Adding Refrigerant
Note on Adding Refrigerant Some systems require additional charging depending on pipe lengths. The standard pipe length varies according to local regulations. For example, in North America, the standard pipe length is 7.5m (25’). In other areas, the standard pipe length is 5m (16‘). The refrigerant should be charged from the service port on the outdoor unit’... -
Seite 39: Test Run
Test Run f. Check to see that the drainage system is Before Test Run unimpeded and draining smoothly. A test run must be performed after the entire g. Ensure there is no vibration or abnormal system has been completely installed. Confirm noise during operation. - Seite 41 Manuel d’Opération et d’Installation de l’Unité Intérieure CEILING & FLOOR TYPE AIR CONDITIONER FDMX R32 Manuel Français FDMX-050N-09M25 / YDAX-050H-09M25 FDMX-070N-09M25 / YDAX-070H-09M25 FDMX-100N-09M25 / YDAX-100H-09M25 FDMX-100N-09M25 / YDAX-100H-09T35 FDMX-140N-09M25 / YDAX-140H-09T35 FDMX-175N-09M25 / YDAX-175H-09T35 NOTE IMPORTANTE: Veuillez lire ces instructions avec attention avant d'utiliser votre climatiseur et les conserver pour un usage futur.
- Seite 42 Table des matiè res Pré cautions de sé curité Manuel du proprié taire Spé cifications et caracté ristiques des unité s 1. Affichage de l'unité inté rieure 2. Tempé rature de fonctionnement 3. Autres caracté ristiques Entretien et maintenance Dé pannage...
- Seite 43 Manuel d'installation Accessoires Ré sumé de l'installation Piè ces de l'unité Installation d'une unité inté rieure 1. Sé lectionnez le lieu d'installation 2. Accrocher l'unité inté rieure 3. Percer un trou dans le mur pour la conduite de raccordement 4. Raccorder le tuyau de vidange Installation de l'unité...
-
Seite 44: Pré Cautions De Sé Curité
Pré cautions de sé curité Lire les pré cautions de sé curité avant l'utilisation et l'installation Une installation incorrecte due à l'ignorance des instructions peut causer de graves dommages ou des blessures. La gravité des dommages ou des blessures potentiels est classé e comme un AVERTISSEMENT ou une ATTENTION. AVERTISSEMENT ATTENTION Ce symbole indique la possibilité... - Seite 45 AVERTISSEMENTS CONCERNANT LE NETTOYAGE ET L'ENTRETIEN Éteignez l'appareil et dé branchez le courant avant de le nettoyer. Le non-respect de cette consigne peut entraî ner un choc é lectrique. Ne Pas nettoyer le climatiseur avec des quantité s excessives d'eau. ...
- Seite 46 AVERTISSEMENTS POUR L'INSTALLATION DU PRODUIT L'installation doit ê tre effectué e par un revendeur ou un spé cialiste autorisé . Une installation dé fectueuse peut provoquer une fuite d'eau, un choc é lectrique ou un incendie. L'installation doit ê tre effectué e conformé ment aux instructions d'installation. Une installation incorrecte peut provoquer une fuite d'eau, un choc é...
- Seite 47 AVERTISSEMENT pour l'utilisation du ré frigé rant R32/R290 Lorsque des ré frigé rants inflammables sont utilisé s, l'appareil doit ê tre stocké dans un endroit bien ventilé où la taille de la piè ce correspond à la surface de la piè ce telle que spé cifié e pour le fonctionnement. Pour les modè...
- Seite 48 Ligne directrice europé enne sur l'é limination des dé chets Ce marquage figurant sur le produit ou sur sa documentation, indique que les dé chets d'é quipements é lectriques et é lectroniques ne doivent pas ê tre mé langé s aux dé chets mé nagers gé né raux. Élimination correcte de ce produit (Dé...
-
Seite 49: Spé Cifications Et Caracté Ristiques Des Unité S
Spé cifications et caracté ristiques des unité s Affichage de l'unité inté rieure REMARQUE: les diffé rents modè les ont des panneaux d'affichage diffé rents. Tous les indicateurs dé crits ci-dessous ne sont pas disponibles pour le climatiseur que vous avez acheté . Veuillez vé... - Seite 50 FUNG MANUEL Ré cepteur infrarouge Affichage LED Ré cepteur infrarouge Affichage LED BOUTON MANUEL : Ce bouton permet de sé lectionner le mode dans l'ordre suivant : AUTO, FROID FORCÉ, ARRÊT. Mode FROID FORCÉ : En mode FROID FORCÉ, le voyant Opé ration clignote. Le systè me passe alors en mode AUTO aprè s avoir refroidi à...
-
Seite 51: Tempé Rature De Fonctionnement
Tempé rature de fonctionnement Lorsque votre climatiseur est utilisé en dehors des plages de tempé rature suivantes, certains dispositifs de protection peuvent s'activer et entraî ner la dé sactivation de l'appareil. Type Inverter Split (plus confortable) Mode FROID Mode Mode SEC POUR UNITÉS CHAUFFAGE... -
Seite 52: Autres Caracté Ristiques
Autres caracté ristiques Ré glage par dé faut Fonction de mé moire d'angle de persienne (certains modè les) Lorsque le climatiseur redé marre aprè s une panne de courant, Certains modè les sont conç us avec une fonction de mé moire d'angle il revient aux ré... -
Seite 53: Entretien Et Maintenance
Entretien et maintenance Nettoyage de votre unité inté rieure Retirez directement le filtre à air de l'unité inté rieure comme indiqué (applicable aux climatiseurs de 14~16KW uniquement). AVANT LE NETTOYAGE OU L'ENTRETIEN Retirez le filtre à air. ÉTEIGNEZ TOUJOURS VOTRE SYSTÈME Nettoyez le filtre à... - Seite 54 Entretien Longues pé riodes ATTENTION non-utilisation Avant de changer le filtre ou de le nettoyer, é teignez l'appareil et dé branchez son alimentation é lectrique. Si vous pré voyez de ne pas utiliser votre climatiseur pendant une pé riode prolongé e, procé dez comme suit : ...
-
Seite 55: Dé Pannage
Dé pannage Pré cautions de sé curité Si l'une des conditions suivantes se produit, é teignez votre appareil immé diatement ! Le cordon d'alimentation est endommagé ou anormalement chaud Vous sentez une odeur de brû lé L'appareil é met des sons forts ou anormaux ... - Seite 56 Problè me Causes possibles L'appareil é mettra diffé rents sons en fonction de son mode de fonctionnement actuel. L'unité exté rieure fait des bruits La poussiè re est é mise par L'appareil peut accumuler de la poussiè re pendant de longues pé riodes de non-utilisation, qui sera é mise l'unité...
- Seite 57 Problè me Causes possibles Solution Panne de courant Attendre le ré tablissement du courant L'é lectricité est coupé e Allumez le courant Le fusible est grillé Remplacer le fusible Les piles des té lé commandes sont Remplacer les piles L'unité ne fonctionne pas mortes La protection de 3 minutes de l'unité...
-
Seite 58: Accessoires
Accessoires Le systè me de climatisation est livré avec les accessoires suivants. Utilisez toutes les piè ces et accessoires d'installation pour installer le climatiseur. Une mauvaise installation peut entraî ner une fuite d'eau, un choc é lectrique et un incendie, ou provoquer une dé faillance de l'é... -
Seite 59: Ré Sumé De L'installation
Ré sumé de l'installation Installer l'unité inté rieure Installer le conduite de drainage Installer l'unité exté rieure Évacuer le systè me de ré frigé ration Connecter les fils Raccorder les conduites de frigorigè ne Effectuer un test ◄ ▶ Page 19... -
Seite 60: Piè Ces De L'unité
Piè ces de l'unité REMARQUE : L'installation doit ê tre effectué e conformé ment aux exigences des normes locales et nationales. L'installation peut ê tre lé gè rement diffé rente selon les ré gions. ①Persienne de flux d'air (à la sortie d'air) ②... -
Seite 61: Installation D'une Unité Inté Rieure
Installation d'une unité inté rieure Instructions d'installation - Unité inté rieure NE PAS installer l'unité dans les endroits suivants : Zones de forage ou de fracturation du pé trole REMARQUE : L'installation des panneaux doit ê tre effectué e aprè s que la conduite et le câ blage ont é té ré alisé s. Zones cô... - Seite 62 Raccordement de la conduite de frigorigè ne (D. cô té gaz) Point de drainage Raccordement de la conduite de frigorigè ne (E. Cô té liquide) Crochet Taille de l'installation des piè ces inté rieures Longueur de A Longueur de B Longueur de C Longueur de D Longueur de E...
-
Seite 63: Accrocher L'unité Inté Rieure
Étape 2 : Accrocher l'unité inté rieure ATTENTION Bois Le corps de l'unité doit ê tre complè tement aligné avec le trou. Placez le montage t en bois en travers de la poutre de toit, puis Assurez-vous que l'unité et le trou sont de la mê me taille avant de installez les boulons à... - Seite 64 Retirez la planche laté rale et la grille. Comment installer la plaque d'installation du conduit (si elle est Boulon à vis de fournie) Bras de suspension suspension Fixez le connecteur de la gaine (pas l'alimentation) sur le trou de la plaque d'installation du conduit. Fixez la plaque d'installation du conduit sur le châ...
-
Seite 65: Percer Un Trou Dans Le Mur Pour La Conduite De Raccordement
Étape 3 : Percer un trou dans le mur pour la conduite de Installation du tuyau d'é vacuation à l'inté rieur raccordement Installez le tuyau d'é vacuation comme illustré dans la figure suivante. Dé terminez l'emplacement du trou dans le mur en fonction de l'emplacement de l'unité... -
Seite 66: Installation De L'unité Exté Rieure
Installation de l'unité exté rieure Installez l'unité en respectant les codes et ré glementations locaux, NE PAS installer l'unité dans les endroits suivants : il peut y avoir de lé gè res diffé rences entre les diffé rentes ré gions. Prè... - Seite 67 Étape 2 : Installez le joint de vidange (unité de pompe à chaleur Étape 3 : Ancrage de l'unité exté rieure uniquement) L'unité exté rieure peut ê tre ancré e au sol ou à un support mural à Avant de boulonner l'unité exté rieure en place, vous devez installer l'aide d'un boulon (M10).
- Seite 68 Installation de rangé es en sé rie Les relations entre H, A et L sont les suivantes. L ≤ 1/2U 25 cm/9,8 po ou plus L ≤ H 1/2H ≤ L ≤ H 30 cm ou plus L > H Ne peut pas ê...
-
Seite 69: Raccordement Des Conduites De Frigorigè Ne
Raccordement des conduites de frigorigè ne Lors du raccordement de la conduite de frigorigè ne, ne pas laisser entrer dans l'appareil des substances ou des gaz autres que le frigorigè ne spé cifié . La pré sence d'autres gaz ou substances ré duira la capacité de l'unité et peut provoquer une pression anormalement é levé e dans le cycle de ré... - Seite 70 Instructions raccordement À l'aide d'un alé soir ou d'un outil d'é bavurage, enlevez toutes les bavures de la partie coupé e de la conduite. Conduite de fluide frigorigè ne Conduite ATTENTION Alé soir • La conduite de dé rivation doit ê tre installé e horizontalement. Un angle supé...
-
Seite 71: Raccorder Les Conduites
EXTENSION DE LA CONDUITE AU-DELÀ DE LA ATTENTION FORME ÉVASÉE • Veillez à enrouler de l'isolant autour de la conduite. Un Jauge de Couple de serrage Dimension de l'é vasement Forme é vasé e contact direct avec la conduite nue peut entraî ner des conduite (A) (Unité... -
Seite 72: Câ Blage
Câ blage 13. Veillez à ne pas croiser votre câ blage é lectrique avec votre câ blage de signalisation. Cela pourrait provoquer AVANT D'EFFECTUER TOUT TRAVAIL des distorsions et des interfé rences. ÉLECTRIQUE, LISEZ CES RÈGLEMENTS 14. L'appareil doit ê tre connecté à la prise principale. Tout le câ... -
Seite 73: Câ Blage De L'unité Exté Rieure
Câ blage de l'unité exté rieure AVERTISSEMENT Interrupteur d'air AVANT D'EFFECTUER TOUT TRAVAIL ÉLECTRIQUE OU Câ bles d'alimentation de l'unité inté rieure DE CÂBLAGE, COUPEZ L'ALIMENTATION PRINCIPALE (acheté sé paré ment) DU SYSTÈME. Pré parez le câ ble pour le branchement Vous devez d'abord choisir la bonne taille de câ... -
Seite 74: Câ Blage Des Unité S Inté Rieures
À l'aide d'une pince à sertir les fils, sertissez les cosses en U Raccordez les cosses en U aux bornes. sur les extré mité s. Faites correspondre les couleurs et les é tiquettes des fils avec REMARQUE: Lors du raccordement des fils, suivez celles du bornier. - Seite 75 Spé cifications d'alimentation(Non applicable pour l'Amé rique du Nord) REMARQUE : le disjoncteur/fusible de type chauffage é lectrique d'appoint doit ajouter plus de 10 A. Spé cifications de l'alimentation é lectrique exté rieure ≤18K MODÈLE(Btu/h) 19K~24K 25K~36K 37K~48K 49K~60K PHASE 1 Phase 1 Phase 1 Phase...
-
Seite 76: Évacuation De L'air
Évacuation de l'air Pré parations et pré cautions S'il y a un changement de pression du systè me, reportez-vous à la section Vé rification des fuites de gaz pour L'air et les corps é trangers dans le circuit de ré frigé ration peuvent savoir comment vé... -
Seite 77: Remarque Sur L'ajout De Ré Frigé Rant
Remarque sur l'ajout de ré frigé rant Certains systè mes né cessitent une charge supplé mentaire en fonction de la longueur des conduites. La longueur standard de la conduite varie en fonction de la ré glementation locale. Par exemple, en Amé rique du Nord, la longueur standard de la conduite est de 7,5 m (25 po). Dans d'autres ré... -
Seite 78: Test De Fonctionnement
Test de fonctionnement Avant l'essai d'exé cution Vé rifiez que le systè me de drainage n'est pas entravé et que la vidange se fait en douceur. Un test doit ê tre effectué aprè s l'installation complè te du systè me. Confirmez les points suivants avant d'effectuer le test : Assurez-vous qu'il n'y a pas de vibration ou de bruit anormal pendant le fonctionnement. - Seite 79 Betriebs- und Installationsanleitung für das Innengerät CEILING & FLOOR TYPE AIR CONDITIONER FDMX R32 Deutsch Manual FDMX-050N-09M25 / YDAX-050H-09M25 FDMX-070N-09M25 / YDAX-070H-09M25 FDMX-100N-09M25 / YDAX-100H-09M25 FDMX-100N-09M25 / YDAX-100H-09T35 FDMX-140N-09M25 / YDAX-140H-09T35 FDMX-175N-09M25 / YDAX-175H-09T35 WICHTIGE NOTIZ: Bevor Sie die Anlage in Betrieb nehmen, lesen Sie bitte diese Bedienungsanleitung gründlich durch und bewahren Sie diese für zukünftige Referenz auf.
- Seite 80 Inhaltsverzeichnis Sicherheitsvorkehrungen Benutzerhandbuch Gerä tespezifikationen und Merkmale 1. Anzeige der Innenbereichseinheit 2. Betriebstemperatur 3. Weitere Merkmale Pflege und Wartung Fehlerbehebung...
- Seite 81 Installationshandbuch Zubehö r Zusammenfassung der Installation Einheitsteile Installation der Innenbereichseinheit 1. Installationsstelle auswä hlen 2. Hä ngende Innenbereichseinheit 3. Wandbohrloch fü r Anschlussrohrleitungen erstellen 4. Ablaufschlauch anschließ en Installation der Auß enbereichseinheit 1. Installationsstelle auswä hlen 2. Abflussverbindung installieren 3. Die Auß enbereichseinheit befestigen Kü...
-
Seite 82: Sicherheitsvorkehrungen
Sicherheitsvorkehrungen Die Sicherheitshinweise vor Inbetriebnahme und Installation durchlesen Eine unsachgemä ß e Installation aufgrund der Nichtbeachtung der Anweisungen kann zu schweren Schä den oder Verletzungen fü hren. Der Schweregrad mö glicher Schä den oder Verletzungen wird entweder als WARNUNG oder VORSICHT eingestuft. WARNUNG VORSICHT Dieses Symbol weist auf das Risiko von Personenschä... -
Seite 83: Reinigungs- Und Wartungshinweise
REINIGUNGS- UND WARTUNGSHINWEISE Schalten Sie das Gerä t vor der Reinigung aus und trennen Sie es vom Stromnetz. Andernfalls kann ein Stromschlag auftreten. Reinigen Sie die Klimaanlage nicht mit ü bermä ß igen Wassermengen. Reinigen Sie die Klimaanlage nicht mit brennbaren Reinigungsmitteln. Brennbare Reinigungsmittel kö nnen Brä nde oder Verformungen verursachen. - Seite 84 HINWEISE ZUR PRODUKTINSTALLATION Die Installation muss von einem autorisierten Hä ndler oder Fachmann durchgefü hrt werden. Eine fehlerhafte Installation kann zu Wasseraustritt, Stromschlag oder Brä nden fü hren. Die Installation muss gemä ß den Installationsanweisungen durchgefü hrt werden. Eine unsachgemä ß e Installation kann Wasseraustritt, Stromschlag oder Brä...
-
Seite 85: Warnung Zur Verwendung Des Kü Hlgass
WARNUNG zur Verwendung des Kü hlgass R32/R290 Wenn brennbares Kü hlgas verwendet wird, ist das Gerä t in einem gut belü fteten Bereich zu lagern, in dem die Raumgrö ß e der fü r den Betrieb spezifischen Raumflä che entspricht. Fü... - Seite 86 Europä ische Entsorgungsrichtlinien Diese Kennzeichnung, die auf dem Produkt oder seiner Beschreibung abgebildet ist, weist darauf hin, dass zu entsorgende Elektro- und Elektronikgerä te nicht mit dem gewö hnlichen Hausmü ll vermischt werden dü rfen. Korrekte Entsorgung dieses Produkts (Elektro- und Elektronik-Altgerä te) Dieses Gerä...
-
Seite 87: Gerä Tespezifikationen Und Merkmale
Gerä tespezifikationen und Merkmale Anzeige der Innenbereichseinheit HINWEIS: Verschiedene Modelle haben unterschiedliche Anzeigefelder. Nicht alle der unten beschriebenen Indikatoren sind fü r das von Ihnen gekaufte Klimaanlage verfü gbar. Bitte ü berprü fen Sie die Innenbereichs-Anzeigetafel des von Ihnen erworbenen Gerä ts. Abbildungen in diesem Handbuch dienen der Beschreibung. - Seite 88 FUNG Handbuch Infrarot-Empfä nger LED-Anzeige Infrarot-Empfä nger LED-Anzeige Manuelle Taste : Mit dieser Schaltflä che wird der Modus in der folgenden Reihenfolge ausgewä hlt: AUTO, ZWANGSKÜHLUNG , AUS. ZWANGSKÜHLUNG-Modus: Im ZWANGSKÜHLUNG-Modus blinkt die Betriebsleuchte. Das System schaltet dann auf AUTO, nachdem es 30 Minuten lang bei hoher Windgeschwindigkeit abgekü...
-
Seite 89: Betriebstemperatur
Betriebstemperatur Wenn Ihre Klimaanlage auß erhalb der folgenden Temperaturbereiche verwendet wird, kö nnen bestimmte Sicherheitsschutzfunktionen aktiviert werden und zur Deaktivierung des Gerä ts fü hren. Wechselrichter Split-Typ FÜR KÜHL-Modus HEIZ-Modus TROCKEN-Modus AUSSENBEREICHSGERÄTE 17° C - 32° C 0° C - 30° C 10°... -
Seite 90: Weitere Merkmale
Weitere Merkmale Standard-Einstellung Lamellenwinkel-Speicherfunktion (bestimmte Modelle) Wenn die Klimaanlage nach einem Stromausfall wieder Bestimmte Modelle sind einer anlä uft, wird sie auf die Werkseinstellungen zurü ckgesetzt Lamellenwinkel-Speicherfunktion ausgestattet. Wenn das Gerä t (AUTO-Modus, AUTO-Ventilator, 24° C (76° F)). Dies kann nach einem Stromausfall wieder anlä... -
Seite 91: Pflege Und Wartung
Pflege und Wartung Die Reinigung Ihrer Innenbereichseinheit Ziehen Sie den Luftfilter wie angegeben direkt aus dem Lufteinlass heraus (gilt nur fü r 14~16KW-Klimaanlagen). VOR DER REINIGUNG ODER WARTUNG Entfernen Sie den Luftfilter. Reinigen Sie den Luftfilter, indem Sie die Oberflä che SCHALTEN REINIGUNGS- ODER... -
Seite 92: Wartung - Lange Nichtbenutzung
Wartung Lange Perioden VORSICHT Nichtbenutzung Vor dem Filterwechsel oder der Reinigung ist das Gerä t Wenn Sie Ihre Klimaanlage ü ber einen lä ngeren Zeitraum nicht auszuschalten und die Stromversorgung zu trennen. benutzen mö chten, verfahren Sie wie folgt: ... -
Seite 93: Fehlerbehebung
Fehlerbehebung SICHERHEITSVORKEHRUNGEN Wenn eine der folgenden Bedingungen eintritt, schalten Sie Ihr Gerä t sofort aus! Das Netzkabel ist beschä digt oder auß ergewö hnlich warm Sie verspü ren einen Brandgeruch Das Gerä t gibt laute oder anormale Gerä usche ab ... - Seite 94 Version Mö gliche Ursachen Das Gerä t erzeugt je nach seiner aktuellen Betriebsart unterschiedliche Gerä usche. Die Auß enbereichseinheit erzeugt Gerä usche Der Staub wird entweder Das Gerä t kann bei lä ngerer Nichtbenutzung Staub ansammeln, der beim Einschalten des Gerä ts Innen- oder ausgestoß...
- Seite 95 Problem Mö gliche Ursachen Lö sung Stromausfall Warten, bis die Stromversorgung wiederhergestellt ist Die Stromversorgung ist ausgeschaltet Schalten Sie die Stromversorgung ein Die Sicherung ist durchgebrannt Ersetzen Sie die Sicherung Die Batterien der Fernbedienung sind Batterien austauschen Das Gerä t funktioniert nicht leer Der 3-Minuten-Schutz des Gerä...
-
Seite 96: Zubehö R
Zubehö r Die Klimaanlage wird mit folgendem Zubehö r geliefert. Verwenden Sie alle Installationsteile und Zubehö rteile fü r die Installation der Klimaanlage. Eine unsachgemä ß e Installation kann zu Wasseraustritt, Stromschlag und Feuer fü hren oder den Ausfall des Gerä ts verursachen. -
Seite 97: Zusammenfassung Der Installation
Zusammenfassung der Installation Installieren Sie die Innenbereichseinheit Installieren des Abflussrohrs Installieren Sie die Auß enbereichseinheit Entleeren Sie das Kü hlsystem Verbinden Sie die Kabel Verbinden Sie die Kü hlgasleitungen Ausfü hren eines Testlaufs ◄ ► Seite 19... -
Seite 98: Einheitsteile
Einheitsteile HINWEIS: Die Installation muss in Übereinstimmung mit den Anforderungen der lokalen und inlä ndischen Normen durchgefü hrt werden. Die Installation kann in verschiedenen Gebieten leicht unterschiedlich sein. ①Luftströ mungslamelle (am Luftauslass) ②Lufteinlass (mit integriertem Luftfilter) ③Installationsteil ④Anzeigefeld ⑤Fernsteuerung ⑥Abflussrohr ⑥Verbindungsrohr ⑧Lufteinlass ⑨Luftauslass... -
Seite 99: Installation Der Innenbereichseinheit
Installation der Innenbereichseinheit Installationsanweisungen - Innenbereichseinheit Installieren Sie das Gerä t NICHT an den folgenden Orten: HINWEIS: Die Abdeckungsinstallation sollte nach Abschluss der Gebiete mit Ölbohrungen oder Fracking Verrohrung und Verkabelung durchgefü hrt werden. Schritt 1: Installationsort auswä hlen Kü stengebiete mit hohem Salzgehalt in der Luft Bevor Sie die Auß... - Seite 100 Kü hlmittelleitungsanschluss (D. Gas-seitig) Ablassstelle Kü hlmittelleitungsanschluss (E. Flü ssigkeits-seitig) Haken Installationsgrö ß e der Innenteile Modell Lä nge von A Lä nge von B Lä nge von C Lä nge von D Lä nge von E (Btu/Std) (mm/Zoll) (mm/Zoll) (mm/Zoll) (mm/Zoll) (mm/Zoll)
- Seite 101 Schritt 2: Aufhä ngen der Innenbereichseinheit VORSICHT Holz Platzieren Sie die Holzbefestigung quer ü ber den Dachbalken und Das Gerä tegehä use muss vollstä ndig auf die Bohrung ausgerichtet bringen Sie dann die Hä ngeschraubenbolzen an. sein. Stellen Sie sicher, dass Gerä t und die Öffnung die gleichen Abmessungen aufweisen, bevor Sie fortfahren.
- Seite 102 Entfernen Sie das Seitenbrett und das Gitter. So installieren Sie die Rohrverlegeplatte (falls mitgeliefert) Hä nge-Schrauben Befestigen Sie den Mantelverbinder (nicht im Lieferumfang Hä ngender Arm bolzen enthalten) auf dem Kabelloch der Rohrverlegeplatte. Befestigen Sie die Kanal-Installationsplatte auf dem Chassis des Gerä...
-
Seite 103: Wandbohrloch Fü R Anschlussrohrleitungen Erstellen
Schritt 3: Wandbohrloch fü r Anschlussrohrleitungen Installation eines Innenabflussrohrs erstellen Installieren Sie das Abflussrohr wie in der folgenden Abbildung Bestimmen Sie die Position des Wandlochs auf der dargestellt. Grundlage der Position der Auß enbereichseinheit. Bohren Sie mit einem 65 mm (2,5 Zoll) oder 90 mm (3,54 Zoll) (je nach Modell) Kernbohrer ein Loch in die Wand. -
Seite 104: Installation Der Auß Enbereichseinheit
Installation der Auß enbereichseinheit Installieren Sie das Gerä t unter Beachtung der ö rtlichen Installieren Sie das Gerä t NICHT an den folgenden Orten: Vorschriften Bestimmungen, wobei zwischen In der Nä he eines Hindernisses, das Luftein- und -Auslä sse verschiedenen Regionen leichte Unterschiede bestehen kö nnen. blockiert In der Nä... -
Seite 105: Die Auß Enbereichseinheit Befestigen
Schritt 2: Installieren Sie eine Abflussverbindung (nur Schritt 3: Die Auß enbereichseinheit befestigen Wä rmepumpeneinheit) Die Auß enbereichseinheit kann am Boden oder mit einer Bevor Sie die Auß enbereichseinheit verschrauben, mü ssen Sie die Schraube (M10) an einer Wandhalterung verankert werden. Abflussverbindung an der Unterseite des Gerä... - Seite 106 Reihenanlagen-Serien Die Beziehungen zwischen H, A und L sind wie folgt. L ≤ 1/2U 25 cm / 9,8" oder mehr L ≤ H 1/2H ≤ L ≤ H 30 cm / 11,8" oder mehr L > H Kann nicht installiert werden 300 cm / 118”...
-
Seite 107: Kü Hlgas-Rohrleitungsanschluss
Kü hlgas-Rohrleitungsanschluss Lassen Sie beim Anschluss von Kü hlmittelleitungen keine anderen Stoffe oder Gase auß er dem spezifizierten Kü hlmittel in das Gerä t eindringen. Das Vorhandensein anderer Gase oder Substanzen verringert die Gerä teleistung und kann einem ungewö hnlich hohen Druck im Kä... -
Seite 108: Anschlussvorschriften -Kü Hlgas-Rohrleitungen
Anschlussvorschriften Entfernen einer Reibahle oder einem Entgratwerkzeug alle Grate aus dem geschnittenen -Kü hlgas-Rohrleitungen Rohrabschnitt. Rohr VORSICHT Reibahle • Die Abzweigleitung muss horizontal verlegt werden. Ein Winkel von mehr als 10° kann zu Fehlfunktionen fü hren. • Installieren Sie die VerbindungsleitungNICHT, bevor sowohl die Innen- als auch die Auß... -
Seite 109: Rohre Verbinden
ROHRLEITUNGSVERLÄNGERUNG ÜBER DIE BÖRDELFORM HINAUS VORSICHT Rohrauß endurchmesser Anzugsdrehmoment Bö rdel-Abmessungen Bö rdelform • Stellen Sie sicher, dass die Isolierung um die (A) (Einheit: Rohrleitung gewickelt wird. Der direkte Kontakt mit mm/Zoll) der blanken Rohrleitung kann zu Verbrennungen Min. Max. oder Erfrierungen fü... -
Seite 110: Verkabelung
Verkabelung 13. Achten Sie darauf, dass Sie Ihre elektrische LESEN SIE DIESE VORSCHRIFTEN, BEVOR Verkabelung nicht mit Ihrer Signalverkabelung ELEKTRISCHE ARBEITEN kreuzen. Dies kann zu Verzerrungen und Stö rungen fü hren. DURCHFÜHREN 14. Das Gerä t muss Hauptstromanschluss Die gesamte Verkabelung muss den ö rtlichen und inlä ndischen angeschlossen werden. -
Seite 111: Verkabelung Der Auß Enbereichseinheit
Verkabelung der Auß enbereichseinheit Luftschalter Spannungskabel der WARNUNG: Innenbereichseinheit Schalten Sie die Hauptstromversorgung des Systems aus, bevor (separat erhä ltlich) Sie elektrische oder Verkablungsarbeiten durchfü hren. Bereiten Sie das Kabel fü r den Anschluss vor Sie mü ssen zunä chst die korrekte Kabelgrö ß e auswä hlen. Stellen Sie sicher, dass Sie H07RN-F-Kabel verwenden. -
Seite 112: Verkabelung Der Innenbereichseinheiten
Crimpen Sie mit einer Kabel-Crimpzange U-Stecker an den Schließ en Sie die U-Stecker an die Klemmen an. Enden. Stimmen Sie die Farben/Beschriftungen der Kabel mit den HINWEIS: Halten Sie sich beim Anschließ en der Drä hte Beschriftungen auf dem Klemmenblock ab. Schrauben Sie strikt an den Schaltplan, der sich im Deckel des den U-Bü... - Seite 113 Leistungsspezifikationen(Nicht zutreffend fü r Nordamerika) HINWEIS: Fü r Sicherungsautomaten/Sicherungen der elektrischen Zusatzheizung mü ssen mehr als 10 A hinzufü gt werden. Spezifikationen der Stromversorgung fü r Auß enbereiche ≤18K Modell (Btu/Std) 19K~24K 25K~36K 37K~48K 49K~60K PHASE 1 Phase 1 Phase 1 Phase 1 Phase 1 Phase...
-
Seite 114: Entlü Ftung
Entlü ftung Vorbereitungen und Vorsichtsmaß nahmen Bei einer Änderung des Systemdrucks finden Sie im Abschnitt Gasleckprü fung Informationen darü ber, wie Sie Luft und Fremdkö rper im Kü hlmittelkreislauf kö nnen anormale auf Lecks prü fen kö nnen. Wenn keine Änderung des Druckanstiege verursachen, die die Klimaanlage beschä... -
Seite 115: Hinweis Zum Hinzufü Gen Von Kü Hlgas
Hinweis zum Hinzufü gen von Kü hlgas Einige Systeme erfordern je nach Rohrlä nge eine zusä tzliche Aufladung. Die Standardrohrlä nge variiert je nach den ö rtlichen Vorschriften. In Nordamerika, zum Beispiel, beträ gt die Standardrohrlä nge 7,5 m (25'). In anderen Regionen beträ... -
Seite 116: Testlauf
Testlauf Vor dem Testlauf Prü fen Sie, ob das Entwä sserungssystem ungehindert und reibungslos funktioniert. Nach der vollstä ndigen Installation des gesamten Systems muss ein Testlauf durchgefü hrt werden. Bestä tigen Sie die folgenden Stellen Sie sicher, dass wä hrend des Betriebs keine Punkte, bevor Sie den Test durchfü... - Seite 117 Manuale di Operazione & Installazione dell' Unità Interna CEILING & FLOOR TYPE AIR CONDITIONER FDMX R32 Italiano Manual FDMX-050N-09M25 / YDAX-050H-09M25 FDMX-070N-09M25 / YDAX-070H-09M25 FDMX-100N-09M25 / YDAX-100H-09M25 FDMX-100N-09M25 / YDAX-100H-09T35 FDMX-140N-09M25 / YDAX-140H-09T35 FDMX-175N-09M25 / YDAX-175H-09T35 NOTA IMPORTANTE : Lea este manual atentamente antes de instalar o utilizar su nueva unidad de aire acondicionado.
- Seite 118 Indice Precauzioni di sicurezza Manuale d'uso Specifiche e caratteristiche dell'unità 1. Visualizzazione unità interna 2. Temperatura di funzionamento 3. Altre caratteristiche Cura e manutenzione Risoluzione dei problemi...
- Seite 119 Manuale di installazione Accessori Riepilogo dell'installazione Parti dell'unità Installazione dell'unità interna 1. Selezionare il luogo di installazione 2. Appendere l'unità interna 3. Praticare un foro nella parete per le tubazioni connettive 4. Collegare il tubo di drenaggio Installazione dell'unità esterna 1.
-
Seite 120: Precauzioni Di Sicurezza
Precauzioni di sicurezza Leggere le precauzioni di sicurezza prima dell'installazione e della posta in marcia. Un'installazione non corretta causata dall'inosservanza delle istruzioni può causare gravi danni o lesioni. Le informazioni che mettono in guardia su potenziali danni o lesioni sono segnalate con ATTENZIONE o PRUDENZA. ATTENZIONE CAUTELA Questo simbolo indica la possibilità... -
Seite 121: Avvertenze Elettriche
AVVERTENZE LA PULIZIA E LA MANUTENZIONE Spegnere il dispositivo e scollegare l'alimentazione prima della pulizia. In caso contrario si possono verificare scosse elettriche. Non pulire il condizionatore d’aria con quantità eccessive di acqua. Non pulire il condizionatore d’aria con detergenti combustibili. I detergenti combustibili possono causare incendi o deformazioni. - Seite 122 AVVERTENZE PER L'INSTALLAZIONE DEL PRODOTTO L'installazione deve essere eseguita da un rivenditore autorizzato o da uno specialista. Un'installazione difettosa può causare perdite d'acqua, scosse elettriche o incendi. L'installazione deve essere eseguita secondo le istruzioni. Un'installazione impropria può causare perdite d'acqua, scosse elettriche o incendi.
- Seite 123 ATTENZIONE per l'utilizzo del refrigerante R32/R290 Quando si utilizza un refrigerante infiammabile, l'apparecchio deve essere posizionato in un'area ben ventilata, e la dimensione del locale deve corrispondere alla superficie specifica per il funzionamento. Per i modelli con refrigerante R32: L’apparecchio deve essere istallato, azionato e stoccato in una stanza con una superficie del pavimento maggiore di X L’apparecchio non deve essere istallato in spazi non ventilati, se lo spazio è...
- Seite 124 Linee guida europee per lo smaltimento Questo marchio, riportato sul prodotto o sulla sua documentazione, indica che i rifiuti di apparecchiature elettriche non devono essere smaltiti con i rifiuti domestici generici. Corretto smaltimento di questo prodotto (Rifiuti di apparecchiature elettriche ed elettroniche) Questo apparecchio contiene refrigerante e altri materiali potenzialmente pericolosi.
-
Seite 125: Specifiche E Caratteristiche Dell'unità
Specifiche e caratteristiche dell'unità Visualizzazione unità interna NOTA: Diversi modelli hanno diversi pannelli di visualizzazione. Non tutti gli indicatori descritti di seguito sono disponibili per il condizionatore d’aria che avete acquistato. Verificare il pannello di visualizzazione interno dell’unità da voi acquistata. Le illustrazioni in questo manuale hanno solo scopo esemplificativo. - Seite 126 FUNZ MANUALE Ricevitore a infrarossi Display a LED Ricevitore a infrarossi Display a LED Tasto MANUALE: questo tasto seleziona la modalità nel seguente ordine: AUTO, RAFFREDDAMENTO INTENSO, SPENTO. Modalità RAFFREDDAMENTO FORZATO: In modalità RAFFREDDAMENTO FORZATO, la luce di funzionamento lampeggia. Il sistema passerà poi ad AUTO dopo che si sarà raffreddato con un'alta velocità di ventilazione per 30 minuti.
-
Seite 127: Temperatura Di Funzionamento
Temperatura di funzionamento Quando il condizionatore d’aria viene utilizzato al di fuori dei seguenti intervalli di temperatura, alcune funzioni di protezione di sicurezza possono attivarsi e causare la disattivazione dell'unità . Tipologia di suddivisione dell’inverter Modalità Modalità Modalità UNITÀ RAFFREDDAMENTO RISCALDAMENTO DEUMIDIFICATORE ESTERNE... -
Seite 128: Altre Caratteristiche
Altre caratteristiche Impostazione predefinita Funzione di memoria dell'angolo della persiana (alcuni modelli) Quando il condizionatore d’aria si riavvia dopo un'interruzione di corrente, ritorna alle impostazioni di Alcuni modelli sono progettati con una funzione di memoria fabbrica (modalità AUTO, ventilatore AUTO, 24° C dell'angolo della persiana. -
Seite 129: Cura E Manutenzione
Cura e manutenzione Estrarre subito il filtro dell’aria dall’ingresso Pulizia dell'unità interna dell’aria come indicato (applicabile solo PRIMA DELLA PULIZIA DELLA condizionatori d’aria da 14 a 16KW). MANUTENZIONE Rimuovere il filtro dell'aria. SPEGNERE SEMPRE IL CONDIZIONATORE D’ARIA Pulire il filtro dell’aria aspirando la superficie o SCOLLEGARNE L'ALIMENTAZIONE PRIMA... - Seite 130 Manutenzione - Lunghi periodi di CAUTELA non utilizzo Prima di sostituire il filtro o di eseguire la pulizia, spegnere l'apparecchio e scollegare l'alimentazione Se si prevede di non utilizzare il condizionatore d’aria per un elettrica. periodo di tempo prolungato, procedere come segue: ...
-
Seite 131: Risoluzione Dei Problemi
Risoluzione dei problemi PRECAUZIONI DI SICUREZZA Se si verifica una delle seguenti condizioni, spegnere immediatamente l'apparecchio! Il cavo di alimentazione è danneggiato o anormalmente caldo Si sente un odore di bruciato L'unità emette suoni forti o anormali ... - Seite 132 Problema Cause possibili L'unità esterna fa L'unità emette rumori diversi in base alla suo modalità operativa. rumore Viene emessa polvere L'unità può accumulare polvere durante lunghi periodi di non utilizzo, che verrà espulsa sia dall'unità interna all'accensione. Questo può essere ridotto coprendo l'unità durante lunghi periodi di inattività . che da quella esterna L'unità...
- Seite 133 Problema Cause possibili Soluzione Interruzione di corrente Attendere il ripristino della corrente L’alimentazione è spenta Accendere l’alimentazione Il fusibile è bruciato Sostituire il fusibile Le batterie del telecomando sono Sostituire le batterie L'unità non funziona scariche La protezione di 3 minuti dell'unità Attendere tre minuti dopo il riavvio dell'unità...
-
Seite 134: Accessori
Accessori Il sistema di climatizzazione viene fornito con i seguenti accessori. Utilizzare tutte le parti di installazione e gli accessori nell’installazione del condizionatore d’aria. Un'installazione non corretta può causare perdite d'acqua, scosse elettriche e incendi, o il guasto dell'apparecchiatura. Gli articoli non sono inclusi nel condizionatore d’aria e devono essere acquistati separatamente. -
Seite 135: Riepilogo Dell'installazione
Riepilogo dell'installazione Installare l'unità interna Installare il tubo di scarico Installare l'unità esterna Collegare i cavi Collegare i tubi del refrigerante Evacuare il sistema di refrigerazione Eseguire un test di funzionamento Pagina 19 ... -
Seite 136: Parti Dell'unità
Parti dell'unità NOTA: l'installazione deve essere eseguita in conformità ai requisiti delle norme locali e nazionali. L'installazione può essere leggermente diversa in base ad aree differenti. ①Persiana per flusso d’aria (sull’ingresso dell’aria) ②Ingresso dell’aria (con filtro dell’aria) ③Parte di istallazione ④... -
Seite 137: Installazione Dell'unità Interna
Installazione dell'unità interna Istruzioni per l'installazione - Unità interna installare l'unità nelle seguenti posizioni: Aree di trivellazione petrolifera o fracking NOTA: l’installazione del pannello deve essere eseguita Zone costiere ad alto contenuto di sale nell'aria dopo che le tubazioni e il cablaggio sono stati completati. Aree con gas caustici nell'aria, come le zone termali Fase 1: Selezionare il luogo di installazione Aree sottoposte a fluttuazioni di potenza, come le... - Seite 138 Collegamento del tubo del refrigerante (D. lato del gas) Punto di scarico Collegamento del tubo del refrigerante (E. lato del liquido) Gancio Parti interne dimensioni dell’istallazione MODELL Lunghezza di A Lunghezza di B Lunghezza di C Lunghezza di D Lunghezza di E O (Btu/h) (mm/pollici) (mm/pollici)
-
Seite 139: Appendere L'unità Interna
Passo 2: Appendere l’unità interna PRUDENZA Legno Il corpo dell’unità deve essere perfettamente allineato con il foro. Assicurarsi che l’unità e il foro siano della stessa Posizionare il supporto per legno attraverso la trave del tetto, quindi installare i bulloni a vite sospesi. dimensione prima di proseguire. - Seite 140 Rimuovere il pannello laterale e la griglia. Come installare la piastra di installazione del condotto (se fornita) Vite di sospensione Braccio di fissaggio Fissare il connettore della guaina (non fornito) sul foro della piastra di installazione del condotto. Fissare la piastra di installazione del condotto sul telaio dell'unità...
-
Seite 141: Collegare Il Tubo Di Drenaggio
Fase 3: Praticare il foro a parete per le tubazioni Installazione del tubo di drenaggio interno connettive Installare il tubo di drenaggio come illustrato nella figura Determinare la posizione del foro a parete in base seguente. alla posizione dell'unità esterna. Utilizzando una punta per carotaggio da 65 mm (2,5in) o 90 mm (3,54in) (a seconda dei modelli), praticare un foro nella parete. -
Seite 142: Installazione Dell'unità Esterna
Installazione dell'unità esterna Installare l'unità seguendo i codici e le normative locali, ci NON installare l'unità nelle seguenti posizioni: possono essere leggere differenze tra le diverse regioni. Vicino ad un ostacolo che bloccherà l'ingresso e l'uscita dell'aria Vicino a una strada pubblica, in zone affollate o dove il rumore dell'unità... -
Seite 143: Installare Il Giunto Di Drenaggio
Fase 3: Ancoraggio dell’unità esterna Fase 2: Installare il giunto di drenaggio (solo per unità con pompa di calore) L'unità esterna può essere ancorata a terra o ad una staffa a Prima di avvitare l'unità esterna, è necessario installare il parete con bullone (M10). - Seite 144 Installazione in serie I rapporti tra H, A e L sono i seguenti. 25 cm / 9,8” o più L <= 1/2 U L ≤ H 1/2H < L ≤ H 30 cm / 11,8" o più L > A Non può...
-
Seite 145: Connessione Delle Tubazioni Del Refrigerante
Connessione delle tubazioni del refrigerante Quando si collegano le tubazioni del refrigerante, lasciare entrare nell'unità sostanze o gas diversi dal refrigerante specificato. La presenza di altri gas o sostanze riduce la capacità dell'unità e può causare una pressione anormalmente elevata nel ciclo di refrigerazione. -
Seite 146: Rimuovere Le Bave
Istruzioni per il collegamento -Tubo Utilizzando un alesatore o uno sbavatore, rimuovere tutte le bave dalla sezione tagliata del tubo. del refrigerante tubazioni CAUTELA Alesatore • tubo di derivazione deve essere installato orizzontalmente. Un angolo superiore a 10° può causare malfunzionamenti. -
Seite 147: Collegare I Tubi
ESTENSIONE DELLE TUBAZIONI OLTRE LA CAUTELA SVASATURA • Assicurarsi di avvolgere l'isolamento intorno alle Dimensioni della Forma svasata tubazioni. Il contatto diretto con la tubazione nuda può Manomet svasatura (A) (Unità : Coppia di provocare ustioni o congelamento. ro della mm/pollice) serraggio •... -
Seite 148: Cablaggio
Cablaggio 13. Assicuratevi di non incrociare il cablaggio PRIMA SVOLGERE QUALSIASI elettrico con il cablaggio del segnale. Ciò può LAVORO ELETTRICO, LEGGERE causare distorsioni e interferenze. QUESTE REGOLE 14. L'unità deve essere collegata alla presa principale. Solitamente, l’alimentazione deve avere Tutti i cavi devono essere conformi alle norme e ai un’impedenza di 32 ohms. -
Seite 149: Cablaggio Dell'unità Esterna
Cablaggio dell'unità esterna Interruttore Cavi dell’alimentazione dell'unità ATTENZIONE interna (acquistare separatamente) PRIMA DI ESEGUIRE QUALSIASI LAVORO ELETTRICO O DI CABLAGGIO, SPEGNERE L'ALIMENTAZIONE PRINCIPALE DEL SISTEMA. Preparare il cavo per il collegamento a. Dovete prima di tutto scegliere la giusta dimensione Unità... -
Seite 150: Cablaggio Dell'unità Interna
Con l'ausilio di un crimpatore per cavi, crimpare i Collegare i copricorda a U ai morsetti. copricorda a U alle estremità . Far corrispondere i colori/le etichette dei cavi con le NOTA: Quando collegano cavi, seguire etichette sulla morsettiera. Avvitare saldamente il scrupolosamente lo schema di cablaggio che si trova copricorda a U di ogni filo al morsetto corrispondente. - Seite 151 Specifiche di alimentazione (non applicabile per il nord America) NOTA: l’interruttore automatico/il fusibile dei modelli con riscaldamento elettrico ausiliario deve essere superiore ai 10 A. Specifiche di alimentazione esterna ≤18K MODELLO (Btu/h) 19K~24K 25K~36K 37K~48K 49K~60K FASE 1 Fase 1 Fase 1 Fase 1 Fase 1 Fase...
-
Seite 152: Evacuazione Aria
Evacuazione aria Preparativi e precauzioni In caso di variazione della pressione del sistema, consultare la sezione Controllo perdite di gas per Aria e corpi estranei nel circuito del refrigerante possono informazioni su come verificare la presenza di causare aumenti di pressione anomali, che possono perdite. -
Seite 153: Nota Sull'aggiunta Di Refrigerante
Nota sull'aggiunta di refrigerante Alcuni sistemi richiedono una ricarica supplementare a seconda della lunghezza dei tubi. La lunghezza standard del tubo varia in base alle normative locali. Ad esempio, in Nord America, la lunghezza standard dei tubi è di 7,5 m (25'). In altre aree, la lunghezza standard dei tubi è... -
Seite 154: Esecuzione Del Test
Esecuzione del test Prima dell'esecuzione del test Verificare che il sistema di drenaggio sia privo di ostacoli e che il drenaggio avvenga senza Una prova deve essere eseguita dopo che l'intero sistema è problemi. stato completamente installato. Confermare i seguenti punti Assicurarsi che non vi siano vibrazioni o rumori prima di eseguire il test: anomali durante il funzionamento. - Seite 155 Manual de Operación & Instalación de Unidad Interior CEILING & FLOOR TYPE AIR CONDITIONER FDMX R32 Español Manual FDMX-050N-09M25 / YDAX-050H-09M25 FDMX-070N-09M25 / YDAX-070H-09M25 FDMX-100N-09M25 / YDAX-100H-09M25 FDMX-100N-09M25 / YDAX-100H-09T35 FDMX-140N-09M25 / YDAX-140H-09T35 FDMX-175N-09M25 / YDAX-175H-09T35 NOTA IMPORTANTE : Lea este manual atentamente antes de instalar o utilizar su nueva unidad de aire acondicionado.
- Seite 156 Tabla de Contenidos Precauciones de Seguridad .........................04 Manual del Propietario Especificaciones y Caracterí sticas de la Unidad ........................................1. Pantalla de la unidad interna ..........................2. Temperatura de operació n ............................3. Otras caracterí sticas Cuidado y Mantenimiento ........................Solució...
- Seite 157 Manual de Instalació n Accesorios ..............................Resumen de la Instalació n ........................Partes de la Unidad ..........................Instalació n de la Unidad Interna ............................................1. Seleccione el lugar de la instalació n ..........................2. Colgado de la unidad interna ..................
-
Seite 158: Precauciones De Seguridad
Precauciones de Seguridad Leas las precauciones de seguridad antes de realizar la instalació n y operar la unidad. Una instalació n incorrecta, por ignorar las instrucciones, puedo provocar dañ os o lesiones serias. La gravedad de los posibles dañ os o lesiones se clasifica como ADVERTENCIA o PRECAUCIÓN. ADVERTENCIA PRECAUCIÓN Este sí... - Seite 159 ADVERTENCIAS SOBRE LA LIMPIEZA Y EL MANTENIMIENTO Apague el dispositivo y desconecte la alimentació n antes de limpiar. De lo contrario, podrí a causar una descarga elé ctrica. No limpie el acondicionador de aire con cantidades excesivas de agua. ...
- Seite 160 ADVERTENCIAS SOBRE LA INSTALACIÓN DEL PRODUCTO La instalació n debe ser hecha por un vendedor autorizado o un especialista. Una instalació n inadecuada puede causar pé rdidas de agua, descargas elé ctricas, o incendios. La instalació n debe hacerse segú n las instrucciones de instalació n. Una instalació n inapropiada puede causar pé rdidas de agua, descargas elé...
- Seite 161 ADVERTENCIA sobre el Uso del Refrigerante R32/R290 Cuando se utilizan refrigerantes inflamables, el dispositivo debe almacenarse en un á rea bien ventilada, cuyo tamañ o se corresponda con el á rea especificada para la operació n. Para los modelos de refrigerante R32: El electrodomé...
-
Seite 162: Eliminació N Correcta De Este Producto
Orientació n europea de eliminació n Este signo que aparece en el producto o en su documentació n indica que los desechos de equipos elé ctricos no deben mezclarse con residuos domé sticos. Eliminació n correcta de este producto (Equipos Elé ctricos y Electró nicos Residuales) Este dispositivo contiene refrigerantes y otras sustancias potencialmente peligrosas. -
Seite 163: Especificaciones Y Caracterí Sticas De La Unidad
Especificaciones y Caracterí sticas de la Unidad Pantalla de la unidad interna AVISO: Los diferentes modelos tienen diferentes paneles de visualizació n. Tenga en cuenta que todas las indicaciones de abajo está n disponibles para el acondicionador de aire que usted compró . Compruebe el panel de visualizació n interior de la unidad que compró... - Seite 164 FUNC MANUAL Receptor infrarrojo Indicador LED Receptor infrarrojo Indicador LED Botó n manual: Ese botó n selecciona los modos en el siguiente orden: AUTOMÁTICO, ENFRÍ ADO FORZADO, APAGADO. Modo de ENFRIADO FORZADO: En el modo de ENFRIADO FORZADO, la luz de funcionamiento parpadea. El sistema entrará...
-
Seite 165: Temperatura De Operació N
Temperatura de operació n Cuando use su acondicionador de aire fuera de los siguientes rangos de temperatura, ciertas funciones de protecció n de seguridad se activará n y hará n que la unidad sea deshabilitada. Tipo Dividido Invertido Modo de Modo de Modo SECO PARA... -
Seite 166: Otras Caracterí Sticas
Otras caracterí sticas Configuració n por Defecto Funció n de Memoria del Ángulo de la Rejilla (algunos modelos) Cuando el acondicionador de aire se reinicia luego de un corte, este volverá a sus configuraciones por defecto (modo Algunos modelos cuentan con la funció n de memoria del á ngulo AUTOMÁTICO, ventilador AUTOMÁTICO,... -
Seite 167: Cuidado Y Mantenimiento
Cuidado y Mantenimiento Extraiga directamente el filtro de aire de la entrada de Limpieza de su Unidad Interna aire como se indica (solo se aplica a los ANTES DE REALIZAR LA LIMPIEZA O EL acondicionadores de aire de 14~16 KW). MANTENIMIENTO Retire el filtro de aire. - Seite 168 Mantenimiento: Periodos Largos sin PRECAUCIÓN Antes de cambiar el filtro o limpiarlo, apague la unidad y Si no piensa usar su acondicionador de aire por un tiempo desconé ctela de la corriente. prolongado, haga lo siguiente: Cuando retire el filtro, no toque las partes metá licas de la unidad.
-
Seite 169: Solució N De Problemas
Solució n de Problemas PRECAUCIONES DE SEGURIDAD Apague su unidad de inmediato cuando ante cualquiera de los siguientes eventos: El cable de alimentació n está dañ ado o se calienta de forma anormal Puede oler un olor a quemado ... - Seite 170 Problema Causas Posibles La unidad externa hace La unidad hará un sonido diferente segú n el modo de operació n actual. ruido La unidad interna o la Es posible que el polvo se acumule durante periodos largos sin uso. Estos será n expulsados cuando se externa emite polvo encienda la unidad.
- Seite 171 Problema Causas Posibles Solució n Falla del suministro elé ctrico Espere a que la corriente elé ctrica vuelva La corriente está apagada Encienda la corriente El fusible está quemado Reemplace el fusible Las baterí as del control remoto está n Reemplace las baterí...
-
Seite 172: Accesorios
Accesorios El sistema de acondicionamiento de aire viene con los siguientes accesorios. Use todas las partes y accesorios para instalar el acondicionador de aire. Una mala instalació n puede causar pé rdidas de agua, descargas de agua, incendios, y el mal funcionamiento del equipo. -
Seite 173: Resumen De La Instalació N
Resumen de la Instalació n Instale la unidad interna Instale el tubo de drenaje Instale la unidad externa Evacue el sistema de refrigeració n Conecte los cables Conecte las tuberí as del refrigerante Realice una puesta en marcha de prueba ◄... -
Seite 174: Partes De La Unidad
Partes de la Unidad AVISO: La instalació n debe realizarse conforme a los requisitos de las normas locales y nacionales. La instalació n puede variar ligeramente entre las diferentes á reas. ① Rejilla de flujo de aire (en la salida de aire) ②... -
Seite 175: Instalació N De La Unidad Interna
Instalació n de la Unidad Interna Instrucciones de Instalació n: Unidad interna No instale la unidad en los siguientes lugares: Lugares de explotació n petrolera o fracking AVISO: La instalació n del panel debe realizarse despué s de que se hayan instalado las tuberí as y el cableado. Zonas costeras con alto contenido de sal en el aire Paso 1: Seleccione el lugar de la instalació... - Seite 176 Conexió n del tubo del refrigerante (D. lado del gas) Punto de drenaje Conexió n del tubo del refrigerante (E. Lado lí quido) Gancho Dimensiones de instalació n de las partes interiores MODELO Longitud A Longitud de B Longitud C Longitud D Longitud E (BTU/h)
- Seite 177 Paso 2: Colgar la unidad interna PRECAUCIÓN Madera Coloque el soporte de madera a lo largo de la viga de techo, La unidad debe estar completamente alineada con el orificio. luego instale los pernos de suspensió n. Asegú rese de que la unidad y el orificio sean del mismo tamañ o antes de continuar.
- Seite 178 Retire el panel lateral y la rejilla. Instalació n de la placa del conducto (si es suministrado) Perno de Fije el conector de funda (no suministrado) en el agujero Brazo colgante suspensió n del cable de la placa de instalació n del conducto. Fije la placa de instalació...
- Seite 179 Paso 3: Taladre un agujero en la pared para la tuberí a Instalació n del Tubo de Drenaje de conexió n Instale el tubo de drenaje segú n la siguiente Figura. Determine la ubicació n del agujero de la pared en base a la ubicació...
-
Seite 180: Instalació N De La Unidad Externa
Instalació n de la Unidad Externa Instale la unidad siguiendo los có digos y regulaciones locales. No instale la unidad en los siguientes lugares: Estas pueden variar ligeramente entre las diferentes regiones. Cerca de un obstá culo que bloqueará las entradas y salidas de aire Cerca de una calle pú... - Seite 181 Paso 2: Instale una unió n de drenaje (solo la bomba de Paso 3: Ancle la unidad externa calor) La unidad externa puede ser anclada al suelo o al soporte de Antes de atornillar la unidad externa en su lugar, debe instalar la pared con un perno (M10).
- Seite 182 Filas de instalació n de las diferentes series Las relaciones entre H, A y L son las siguientes. L ≤ 1/2U 25 cm / 9,8” o más L ≤ H 1/2H ≤ L ≤ H 30 cm / 11,8" o má s 760x590x285 530 (20,85) 290 (11,4)
-
Seite 183: Conexió N De La Tuberí A Del Refrigerante
Conexió n de la Tuberí a del Refrigerante Al conectar la tuberí a del refrigerante, no permita que entren en la unidad sustancias o gases distintos al refrigerante especificado. La presencia de otros gases o sustancias reducirá la capacidad de la unidad y puede provocar una presió n anormalmente alta en el ciclo de refrigeració... -
Seite 184: Instrucciones De Conexió N: Tuberí A Del Refrigerante
Instrucciones de conexió n: tuberí a del Use un escariado o un desbarbador para sacar todas las rebabas de la secció n de corte del tubo. refrigerante tubo PRECAUCIÓN Escariado • El tubo bifurcado debe ser instalado de forma horizontal. Un á... - Seite 185 EXTENSIÓN DE LA TUBERÍ A MÁS ALLÁ DE LA FORMA DEL ENSANCHAMIENTO PRECAUCIÓN Calibre Par de apriete Dimensió n del Forma del • Asegú rese de aislar la tuberí a. El contacto directo con los de tubo ensanchamiento (A) ensanchamiento tubos puede causar quemaduras o quemaduras por (Unidad: mm/pulgada) congelació...
-
Seite 186: Cableado
Cableado 13. Asegú rese de no cruzar el cableado elé ctrico con el ANTES REALIZAR CUALQUIER de señ ales. Esto puede causar distorsiones e TRABAJO ELÉCTRICO, ESTAS interferencias. REGULACIONES 14. La unidad debe estar conectada al tomacorriente principal. Normalmente, la fuente de alimentació n Todo el cableado debe cumplir con los có... -
Seite 187: Cableado De La Unidad Externa
Cableado de la unidad externa Interruptor de aire ADVERTENCIA Cables de corriente de la unidad interna Antes de realizar cualquier trabajo elé ctrico o de cableado, (comprados por separado) desconecte la alimentació n principal del sistema. 1. Prepare el cable para su conexió n Primero debe elegir el tamañ... -
Seite 188: Cableado De La Unidad Interna
Con una pinza de engarce, coloque las orejetas en forma Conecte las orejas en forma de U a las terminales. de U en los extremos del cable. Empareje los colores/etiquetas de los cables en el bloque AVISO: Al conectar los cables, siga a cabalidad el terminal. - Seite 189 Especificaciones de potencia (no aplicable para Norteamé rica) AVISO: El disyuntor automá tico/fusible del tipo de calefacció n auxiliar elé ctrica debe agregar má s de 10 A. Especificaciones de la fuente de alimentació n exterior ≤18K MODELO (BTU/h) 19K~24K 25K~36K 37K~48K 49K~60K...
-
Seite 190: Evacuació N De Aire
Evacuació n de Aire Preparativos y Precauciones Si hay un cambio en la presió n del sistema, consulte la secció n Comprobació n de fugas de gas para obtener El aire y las materias extrañ as en el circuito de refrigerante informació... -
Seite 191: Aviso Sobre La Añ Adido De Refrigerante
Aviso sobre la añ adido de refrigerante Algunos sistemas requieren una carga adicional dependiendo de la longitud del tubo. La longitud está ndar del tubo varí a segú n las regulaciones locales. Por ejemplo, en Norteamé rica, la longitud está ndar del tubo es de 7,5 m (25 '). En otras zonas, la longitud está... -
Seite 192: Puesta En Marcha De Prueba
Puesta en Marcha de Prueba Antes de la Puesta en Marcha de Prueba Compruebe que el sistema de drenaje no tenga obstá culos y que drene con fluidez. Se debe realizar una prueba despué s de que todo el sistema haya sido instalado completamente. - Seite 193 Manual de Instalação e Operação da Unidade Interior CEILING & FLOOR TYPE AIR CONDITIONER FDMX R32 Português Manual FDMX-050N-09M25 / YDAX-050H-09M25 FDMX-070N-09M25 / YDAX-070H-09M25 FDMX-100N-09M25 / YDAX-100H-09M25 FDMX-100N-09M25 / YDAX-100H-09T35 FDMX-140N-09M25 / YDAX-140H-09T35 FDMX-175N-09M25 / YDAX-175H-09T35 IMPORTANT NOTE: Leia Atentamente este manual antes de instalar ou operar a SUANova unidade de ar condicionado.
- Seite 194 Í ndice Cuidados de Seguranç a ....................... 04 Manual do Proprietá rio Especificaç õ es e Recursos da Unidade ............................................... 1. Tela da unidade interna ..........................2. Temperatura de operaç ã o .............................. 3. Outros recursos Cuidado e Manutenç ã o ........................
- Seite 195 Manual de Instalaç ã o Acessó rios ..............................Resumo da Instalaç ã o ........................... Peç as da Unidade ........................... Instalaç ã o da Unidade Interna ................................................ 1. Selecionar local de instalaç ã o ..........................2. Unidade interna suspensa ..................3.
-
Seite 196: Cuidados De Seguranç A
Cuidados de Seguranç a Leia os Cuidados de Seguranç a Antes da Instalaç ã o e Operaç ã o Instalaç ã o incorreta por ignorar as instruç õ es pode causar danos ou ferimentos graves. A gravidade dos danos e ferimentos potenciais é classificada como AVISO ou CUIDADO. AVISO CUIDADO Este sí... - Seite 197 AVISO DE LIMPEZA E MANUTENÇÃO Desligue o dispositivo e desconecte a alimentaç ã o antes da limpeza. A nã o observâ ncia em fazê -lo pode causar choque elé trico. Nã o limpe o ar-condicionado com quantidades excessivas de á gua. ...
- Seite 198 AVISOS PARA A INSTALAÇÃO DO PRODUTO A instalaç ã o deve ser realizada por um revendedor ou especialista autorizado. Instalaç ã o defeituosa pode causar vazamento de á gua, choque elé trico ou incê ndio. A instalaç ã o deve ser realizada de acordo com as instruç õ es de instalaç ã o. Instalaç ã o incorreta pode causar vazamento de á gua, choque elé...
- Seite 199 AVISO ao Usar Lí quido Refrigerante R32/R290 Ao empregar-se lí quido refrigerante inflamá vel, o aparelho deve ser armazenado em uma á rea bem ventilada, onde o tamanho do ambiente corresponda com a á rea do ambiente especificada para operaç ã o. Para os modelos com lí...
- Seite 200 Orientaç ã o Europeia Para Descarte Esta marcaç ã o mostrada no produto ou em sua literatura indica que o descarte elé trico e o equipamento elé trico nã o devem ser misturados com o lixo domé stico geral. Descarte Correto Deste Produto (Resí...
-
Seite 201: Especificaç Õ Es E Recursos Da Unidade
Especificaç õ es e Recursos da Unidade Tela da unidade interna NOTA: Modelos diferentes possuem diferentes painé is de exibiç ã o. Nem todos os indicadores descritos abaixo estã o disponí veis para o ar-condicionado que você comprou. Verifique o painel de exibiç ã o interno da unidade que você comprou. As ilustraç... - Seite 202 Func MANUAL Receptor infravermelho Tela LED Receptor infravermelho Tela LED Botã o MANUAL: Este botã o seleciona o modo na seguinte ordem: AUTO, REFRIGERAÇÃO FORÇADA, DESLIGAR. Modo de REFRIGERAÇÃO FORÇADA: No modo de REFRIGERAÇÃO FORÇADA, a luz de operaç ã o pisca. O sistema liga o AUTOMÁTICO depois de ter resfriado com uma alta velocidade de vento por 30 minutos.
-
Seite 203: Temperatura De Operaç Ã O
Temperatura de operaç ã o Quando seu ar-condicionado for usado fora dos intervalos de temperatura a seguir, alguns recursos de proteç ã o de seguranç a podem ativar-se e fazerem com que a unidade se desative. Tipo de Inversor Split Modo Modo PARA UNIDADES EXTERNAS... -
Seite 204: Outros Recursos
Outros recursos Configuraç ã o Padrã o Funç ã o de Memó ria do Ângulo da Aleta (alguns modelos) Quando o ar-condicionado reinicia depois de uma falha de Alguns modelos sã o projetados com uma funç ã o de memó ria do energia, ele retorna à... -
Seite 205: Cuidado E Manutenç Ã O
Cuidado e Manutenç ã o Puxe o filtro de ar diretamente da entrada de ar como Limpar Sua Unidade Interna indicado (aplicá vel somente aos aparelhos de ANTES DE LIMPAR OU REALIZAR ar-condicionado de 14~16KW). MANUTENÇÃO Retire o filtro de ar. SEMPRE DESLIGUE SISTEMA... - Seite 206 Manutenç ã o - Longos Perí odos Sem CUIDADO Antes de trocar ou limpar o filtro , desligue a unidade e Se planeja nã o usar o seu ar-condicionado por um perí odo desconecte sua fonte de alimentaç ã o. longo de tempo, faç...
-
Seite 207: Soluç Ã O De Problemas
Soluç ã o de Problemas CUIDADOS DE SEGURANÇA Caso ocorra alguma das situaç õ es a seguir, desligue imediatamente a sua unidade! O cabo de alimentaç ã o está danificado ou anormalmente quente Sente cheiro de queimado A unidade emite barulhos ou sons fora do normal ... - Seite 208 Problema Causas Possí veis A unidade externa faz A unidade faz diferentes sons com base no seu modo atual de operaç ã o. barulho Poeira é emitida da A unidade pode acumular poeira durante longos perí odos fora de uso, que será emitida quando a unidade externa e da unidade for ligada.
- Seite 209 Problema Causas Possí veis Soluç ã o Falha de energia Aguarde a energia ser restaurada A energia está desligada Ligue a energia O fusí vel está queimado Substitua o fusí vel A unidade nã o está As pilhas do controle remoto Trocar pilhas funcionando acabaram...
-
Seite 210: Acessó Rios
Acessó rios O sistema de ar-condicionado acompanha os seguintes acessó rios. Use todas as peç as de instalaç ã o e acessó rios para instalar o ar-condicionado. A instalaç ã o incorreta pode resultar em vazamento de á gua, choque elé trico e incê ndio, ou causar falhas no equipamento. -
Seite 211: Resumo Da Instalaç Ã O
Resumo da Instalaç ã o Instalar a unidade interna Instalar a canalizaç ã o Instalar a unidade externa Conectar os canos do lí quido Evacuar o sistema de refrigeraç ã o Conectar os fios refrigerante Realizar ativaç ã o de teste ◄... -
Seite 212: Peç As Da Unidade
Peç as da Unidade NOTA: A instalaç ã o deve ser realizada de acordo com os requisitos das normas locais e nacionais. A instalaç ã o pode ser ligeiramente diferente em á reas diferentes. ① Aleta de fluxo de ar (na saí da de ar) ②... -
Seite 213: Instalaç Ã O Da Unidade Interna
Instalaç ã o da Unidade Interna Instruç õ es de Instalaç ã o - Unidade interna NÃO instale a unidade nos seguintes locais: NOTA: A instalaç ã o do painel deve ser realizada apó s a Áreas de extraç ã o de petró leo ou fraturamento hidrá ulico conclusã... - Seite 214 Conexã o da tubulaç ã o do lí quido refrigerante (D. Lado do gá s) Ponto de drenagem Conexã o da tubulaç ã o do lí quido refrigerante (E. Lado do lí quido) Gancho Tamanho de instalaç ã o das partes internas MODELO Comprimento de A Comprimento de B...
-
Seite 215: Unidade Interna Suspensa
Passo 2: Unidade interna suspensa CUIDADO Madeira Coloque o suporte de madeira atravé s da viga do telhado, O corpo da unidade deve estar totalmente alinhado com o depois instale os parafusos de sustentaç ã o. buraco. Certifique-se de que a unidade e o buraco sejam do mesmo tamanho antes de mover. - Seite 216 Retire a placa lateral e a grelha. Como instalar a placa de instalaç ã o do conduí te (se fornecida) Parafusos de Prenda o conector do revestimento (nã o fornecido) no Braç o de suspensã o sustentaç ã o buraco da fiaç ã o da placa de instalaç ã o do conduí te. Prenda a placa de instalaç...
-
Seite 217: Perfurar Um Buraco Na Parede Para Tubulaç Ã O De Conexã O
Passo 3: Perfurar um buraco na parede para Instalaç ã o da Canalizaç ã o Interna tubulaç ã o de conexã o Instale a canalizaç ã o conforme ilustrado na Figura a seguir. Determine o local do buraco na parede com base no local da unidade externa. -
Seite 218: Instalaç Ã O Da Unidade Externa
Instalaç ã o da Unidade Externa Instale a unidade seguindo os có digos e regulamentos locais, NÃO instale a unidade nos seguintes locais: pode haver uma ligeira diferenç a entre diferentes regiõ es. Pró ximo a um obstá culo que bloqueia as entradas e saí das de ar Pró... -
Seite 219: Instalar A Articulaç Ã O Da Drenagem
Passo 2: Instalar a articulaç ã o da drenagem (Somente a Passo 3: Fixaç ã o da unidade externa unidade com bomba de aquecimento) A unidade externa pode ser fixada ao solo ou a um suporte Antes de parafusar a unidade externa no lugar, você deve montado na parede com um parafuso (M10). - Seite 220 Linhas da instalaç ã o em sé rie As relaç õ es entre H, A e L sã o como segue. L ≤ 1/2H 25 cm / 9,8" ou mais L ≤ H 1/2H ≤ L ≤ H 30 cm / 11,8" ou mais L >...
-
Seite 221: Conexã O Da Tubulaç Ã O Do Lí Quido Refrigerante
Conexã o da Tubulaç ã o do Lí quido Refrigerante Ao conectar a tubulaç ã o do lí quido refrigerante, nã o deixe substâ ncias ou gases diferentes do lí quido refrigerante especificado entrarem na unidade. A presenç a de outros gases ou substâ ncias reduz a capacidade da unidade e pode causar uma pressã o anormalmente alta no ciclo de refrigeraç... -
Seite 222: Instruç Õ Es De Conexã O -Tubulaç Ã O Do Lí Quido Refrigerante
Instruç õ es de Conexã o - Tubulaç ã o Usando um mandril ou uma ferramenta de desbaste, remova todas as rebarbas da seç ã o de corte do cano. do Lí quido Refrigerante Cano CUIDADO Mandril • O tubo de ramificaç ã o deve ser instalado horizontalmente. Um â... -
Seite 223: Tubos De Conexã O
EXTENSÃO DA TUBULAÇÃO ALÉM DO MODELO FLANGEADO CUIDADO Calibre Torque de Dimensã o da flange (A) Forma da flange • Certifique-se de envolver a tubulaç ã o com isolante. do cano aperto (Unidade: mm/polegada) Contato direto com a tubulaç ã o sem revestimento pode resultar em queimaduras ou congelamentos. -
Seite 224: Cabeamento
Cabeamento 13. Certifique-se de nã o cruzar sua fiaç ã o elé trica com ANTES REALIZAR QUALQUER sua fiaç ã o de sinal. Isso pode causar distorç õ es e TRABALHO ELÉTRICO, LEIA ESTES interferê ncia. REGULAMENTOS 14. A unidade deve ser conectada à tomada principal. Geralmente, a fonte de alimentaç... -
Seite 225: Cabeamento Da Unidade Externa
Cabeamento da Unidade Externa Interruptor de ar Cabos de alimentaç ã o da unidade AVISO interna Antes de realizar qualquer trabalho elé trico ou fiaç ã o, (adquirido separadamente) desligue a energia principal do sistema. 1. Preparar o cabo para conexã o Primeiro, você... -
Seite 226: Cabeamento Da Unidade Interna
Usando um alicate crimpador, crimpe os bornes U das Conecte os bornes U nos terminais. extremidades. Combine as cores dos fios/etiquetas com as etiquetas na NOTA: Ao conectar os fios, siga estritamente o diagrama caixa terminal. Parafuse o borne U de cada fio com da fiaç... - Seite 227 Especificaç õ es de Alimentaç ã o (Nã o aplicá vel à Amé rica do Norte) NOTA: Disjuntor/fusí vel do tipo de aquecimento auxiliar elé trico precisam adicionar mais de 10 A. Especificaç õ es da Fonte de Alimentaç ã o Externa ≤18K MODELO (Btu/h) 19K~24K...
-
Seite 228: Evacuaç Ã O Do Ar
Evacuaç ã o do ar Preparos e Cuidados Se houver uma mudanç a na pressã o do sistema, consulte a seç ã o Verificaç ã o de Vazamento de Gá s com Ar e maté ria estranha no circuito do lí quido refrigerante podem informaç... -
Seite 229: Nota Sobre Adicionar Lí Quido Refrigerante
Nota sobre Adicionar Lí quido Refrigerante Alguns sistemas exigem carregamento adicional dependendo dos comprimentos do cano. O comprimento padrã o do cano varia de acordo com os regulamentos locais. Por exemplo, na América do Norte, o comprimento padrão do cano é de 7,5m (25’). Em outras áreas, o comprimento padrão do cano é... -
Seite 230: Teste
Teste Antes do Teste Verifique para ver se o sistema de drenagem está desimpedido e com boa drenagem. Deve-se realizar um teste depois que todo o sistema tiver sido instalado. Confirme os pontos a seguir antes de realizar o teste: Certifique-se de que nã... - Seite 231 Gebruikers- en installatiehandleiding CEILING & FLOOR TYPE AIR CONDITIONER FDMX R32 Dutch Manual FDMX-050N-09M25 / YDAX-050H-09M25 FDMX-070N-09M25 / YDAX-070H-09M25 FDMX-100N-09M25 / YDAX-100H-09M25 FDMX-100N-09M25 / YDAX-100H-09T35 FDMX-140N-09M25 / YDAX-140H-09T35 FDMX-175N-09M25 / YDAX-175H-09T35 BELANGRIJKE OPMERKING: Lees deze handleiding aandachtig door alvorens uw nieuwe airconditioning unit te installeren of tegebruiken.
- Seite 232 Inhoudstafel Veiligheidsmaatregelen ........................Gebruikershandleiding Specificaties en kenmerken van de eenheid ........................................... 1. Weergave van de binnenunit ............................2. Bedrijfstemperatuur ............................3. Andere kenmerken Verzorging en Onderhoud ........................ Problemen oplossen ..........................
- Seite 233 Installatiehandleiding Accessoires .............................. Installatie Overzicht ..........................Eenheid Onderdelen ........................... Installatie binnenunit ..................................................1. Selecteer de installatieplaats ........................... 2. Hang de binnenunit op ....................... 3. Wandgat boren voor aansluitende leidingen ..........................4. Afvoerslang aansluiten Installatie van de buitenunit ............................................... 1.
-
Seite 234: Veiligheidsmaatregelen
Veiligheidsmaatregelen Lees de veiligheidsmaatregelen voor gebruik en installatie Onjuiste installatie door het negeren van instructies kan ernstige schade of letsel veroorzaken. De ernst van potentië le schade of letsel wordt geclassificeerd als WAARSCHUWING of VOORZICHTIG. WAARSCHUWING VOORZICHTIG Dit symbool geeft de mogelijkheid van persoonlijk letsel Dit symbool geeft de mogelijkheid van materië... - Seite 235 WAARSCHUWINGEN VOOR REINIGING EN ONDERHOUD Schakel het apparaat uit en ontkoppel de stroomtoevoer voordat u het reinigt. Als u dit niet doet, kan dit een elektrische schok veroorzaken. Reinig de airconditioner niet met te veel water. Reinig de airconditioner niet met brandbare reinigingsmiddelen. Brandbare reinigingsmiddelen kunnen brand of vervorming veroorzaken.
- Seite 236 WAARSCHUWINGEN VOOR DE INSTALLATIE VAN HET PRODUCT De installatie moet worden uitgevoerd door een geautoriseerde dealer of specialist. Een defecte installatie kan leiden tot waterlekkage, elektrische schokken of brand. De installatie moet worden uitgevoerd volgens de installatie-instructies. Onjuiste installatie kan waterlekkage, elektrische schokken of brand veroorzaken.
- Seite 237 WAARSCHUWING voor het gebruik van R32/R290 Koelmiddel Bij gebruik van brandbaar koudemiddel moet het apparaat in een goed geventileerde ruimte worden opgeslagen, waar de grootte van de ruimte overeenkomt met die van de ruimte die voor het gebruik ervan nodig is. Voor de R32 koelmiddelmodellen: Het apparaat moet worden geï...
- Seite 238 Europese richtlijnen voor afvalverwijdering Deze markering op het product of in de literatuur geeft aan dat afgedankte elektrische en elektronische apparatuur niet met het algemene huishoudelijke afval mag worden vermengd. Correcte verwijdering van dit product (Afval van elektrische en elektronische apparatuur) Dit apparaat bevat koelmiddel en andere potentieel gevaarlijke stoffen.
-
Seite 239: Specificaties En Kenmerken Van De Eenheid
Specificaties en kenmerken van de eenheid Weergave van de binnenunit OPMERKING: Verschillende modellen hebben een verschillend display. Niet alle hieronder beschreven indicatoren zijn beschikbaar voor de airconditioner die u hebt aangeschaft. Controleer het display van het apparaat dat u hebt gekocht.De afbeeldingen in deze handleiding dienen ter verduidelijking. - Seite 240 FUNG Handleiding Infrarood ontvanger LED-display Infrarood ontvanger LED-display HANDMATIGE knop : Met deze toets selecteert u de modus in de volgende volgorde: AUTO, VOLG ME FUNCTIE, UIT. VOLG ME FUNCTIE-modus: In de modus VOLG ME FUNCTIE knippert het operatielampje. Het systeem schakelt dan over op AUTO nadat het gedurende 30 minuten met een hoge windsnelheid is afgekoeld.
-
Seite 241: Bedrijfstemperatuur
Bedrijfstemperatuur Wanneer uw airconditioner buiten de volgende temperatuurbereiken wordt gebruikt, kunnen bepaalde veiligheidsvoorzieningen worden geactiveerd en het apparaat uitschakelen. Omvormer Gesplitste Type KOELMODUS VERWARMEND Droogstand VOOR BUITENUNITS E modus ELEKTRISCHE HULPVERWARMING 17° C - 32° C 0° C - 30° C 10°... -
Seite 242: Andere Kenmerken
Andere kenmerken Standaardinstelling Jaloeziehoekgeheugenfunctie (sommige modellen) Wanneer de airconditioner na een stroomstoring opnieuw Sommige modellen zijn ontworpen opstart, zal deze standaard op de fabrieksinstellingen jaloeziehoekgeheugenfunctie. Wanneer het toestel na een (AUTO-modus, AUTO-ventilator, 24° C (76° F)) worden stroomonderbreking opnieuw opstart, zal de hoek van de ingesteld. -
Seite 243: Verzorging En Onderhoud
Verzorging en Onderhoud Trek het luchtfilter direct uit de luchtinlaat zoals Uw binnenunit reinigen aangegeven (alleen van toepassing op 14~16KW airconditioners). VOOR REINIGING OF ONDERHOUD Verwijder het luchtfilter. SCHAKEL UW AIRCONDITIONERSYSTEEM ALTIJD Reinig het luchtfilter door het oppervlak te stofzuigen SCHAKEL DE STROOMTOEVOER UIT of te wassen in warm water met een mild... - Seite 244 Onderhoud - Lange periodes van VOORZICHTIG niet-gebruik Voordat u het filter vervangt of reinigt, dient u het Als u van plan bent uw airconditioner voor langere tijd niet te apparaat uit te schakelen en de stroomtoevoer te gebruiken, doe dan het volgende: onderbreken.
-
Seite 245: Problemen Oplossen
Problemen oplossen VEILIGHEIDSMAATREGELEN Als een van de volgende omstandigheden zich voordoet, schakel uw toestel dan onmiddellijk uit! Het netsnoer is beschadigd of abnormaal warm. Je ruikt een brandende geur Het apparaat zendt luide of abnormale geluiden uit. ... - Seite 246 Uitgifte Mogelijke oorzaken buitenunit maakt Het apparaat maakt verschillende geluiden op basis van de huidige bedrijfsmodus. geluiden Er wordt stof uitgestoten Het apparaat kan tijdens langere perioden van niet-gebruik stof ophopen, dat bij het inschakelen van het apparaat wordt uitgestoten. Dit kan worden beperkt door het apparaat gedurende lange perioden door binnen- buitenunit.
- Seite 247 Probleem Mogelijke oorzaken Oplossing Stroomuitval Wacht tot de stroom weer hersteld is De stroom is uitgeschakeld Zet de stroom aan De zekering is doorgebrand Vervang de zekering batterijen Vervang de batterijen Het apparaat werkt niet afstandsbediening zijn leeg De 3-minuten beveiliging van de Wacht drie minuten na het herstarten van het apparaat.
-
Seite 248: Accessoires
Accessoires Het airconditioningsysteem wordt geleverd met de volgende accessoires. Gebruik alle installatieonderdelen en accessoires om de airconditioner te installeren. Onjuiste installatie kan leiden tot waterlekkage, elektrische schokken en brand, of kan ertoe leiden dat de apparatuur uitvalt. De onderdelen die niet bij de airconditioner worden geleverd, moeten apart worden aangeschaft. Naam van de Hoeveelheid Naam van de... -
Seite 249: Installatie Overzicht
Installatie Overzicht Installeer de binnenunit Installeer de afvoerbuis Installeer de buitenunit Evacueren van het koelsysteem Sluit de draden aan Sluit de koudemiddelleidingen Voer een test uit ◀ Pagina 19 ▶... -
Seite 250: Eenheid Onderdelen
Eenheid Onderdelen OPMERKING: De installatie moet worden uitgevoerd in overeenstemming met de eisen van de lokale en nationale normen. De installatie kan in verschillende gebieden iets anders zijn. ① Luchtstroomrooster (bij de luchtuitlaat) ② Luchtinlaat (met luchtfilter erin) ③Installation deel ④... -
Seite 251: Installatie Binnenunit
Installatie binnenunit Installatie-instructies - Binnenunit Installeer de unit NIET op de volgende locaties: Gebieden met olieboringen of fracking OPMERKING: De installatie van het paneel moet worden uitgevoerd nadat de leidingen en bedrading zijn voltooid. Kustgebieden met een hoog zoutgehalte in de Stap 1: Selecteer de installatieplaats lucht Voordat u de binnenunit installeert, moet u een geschikte... - Seite 252 Koelmiddelleidingaansluiting (D. gaszijde) Afvoerpunt Koelmiddelleidingaansluiting (E. Vloeibare zijde) Haak Installatie van onderdelen voor binnenshuis Lengte van A Lengte van B Lengte van C Lengte van D Lengte van E Model (Btu/h) (mm/inch) (mm/inch) (mm/inch) (mm/inch) (mm/inch) 18K~24K 1068/42 675/26,6 235/9,3 983/38,7 220/8,7 30K~48K...
-
Seite 253: Hang De Binnenunit Op
Stap 2: Hang de binnenunit op VOORZICHTIG Hout Plaats de houtmontage over de dakbalk en installeer De behuizing van het apparaat moet volledig uitgelijnd zijn met vervolgens de. het gat. Zorg ervoor dat het apparaat en het gat dezelfde grootte hebben voordat u verder gaat. - Seite 254 Verwijder het zijbord en het rooster. installeert leiding installatieplaat (indien Hangende meegeleverd)? Hangarm schroefbout Bevestig de mantelconnector (niet de voeding) op het draadgat van de leiding installatieplaat. Bevestig de leiding installatieplaat op het chassis van het toestel. De leiding installatieplaat Chassis Zijplank Kabelgoot...
-
Seite 255: Wandgat Boren Voor Aansluitende Leidingen
Stap 3: Wandgat boren voor aansluitende leidingen Installatie van de binnenafvoerpijp Bepaal de plaats van het muuropeningsgat aan de hand van Installeer de regenpijp zoals op de volgende afbeelding is de plaats van de buitenunit. aangegeven. Boor met een 65 mm (2,5in) of 90 mm (3,54in) (afhankelijk van het model) een gat in de muur. -
Seite 256: Installatie Van De Buitenunit
Installatie van de buitenunit Installeer het apparaat volgens de plaatselijke codes en Installeer de unit NIET op de volgende locaties: voorschriften, er kunnen kleine verschillen zijn tussen de In de buurt van een obstakel dat de luchtinlaten en verschillende regio's. -uitlaten zal blokkeren In de buurt van een openbare straat, drukke gebieden, of waar het lawaai van de eenheid anderen zal storen. -
Seite 257: In Koude Klimaten
Stap Installeer afvoerklep (alleen Stap 3: Veranker de buitenunit warmtepompunit) De buitenunit kan met een bout (M10) aan de grond of aan een Voordat buitenunit vastschroeft, moet muurbeugel worden verankerd. Bereid de installatiebasis van afvoerkoppeling aan de onderkant van de unit installeren. de unit voor volgens de onderstaande afmetingen. - Seite 258 Rijen van serie-installatie De relaties tussen H, A en L zijn als volgt. L ≤ 1/2U 25 cm / 9,8" of meer L ≤ H 1/2H≤ L≤ H 30 cm / 11,8" of meer L > H Kan niet worden geï nstalleerd (eenheid: mm/inch) Montageafmetingen Afmetingen buitenunit...
-
Seite 259: Koelmiddelleiding Aansluiting
Koelmiddelleiding Aansluiting Laat bij het aansluiten van de koudemiddelleidingen geen andere stoffen of gassen dan het opgegeven koudemiddel in het apparaat komen. De aanwezigheid van andere gassen of stoffen zal de capaciteit van de unit verlagen en kan een abnormaal hoge druk in de koelcyclus veroorzaken. -
Seite 260: Aansluitingsinstructies -Refrigerant Piping
Aansluitingsinstructies - Refrigerant Verwijder met een ruimer of ontbraamgereedschap alle bramen uit het snijgedeelte van de buis. Piping Pijp VOORZICHTIG Ruimer • aftakkende leiding moet horizontaal worden geï nstalleerd. Een hoek van meer dan 10° kan een storing veroorzaken. Punt naar beneden •... -
Seite 261: Buizen Aansluiten
PIJPVERLENGING VOORBIJ DE FAKKELVORM VOORZICHTIG Schitteringsafmeting (A) (Eenheid: mm/ • Zorg ervoor dat u de isolatie rond de leidingen wikkelt. Pijpmeter Aanhaalmoment Schijnselvorm Inch) Direct contact met de kale leiding kan leiden tot Min. Max. brandwonden of bevriezing. • Zorg ervoor dat de leiding goed is aangesloten. Het te 18-20 N.m Ø... -
Seite 262: Bedrading
Bedrading 13. Zorg ervoor dat u uw elektrische bedrading niet LEES REGLEMENT DOOR kruist met uw signaalbedrading. Dit kan vervorming VOORDAT ELEKTRISCHE en storing veroorzaken. WERKZAAMHEDEN UITVOERT 14. Het apparaat moet worden aangesloten op het Alle bedrading moet voldoen aan de lokale en nationale stopcontact. - Seite 263 Bedrading van de buitenunit Luchtschakelaar Voedingskabels voor binnenshuis WAARSCHUWING (apart aangeschaft) Voordat u elektrische of bedradingswerkzaamheden uitvoert, dient u de hoofdstroom naar het systeem uit te schakelen. Bereid de kabel voor op aansluiting Je moet eerst de juiste kabelmaat kiezen. Zorg ervoor Binnenunit dat u H07RN-F-kabels gebruikt.
- Seite 264 Gebruik een draadkrimper, krimp u-stekkers aan de Sluit de u-stekkers aan op de aansluitingen. uiteinden. Zorg ervoor dat de draadkleuren/labels overeenkomen met OPMERKING: Volg bij het aansluiten van de draden strikt de labels op het klemmenblok. Schroef de u-stekker van het bedradingsschema dat zich aan de binnenkant van het elke draad stevig vast aan de overeenkomstige klem.
- Seite 265 Stroomspecificaties (niet van toepassing op Noord-Amerika) OPMERKING: Elektrische hulpaggregaten voor verwarming moeten meer dan 10 A toevoegen. Specificaties van de buitenvoeding ≤18K Model (Btu/h) 19K~24K 25K~36K 37K~48K 49K~60K FASE 1 Fase 1 Fase 1 Fase 1 Fase 1 Fase POWER VOLT 208-240V 208-240V...
-
Seite 266: Luchtafvoer
Luchtafvoer Voorbereidingen en voorzorgsmaatregelen Als er een verandering in de systeemdruk is, raadpleeg dan het hoofdstuk Gaslekcontrole voor informatie over Lucht en vreemde stoffen in het koelmiddelcircuit kunnen hoe u kunt controleren op lekkages. Als er geen abnormale drukverhogingen veroorzaken, die de airconditioner verandering in de systeemdruk is, draai dan de dop los. -
Seite 267: Opmerking Over Het Toevoegen Van Koelmiddel
Opmerking over het toevoegen van koelmiddel Sommige systemen vereisen extra lading, afhankelijk van de lengte van de pijp. De standaard leidinglengte is afhankelijk van de plaatselijke voorschriften. In Noord-Amerika bijvoorbeeld is de standaard buislengte 7,5 m (25'). In andere gebieden is de standaard leidinglengte 5m (16'). Het koudemiddel moet worden opgeladen via de servicepoort op de lagedrukventiel van de buitenunit. -
Seite 268: Proefrit
Proefrit Voor de testrun Controleer of het afvoersysteem onbelemmerd en soepel werkt. Een testrit moet worden uitgevoerd nadat het hele systeem volledig is geï nstalleerd. Bevestig de volgende punten alvorens Zorg ervoor dat er geen trillingen of abnormale de test uit te voeren: geluiden zijn tijdens het gebruik. - Seite 269 Consult with the sales agency or manufacturer for details. ATTENTION : Le design et les données techniques sont donnés à titre indicatif et peuvent être modifiés sans préavis. AIRWELL RESIDENTIAL SAS 10,Rue du Fort de Saint Cyr, 78180 Montigny le Bretonneux - France www.airwell.com...