Herunterladen Inhalt Inhalt Diese Seite drucken
auna AV2-CD850BT Bedienungsanleitung
Vorschau ausblenden Andere Handbücher für AV2-CD850BT:

Werbung

Verfügbare Sprachen
  • DE

Verfügbare Sprachen

  • DEUTSCH, seite 1

Werbung

Inhaltsverzeichnis
loading

Inhaltszusammenfassung für auna AV2-CD850BT

  • Seite 3: Inhaltsverzeichnis

    Sehr geehrter Kunde, wir gratulieren Ihnen zum Erwerb Ihres Gerätes. Lesen Sie die folgenden Hinweise sorgfältig durch und befolgen Sie diese, um möglichen Schäden vorzubeugen. Für Schäden, die durch Missachtung der Hinweise und unsachgemäßen Gebrauch entstehen, übernehmen wir keine Haftung. Scannen Sie den folgenden QR-Code, um Zugriff auf die aktuellste Bedienungsanleitung und weitere Informationen rund um das Produkt zu erhalten:...
  • Seite 4: Technische Daten

    TECHNISCHE DATEN Artikelnummer 10031404, 10032758 Stromversorgung 220-240 V ~ 50/60 Hz Ausgangsleistung 8 x 50 W RMS 3 x Stereo-Cinch-AUX-Eingang 1 x REC-Audio-Ausgang Anschlüsse 1 x USB-Port 1 x RF-Antennen-Eingang 4 x2 Lautsprecherklemmen Abspielbare Formate MP3, WMA Lautsprecher Impedanz 4 - 80 Ohm BT-Frequenz 2402-2480 MHz BT-Sendeleistung (max.)
  • Seite 5 • Der Netzstecker dient dazu, das Gerät nach dem Ausschalten vom Stromnetz zu trennen. Achten Sie darauf, dass der Netzstecker immer frei zugänglich ist. • Setzen Sie das Gerät keinem Spritzwasser aus und stellen Sie keine mit Flüssigkeit gefüllten Objekte, wie beispielsweise Vasen, auf das Gerät. •...
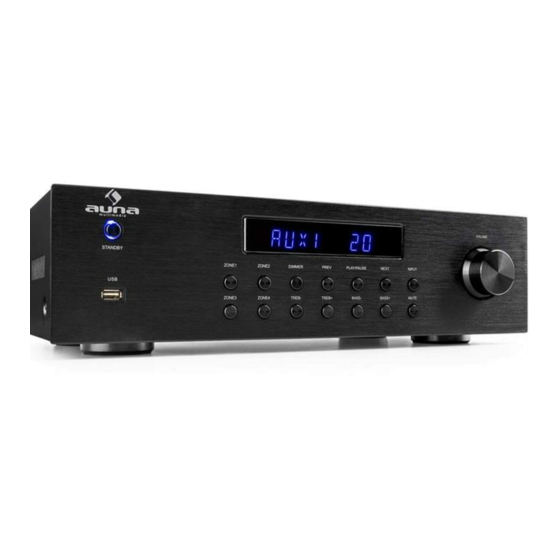
  • Seite 6: Geräteübersicht Und Funktionstasten

    GERÄTEÜBERSICHT UND FUNKTIONSTASTEN Vorderseite STANDBY Titel zurück - Drücken, um im USB-Betreib zum vorigen USB-Eingang Titel zu springen. Wenn Sie sich im BT- Betrieb befinden, LED - Zeigt die Modi für BT, funktioniert dies auch bei einigen USB und AUX an. Richten Sie Apps.
  • Seite 7 Rückseite ZONE 4 : Lautprecherklemme REC AUDIOAUSGANG (RECHTS) ZONE 4 : Lautprecherklemme AUX3 AUDIOEINGANG (LINKS) ZONE 3 : Lautprecherklemme AUX2 AUDIOEINGANG (RECHTS) ZONE 3 : Lautprecherklemme AUX1 AUDIOEINGANG (LINKS) ZONE 2 : Lautprecherklemme RF-ANTENNEINGANG (RECHTS) ZONE 2 : Lautprecherklemme AC EINGANG (230 V~,50 Hz) (LINKS) ZONE 1 : Lautprecherklemme EIN/AUS-Schalter...
  • Seite 8: Fernbedienung

    Fernbedienung STANDBY BT BT-Modus AUX1 AUX1 wählen 4 Nummerntaste Titelanwahl im USB- Titelmodus 5 Vorspulen 6 Titel zurückspringen Zurückspulen 8 Lautstärke verringern Lautstärkepegel 10 HÖHE + 11 Wiederholen (in der USB-Wiedegabe) 12 HÖHE - 13 Lautstärke + für ZONE 1 14 Lautstärke - für ZONE 1 15 Lautstärke + für ZONE 2 16 Lautstärke - für ZONE 2...
  • Seite 9: Inbetriebnahme Und Bedienung

    INBETRIEBNAHME UND BEDIENUNG Lautsprechersystem • Ein 5-Lautsprecher-System ermöglicht Ihnen einen guten Klangfeldeffekt. Die hinteren Lautsprecher liefern dabei einen breit gestreuten Klang während die mittleren Lautsprecher das Gefühl erzeugen, während eines Dialogs die angesprochene Person zu sein. • Sollten Sie nur die Hauptlautsprecher und die hinteren Lautsprecher verwenden, kann durch diese vier Lautsprecher ein Live-Gefühl erzeugt werden.
  • Seite 10: Lautsprecherauswahl

    Lautsprecherauswahl Die Lautsprecher sollten kraftvoll genug sein. Die Impedanz der vorderen Lautsprecher sollte 4 Ω – 8 Ω betragen. Die Impedanz der mittleren und hinteren Lautsprecher sollte ebenfalls bei allen 4 Ω – 8 Ω betragen. Verbindungsherstellung Schalten Sie das Gerät zur Verbindungsherstellung aus und ziehen Sie den Netzstecker aus der Steckdose.
  • Seite 11 Anschluss der Lautsprecher • Die Lautsprecher müssen die richtige Impedanz aufweisen (Lesen Sie „Wahl der Lautsprecher“), sonst können Sie beschädigt werden. • Lassen Sie die bloßen Lautsprecherdrähte nicht einander oder andere Metalltteile berühren, da dies das Gerät oder die Lautsprecher beschädigen könnte.
  • Seite 12: Bedienung

    BEDIENUNG Die jeweiligen Tasten finden Sie auf der Vorderseite des Verstärkers und auf der Fernbedienung. Wählen Sie eine Audioquelle aus, indem Sie die Taste INPUT am Gerät oder auf der Fernbedienung drücken. Nacheinander wird USB, BT, AUX1, AUX2, AUX3 eingestellt. 2.
  • Seite 13: Fehlerbehebung

    FEHLERBEHEBUNG Problem Mögliche Ursache Lösungsansatz Das Gerät lässt sich Das Netzkabel ist beschädigt Überprüfen Sie das Netzkabel auf nicht einschalten oder oder Netzstecker steckt nicht in Schäden oder stecken Sie den kein Ton. der Steckdose. Netzstecker in die Steckdose. Das Gerät lässt sich Keine Lautsprecher Verbinden Sie mit dem einschalten aber kein...
  • Seite 14: Hinweise Zur Entsorgung

    HINWEISE ZUR ENTSORGUNG Wenn es in Ihrem Land eine gesetzliche Regelung zur Entsorgung von elektrischen und elektronischen Geräten gibt, weist dieses Symbol auf dem Produkt oder auf der Verpackung darauf hin, dass dieses Produkt nicht im Hausmüll entsorgt werden darf. Stattdessen muss es zu einer Sammelstelle für das Recycling von elektrischen und elektronischen Geräten gebracht werden.
  • Seite 15 Dear customer, Congratulations on the purchase of your device. Please read the following instructions carefully and follow them to prevent potential damage. We accept no liability for damage caused by disregarding the instructions or improper use. Please scan the QR code to access the latest operating instructions and for further information about the product.
  • Seite 16: Technical Data

    TECHNICAL DATA Product code 10031404, 10032758 Power supply 220-240 V ~ 50/60 Hz Output power 8 x 50 W RMS 3 x stereo RCA AUX input 1 x REC audio output Connections 1 x USB port 1 x RF antenna input 4 x 2 speaker terminals Playable formats MP3, WMA...
  • Seite 17 • The mains plug is used to disconnect the unit from the mains after it has been switched off . Make sure that the mains plug is always freely accessible. • Do not expose the appliance to splashing water and do not place objects fi...
  • Seite 18: Device Overview And Function Keys

    DEVICE OVERVIEW AND FUNCTION KEYS Front side STANDBY Track back - Press to go to the previous track in USB mode. If you USB input are in BT mode, this also works for some apps. With other apps, LED - Indicates the modes for BT, however, it may be the case that a USB and AUX.
  • Seite 19 Back side ZONE 4 : Speaker terminal REC AUDIO OUTPUT (RIGHT) ZONE 4 : Speaker terminal (LEFT) AUX3 AUDIO INPUT ZONE 3 : Speaker terminal AUX2 AUDIO INPUT (RIGHT) ZONE 3 : Speaker terminal (LEFT) AUX1 AUDIO INPUT ZONE 2 : Speaker terminal RF ANTENNA INPUT (RIGHT) ZONE 2 : Speaker terminal (LEFT)
  • Seite 20: Remote Control

    Remote control STANDBY BT BT mode AUX1 AUX1 select 4 Number key Title selection in USB title mode 5 Fast forward 6 Jump back title Rewind 8 Decrease volume Volume level 10 TREBLE + 11 Repeat (in the USB playback) 12 TREBLE - 13 Volume + for ZONE 1 14 Volume - for ZONE 1...
  • Seite 21: Setup And Operation

    SETUP AND OPERATION Speaker system • A 5-speaker system gives you a good sound field effect. The rear speakers deliver a broadly dispersed sound while the middle speakers create the feeling of being the person being addressed during a dialogue. •...
  • Seite 22 Speaker selection The speakers should be powerful enough. The impedance of the front speakers should be 4 Ω - 8 Ω. The impedance of the centre and rear speakers should also be 4 Ω - 8 Ω for all. Establishing a connection Switch the device off immediately and pull the power plug out of the socket.
  • Seite 23 Connecting the speakers • The speakers must have the correct impedance (read "Choosing Speakers"), otherwise they may be damaged. • Do not let the bare speaker wires touch each other or other metal parts, as this could damage the unit or the speakers. •...
  • Seite 24: Operation

    OPERATION The respective buttons can be found on the front of the amplifier and on the remote control. Select an audio source by pressing the INPUT button on the unit or on the remote control. USB, BT, AUX1, AUX2, AUX3 are set one after the other.
  • Seite 25: Troubleshooting

    TROUBLESHOOTING Problem Potential cause Possible solution The unit will not turn The mains cable is damaged or Check the mains cable for on or there is no the mains plug is not inserted in damage or insert the mains plug sound.
  • Seite 26: Disposal Considerations

    DISPOSAL CONSIDERATIONS If there is a legal regulation in your country regarding the disposal of electrical and electronic equipment, this symbol on the product or on the packaging indicates that this product must not be disposed of with household waste. Instead, it must be taken to a collection point for the recycling of electrical and electronic equipment.
  • Seite 27 Estimado cliente: Le felicitamos por la adquisición de este producto. atentamente siguiente manual siga cuidadosamente las instrucciones de uso con el fin de evitar posibles daños. La empresa no se responsabiliza de los daños ocasionados por un uso indebido del producto o por haber desatendido las indicaciones de seguridad.
  • Seite 28: Datos Técnicos

    DATOS TÉCNICOS Número de artículo 10031404, 10032758 Alimentación 220-240 V ~ 50/60 Hz Potencia de salida 8 x 50 W RMS 3 x entradas estéreo RCA AUX 1 x salida de audio REC Conexiones 1 puerto USB 1 x entrada de antena RF 4 x 2 terminales de altavoz Formatos reproducibles MP3, WMA...
  • Seite 29 • El enchufe sirve para desconectar el aparato de la fuente eléctrica una vez que haya sido apagado. Procure que el enchufe esté siempre accesible. • No exponga el aparato a agua pulverizada ni le coloque recipientes con líquidos, vasos por ejemplo, encima. •...
  • Seite 30: Vista General Del Dispositivo Y Teclas De Función

    VISTA GENERAL DEL DISPOSITIVO Y TECLAS DE FUNCIÓN Parte frontal STANDBY Pista anterior - Pulse para ir a la pista anterior en el modo Entrada USB USB. Si estás en modo BT, esto también funciona para algunas aplicaciones. Sin embargo, con LED - Indica los modos para BT, otras aplicaciones puede ocurrir USB y AUX.
  • Seite 31: Parte Trasera

    Parte trasera ZONA 4 : Terminal de altavoz Salida de audio REC (grabación) (DERECHO) ZONA 4 : Terminal de altavoz AUX3 ENTRADA DE AUDIO (IZQUIERDO) ZONA 3 : Terminal de altavoz AUX2 ENTRADA DE AUDIO (DERECHO) ZONA 3 : Terminal de altavoz AUX1 ENTRADA DE AUDIO (IZQUIERDO) ZONA 2 : Terminal de altavoz...
  • Seite 32 Mando a distancia STANDBY (pausa) BT Modo BT AUX1 AUX1 seleccionar 4 Tecla numérica Selección de título en el modo de título USB 5 Avanzar 6 Retroceder una pista Retroceder 8 Disminuir el volumen Nivel de volumen 10 AGUDOS+ 11 Repetir (en la reproducción USB) 12 AGUDOS- 13 Volumen + para ZONA 1 14 Volumen - para ZONA 1...
  • Seite 33: Puesta En Funcionamiento Y Operación

    PUESTA EN FUNCIONAMIENTO Y OPERACIÓN. Sistema de altavoces • Un sistema de 5 altavoces proporciona un buen efecto de campo sonoro. Los altavoces traseros ofrecen un sonido ampliamente disperso, mientras que los altavoces centrales crean la sensación de ser la persona a la que se dirigen durante un diálogo. •...
  • Seite 34 Selección de altavoces Los altavoces deben contar con suficiente potencia. La impedancia del altavoz delantero debe ser 4 Ω – 8 Ω. La impedancia del altavoz delantero debe ser de 4 Ω – 8 Ω. Establecimiento de conexión Apague el aparato y desconecte el enchufe de la toma de corriente. No vuelva a encender el aparato hasta que la conexión se haya establecido correctamente.
  • Seite 35 Conexión de los altavoces • Los altavoces deben tener la impedancia correcta (lea "Elección de los altavoces"), de lo contrario pueden resultar dañados. • Asegúrese de que los cables de altavoces sin aislar no toquen piezas metálicas, pues el aparato o los altavoces podrían sufrir daños. •...
  • Seite 36: Puesta En Funcionamiento

    PUESTA EN FUNCIONAMIENTO Los botones respectivos se encuentran en la parte frontal del amplificador y en el mando a distancia. Seleccione una fuente de audio pulsando el botón INPUT del aparato o del mando a distancia. USB, BT, AUX1, AUX2, AUX3 se ajustan uno tras otro.
  • Seite 37: Reparación De Anomalías

    REPARACIÓN DE ANOMALÍAS Problema Posible causa Propuesta de solución El aparato no se puede El cable de alimentación está Compruebe si el cable de encender o no hay dañado o el enchufe no está bien alimentación está dañado o sonido. encajado en la toma de corriente.
  • Seite 38: Indicaciones Sobre La Retirada Del Aparato

    INDICACIONES SOBRE LA RETIRADA DEL APARATO Si en su país existe una disposición legal relativa a la eliminación de aparatos eléctricos y electrónicos, este símbolo estampado en el producto o en el embalaje advierte de que no debe eliminarse como residuo doméstico. En lugar de ello, debe depositarse en un punto de recogida de reciclaje de aparatos eléctricos y electrónicos.
  • Seite 39 Cher client, chère cliente, Toutes nos félicitations pour l’acquisition de ce nouvel appareil. Lisez attentivement les indications suivantes et suivez-les pour éviter d'éventuels dommages. Nous ne saurions être tenus pour responsables des dommages dus au non-respect des consignes et à la mauvaise utilisation de l’appareil.
  • Seite 40: Tiche Technique

    TICHE TECHNIQUE Numéro d'article 10031404, 10032758 Alimentation 220-240 V ~ 50/60 Hz Puissance de sortie 8 x 50 W RMS 3 x RCA stéréo Entrée AUX 1 x sortie audio REC Connexions 1 x port USB 1 x entrée d'antenne RF 4x2 bornes à...
  • Seite 41 • La fi che d'alimentation sert à déconnecter l'appareil de l'alimentation électrique après l'avoir éteint. Veillez à ce que la fi che reste toujours accessible. • N'exposez pas l'appareil aux projections d'eau et ne placez pas d'objets remplis de liquide, tels que des vases, sur l'appareil. •...
  • Seite 42: Aperçu De L'appareil Et Touches De Fonctions

    APERÇU DE L'APPAREIL ET TOUCHES DE FONCTIONS Face avant STANDBY Titre précédent - Appuyez pour passer à la piste précédente en Port USB mode USB. En mode BT, cela fonctionne également pour LED - Indique les modes pour certaines applications. Avec BT, USB et AUX.
  • Seite 43 Dos de l'appareil ZONE 4 : borne d'enceinte SORTIE AUDIO REC (DROITE) ZONE 4 : borne d'enceinte ENTRÉE AUDIO AUX3 (GAUCHE) ZONE 3 : borne d'enceinte ENTRÉE AUDIO AUX2 (DROITE) ZONE 3 : borne d'enceinte ENTRÉE AUDIO AUX1 (GAUCHE) ZONE 2 : borne d'enceinte PRISE DE L'ANTENNE RF (DROITE) ZONE 2 : borne d'enceinte...
  • Seite 44 Télécommande STANDBY BT Mode BT AUX1 sélectionner AUX1 4 Touche numérique Sélection du titre en mode titre USB 5 Avance rapide 6 Reculer d'un titre Rembobiner 8 Diminution du volume Niveau de volume 10 AIGUS + 11 Répétition (en lecture USB) 12 AIGUS - 13 Volume + pour la ZONE 1 14 Volume - pour la ZONE 1...
  • Seite 45: Mise En Marche Et Utilisation

    MISE EN MARCHE ET UTILISATION Système d'enceintes • Un système à 5 enceintes permet d'obtenir un bon effet de champ sonore. Les enceintes arrière diffusent un son largement dispersé, tandis que les enceintes centrales donnent l'impression d'être la personne à laquelle on s'adresse pendant un dialogue. •...
  • Seite 46 Choix des enceintes Les enceintes doivent être assez puissantes. L'impédance des enceintes avant doit être de 4 Ω - 8 Ω. L'impédance des enceintes centrale et arrière doit être de 4 Ω - 8 Ω également. Établissement d'une connexion Éteignez l'appareil et débranchez la fiche de la prise. Ne remettez pas l'appareil sous tension tant que la connexion n'a pas été...
  • Seite 47 Raccordement des enceintes • Les enceintes doivent avoir une impédance correcte (lire « Choix des enceintes »), sinon elles risquent d'être endommagées. • Veillez à ce que les câbles nus des enceintes ou d'autres parties métalliques ne se touchent pas, car cela pourrait endommager l'appareil ou les enceintes.
  • Seite 48: Utilisation

    UTILISATION Les touches se trouvent sur la face avant de l'amplificateur et sur la télécommande. Sélectionnez une source audio en appuyant sur la touche INPUT de l'appareil ou de la télécommande. USB, BT, AUX1, AUX2, AUX3 sont réglés l'un après l'autre. 2.
  • Seite 49: Résolution Des Problèmes

    RÉSOLUTION DES PROBLÈMES Problème Cause possible Solution Impossible d'allumer Le câble secteur est endommagé Vérifiez que le câble secteur n'est l'appareil ou pas de ou la fiche secteur n'est pas pas endommagé ou insérez la son. insérée correctement dans la fiche secteur dans la prise.
  • Seite 50: Informations Sur Le Recyclage

    INFORMATIONS SUR LE RECYCLAGE Si la mise en rebut des appareils électriques et électroniques est réglementée dans votre pays, ce symbole sur le produit ou sur l'emballage indique qu'il ne doit pas être éliminé avec les ordures ménagères. Vous devez l'acheminer vers un point de collecte pour le recyclage des appareils électriques et électroniques.
  • Seite 51 Gentile cliente, la ringraziamo per l'acquisto del dispositivo. La preghiamo di leggere attentamente le seguenti istruzioni per l’uso e di seguirle per evitare possibili danni. Non ci assumiamo alcuna responsabilità per danni scaturiti da una mancata osservanza delle avvertenze di sicurezza e da un uso improprio del dispositivo.
  • Seite 52: Dati Tecnici

    DATI TECNICI Numero articolo 10031404, 10032758 Alimentazione 220-240 V ~ 50/60 Hz Potenza di uscita 8 x 50 W RMS 3 x ingressi stereo AUX RCA 1 x uscita audio REC Connessioni 1 x porta USB 1 x ingresso antenna RF 4 x 2 morsetti altoparlanti Formati riproducibili MP3, WMA...
  • Seite 53 • La spina di alimentazione viene utilizzata per scollegare il dispositivo dalla rete dopo averlo spento. Assicurarsi che la spina sia sempre accessibile liberamente. • Non esporre il dispositivo a spruzzi d'acqua e non collocarvi sopra oggetti pieni di liquido, come vasi. •...
  • Seite 54: Panoramica Del Dispositivo E Tasti Funzione

    PANORAMICA DEL DISPOSITIVO E TASTI FUNZIONE Lato anteriore STANDBY Titolo precedente - Premere per passare alla traccia precedente Ingresso USB in modalità USB. In modalità BT, questa funzione è valida anche LED - Indica le modalità per per alcune app. Con altre app, BT, USB e AUX.
  • Seite 55 Lato posteriore ZONA 4: morsetto per altoparlanti USCITA AUDIO REC (DESTRA) ZONA 4: morsetto per altoparlanti INGRESSO AUDIO AUX3 (SINISTRA) ZONA 3: morsetto per altoparlanti INGRESSO AUDIO AUX2 (DESTRA) ZONA 3: morsetto per altoparlanti INGRESSO AUDIO AUX1 (SINISTRA) ZONA 2: morsetto per altoparlanti INGRESSO ANTENNA RF (DESTRA) ZONA 2: morsetto per altoparlanti...
  • Seite 56 Telecomando STANDBY BT Modalità BT AUX1 Selezionare AUX1 4 Tasto numerico Selezione del titolo in modalità USB 5 Avanti velocemente 6 Titolo precedente Indietro velocemente 8 Abbassare il volume Livello del volume 10 ALTI + 11 Ripetizione (in modalità di riproduzione USB) 12 ALTI - 13 Volume + per ZONA 1...
  • Seite 57: Messa In Funzione E Utilizzo

    MESSA IN FUNZIONE E UTILIZZO Sistema di altoparlanti • Un sistema a 5 altoparlanti assicura un buon effetto di campo sonoro. Gli altoparlanti posteriori offrono un sound ad ampia diffusione, mentre quelli centrali danno la sensazione di essere la persona a cui ci si rivolge durante un dialogo.
  • Seite 58 Scegliere gli altoparlanti Gli altoparlanti devono essere sufficientemente potenti. L'impedenza degli altoparlanti anteriori deve essere di 4 Ω – 8 Ω. Anche l'impedenza degli altoparlanti posteriori e centrali deve essere di 4 Ω – 8 Ω. Stabilire un collegamento Per stabilire un collegamento, spegnere il dispositivo e staccare la spina dalla presa.
  • Seite 59: Collegare Gli Altoparlanti

    Collegare gli altoparlanti • Gli altoparlanti devono avere l'impedenza corretta (v. "Scegliere gli altoparlanti"), altrimenti possono essere danneggiati. • Assicurarsi che i cavi degli altoparlanti scoperti non entrino in contatto tra loro o con altri componenti metallici, altrimenti possono risultare danni a dispositivo o altoparlanti.
  • Seite 60: Utilizzo

    UTILIZZO I rispettivi tasti si trovano sulla parte anteriore dell'amplificatore e sul telecomando. Selezionare una sorgente audio premendo il tasto INPUT sul dispositivo o sul telecomando. Vengono impostati in sequenza USB, BT, AUX1, AUX2, AUX3. 2. Regolare il volume principale con l'apposita manopola (VOLUME) (VOL +/-).
  • Seite 61: Risoluzione Dei Problemi

    RISOLUZIONE DEI PROBLEMI Problema Possibile causa Soluzioni Non è possibile Il cavo di alimentazione è Controllare che il cavo non sia accendere il danneggiato o la spina non è danneggiato o inserire la spina dispositivo o non viene inserita nella presa elettrica. nella presa.
  • Seite 62: Avviso Di Smaltimento

    AVVISO DI SMALTIMENTO Se nel vostro Paese sono vigenti regolamenti legislativi relativi allo smaltimento di dispositivi elettrici ed elettronici, questo simbolo sul prodotto o sull'imballaggio indica che non è consentito smaltire questo prodotto nei rifi uti casalinghi. Il dispositivo deve invece essere portato in un centro di raccolta per il riciclaggio di apparecchi elettrici ed elettronici.

Diese Anleitung auch für:

1003140410032758

Inhaltsverzeichnis