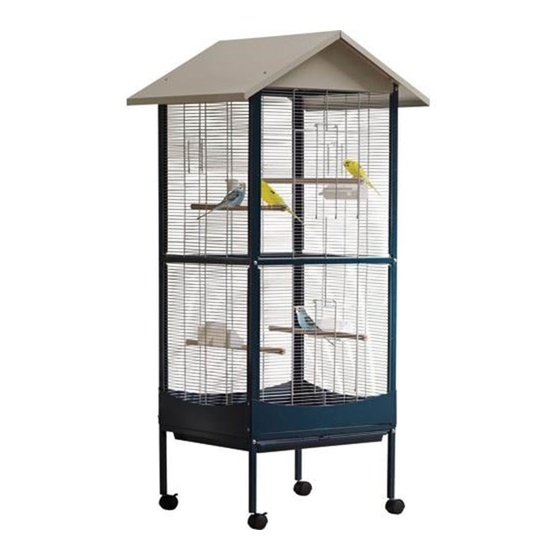
savic Gite1 Montageanleitung

Verwandte Anleitungen für savic Gite1


Inhaltszusammenfassung für savic Gite1
- Seite 1 Manual Handleiding Instructions d’installation Montageanleitung Instrucciones de montaje Инструкции по установке...
- Seite 2 Before you install the cage, please check if you have all the necessary parts for the assembly: 1 front panel (A) - 1 back panel (B) - 4 side panels (C) - 2 bars with groove (D) - 4 bars (E) - 4 wheels (art.nr. 951132) (F) - 4 rims (G) - 7 little screws + nut (H) - 8 little screws (I) - 12 large screws (J) - 4 perches (art.nr.
- Seite 3 Attach the 2 side bars with grooves (D) at the bottom of the front panel (A). Make sure the grooves of the bars and panel are facing inwards. Use the umbraco and screws. Bevestig de 2 staven met gleuven (D) onderaan het voorpaneel (A). Zorg ervoor dat de gleuven van de staven en het voorpaneel naar binnen zijn gericht.
- Seite 4 Slide the 2 side panels without door (C1) in the front and back panel. One panel per side. Laat nu 2 zijpanelen zonder deur (C1) in de gleuven van het voor- en achterpaneel glijden, 1 paneel per zijde. Laissez glisser les 2 panneaux latéraux sans porte (C1) dans les rainures du panneau de face et arrière, 1 panneau par côté.
- Seite 5 Slide the 2 side panels (C2) with door in the front and back panel. One panel per side. Attach the remaining bars at the top. Laat nu de 2 zijpanelen met deur (C2) in het voor - en achterpaneel glijden, 1 paneel per zijde.
- Seite 6 Attach the roof top panels (O) to each other, using the little screws with nut (M6 x 8) (H). Secondly fix the front and back panel (N) to the roof panels with the little screws with nut (H). Make sure the rim of the front and back panel are facing innwards. Finally place the roof on the cage.