Inhaltsverzeichnis
Werbung
Verfügbare Sprachen
Verfügbare Sprachen
Quicklinks
Quick Start Guide
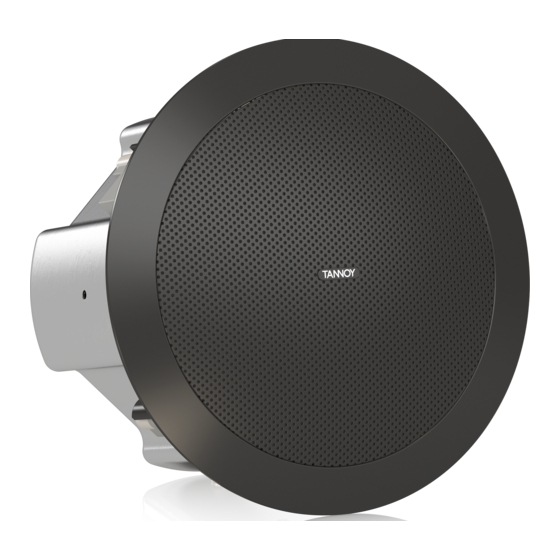
CVS Series
CVS 301 / CVS 301-BK
3" In-Ceiling Loudspeaker for Installation Applications
CVS 401 / CVS 401-BK
4" Coaxial In-Ceiling Loudspeaker for Installation Applications
CVS 601 / CVS 601-BK
6.5" Coaxial In-Ceiling Loudspeaker for Installation Applications
CVS 801 / CVS 801-BK
8" Coaxial In-Ceiling Loudspeaker for Installation Applications
CVS 801S
8" In-Ceiling Subwoofer Loudspeaker for Installation Applications
CVS 801S LZ
8" In-Ceiling Subwoofer Loudspeaker for
Installation Applications - Low Impedance Operation Only
V 1.0
Werbung
Inhaltsverzeichnis

Verwandte Anleitungen für Tannoy CVS-Serie


Inhaltszusammenfassung für Tannoy CVS-Serie
- Seite 1 Quick Start Guide CVS Series CVS 301 / CVS 301-BK 3" In-Ceiling Loudspeaker for Installation Applications CVS 401 / CVS 401-BK 4" Coaxial In-Ceiling Loudspeaker for Installation Applications CVS 601 / CVS 601-BK 6.5" Coaxial In-Ceiling Loudspeaker for Installation Applications CVS 801 / CVS 801-BK 8"...
-
Seite 2: Legal Disclaimer
Midas, Klark Teknik, Lab Gruppen, by qualified personnel. instalación o modificación debe ser realizada únicamente or table specified by the Lake, Tannoy, Turbosound, TC Electronic, TC Helicon, que no pueda ser pisado y que esté protegido de objetos por un técnico cualificado. manufacturer, or sold with... -
Seite 3: Garantie Limitée
Ce symbole avertit de la présence d’une niveau de sa prise électrique et de l’ e ndroit où il est relié à Fachpersonal ausgeführt werden. Midas, Klark Teknik, Lab Gruppen, Lake, Tannoy, tension dangereuse et non isolée à 14. Verwenden l’appareil;... -
Seite 4: Instruções De Segurança Importantes
Todas as modifiche devono essere eseguite esclusivamente da produttore o venduti con 13. Utilize apenas ligações/acessórios especificados Lab Gruppen, Lake, Tannoy, Turbosound, TC Electronic, marcas são propriedade de seus respectivos donos. personale qualificato. l'apparecchio. Utilizzando pelo fabricante. -
Seite 5: Beperkte Garantie
Alla varumärken tillhör respektive ägare. Midas, 19. Plaats geen open vlammen, zoals brandende stopcontact passen, laat het contact dan door een med intakt skyddsledare. Klark Teknik, Lab Gruppen, Lake, Tannoy, Turbosound, kaarsen, op het apparaat. elektricien vervangen. TC Electronic, TC Helicon, Behringer, Bugera, Oberheim, 12. -
Seite 6: Safety Notices
Brands Ltd. 2021 Wszystkie prawa zastrzeżone. Gracias por adquirir este altavoz de techo Tannoy. Esta gama de productos es adecuada para aplicaciones de refuerzo de voz y música de alto nivel que requieren una posługiwania się wózkiem należy zachować szczególną... - Seite 7 Merci d’avoir acheté ce haut-parleur de plafond Tannoy. Cette gamme de produits est adaptée aux applications de musique et de renforcement de la parole de haut Obrigado por adquirir este alto-falante de teto Tannoy. Esta linha de produtos é adequada para música de alto nível e aplicações de reforço de fala que requerem niveau nécessitant une qualité...
- Seite 8 Rozpakowanie Elk Tannoy-product en accessoire wordt zorgvuldig geïnspecteerd voordat het wordt verpakt. Controleer uw product na het uitpakken om er zeker van te zijn dat er Każdy produkt i akcesoria Tannoy są dokładnie sprawdzane przed zapakowaniem. Po rozpakowaniu sprawdź produkt, aby upewnić się, że nie został uszkodzony geen schade is opgetreden tijdens het transport.
-
Seite 9: Side View
CVS Series Quick Start Guide Accessories Product Feature Identification (CVS-601 shown) Standard Accessories Side View Front View C-Ring Tile bridge kit Note: A tile bridge kit must always be used when installing into suspended ceiling tiles Mounting screws Mounting screws Paint Mask Cut-out template Tap selector... - Seite 10 4. Connect a secondary support line to the safety tab. Some construction codes require use of this secondary If using a power driver, Tannoy recommends a torque setting of 1.5 Nm. (Fig.4) support point, which should connect to a separate secure support point using a suitable support line.
- Seite 11 Installation Instructions for Optional Plaster Ring Wiring and Setting Up An optional plaster (mud) ring bracket is available from Tannoy. This bracket is designed to be NOTE: The speaker images shown are for guidance only, and may not exactly represent your particular model.
- Seite 12 3. Deslice el conjunto del altavoz a través del orificio y gire los tornillos en la parte frontal del altavoz para extender las alas de montaje. Apriete los tornillos hasta lograr un agarre firme. Si utiliza un controlador motorizado, Tannoy recomienda un par de apriete de 1,5 Nm. (Figura 4) ¡NO APRIETE DEMASIADO! Fig.3...
- Seite 13 Un soporte de anillo de yeso (barro) opcional está disponible en Tannoy. Este soporte está diseñado para ser NOTA: Las imágenes de los altavoces que se muestran son solo orientativas y es posible que no representen preinstalado en techos no suspendidos de nueva construcción.
- Seite 14 CVS Series Quick Start Guide Cableado y configuración 5. Apriete la abrazadera del cable o el prensaestopas y enchufe el conector tipo europeo al altavoz. Vuelva a colocar la cubierta trasera y apriete firmemente los tornillos suministrados. NOTA: Las imágenes de los altavoces que se muestran son solo orientativas y es posible que no representen exactamente su modelo en particular. Recomendamos el uso de cableado de altavoz aislado de entre 12 y 18 AWG.
- Seite 15 étendre les ailes de montage. Serrez les vis jusqu’à ce qu’une prise ferme soit obtenue. Si vous utilisez un pilote d’alimentation, Tannoy recommande un couple de réglage de 1,5 Nm. (Fig.4) 4. Connectez une ligne de support secondaire à l’onglet de sécurité. Certains codes de construction exigent NE PAS TROP SERRER! l’utilisation de ce point de support secondaire, qui doit se connecter à...
- Seite 16 REMARQUE: les images d’enceintes affichées sont fournies à titre indicatif uniquement et peuvent ne pas représenter exactement votre modèle particulier. Un support d’anneau en plâtre (boue) en option est disponible auprès de Tannoy. Ce support est conçu pour Nous recommandons l’utilisation d’un câblage d’enceinte isolé de 12 à 18 AWG.
- Seite 17 3. Schieben Sie die Lautsprecherbaugruppe durch das Loch und drehen Sie die Schrauben an der Vorderseite des Lautsprechers, um die Montageflügel zu verlängern. Ziehen Sie die Schrauben an, bis ein fester Griff erreicht ist. Bei Verwendung eines Kraftfahrers empfiehlt Tannoy eine Drehmomenteinstellung von 1,5 Nm. (Abb.4) NICHT ÜBERDREHEN! Fig.3 4.
- Seite 18 Quick Start Guide Installationsanleitung für Trockenbaudecken Installationsanleitung für optionalen Putzring Eine optionale Gipsringhalterung ist bei Tannoy erhältlich. Diese Halterung kann in neu gebaute, nicht HINWEIS: Die gezeigten Lautsprecherbilder dienen nur zur Orientierung und repräsentieren möglicherweise abgehängte Decken vorinstalliert werden. nicht genau Ihr bestimmtes Modell.
-
Seite 19: Verkabelung Und Einrichtung
CVS Series Quick Start Guide Verkabelung und Einrichtung 5. Ziehen Sie die Kabelklemme oder Kabelverschraubung fest und stecken Sie den Euro-Stecker in den Lautsprecher. Bringen Sie die hintere Abdeckung wieder an und ziehen Sie die mitgelieferten Schrauben fest an. HINWEIS: Die gezeigten Lautsprecherbilder dienen nur zur Orientierung und repräsentieren möglicherweise nicht genau Ihr bestimmtes Modell. Wir empfehlen die Verwendung einer isolierten Lautsprecherkabel zwischen 12 und 18 AWG. - Seite 20 4. Conecte uma linha de suporte secundária à guia de segurança. Alguns códigos de construção requerem o uso Se estiver usando uma chave de força, a Tannoy recomenda um ajuste de torque de 1,5 Nm. (Fig.4) deste ponto de suporte secundário, que deve se conectar a um ponto de suporte seguro separado usando NÃO APERTAR DEMAIS!
- Seite 21 NOTA: As imagens dos alto-falantes mostradas são apenas para orientação e podem não representar exatamente o seu modelo específico. Um suporte de anel de gesso (lama) opcional está disponível na Tannoy. Este suporte foi projetado para ser pré- Recomendamos o uso de fiação de alto-falante isolada entre 12 e 18 AWG.
- Seite 22 3. Far scorrere il gruppo altoparlante attraverso il foro e ruotare le viti sulla parte anteriore dell’altoparlante per estendere le alette di montaggio. Serrare le viti fino a ottenere una presa salda. Se si utilizza un driver di potenza, Tannoy consiglia una coppia di serraggio di 1,5 Nm. (Fig.4) NON STRINGERE ECCESSIVAMENTE! Fig.3...
- Seite 23 Una staffa ad anello in gesso (fango) opzionale è disponibile presso Tannoy. Questa staffa è progettata per essere NOTA: Le immagini degli altoparlanti mostrate sono solo indicative e potrebbero non rappresentare preinstallata in controsoffitti non sospesi di nuova costruzione.
- Seite 24 CVS Series Quick Start Guide Cablaggio e configurazione 5. Stringere il pressacavo o il pressacavo e collegare il connettore di tipo Euro all’altoparlante. Riposizionare il coperchio posteriore e serrare saldamente le viti in dotazione. NOTA: le immagini dei diffusori mostrate sono solo indicative e potrebbero non rappresentare esattamente il modello in uso. Si consiglia di utilizzare cavi per altoparlanti isolati da 12 a 18 AWG.
- Seite 25 3. Schuif de luidsprekerset door het gat en draai de schroeven aan de voorkant van de luidspreker om de montagevleugels te verlengen. Draai de schroeven vast totdat u ze stevig vasthoudt. Bij gebruik van een power driver adviseert Tannoy een aanhaalmoment van 1,5 Nm. (Afb.4) 4. Sluit een secundaire ondersteuningslijn aan op het veiligheidslipje. Sommige constructiecodes vereisen het...
- Seite 26 Installatie-instructies voor optionele gipsring Bedrading en installatie Een optionele beugel van gips (modder) ring is verkrijgbaar bij Tannoy. Deze beugel is ontworpen om vooraf te OPMERKING: De getoonde luidsprekerafbeeldingen zijn alleen bedoeld als richtlijn en vertegenwoordigen mogelijk niet exact uw specifieke model.
- Seite 27 3. Skjut högtalarenheten genom hålet och vrid skruvarna på högtalarens framsida för att förlänga monteringsvingarna. Dra åt skruvarna tills ett fast grepp uppnås. Om du använder en kraftdrivare rekommenderar Tannoy en vridmomentinställning på 1,5 Nm. (Bild 4) TÄCK INTE! Fig.3 4.
- Seite 28 Quick Start Guide Installationsguide för gipstak Installationsanvisningar för valfri gipsring En valfri gipsring (lera) finns i Tannoy. Detta fäste är utformat för att förinstalleras i nykonstruerade, NOTERA: Högtalarbilderna som visas är endast vägledande och kanske inte exakt representerar din icke-upphängda tak.
- Seite 29 CVS Series Quick Start Guide Kabeldragning och installation 5. Dra åt kabelklämman eller kabelförskruvningen och sätt in Euro-kontakten i högtalaren. Sätt tillbaka det bakre locket och dra åt de medföljande skruvarna ordentligt. 6. Högtalaren är utrustad med en multikranstransformator för användning i distribuerade linjesystem (fig.6). Det finns också en LOZ-kran. Välj önskad kran innan du OBS: Högtalarbilderna som visas är endast vägledande och kanske inte exakt representerar din specifika modell.
- Seite 30 Dokręć śruby, aż do uzyskania mocnego zamocowania. 4. Podłącz pomocniczą linię pomocniczą do zaczepu zabezpieczającego. Niektóre przepisy konstrukcyjne Jeśli używasz sterownika mocy, Tannoy zaleca ustawienie momentu obrotowego na 1,5 Nm. (Ryc.4) wymagają zastosowania tego dodatkowego punktu podparcia, który powinien być połączony z oddzielnym NIE DOKRĘCAĆ...
- Seite 31 UWAGA: Przedstawione obrazy głośników mają jedynie charakter informacyjny i mogą nie odzwierciedlać dokładnie Twojego konkretnego modelu. Opcjonalny wspornik pierścieniowy do gipsu (błota) jest dostępny w firmie Tannoy. Ten wspornik jest Zalecamy stosowanie izolowanych przewodów głośnikowych o przekroju od 12 do 18 AWG.
- Seite 32 CVS Series Quick Start Guide 5. Dokręcić zacisk kablowy lub dławik kablowy i podłączyć złącze typu Euro do głośnika. Załóż tylną pokrywę i mocno dokręć dostarczone śruby. Dimensions (mm) 6. Głośnik jest wyposażony w transformator wielozłączowy do użytku w systemach z linią rozproszoną (rys.6). Jest też kran LOZ. Wybierz żądany kran przed wsunięciem grilla na miejsce.
-
Seite 33: Specifications
CVS Series Quick Start Guide Specifications CVS 301 CVS 401 CVS 601 CVS 801 CVS 801S CVS 801S LZ CVS 301 CVS 401 CVS 601 CVS 801 CVS 801S CVS 801S LZ Performance Dimensions Frequency response Bezel diameter 85 Hz-19 kHz 102 Hz-20 kHz 105 Hz-20 kHz 88 Hz-20 kHz... -
Seite 34: Belangrijke Informatie
CVS Series Quick Start Guide Other important information Outras Informações Important information Informations importantes Belangrijke informatie Ważna informacja Importantes 1. Register online. Please register your new 1. Enregistrez-vous en ligne. Prenez le 1. Registre-se online. Por favor, registre seu 1. Registreer online. Registreer uw nieuwe 1. - Seite 35 CVS Series Quick Start Guide Hereby, Music Tribe declares that this product is in compliance with Directive 2011/65/EU and Amendment 2015/863/EU, Directive 2012/19/EU, Regulation 519/2012 REACH SVHC and Directive 1907/2006/EC, and this passive product is not applicable to EMC Directive 2014/30/EU, LV Directive 2014/35/EU. Full text of EU DoC is available at https://community.musictribe.com/ EU Representative: Music Tribe Brands DK A/S Address: Ib Spang Olsens Gade 17, DK - 8200 Aarhus N, Denmark...