Herunterladen Inhalt Inhalt Diese Seite drucken
Philips HQC486 Bedienungsanleitung
Vorschau ausblenden Andere Handbücher für HQC486:

Werbung

Verfügbare Sprachen
  • DE

Verfügbare Sprachen

  • DEUTSCH, seite 54
All manuals and user guides at all-guides.com
DIRECTIONS FOR USE
ITALIANO 29
PORTUGUÊS 34
39
TÜRKÇE 44
STYLING BOOKLET
ENGLISH 50
DEUTSCH 56
FRANÇAIS 62
NEDERLANDS 68
ESPAÑOL 74
ITALIANO 80
PORTUGUÊS 86
92
TÜRKÇE 99
3

Werbung

Inhaltsverzeichnis
loading

Inhaltszusammenfassung für Philips HQC486

  • Seite 1: Inhaltsverzeichnis

    All manuals and user guides at all-guides.com DIRECTIONS FOR USE ENGLISH 4 DEUTSCH 9 FRANÇAIS 14 NEDERLANDS 19 ESPAÑOL 24 ITALIANO 29 PORTUGUÊS 34 TÜRKÇE 44 STYLING BOOKLET ENGLISH 50 DEUTSCH 56 FRANÇAIS 62 NEDERLANDS 68 ESPAÑOL 74 ITALIANO 80 PORTUGUÊS 86 TÜRKÇE 99...
  • Seite 2 All manuals and user guides at all-guides.com ENGLISH Introduction Dear customer, you have made the right choice! Your new Philips hair clipper adapts to the contours of the head and enables comfortable use. To enjoy this hair clipper for a long time, we advise you to read the following information.
  • Seite 3 All manuals and user guides at all-guides.com ENGLISH Optimising the lifetime of the battery - Discharge the battery completely twice a year by letting the motor run until it stops. - Do not keep the cord plugged into the wall socket all the time. - If the appliance has not been used for a long period of time, it must be recharged for at least 12 hours.
  • Seite 4: English

    Make sure you push the cutting unit back until you hear a click. Replacement A worn or damaged cutting unit should only be replaced with an original Philips cutting unit. Open the cutting unit by pressing the middle part and then remove it by pulling it upwards.
  • Seite 5 Do not throw the battery away with the normal household waste but hand it in at an official collection point. You can also take the appliance to a Philips service centre, where staff will be happy to help you remove the battery and dispose of it in an environmentally safe way.
  • Seite 6: Information & Service

    Information & service If you need information or if you have a problem, please visit the Philips Web site at www.philips.com or contact the Philips Customer Care Centre in your country (you will find its phone number in the worldwide guarantee leaflet).
  • Seite 7: Einleitung

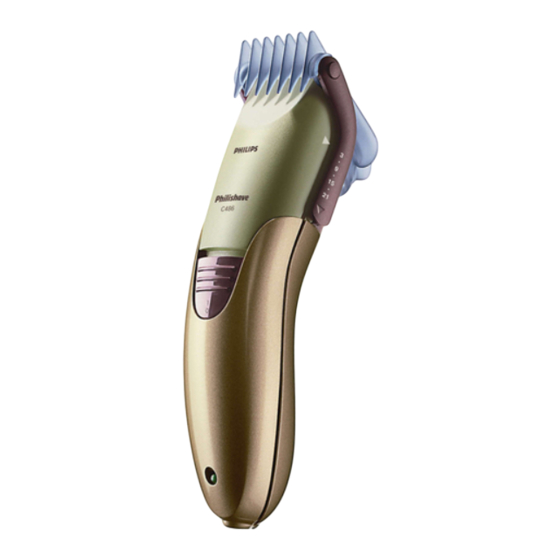
    All manuals and user guides at all-guides.com DEUTSCH Einleitung Lieber Kunde, Sie haben die richtige Wahl getroffen! Ihr neuer Philishave Haarschneider passt sich den Konturen des Kopfes an und ist deshalb besonders komfortabel im Gebrauch. Damit Sie lange Zeit Freude an diesem Haarschneider haben, sollten Sie die folgenden Informationen lesen.
  • Seite 8: Vorbereitungen Zum Gebrauch

    All manuals and user guides at all-guides.com DEUTSCH Optimieren der Lebensdauer des Akkus - Entladen Sie den Akku zweimal pro Jahr vollständig, indem Sie das Gerät laufen lassen, bis der Motor anhält. - Lassen Sie den Netzstecker nicht ununterbrochen in der Steckdose. - Wurde das Gerät längere Zeit nicht benutzt, muss es mindestens 12 Stunden lang aufgeladen werden.
  • Seite 9: Reinigung

    Drücken Sie auf die Schneideeinheit, bis sie hörbar einrastet. Austauschen der Schneideeinheit Eine abgenutzte oder beschädigte Schneideeinheit darf nur durch eine Philips Schneideeinheit ersetzt werden. Öffnen Sie die Schneideeinheit, indem Sie gegen den mittleren Teil drücken. Heben Sie die Schneideeinheit dann nach oben ab.
  • Seite 10: Umweltschutz

    öffentlichen Sammelstellen Ihrer Gemeinde oder an einer Verkaufsstelle für entspechende Geräte bzw. Batterien und Akkus ab. Sie können das Gerät auch bei einem Philips Service Center abgeben. Wir kümmern uns dann gern um eine umweltgerechte Entsorgung. Ziehen Sie den Stecker aus der Steckdose, und lassen Sie das Gerät laufen, bis der Motor anhält.
  • Seite 11 Philips Service Center in Ihrem Land. (Die Telefonnummern entnehmen Sie bitte der beigefügten Garantieschrift). Ist in Ihrem Land kein Philips Service Center vorhanden, so wenden Sie sich an das Service Department von Philips Domestic Appliances and Personal Care BV.
  • Seite 12 FRANÇAIS Introduction Cher consommateur, vous avez fait le bon choix! Votre nouvelle tondeuse Philips s'adapte aux contours de votre coiffure en facilitant ainsi son utilisation. Afin de pouvoir utiliser au mieux votre tondeuse, nous vous conseillons de suivre les instructions qui suivent.
  • Seite 13: Utilisation Sur Secteur

    All manuals and user guides at all-guides.com FRANÇAIS Durée des accumulateurs - Déchargez les batteries complètement deux fois par an en laissant tourner le moteur jusqu'à l'arrêt. - Ne laissez pas le cordon d'alimentation branché sur le secteur continuellement. - Si l'appareil n'a pas été utilisé pendant une longue période, rechargez-le pendant 12 heures au moins.
  • Seite 14 Repoussez l'unité de coupe jusqu'à entendre un clic. Remplacement Utilisez uniquement une unité de coupe Philips d'origine pour remplacer la votre, si elle est usée ou endommagée. Ouvrez l'unité de coupe en poussant dessus, au centre et...
  • Seite 15 à cet effet. Vous pouvez également déposer votre appareil dans un Centre Service Agréé Philips, où l'on se chargera avec plaisir d'enlever la batterie, et de la jeter dans un lieu assigné à cet effet.
  • Seite 16: Informations & Service

    Pour toute réparation/information, ou en cas de problème, visitez notre website: www.philips.com. Ou veuillez contacter le Service Consommateurs Philips de votre pays (vous trouverez le numéro de téléphone dans le dépliant sur la garantie internationale). S'il n'y a aucun Service Consommateurs Philips dans votre pays, contactez votre distributeur ou le Service Department de Philips Domestic Appliances and Personal Care BV.
  • Seite 17 All manuals and user guides at all-guides.com NEDERLANDS Introductie Beste klant, u heeft de juiste keuze gemaakt! Uw nieuwe Philishave haartrimmer volgt de contouren van het hoofd en is gemakkelijk in het gebruik. Om lang plezier te hebben van uw Philishave haartrimmer, raden we u aan de onderstaande informatie te lezen.
  • Seite 18 All manuals and user guides at all-guides.com NEDERLANDS De levensduur van de accu optimaliseren - Ontlaad de batterij twee keer per jaar volledig door de motor te laten lopen totdat hij stopt. - Laat de stekker niet continu in het stopcontact zitten. - Indien het apparaat lange tijd niet gebruikt is, dient het minstens 12 uur opgeladen te worden.
  • Seite 19: Nederlands

    Duw net zolang op het knipelement totdat u het hoort vastklikken. Vervanging Vervang een versleten of beschadigd knipelement alleen door een origineel Philips knipelement. Open het knipelement door op het midden te drukken en verwijder het door het naar boven te trekken.
  • Seite 20: Accu Verwijderen

    Gooi de accu niet bij het normale huisvuil, maar lever deze in op een door de overheid aangewezen plaats. U kunt het apparaat ook naar een Philips servicecentrum brengen, waar men u zal helpen de accu te verwijderen en ervoor zal zorgen dat deze op milieuvriendelijke wijze wordt verwerkt.
  • Seite 21 Philips Customer Care Centre in uw land (u vindt het telefoonnummer in het 'worldwide guarantee' vouwblad). Als er geen Customer Care Centre in uw land is, ga dan naar uw Philips dealer of neem contact op met de afdeling Service van Philips Domestic Appliances and Personal...
  • Seite 22 ESPAÑOL Introducción Estimado cliente: ¡Ha acertado en su elección! El nuevo cortapelos de Philips se adapta a los contornos de la cabeza y permite utilizarlo con comodidad. Para que disfrute durante más tiempo del cortapelos, le recomendamos que lea la siguiente información.
  • Seite 23: Español

    All manuals and user guides at all-guides.com ESPAÑOL Cómo optimizar la vida útil de la batería - Descargue completamente la batería dos veces al año dejando funcionar el motor hasta que se pare. - No tenga siempre el aparato enchufado a la red. - Si no ha utilizado el aparato durante mucho tiempo, debe recargarlo durante al menos 12 horas.
  • Seite 24 Asegúrese de encajar correctamente la unidad cortante hasta que oiga un clic. Sustitución Una unidad de corte gastada o deteriorada sólo debe ser sustituida por una unidad de corte original de Philips. Abra la unidad de corte presionando en el centro y luego quítela tirando hacia arriba.
  • Seite 25: Medio Ambiente

    También puede llevar el aparato a un Servicio de Asistencia Técnica de Philips, donde le ayudarán a desmontar la batería y desecharla de un modo seguro para el medio ambiente. Desenchufe el aparato de la red y deje que funcione hasta que el motor se pare.
  • Seite 26 Si necesita información o tiene algún problema, visite la página Web de Philips en www.philips.com, o póngase en contacto con el Servicio Philips de Atención al Cliente de su país (hallará el número de teléfono en el folleto de la Garantía Mundial). Si en su país no hay Servicio Philips de Atención al Cliente, diríjase a su distribuidor local Philips o...
  • Seite 27 All manuals and user guides at all-guides.com ITALIANO Introduzione Caro cliente, ha fatto la scelta giusta! Il nuovo regolacapelli Philips si adatta perfettamente al contorno della tua testa, rendendo ancora più pratico il suo impiego. Per sfruttare al meglio e a lungo il regolacapelli, vi consigliamo di leggere attentamente le seguenti informazioni.
  • Seite 28 All manuals and user guides at all-guides.com ITALIANO Come ottimizzare la durata della batteria - Scaricate completamente la batteria due volte all'anno, facendo funzionare il motore fino a quando si spegne. - Non tenete il cavo sempre inserito nella presa di corrente. - Se l'apparecchio è...
  • Seite 29 Quando avrete inserito correttamente il blocco coltelli, sentirete un click. Sostituzione Il blocco coltelli danneggiato o usurato dovrà essere sostituito con un pezzo originale Philips. Aprite il blocco coltelli premendo al centro e poi estraetelo tirando verso l'alto.
  • Seite 30 Se volete, potete anche portare l'apparecchio presso un Centro d'Assistenza Philips: il personale sarà lieto di togliere la batteria e di gettarla conformemente alle norme vigenti. Scollegate l'apparecchio dalla presa di corrente e lasciate funzionare l'apparecchio fino a quando il motore non si ferma.
  • Seite 31: Garanzia E Assistenza

    Paese (troverete il numero di telefono sull'opuscolo della garanzia). Qualora nel vostro Paese non ci siano Centri Assistenza Clienti, rivolgetevi a un rivenditore autorizzato Philips oppure contattate il Service Department of Philips Domestic Appliances and Personal Care BV...
  • Seite 32 All manuals and user guides at all-guides.com PORTUGUÊS Introdução Caro cliente, acaba de fazer a escolha certa! O seu novo Aparador de Cabelo Philishave adapta-se aos contornos da cabeça e permite uma utilização confortável. Para disfrutar do aparador durante muito tempo, aconselha-se a leitura das informações que se segue, Importante Antes de ligar, verifique se a voltagem indicada na ficha...
  • Seite 33 All manuals and user guides at all-guides.com PORTUGUÊS Optimizar o tempo de vida da bateria - Descarregue a bateria por completo duas vezes por ano, deixando o motor a trabalhar até parar. - Não deixe o fio permanentemente ligado à tomada eléctrica. - Se a máquina não for usada durante um longo período de tempo, deverá...
  • Seite 34 Se ouvir um clique, a unidade de corte está bem colocada. Substituição Uma unidade de corte gasta ou estragada só deverá ser substituída por uma peça de origem Philips. Abra a unidade de corte pressionando o centro e depois retire-a puxando para cima.
  • Seite 35: Meio Ambiente

    Coloque-a nos ecopontos próprios. Se quiser, também poderá levar a máquina a um Centro de Serviço Philips, cujo pessoal está habilitado a retirar a bateria e desfazer-se dela de forma a proteger o meio ambiente. Desligue a máquina da corrente e deixe-a a trabalhar até o motor parar.
  • Seite 36 Informação ao Consumidor Philips do seu país (encontrará os números de telefone no folheto da garantia mundial). Se não existir um Centro de Informação ao Cliente no seu país, dirija-se ao seu agente Philips ou contacte o Departamento de Service da Philips Domestic Appliances...
  • Seite 37 All manuals and user guides at all-guides.com Philipshave 35c.
  • Seite 38 All manuals and user guides at all-guides.com 3 mm 23 mm 6 mm 26 mm 9 mm 29 mm 12 mm 32 mm 15 mm 35 mm 18 mm 38 mm 21 mm 41 mm...
  • Seite 39 All manuals and user guides at all-guides.com Philips.
  • Seite 40 All manuals and user guides at all-guides.com Philips ,...
  • Seite 41 All manuals and user guides at all-guides.com & Philips www.philips.com Philips Philips Philips.
  • Seite 42 All manuals and user guides at all-guides.com TÜRKÇE Giriş Değerli müşterimiz, doğru seçim yaptınız! Yeni Philips saç kesme cihazınız başınızın tüm hatlarına uyum sağlar ve rahat bir kullanım sunar. Saç kesme cihazından uzun süre faydalanmak için, verilen bilgileri okumanızı tavsiye ederiz.
  • Seite 43 All manuals and user guides at all-guides.com TÜRKÇE Pilin ömrünü uzatma - Cihazın pilini yılda iki kere, motoru duruncaya dek çalıştırarak boşaltın. - Kabloyu sürekli prizde takılı olarak bırakmayın. - Eğer cihaz uzun bir süre kullanılmamışsa, 12 saat boyunca tekrar şarj edilmelidir.
  • Seite 44 üstüne geri itin. Kesici üniteyi bir klik sesi duyana kadar geri ittiğinizden emin olun. Değiştirme Yıpranmış veya hasar görmüş kesici ünite sadece orijinal bir Philips kesici ünite ile değiştirilmelidir. Kesici üniteyi merkezine basınç uygulayarak açın ve ardından yukarı doğru iterek çekin.
  • Seite 45 Cihazı çöpe atarken şarj edilebilen pilleri çıkartın. Pilleri normal ev çöpüne atmayın, resmi bir toplama noktasında imha edin. Ayrıca, cihazı Philips Servis Merkezine götürürseniz, yetkililer pilleri çıkartmanıza ve pillerin çevreye zarar vermeden yok edilmelerine yardımcı olmaktan mutluluk duyacaktır. Cihazın fişini prizden çekerek, cihazı motoru duruncaya kadar çalıştırın.
  • Seite 46 ülkenizde bulunan Philips Müşteri Danışma Merkezi ile iletişime geçiniz (dünya genelindeki telefon numaralarını verilen garanti belgeleri içerisinde bulabilirsiniz). Eğer ülkenizde Müşteri Danışma Merkezi yoksa, yerel Philips yetkilinize başvurun veya Philips Ev Aletleri ve Kişisel Bakım BV Servis Departmanı ile iletişime geçin.
  • Seite 47 All manuals and user guides at all-guides.com...
  • Seite 48 All manuals and user guides at all-guides.com ENGLISH Introduction Creating different hairstyles has become very easy with Philishave's new line of hair clippers. Forget those expensive and time-consuming appointments at the barber's. Create your own hairstyle at home, whenever you want! In the directions for use you can read how to charge, use, clean and store your clipper.
  • Seite 49 All manuals and user guides at all-guides.com ENGLISH Then use a shorter length setting to clip the areas near the temple and at the nape. Finally, contour the hairline round the ears and at the nape. Tip: regularly remove cut hair from the comb while clipping. Clipping with comb attachment The comb has been specially designed to always keep the cutting element at the same distance from the scalp.The flexible comb easily...
  • Seite 50 All manuals and user guides at all-guides.com ENGLISH Clipping without comb attachment You can obtain hair lengths of over 4 cm by using a styling comb or your fingers together with the hair clipper without comb attachment. Comb a small section of hair upwards against the direction of growth.
  • Seite 51 All manuals and user guides at all-guides.com ENGLISH You can repeat this procedure until the hair on every part of the head has the desired length and a smooth transition between the long hair on the top and the shorter hair on the back and sides of the head has been achieved.
  • Seite 52 All manuals and user guides at all-guides.com ENGLISH Create your favourite haircut! The Philishave hair clipper has been designed to give you optimum freedom when cutting hair at home.With its 14 different hair length settings and a styling comb the possibilities are nearly endless. Of course, the results depend on the type of hair, your own personal taste and creativity.To make sure you get good results right from the start, we have selected a few hairstyles.The following hairstyles give you an...
  • Seite 53 All manuals and user guides at all-guides.com ENGLISH Curly hair > 41 Hair length settings: nape: 6 mm lower part of back and sides: 15 mm upper part of back and sides: 21 mm top: with clipper over fingers Remember your personal settings! Clipping with the Philishave hair clipper is much easier than it looks.
  • Seite 54: Einführung

    All manuals and user guides at all-guides.com DEUTSCH Einführung Verschiedene Frisuren zu gestalten, ist mit der neuen Produktlinie von Philishave Haarschneidern ganz einfach.Vergessen Sie all die kostspieligen und zeitraubenden Termine beim Friseur. Kreieren Sie Ihre eigene Frisur zu Hause, wann immer Sie wollen! Dieser Gebrauchsanweisung können Sie entnehmen, wie Sie den Akku laden sowie das Gerät benutzen, reinigen und aufbewahren.
  • Seite 55 All manuals and user guides at all-guides.com DEUTSCH Verwenden Sie dann eine kürzere Einstellung, um die Haare an den Schläfen und im Nacken zu schneiden. Ziehen Sie abschließend die Konturen an den Ohren und im Nacken. Tipp: Entfernen Sie regelmäßig die abgeschnittenen Haare aus dem Kamm-Aufsatz.
  • Seite 56: Die Richtigen Techniken Für Ihren Haarschnitt

    All manuals and user guides at all-guides.com DEUTSCH Haare ohne Kamm-Aufsatz schneiden Frisuren mit Längen über 4 cm sind möglich, indem Sie einen Frisierkamm oder Ihre Finger und den Haarschneider ohne Kamm- Aufsatz benutzen. Kämmen Sie einige Haare gegen die Richtung des Haarwuchses nach oben.
  • Seite 57 All manuals and user guides at all-guides.com DEUTSCH Wählen Sie dann eine kürzere Einstellung und schneiden Sie alle Haare außer denen oben auf dem Kopf, die länger bleiben sollen. Sie können diesen Schritt wiederholen, bis alle Haare die gewünschte Länge aufweisen und ein sanfter Übergang zwischen den langen Haaren oben auf dem Kopf und den kürzeren Haaren hinten und an den Seiten erreicht ist.
  • Seite 58 All manuals and user guides at all-guides.com DEUTSCH Platzieren Sie den Haarschneider nicht zu weit oben am Hinterkopf. Folgen Sie der natürlichen Haarlinie. Kämmen Sie die Haare nicht mit dem Haarschneider nach unten.Alle berührten Haare werden sofort vom Gerät abgeschnitten. Gestalten Sie Ihren eigenen Haarschnitt! Der Philishave Haarschneider bietet zuhause viele Möglichkeiten zum Schneiden der Haare.
  • Seite 59 All manuals and user guides at all-guides.com DEUTSCH Modisch kurz Haarlängeneinstellungen: Nacken: 9 mm Unterer Teil des Hinterkopfs und der Seiten: 12 mm Oberer Teil des Hinterkopfs und der Seiten: 18 mm Oben: 32 mm Lockiges Haar > 41 Haarlängeneinstellungen: Nacken: 6 mm Unterer Teil des Hinterkopfs und der Seiten: 15 mm Oberer Teil des Hinterkopfs und der Seiten: 21 mm...
  • Seite 60: Avant La Première Utilisation

    All manuals and user guides at all-guides.com FRANÇAIS Introduction La nouvelle gamme de tondeuses à cheveux Philishave vous permet de réaliser très facilement différentes coiffures. Ne perdez plus de temps ni d'argent chez le coiffeur. Créez votre propre coiffure chez vous, quand vous le souhaitez! Ce mode d'emploi vous indique comment recharger, utiliser, nettoyer et conserver votre tondeuse.
  • Seite 61 All manuals and user guides at all-guides.com FRANÇAIS Ensuite utilisez un réglage inférieur pour couper les pattes et la nuque. A la fin, dessinez le contour de la nuque et des oreilles. Suggestion: retirez à intervalles réguliers les mèches coupées. Taille avec guide de coupe Le guide de coupe a été...
  • Seite 62 All manuals and user guides at all-guides.com FRANÇAIS Taille sans guide de coupe Vous pouvez obtenir une longueur des cheveux supérieure à 4 cm en utilisant un peigne ou vos doigts et la tondeuse sans guide de coupe. Peignez une mèche de cheveux vers le haut dans le sens inverse de la pousse.
  • Seite 63 All manuals and user guides at all-guides.com FRANÇAIS Ensuite choisissez un réglage inférieur et coupez les cheveux à l'arrière de la tête, sauf le sommet. Vous pouvez répéter cette procédure jusqu'à ce que les cheveux de la nuque et des côtés aient la longueur désirée et que vous ayez effectué...
  • Seite 64 All manuals and user guides at all-guides.com FRANÇAIS Ne peignez pas les cheveux avec la tondeuse car l'appareil coupe tous les cheveux qu'il touche. Réalisez votre coupe de cheveux préférée! La tondeuse Philishave a été spécialement conçue pour vous permettre de couper les cheveux avec une entière liberté.
  • Seite 65 All manuals and user guides at all-guides.com FRANÇAIS Cheveux bouclés > 41 Réglages de la hauteur de coupe: nuque: 6 mm partie inférieure de la nuque et des côtés: 15 mm partie supérieure de la nuque et des côtés: 21 mm sommet: avec tondeuse par-dessus les doigts N'oubliez pas les positions utilisées! Tondre les cheveux avec la tondeuse Philishave est beaucoup plus facile...
  • Seite 66: Voordat U Begint

    All manuals and user guides at all-guides.com NEDERLANDS Introductie Het creëren van verschillende kapsels is nu zeer gemakkelijk met de nieuwe serie haartrimmers van Philishave.Vergeet al die dure en tijdrovende afspraken bij de kapper. Creëer uw eigen kapsel thuis, wanneer u maar wilt! In de gebruiksaanwijzing leest u hoe u de haartrimmer moet opladen, schoonmaken en opbergen.
  • Seite 67 All manuals and user guides at all-guides.com NEDERLANDS Selecteer vervolgens een kortere kniplengte om het haar bij de slapen en in de nek te knippen. Werk tenslotte de de neklijn en de haarlijn rond de oren bij. Tip: Ontdoe de opzetkam regelmatig van het afgeknipte haar dat zich hierin ophoopt.
  • Seite 68 All manuals and user guides at all-guides.com NEDERLANDS Knippen zonder opzetkam U kunt haarlengtes van meer dan 4 cm creëren door met de haartrimmer zonder opzetkam langs een kam of uw vingers te knippen. Kam een lok haar omhoog tegen de groeirichting in. Til de haarlok op met de kam of neem deze tussen uw wijsvinger en middelvinger zodat alleen het gedeelte dat afgeknipt moet worden nog boven de kam of uw vingers...
  • Seite 69 All manuals and user guides at all-guides.com NEDERLANDS Kies dan een kortere kniplengtestand en knip al het haar behalve het deel bovenop het hoofd dat u langer wilt houden op deze kortere lengte. Herhaal deze procedure totdat het haar overal de gewenste lengte heeft en u een gelijkmatige overgang van het langere haar bovenop het hoofd en het kortere haar aan de achterzijde en zijkanten van het hoofd heeft gecreëerd.
  • Seite 70 All manuals and user guides at all-guides.com NEDERLANDS Plaats de haartrimmer niet te hoog in de nek maar volg de natuurlijke haarlijn. Probeer het haar niet met de ingeschakelde haartrimmer naar beneden te kammen, omdat het apparaat al het haar dat het aanraakt zal afknippen.
  • Seite 71 All manuals and user guides at all-guides.com NEDERLANDS Modieus kort Kniplengtestanden: neklijn: 9 mm onderste deel van achterkant en zijkanten: 12 mm bovenste deel van achterkant en zijkanten: 18 mm bovenkant: 32 mm Krullend haar > 41 Kniplengtestanden neklijn: 6 mm onderste deel van achterkant en zijkanten: 15 mm bovenste deel van achterkant en zijkanten: 21 mm bovenkant: knip met haartrimmer over vingers...
  • Seite 72 All manuals and user guides at all-guides.com ESPAÑOL Introducción La creación de nuevos cortes de pelo resulta muy fácil con la nueva línea de Cortapelos Philishave. Olvide las citas en la peluquería, con las que pierde tanto tiempo y dinero. ¡Cree su propio peinado en casa, en el momento que desee!.
  • Seite 73 All manuals and user guides at all-guides.com ESPAÑOL Después, utilice la posición de corte más corta para cortar las zonas cercanas a la sien y a la nuca. Para terminar, retoque la línea del pelo de alrededor de las orejas y de la nuca. Consejo: quite regularmente el pelo del peine mientras corta.
  • Seite 74 All manuals and user guides at all-guides.com ESPAÑOL Corte de pelo sin el accesorio de peine Puede conseguir una longitud de corte de unos 4 cm si utiliza un peine de peluquería o sus dedos con el cortapelos sin accesorio de peine. Peine poca cantidad de pelo hacia arriba en sentido contrario al crecimiento del cabello.
  • Seite 75 All manuals and user guides at all-guides.com ESPAÑOL Después elija una posición de corte más corta y corte el pelo por todas partes menos por la parte de arriba de la cabeza para que quede más largo. Puede repetir este proceso hasta que todo el pelo consiga la longitud que desee y no se note el cambio de la parte superior de la cabeza con pelo más largo y, la parte de atrás y laterales con pelo más corto.
  • Seite 76 All manuals and user guides at all-guides.com ESPAÑOL No intente peinar el pelo hacia abajo con el cortapelos, ya que el aparato cortará todo el pelo que se encuentre. Cree su corte de pelo favorito El cortapelos Philipshave está diseñado para proporcionarle plena libertad cuando se corte el pelo en casa.
  • Seite 77 All manuals and user guides at all-guides.com ESPAÑOL Pelo rizado > 41 Posiciones de longitud de corte: nuca: 6 mm parte inferior de la parte trasera y laterales: 15 mm parte superior de la parte trasera y laterales: 21 mm parte superior: con el cortapelos sobre los dedos Recuerde sus ajustes personales Cortar el pelo con el Cortapelos Philishave es mucho más fácil de lo...
  • Seite 78 All manuals and user guides at all-guides.com ITALIANO Introduzione Con la nuova linea di regolacapelli Philishave, creare nuove acconciature non è mai stato così facile! D'ora in poi potrete dire addio alle lunghe attese dal parrucchiere e divertirvi a creare stili diversi, ovunque vogliate! Nelle istruzioni per l'uso, troverete come caricare, usare, pulire e riporre il vostro regolacapelli.
  • Seite 79 All manuals and user guides at all-guides.com ITALIANO A questo punto passate ad una lunghezza inferiore per rifinire le zone attorno alle tempie e sulla nuca. Alla fine, rifinite il contorno attorno alle orecchie e sulla nuca. Consiglio: durante questa operazione, eliminate spesso i capelli tagliati. Come tagliare i capelli usando il pettine distanziatore Il pettine è...
  • Seite 80 All manuals and user guides at all-guides.com ITALIANO Come tagliare i capelli senza usare il pettine distanziatore Potete tagliare i capelli ad una lunghezza superiore a 4 cm usando un normale pettine o le dita insieme al regolacapelli, senza inserire il pettine distanziatore.
  • Seite 81 All manuals and user guides at all-guides.com ITALIANO A questo punto scegliete una lunghezza inferiore e tagliate i capelli ad eccezione di quelli in cima alla testa, dove volete che siano più lunghi. Potete ripetere questa operazione fino a quando i capelli saranno della lunghezza desiderata, con un giusto equilibrio fra le parti più...
  • Seite 82 All manuals and user guides at all-guides.com ITALIANO Non appoggiate il regolacapelli troppo in alto sulla parte posteriore della testa. Seguite la linea naturale dell'attaccatura. Non cercate di pettinare i capelli con il regolacapelli in quanto l'apparecchio taglia tutti i capelli che tocca. Come creare la vostra acconciatura preferita! Il regolacapelli Philishave è...
  • Seite 83 All manuals and user guides at all-guides.com ITALIANO Corti alla moda Impostazioni lunghezza di taglio: nuca: 9 mm parte inferiore e lati della testa: 12 mm parte superiore e lati della testa: 18 mm sommità: 32 mm Capelli ricci > 41 Impostazione lunghezza di taglio: nuca: 6 mm parte inferiore e lati della testa: 15 mm...
  • Seite 84: Antes De Começar

    All manuals and user guides at all-guides.com PORTUGUÊS Introdução Criar vários penteados e diferentes estilos tornou-se muito fácil graças à nova linha de Aparadores de Cabelo Philishave. Esqueça as dispendiosas e demoradas marcações no seu barbeiro ou cabeleireiro. Crie o seu próprio estilo, sem sair do conforto da sua casa, sempre que lhe apetecer! No modo de emprego que acompanha o aparelho ficará...
  • Seite 85 All manuals and user guides at all-guides.com PORTUGUÊS Em seguida, use uma regulação mais baixa para aparar junto às têmporas e à nuca. Por fim, contorne a linha à volta das orelhas e da nuca. Sugestão: de vez em quando vá limpando os cabelos aparados que ficam no pente.
  • Seite 86 All manuals and user guides at all-guides.com PORTUGUÊS Aparar sem o pente acessório Para obter comprimentos de cabelo acima de 4 cm, utilize um pente ou os dedos, juntamente com o aparador, mas sem o acessório. Penteie uma pequena secção do cabelo para cima, na direcção contrária ao crescimento.
  • Seite 87 All manuals and user guides at all-guides.com PORTUGUÊS Comece por aparar todo o cabelo com o comprimento mais alto. Em seguida, escolha uma regulação mais baixa e corte o cabelo em todos os sítios excepto na parte de cima da cabeça onde pretende que o cabelo fique mais comprido.
  • Seite 88 All manuals and user guides at all-guides.com PORTUGUÊS Use o aparador sem o pente acessório e segure-o com a guarda virada para baixo. Faça passagens lentas e seguras no sentido descendente. Não coloque o aparador muito acima da parte de trás da cabeça.
  • Seite 89 All manuals and user guides at all-guides.com PORTUGUÊS Corte 'fashion' Regulações de comprimento: nuca: 9 mm parte de baixo do pescoço e lados: 12 mm parte de cima do pescoço e lados: 18 mm topo: 32 mm Cabelo encaracolado > 41 Regulações de comprimento: nuca: 6 mm parte de baixo do pescoço e lados: 15 mm...
  • Seite 90 All manuals and user guides at all-guides.com Philishave. Philipshave,...
  • Seite 91 All manuals and user guides at all-guides.com 3 mm 23 mm 6 mm 26 mm 9 mm 29 mm 12 mm 32 mm 15 mm 35 mm 18 mm 38 mm 21 mm 41 mm...
  • Seite 92 All manuals and user guides at all-guides.com...
  • Seite 93 All manuals and user guides at all-guides.com Philipshave...
  • Seite 94 All manuals and user guides at all-guides.com Philipshave Philipshave.
  • Seite 95 All manuals and user guides at all-guides.com : 9mm : 18mm : 9mm : 18 mm : 41 mm : 9 mm : 12 mm : 18 mm : 32 mm > 41 : 6 mm : 15 mm : 21 mm...
  • Seite 96 All manuals and user guides at all-guides.com Philishave...
  • Seite 97 All manuals and user guides at all-guides.com TÜRKÇE Giriş Değişik saç kesimleri yaratmak, Philishave saç kesme cihazının yeni çizgisiyle artık çok kolay. Pahalı ve vakit alan berber dükkanlarını unutun. İstediğiniz zaman evinizde kendi saç şeklinizi yaratın! Saç kesme cihazının şarj edilmesi, temizliği ve saklanması ile ilgili bilgileri kullanma kılavuzu içerisindeki açıklamalarda bulabilirsiniz.
  • Seite 98 All manuals and user guides at all-guides.com TÜRKÇE Daha sonra, şakak yakınında kalan alanda ve ensede kesim yapmak için, daha kısa bir uzunluk ayarı kullanın. Son olarak, kulak çevresi ve ensede saç çizgisini şekillendirin. Tavsiye: Kesim esnasında düzenli olarak kesilen saçı taraktan ayırın. Tarak aparatı...
  • Seite 99 All manuals and user guides at all-guides.com TÜRKÇE Tarak aparatı olmadan saç kesme Tarak aparatsız saç kesme cihazıyla, şekillendirme tarağını veya parmaklarınızı kullanarak 4 cm üzerinde saç uzunluğu elde edebilirsiniz. Saçın küçük bir kısmını uzama yönünün tersine yukarı doğru tarayın. Sadece kesilmesi gereken uzunluk açığa çıkana kadar, saçı...
  • Seite 100 All manuals and user guides at all-guides.com TÜRKÇE Bu işlemi, başın her kısmındaki saç istenilen uzunluğa gelene kadar ve üst kısımdaki uzun saçla arka kısımdaki kısa saç ve başın yanlarında bulunan saçlar arasında düzgün bir geçiş sağlayana kadar sürdürebilirsiniz. Tarak aparatı olmadan hassas şekillendirme Kulak ve ensedeki saç...
  • Seite 101 All manuals and user guides at all-guides.com TÜRKÇE En beğendiğiniz saç kesimini yaratın! Philishave saç kesme cihazı, evde saç kesimi yaparken size özgürlüğünüzü sunmak için tasarlandı. 14 farklı saç uzunluk ayarı ve şekillendirici tarağıyla sınırsız olanak sunuyor.Tabi ki sonuç saç tipine, kendi kişisel beğeni ve yaratıcılığınıza bağlıdır.
  • Seite 102 All manuals and user guides at all-guides.com TÜRKÇE Kıvırcık saç > 41 Saç uzunluğu ayarları: ense: 6 mm arka ve yanların alt kısmı: 15 mm arka ve yanların alt kısmı: 21 mm üst:cihaz parmakların üzerinde Kişisel ayarlarınızı unutmayın! Philishave saç kesme cihazı ile saç kesmek göründüğünden çok daha kolaydır.
  • Seite 103 All manuals and user guides at all-guides.com...
  • Seite 104 All manuals and user guides at all-guides.com 4203 000 52331...

Diese Anleitung auch für:

Hqc486/00

Inhaltsverzeichnis