Herunterladen Inhalt Inhalt Diese Seite drucken

Werbung

Verfügbare Sprachen
  • DE

Verfügbare Sprachen

  • DEUTSCH, seite 1
Sonnenwind
Standventilator
Stand Fan
Ventilador de pie
Ventilateur sur pied
Ventilatore verticale
10034674 10034675

Werbung

Inhaltsverzeichnis
loading

Inhaltszusammenfassung für Klarstein Sonnenwind

  • Seite 1 Sonnenwind Standventilator Stand Fan Ventilador de pie Ventilateur sur pied Ventilatore verticale 10034674 10034675...
  • Seite 3: Inhaltsverzeichnis

    Sehr geehrter Kunde, wir gratulieren Ihnen zum Erwerb Ihres Gerätes. Lesen Sie die folgenden Hinweise sorgfältig durch und befolgen Sie diese, um möglichen Schäden vorzubeugen. Für Schäden, die durch Missachtung der Hinweise und unsachgemäßen Gebrauch entstehen, übernehmen wir keine Haftung. Scannen Sie den folgenden QR-Code, um Zugriff auf die aktuellste Bedienungsanleitung und weitere Informationen rund um das Produkt zu erhalten.
  • Seite 4: Sicherheitshinweise

    SICHERHEITSHINWEISE • Entfernen Sie die Verpackung und versichern Sie sich, dass kein Teil während des Transports beschädigt wurde. Falls Teile beschädigt wurden wenden Sie sich umgehend an den Kundendienst. • Kinder könnten sich an den Verpackungsmaterialien und Altgeräten verletzen. Entsorgen Sie das Verpackungsmaterial daher umgehend. •...
  • Seite 5 • Hängen Sie das Gerät nicht an der Decke oder Wand auf, außer es ist für diesen Betrieb ausgelegt. • Lassen Sie um das Gerät herum genug Platz zu Wänden, Möbeln oder anderen Geräten, um eine bestmögliche Leistung zu erzielen. •...
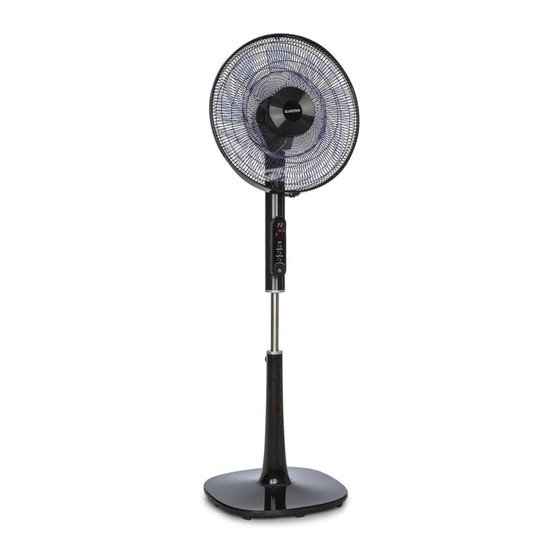
  • Seite 6: Geräteübersicht

    GERÄTEÜBERSICHT Bedienfeld und Fernbedienung Fernbedienung Funktionstasten Regler für die Geschwindigkeit Taste Ein/Aus Lüfterring Motorabdeckung Lüfterblätter Neigungseinstellung Vorderes Gitter Hintere Abdeckung Verriegelung Einstellknopf Vordere Abdeckung Oberes Rohr Bedienfeld Einstellknopf für die Höhe Unteres Rohr Standfuß Hinteres Gitter...
  • Seite 7: Zusammenbau

    ZUSAMMENBAU Installation des Standfußes • Drehen Sie den Einstellknopf am unteren Rohr gegen den Uhrzeigersinn. Ziehen Sie das obere Rohr bis zum Anschlag aus dem unteren Rohr heraus. Ziehen Sie dann den Einstellknopf im Uhrzeigersinn fest. • Entfernen Sie die Schraube aus dem Standfuß. •...
  • Seite 8 Installation des hinteren Gitters • Drehen Sie den Gitterknopf gegen den Uhrzeigersinn und nehmen Sie ihn ab. • Richten Sie das hinteren Gitter an den Fixierpunkten der Motorabdeckung aus. • Halten Sie das hintere Gitter mit einer Hand fest und drehen Sie den Gitterknopf mit der anderen Hand im Uhrzeigersinn fest.
  • Seite 9 Nehmen Sie den Lüfterknopf aus der Verpackung. Halten Sie die Lüfterblätter mit der einen Hand und drehen Sie den Lüfterknopf mit der anderen Hand gegen den Uhrzeigersinn fest. Lüfterknopf Installation des vorderen Gitters • Entfernen Sie die Schrauben am Lüfterring. Setzen Sie das vordere Gitter schräg an das hintere Gitter.
  • Seite 10: Bedienung

    BEDIENUNG Geräte einschalten/ausschalten Stecken Sie den Stecker in die Steckdose. Drücken Sie die Taste EIN/AUS, um das Gerät ein- und wieder auszuschalten. Modus auswählen Drücken Sie im eingeschalteten Zustand mehrmals auf die Taste MODE, um einen der folgenden Windmodi auszuwählen: Normaler Wind > Natürlicher Wind > Schlafmodus >...
  • Seite 11: Schwingfunktion Aktivieren

    Einschalt-Timer einstellen Drücken Sie im Standby-Zustand mehrmals auf die Taste TIMER/PRESET und das Timer-Symbol beginnt zu blinken. Benutzen Sie die Tasten [+] und [-], um die Zeit für den Einschalt-Timer einzustellen von 0.5-12 Stunden einzustellen. Halten Sie die Tasten gedrückt, um die zeit schneller einzustellen. Wenn Sie die Gewünschte Zeit eingestellt haben, drücken Sie erneut auf die Taste TIMER/PRESET, um die Einstellung zu bestätigen.
  • Seite 12: Weitere Funktionen

    WEITERE FUNKTIONEN Automatische Display-Abschaltung Wenn sie das Gerät einschalten aber länger als 40 Sekunden lang kein Betrieb erfolgt, erlöschen alle Anzeigen. Durch Drücken einer beliebigen Taste (außer der Taste EIN/ AUS) kann die Anzeige wieder aktiviert werden. Speicherfunktion Das Produkt verfügt über eine Speicherfunktion. Solange das Gerät ausgeschaltet, aber noch ans Stromnetz angeschlossen ist, speichert es den aktuellen Betriebszustand.
  • Seite 13: Reinigung Und Pflege

    REINIGUNG UND PFLEGE • Ziehen Sie vor der Reinigung den Stecker aus der Steckdose. • Verwenden Sie zur Reinigung keine Scheuerschwämme oder harte Gegenstände, um Kratzer zu vermeiden. • Verwenden Sie zur Reinigung der Komponenten keinen Verdünner, Alkohol, Scheuerpulver oder harte Bürsten. •...
  • Seite 14: Hinweise Zur Entsorgung

    HINWEISE ZUR ENTSORGUNG Befindet sich die linke Abbildung (durchgestrichene Mülltonne auf Rädern) auf dem Produkt, gilt die Europäische Richtlinie 2012/19/EU. Diese Produkte dürfen nicht mit dem normalen Hausmüll entsorgt werden. Informieren Sie sich über die örtlichen Regelungen zur getrennten Sammlung elektrischer und elektronischer Gerätschaften.
  • Seite 15 Dear Customer, Congratulations on purchasing this device. Please read the following instructions carefully and follow them to prevent possible damages. We assume no liability for damage caused by disregard of the instructions and improper use. Scan the QR code to get access to the latest user manual and more product information.
  • Seite 16: Safety Instructions

    SAFETY INSTRUCTIONS • Remove the packaging and make sure that the appliance is intact. If in doubt, do not use it and contact qualified personnel only. • Packaging materials (plastic bags, polystyrene, staples etc.) Must be kept out of the reach of children as they could be hazardous.
  • Seite 17 • Do not hang the fan on the wall or ceiling unless this type of installation is provided and explained in this manual. • Place the device at a proper distance from the objects or surrounding walls making sure that its functioning will not cause accidental damages. •...
  • Seite 18: Product Overview

    PRODUCT OVERVIEW Remote control and control panel Remote control Function keys Controller for wind speed Key On/Off Fan ring Motor cover Fan blades Inclination adjustment Front grille Rear cover Lock Adjustment knob Front cover Upper tube Control panel Height adjustment knob Lower tube Base Rear grille...
  • Seite 19: Assembly

    ASSEMBLY Installing the Base • Turn the adjustment knob on the lower tube counterclockwise. Pull the upper tube out of the lower tube as far as it will go. Then tighten the adjustment knob clockwise. • Remove the screw from the base. •...
  • Seite 20 Installing the rear grille • Turn the lattice knob counterclockwise and remove it. • Align the rear grille with the fixing points on the engine cover. • Hold the rear grille firmly with one hand and turn the grille knob clockwise with the other hand.
  • Seite 21 Remove the fan button from the packaging. Hold the fan blades with one hand and turn the fan knob counterclockwise with the other hand. Fan button Installing the front grille • Remove the screws from the fan ring. Place the front grille at an angle to the rear grille.
  • Seite 22: Operation

    OPERATION Switching device on/off Insert the plug into the socket. Press the ON/OFF button to turn the unit on and off. Selecting the Mode Press the MODE button repeatedly to select one of the following wind modes: Normal Wind > Natural Wind > Sleep mode > Quiet mode. Normal Wind: The wind speed is constant.
  • Seite 23 Setting the switch-on timer In standby mode, press the TIMER/PRESET button repeatedly and the timer icon will start flashing. Use the [+] and [-] buttons to set the power on timer time from 0.5-12 hours. Press and hold the buttons to set the time faster. When you have set the desired time, press the TIMER/PRESET button again to confirm the setting.
  • Seite 24: Further Functions

    FURTHER FUNCTIONS Automatic display switch-off If you switch on the unit but do not operate it for more than 40 seconds, all displays will go out. The display can be reactivated by pressing any button (except the ON/OFF button). Memory function The product has a memory function.
  • Seite 25: Cleaning And Care

    CLEANING AND CARE • Disconnect the plug from the socket before cleaning. • To avoid scratches, do not use scouring pads or hard objects for cleaning. • Do not use thinner, alcohol, scouring powder, or hard brushes to clean the components.
  • Seite 26: Hints On Disposal

    HINTS ON DISPOSAL According to the European waste regulation 2012/19/EU this symbol on the product or on its packaging indicates that this product may not be treated as household waste. Instead it should be taken to the appropriate collection point for the recycling of electrical and electronic equipment.
  • Seite 27: Datos Técnicos

    Estimado cliente: Le felicitamos por la adquisición de este producto. Lea atentamente el siguiente manual y siga cuidadosamente las instrucciones de uso con el fin de evitar posibles daños. La empresa no se responsabiliza de los daños ocasionados por un uso indebido del producto o por haber desatendido las indicaciones de seguridad.
  • Seite 28: Indicaciones De Seguridad

    INDICACIONES DE SEGURIDAD • Retire el embalaje y asegúrese de que no se ha dañado ninguna pieza durante el transporte. En caso de que se hayan dañado piezas, contacte inmediatamente con le servicio de atención al cliente. • Los niños pueden lesionarse con el material de embalaje y los aparatos usados. Por ello, tire el material de embalaje inmediatamente.
  • Seite 29 • No cuelgue el aparato del techo o la pared, a no ser que esté diseñado para esto, • Deje suficiente espacio alrededor del aparato para que llegue a paredes, muebles y otros aparatos de la manera más eficaz. • No use ni almacene el aparato cerca de hornos o radiadores de gas. •...
  • Seite 30: Descripción Del Aparato

    DESCRIPCIÓN DEL APARATO Panel de control y mando a distancia Mando a distancia Botones de función Regulador de velocidad Botón on/off Anillo del ventilador Cubierta del motor Aspas del ventilador Ajuste de inclinación Rejilla delantera Cubierta trasera Bloqueo Pin de ajuste Cubierta delantera Tubo superior Panel de control...
  • Seite 31: Montaje

    MONTAJE Instalación de la pata de soporte • Gire el pin de ajuste del tubo inferior en sentido antihorario. Extraiga el tubo superior del tubo inferior hasta el tope. A continuación, apriete el pin de ajuste en sentido horario. • Retire el tornillo de la pata de soporte. •...
  • Seite 32 Instalación de la rejilla trasera • Gire el tirador de la rejilla en sentido antihorario y retírelo. • Oriente la rejilla trasera a los puntos de fijación de la cubierta del motor. • Sujete la rejilla trasera con un mano y, con la otra, apriete el tirador de la rejilla en sentido horario.
  • Seite 33 Extraiga el cabezal del ventilador del embalaje. Sujete las aspas del ventilador con una mano y, con la otra, apriete el tirador del ventilador en sentido antihorario. Tirador del ventilador Instalación de la rejilla delantera • Retire los tornillos de la anilla del ventilador. Coloque rejilla delantera en posición oblicua con respecto a la rejilla trasera.
  • Seite 34: Utilización

    UTILIZACIÓN Apagar/encender aparato Conecte el enchufe a la toma de corriente. Pulse el botón ON/OFF para encender o apagar el aparato. Seleccionar modo Con el aparato encendido, pulse varias veces el botón MODE para seleccionar uno de los siguientes modos: Brisa normal > Brisa natural > Modo noche > Modo silencioso. Brisa normal: La velocidad del aire es constante.
  • Seite 35 Configurar temporizador de encendido En modo standby, pulse varias veces el botón TIMER/PRESET y el símbolo del temporizador comienza a parpadear. Utilice los botones [+] y [-] para configurar el tiempo para el temporizador de encendido, entre 0,5 y 12 horas. Mantenga pulsados los botones para ajustar el tiempo más rápidamente.
  • Seite 36: Otras Funciones

    OTRAS FUNCIONES Apagado automático de la pantalla Si enciende el aparato pero no realiza ninguna acción en 40 segundos, todos los indicadores se apagan. Pulsando cualquier botón (excepto ON/OFF) se puede volver a activar la pantalla. Función de memoria El producto dispone de una función de memoria. Aunque el aparato se apague pero todavía esté...
  • Seite 37: Limpieza Y Cuidado

    LIMPIEZA Y CUIDADO • Desconecte el enchufe antes de limpiar el aparato. • Para la limpieza no utilice esponjas abrasivas ni objetos duros para evitar arañazos. • Tampoco utilice disolvente, alcohol, polvo abrasivo ni cepillos de cerdas duras para limpiar los componentes. •...
  • Seite 38: Retirada Del Aparato

    RETIRADA DEL APARATO Si el aparato lleva adherida la ilustración de la izquierda (el contenedor de basura tachado) entonces rige la normativa europea, directiva 2012/19/UE. Este producto no debe arrojarse a un contenedor de basura común. Infórmese sobre las leyes territoriales que regulan la recogida separada de aparatos eléctricos y electrónicos.
  • Seite 39: Fiche Technique

    Chère cliente, cher client, Toutes nos félicitations pour l’acquisition de ce nouvel appareil. Veuillez lire attentivement et respecter les instructions de ce mode d’emploi afin d’éviter d’éventuels dommages. Le fabricant ne saurait être tenu pour responsable des dommages dus au non- respect des consignes de sécurité...
  • Seite 40: Consignes De Sécurité

    CONSIGNES DE SÉCURITÉ • Retirez l‘emballage et assurez-vous qu‘aucun élément n‘a été endommagé pendant le transport. Si des pièces ont été endommagées, adressez-vous sans attendre au service client. • Les matériaux d‘emballage et les vieux appareils représentent un danger pour les enfants qui peuvent se blesser avec.
  • Seite 41 • N‘accrochez pas l‘appareil au plafond ou au mur, sauf s‘il est prévu pour cette utilisation. • Laissez suffisamment d‘espace tout autour de l‘appareil entre lui et les murs, meubles et autres objets, pour obtenir une puissance idéale. • N‘utilisez pas l‘appareil à proximité de fours à gaz ou de radiateurs à gaz. •...
  • Seite 42: Aperçu De L'appareil

    APERÇU DE L‘APPAREIL Panneau de commande et télécommande Télécommande Touches de fonction Contrôleur de vitesse Touche marche / arrêt Anneau du ventilateur Capot moteur Pales du ventilateur Réglage de l'inclinaison Grille avant Cache arrière Verrouillage Bouton de réglage Cache avant Tube supérieur Panneau de commande Bouton de réglage de la hauteur...
  • Seite 43: Assemblage

    ASSEMBLAGE Installation du pied de support • Tournez le bouton de réglage sur le tube inférieur dans le sens antihoraire. Tirez le tube supérieur hors du tube inférieur jusqu‘en butée. Serrez ensuite le bouton dans le sens des aiguilles d‘une montre. •...
  • Seite 44 Installation de la grille arrière • Tournez le bouton de la grille dans le sens antihoraire et retirez-le. • Alignez la grille arrière avec les points de fixation du capot moteur. • Tenez fermement la grille arrière d‘une main et tournez le bouton de la grille dans le sens horaire de l‘autre main.
  • Seite 45 Retirez le bouton du ventilateur de l‘emballage. Tenez les pales du ventilateur d‘une main et tournez le bouton du ventilateur dans le sens antihoraire de l‘autre main. Bouton du ventilateur Installation de la grille avant • Retirez les vis de l‘anneau du ventilateur. Placez la grille avant inclinée par rapport à...
  • Seite 46: Utilisation

    UTILISATION Pour allumer / éteindre l‘appareil Branchez la fiche dans la prise. Appuyez sur la touche ON / OFF pour allumer et éteindre l‘appareil. Choix du mode Une fois allumé, appuyez plusieurs fois sur la touche MODE pour sélectionner l‘un des modes de vent suivants : Vent normal >...
  • Seite 47 Réglage de la minuterie de démarrage automatique En mode veille, appuyez plusieurs fois sur la touche TIMER / PRESET et l‘icône de la minuterie se met à clignoter. Utilisez les touches [+] et [-] pour régler le délai de la minuterie d‘allumage de 0,5 à...
  • Seite 48: Autres Fonctions

    AUTRES FONCTIONS Extinction automatique de l‘écran Si vous allumez l‘appareil mais ne l‘utilisez pas pendant plus de 40 secondes, tous les voyants s‘éteignent. Appuyez sur n‘importe quelle touche (sauf la touche ON / OFF) pour réactiver l‘écran. Fonction mémoire Le produit possède une fonction mémoire. Tant que l‘appareil est éteint mais toujours connecté...
  • Seite 49: Nettoyage Et Entretien

    NETTOYAGE ET ENTRETIEN • Débranchez la fiche de la prise avant de procéder au nettoyage. • N‘utilisez pas de tampons à récurer ou d‘objets durs pour le nettoyage afin d‘éviter les rayures. • N‘utilisez pas de diluant, d‘alcool, de poudre à récurer ou de brosses dures pour nettoyer les composants.
  • Seite 50: Informations Sur Le Recyclage

    INFORMATIONS SUR LE RECYCLAGE Le pictogramme ci-contre apposé sur le produit signifie que la directive européenne 2012/19/UE s‘applique (poubelle à roues barrée d’une croix). Ces produits ne peuvent être jetés dans les poubelles domestiques courantes. Renseignez- vous concernant les règles appliquées pour la collecte d’appareils électriques et électroniques.
  • Seite 51 Gentile cliente, La ringraziamo per aver acquistato il dispositivo. La preghiamo di leggere attentamente le seguenti istruzioni per l’uso e di seguirle per evitare possibili danni tecnici. Non ci assumiamo alcuna responsabilità per danni scaturiti da una mancata osservazione delle avvertenze di sicurezza e da un uso improprio del dispositivo.
  • Seite 52: Norme Di Sicurezza

    NORME DI SICUREZZA • Rimuovere il materiale di imballaggio e assicurarsi che nessun componente si sia danneggiato durante il trasporto. Se ci sono dei componenti danneggiati, contattare immediatamente il servizio clienti. • I bambini possono farsi male con il materiale di imballaggio e con i vecchi apparecchi.
  • Seite 53 • Non appendere il dispositivo al soffitto o alla parete a meno che il dispositivo non sia progettato per questo utilizzo. • Lasciare abbastanza spazio intorno al dispositivo con le pareti, i mobili o con altri apparecchi per ottenere le migliori prestazioni possibili. •...
  • Seite 54: Descrizione Del Prodotto

    DESCRIZIONE DEL PRODOTTO Pannello di controllo e telecomando Telecomando Tasti funzione Regolatore di velocità Tasto on/off Anello del ventilatore Copertura motore Pale del ventilatore Posizione inclinata Griglia anteriore Copertura posteriore Fermo Manopola di regolazione Copertura anteriore Tubo superiore Pannello di controllo Manopola di regolazione altezza Tubo inferiore Supporto...
  • Seite 55: Montaggio Del Supporto

    MONTAGGIO Montaggio del supporto • Girare la manopola di regolazione sul tubo inferiore in senso antiorario. Estrarre il tubo superiore dal tubo inferiore fino al dispositivo di arresto. Dopodiché stringere la manopola di regolazione in senso orario. • Rimuovere la vite dal supporto. •...
  • Seite 56 Montaggio della griglia posteriore • Girare la manopola della griglia in senso antiorario e levarla. • Allineare la griglia posteriore con i punti di fissaggio della copertura del motore. • Tenere con una mano la griglia posteriore e con l’altra avvitare la manopola della griglia in senso orario.
  • Seite 57 Togliere la manopola del ventilatore dalla confezione. Tenere le pale con una mano e con l’altra avvitare la manopola in senso antiorario. Manopola del ventilatore Montaggio della griglia anteriore • Rimuovere le viti dall’anello del ventilatore. Mettere la griglia anteriore in modo obliquo sopra la griglia posteriore.
  • Seite 58 FUNZIONAMENTO Accendere/spegnere il ventilatore Inserire la spina nella presa. Premere il tasto On/Off per accendere o spegnere il ventilatore. Come selezionare la modalità Premere più volte il tasto Mode quando il dispositivo è acceso per selezionare una delle modalità: vento normale > vento naturale > modalità notturna > modalità silenziosa. Vento normale: la velocità...
  • Seite 59 Impostare il timer di accensione In modalità standby premere più volte il tasto TIMER/PRESET e il simbolo del timer inizia a lampeggiare. Utilizzare i tasti [+] e [-] per impostare il timer di accensione da 0,5 a 12 ore. Tenere premuto i tasti per impostare il tempo più velocemente. Quando è...
  • Seite 60: Ulteriori Funzioni

    ULTERIORI FUNZIONI Spegnimento automatico del display Se quando il dispositivo è acceso non viene eseguita nessun’impostazione nell’arco di 40 secondi, tutte le spie si spengono. Premendo un tasto qualsiasi (tranne ON/OFF) la spia si riattiva. Funzione di salvataggio Questo prodotto è provvisto di una funzione di salvataggio. Finché il dispositivo è spento, ma è...
  • Seite 61: Pulizia E Manutenzione

    PULIZIA E MANUTENZIONE • Prima della pulizia staccare sempre la spina dalla presa. • Per la pulizia non utilizzare pagliette od oggetti duri per evitare graffi. • Per pulire i componenti non utilizzare diluenti, alcool, polveri abrasive o spazzole dure. •...
  • Seite 62: Smaltimento

    SMALTIMENTO Se sul prodotto è presente la figura a sinistra (il cassonetto dei rifiuti mobile sbarrato), si applica la direttiva europea 2012/19/UE. Questi prodotti non possono essere smaltiti con i rifiuti normali. Informarsi sulle disposizioni vigenti in merito alla raccolta separata di dispositivi elettrici ed elettronici. Non smaltire i vecchi dispositivi con i rifiuti domestici.

Inhaltsverzeichnis