Herunterladen Inhalt Inhalt Diese Seite drucken
Klarstein 10028295 Bedienungsanleitung

Klarstein 10028295 Bedienungsanleitung

Deckenventilator
Vorschau ausblenden Andere Handbücher für 10028295:

Werbung

Verfügbare Sprachen
  • DE

Verfügbare Sprachen

  • DEUTSCH, seite 1
Deckenventilator
10028295
10028296

Werbung

Inhaltsverzeichnis
loading

Inhaltszusammenfassung für Klarstein 10028295

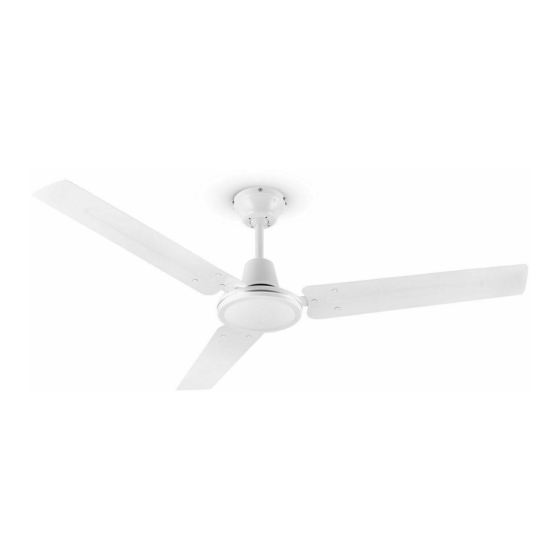
  • Seite 1 Deckenventilator 10028295 10028296...
  • Seite 2: Technische Daten

    Schäden vorzubeugen. Für Schäden, die durch Missachtung der Sicherheitshinweise und unsachgemäßen Gebrauch entstehen, übernehmen wir keine Haftung. Technische Daten Artikelnummer 10028295, 10028296 Stromversorgung 220-240 V ~ 50-60 Hz Sicherheitshinweise • Befestigen Sie den Ventilator nicht an der Steckdose, sondern nur an der Decke.
  • Seite 3 Hängen Sie den Lüfter- Verbinden Sie die Kabel Schieben abdeckung an einem von der Stromquelle wie Abedckung hoch, bis Loch in die Halteklam- folgt: die Schrauben die Un- mer an der Montage- terseite der Schlitze halterung. Braunes Kabel: “L” erreichen. Drehen Sie Blaues Kabel: “N”...
  • Seite 4: Hinweise Zur Entsorgung

    Inbetriebnahme und Bedienung • Schalten Sie den Strom ein, bevor Sie den Ventilator starten. • Der Ventilator startet, sobald Sie den 3-Stufen-Schalter bedienen, der über die Verlänge- rungskette mit dem Motor verbunden ist. Der Ventilator dreht sich mit 3 verschiedenen Geschwindigkeiten, je nachdem wie oft sie an der Verlängerungskette ziehen: •...
  • Seite 5: Technical Data

    Dear Customer, Congratulations on purchasing this Klarstein equipment. Please read this manual carefully and take care of the following hints on installation and use to avoid technical damages. Any failure caused by ignoring the mentioned items and cautions mentioned in the operation and installation instructions are not covered by our warranty and any liability.
  • Seite 6 Hang the fan onto the Connect wires from sup- Lift until bracket hook by using ply and the wiring termi- screws reach the bot- one of the holes at the nals as the photo. tom of the slots and top of the upper cano- then rotate the canopy py screws.
  • Seite 7: Use And Operation

    Use and Operation • Turn electricity on before the fan start to work. • The fan starts to operate when pulling the Three-speed Switch connected by an extension chain on the motor housing. The fan can be in diff erent speeds as pulling the Three-speed Switch: •...
  • Seite 8: Dati Tecnici

    Non ci assumiamo alcuna responsabilità per danni derivati da una mancata osserva- zione delle avvertenze per la sicurezza e da un uso improprio del dispositivo. Dati tecnici Numero dell‘articolo 10028295, 10028296 Alimentazione 220-240 V ~ 50-60 Hz Avvertenze di sicurezza •...
  • Seite 9 Appendere venti- Collegare i fili della fonte Spingere in alto la ca- latore al gancio uti- di alimentazione come lotta finché le viti rag- lizzando uno dei fori segue: giungono le apposite all’estremità della scanalature. Avvitare staffa di montaggio. filo marrone: “L” la calotta in senso an- filo blu:”N”...
  • Seite 10: Messa In Funzione E Utilizzo

    Messa in funzione e utilizzo • Prima di mettere in funzione il ventilatore, collegarlo alla corrente. • Il ventilatore si mette in funzione dopo aver premuto l’interruttore a 3 livelli posto sulla catena di comando collegata al motore. • Per accendere e spegnere la luce tirare la catena di comando dell’interruttore della luce. Il ventilatore funziona con 3 diverse velocità...
  • Seite 11: Données Techniques

    Le fabricant ne saurait être tenu pour responsable des dommages dus au non- respect des consignes de sécurité et à la mauvaise utilisation de l’appareil. Données techniques Numéro d’article 10028295, 10028296 Alimentation électrique 220-240 V ~ 50-60 Hz Consignes de sécurité...
  • Seite 12 Accrocher le ventila- Connecter les câbles Soulever ventila- teur par l’un des trous de la source électrique teur jusqu’à ce que les du capot à l’une des de terre avec la borne agrafes soient enga- agrafes de retenue de plate de la manière gées au fond des en- la plaque de montage.
  • Seite 13: Mise En Marche Et Utilisation

    Mise en marche et utilisation • Allumer le courant avant de mettre en route le ventilateur. • Le ventilateur se met en route lorsque l’interrupteur à trois niveaux est activé. Il s’agit du cordon de rallonge relié au moteur. Le ventilateur est équipé de 3 vitesses de rotation diff érentes qui sont sélectionnées selon le nombre de fois où...
  • Seite 14: Datos Técnicos

    Sobre los daños acaecidos debido a una deficiente aplicación de las indicaciones de seguridad o a un uso inapropiado del aparato, declinamos asumir cualquier responsabilidad. Datos técnicos Número del artículo 10028295, 10028296 Suministro eléctrico 220-240 V ~ 50-60 Hz Indicaciones de seguridad •...
  • Seite 15 Cuelgue la tapa del Conecte los cables de Impulse hacia arriba la ventilador a la pinza la fuente de corriente tapa hasta que los tor- de sujeción de la pla- de la siguiente mane- nillos alcancen la parte taforma de montaje a inferior de la ranura.
  • Seite 16: Puesta En Marcha Y Funcionamiento

    Puesta en marcha y funcionamiento • Vuelva a conectar la corriente antes de poner en marcha el ventilador. • El ventilador comenzará a funcionar en cuanto haya accionado el interruptor de 3 posi- ciones conectado al motor mediante el cordón de extensión. El ventilador gira sobre sí...

Diese Anleitung auch für:

10028296

Inhaltsverzeichnis