Electrolux LIL61443C Benutzerinformation
Inhaltsverzeichnis
Verfügbare Sprachen
Verfügbare Sprachen
Quicklinks
Questo manuale d'istruzione è fornito da trovaprezzi.it. Scopri tutte le offerte per
cerca il tuo prodotto tra le
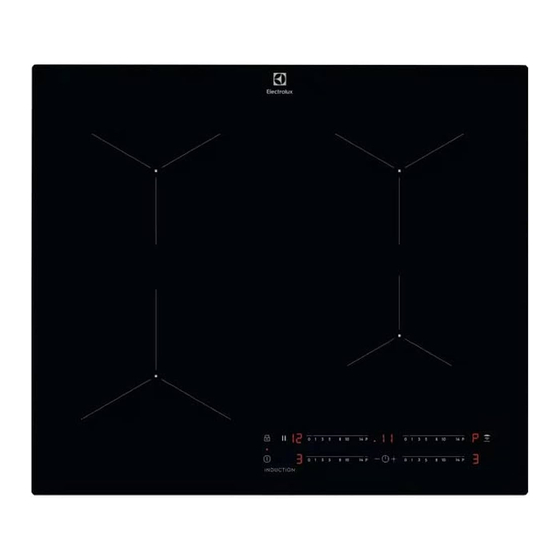
LIL61443C
migliori offerte di Cucine e Piani cottura
User Manual
Hob
Notice d'utilisation
Table de cuisson
Benutzerinformation
Kochfeld
Istruzioni per l'uso
Piano cottura
Manual de instrucciones
Placa de cocción
electrolux.com/register
Electrolux LIL61443C
o
EN
2
FR 20
DE 40
IT
60
ES 80
Kapitel
Inhaltsverzeichnis
Fehlerbehebung

Verwandte Anleitungen für Electrolux LIL61443C


Inhaltszusammenfassung für Electrolux LIL61443C
- Seite 1 Questo manuale d’istruzione è fornito da trovaprezzi.it. Scopri tutte le offerte per Electrolux LIL61443C cerca il tuo prodotto tra le migliori offerte di Cucine e Piani cottura User Manual Notice d'utilisation FR 20 LIL61443C Table de cuisson Benutzerinformation DE 40 Kochfeld Istruzioni per l’uso...
-
Seite 40: Sicherheitshinweise
WIR DENKEN AN SIE Vielen Dank für Ihren Kauf eines Electrolux-Geräts. Sie haben ein Produkt gewählt, das jahrzehntelange professionelle Erfahrung und Innovation mit sich bringt. Das ausgeklügelte und stilvolle Produkt wurde für Sie entwickelt. So können Sie jedes Mal, wenn Sie das Produkt verwenden, sicher sein, dass Sie großartige Ergebnisse erzielen werden. -
Seite 41: Sicherheit Von Kindern Und Schutzbedürftigen
Verwendung übernimmt der Hersteller keine Haftung. Bewahren Sie die Anleitung zum Nachschlagen an einem sicheren und zugänglichen Ort auf. 1.1 Sicherheit von Kindern und schutzbedürftigen Personen Das Gerät kann von Kindern ab 8 Jahren und Personen mit • eingeschränkten physischen, sensorischen oder geistigen Fähigkeiten oder mit mangelnder Erfahrung und/oder mangelndem Wissen nur dann verwendet werden, wenn sie durch eine für ihre Sicherheit zuständige Person... - Seite 42 Versuchen Sie NIEMALS, ein Feuer mit Wasser zu löschen, • sondern schalten Sie das Gerät aus und decken Sie die Flamme ab, z.B. mit einem Deckel oder einer Feuerlöschdecke. VORSICHT: Das Gerät darf nicht durch ein externes • Schaltgerät, wie einer Zeitschaltuhr, mit Strom versorgt oder an einen Schaltkreis angeschlossen werden, der vom einem Programm regelmäßig ein- und ausgeschaltet wird.
-
Seite 43: Sicherheitsanweisungen
Schutzabdeckung. Es besteht Unfallgefahr durch die Verwendung ungeeigneter Schutzabdeckungen. 2. SICHERHEITSANWEISUNGEN 2.1 Montage • Entfernen Sie Trennplatten, die im Küchenmöbel unter dem Gerät installiert sind. WARNUNG! Die Montage des Geräts darf nur 2.2 Elektrischer Anschluss von einer qualifizierten Fachkraft durchgeführt werden. WARNUNG! Brand- und Stromschlaggefahr. - Seite 44 müssen so befestigt werden, dass sie • Benutzen Sie das Gerät nicht als Arbeits- nicht ohne Werkzeug entfernt werden oder Abstellfläche. können. • Hat die Geräteoberfläche einen Sprung, • Stecken Sie den Netzstecker erst nach trennen Sie das Gerät umgehend von der Abschluss der Montage in die Steckdose.
-
Seite 45: Entsorgung
• Dieses Gerät ist nur zum Kochen • Bezüglich der Lampe(n) in diesem Gerät bestimmt. Jeder andere Gebrauch ist als und separat verkaufter Ersatzlampen: bestimmungsfremd anzusehen, zum Diese Lampen müssen extremen Beispiel das Beheizen eines Raums. physikalischen Bedingungen in Haushaltsgeräten standhalten, wie z.B. 2.4 Reinigung und Pflege Temperatur, Vibration, Feuchtigkeit, oder sollen Informationen über den... -
Seite 46: Einbau
Ist das Gerät über einer Schublade installiert, How to install your Electrolux kann die Kochfeldbelüftung die in der Induction Hob - Worktop installation Schublade aufbewahrten Gegenstände während des Garvorgangs erwärmen. 4. GERÄTEBESCHREIBUNG 4.1 Anordnung der Kochflächen... -
Seite 47: Bedienfeldanordnung
4.2 Bedienfeldanordnung Bedienen Sie das Gerät über die Sensorfelder. Die Anzeigen, Kontrolllampen und akustischen Signale informieren Sie über die aktiven Funktionen. Sen‐ Funktion Kommentar sorfeld EIN/AUS Ein- und Ausschalten des Kochfeldes. Verriegelung / Kindersicherung Verriegeln/Entriegeln des Bedienfelds. Pause Ein- und Ausschalten der Funktion. Kochstufenanzeige Zeigt die Kochstufe an. -
Seite 48: Optiheat Control (3-Stufige Restwärmeanzeige)
Display Beschreibung PowerBoost ist eingeschaltet. Eine Störung ist aufgetreten. + Zahl OptiHeat Control (3-stufige Restwärmeanzeige): Weitergaren/Warmhalten/Restwärme. Verriegelung/ Kindersicherung ist eingeschaltet. Das Kochgeschirr ist ungeeignet oder zu klein bzw. es befindet sich kein Kochgeschirr auf der Kochzone. Automatische Abschaltung ist eingeschaltet. 4.4 OptiHeat Control (3-stufige verwenden. -
Seite 49: Verwenden Der Kochzonen
Zeitraum eingeschaltet werden. Danach schaltet die Induktionskochzone automatisch Kochstufe Das Kochfeld wird wieder auf die höchste Kochstufe um. ausgeschaltet nach Siehe Kapitel „Technische 10 - 14 1,5 Stunden Daten“. 5.3 Kochstufe Einschalten der Funktion für eine Einstellen oder Ändern der Kochstufe: Kochzone: Berühren Sie leuchtet auf. -
Seite 50: Verriegelung
• CountUp Timer Berühren Sie zum Einschalten der Funktion Mit dieser Funktion können Sie feststellen, wie lange eine Kochzone bereits in Betrieb leuchtet.Die Kochstufe verringert sich auf ist. Berühren Sie zum Ausschalten der Auswählen der Kochzone: Berühren Sie wiederholt, bis die Anzeige der gewünschten Funktion . -
Seite 51: Offsound Control (Ein- Und Ausschalten Der Signaltöne)
5.11 OffSound Control (Ein- und • P25 — 2500 W • P30 — 3000 W Ausschalten der Signaltöne) • P35 — 3500 W Schalten Sie das Kochfeld aus. Berühren Sie • P40 — 4000 W 3 Sekunden lang. Das Display wird ein- 5.13 Power-Management und ausgeschaltet. - Seite 52 Bei den meisten Automa‐ Kochen 1) Braten 2) Dunstabzugshauben ist das tische Fernsteuerungssystem Einschal‐ werkseitig ausgeschaltet. tung der Schalten Sie es ein, bevor Sie Beleuch‐ die Funktion nutzen. Weitere Informationen finden Sie in der tung Anleitung der Modus H6 Lüfterge‐ Lüfterge‐...
-
Seite 53: Tipps Und Hinweise
Einschalten der Beleuchtung manuell ändern. Durch Drücken von Sie können das Kochfeld so einstellen, dass erhöht sich die Lüftergeschwindigkeit um sich die Beleuchtung automatisch eine Stufe. Wenn Sie die Intensivstufe einschaltet, wenn Sie das Kochfeld gewählt haben und erneut drücken wird einschalten. - Seite 54 • Summen: Sie haben die Kochzone auf nicht linear. Bei einer höheren Kochstufe eine hohe Stufe geschaltet. steigt der Energieverbrauch nicht • Klicken: Elektrisches Umschalten . proportional an. Das bedeutet, dass eine • Zischen, Surren: Der Ventilator läuft. Kochzone, die auf eine mittlere Kochstufe Die Geräusche sind normal und weisen eingestellt ist, weniger als die Hälfte ihrer nicht auf eine Störung hin.
-
Seite 55: Reinigung Und Pflege
Dunstabzugshauben, die mit dieser Funktion nicht ab. ausgestattet sind, finden Sie auf unserer • Unterbrechen Sie den Signalfluss Verbraucher-Website. Die Electrolux zwischen dem Kochfeld und der Dunstabzugshauben, die mit dieser Funktion Dunstabzugshaube nicht (z.B. mit der ausgestattet sind, sind mit dem Symbol Hand, einem Kochgeschirrgriff oder gekennzeichnet. -
Seite 56: Fehlersuche
• Folgendes kann nach ausreichender • Entfernen Sie metallisch schimmernde Abkühlung des Kochfelds entfernt Verfärbungen: Benutzen Sie für die werden: Kalk- und Wasserränder, Reinigung der Glasoberfläche ein mit Fettspritzer und metallisch schimmernde einer Lösung aus Essig und Wasser Verfärbungen. Reinigen Sie das Kochfeld angefeuchtetes Tuch. - Seite 57 Störung Mögliche Ursache Problembehebung Sie benutzen einen sehr hohen Verwenden Sie einen kleineren Topf, Topf, der das Signal blockiert. wechseln Sie die Kochzone oder be‐ dienen Sie die Dunstabzugshaube ma‐ nuell. Automatisches Aufheizen funktio‐ Die Kochzone ist heiß. Lassen Sie die Kochzone abkühlen. niert nicht.
-
Seite 58: Technische Daten
9. TECHNISCHE DATEN 9.1 Typenschild Modell LIL61443C Produkt-Nummer (PNC) 949 599 139 00 Typ 62 B4A 00 AA 220–240 V ~ 50–60 Hz Induktion 4.6 kW Hergestellt in Deutschland Ser.-Nr....4.6 kW ELECTROLUX 9.2 Technische Daten der Kochzonen Kochzone... -
Seite 59: Energie Sparen
* Für die Europäische Union gemäß EU 66/2014. Für Weißrussland gemäß STB 2477-2017 Anhang A. Für die Ukraine gemäß 742/2019. EN 60350-2 - Elektrische Kochgeräte für den Hausgebrauch – Teil 2: Kochfelder – Verfahren zur Messung der Leistung 10.2 Energie sparen •... - Seite 100 electrolux.com...