Cisco 250 Serie Schnellstartanleitung
Smart switches
Vorschau ausblenden
Andere Handbücher für 250 Serie:
- Kurzanleitung (2 Seiten) ,
- Kurzanleitungen (5 Seiten)
Inhaltsverzeichnis
Werbung
Verfügbare Sprachen
Verfügbare Sprachen
Quick Start Guide
Schnellstartanleitung
Guía de inicio rápido
Guide de démarrage rapide
Краткое руководство по
началу работы
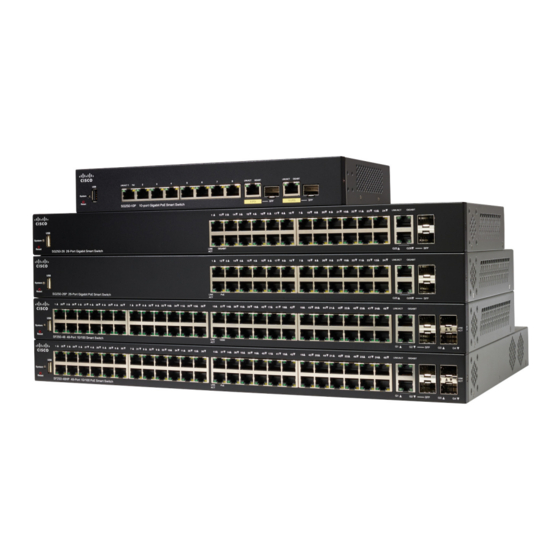
Cisco 250 Series Smart Switches
Cisco Smart Switches der Serie 250
Switches inteligentes Cisco de la serie 250
Commutateurs intelligents Cisco 250
Коммутаторы Cisco Smart серии 250
Werbung
Inhaltsverzeichnis

Verwandte Anleitungen für Cisco 250 Serie


Inhaltszusammenfassung für Cisco 250 Serie
- Seite 17 Schnellstartanleitung Cisco Smart Switches der Serie 250...
- Seite 18 Willkommen Danke, dass Sie sich für einen Cisco Smart Switch der Serie 250 entschieden haben. Diese Switches wurden so entwickelt, dass Sie sofort als Standard-Switch eingesetzt werden können. In der standardmäßigen Konfiguration werden Pakete zwischen den angeschlossenen Geräten umleitet, nachdem diese hochgefahren wurden.
-
Seite 19: Montage Des Cisco Smart Switches Der Serie 250
Mozilla Firefox (Version 51.0, 52.0, 53.0 oder höher) oder Google Chrome (Version 56, 57,58 oder höher) für die Verwendung der webbasierten Benutzeroberfläche. Montage des Cisco Smart Switches der Serie 250 Es gibt drei Möglichkeiten zur Installation des Switches: • Platzieren Sie den Switch auf einer flachen Oberfläche. Wenn Sie den Switch auf dem Schreibtisch platzieren möchten, montieren Sie die vier... - Seite 20 Wiederholen Sie den vorherigen Schritt, um die andere CHRITT Klammer an der gegenüberliegenden Seite des Switches zu befestigen. Nachdem die Klammern ordnungsgemäß befestigt wurden, CHRITT kann der Switch nun in einem standardmäßigen 48-cm-Rack installiert werden. Cisco Smart Switches der Serie 250...
-
Seite 21: Anschluss Von Netzwerkgeräten
Wandmontage Montage des Cisco Smart Switches der Serie 250: Bestimmen Sie, wo Sie das Gerät montieren möchten. Stellen CHRITT Sie sicher, dass die Oberfläche glatt, flach, trocken und stabil ist. Bohren Sie zwei Befestigungslöcher in die Oberfläche der CHRITT Wand mit einem Abstand von 94 mm. -
Seite 22: Power-Over-Ethernet-Überlegungen
Für Gigabit-Verbindungen empfiehlt Cisco die Verbindung eines INWEIS Cat5 oder eines besseren Kabels. Wenn Sie Ihre Netzwerkgeräte verbinden, überschreiten Sie nicht die maximale Kabellänge von 100 Metern. Nach dem Anschließen kann es bis zu einer Minute dauern, bis die angeschlossenen Geräte oder das LAN einsatzbereit ist. Dies ist völlig normal. -
Seite 23: Konfiguration Der Cisco Smart Switches Der Serie 250
Konfiguration Ihres Switches über die webbasierte Benutzeroberfläche Um über die webbasierte Benutzeroberfläche auf den Switch zuzugreifen, müssen die vom Switch verwendete IP-Adresse kennen. Der Switch verwendet die werkseitig voreingestellte IP-Adresse 192.168.1.254 mit einem Subnetz von /24. Cisco Smart Switches der Serie 250... - Seite 24 Plug-in zu installieren, befolgen Sie die Aufforderung zum Akzeptieren des Plug-ins. Geben Sie die IP-Adresse des Switches in die Adresszeile ein, CHRITT und drücken Sie die Eingabetaste. Zum Beispiel http:// 192.168.1.254 . Die Switch-Anmeldeseite wird angezeigt. Cisco Smart Switches der Serie 250...
- Seite 25 Geben Sie die standardmäßigen Anmeldeinformationen ein: CHRITT • Der Benutzername ist cisco • Das Standardpasswort ist cisco (Bei Passwörtern wird zwischen Groß- und Kleinschreibung unterschieden) Klicken Sie auf Anmelden. CHRITT Wenn Sie sich zum ersten Mal mit Standard-Benutzername und -Passwort anmelden, wird die Seite „Passwort ändern“...
-
Seite 26: Fehlerbehebung Ihrer Verbindung
• Prüfen Sie, ob die LEDs ordnungsgemäß leuchten. • Überprüfen Sie die Anschlüsse des Ethernet-Kabels, um sicherzustellen, dass diese fest mit dem Switch und Ihrem Computer verbunden sind. • Verwenden Sie ein anderes Ethernet-Kabel oder einen anderen Port. Cisco Smart Switches der Serie 250... -
Seite 27: Funktionen Der Cisco Smart Switches Der Serie 250
Falsche IP-Adresse • Der Zugriff auf die Cisco Switches kann auch über das Cisco FindIT Network Discovery Utility erfolgen. Dieses erkennt automatisch alle Cisco Small Business-Geräte im selben lokalen Netzwerksegment wie Ihr Computer. Sie können Geräteinformationen wie die aktuelle IP- Adresse anzeigen, die neueste Firmware für das Gerät herunterladen... - Seite 28 Stecksystem) sind Anschlusspunkte für Module, damit der Switch eine Verbindung mit anderen Switches herstellen kann. Diese Ports werden gemeinhin auch als miniGBIC-Ports (miniGigaBit Interface Converter) bezeichnet. In dieser Anleitung wird die Bezeichnung SFP verwendet. Cisco Smart Switches der Serie 250...
- Seite 29 Verbindungsgeschwindigkeit unter 10 Gbit/s, oder es ist kein Kabel an den Port angeschlossen. PoE (falls vorhanden) – (Gelb) Auf der rechten Seite des Ports. Die LED leuchtet durchgehend, um anzuzeigen, dass Strom für ein mit dem entsprechenden Port verbundenes Gerät bereitgestellt wird. Cisco Smart Switches der Serie 250...
-
Seite 30: Zusätzliche Funktionen
2. Drücken und halten Sie bei eingeschaltetem Strom die Rücksetztaste für mehr als 10 Sekunden. Dies ist ein Produkt der Klasse A. In einem häuslichen Umfeld ARNUNG kann dieses Produkt Funkstörungen verursachen. In diesem Fall muss der Benutzer möglicherweise entsprechende Maßnahmen ergreifen. Cisco Smart Switches der Serie 250... -
Seite 31: Weitere Informationen
_support_center_contacts.html Cisco Firmware-Downloads www.cisco.com/go/smallbizfirmware Wählen Sie einen Link aus, um Firmware für Cisco Produkte herunterzuladen. Es ist keine Anmeldung erforderlich. Cisco Open Source- Um ein Exemplar des Quellcodes zu Anfragen erhalten, zu dem Sie im Rahmen der entsprechenden kostenlosen/Open... - Seite 32 Sie auf der Cisco Website unter www.cisco.com/go/offices. 78-101209-01A0 Cisco und das Cisco Logo sind Marken oder eingetragene Marken von Cisco und/oder Partnerunternehmen in den Vereinigten Staaten und anderen Ländern. Eine Liste der Cisco Marken finden Sie unter www.cisco.com/go/trademarks. Die genannten Marken von Drittanbietern sind Eigentum der jeweiligen Inhaber.
- Seite 87 Коммутаторы Cisco Smart серии 250...